Practical PHP and MySQL Web Site Databases: A Simplified Approach (2013)
Chapter 11. E-Commerce: A Brief Introduction
E-commerce web sites accept payment in exchange for goods or services. A user orders from a range of goods or services displayed in the web site’s catalog pages. The details of the user’s orders are stored in the web site’s database. Money passes from the user to the web-site owner. This is achieved by means of a payment system incorporated into the web site. Finally, the ordered items are delivered to the user. Users can track the progress of their orders, update their account details, and if necessary, contact a customer support department.
Some types of e-commerce web sites do not need a database management system—for instance, an online shop with a limited range of goods, and with no expectation of expanding the range, can operate successfully without a database. I provided two of my clients with that type of web site, and you can view one of them at www.annroejones-artist.co.uk.
Two types of e-commerce sites would benefit from using a database: (i) An online shop with an extensive range of goods or services, for instance Amazon, and (ii) an online shop with a limited range of goods, but the owner has every intention of expanding the range. The brief outline for an e-commerce site in this chapter is based on this type of shop.
This chapter describes two types of shopping carts: a PayPal shopping cart, and a custom shopping cart. These are presented in three parts as follows:
· Features common to both shopping carts
· Security warning
· The plan
· The home page
· Registering users
· The Login page with a “forgotten password” link
· The administration
· Searching for products
· Features applicable only to the PayPal shopping cart
· Integrating with the PayPal shopping cart
· The art table for use with a PayPal shopping cart
· Adding paintings for the PayPal shopping cart
· The product display with PayPal Shopping cart buttons
· Features applicable to the custom shopping cart (demonstration files provided)
· Add paintings to a table for a custom shopping cart
· The database and tables
· Displaying the products using the custom shopping cart links
· Adding purchases to the custom cart
· The checkout page
· The additional administrative tasks
I left out several processes in order to fit this brief outline into one chapter, but the outline will provide you with a starting point for further study. This chapter is not a tutorial because the code alone for a tutorial would occupy around 50 pages. In fact, this chapter contains very little code because the web site described combines most of the code already shown and explained in the previous chapters.
For instance:
· The registration page is similar to the registration page described in Chapter 6.
· Most of the administration facilities were described in Chapters 3 and 8.
· Chapter 9 described the use of multiple tables.
Login and logout pages were covered fully in several previous chapters. However, the login page in this chapter contains a link to enable users to retrieve a forgotten password; the code is provided for this feature.
![]() Note This chapter is a very brief introduction to an e-commerce web site. To deal fully with a practical example of an e-commerce web site with its payment gateway, stock control system, order tracking, security measures, invoicing and customer services would require a whole book. You will find a list of resources for designing and developing e-commerce web sites in the appendix.
Note This chapter is a very brief introduction to an e-commerce web site. To deal fully with a practical example of an e-commerce web site with its payment gateway, stock control system, order tracking, security measures, invoicing and customer services would require a whole book. You will find a list of resources for designing and developing e-commerce web sites in the appendix.
My thanks go to Roger St. Barbe for providing the images of colored etchings. His method of producing the etchings is fascinating, a précis of the process can be found on his web site:
http://www.dolphin-gallery.co.uk
Although we state that each product is unique, Roger does actually produce a limited number of signed copies of each etching. For the sake of simplicity, in our example “The Dove Gallery” will stock only one copy. I own the other paintings used in this chapter. The artist James Kessell (now deceased) was a double Royal Academy artist (London and Birmingham UK).
![]() Note In this outline description of an e-commerce web site, when code is provided, no attempt has been made to accommodate Internet Explorer 8. The downloadable files for the PayPal shopping cart section are included in a separate subfolder together with a Read Me file describing how to set up the PayPal database and tables. The main downloadable folder named ecommerce contains the custom shopping cart files.
Note In this outline description of an e-commerce web site, when code is provided, no attempt has been made to accommodate Internet Explorer 8. The downloadable files for the PayPal shopping cart section are included in a separate subfolder together with a Read Me file describing how to set up the PayPal database and tables. The main downloadable folder named ecommerce contains the custom shopping cart files.
Items Common to Both Shopping Carts
Most topics in this section apply to e-commerce web sites using a PayPal shopping cart or a custom cart. The two most important topics for both shopping carts are security and careful planning.
Security Warning
Database-driven e-commerce web sites can be extremely vulnerable; therefore, security is a primary concern. By heeding the following warnings, you can make an e-commerce web site reasonably secure:
· A developer should not attempt to launch an e-commerce web site until he or she has achieved a high level of expertise with PHP and MySQL.
· Knowledge of PHP stored procedures and transactions is essential for e-commerce. The Appendix contains resources for, and a brief outline of, these techniques.
· The developer must thoroughly understand the inherent security problems.
· Developers must be aware of and fully comply with the data protection laws for their territory, and with the laws governing online trading.
· The web site should never store customers’ bank and credit card details unless a costly and efficient security scheme is in place.
· To avoid some of the worry associated with Internet financial transactions, always use a secure payment system such as PayPal, Stripe, Sage Pay, or Authorize.net. If you decide to use their shopping cart buttons, be sure to choose the encoded versions.
· An e-commerce database-driven web site must use an unshared secure server.
· Use https pages. These are protected by a secure socket layer (SSL).
![]() Note The login details for the two web sites are as follows:
Note The login details for the two web sites are as follows:
For the custom shopping cart administrator, e-mail: miker@myisp.com Password: willgates
For the custom shopping cart registered user, e-mail: rbush@myisp.co.uk Password: redblooms
For the PayPal shopping cart administrator, e-mail: ddruff@myisp.co.uk Password: epidermal
We will now examine a plan for an e-commerce web site.
The Plan
As usual, the first design step for creating a database means discussing the web-site owner’s requirements and then producing a plan to fulfill those requirements:
· The web site outlined in this chapter sells original paintings and colored etchings.
· An administrator will be able to add or delete paintings and artists from the database tables by means of a user-friendly interface.
· The basic e-commerce database would use a large number of tables, typically 12 or more, but we will discuss only five as follows:
· user: The administrator and registered users. This will include the user’s address. For brevity, it will not include an alternative delivery address.
· art: This table contains a description of the paintings and will be used to display a catalog of the stock of paintings.
· artist: Contains the name of the artist. To save space, it will not contain the traditional brief description of the artist.
· orders: For information about the items ordered, the order date, and cost.
· order_contents: Contains the order number and the dispatch date.
The database tables are described fully in the custom shopping cart section.
![]() Note During the planning stage, the owner and the developer decide whether users should be asked to register up front or at the checkout stage. If they think an up-front registration will deter users, the second solution should be adopted. The up-front solution can be made less daunting by providing radio buttons or a check box on the registration page to enable users to opt out of receiving e-mails announcing special offers. The custom shopping cart web site described in this chapter requires the prospective user to register up front and log in. In the PayPal shopping cart version, up-front registration is optional.
Note During the planning stage, the owner and the developer decide whether users should be asked to register up front or at the checkout stage. If they think an up-front registration will deter users, the second solution should be adopted. The up-front solution can be made less daunting by providing radio buttons or a check box on the registration page to enable users to opt out of receiving e-mails announcing special offers. The custom shopping cart web site described in this chapter requires the prospective user to register up front and log in. In the PayPal shopping cart version, up-front registration is optional.
The Home Page
To encourage viewers to register, the home page displays tempting samples of the products. A suggested home page is shown in Figure 11-1.

Figure 11-1. The home page
The code for the home page and its header are included in the downloadable files as index.php and header_home, respectively. Note the Register button and a Login button in the header. By displaying some of the products, you encourage users to register in order to see the full range. The home page for the PayPal Shopping cart has additional search capabilities. It can be found in the downloadable subfolder named shopper.
Registering Users
The registration page is shown in Figure 11-2.
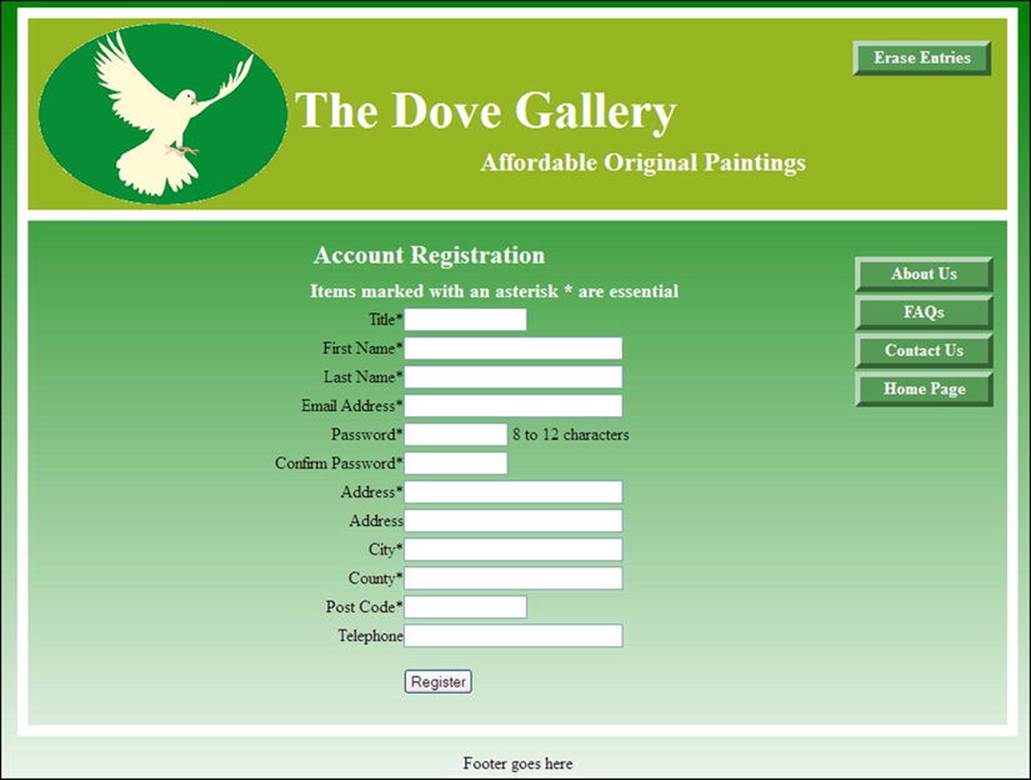
Figure 11-2. The Registration page
No listing is provided for this page because the code was described in Chapter 6. (The Dove Gallery styling is the only difference.) A single menu button in the header is adequate for the registration page because the user can escape to the home page using the main menu. A more comprehensive registration page would have fields for an alternative shipping address and a text area for delivery instructions. The page might also contain two radio buttons or a check box for opting out of an option to receive e-mails describing special offers. Radio buttons and check boxes were described in Chapter 7. The designer would need to create an extra column in the users table to contain the users’ response to the option.
The administrator will register as a USER with her proper name, e-mail address and password. Then she will register as the ADMINISTRATOR by entering a fictitious name and e-mail address and a password so that she alone can log in to the administration pages.
Then phpMyAdmin is used to edit the administrator’s user_level to a number greater than zero so that registered users and the administrator are directed to their appropriate pages when they log in.
The Header for the Registration Form
The header for the registration form requires only one menu button. This clears data from the registration fields if the user wishes to start again. No home page button is needed in the header menu because it is in the main menu. The snippet of code for the header is given in Listing 11-2.
Listing 11-2. Creating the Header for the Registration Page (header_reg.inc)
<div id="header-button">
<ul>
<li><a href="register.php">Erase Entries</a></li>
</ul>
</div>
<h1>The Dove Gallery</h1>
<h2>Affordable Original Paintings</h2>
After successfully registering, the user will see a thank-you page similar to those in previous chapters.
The Login Page with a Forgotten-Password Link
The login page is shown in Figure 11-3.
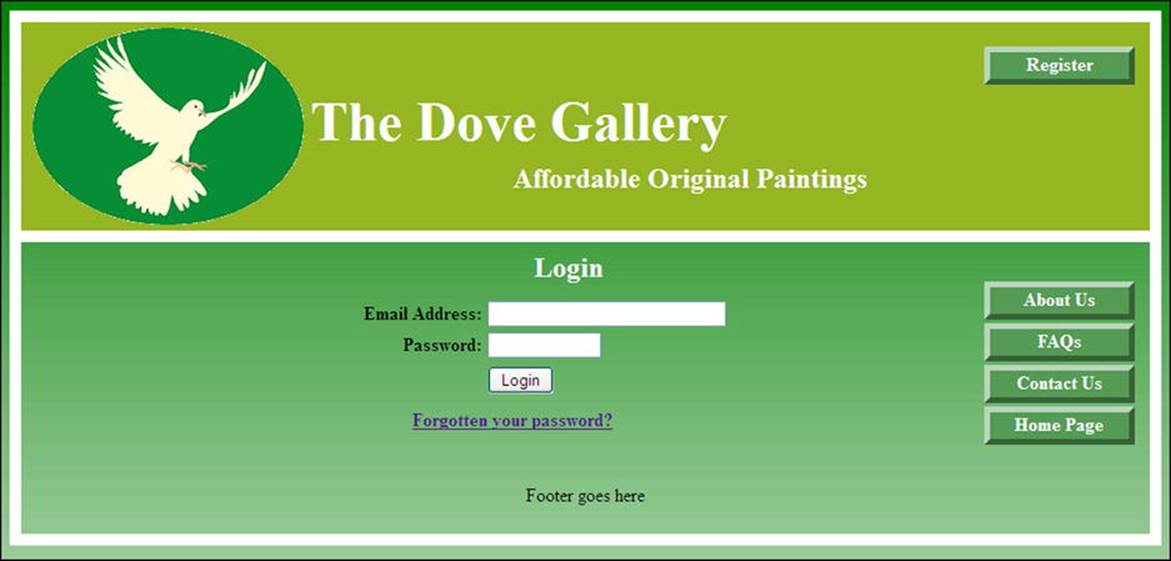
Figure 11-3. The Login page
The code for the login page is given in Listing 11-3
Listing 11-3. Creating the Login Page (login.php)
The form fields are positioned by means of an internal style.
<!doctype html>
<html lang=en>
<head>
<title>Login page</title>
<meta charset=utf-8>
<link rel="stylesheet" type="text/css" href="transparent.css">
<style type="text/css">
#content h2 { width:60px; margin-left:-40px; }
p.error { color:red; font-size:105%; font-weight:bold; text-align:center;}
form { margin-left:130px; }
.submit { margin-left:215px; }
.cntr { text-align:center; margin-left:20px; }
</style>
</head>
<body>
<div id="container">
<header>
<?php include('includes/header_login.inc'); ?>
<div id="logo">
<img alt="dove" height="170" src="images/dove-1.png" width="234">
</div>
</header><div id="content"><!--Start of the login page content-->
<div id="rightcol">
<nav>
<?php include('includes/menu.inc'); ?>
</nav>
</div>
<?php
// Determine whether the form has been submitted
if ($_SERVER['REQUEST_METHOD'] == 'POST') {
//Connect to database
require ('mysqli_connect.php');
// Was the email address entered?
if (!empty($_POST['email'])) {
$e = mysqli_real_escape_string($dbcon, $_POST['email']);
} else {
$e = FALSE;
echo '<p class="error">You forgot to enter your email address.</p>';
}
// Was the password entered?
if (!empty($_POST['psword'])) {
$p = mysqli_real_escape_string($dbcon, $_POST['psword']);
} else {
$p = FALSE;
echo '<p class="error">You forgot to enter your password.</p>';
}
if ($e && $p){//If no problem was encountered
// Select the user_id, first_name and user_level for that email/password combination
$q = "SELECT user_id, fname, user_level FROM users WHERE (email='$e' AND ![]()
psword=SHA1('$p'))";
$result = mysqli_query ($dbcon, $q);
// Check the result
if (@mysqli_num_rows($result) == 1) {//The user input matched the database record
// Start the session, fetch the record and insert the three values in an array
session_start();
$_SESSION = mysqli_fetch_array ($result, MYSQLI_ASSOC);
$_SESSION['user_level'] = (int) $_SESSION['user_level']; // Ensure the user level ![]()
is an integer.
// The login page redirects the user either to the admin page or the user’s search page
// Use a ternary operation to set the URL
$url = ($_SESSION['user_level'] === 51) ? 'admin_page.php' : 'users_search_page.php';
header('Location: ' . $url); // The user is directed to the appropriate page
exit(); // Cancel the rest of the script
mysqli_free_result($result);
mysqli_close($dbcon);
} else { // If no match was found
echo '<p class="error">Your email address and password combination does not match our ![]()
records.<br>Perhaps you need to register. Click the Register button on the header menu</p>';
}
} else { // If there was a problem
echo '<p class="error">Please try again.</p>';
}
mysqli_close($dbcon);
} // End of submit conditionals
?>
<!--Display the form fields-->
<div id="loginfields">
<?php include ('includes/login_page.inc.php'); ?>
</div>
<p> </p>
<p class="cntr"><a href="forgot.php"><b>Forgotten your password?</b></a></p> #1
<footer>
<?php include ('includes/footer.inc'); ?>
</footer>
</div>
</div>
</body>
</html>
![]() Note The code for logging out is the same as in the previous chapters.
Note The code for logging out is the same as in the previous chapters.
Explanation of the Login Code
The login and logout files are available in the download files for this chapter. The code for the login page is the same as the book’s previous login files except for the page style and the inclusion of the following statement:
<p class="cntr"><a href="forgot.php"><b>Forgotten your password?</b></a></p> #1
This is simply a link to the page named forgot.php. The code for this page is given in Listing 11-4.
Retrieving a Forgotten Password
You may have wondered why I left it for so late in the book to introduce a means of retrieving a forgotten password. My reasoning was as follows:
· I decided that the more complex PHP code required would be best introduced in a later chapter when you have become more proficient in the use of PHP.
· Password retrieval was not necessary in the earlier tutorials because you were not interacting with real users who might have forgotten their passwords.
· I assumed that the reader would not attempt to migrate a database-driven web site to an external host until he or she had at least reached Chapter 11. Password retrieval involves sending an e-mail to the user. This cannot be tested unless the reader either uploads the web site to a host or installs an e-mail-processing program on his or her computer.
![]() Caution If you click the Forgotten your password link and then click the Get a new password button, you will cause a password to be changed. However, if you do this on a computer’s server with no e-mail client, such as Mercury, you will not receive the e-mail; therefore, you will not know the new password. You will no longer be able to log in as that user. The Get a new password button works only if you upload the file to a server together with the database and tables. However, if you have a configured e-mail client such as Mercury installed on your computer, you would be able to test the file and receive an e-mail containing the new password.
Caution If you click the Forgotten your password link and then click the Get a new password button, you will cause a password to be changed. However, if you do this on a computer’s server with no e-mail client, such as Mercury, you will not receive the e-mail; therefore, you will not know the new password. You will no longer be able to log in as that user. The Get a new password button works only if you upload the file to a server together with the database and tables. However, if you have a configured e-mail client such as Mercury installed on your computer, you would be able to test the file and receive an e-mail containing the new password.
Figure 11-4 shows the interface for retrieving a forgotten password.
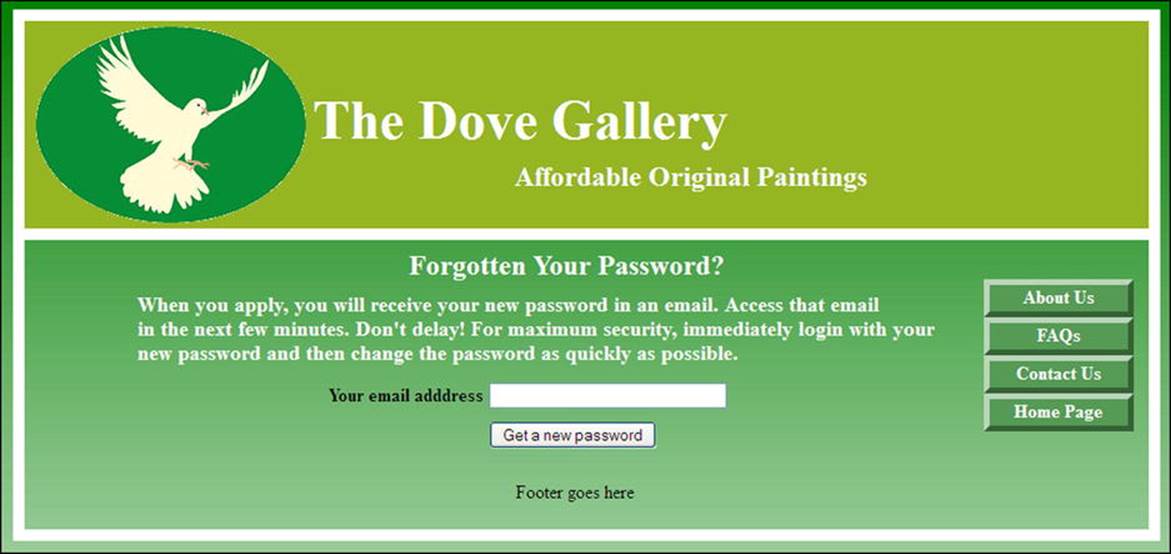
Figure 11-4. Retrieving a forgotten password
The code for the forgotten password page is given in Listing 11-4.
Listing 11-4. Creating the Forgotten Password Page (forgot.php)
An internal style provides the layout of the form elements.
<!doctype html>
<html lang=en>
<head>
<title>Forgotten password form</title>
<meta charset=utf-8>
<link rel="stylesheet" type="text/css" href="transparent.css">
<style type="text/css">
#content h2 { margin-left:-220px;}
#content h2.main_title { margin-left:-100px; }
#content h3 { margin-left:90px; }
l { margin-top:0; }
ul li {height:30px; }
p { margin-bottom:-5px; }
form { margin-left:180px; }
#submit {margin-top:0; margin-left:215px; }
p.error { color:red; font-size:105%; font-weight:bold; text-align:center;}
footer { margin-left:-20px; }
</style>
</head>
<body>
<div id="container">
<header>
<?php include('includes/header_forgot.inc'); ?>
<div id="logo">
<img alt="dove" height="170" src="images/dove-1.png" width="234">
</div>
</header>
<div id="content">
<?php
if ($_SERVER['REQUEST_METHOD'] == 'POST') {
require ('mysqli_connect.php');
// Assign the value FALSE to the variable $user_id
$user_id = FALSE;
// If the email address has been entered, validate it
if(filter_var($_POST['email'],FILTER_VALIDATE_EMAIL)){
// Does that email address exist in the database? #1
$q = 'SELECT user_id FROM users WHERE email="'. mysqli_real_escape_string ![]()
($dbcon, $_POST['email']) . '"';
$result = mysqli_query ($dbcon, $q) or trigger_error("Query: $q\n<br>![]()
MySQL Error: " . mysqli_error($dbcon));
if (mysqli_num_rows($result) == 1) { // Retrieve the user’s id
$row = mysqli_fetch_array($result,MYSQLI_NUM);
$user_id = $row[0];
} else { // If the users_id for that email address was not found
echo '<p class="error">That email address is not in our records</p>';
}
}
if ($user_id) { // If the user_id for the email address was found, create a random password
$p = substr ( md5(uniqid(rand(), true)), 5, 10); #2
// Update the users database table with the new password
$q = "UPDATE users SET psword=SHA1('$p') WHERE user_id=$user_id LIMIT 1";
$result = mysqli_query ($dbcon, $q) or trigger_error("Query: $q\n<br>![]()
MySQL Error: " . mysqli_error($dbcon));
if (mysqli_affected_rows($dbcon) == 1) { // If the password was updated successfully
// Send an email to the user
$body = "Your password has been changed to '$p'. Please log in as soon as possible ![]()
using the new password. Then change it immediately. Otherwise, if a hacker has ![]()
intercepted this email he will know your login details.";
mail($_POST['email'], 'Your new password.', $body, 'From: admin@thedovegallery.co.uk'); #3
// Echo a message and exit the code
echo '<h3>Your password has been changed. You will shortly receive the new temporary ![]()
password by email.</h3>';
mysqli_close($dbcon);
include ('includes/footer.inc');
exit(); // Stop the script
} else { // If the query failed to run
echo '<p class="error">There was a system error, your password could not be changed. ![]()
We apologize for any inconvenience.</p>';
}
}
mysqli_close($dbcon);
}
?>
<div id="rightcol">
<nav>
<?php include('includes/menu.inc'); ?>
</nav>
</div>
<h2 class="main_title">Forgotten Your Password?</h2>
<h3>When you apply, you will receive your new password in an email. Access that email![]()
<br>within the next few minutes. Don't delay! For maximum security, immediately log in ![]()
with your new password and then change the password as quickly as possible.<br></h3>
<form action="forgot.php" method="post">
<p><label class="label" for="email"><b>Your email adddress</b></label> ![]()
<input id="email" type="text" name="email" size="30" maxlength="30" ![]()
value="<?php if (isset($_POST['email'])) echo $_POST['email']; ?>"><br>
<p><input id="submit" type="submit" name="submit" value="Get a new password"></p>
</form>
<footer>
<?php include ('includes/footer.inc'); ?>
</footer><br></div>
<div></div></div>
</body>
</html>
Explanation of the Code
// Does that email address exist in the database? #1
$q = 'SELECT user_id FROM users WHERE email="'. mysqli_real_escape_string ![]()
($dbcon, $_POST['email']) . '"';
$result = mysqli_query ($dbcon, $q) or trigger_error("Query: $q\n<br>![]()
MySQL Error: " . mysqli_error($dbcon));
The first statement cleans the e-mail address before it is used in the SELECT statement. In the second statement, you will not have seen the trigger error() function before. This is a standard PHP function and a neat way of displaying error messages during development. The script will stop if an error is detected, and an informative error message will be displayed.
$p = substr ( md5(uniqid(rand(), true)), 5, 10); #2
// Update the users table with the new password
$q = "UPDATE users SET psword=SHA1('$p') WHERE user_id=$user_id LIMIT 1";
$result = mysqli_query ($dbcon, $q) or trigger_error("Query: $q\n<br>![]()
MySQL Error: " . mysqli_error($dbcon));
if (mysqli_affected_rows($dbcon) == 1) { // If the password was updated successfully
// Send an email to the user
The first line creates a new randomly generated string. It is hashed using the slightly less secure md5 hashing method. The md5 string will be 32 characters long. Note the digits (5 and 10); they select a 10-digit portion of the string starting at the fifth digit. In the third line, the UPDATE query enters the shortened string into the users table using the more secure SHA1 hashing method.
The trigger_error() function is used again in the fourth line. The shortened and randomly generated string is the user’s new temporary password. This is sent to the user in an e-mail (reference line #3).
A plan for the role of administrator will be described next.
Administration
The administrator should be able to do the following:
· Add or remove an artist.
· Add paintings to the catalog.
· Remove paintings from the catalog when they are sold.
· Update prices.
· View users’ details.
· View the orders.
· Change his own password.
Due to space limitations, only the first two tasks are described in this chapter. Several other tasks are omitted; for instance, in a real-world e-commerce web site, the administrator’s team would also be able to view the orders, process the orders, control the stock situation, and manage customer services. There are some downloadable administration files, but others (such as those enabling the administrator to edit and delete data in the database tables) are not provided because they are similar to the administration files shown previously in Chapters 2, 3, and 8.
The administration page will be described next.
Creating the Administration Page
When the administrator logs in, she will be taken straight to a dual-purpose administration page that will enable her to add an artist. Figure 11-5 shows the administration/add an artist page. Note the new header menu buttons.
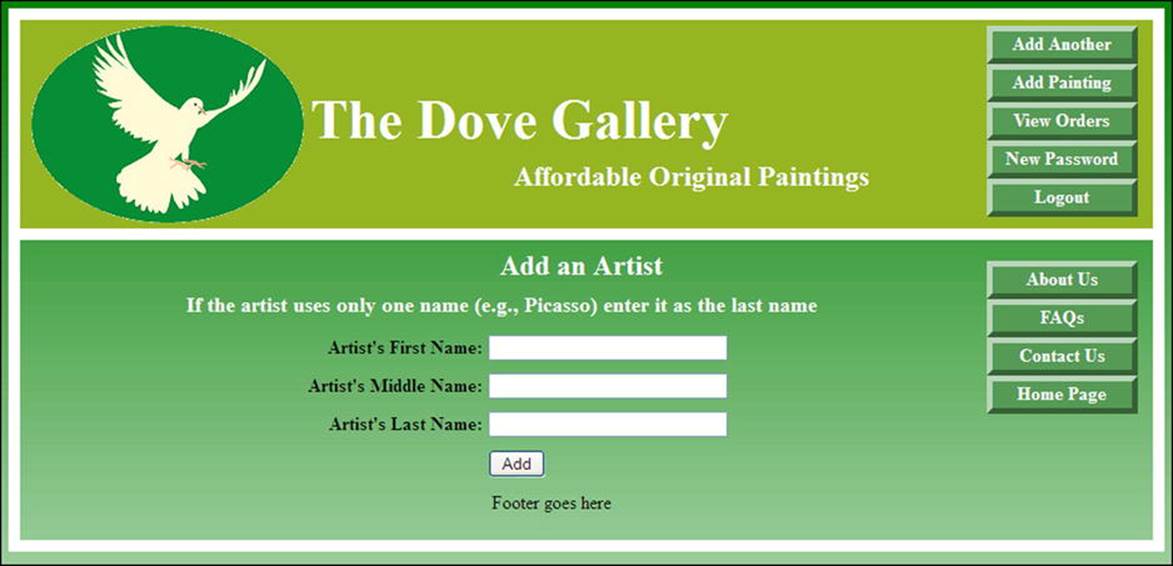
Figure 11-5. The administration/“Add an Artist” page
The administration page has several new header buttons, including a New Password button. For brevity the third and fourth menu buttons are not active. This avoids having to repeat the code from Chapters 2 and 3 in this already overcrowded chapter, but feel free to add the links and their pages if you wish. The administration page is also the Add an Artist page. The code starts with a session to ensure that only the administrator can access this page. The admin_page.php is a shortened version of the add-a-house page in Chapter 8. For brevity, the code will not be repeated here. The file admin_page.php is included in the downloadable files so that you can examine it. However, you should not attempt to add artists because file artist.sql is provided with the demonstration files for the custom shopping cart.
Add an Artist
For viewing the demonstration custom cart described later, three artists are included in the downloadable file artists.sql. They are listed in Table 11-1.
Table 11-1. The Artists’ Names
|
First name |
Middle name |
Last name |
|
Adrian |
W |
West |
|
Roger |
St. |
Barbe |
|
James |
Kessell |
Searching and Displaying Products
When registered users log in, they will be directed to the search page. The search criteria in this example are based on the type and price of paintings. Other fields could be added, such as size, medium, and an artist’s name. In that case, all the fields would be given NULL attributes so that users can choose to limit their search criteria. For instance, they might wish to search for abstract oil paintings, at a certain maximum price, by a particular artist. Or they might wish to search for all the paintings by a particular artist. Our simplified minimal search page is shown in Figure 11-6.
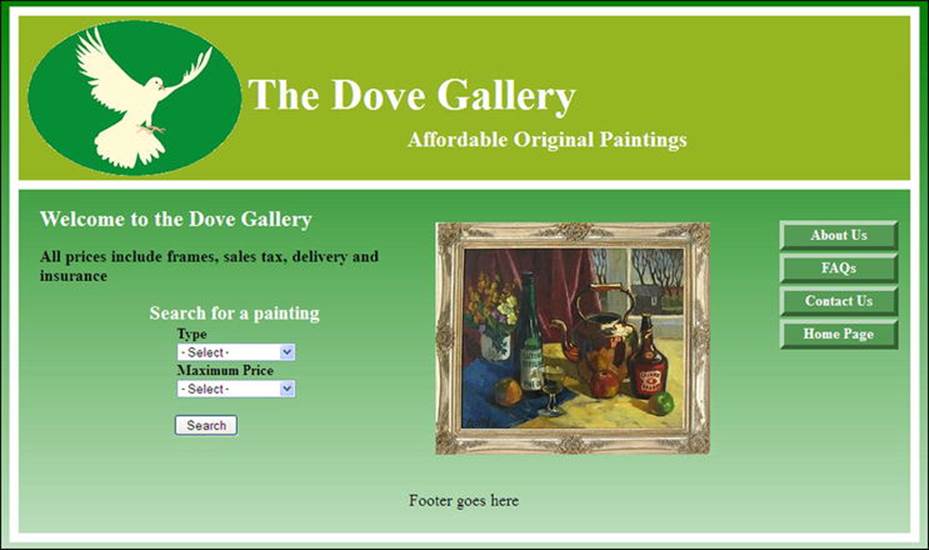
Figure 11-6. The users’ search page
The page allows registered users to search for a particular type of painting (still-life, nature, or abstract) and to set the maximum price they are willing to pay. This page is also the home page in the PayPal version of the web site. In the PayPal version, the code does not begin with a session because users do not have to log in.
The code for the users’ search page is given in Listing 11-6.
Listing 11-6. Creating the Users’ Search Page (users_search_page.php)
The session and DOCTYPE go here
<title><title>The registered user's search page, custom cart version</title></title>
<meta charset=utf-8>
<link rel="stylesheet" type="text/css" href="transparent.css">
<style type="text/css">
p { font-size:110%; }
#midcol h2 { width:400px; }
#mid-left-col h3 {font-size:150%; text-align:left; }
select { width:130px; }
form { margin-left:150px; }
.search { margin:0 0 0 120px; font-weight:bold; font-size:130%; color:white; }
#submit { width:70px; position:absolute; left:190px; }
</style>
</head>
<body>
<div id="container">
<header>
<?php include('includes/header_forgot.inc'); ?>
<div id="logo">
<img alt="dove" height="170" src="images/dove-1.png" width="234">
</div>
</header>
<div id="content"><!--Start of users' page content-->
<div id="rightcol">
<nav>
<?php include('includes/menu.inc'); ?>
</nav>
</div>
<div id="midcol">
<div id="mid-left-col">
<h3><b>Welcome to the Dove Gallery</b></h3>
<p><b>All prices include frames, sales tax, delivery and insurance</b></p>
<p class="search"><strong>Search for a painting</strong></p>
<form action="found_pics_cart.php" method="post"> #1
<strong>Type</strong><br>
<select name="type">
<option value="">- Select -</option>
<option value="still-life">Still Life</option>
<option value="nature">Nature</option>
<option value="abstract">Abstract</option>
</select><br>
<strong>Maximum Price</strong><br>
<select name="price">
<option value="">- Select -</option>
<option value="40">£40</option>
<option value="80">£80</option>
<option value="800">£800</option>
</select><br>
<p><input id="submit" type="submit" name="submit" value="Search"></p>
</form>
</div>
<div id="mid-right-col">
<p><img alt="Copper Kettle by James Kessell" height="254" width="300"![]()
src="images/k-copper-kettle-300.jpg"></p>
</div>
<br class="clear">
</div>
<footer>
<?php include ('includes/footer.inc'); ?>
</footer></div>
</div>
</body>
</html>
Explanation of the Code
<form action="found_pics_cart.php" method="post"> #1
The file found_pics_cart.php is one of the demonstration files for the custom cart described later.
Features Applicable Only to the PayPal Shopping Cart
In the downloadable files, there is a subfolder named shopper for demonstrating the PayPal version of the e-commerce web site; the subfolder contains instructions for setting up the PayPal shopping cart database and tables. In the subfolder, you will find a different version of theadmin_add_painting.php interface that allows the administrator to insert the PayPal shopping cart code. This is described next.
![]() Note This example assumes the use of PayPal buttons downloaded from a PayPal account for processing the purchase of a painting. Guidance for downloading PayPal buttons is given later in this section. Note that PayPal can also be integrated with a custom shopping cart.
Note This example assumes the use of PayPal buttons downloaded from a PayPal account for processing the purchase of a painting. Guidance for downloading PayPal buttons is given later in this section. Note that PayPal can also be integrated with a custom shopping cart.
The tables for the custom shopping cart are shown later in the chapter. The art table for a PayPal shopping cart is slightly different from the custom shopping cart art table. Note that an extra column is used to hold the code for the PayPal shopping cart buttons, this is shown in Table 11-2. The .sql file can be found in the shopper subfolder.
Table 11-2. The art Table for a PayPal Shopping Cart
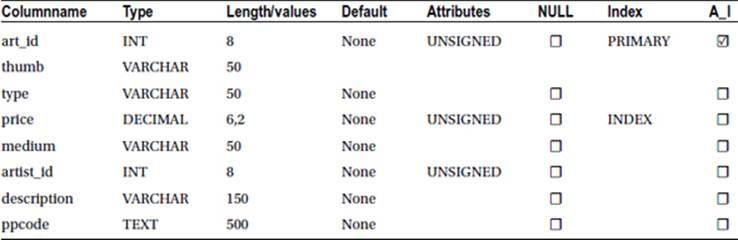
Different payment systems might require tables that match their particular process. In this chapter, we will only be covering a PayPal cart and a custom cart.
The administrator’s interface for adding paintings and PayPal code is shown in Figure 11-7.
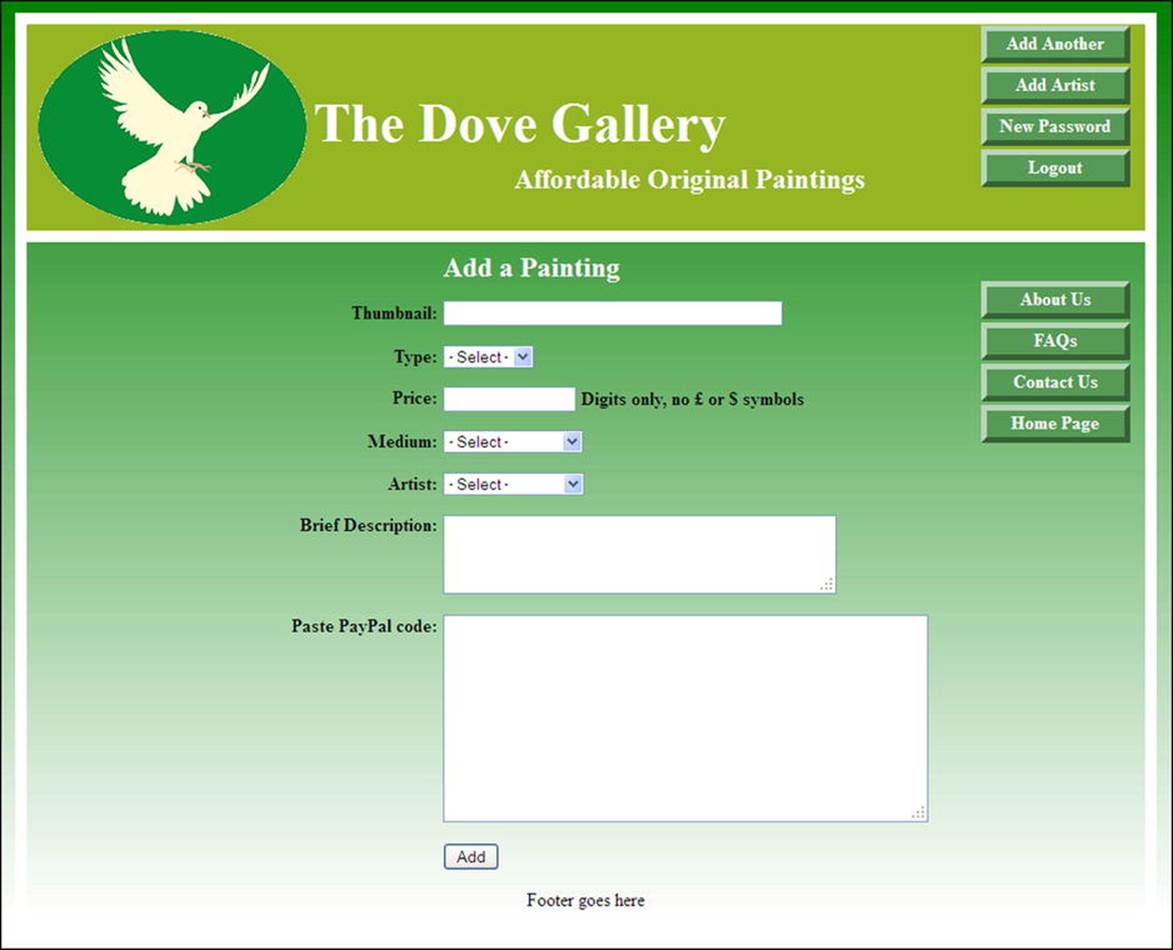
Figure 11-7. The administrator’s interface for adding paintings and PayPal “Add to Cart” buttons
The code for this page must begin with a session so that it can be accessed only by the administrator. The page is similar to the add-a-house page in Chapter 8, and the procedure is exactly the same as the instructions in Chapter 8. However, in this example an additional text area is included for the PayPal code. The procedure for obtaining the PayPal code is described later. Part of the code for the page is given in Listing 11-7a, where the PayPal item is shown in bold type. The code for a pull-down menu for artists is also shown in bold type. The downloadable code is included in the subfolder named shopper.
Partial Listing 11-7a. Creating the Page for Adding a Painting (admin_add_painting.php)
The session and the DOCTYPE go here
<title>The admin_add_painting page with a PayPal code textarea)</title>
<meta charset=utf-8>
<link rel="stylesheet" type="text/css" href="transparent.css">
<style type="text/css">
#header-button { margin-top:-10px; }
#content h2 { margin-left:-70px; }
form { margin-left:140px; }
p.error { color:red; font-size:105%; font-weight:bold; text-align:center;}
#submit { margin-left:-170px; }
</style>
</head>
<body>
<div id="container">
<header>
<?php include('includes/header_admin.inc'); ?>
<div id="logo">
<img alt="dove" height="170" src="images/dove-1.png" width="234">
</div>
</header>
<div id="content"><!--Start of admin/add paintings content-->
<?php
// This code is a query that INSERTs a painting into the art table
// Confirm that the form has been submitted
if ($_SERVER['REQUEST_METHOD'] == 'POST') {
$errors = array(); // Start an array to contain the error messages
// Check if a thumbnail url has been entered
if (empty($_POST['thumb'])) {
$errors[] = 'You forgot to enter the thumbnail url';
}else{
$thumb = ($_POST['thumb']);
}
// Check for a type
if (empty($_POST['type'])) {
$errors[] = 'You forgot to select the type of painting';
}else{
$type = trim($_POST['type']);
}
// Has a price been entered?
if (empty($_POST['price'])){
$errors[] ='You forgot to enter the price.' ;
}
elseif (!empty($_POST['price'])) {
//Remove unwanted characters and ensure that the remaining characters are digits
$price = preg_replace('/\D+/', '', ($_POST['price']));
}
// Has the medium been entered?
if (empty($_POST['medium'])) {
$errors[] = 'You forgot to select the medium';
}else{
$medium = ($_POST['medium']);
}
// Has the artist been entered?
if (empty($_POST['artist'])) {
$errors[] = 'You forgot to select the artist';
}else {
$artist = ($_POST['artist']);
}
// Has a brief description been entered?
if (empty($_POST['mini_descr'])) {
$errors[] = 'You forgot to enter the brief description';
}else{
$mini_descr = strip_tags($_POST['mini_descr']);
}
// Has the PayPal code been entered? #1
if (empty($_POST['ppcode'])) {
$errors[] = 'You forgot to enter the PayPal code';
}else{
$ppcode = ($_POST['ppcode']);
}
if (empty($errors)) { // If no errors were encountered, register the painting in the database
require ('mysqli_connect.php'); // Connect to the database
// Make the query #2
$q = "INSERT INTO art (art_id, thumb, type, price, medium, artist, mini_descr,ppcode) ![]()
VALUES (' ', '$thumb', '$type', '$price', '$medium', '$artist', '$mini_descr','$ppcode')";
$result = @mysqli_query ($dbcon, $q); // Run the query.
if ($result) { // If the query ran without a problem
echo '<h2>The painting was successfully registered</h2><br>';
} else { // If it was not registered, display an error message
echo '<h2>System Error</h2>
<p class="error">The painting could not be added due to a system error. We apologize for ![]()
any inconvenience.</p>';
// Debugging message
echo '<p>' . mysqli_error($dbcon) . '<br><br>Query: ' . $q . '</p>';
} // End of the if ($result)
mysqli_close($dbcon); // Close the database connection
} else { // Display the errors messages
echo '<h2>Error!</h2>
<p class="error">The following error(s) occurred:<br>';
foreach ($errors as $msg) { // Print each error.
echo " - $msg<br>\n";
}
echo '</p><h3>Please try again.</h3><p><br></p>';
}// End of the if (empty($errors))
} // End of the main submit conditionals
?>
<div id="rightcol">
<nav>
<?php include('includes/menu.inc'); ?>
</nav>
</div>
<h2>Add a Painting</h2>
<form action="admin_page_pp.php" method="post">![]()
<p><label class="label" for="thumb"><b>Thumbnail:</b></label>
<input id="thumb" type="text" name="thumb" size="45" maxlength="45"![]()
value="<?php if (isset($_POST['thumb'])) echo $_POST['thumb']; ?>"></p>
<p><label class="label"><b>Type:</b></label>
<select name="type" >
<option value="">- Select -</option>
<option value="Still-life">Still Life</option>
<option value="Nature">Nature</option>
<option value="Abstract">Abstract</option>
</select><br>
<p><label class="label" for="price"><b>Price:</b></label>![]()
<input id="price" type="text" name="price" size="15" maxlength="15" ![]()
value="<?php if (isset($_POST['price'])) echo $_POST['price']; ?>"></p>
<p><label class="label"><b>Medium:</b></label>![]()
<select name="medium" >
<option value="">- Select -</option>
<option value="Oil-painting">Oil Painting</option>
<option value="Colored-etching">Colored Etching</option>
</select><br>
<p><label class="label"><b>Artist:</b></label>
<select name="artist" > #3
<option value="">- Select -</option
<option value="Adrian-W-West">Adrian W West</option>
<option value="Roger-St-Barbe">Roger St. Barbe</option>
<option value="James-Kessell">James Kessell</option>
</select><br>
<p><label class="label"><b>Brief Description:</b></label>
<textarea name="mini_descr" rows="3" cols="40"></textarea></p>
<p><label class="label"><b>Paste PayPal code:</b></label>
//insert a text area for the PayPal code
<textarea name="ppcode" rows="10" cols="50"></textarea></p> #4
<div id="submit">
<p><input id="submit" type="submit" name="submit" value="Add"></p>
</div>
</form><!--End of the "add a painting content"-->
<div>
<footer>
<?php include ('includes/footer.inc'); ?>
</footer></div>
</div>
</div>
</body>
</html>
Explanation of the Code
Line numbers #1, #2 and #4 will process the PayPal code; line number #3 starts the pull-down list of artists and this is explained next.
<select name="artist"> #3
<option value="">- Select -</option
<option value="Adrian-W-West">Adrian W West</option>
<option value="Roger-St-Barbe">Roger St. Barbe</option>
<option value="James-Kessell">James Kessell</option>
</select>
Because this example web site uses only three artists for brevity, the pull-down menu for the artist field is hard-coded. However, e-commerce web sites should be extensible in the hope that the business will grow. In our example, the owner hopes that the number of artists will increase, also, some names may be dropped and others will be added. To dynamically change the pull down list of artists to accommodate a larger number of artists, new artist, and discontinued artists, the pull-down list would preferably retrieve artists from the artists table.
This can be achieved by replacing the hard-coded section with the code given in Listing 11-7b. This code can be used in other types of database-driven web sites; therefore, it is included in the downloadable files for this chapter.
Listing 11-7b. Replacing the Pull-Down Hard Code So That It Pulls Data from the Artists Table (get_artists.php)
<select name="artist">
<option>--Select the artist--</option>
<?php // Fetch all the artists from theartisttable and insert them in the artist pull-![]()
down menu
$q = "SELECT artist_id, CONCAT_WS(' ', first_name, middle_name, last_name) ![]()
FROM artists ORDER BY last_name, first_name ASC";
$result = mysqli_query ($dbcon, $q);
if (mysqli_num_rows($result) > 0) {
while ($row = mysqli_fetch_array ($result, MYSQLI_NUM)) {
echo "<option value=\"$row[0]\"";
// Ensure that the form names are sticky
if (isset($_POST['artist']) && ($_POST['artist'] == $row[0]) ) echo ' selected="selected"';
echo ">$row[1]</option>\n";
}
} else {
echo '<option>Please add a new artist</option>';
}
mysqli_close($dbcon); // Close the database connection.
?>
</select></p>
Integrating with the PayPal Shopping Cart
PayPal is secure and familiar to millions throughout the world. The PayPal payment buttons are encoded so that the prices cannot be manipulated by rogue customers. When a product is paid for, PayPal will send the administrator an e-mail containing the following information: the date and ID of the transaction, the amount paid, the e-mail address of the user, the user’s delivery address, and a description of the purchased item.
![]() Note PayPal provides a safe, self-contained environment called Sandbox. This enables web-site developers to test PayPal transactions without paying real money.
Note PayPal provides a safe, self-contained environment called Sandbox. This enables web-site developers to test PayPal transactions without paying real money.
The PayPal payment system will not be described in detail because this would need its own chapter (or two). A full description would probably become obsolete anyway, because PayPal frequently updates and simplifies the process. Instead of giving detailed instructions, I provided this overview so that you know what to look for on the PayPal web site. PayPal and other PayPal resources provide plenty of instructions on their web sites. Two helpful forums are listed in the appendix. They will help you learn about configuring PayPal and will solve problems you might meet when integrating the cart buttons with your web site.
To create a business account, access the PayPal web site for your territory (for example, www.paypal.com for the USA or www.paypal.co.uk for the UK). Registration is free and not difficult to set up. Then access your business account, click the business tab, and use the search field to locate the necessary buttons and logos.
Each product in the e-commerce catalog will require its unique Add to Cart button. These can be fully configured using your account on the PayPal web site. The code for each button can then be copied and pasted into the database’s art table. In our example, this is achieved by pasting the code into the PayPal textarea of the page shown in Figure 11-7.
![]() Note The PayPal buttons will not be visible on the search results page unless you are online.
Note The PayPal buttons will not be visible on the search results page unless you are online.
PayPal provides several credit/debit card logos. The logos inform users that payments can be made even if they do not have a PayPal account. Figure 11-8 shows two standard encoded PayPal buttons and a horizontal version of a credit/debit card logo.

Figure 11-8. The appearance of the buttons and credit/debit card logo
The dummy codes for the PayPal buttons are included in this chapter’s downloadable subfolder named shopper. The code for real-world PayPal buttons will be unique and will apply only to products on your own e-commerce web site.
The code for an Add to Cart button will be similar to the example in Listing 11-8a. For security, the ID value for each product is given as XXXXXXX, but real-world buttons will have digits instead of Xs.
Listing 11-8a. Sample Code for a PayPal “Add to Cart” Button
<form target="paypal" action="https://www.paypal.com/cgi-bin/webscr" method="post">
<input name="cmd" value="_s-xclick" type="hidden">
<input name="hosted_button_id" value="XXXXXXX" type="hidden">
<p><input src="https://www.paypal.com/en_GB/i/btn/btn_cart_LG.gif" name="submit" ![]()
alt="PayPal - The safer, easier way to pay online." style="float: left;" border="0" ![]()
type="image"><img alt="" src="https://www.paypal.com/en_GB/i/scr/pixel.gif" border="0" ![]()
height="1" width="1"></p>
</form>
You need to place a PayPal View Cart button in the header of the shop’s found_paintings pages. The code for the View Cart button will be something like Listing 11-8b.
Listing 11-8b. The Code for a PayPal “View Cart” Button
The dummy e-mail address shown in bold type must be replaced by the PayPal account owner’s e-mail address. When an order is checked out, PayPal will send the details in an e-mail to that address.
<form name="_xclick" target="paypal" ![]()
action="https://www.paypal.com/uk/cgi-bin/webscr" method="post">
<input type="hidden" name="cmd" value="_cart"> ![]()
<input type="hidden" name="business" value="me@mybusiness.co.uk"> ![]()
<input type="image" src="https://www.paypal.com/en_GB/i/btn/view_cart.gif" border="0" ![]()
name="submit" alt="Make payments with PayPal - it's fast, free and secure!"> ![]()
<input type="hidden" name="display" value="1">
</form>
![]() Caution When configuring a unique PayPal button for each product in the shop, the configuration must include the price, the currency (US dollars or GB pounds), the name of the item being purchased, and the product identity number. Most importantly, ensure that you configure the PayPal buttons so that the user is prompted to enter a delivery address. The PayPal buttons will be automatically encoded.
Caution When configuring a unique PayPal button for each product in the shop, the configuration must include the price, the currency (US dollars or GB pounds), the name of the item being purchased, and the product identity number. Most importantly, ensure that you configure the PayPal buttons so that the user is prompted to enter a delivery address. The PayPal buttons will be automatically encoded.
Displaying the Result of a Search
Figure 11-9 shows the result of a search for nature paintings costing £40 each or less.
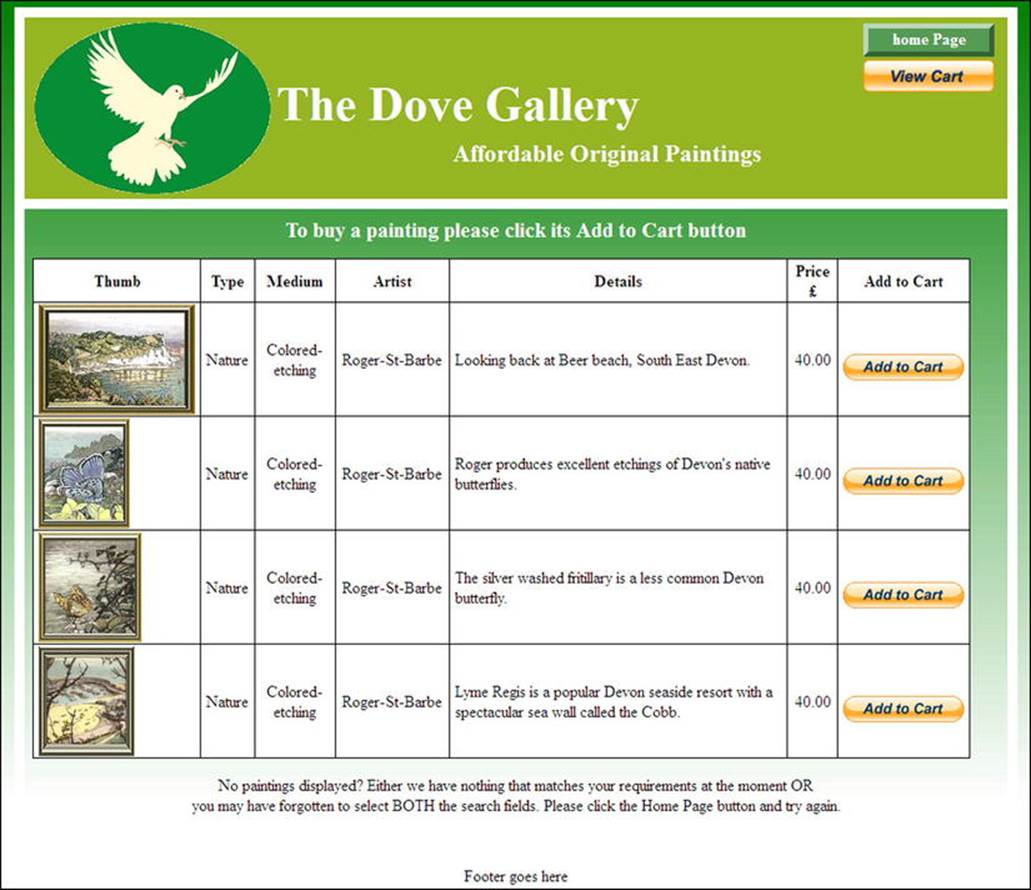
Figure 11-9. The result of searching for nature paintings costing £40 or less
The PayPal Add to Cart and View Cart buttons link directly to PayPal, so that when an Add to Cart button is clicked, the PayPal cart is actioned automatically. When the View Cart button is clicked, PayPal displays the cart information in the user’s browser.
The file for Listing 11-9a is included in the downloadable subfolder shopper.
Listing 11-9a. Creating a Page for Displaying Search Results (found_paintings.php)
The session and the DOCTYPE go here.
<title>The page for displaying the found paintings</title>
<meta charset=utf-8>
<link rel="stylesheet" type="text/css" href="transparent.css">
<style type="text/css">
body { margin:auto; }
p{ text-align:center; }
table, td, th { width:930px; border-collapse:collapse; border:1px black solid; ![]()
background:white;}
td, th { padding-left:5px; padding-right:5px; text-align:center; }
td.narrow, th.narrow { width:45px;}
td.descr { text-align:left; }
td.medium, th.medium { width:100px;}
td.artist, th.artist { width:210px;}
td.thumb, th.thumb { width:125px; text-align:center;}
#content h3 { text-align:center; font-size:130%; font-weight:bold;}
img { display:block;}
#header-button { margin-top:-5px;}
</style>
</head>
<body>
<div id="container">
<header>
<?php include('includes/header_found_pics.inc'); ?>
<div id="logo">
<img alt="dove" height="170" src="images/dove-1.png" width="234">
</div>
</header>
<div id="content"><!--Start of table display content-->
<h3>To buy a painting please click its Add to Cart button</h3>
<p>
<?php
$type=$_POST['type'];
$price=$_POST['price'];
require ('mysqli_connect.php'); // Connect to the database
// Fetch the records that match the search criteria
$q = "SELECT art_id, thumb, type, price, medium, artist, mini_descr, ppcode ![]()
FROM art WHERE type='$type' AND price <= '$price' ORDER BY price ASC ";
$result = @mysqli_query ($dbcon, $q);
if ($result) { // If the query encountered no problems, display the records
// Table header
echo '<table>
<tr> #1
<th class="thumb"><b>Thumb</b></th>
<th class="narrow"><b>Type</b></th>
<th class="medium"><b>Medium</b></th>
<th class="artist"><b>Artist</b></th>
<th class="descr"><b>Details</b></th>
<th class="narrow"><b>Price</b></th>
<th class="medium"><b>Add to Cart</b></th>
</tr>';
// Fetch and echo the matching records
while ($row = mysqli_fetch_array($result, MYSQLI_ASSOC)) {
echo '<tr>
<td class="thumb"><img src='.$row['thumb'] . '></td>
<td class="narrow">' . $row['type'] . '</td>
<td class="medium">' . $row['medium'] . '</td>
<td class="artist">' . $row['artist'] . '</td>
<td class="descr">' . $row['mini_descr'] . '</td>
<td class="narrow">' . $row['price'] . '</td>
<td class="medium">' . $row['ppcode'] . '</td>
</tr>';
}
echo '</table>'; // Close the table
mysqli_free_result ($result); // Free up the resources
} else { // If the query encountered a problem
// Error message
echo '<p class="error">The records could not be retrieved. We apologize for any ![]()
inconvenience.</p>';
// Debugging error message:
echo '<p>' . mysqli_error($dbcon) . '<br><br>Query: ' . $q . '</p>';
} // End of if ($result)
mysqli_close($dbcon); // Close the database connection
?>
<p>No paintings displayed? Either we have nothing that matches your requirements ![]()
at the moment OR<br>you may have forgotten to select BOTH the search fields. Please ![]()
click the Home Page button and try again.</p>
</div><!--End of table display content-->
<?php include("includes/footer.inc"); ?>
</div>
</body>
</html>
Explanation of the Code
<tr> #1
<th class="thumb"><b>Thumb</b></th>
<th class="narrow"><b>Type</b></th>
<th class="medium"><b>Medium</b></th>
<th class="artist"><b>Artist</b></th>
<th class="descr"><b>Details</b></th>
<th class="narrow"><b>Price</b></th>
<th class="medium"><b>Add to Cart</b></th>
</tr>';
The words thumb, narrow, medium, artist, and descr set the width of the displayed columns. Refer to the internal style at the beginning of the listing to see the widths of these columns.
The code for the found_pics header is given in Listing 11-9b.
Listing 11-9b. Creating the User’s Page Header (header_found_pics.inc)
<div id="header-button">
<ul>
<li><a href="index.php">home Page</a></li>
<form name="_xclick" target="paypal"
action="https://www.paypal.com/uk/cgi-bin/webscr" method="post">
<input type="hidden" name="cmd" value="_cart">
<input type="hidden" name="business" value="me@mybusiness.co.uk">
<input type="image" src="https://www.paypal.com/en_GB/i/btn/view_cart.gif" border="0" ![]()
name="submit" alt="Make payments with PayPal - it's fast, free and secure!">
<input type="hidden" name="display" value="1">
</form>
...</ul>
</div>
<h1>The Dove Gallery</h1>
<h2>Affordable Original Paintings</h2>
That concludes the brief description of a PayPal shopping cart. I will now describe a demonstration custom shopping cart so that you can discover how a custom shopping cart works.
A Custom Shopping Cart
Many e-commerce web sites use their own custom shopping cart. By this, I mean a shopping cart designed by the web-site developer. This helps to maintain customer records and re-orders.
Custom carts can be linked to a payment system such as PayPal. The code for achieving the PayPal link is beyond the scope of this brief description, but resources for integrating PayPal with a custom cart are included in the Appendix. Custom shopping carts are complex and require several interactive pages to replace the online PayPal system. The process is best described by a flow chart such as the one shown in Figure 11-10.

Figure 11-10. A typical shopping cart flow diagram
The numbered circles indicate the steps taken by a user. After logging in (step 2), the user’s ID is saved in a session that passes to all the subsequent pages. The user level is detected, and the user is redirected to a search page (step 3); our example has pull-down menus containing search criteria. The user selects the search criteria and clicks the Search button. She is then redirected to a catalog of products that match her search criteria. If the user decides to buy a painting, she will click its Add to Cart button (step 4). This sends the product ID and the user ID to the cart; a message confirming the action is displayed (step 5). The display has a Continue shopping link and a link to the Checkout page. Clicking the Continue shopping link returns the user to the shop page (step 4) where the user can add more products. If the user clicks the View Cart button on the header menu, she will be shown a tabular display showing the products she has chosen and the cost. This tabular display allows the user to change the quantities or remove an item from the cart.
The Database and Tables
Downloadable images and files are provided only for demonstrating the custom shopping cart. The search page and the search results page are hard-coded so that you can instantly explore the workings of a custom shopping cart. To view the demonstration, follow these steps:
1. Create a folder in htdocs named ecommerce.
2. In phpMyAdmin, create a database named shopdb using the user and password given in the connection file listed next.
The downloadable file for accessing the database is mysqli_connect.php and has the following code:
<?php
$dbcon = @mysqli_connect ( 'localhost', 'turing', 'computerman', 'shopdb' )
# If it fails
OR die ( mysqli_connect_error() ) ;
# Set the encoding
mysqli_set_charset( $dbcon, 'utf8') ;
?>
3. Use phpMyAdmin to import the downloadable .sql files to create the already populated tables.
When you have complete steps 1 to 3, you can begin to explore the cart.
Exploring the Custom Shopping Cart
With XAMPP running, type localhost/ecommerce/ in the address field of a modern browser (not Internet Explorer 8), and then follow these steps:
1. Log in as Rose Bush using the e-mail address rbush@myisp.co.uk and the password redblooms.
2. When the search results page appears, select any type of painting and any maximum price. The hard code will ignore what you select and send you directly to the page with Add to Cart links.
3. When the search results page appears, click any Add to cart link and then click the View cart button.
4. In the cart view, try changing the quantity from 1 to 2, and then click the Update cart link.
5. In the cart view, click the Continue shopping link and add another painting. Then click the View Cart button on the header menu.
6. To remove a painting from the cart view, change one of the quantities to zero and click the Update cart link.
The populated tables and the PHP files are in the downloads for the custom shopping cart demonstration. For your information, the five tables and the file listings are shown next.
The Tables
The minimal artists table has four columns, as shown in Table 11-3.
Table 11-3. The artists Table

Because the user or administrator might wish to do a full text search for an artist, the MyISAM storage engine was selected for the artists table. With the latest versions of XAMPP, MySQL, and PHP, the INNODB storage engine also allows full text searches.
The details of the paintings are stored in a table named art with seven columns, as shown in Table 11-4.
Table 11-4. The art Table
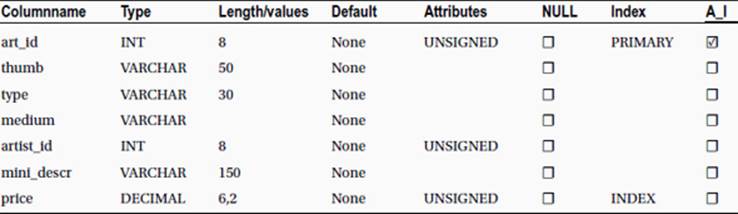
Again, this used the MyISAM storage engine to enable a full text search. With the latest versions of XAMPP, MySQL, and PHP, the INNODB storage engine also allows full text searches. The column named thumb is for storing the URLs for thumbnail images of the paintings. The description column contains the name of the painting, its size, some information about the picture, such as whether an oil painting was painted on canvas or board. A real-world art table might also include a column for the URLs of enlarged versions of the paintings. Note that the downloadable table has no column for PayPal shopping cart button code.
The minimal orders table has four columns, the order ID, the user ID, the price, and the order date. This is shown in Table 11-5.
Table 11-5. The orders Table

The orders table needs to be able to join with other tables; therefore, the INNODB storage engine was used.
A table named order_contents with five columns contains various IDs, the price, the quantity ordered, and the dispatch date, as shown in Table 11-6.
Table 11-6. A Minimal Order Contents Table
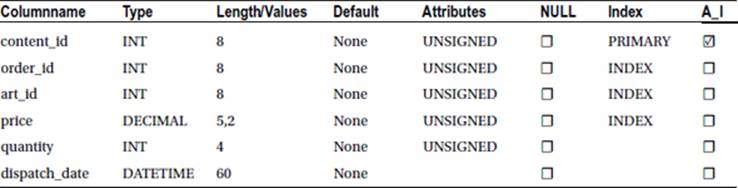
To link this table with other tables, the INNODB storage engine was chosen.
Normally, there would be a column for quantity, and this is shown for completeness in Table 11-6. However, if the paintings are originals (as in our example web site), only one of each exists—in which case, a quantity column is not required. If the shop sold prints or ink cartridges, a quantity column would be essential. Columns for the dispatch address and special delivery instructions would also be included.
The simplistic order and order_contents tables are presented only to make the statement that similar tables would be part of an e-commerce web site.
Finally, the users table for the e-commerce web-site has 14 columns, as shown in Table 11-7.
Table 11-7. The Types and Attributes for a Minimal users Table
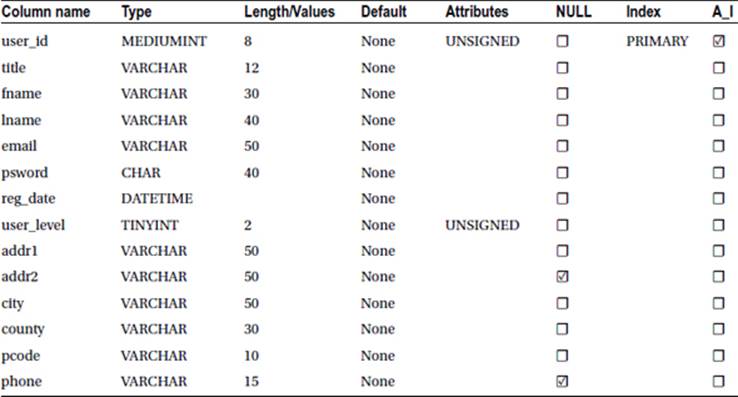
An administrator might wish to carry out a full text search of the registered users’ table; therefore, the MyISAM storage engine was used. With the latest versions of XAMPP, MySQL, and PHP, the INNODB storage engine also allows full text searches.
A user_level column is included to enable the login page to differentiate between a registered user and an administrator. The users have a user_level of zero, and the administrator has been given the user level 51.
The downloadable file users.sql contains two registrations, which are shown in Table 11-8. These users’ details will be used when you explore the workings of the custom shopping cart later in the chapter.
Table 11-8. The Data for Two People in the First Five Columns of the users Table (users.sql)
|
User |
Administrator |
|
|
Title |
Mrs |
Mr |
|
First Name |
Rose |
Mike |
|
Last Name |
Bush |
Rosoft |
|
|
rbush@myisp.co.uk |
miker@myisp.com |
|
Password |
redblooms |
willgates |
To save space in the preceding table, I have not shown the addresses that are contained in the table’s .sql file. I gave Mrs. Bush and Mr. Rosoft the same mailing address because they are actually the same person. The address details are not accessed again in this example e-commerce web site; therefore, they are not important. You will need to refer to the user’s e-mail address and password when you explore the custom shopping cart demonstration.
When the administrator Mike Rosoft logs in, he will be directed to an admin page. This is described next.
Add Paintings to a Table for a Custom Shopping Cart
To add paintings to a database table intended for a custom shopping cart, the administration interface is almost the same as the one used for a PayPal cart, but the text area for the PayPal code is omitted. The new interface is shown in Figure 11-11.

Figure 11-11. The interface for adding paintings for the custom cart
No listing is given for this interface because it is similar to Listing 11-7, except that the PayPal textarea is omitted. The file admin_page.php is included in the downloadable files so that you can examine it. However, you should not attempt to use it because all the thumbnail pictures have already been inserted in the file art.sql provided with the demonstration files for the custom shopping cart.
When registered users log in, they can search for paintings and purchase them. The search page was shown earlier in Figure 11-6.
![]() Note Because I hard-coded the page that displays the paintings, a search will take you straight to the display shown in Figure 11-12 no matter what type of painting or what price you enter into the search fields. This is deliberate because the demonstration is designed to direct you instantly to the display of products with their Add to Cart links. You can then use the Add to Cart links to explore the features of the View Cart demonstration. A search page that is not hard-coded can be found in the subfolder for the PayPal shopping cart version.
Note Because I hard-coded the page that displays the paintings, a search will take you straight to the display shown in Figure 11-12 no matter what type of painting or what price you enter into the search fields. This is deliberate because the demonstration is designed to direct you instantly to the display of products with their Add to Cart links. You can then use the Add to Cart links to explore the features of the View Cart demonstration. A search page that is not hard-coded can be found in the subfolder for the PayPal shopping cart version.
We will now describe the result of the hard-coded search page using the custom shopping cart.
Displaying the Products Using Custom Shopping Cart Links
As in the earlier PayPal example, when a user searches for paintings, the result is a table displaying the chosen paintings. However, in this case, the PayPal Add to Cart buttons are replaced by custom Add to Cart links, as shown in Figure 11-12. Your own images can be used as links instead of standard hyperlinks.
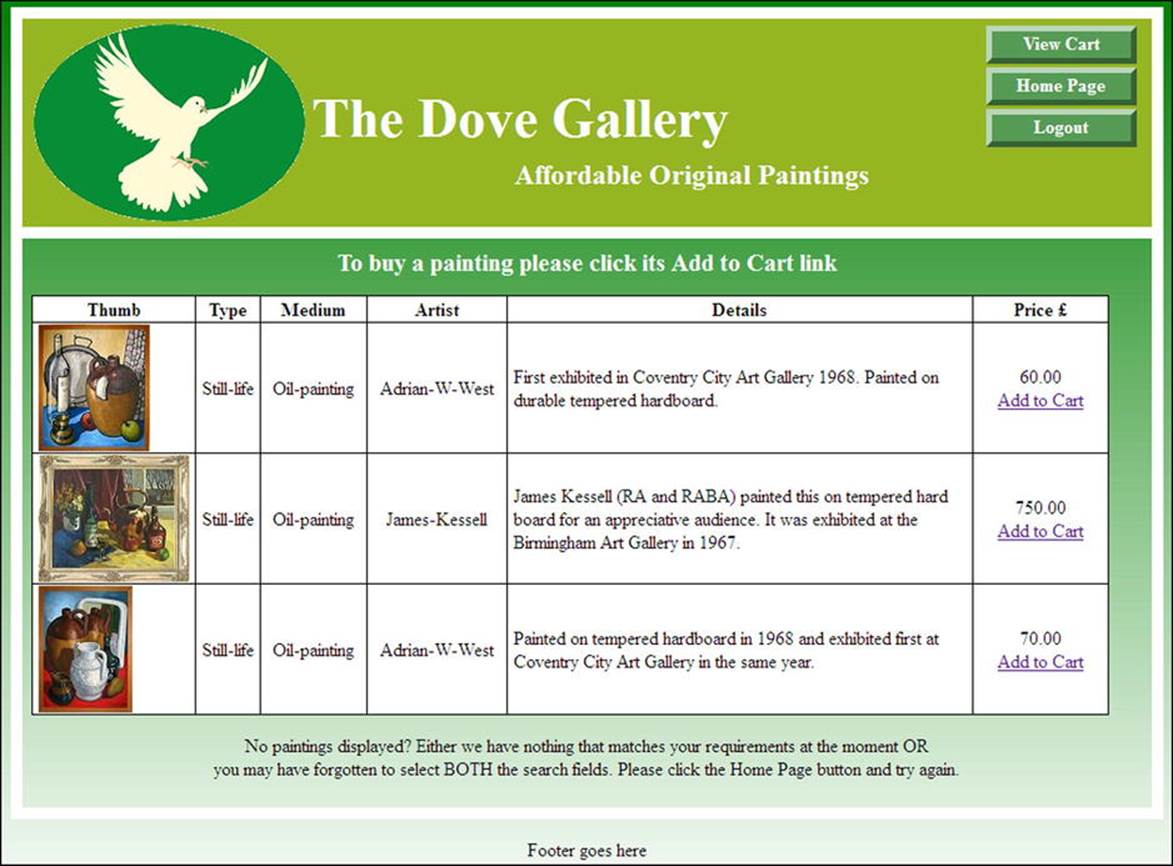
Figure 11-12. The display of paintings with “Add to Cart” links
In addition to swapping the PayPal buttons for Add to Cart links, the prices and Add to Cart links are located together in the last column.
![]() Note The ability to show an enlarged version of a painting together with an expanded description would be a useful addition to this page of search results. Amazon provides a good example; by clicking the thumbnail image of a book, the image expands, and you can view a contents list and the book’s introduction. You can even browse through a few of the book’s pages. To achieve a similar display, the art table would require an additional column for the URL of the enlarged version as described in Chapter 8 for a real estate agent.
Note The ability to show an enlarged version of a painting together with an expanded description would be a useful addition to this page of search results. Amazon provides a good example; by clicking the thumbnail image of a book, the image expands, and you can view a contents list and the book’s introduction. You can even browse through a few of the book’s pages. To achieve a similar display, the art table would require an additional column for the URL of the enlarged version as described in Chapter 8 for a real estate agent.
In Listing 11-12, the hard-coded query in the demonstration shopping cart display is shown in bold type.
Listing 11-12. Creating a Hard-Coded Page of Search Results for a Custom Cart (found_pics_cart.php)
<?php
session_start();
if (!isset($_SESSION['user_id'])){
header('location:login.php');
exit();
}
?>
<!doctype html>
<html lang=en>
<head>
<title>The page for displaying the found paintings </title>
<meta charset=utf-8>
<link rel="stylesheet" type="text/css" href="transparent.css">
<style type="text/css">
body { margin:auto; }
p{ text-align:center; }
table, td, th { width:930px; border-collapse:collapse; border:1px black solid;
background:white;}
td, th { padding-left:5px; padding-right:5px; text-align:center; }
td.narrow, th.narrow { width:45px;}
td.descr { text-align:left; }
td.medium, th.medium { width:100px;}
td.artist, th.artist { width:210px;}
td.thumb, th.thumb { width:125px; text-align:center;}
#content h3 { text-align:center; font-size:130%; font-weight:bold;}
img { display:block;}
#header-button { margin-top:-5px;}
</style>
</head>
<body>
<div id="container">
<header>
<?php include('includes/header_found_pics_cart.inc'); ?>
<div id="logo">
...<img alt="dove" height="170" src="images/dove-1.png" width="234">
</div>
</header>
<div id="content"><!--Start of table displaying selected paintings-->
<h3>To buy a painting please click its Add to Cart link</h3>
<p>
<?php #1
//Connect to the database
require ( 'mysqli_connect.php' ) ;
// Apply some hard coding to retrieve three items from the art table
$q = "SELECT * FROM art LIMIT 3";
$result = mysqli_query( $dbcon, $q ) ;
if ( mysqli_num_rows( $result ) > 0 )
{
// Table header
echo '<table>
<tr>
<th class="thumb"><b>Thumb</b></th>
<th class="narrow"><b>Type</b></th>
<th class="medium"><b>Medium</b></th>
<th class="artist"><b>Artist</b></th>
<th class="descr"><b>Details</b></th>
<th class="narrow"><b>Price</b></th>
</tr>';
// Fetch the matching records and populate the table
while ($row = mysqli_fetch_array($result, MYSQLI_ASSOC)) {
echo '<tr>
<td class="thumb"><img src='.$row['thumb'] . '></td>
<td class="narrow">' . $row['type'] . '</td>
<td class="medium">' . $row['medium'] . '</td>
<td class="artist">' . $row['artist'] . '</td>
<td class="descr">' . $row['mini_descr'] . '</td>
<td class="artist">' . $row['price'] .
'<br><a href="added.php?id=' . $row['art_id'] . '">Add to Cart</a></td> #2
</tr>';
}
echo '</table>'; // End of table
// Close the database connection
mysqli_close( $dbcon ) ;
}
// Or notify the user that no matching paintings were found
else { echo '<p>There are currently no items matching your search criteria.</p>' ; }
?>
<p>No paintings displayed? Either we have nothing that matches your requirements at the moment OR<br>you may have forgotten to select BOTH the search fields. Please click the Home Page button and try again.</p>
</div><!--End of table display content-->
<?php include("includes/footer.inc"); ?>
</div>
</body>
</html>
Explanation of the Code
<?php #1
//Connect to the database
require ( 'mysqli_connect.php' ) ;
// Apply some hard coding to retrieve three items from the art table
$q = "SELECT * FROM art LIMIT 3";
To save space, this SELECT statement was hard-coded to fetch all the records with a LIMIT of three results. This means that when you explore the demonstration files, you can quickly display a page containing custom cart links so that you can experiment with the View Cart files. A real-world SELECT statement would select all the paintings matching the user’s search criteria. This can be demonstrated using the downloadable shopper subfolder files. To select all the files that match search criteria, the SELECT statement would be as follows:
<?php
$type=$_POST['type'];
$price=$_POST['price'];
// Select all the records that match the search criteria
require ('mysqli_connect.php'); // Connect to the database.
$q = "SELECT art_id, thumb, type, medium, artist, mini_descr, price FROM art ![]()
WHERE type='$type' AND price <= '$price' ORDER BY price DESC ";
<td class="artist">' . $row['price'] .
'<br><a href="added.php?id=' . $row['art_id'] . '">Add to Cart</a></td> #2
This code combines the price of the each selected painting with an Add to Cart link and places both items in the last column of the displayed table. The line break <br> pushes the link below the price.
Adding Purchases to the Cart
When the user clicks one of the Add to Cart links, the details of the purchases are entered into the cart and the user will see one of two confirmation messages, as shown in Figures 11-13a and 11-13b.
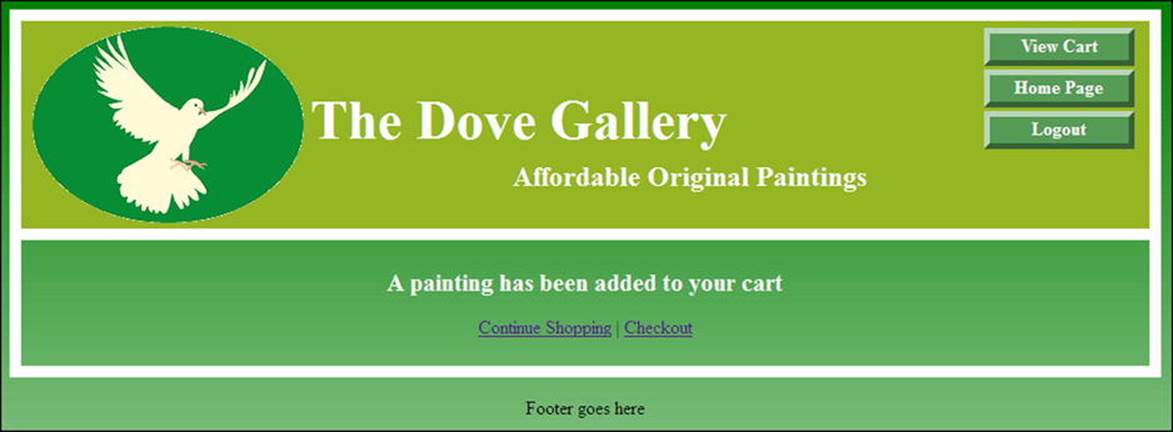
Figure 11-13a. Confirmation of an addition to the cart
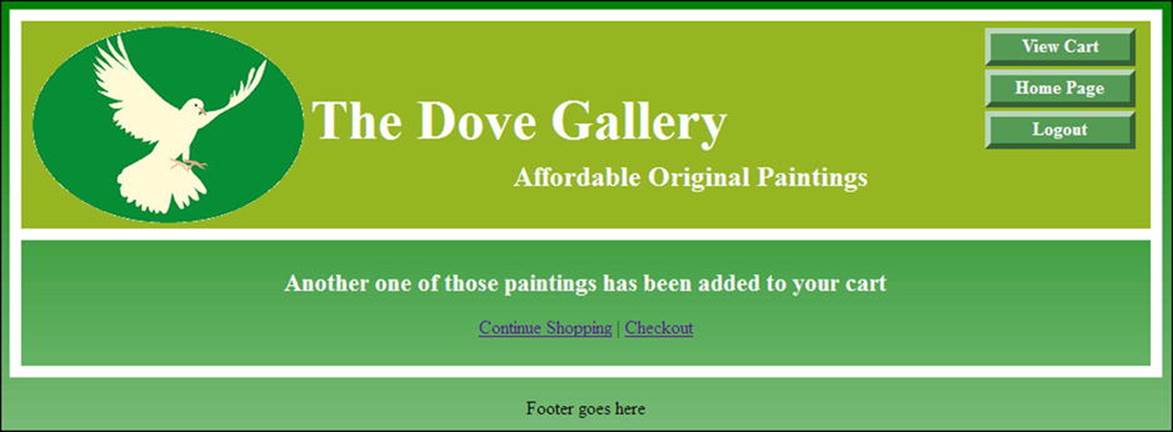
Figure 11-13b. Confirmation that another of the same product has been added to the cart
The next figure is not really applicable to this example web site because the paintings are originals and you can’t order more than one of each. However, the facility to add another identical painting is included here for completeness so that you can test this feature. If the user adds another of the same product, she will see the confirmation shown in Figure 11-13b.
Note the two links below the confirmation message. The user can continue shopping and add more items to the cart. She can choose to view the cart contents by clicking View Cart link on the header menu. She could also use the second link to go straight to the checkout. The code for the confirmation page is given in Listing 11-13.
Listing 11-13. Creating the Confirmation Page (added.php)
<?php
// Start the session
session_start() ;
// Redirect the user if he is not logged in
if (!isset( $_SESSION['user_id'] ) ) {require ('login_tools.php') ; load() ; }
?>
<!doctype html>
<html lang=en>
<head>
<title>The confirmation page</title>
<meta charset=utf-8>
<link rel="stylesheet" type="text/css" href="transparent.css">
<style type="text/css">
body { margin:auto; }
p{ text-align:center; }
#content h3 { text-align:center; font-size:130%; font-weight:bold;}
img { display:block;}
#header-button { margin-top:-5px;}
</style>
</head>
<body>
<div id="container">
<header>
<?php include('includes/header_found_pics_cart.inc'); ?>
<div id="logo">
<img alt="dove" height="170" src="images/dove-1.png" width="234">
</div>
</header>
<div id="content"><!--Start of the confirmation page-->
<p>
<?php
if ( isset( $_GET['id'] ) ) $id = $_GET['id'] ;
// Connect to the database
require ( 'mysqli_connect.php' ) ;
// Get selected painting data from the art table #1
$q = "SELECT * FROM art WHERE art_id = $id" ;
$result = mysqli_query( $dbcon, $q ) ;
if ( mysqli_num_rows( $result ) == 1 )
{
$row = mysqli_fetch_array( $result, MYSQLI_ASSOC );
// Does the cart already contain one of that product id
if ( isset( $_SESSION['cart'][$id] ) )
{
// Add another one of those paintings
$_SESSION['cart'][$id]['quantity']++;
echo '<h3>Another one of those paintings has been added to your cart</h3>';
}
else
{
// Add a different painting
$_SESSION['cart'][$id]= array ( 'quantity' => 1, 'price' => $row['price'] ) ;
echo '<h3>A painting has been added to your cart</h3>' ;
}
}
// Close the database connection
mysqli_close($dbcon);
// Insert three links
echo '<p><a href="found_pics_cart.php">Continue Shopping</a> | <a href="cart.php">View Cart</a> ![]()
| <a href="checkout.php">Checkout</a> | <a href="logout.php">Logout</a></p>' ;
?>
</div><!--End of confirmation page content-->
<?php include("includes/footer.inc"); ?>
</div>
</body>
</html>
Explanation of the Code
// Get selected painting data from the art table #1
Following this comment, the details of the selected paintings are checked to determine which of two messages to display, either A painting has been added or Another of those paintings has been added.
If the user chooses to view the cart, she will see the contents displayed as shown in Figure 11-14a.
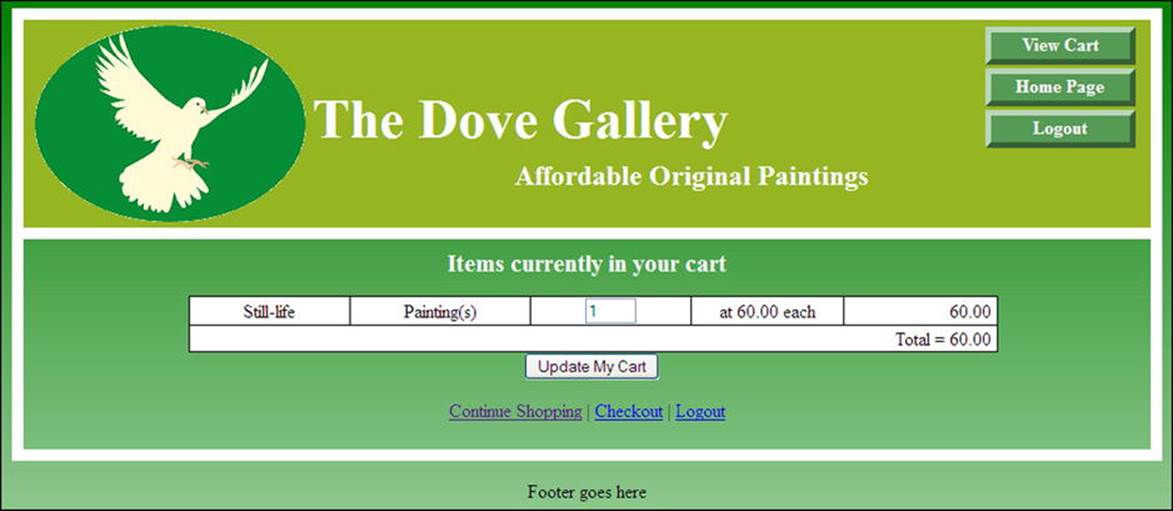
Figure 11-14a. The cart content shows that the user added one painting costing £60
The quantity in the third column of the table can be edited by the user. To remove a painting from the cart, the user will change the current figure to zero. After editing the quantity, the user must click the Update My Cart button to reveal the new subtotal (last column in the top row) and the revised total price.
If she clicks the Continue Shopping link, the page shown in Figure 11-12 reappears and she can click another Add to Cart link to add another painting. If she added a new painting worth £750 to the cart, and she viewed the cart, she would see the revised cart content as shown in Figure 11-14b.
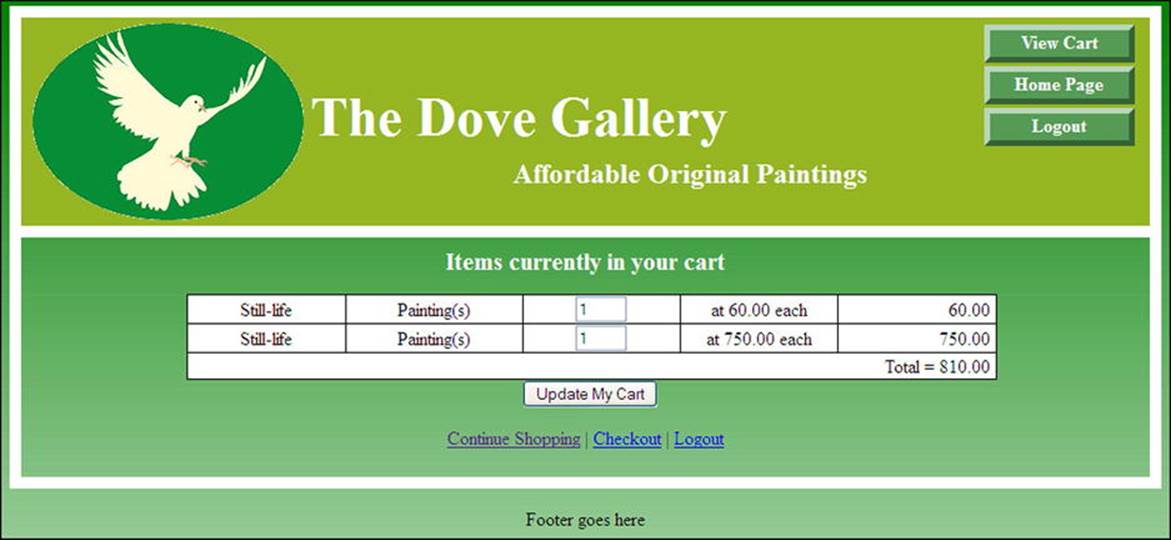
Figure 11-14b. The contents of the cart after adding another painting costing £750
The code for creating the View Cart page is given in Listing 11-14.
Listing 11-14. Creating the View Cart Page (cart.php)
<?php
// Start the session
session_start();
// Redirect the user if he is not logged in
if ( !isset( $_SESSION[ 'user_id' ] ) ) { require ( 'login_tools.php' ) ; load() ; }
?>
<!doctype html>
<html lang=en>
<head>
<title>The view cart page</title>
<meta charset=utf-8>
<link rel="stylesheet" type="text/css" href="transparent.css">
<style type="text/css">
body { margin:auto; }
p{ text-align:center; }
table { width:700px; border-collapse:collapse; border:1px black solid; ![]()
background:white; margin-left:135px;}
td, th { padding-left:5px; padding-right:5px; text-align:center; }
#content h3 { text-align:center; font-size:130%; font-weight:bold;}
#header-button { margin-top:-5px;}
#submit { margin-left: 425px;
}
</style>
</head>
<body>
<div id="container">
<header>
<?php include('includes/header_found_pics_cart.inc'); ?>
<div id="logo">
<img alt="dove" height="170" src="images/dove-1.png" width="234">
</div>
</header>
<div id="content"><!--Start of table of cart contents-->
<h3>Items currently in your cart</h3>
<p>
<?php
if ( $_SERVER['REQUEST_METHOD'] == 'POST' )
{
// If the user changes the quantity, update the cart
foreach ( $_POST['qty'] as $art_id => $item_qty ) #1
{
// Ensure that the id and the quantity are integers
$id = (int) $art_id;
$qty = (int) $item_qty;
// If the quantity is set to zero, clear the session or else store the changed quantity
if ( $qty == 0 ) { unset ($_SESSION['cart'][$id]); }
elseif ( $qty > 0 ) { $_SESSION['cart'][$id]['quantity'] = $qty; }
}
}
// Set the initial variable for the total cost
$total = 0;
// Display the cart contents
if (!empty($_SESSION['cart']))
{
// Connect to the database
require ('mysqli_connect.php');
// Get the items from the shop table and insert them into the cart
$q = "SELECT * FROM art WHERE art_id IN ("; #2
foreach ($_SESSION['cart'] as $id => $value) { $q .= $id . ','; }
$q = substr( $q, 0, -1 ) . ') ORDER BY art_id ASC';
$result = mysqli_query ($dbcon, $q);
// create a form and a table
echo '<form action="cart.php" method="post">
<table><tr>';
while ($row = mysqli_fetch_array ($result, MYSQLI_ASSOC))
{
// Calculate the subtotals and the grand total #3
$subtotal = $_SESSION['cart'][$row['art_id']]['quantity'] * ![]()
$_SESSION['cart'][$row['art_id']]['price'];
$total += $subtotal;
// Display the table
echo "<tr> <td>{$row['type']}</td><td>Painting(s)</td>
<td><input type=\"text\" size=\"3\" name=\"qty[{$row['art_id']}]\" ![]()
value=\"{$_SESSION['cart'][$row['art_id']]['quantity']}\"></td>
<td>at {$row['price']} each </td> <td style=\"text-align:right\">". ![]()
number_format ($subtotal, 2)."</td></tr>";
}
// Close the connection to the database
mysqli_close($dbcon);
// Display the total
echo ' <tr><td colspan="5" style="text-align:right">![]()
Total = '.number_format($total,2).'</td></tr>
</table>
<input id="submit" type="submit" name="submit" value="Update My Cart"></form>';
}
else
// Or display a message
{ echo '<p>Your cart is currently empty.</p>' ; }
// Create some links
echo '<p><a href="found_pics_cart.php">Continue Shopping</a> | ![]()
<a href="checkout.php">Checkout</a></p>' ;
?>
</div><!--End of the view cart content page-->
<?php include("includes/footer.inc"); ?>
</div>
</body>
</html>
Explanation of the Code
The comments within the listing explain the steps used to populate a cart. However, some items need a little more explanation as follows:
foreach ( $_POST['qty'] as $art_id => $item_qty ) #1
The View Cart process relies on sessions and also some complex arrays. The function foreach is a special loop that works with arrays. In line #1, the item $_POST['qty'] is an array containing the quantity of a particular product. The symbol => does not mean equal to or greater than; it is an array operator that associates the item qty with the $art_id of the product.
$q = "SELECT * FROM art WHERE art_id IN ("; #2
foreach($_SESSION['cart']as $id => $value) { $q .= $id . ','; }
$q = substr( $q, 0, -1 ) . ') ORDER BY art_id ASC';
Values are added to a session array named cart shown in bold type.
// Calculate the subtotals and the grand total #3
$subtotal = $_SESSION['cart'][$row['art_id']]['quantity'] * ![]()
$_SESSION['cart'][$row['art_id']]['price'];
$total += $subtotal;
// Display the table
echo "<tr> <td>{$row['type']}</td><td>Painting(s)</td>
<td><input type=\"text\" size=\"3\" name=\"qty[{$row['art_id']}]\" ![]()
value=\"{$_SESSION['cart'][$row['art_id']]['quantity']}\"></td>
<td>at {$row['price']} each </td> <td style=\"text-align:right\">". ![]()
number_format ($subtotal, 2)."</td></tr>";
}
The session arrays are used to insert values into the cells of the View Cart table. Note that in the code that formats the table, the double quotes are escaped by using backslashes.
![]() Note In a real-world web site, to achieve the necessary standard of security, two techniques would be used: prepared statements and transactions. These advanced concepts are beyond the scope of this book, but you can learn about them using the resources provided in the Appendix.
Note In a real-world web site, to achieve the necessary standard of security, two techniques would be used: prepared statements and transactions. These advanced concepts are beyond the scope of this book, but you can learn about them using the resources provided in the Appendix.
We will briefly mention the checkout page.
The Checkout Page
When the checkout link is clicked, four things happen:
· A Thank You page appears, which also states the order number.
· The order details are posted to the order_contents table.
· The order is entered into the orders table.
· The shopping cart is emptied and is ready for the next purchases.
The Thank You page is shown in Figure 11-15.
Figure 11-15. The Thank You page
The checkout page is included in the downloadable files as checkout.php, but it is hard-coded to produce the display shown in Figure 11-15. Because of this, its function is limited so that checking out has no effect on the orders and order_contents tables.
Additional Administrative Tasks
The process for adding artists and paintings was described earlier in the chapter, but an administrator must perform several other tasks. Editing and deleting artists and paintings can be achieved by the techniques described in Chapter 3. Other tasks are usually undertaken by an administration team. These duties include order processing, shipping, stock control, financial control, and customer support. All these activities would be recorded in the appropriate database tables.
Summary
In this chapter, two useful techniques were included: retrieving a forgotten password and dynamically loading a pull-down menu. You learned about some of the many elements required for an e-commerce web site. However, the need for brevity meant that the number of elements discussed was limited. Because a practical e-commerce web site needs an enormous number of files, the chapter described the main displays as seen by a user. The chapter was not a tutorial, but a description of an e-commerce web site followed by a hard-coded demonstration of a shopping cart. The hard-coded files allowed you to quickly explore the custom shopping cart.
PayPal shopping cart files in the subfolder shopper allowed you to explore features such as a search file that was not hard-coded and the administration file for inserting PayPal code into a table.
I hope you were able to appreciate the fact that e-commerce webs sites are very complex and that the need for very tight security is paramount. I also hope the chapter has inspired you to explore some of the e-commerce resources given in the appendix.
All materials on the site are licensed Creative Commons Attribution-Sharealike 3.0 Unported CC BY-SA 3.0 & GNU Free Documentation License (GFDL)
If you are the copyright holder of any material contained on our site and intend to remove it, please contact our site administrator for approval.
© 2016-2026 All site design rights belong to S.Y.A.