PHP Solutions: Dynamic Web Design Made Easy, Third Edition (2014)
Chapter 12. Creating a Dynamic Photo Gallery
The previous chapter concentrated mainly on extracting the contents of the images table as text. This chapter builds on those techniques to develop the mini photo gallery shown in Figure 12-1.

Figure 12-1. This mini photo gallery is driven by pulling information from a database
The gallery also demonstrates some cool features that you’ll want to incorporate into text-driven pages, too. For instance, the grid of thumbnail images on the left displays two images per row. Just by changing two numbers, you can make the grid as many columns wide and as many rows deep as you like. Clicking one of the thumbnails replaces the main image and caption. It’s the same page that reloads, but exactly the same technique is used to create online catalogs that take you to another page with more details about a product. The Next link at the foot of the thumbnails grid shows you the next set of photographs, using exactly the same technique as you use to page through a long set of search results. This gallery isn’t just a pretty face or two . . .
What this chapter covers:
· Why storing images in a database is a bad idea, and what you should do instead
· Planning the layout of a dynamic gallery
· Displaying a fixed number of results in a table row
· Limiting the number of records retrieved at a time
· Paging through a long set of results
Why Not Store Images in a Database?
The images table contains filenames and captions, but not the images themselves. Even though you can store binary objects, such as images, in a database, I don’t intend to do so for the simple reason that it’s usually more trouble than it’s worth. The main problems are as follows:
· Images can’t be indexed or searched without storing textual information separately.
· Images are usually large, bloating the size of tables. If there’s a limit on the amount of storage in your database, you risk running out of space.
· Table fragmentation affects performance if images are deleted frequently.
· Retrieving images from a database involves passing the image to a separate script, slowing down display on a webpage.
It’s more efficient to store images in an ordinary folder on your website and use the database for information about the images. You need just two pieces of information—the filename and a caption that can also be used as alt text. Some developers store the full path to the image in the database, but I think storing only the filename gives you greater flexibility. The path to the images folder will be embedded in the HTML. There’s no need to store the image’s height and width. As you saw in Chapters 4 and 8, you can generate that information dynamically using PHP’sgetimagesize() function.
Planning the Gallery
I find that the best way to design a database-driven site is to start with a static page and fill it with placeholder text and images. I then create my CSS style rules to get the page looking the way I want, and finally I replace each placeholder element with PHP code. Each time I replace something, I check the page in a browser to make sure everything is still holding together.
Figure 12-2 shows the static mockup I made of the gallery and points out the elements that need to be converted to dynamic code. The images are the same as those used for the random image generator in Chapter 4 and are all different sizes. I experimented by scaling the images to create the thumbnails, but decided that the result looked too untidy, so I made the thumbnails a standard size (80 × 54 pixels). Also, to make life easy, I gave each thumbnail the same name as the larger version and stored them in a separate subfolder of the images folder called thumbs.

Figure 12-2. Working out what needs to be done to convert a static gallery to a dynamic one
In the previous chapter, displaying the contents of the images table was easy. You created a single table row, with the contents of each field in a separate table cell. By looping through the result set, each record was displayed on a row of its own, simulating the column structure of the database table. This time, the two-column structure of the thumbnail grid no longer matches the database structure. You need to count how many thumbnails have been inserted in a row before creating the next row.
Once I had worked out what needed to be done, I stripped out the code for thumbnails 2 to 6, and for the navigation link. The following listing shows what was left in the <main> element of gallery.php, with the elements that need to be converted to PHP code highlighted in bold (you can find the code in gallery_01.php in the ch12 folder):
<main>
<h2>Images of Japan</h2>
<p id="picCount">Displaying 1 to 6 of 8</p>
<div id="gallery">
<table id="thumbs">
<tr>
<!-- This row needs to be repeated -->
<td><a href="gallery.php"><img src="images/thumbs/basin.jpg" alt=""
width="80" height="54"></a></td>
</tr>
<!-- Navigation link needs to go here -->
</table>
<figure id="main_image">
<img src="images/basin.jpg" alt="" width="350" height="237">
<figcaption>Water basin at Ryoanji temple, Kyoto</figcaption>
</figure>
</div>
</main>
Converting the Gallery Elements to PHP
Before you can display the contents of the gallery, you need to connect to the phpsols database and retrieve all the records stored in the images table. The procedure for doing so is the same as that in the previous chapter, using the following simple SQL query:
SELECT filename, caption FROM images
You can then use the first record to display the first image and its associated caption and thumbnail. You don’t need image_id.
PHP Solution 12-1: Displaying the First Image
If you set up the Japan Journey website in Chapter 4, you can work directly with the original gallery.php. Alternatively, copy gallery_01.php from the ch12 folder and save it in the phpsols site root as gallery.php. You also need to copy title.php, menu.php, andfooter.php to the includes folder of the phpsols site. If your editing program asks if you want to update the links in the files, choose the option not to update.
1. Load gallery.php into a browser to make sure that it displays correctly. The main part of the page should look like Figure 12-3, with one thumbnail image and a larger version of the same image.
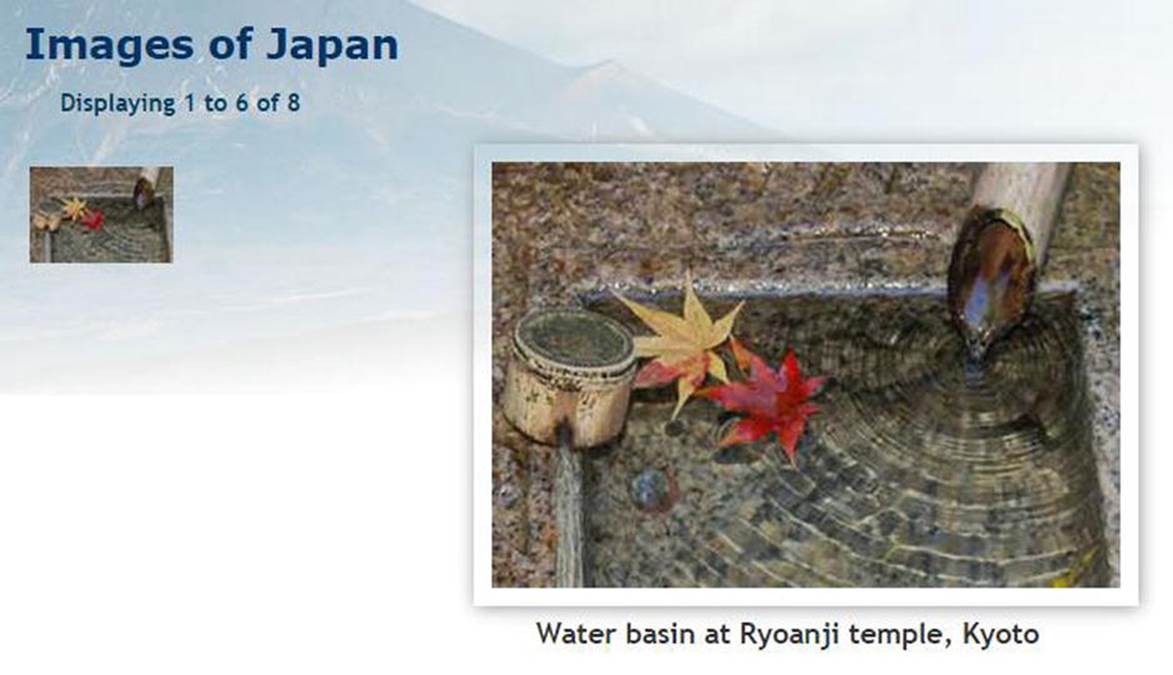
Figure 12-3. The stripped-down version of the static gallery ready for conversion
2. The gallery depends on a connection to the database, so include connection.php, create a read-only connection to the phpsols database, and define the SQL query. Add the following code just before the closing PHP tag above the DOCTYPE declaration ingallery.php (new code is highlighted in bold):
include './includes/title.php';
require_once './includes/connection.php';
$conn = dbConnect('read');
$sql = 'SELECT filename, caption FROM images';
If you are using PDO, add 'pdo' as the second argument to dbConnect().
3. The code for submitting the query and extracting the first record from the results depends on which method of connection you are using. For MySQLi, use this:
// submit the query
$result = $conn->query($sql);
if (!$result) {
$error = $conn->error;
} else {
// extract the first record as an array
$row = $result->fetch_assoc();
}
For PDO, use this:
// submit the query
$result = $conn->query($sql);
// get any error messages
$errorInfo = $conn->errorInfo();
if (isset($errorInfo[2])) {
$error = $errorInfo[2];
} else {
// extract the first record as an array
$row = $result->fetch();
}
To display the first image when the page loads, you need to retrieve the first result before creating a loop that will eventually display the grid of thumbnails. The code for both MySQLi and PDO submits the query, extracts the first record, and stores it in $row.
4. You now have the details of the first record image stored as $row['filename'] and $row['caption']. In addition to the filename and caption, you need the dimensions of the large version so that you can display it in the main body of the page. Add the following code inside the else block immediately after the code that fetches the first result:
// get the name and caption for the main image
$mainImage = $row['filename'];
$caption = $row['caption'];
// get the dimensions of the main image
$imageSize = getimagesize('images/'.$mainImage)[3];
As explained in Chapter 8, getimagesize() returns an array, the fourth element of which contains a string with the width and height of an image ready for insertion into an <img> tag. We’re interested only in the fourth element, so we can use the array-dereferencing technique introduced in Chapter 7. Adding [3] after the closing parenthesis of getimagesize() returns only the fourth element of the array, which is assigned to $imageSize.
![]() Note Array dereferencing requires PHP 5.4 or later. If your server is running an earlier version of PHP, you need to omit the [3] after the call to getimagesize() and assign the complete array to $imageSize. You can then access the fourth element in the normal way as $imageSize[3].
Note Array dereferencing requires PHP 5.4 or later. If your server is running an earlier version of PHP, you need to omit the [3] after the call to getimagesize() and assign the complete array to $imageSize. You can then access the fourth element in the normal way as $imageSize[3].
5. You can now use this information to dynamically display the thumbnail, main image, and caption. The main image and thumbnail have the same name, but you eventually want to display all thumbnails by looping through the full result set. Consequently, the dynamic code that goes in the table cell needs to refer to the current record—in other words, to $row['filename'] and $row['caption'], rather than to $mainImage and $caption. You’ll see later why I’ve assigned the values from the first record to separate variables. Amend the code in the table like this:
<td><a href="gallery.php">
<img src="images/thumbs/<?= $row['filename']; ?>"
alt="<?= $row['caption']; ?>" width="80" height="54"></a></td>
6. In case there’s a problem with the query, you need to check if $error has been set, and prevent the gallery from being displayed. Add a PHP block containing the following conditional statement immediately after the <h2> Images of Japan heading:
<?php if (isset($error)) {
echo "<p>$error</p>";
} else {
?>
7. Insert a new line immediately before the closing </main> tag (around line 54) and add a PHP block with the else block’s closing curly brace:
<?php } ?>
8. Save gallery.php and view it in a browser. It should look the same as Figure 12-3. The only difference is that the thumbnail and its alt text are dynamically generated. You can verify this by looking at the source code. The original static version had an empty altattribute, but as the following screenshot shows, it now contains the caption from the first record:

If things go wrong, make sure there’s no gap between the static and dynamically generated text in the image’s src attribute. Also check that you’re using the right code for the type of connection you have created with the database. You can check your code againstgallery_mysqli_02.php or gallery_pdo_02.php in the ch12 folder.
9. Once you have confirmed that you’re picking up the details from the database, you can convert the code for the main image. Amend it like this (new code is in bold):
<figure id="main_image">
<img src="images/<?= $mainImage; ?>" alt="<?= $caption; ?>"
<?= $imageSize; ?>></p>
<figcaption><?= $caption; ?></figcaption>
</figure>
$imageSize inserts a string containing the correct width and height attributes for the main image.
10.Test the page again. It should look the same as in Figure 12-3, but the images and caption are being drawn dynamically from the database, and getimagesize() is calculating the correct dimensions for the main image. You can check your code againstgallery_mysqli_03.php or gallery_pdo_03.php in the ch12 folder.
Building the Dynamic Elements
The first task after converting the static page is to display all the thumbnails and then build dynamic links that will enable you to display the large version of any thumbnail that has been clicked. Displaying all the thumbnails is easy—just loop through them (we’ll work out how to display them in rows of two later). Activating the link for each thumbnail requires a little more thought. You need a way of telling the page which large image to display.
Passing Information Through a Query String
In the last section you used $mainImage to identify the large image, so you need a way of changing its value whenever a thumbnail is clicked. The solution is to add the image’s filename to a query string at the end of the URL in the link, like this:
<a href="gallery.php?image=filename">
You can then check whether the $_GET array contains an element called image. If it does, change the value of $mainImage. If it doesn’t, leave $mainImage as the filename from the first record in the result set.
PHP Solution 12-2: Activating the Thumbnails
Continue working with the same file as in the previous section. Alternatively, copy gallery_mysqli_03.php or gallery_pdo_03.php to the phpsols site root, and save it as gallery.php
1. Locate the opening <a> tag of the link surrounding the thumbnail. It looks like this:
<a href="gallery.php">
Change it to this:
<a href="<?= $_SERVER['PHP_SELF']; ?>?image=<?=$row['filename']; ?>">
Be careful when typing the code. It’s easy to mix up the question marks in the PHP tags with the question mark at the beginning of the query string. It’s also important that there are no spaces surrounding ?image=.
$_SERVER['PHP_SELF'] is a handy predefined variable that refers to the name of the current page. You could just leave gallery.php hard-coded in the URL, but using $_SERVER['PHP_SELF'] ensures that the URL is pointing to the correct page. The rest of the code builds the query string with the current filename.
2. Save the page and load it into a browser. Hover your mouse pointer over the thumbnail and check the URL displayed in the status bar. It should look like this:
http://localhost/phpsols/gallery.php?image=basin.jpg
If nothing is shown in the status bar, click the thumbnail. The page shouldn’t change, but the URL in the address bar should now include the query string. Check that there are no gaps in the URL or query string.
3. To show all the thumbnails, you need to wrap the table cell in a loop. Insert a new line after the HTML comment about repeating the row and create the first half of a do... while loop like this (see Chapter 3 for details of the different types of loops):
<!-- This row needs to be repeated -->
<?php do { ?>
4. You already have the details of the first record in the result set, so the code to get subsequent records needs to go after the closing </td> tag. Create some space between the closing </td> and </tr> tags, and insert the following code. It’s slightly different for each method of database connection.
For MySQLi, use this:
</td>
<?php } while ($row = $result->fetch_assoc()); ?>
</tr>
For PDO, use this:
</td>
<?php } while ($row = $result->fetch()); ?>
</tr>
This fetches the next row in the result set and sends the loop back to the top. Because $row['filename'] and $row['caption'] have different values, the next thumbnail and its associated alt text are inserted into a new table cell. The query string is also updated with the new filename.
5. Save the page and test it in a browser. You should now see all eight thumbnails in a single row across the top of the gallery, as shown in the following screenshot.
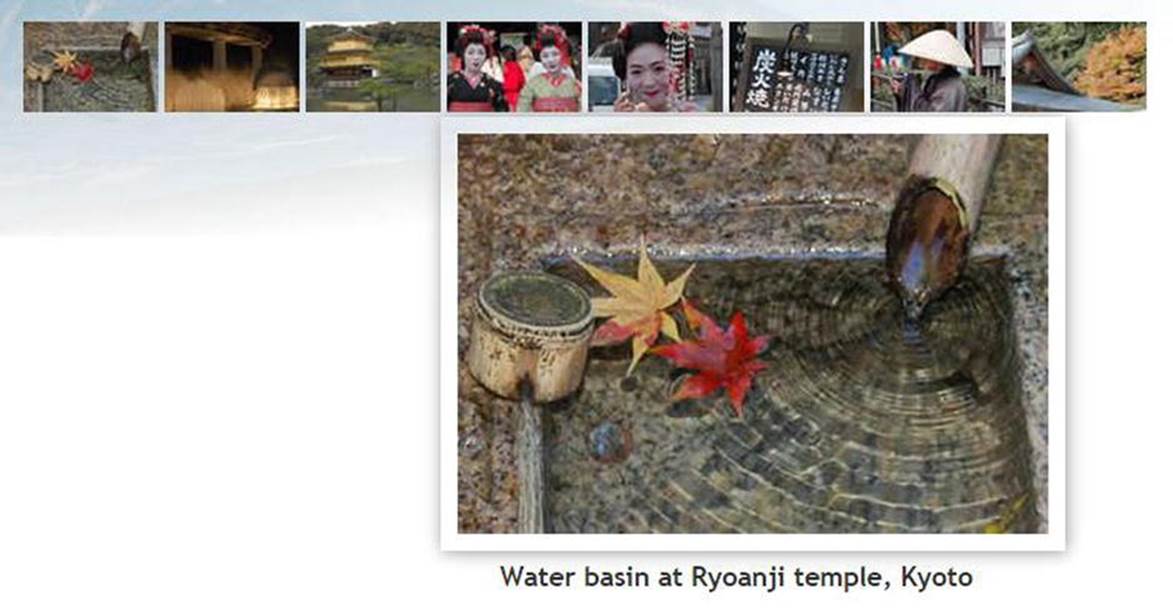
Hover your mouse pointer over each thumbnail, and you should see the query string displaying the name of the file. You can check your code against gallery_mysqli_04.php or gallery_pdo_04.php.
6. Clicking the thumbnails still doesn’t do anything, so you need to create the logic that changes the main image and its associated caption. Locate this section of code in the block above the DOCTYPE declaration:
// get the name and caption for the main image
$mainImage = $row['filename'];
$caption = $row['caption'];
Highlight the line that defines $caption and cut it to your clipboard. Wrap the other line in a conditional statement like this:
// get the name for the main image
if (isset($_GET['image'])) {
$mainImage = $_GET['image'];
} else {
$mainImage = $row['filename'];
}
The $_GET array contains values passed through a query string, so if $_GET['image'] has been set (defined), it takes the filename from the query string and stores it as $mainImage. If $_GET['image'] doesn’t exist, the value is taken from the first record in the result set, as before.
7. Finally, you need to get the caption for the main image. It’s no longer going to be the same every time, so you need to move it to the loop that displays the thumbnails in the thumbs table. It goes right after the opening curly brace of the loop (around line 48). Position your cursor after the brace and insert a couple of lines, then paste the caption definition that you cut in the previous step. You want the caption to match the main image, so if the current record’s filename is the same as $mainImage, that’s the one you’re after. Wrap the code that you have just pasted in a conditional statement, like this:
<?php
do {
// set caption if thumbnail is same as main image
if ($row['filename'] == $mainImage) {
$caption = $row['caption']; // this is the line you pasted
}
?>
8. Save the page and reload it in your browser. This time, when you click a thumbnail the main image and caption will change. Don’t worry about some images and captions being hidden by the footer. That will correct itself when the thumbnails move to the left of the main image.
![]() Note Passing information through a query string like this is an important aspect of working with PHP and database results. Although form information is normally passed through the $_POST array, the $_GET array is frequently used to pass details of a record that you want to display, update, or delete. It’s also commonly used for searches because the query string can easily be bookmarked.
Note Passing information through a query string like this is an important aspect of working with PHP and database results. Although form information is normally passed through the $_POST array, the $_GET array is frequently used to pass details of a record that you want to display, update, or delete. It’s also commonly used for searches because the query string can easily be bookmarked.
9. There’s no danger of SQL injection in this case. But if someone changes the value of the filename passed through the query string, you’ll get ugly error messages if the image can’t be found and display_errors is on. Before calling getimagesize(), let’s find out if the image exists. Wrap it in a conditional statement like this:
if (file_exists('images/'.$mainImage)) {
// get the dimensions of the main image
$imageSize = getimagesize('images/'.$mainImage)[3];
} else {
$error = 'Image not found.';
}
10.Try changing the value of image in the query string to any value except that of an existent file. When you load the page, you should see Image not found.
Check your code, if necessary, against gallery_mysqli_05.php or gallery_pdo_05.php.
Creating a Multicolumn table
With only eight images, the single row of thumbnails across the top of the gallery doesn’t look too bad. However, it’s useful to be able to build a table dynamically by using a loop that inserts a specific number of table cells in a row before moving to the next row. This is achieved by keeping count of how many cells have been inserted. When the limit is reached for the row, the code needs to insert a closing tag for the current row and, if more thumbnails remain, also insert an opening tag for the next row. What makes it easy to implement is the modulus operator, %, which returns the remainder of a division.
This is how it works. Let’s say you want two cells in each row. After the first cell is inserted, the counter is set to 1. If you divide 1 by 2 with the modulus operator (1 % 2), the result is 1. When the next cell is inserted, the counter is increased to 2. The result of 2 % 2 is 0. The next cell produces this calculation: 3 % 2, which results in 1; but the fourth cell produces 4 % 2, which is again 0. So, every time that the calculation results in 0, you know—or to be more exact, PHP knows—you’re at the end of a row.
So how do you know if there are any more rows left? By putting the code that inserts the closing and opening <tr> tags at the top of the loop, there must always be at least one image left. However, the first time the loop runs, the remainder is also 0, so the issue is that you need to prevent the tags from being inserted until at least one image has been displayed. Phew . . . let’s try it.
PHP Solution 12-3: Looping Horizontally and Vertically
This PHP solution shows how to control a loop so as to display a specific number of columns in a table. The number of columns is controlled by setting a constant. Continue working with the files from the preceding section. Alternatively, use gallery_mysqli_05.php orgallery_pdo_05.php.
1. You may decide at a later stage that you want to change the number of columns in the table, so it’s a good idea to create a constant at the top of the script where it’s easy to find, rather than burying the figures deep in your code. Insert the following code just before creating the database connection:
// define number of columns in table
define('COLS', 2);
A constant is similar to a variable, except that its value cannot be changed by another part of the script. You create a constant with the define() function, which takes two arguments: the name of the constant and its value. By convention, constants are always in uppercase. Unlike variables, they do not begin with a dollar sign.
2. You need to initialize the cell counter outside the loop. Also create a variable that indicates whether it’s the first row. Add the following code immediately after the constant you have just defined:
define('COLS', 2);
// initialize variables for the horizontal looper
$pos = 0;
$firstRow = true;
3. The code that keeps count of the columns goes inside the PHP block at the start of the loop that displays the thumbnails. Amend the code like this:
<?php do {
// set caption if thumbnail is same as main image
if ($row['filename'] == $mainImage) {
$caption = $row['caption'];
}
// if remainder is 0 and not first row, close row and start new one
if ($pos++ % COLS === 0 && !$firstRow) {
echo '</tr><tr>';
}
// once loop begins, this is no longer true
$firstRow = false;
?>
Because the increment operator (++) is placed after $pos, its value is divided by the number of columns before being incremented by 1. The first time the loop runs, the remainder is 0, but $firstRow is true, so the conditional statement fails. However,$firstRow is reset to false after the conditional statement. On future iterations of the loop, the conditional statement closes the current table row and starts a new one each time the remainder is 0.
4. If there are no more records, you need to check if you have an incomplete row at the bottom of the table. Add a while loop after the existing do. . . while loop. In the MySQLi version, it looks like this:
<?php } while ($row = $result->fetch_assoc());
while ($pos++ % COLS) {
echo '<td> </td>';
}
?>
The new code is identical in the PDO version. The only difference is that the preceding line uses $result->fetch() instead of $result->fetch_assoc().
The second loop continues incrementing $pos while $pos++ % COLS produces a remainder (which is interpreted as true) and inserts an empty cell.
![]() Caution This second loop is not nested inside the first. It runs only after the first loop has ended.
Caution This second loop is not nested inside the first. It runs only after the first loop has ended.
5. Save the page and reload it in a browser. The single row of thumbnails across the top of the gallery should now be neatly lined up two by two, as shown in Figure 12-4.
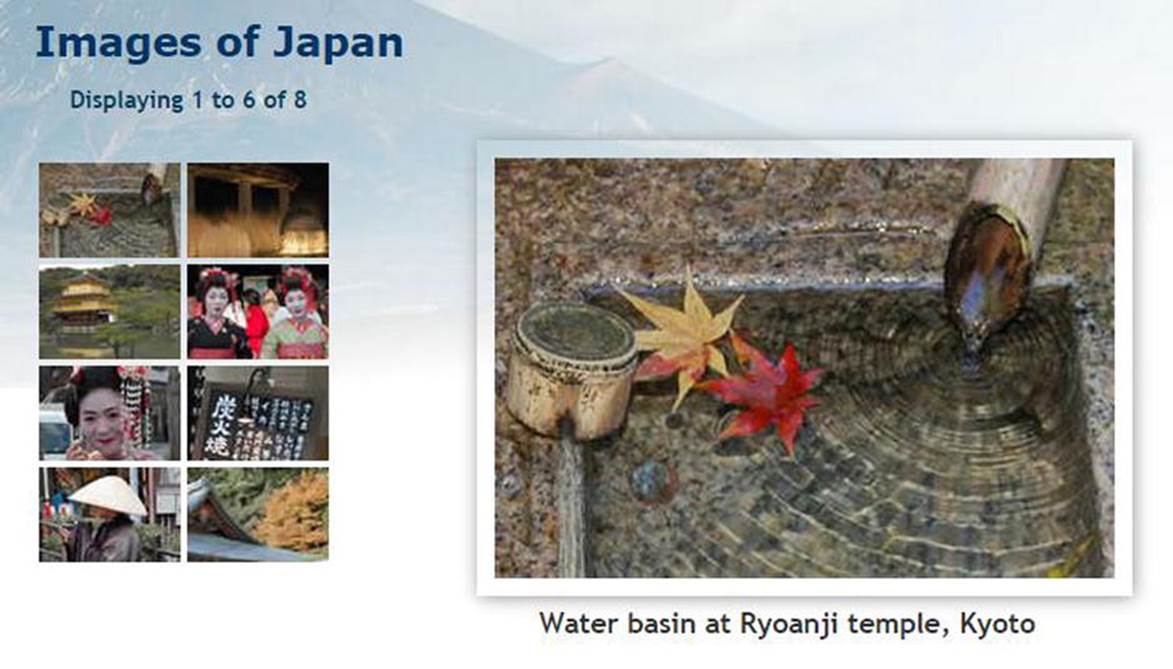
Figure 12-4. The thumbnails are now in neat columns
Try changing the value of COLS and reloading the page. The main image will be displaced because the page has been designed for only two columns, but you can see how easy it is to control the number of cells in each row by changing just one number. You can check your code against gallery_mysqli_06.php or gallery_pdo_06.php.
Paging Through a Long set of Records
The grid of eight thumbnails fits quite comfortably in the gallery, but what if you have 28 or 48? The answer is to limit the number of results displayed on each page and then build a navigation system that lets you page back and forth through the results. You’ve seen this technique countless times when using a search engine; now you’re going to learn how to build it yourself.The task can be broken down into the following two stages:
1. Selecting a subset of records to display
2. Creating the navigation links to page through the subsets
Both stages are relatively easy to implement, although they involve applying a little conditional logic. Keep a cool head, and you’ll breeze through it.
Selecting a Subset of Records
Limiting the number of results on a page is simple—just add the LIMIT keyword to the SQL query like this:
SELECT filename, caption FROM images LIMIT startPosition, maximum
The LIMIT keyword can be followed by one or two numbers. If you use just one number, it sets the maximum number of records to be retrieved. That’s useful, but it’s not suitable for a paging system. For that, you need to use two numbers: the first indicates which record to start from, and the second stipulates the maximum number of records to be retrieved. MySQL counts records from 0, so to display the first six images, you need the following SQL:
SELECT filename, caption FROM images LIMIT 0, 6
To show the next set, the SQL needs to change to this:
SELECT filename, caption FROM images LIMIT 6, 6
There are only eight records in the images table, but the second number is only a maximum, so this retrieves records 7 and 8.
To build the navigation system, you need a way of generating these numbers. The second number never changes, so let’s define a constant called SHOWMAX. Generating the first number (call it $startRecord) is pretty easy, too. Start numbering the pages from 0, and multiply the second number by the current page number. So, if you call the current page $curPage, the formula looks like this:
$startRecord = $curPage * SHOWMAX;
And for the SQL, it becomes this:
SELECT filename, caption FROM images LIMIT $startRecord, SHOWMAX
If $curPage is 0, $startRecord is also 0 (0 × 6), but when $curPage increases to 1, $startRecord changes to 6 (1 × 6), and so on.
Since there are only eight records in the images table, you need a way of finding out the total number of records so as to prevent the navigation system from retrieving empty result sets. In the last chapter, you used the MySQLi num_rows property, and rowCount() in PDO. However, that won’t work this time, because you want to know the total number of records, not how many there are in the current result set. The answer is to use the SQL COUNT() function like this:
SELECT COUNT(*) FROM images
When used like this in combination with an asterisk, COUNT() gets the total number of records in the table. So, to build a navigation system, you need to run both SQL queries: one to find the total number of records, and the other to retrieve the required subset. These are simple queries, so the result is almost instantaneous.
I’ll deal with the navigation links later. Let’s begin by limiting the number of thumbnails on the first page.
PHP Solution 12-4: Displaying a Subset of Records
This PHP solution shows how to select a subset of records in preparation for creating a navigation system that pages through a longer set. It also demonstrates how to display the numbers of the current selection, as well as the total number of records.
Continue working with the same file as before. Alternatively, use gallery_mysqli_06.php or gallery_pdo_06.php.
1. Define SHOWMAX and the SQL query to find the total number of records in the table. Amend the code toward the top of the page like this (new code is shown in bold):
// initialize variables for the horizontal looper
$pos = 0;
$firstRow = true;
// set maximum number of records
define('SHOWMAX', 6);
$conn = dbConnect('read');
// prepare SQL to get total records
$getTotal = 'SELECT COUNT(*) FROM images';
2. You now need to run the new SQL query. The code goes immediately after the code in the preceding step but differs according to the type of MySQL connection. For MySQLi, use this:
// submit query and store result as $totalPix
$total = $conn->query($getTotal);
$row = $total->fetch_row();
$totalPix = $row[0];
This submits the query and then uses the fetch_row() method, which gets a single row from a MySQLi_Result object as an indexed array. There’s only one column in the result, so $row[0] contains the total count of records in the images table.
For PDO, use this:
// submit query and store result as $totalPix
$total = $conn->query($getTotal);
$totalPix = $total->fetchColumn();
This submits the query and then uses fetchColumn() to get a single result, which is stored in $totalPix.
3. Next, set the value of $curPage. The navigation links that you’ll create later will pass the value of the required page through a query string, so you need to check whether curPage is in the $_GET array. If it is, use that value. Otherwise, set the current page to 0. Insert the following code immediately after the code in the previous step:
// set the current page
if (isset($_GET['curPage'])) {
$curPage = $_GET['curPage'];
} else {
$curPage = 0;
}
4. You now have all the information that you need to calculate the start row and to build the SQL query to retrieve a subset of records. Add the following code immediately after the code in the preceding step:
// calculate the start row of the subset
$startRow = $curPage * SHOWMAX;
5. But there’s a problem. The value of $curPage comes from the query string. If someone changes the number manually in the browser address bar, $startRow might be greater than the number of records in the database. If the value of $startRow exceeds$totalPix, you need to reset both $startRow and $curPage to 0. Add this conditional statement after the code in the preceding step:
if ($startRow > $totalPix) {
$startRow = 0;
$curPage = 0;
}
![]() Note If curPage is manually changed to anything other than a number, PHP automatically converts it to 0 when it’s multiplied by SHOWMAX.
Note If curPage is manually changed to anything other than a number, PHP automatically converts it to 0 when it’s multiplied by SHOWMAX.
6. The original SQL query should now be on the next line. Amend it like this:
// prepare SQL to retrieve subset of image details
$sql = "SELECT filename, caption FROM images LIMIT $startRow," . SHOWMAX;
I’ve used double quotes this time, because I want PHP to process $startRow. Unlike variables, constants aren’t processed inside double-quoted strings. So SHOWMAX is added to the end of the SQL query with the concatenation operator (a period). The comma inside the closing quotes is part of the SQL, separating the two arguments of the LIMIT clause.
7. Save the page and reload it into a browser. Instead of eight thumbnails, you should see just six, as shown in Figure 12-5.
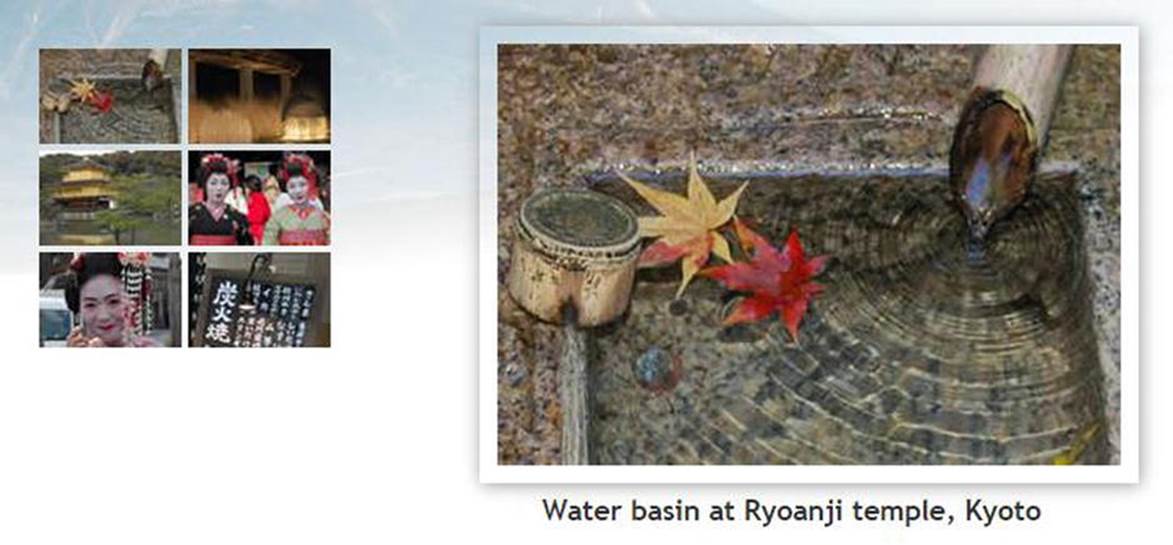
Figure 12-5. The number of thumbnails is limited by the SHOWMAX constant
Change the value of SHOWMAX to see a different number of thumbnails.
8. The text above the thumbnail grid doesn’t update because it’s still hard-coded, so let’s fix that. Locate the following line of code in the main body of the page:
<p id="picCount">Displaying 1 to 6 of 8</p>
Replace it with this:
<p id="picCount">Displaying <?php echo $startRow+1;
if ($startRow+1 < $totalPix) {
echo ' to ';
if ($startRow+SHOWMAX < $totalPix) {
echo $startRow+SHOWMAX;
} else {
echo $totalPix;
}
}
echo " of $totalPix";
?></p>
Let’s take this line by line. The value of $startRow is zero-based, so you need to add 1 to get a more user-friendly number. So, $startRow+1 displays 1 on the first page and 7 on the second page.
In the second line, $startRow+1 is compared with the total number of records. If it’s less, that means the current page is displaying a range of records, so the third line displays the text “to” with a space on either side.
You then need to work out the top number of the range, so a nested if ... else conditional statement adds the value of the start row to the maximum number of records to be shown on a page. If the result is less than the total number of records,$startRow+SHOWMAX gives you the number of the last record on the page. However, if it’s equal to or greater than the total, you display $totalPix instead.
Finally, you exit both conditional statements and display “of” followed by the total number of records.
9. Save the page and reload it in a browser. You still get only the first subset of thumbnails, but you should see the second number change dynamically whenever you alter the value of SHOWMAX. Check your code, if necessary, against gallery_mysqli_07.phporgallery_pdo_07.php.
Navigating Through Subsets of Records
As I mentioned in step 3 of the preceding section, the value of the required page is passed to the PHP script through a query string. When the page first loads, there is no query string, so the value of $curPage is set to 0. Although a query string is generated when you click a thumbnail to display a different image, it includes only the filename of the main image, so the original subset of thumbnails remains unchanged. To display the next subset, you need to create a link that increases the value of $curPage by 1. It follows, therefore, that to return to the previous subset, you need another link that reduces the value of $curPage by 1.
That’s simple enough, but you also need to make sure that these links are displayed only when there is a valid subset to navigate to. For instance, there’s no point in displaying a back link on the first page, because there isn’t a previous subset. Similarly, you shouldn’t display a forward link on the page that displays the last subset, because there’s nothing to navigate to.
Both issues are easily solved by using conditional statements. There’s one final thing that you need to take care of. You must also include the value of the current page in the query string generated when you click a thumbnail. If you fail to do so, $curPage is automatically set back to 0, and the first set of thumbnails is displayed instead of the current subset.
PHP Solution 12-5: Creating the Navigation Links
This PHP solution shows how to create the navigation links to page back and forth through each subset of records. Continue working with the same file as before. Alternatively, use gallery_mysqli_07.php or gallery_pdo_07.php.
1. I have placed the navigation links in an extra row at the bottom of the thumbnail table. Insert this code between the placeholder comment and the closing </table> tag:
<!-- Navigation link needs to go here -->
<tr><td>
<?php
// create a back link if current page greater than 0
if ($curPage > 0) {
echo '<a href="' . $_SERVER['PHP_SELF'] . '?curPage=' . ($curPage-1) .
'"> < Prev</a>';
} else {
// otherwise leave the cell empty
echo ' ';
}
?>
</td>
<?php
// pad the final row with empty cells if more than 2 columns
if (COLS-2 > 0) {
for ($i = 0; $i < COLS-2; $i++) {
echo '<td> </td>';
}
}
?>
<td>
<?php
// create a forward link if more records exist
if ($startRow+SHOWMAX < $totalPix) {
echo '<a href="' . $_SERVER['PHP_SELF'] . '?curPage=' . ($curPage+1) .
'"> Next ></a>';
} else {
// otherwise leave the cell empty
echo ' ';
}
?>
</td></tr>
</table>
It looks like a lot, but the code breaks down into three sections: the first creates a back link if $curPage is greater than 0; the second pads the final table row with empty cells if there are more than two columns; and the third uses the same formula as before ($startRow+SHOWMAX < $totalPix) to determine whether to display a forward link.
Make sure you get the combination of quotes right in the links. The other point to note is that the $curPage-1 and $curPage+1 calculations are enclosed in parentheses to avoid the period after the number being misinterpreted as a decimal point. It’s used here as the concatenation operator to join the various parts of the query string.
2. You now need to add the value of the current page to the query string in the link surrounding the thumbnail. Locate this section of code (around line 95):
<a href="<?= $_SERVER['PHP_SELF']; ?>?image=<?= $row['filename']; ?>">
Change it like this:
<a href="<?= $_SERVER['PHP_SELF']; ?>?image=<?= $row['filename'];?>
&curPage=<?= $curPage; ?>">
You want the same subset to be displayed when clicking a thumbnail, so you just pass the current value of $curPage through the query string.
![]() Caution Because of the limitations of the printed page, I’ve had to break the code over two lines. In your PHP script, all the code must be on the same line with no space between the closing PHP tag and &. This code creates the URL and query string, which must have no spaces in it.
Caution Because of the limitations of the printed page, I’ve had to break the code over two lines. In your PHP script, all the code must be on the same line with no space between the closing PHP tag and &. This code creates the URL and query string, which must have no spaces in it.
3. Save the page and test it. Click the Next link, and you should see the remaining subset of thumbnails, as shown in Figure 12-6. There are no more images to be displayed, so the Next link disappears, but there’s a Prev link at the bottom left of the thumbnail grid. The record counter at the top of the gallery now reflects the range of thumbnails being displayed, and if you click the right thumbnail, the same subset remains onscreen while displaying the appropriate large image. You’re done!
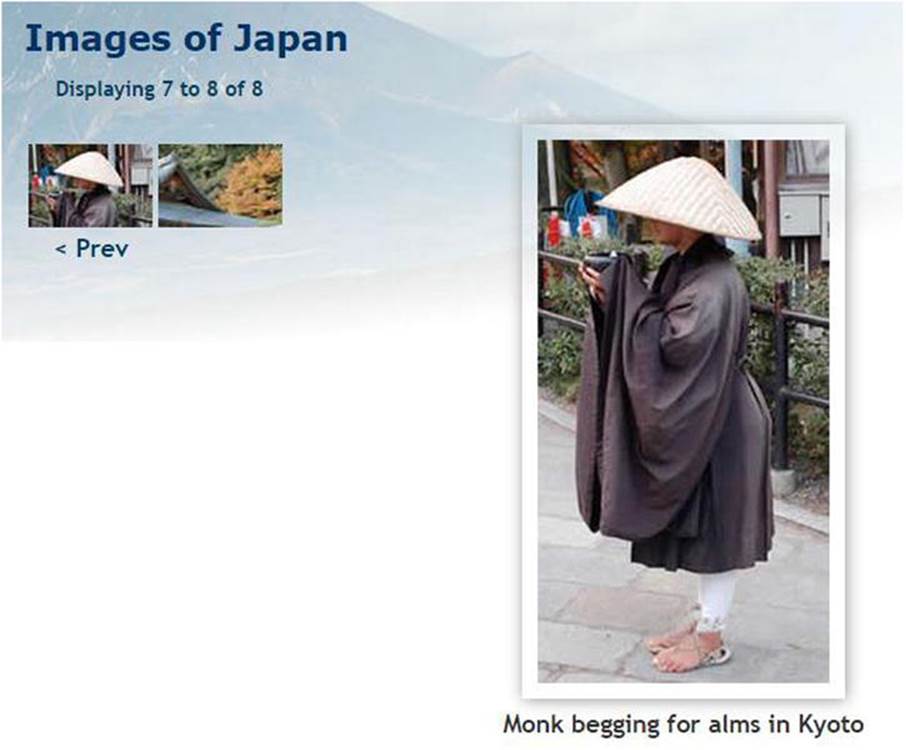
Figure 12-6. The page navigation system is now complete
You can check your code against gallery_mysqli_08.php or gallery_pdo_08.php.
Chapter Review
In just a few pages, you have turned a boring list of filenames into a dynamic online gallery, complete with a page navigation system. All that’s necessary is to create a thumbnail for each major image, upload both images to the appropriate folders, and add the filename and a caption to theimages table in the database. As long as the database is kept up to date with the contents of the images and thumbs folders, you have a dynamic gallery. Not only that, you’ve learned how to select subsets of records, link to related information through a query string, and build a page navigation system.
The more you use PHP, the more you realize that the skill doesn’t lie so much in remembering how to use lots of obscure functions but in working out the logic needed to get PHP to do what you want. It’s a question of if this, do that; if something else, do something different. Once you can anticipate the likely eventualities of a situation, you can normally build the code to handle it.
So far, you’ve concentrated on extracting records from a simple database table. In the next chapter, I’ll show you how to insert, update, and delete material.
All materials on the site are licensed Creative Commons Attribution-Sharealike 3.0 Unported CC BY-SA 3.0 & GNU Free Documentation License (GFDL)
If you are the copyright holder of any material contained on our site and intend to remove it, please contact our site administrator for approval.
© 2016-2026 All site design rights belong to S.Y.A.