WordPress To Go - How To Build A WordPress Website On Your Own Domain, From Scratch, Even If You Are A Complete Beginner (2013)
QUICK START GUIDE - YOUR OWN WEBSITE IN 8 EASY LESSONS
Lesson 7. Add Your First Wordpress Post
You have now added one or more Pages to your website and these provide the static, background information to tell the world about you and your website. Now it’s time to start adding content in the form of Posts, which is what will become a more on-going process as you build your website over time.
You will, I hope, be relieved to hear that adding posts is almost the same as adding pages. So I’m not going to repeat all the stuff in Lesson 6. To add a post, just follow the same instructions, substituting the word ‘post’ for the word ‘page’ and you’ll get there.
The Essential Difference Between Posts And Pages
What I’m going to do in this lesson is point out a few of the differences between posts and pages which might help you make up your mind how the two different types of entries can contribute to your website.
Posts are designed to be a more chronological, dynamic way to present content to your visitors. In the olden days, when WordPress was used primarily for blogging, each post would become the latest in the blogger’s stream of news/comments/events. (…’Emily laid one egg today but dear old Jane seems to be getting broody again’…) The latest post would occupy the top position on the page and earlier posts would scroll down beneath it.
Suppose you wanted to have a website where you displayed topical information, or some sort of journal, or news, you’d want to make use of posts. Typically, a website that uses posts also has some static pages (as above) but the Post content includes a series of entries that you add to on a regular basis and which adds further, timely content to the website.
But the real power of Posts is that they also have handy features called ‘categories’ and ‘tags’ which I will now explain.
How To Make Use Of Categories And Tags
As you will learn, posts don’t have to appear on the front page of your website (see Lesson 13). You could have your ‘Welcome’ page as the front page and, in your sidebar, you could have a series of navigation links filtering your posts by category.
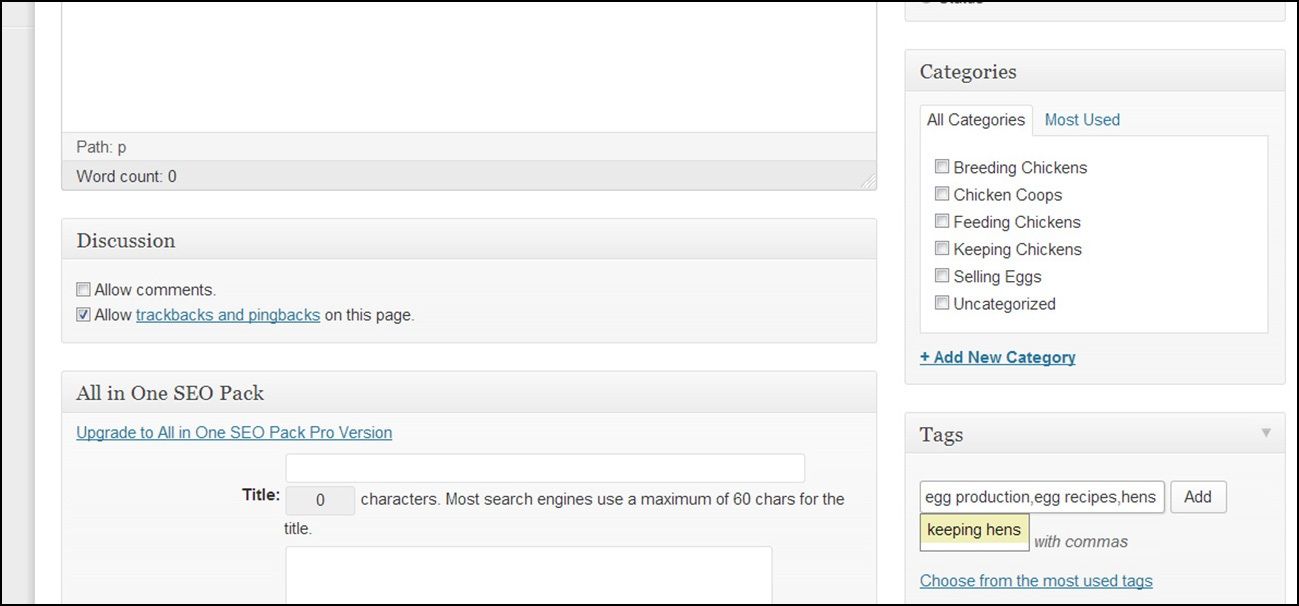
Categories are a way to classify your content into topics so that your visitors can access all the posts you have written on a particular subject. To take my chicken site as an example, I could write a number of posts on broad categories such as ‘chicken food’, ‘chicken houses’, ‘breeds of chicken’ etc.
As I write each post, I would choose one or more appropriate categories for the subject matter. This would then automatically provide a filter of all the posts in the same category so that my visitors can easily find their way through the site without having to read posts on topics that don’t interest them.
If you know what categories you are going to use you can set them up in advance. From the dashboard, go to ‘Posts’, ‘Categories’ and add them there. But you can also add categories as you go by adding a new category at the time you add a post, as shown in Figure 7.1.
Tags are a looser way of categorizing your material that will help the search engines associate certain keywords with your posts. Every time you add a post you should add two or three tags which contain keywords or phrases to help the search engines classify your site. And one way to use the tags you have coded is to have a ‘tag cloud’ in your sidebar. I’ll show you how to do that in the next lesson.
Before I leave the subject of posts, let me share another neat feature of WordPress: the ability to pre- and post-date entries.
How To Go Back (Or Forward) In Time
If you simply want your post to be dated at the date and time you published it then just leave it. But if you want to backdate an entry, you can change the date of publication to a prior date.
Just above the ‘Publish’ button, where it says ‘Publish immediately’, click on ‘Edit’ and you can change the date and time to whatever you want. Change the date/time as shown in Figure 7.2 and click on ‘OK’. That’s the date/time that will appear on your website.
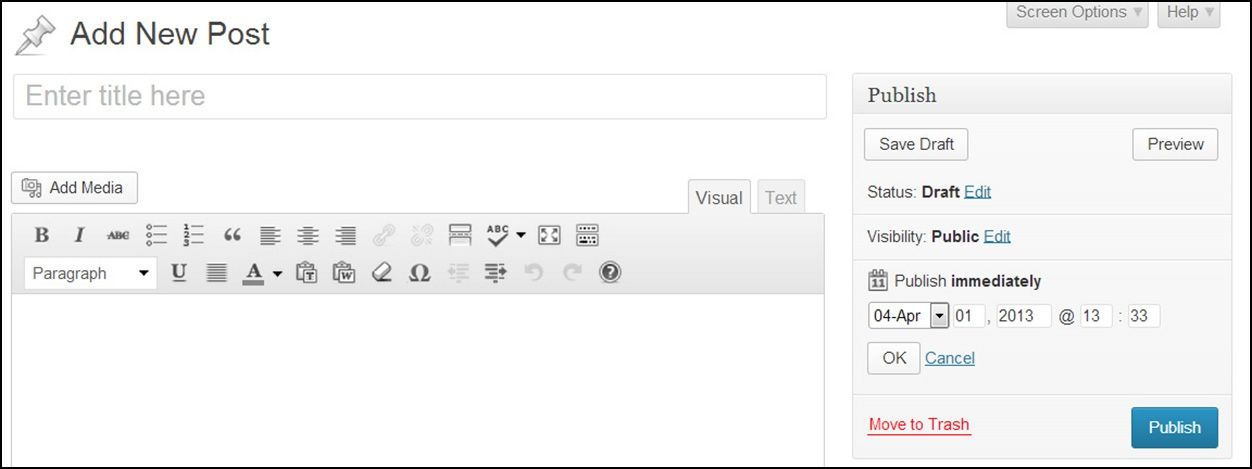
And, hey, you can even schedule WordPress to publish a post at some date/time in the future. Just change the date (as in Figure 7.2) to a date in the future, click ‘OK’ and ‘Schedule’. WordPress will hold the post until that date/time occurs and then it will automatically publish it as if you had hit the button yourself. Magic!
Using Quickpress
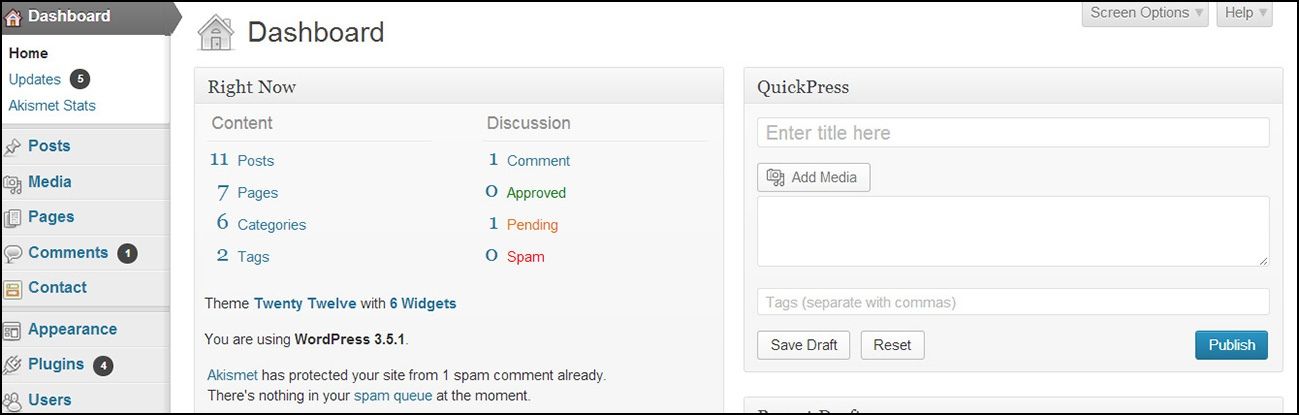
As we have seen, there is a shortcut you can use to add new posts. From the dashboard, look at the box marked ‘QuickPress’, as shown in Figure 7.3.
You can quickly add a new post with title, text, tags and even a picture and publish this immediately.
So, now you can begin adding Posts to your website, complete with categories and tags, continuing to add them until you have the range of content you need to display a full and rich website.
___
Next, we’re going into the final lesson of the Quick Start Guide where I’ll show you how to use Widgets to enhance your WordPress website.
FAQ
I’ve added some posts and now I realize that they should really be pages. Can I convert a post into a page (and the other way round)?
Sadly no. The way out of this is to copy the text from the unwanted post/page, add a new post/page and paste the text that you just copied. Then delete the unwanted page/post.
How do I delete a post or page?
See Lesson 5 (Delete The Junk).
All materials on the site are licensed Creative Commons Attribution-Sharealike 3.0 Unported CC BY-SA 3.0 & GNU Free Documentation License (GFDL)
If you are the copyright holder of any material contained on our site and intend to remove it, please contact our site administrator for approval.
© 2016-2026 All site design rights belong to S.Y.A.