Introducing Elixir: Getting Started in Functional Programming (2014)
Chapter 11. Storing Structured Data
Despite Elixir’s general preference for avoiding side effects, storing and sharing data is a fundamental side effect needed for a wide variety of projects.
Because Elixir works well with Erlang, you can use Erlang Term Storage (ETS) to help you store and manipulate those sets, and the Mnesia database provides additional features for reliable distributed storage.
Records: Structured Data Before structs
As you saw in From Maps to Structs, Elixir’s structs allow you to use names to connect with data rather than order (as with tuples). Structs, however, are based on maps, which are new to Erlang and Elixir. Before maps existed, Erlang had to solve the problem of keeping structured data, and that solution was the concept of records. As with structs, you can read, write, and pattern match data in a record without having to worry about the details of where in a tuple a field lurks or whether someone’s added a new field.
Records are not especially loved in Erlang, and are supported but not encouraged in Elixir. The record definition requirement creates headaches. However, records are common in Erlang APIs and run efficiently, so they are still worth understanding. At the very least you’ll have a better sense of what people are arguing about in discussions of Elixir and Erlang data structures.
WARNING
There are still tuples underneath records, and occasionally Elixir will expose them to you. Do not attempt to use the tuple representation directly, or you will add all the potential problems of using tuples to the slight extra syntax of using records.
Setting Up Records
Using records requires telling Elixir about them with a special declaration. Instead of saying defmodule, you use a defrecord declaration:
defrecord Planemo, name: :nil, gravity: 0, diameter: 0, distance_from_sun: 0
That defines a record type named Planemo, containing fields named name, gravity, diameter, and distance_from_sun with their default values. This declaration creates records for different towers for dropping objects:
defrecord Tower, location: "", height: 20, planemo: :earth, name: ""
Unlike defmodule declarations, you’ll often want to share record declarations across multiple modules and (for the examples in this chapter at least) even use them in the shell. To share record declarations reliably, just put the record declarations in their own file, ending with the extension.ex. You may want to put each record declaration in a separate file or all of them in a single file, depending on your needs. To get started, to see how these behave, you can put both of the declarations into a single file, records.ex, shown in Example 11-1. (You can find it in ch11/ex1-records.)
Example 11-1. A records.ex file containing two rather unrelated record declarations
defmodule Planemo do
require Record
Record.defrecord :planemo, [name: :nil, gravity: 0, diameter: 0,
distance_from_sun: 0]
end
defmodule Tower do
require Record
Record.defrecord :tower, Tower,
[location: "", height: 20, planemo: :earth, name: ""]
end
Record.defrecord constructs a set of macros to create and access a record. The first item after Record.defrecord is the record name. The second item is optional; it is the tag. If you don’t provide a tag, Elixir uses the record name. In this case, we have provided a tag for Tower records, but not for Planemo records. The name and optional tag are followed by a list that gives pairs of key names and default values. Elixir automatically builds functions into the module that let you create new records, access record values, and update record values. Because records are modules,all you need to do to make a record available to your program is to be sure that it has been compiled and in the same directory as your other modules. You can use the elixirc program from the command line to compile defrecord declarations, or you can compile from the shell:
iex(1)> c("records.ex")
[Tower,Planemo]
The shell now understands records with the names Planemo and Tower, but you must require them in order to use them in a program or in the shell.
NOTE
You can also declare records directly in the shell by typing the defrecord declaration, but if you’re doing anything more than just poking around, it’s easier to have them in an external file.
Creating and Reading Records
You can now create variables that contain new records. You create a new record by using the record name function
iex(2)> require Tower
nil
iex(3)> tower1 = Tower.tower()
{Tower, "", 20, :earth, ""}
iex(4)> tower2 = Tower.tower(location: "Grand Canyon")
{Tower, "Grand Canyon", 20, :earth, ""}
iex(5)> tower3 = Tower.tower(location: "NYC", height: 241,
...(5)> name: "Woolworth Building")
{Tower, "NYC", 241, :earth, "Woolworth Building"}
iex(6)> tower4 = Tower.tower location: "Rupes Altat 241", height: 500,
...(6)> planemo: :moon, name: "Piccolini View"
{Tower, "Rupes Altat 241", 500, :moon, "Piccolini View"}
iex(7)> tower5 = Tower.tower planemo: :mars, height: 500,
...(7)> name: "Daga Vallis", location: "Valles Marineris"
{Tower, "Valles Marineris", 500, :mars, "Daga Vallis"}
These towers (or at least drop sites) demonstrate a variety of ways to use the record syntax to create variables as well as interactions with the default values:
§ Line 3 just creates tower1 with the default values. You can add real values later.
§ Line 4 creates a tower with a location, but otherwise relies on the default values.
§ Line 5 overrides the default values for location, height, and name, but leaves the planemo alone.
§ Line 6 replaces all of the default values with new values. Also, as is usual with Elixir, you do not need to put the arguments to new inside parentheses.
§ Line 7 replaces all of the default values, and also demonstrates that it doesn’t matter in what order you list the name/value pairs. Elixir will sort it out.
You can read record entries with two different approaches. To extract a single value, you can use a dot (.) syntax that may look familiar from other languages. For example, to find out which planemo tower5 is on, you could write:
iex(8)> Tower.tower(tower5, :planemo)
:mars
iex(9)> import Tower
nil
iex(10)> tower(tower5, :height)
500
Line 9 did an import to make life easier, so line 10 no longer requires Tower.
If you want to change a value in a record, you can do so. In the following example, the right-hand side actually returns an entirely new record and re-binds that new record to tower5, overwriting its old value.
iex(11)> tower5
{Tower, "Valles Marineris", 500, :mars, "Daga Vallis"}
iex(12)> tower5 = tower(tower5, height: 512)
{Tower, "Valles Marineris", 512, :mars, "Daga Vallis"}
Using Records in Functions
You can pattern match against records submitted as arguments. The simplest way to do this is to just match against the type of the record, as shown in Example 11-2, which is in ch11/ex2-records.
Example 11-2. A method that pattern matches a complete record
defmodule RecordDrop do
require Planemo
require Tower
def fall_velocity(t = Tower.tower()) do
fall_velocity(Tower.tower(t, :planemo), Tower.tower(t, :height))
end
def fall_velocity(:earth, distance) whendistance >= 0 do
:math.sqrt(2 * 9.8 * distance)
end
def fall_velocity(:moon, distance) whendistance >= 0 do
:math.sqrt(2 * 1.6 * distance)
end
def fall_velocity(:mars, distance) whendistance >= 0 do
:math.sqrt(2 * 3.71 * distance)
end
end
This uses a pattern match that will match only Tower records, and puts the record into a variable t. Then, like its predecessor in Example 3-8, it passes the individual arguments to fall_velocity/2 for calculations, this time using the record syntax.
iex(13)> c("record_drop.ex")
[RecordDrop]
iex(14)> RecordDrop.fall_velocity(tower5)
60.909769331364245
iex(15)> RecordDrop.fall_velocity(tower1)
19.79898987322333
The record_drop:fall_velocity/1 function shown in Example 11-3 pulls out the planemo field and binds it to the variable planemo. It pulls out the height field and binds it to distance. Then it returns the velocity of an object dropped from that distance just like earlier examples throughout this book.
You can also extract the specific fields from the record in the pattern match, as shown in Example 11-3, which is in ch11/ex3-records.
Example 11-3. A method that pattern matches components of a record
defmodule RecordDrop do
require Tower
def fall_velocity(Tower.tower(planemo: planemo, height: distance)) do
fall_velocity(planemo, distance)
end
def fall_velocity(:earth, distance) whendistance >= 0 do
:math.sqrt(2 * 9.8 * distance)
end
def fall_velocity(:moon, distance) whendistance >= 0 do
:math.sqrt(2 * 1.6 * distance)
end
def fall_velocity(:mars, distance) whendistance >= 0 do
:math.sqrt(2 * 3.71 * distance)
end
end
You can take the records created and feed them into this function, and it will tell you the velocity resulting from a drop from the top of that tower to the bottom.
Finally, you can pattern match against both the fields and the records as a whole. Example 11-4, in ch11/ex4-records, demonstrates using this mixed approach to create a more detailed response than just the fall velocity.
Example 11-4. A method that pattern matches the whole record as well as components of a record
defmodule RecordDrop do
require Tower
import Tower
def fall_velocity(t = tower(planemo: planemo, height: distance)) do
IO.puts("From #{tower(t, :name)}'s elevation of #{distance} meters on #{planemo},")
IO.puts("the object will reach #{fall_velocity(planemo, distance)} m/s")
IO.puts("before crashing in #{tower(t, :location)}")
end
def fall_velocity(:earth, distance) whendistance >= 0 do
:math.sqrt(2 * 9.8 * distance)
end
def fall_velocity(:moon, distance) whendistance >= 0 do
:math.sqrt(2 * 1.6 * distance)
end
def fall_velocity(:mars, distance) whendistance >= 0 do
:math.sqrt(2 * 3.71 * distance)
end
end
NOTE
It is possible to have a variable whose name is the same as a field name; in the previous example, the planemo field was assigned to a variable also named planemo.
If you pass a Tower record to RecordDrop.fall_velocity/1, it will match against individual fields it needs to do the calculation, and match the whole record into t so that it can produce a more interesting if not necessarily grammatically correct report.
iex(16)> RecordDrop.fall_velocity(tower5)
From Daga Vallis's elevation of 500 meters on mars,
the object will reach 60.90976933136424520399 m/s
before crashing in Valles Marineris
:ok
iex(17)> RecordDrop.fall_velocity(tower3)
From Woolworth Building's elevation of 241 meters on earth,
the object will reach 68.72845116834803036454 m/s
before crashing in NYC
:ok
Storing Data in Erlang Term Storage
Erlang Term Storage (ETS) is a simple but powerful in-memory collection store. It holds tuples, and since records are tuples underneath, they’re a natural fit. ETS and its disk-based cousin DETS provide a (perhaps too) simple solution for many data management problems. ETS is not exactly a database, but it does similar work and is useful by itself as well as underneath the Mnesia database, which you’ll see in the next section.
Every entry in an ETS tables is a tuple (or corresponding record), and one piece of the tuple is designated the key. ETS offers a few different structural choices depending on how you want to handle that key. ETS can hold four kinds of collections:
Sets (:set)
Can contain only one entry with a given key. This is the default.
Ordered sets (:ordered_set)
Same as a set, but also maintains a traversal order based on the keys. Great for anything you want to keep in alphabetic or numeric order.
Bags (:bag)
Lets you store more than one entry with a given key. However, if you have multiple entries that have completely identical values, they get combined into a single entry.
Duplicate bags (:duplicate_bag)
Not only lets you store more than one entry with a given key, but also lets you store multiple entries with completely identical values.
By default, ETS tables are sets, but you can specify one of the other options when you create a table. The examples here will be sets because they are simpler to figure out, but the same techniques apply to all four table varieties.
NOTE
There is no requirement in ETS that all of your entries look at all similar. When you’re starting out, however, it’s much simpler to use the same kind of record, or at least tuples with the same structure. You can also use any kind of value for the key, including complex tuple structures and lists, but again, it’s best not to get too fancy at the beginning.
All of the examples in the following section will use the planemo record type defined in Records: Structured Data Before structs, and the data in Table 11-1.
Table 11-1. Planemos for gravitational exploration
|
Planemo |
Gravity (m/s2) |
Diameter (km) |
Distance from Sun (106 km) |
|
mercury |
3.7 |
4878 |
57.9 |
|
venus |
8.9 |
12104 |
108.2 |
|
earth |
9.8 |
12756 |
149.6 |
|
moon |
1.6 |
3475 |
149.6 |
|
mars |
3.7 |
6787 |
227.9 |
|
ceres |
0.27 |
950 |
413.7 |
|
jupiter |
23.1 |
142796 |
778.3 |
|
saturn |
9.0 |
120660 |
1427.0 |
|
uranus |
8.7 |
51118 |
2871.0 |
|
neptune |
11.0 |
30200 |
4497.1 |
|
pluto |
0.6 |
2300 |
5913.0 |
|
haumea |
0.44 |
1150 |
6484.0 |
|
makemake |
0.5 |
1500 |
6850.0 |
|
eris |
0.8 |
2400 |
10210.0 |
NOTE
Although the name is Erlang Term Storage, you can still use ETS from Elixir. Just as you can use Erlang’s math module to calculate square roots by saying :math.sqrt(3), you can use ETS functions by preceding them with :ets.
Creating and Populating a Table
The :ets.new/2 function lets you create a table. The first argument is a name for the table, and the second argument is a list of options. There are lots and lots of options, including the identifiers for the table types described in the previous section, but the two most important for getting started are :named_table and the tuple starting with :keypos.
Every table has a name, but only some can be reached using that name. If you don’t specify :named_table, the name is there but visible only inside the database. You’ll have to use the value returned by :ets.new/2 to reference the table. If you do specify :named_table, processes can reach the table as long as they know the name, without needing access to that return value.
NOTE
Even with a named table, you still have some control over which processes can read and write the table through the :private, :protected, and :public options.
The other important option, especially for ETS tables containing records, is the :keypos tuple. By default, ETS treats the first value in a tuple as the key. The tuple representation underneath records (which you shouldn’t really touch) always uses the first value in a tuple to identify the kind of record, so that approach works very badly as a key for records. Using the :keypos tuple lets you specify which record value should be the key.
Remember, the record format for a Planemo looks like the following:
defmodule Planemo do
require Record
Record.defrecord :planemo, [name: :nil, gravity: 0, diameter: 0,
distance_from_sun: 0]
end
Because this table is mostly used for calculations based on a given planemo, it makes sense to use the :name as a key. An appropriate declaration for setting up the ETS table might look like the following:
planemo_table = :ets.new(:planemos,[ :named_table, {:keypos,
Planemo.planemo(:name) + 1} ])
That gives the table the name :planemos and uses the :named_table option to make that table visible to other processes that know the name. Because of the default access level of :protected, this process can write to that table but other processes can only read it. It also tells ETS to use the :name field as the key.
NOTE
ETS expects the :keypos to be a number that gives the position of the key field in the underlying tuple, with the first entry numbered as one. The call to the planemo function returns the index of the field in the underlying Elixir tuple, with the first entry numbered as zero. That’s why the preceding code had to add one.
Because it doesn’t specify otherwise, the table will be treated as a set, where each key maps to only one instance of record, and ETS doesn’t keep the list sorted by key.
Once you have the table set up, as shown in Example 11-5, you use the :ets.info/1 function to check out its details. (You can find this in ch11/ex5-ets.)
Example 11-5. Setting up a simple ETS table and reporting on what’s there
defmodule PlanemoStorage do
require Planemo
def setup do
planemo_table = :ets.new(:planemos,[:named_table,
{:keypos, Planemo.planemo(:name) + 1}])
:ets.info planemo_table
end
end
If you compile and run this, you’ll get a report of an empty ETS table with more properties than you probably want to know about at the moment.
iex(1)> c("records.ex")
[Tower,Planemo]
iex(2)> c("planemo_storage.ex")
[PlanemoStorage]
iex(3)> PlanemoStorage.setup
[compressed: false, memory: 307, owner: #PID<0.26.0>, heir: :none,
name: :planemos, size: 0, node: :"nonode@nohost", named_table: true,
type: :set, keypos: 2, protection: :protected]
Most of this is either more information than you need or unsurprising, but it is good to see the name(:planemos), size (0 — empty!), and keypos (not 1, the default, but 2, the location of the name in the tuple underneath the record). It is, as the defaults specify, set up as a :protected:set.
You can set up only one ETS table with the same name. If you call PlanemoStorage.setup/0 twice, you’ll get an error:
iex(3)> PlanemoStorage.setup
** (ArgumentError) argument error
(stdlib) :ets.new(:planemos, [:named_table, {:keypos, 2}])
planemo_storage.ex:6: PlanemoStorage.setup/0
To avoid this, at least in these early tests, you’ll want to use the :ets.delete/1 command to delete the table. Give the table name — in this case, :planemos--as the argument. If you think you’re likely to call your initialization code repeatedly after you figure the basics out, you can also test the :ets.info/1 for :undefined to make sure the table doesn’t already exist, or put a try…catch construct around the :ets.new/2 call.
A more exciting ETS table, of course, will include content. The next step is to use :ets.insert/2 to add content to the table. The first argument is the table, referenced either by its name (if you set the named_table option), or by the variable that captured the return value of:ets.new/2. In Example 11-6, which is in ch11/ex6-ets, the first call uses the name, to show that it works, and the rest use the variable. The second argument is a record representing one of the rows from Table 11-1.
Example 11-6. Populating a simple ETS table and reporting on what’s there
defmodule PlanemoStorage do
require Planemo
def setup do
planemo_table = :ets.new(:planemos,[:named_table,
{:keypos, Planemo.__record__(:index, :name) + 1}])
:ets.insert :planemos, Planemo.planemo(name: :mercury, gravity: 3.7,
diameter: 4878, distance_from_sun: 57.9)
:ets.insert :planemos, Planemo.planemo(name: :venus, gravity: 8.9,
diameter: 12104, distance_from_sun: 108.2)
:ets.insert :planemos, Planemo.planemo(name: :earth, gravity: 9.8,
diameter: 12756, distance_from_sun: 149.6)
:ets.insert :planemos, Planemo.planemo(name: :moon, gravity: 1.6,
diameter: 3475, distance_from_sun: 149.6)
:ets.insert :planemos, Planemo.planemo(name: :mars, gravity: 3.7,
diameter: 6787, distance_from_sun: 227.9)
:ets.insert :planemos, Planemo.planemo(name: :ceres, gravity: 0.27,
diameter: 950, distance_from_sun: 413.7)
:ets.insert :planemos, Planemo.planemo(name: :jupiter, gravity: 23.1,
diameter: 142796, distance_from_sun: 778.3)
:ets.insert :planemos, Planemo.planemo(name: :saturn, gravity: 9.0,
diameter: 120660, distance_from_sun: 1427.0)
:ets.insert :planemos, Planemo.planemo(name: :uranus, gravity: 8.7,
diameter: 51118, distance_from_sun: 2871.0)
:ets.insert :planemos, Planemo.planemo(name: :neptune, gravity: 11.0,
diameter: 30200, distance_from_sun: 4497.1)
:ets.insert :planemos, Planemo.planemo(name: :pluto, gravity: 0.6,
diameter: 2300, distance_from_sun: 5913.0)
:ets.insert :planemos, Planemo.planemo(name: :haumea, gravity: 0.44,
diameter: 1150, distance_from_sun: 6484.0)
:ets.insert :planemos, Planemo.planemo(name: :makemake, gravity: 0.5,
diameter: 1500, distance_from_sun: 6850.0)
:ets.insert :planemos, Planemo.planemo(name: :eris, gravity: 0.8,
diameter: 2400, distance_from_sun: 10210.0)
:ets.info planemo_table
end
end
Again, the last call is to :ets.info/1, which now reports that the table has 14 items.
iex(4)> c("PlanemoStorage.ex")
[PlanemoStorage]
iex(5)> :ets.delete(:planemos)
true
iex(6)> PlanemoStorage.setup
[compressed: false, memory: 531, owner: #PID<0.26.0>, heir: :none, name:
:planemos, size: 14, node: :"nonode@nohost", named_table: true, type: :set,
keypos: 2, protection: :protected]
If you want to see what’s in that table, you can do it from the shell by using the :ets.tab2list/1 function, which will return a list of records, broken into separate lines for ease of reading:
iex(25)> :ets.tab2list :planemos
[{:planemo, :neptune, 11.0, 30200, 4497.1},
{:planemo, :jupiter, 23.1, 142796, 778.3},
{:planemo, :haumea, 0.44, 1150, 6484.0}, {:planemo, :pluto, 0.6, 2300, 5913.0},
{:planemo, :mercury, 3.7, 4878, 57.9}, {:planemo, :earth, 9.8, 12756, 149.6},
{:planemo, :makemake, 0.5, 1500, 6850.0}, {:planemo, :moon, 1.6, 3475, 149.6},
{:planemo, :mars, 3.7, 6787, 227.9}, {:planemo, :saturn, 9.0, 120660, 1427.0},
{:planemo, :uranus, 8.7, 51118, 2871.0}, {:planemo, :ceres, 0.27, 950, 413.7},
{:planemo, :venus, 8.9, 12104, 108.2}, {:planemo, :eris, 0.8, 2400, 10210.0}]
If you’d rather keep track of the table in a separate window, Erlang’s Observer table visualizer shows the same information in a slightly more readable form. You can start it from the shell with :observer.start(), and click the Table Viewer tab. You will see something that looks likeFigure 11-1. Double-click on the planemos table, and you’ll see a more detailed report on its contents like the one shown in Figure 11-2.

Figure 11-1. Opening the table visualizer
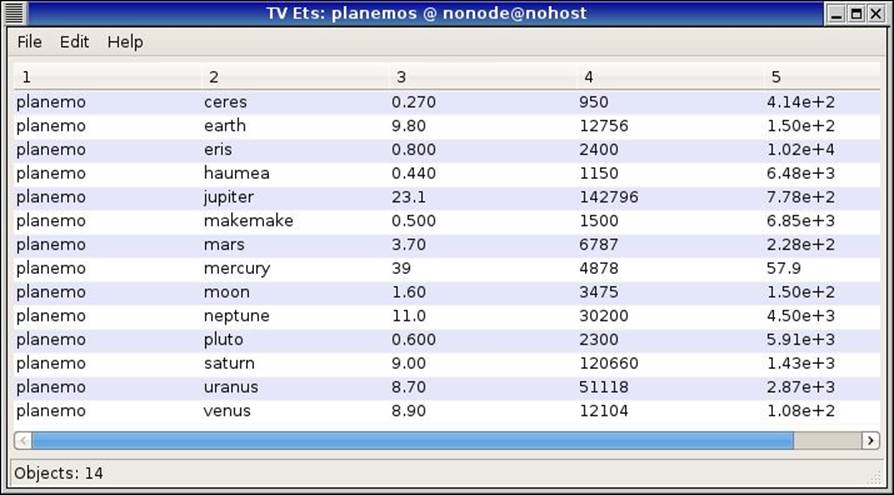
Figure 11-2. Reviewing the planemos table in the visualizer
The visualizer doesn’t know about your record declarations; it only knows the field numbers. The Edit menu lets you poll the table to be sure you have its latest contents, and set a polling interval if you want it to refresh automatically. If you declare tables public, you can even edit their contents in the table viewer.
NOTE
If you want to see a table of all the current ETS tables, try issuing :ets.i() in the shell. You’ll see the tables you’ve created (probably) near the bottom.
Simple Queries
The easiest way to look up records in your ETS table is with the :ets.lookup/2 function and the key. You can test this easily from the shell:
iex(9)> :ets.lookup(:planemos, :eris)
[{:planemo, :eris, 0.8, 2400, 10210.0}]
The return value is always a list. This is true despite Elixir’s knowing that this ETS table has the :set type, so only one value can match the key, and despite there being only one value. In situations like this where you know that there will only be one returned value, the hd/1 function will get you the head of a list quickly. Since there is only one item, the head is just that item.
iex(10)> hd(:ets.lookup(:planemos, :eris))
{:planemo, :eris, 0.8, 2400, 10210.0}
The square brackets are gone, which means that you can now extract, say, the gravity of a planemo:
iex(11)> result = hd(:ets.lookup(:planemos, :eris))
{:planemo, :eris, 0.8, 2400, 10210.0}
iex(12)> Planemo.planemo(result, :gravity)
0.8
Overwriting Values
Although you can re-assign values to Elixir variables, it’s better if you don’t overwrite the value of a variable or change the value of an item in a list. Keeping variables “single-assignment” makes it easier to more write reliable programs that involve communication among many processes (you saw this in Chapter 9 and will see more about communicating processes in Chapter 12). However, ETS is meant for storing values that might need to be re-assigned. If you want to change the value of gravity on :mercury, you can. (I pressed ENTER on line 13 so that the listing does not go off the edge of the page.)
iex(13)> :ets.insert(:planemos, Planemo.planemo(name: :mercury,
...(13)> gravity: 3.9, diameter: 4878, distance_from_sun: 57.9))
true
iex(14)> :ets.lookup(:planemos, :mercury)
[{:planemo, :mercury, 3.9, 4878, 57.9}]
Just because you can change values in an ETS table, however, doesn’t mean that you should rewrite your code to replace variables with flexible ETS table contents. Nor should you make all your tables public so that various processes can read and write whatever they like to the ETS table, making it a different form of shared memory.
Ask yourself when making changes is going to be useful, and when it might introduce tricky bugs. You probably won’t have to change the gravity of Mercury, but it certainly could make sense to change a shipping address. If you have doubts, lean toward caution.
ETS Tables and Processes
Now that you can extract gravitational constants for planemos, you can expand the drop module to calculate drops in many more locations. Example 11-7 combines the drop module from Example 9-6 with the ETS table built in Example 11-6 to create a more powerful drop calculator. (You can find this in ch11/ex7-ets-calculator.)
Example 11-7. Calculating drop velocities using an ETS table of planemo properties
defmodule Drop do
require Planemo
def drop do
setup
handle_drops
end
def handle_drops do
receivedo
{from, planemo, distance} ->
send(from, {planemo, distance, fall_velocity(planemo, distance)})
handle_drops
end
end
def fall_velocity(planemo, distance) whendistance >= 0 do
p = hd(:ets.lookup(:planemos, planemo))
:math.sqrt(2 * Planemo.planemo(p, :gravity) * distance)
end
def setup do
:ets.new(:planemos, [:named_table,
{:keypos, Planemo.__record__(:index, :name) + 1}])
info = [
{:mercury, 3.7, 4878, 57.9},
{:venus, 8.9, 12104, 108.2},
{:earth, 9.8, 12756, 149.6},
{:moon, 1.6, 3475, 149.6},
{:mars, 3.7, 6787, 227.9},
{:ceres, 0.27, 950, 413.7},
{:jupiter, 23.1, 142796, 778.3},
{:saturn, 9.0, 120660, 1427.0},
{:uranus, 8.7, 51118, 2871.0},
{:neptune, 11.0, 30200, 4497.1},
{:pluto, 0.6, 2300, 5913.0},
{:haumea, 0.44, 1150, 6484.0},
{:makemake, 0.5, 1500, 6850.0},
{:eris, 0.8, 2400, 10210.0}]
insert_into_table(info)
end
def insert_into_table([]) do # stop recursion
:undefined
end
def insert_into_table([{name, gravity, diameter, distance} | tail]) do
:ets.insert(:planemos, Planemo.new(name: name, gravity: gravity,
diameter: diameter, distance_from_sun: distance))
insert_into_table(tail)
end
end
The drop/0 function changes a little to call the initialization separately and avoid setting up the table on every call. This moves the message handling to a separate function, handle_drop/0. The fall_velocity/2 function also changes, as it now looks up planemo names in the ETS table and gets their gravitational constant from that table rather than hardcoding those contents into the function. (While it would certainly be possible to pass the planemo_table variable from the previous example as an argument to the recursive message handler, it’s simpler to just use it as a named table.)
The setup function has also changed dramatically. Rather than doing a series of :ets.insert calls, it creates a list of tuples with the planemo information and then calls the insert_into_table/1 recursively to insert each entry.
NOTE
If this process crashes and needs to be restarted, restarting it will trigger the setup/0 function, which currently doesn’t check to see if the ETS table exists. That could cause an error, except that ETS tables vanish when the processes that created them die. ETS offers an heir option and an :ets.give_away/3 function if you want to avoid that behavior, but for now it works well.
If you combine this module with the mph_drop module from Example 9-7, you’ll be able to calculate drop velocities on all of these planemos:
iex(1)> c("drop.ex")
[Drop]
iex(2)> c("mph_drop.ex")
[MphDrop]
iex(3)> pid1 = spawn(MphDrop, :mph_drop, [])
#PID<0.47.0>
iex(4)> send(pid1, {:earth, 20})
On earth, a fall of 20 meters yields a velocity of 44.289078952755766 mph.
{:earth,20}
iex(5)> send(pid1, {:eris, 20})
On eris, a fall of 20 meters yields a velocity of 12.65402255793022 mph.
{:eris,20}
iex(6)> send(pid1, {:makemake, 20})
On makemake, a fall of 20 meters yields a velocity of 10.003883211552367 mph.
{:makemake,20}
That’s a lot more variety than its :earth, :moon, and :mars predecessors!
Next Steps
While many applications just need a fast key/value store, ETS tables are far more flexible than the examples so far demonstrate. You can use Erlang’s match specifications and :ets.fun2ms to create more complex queries with :ets.match and :ets.select. You can delete rows (as well as tables) with :ets.delete. The :ets.first, :ets.next, and :ets.last functions let you traverse tables recursively.
Perhaps most important, you can also explore DETS, the Disk-Based Term Storage, which offers similar features but with tables stored on disk. It’s slower, with a 2 GB limit, but the data doesn’t vanish when the controlling process stops.
You can dig deeper into ETS and DETS, but if your needs are more complex, and especially if you need to split data across multiple nodes, you should probably explore the Mnesia database.
Storing Records in Mnesia
Mnesia is a database management system (DBMS) that comes with Erlang, and, by extension, one that you can use with Elixir. It uses ETS and DETS underneath, but provides many more features than those components.
You should consider shifting from ETS (and DETS) tables to the Mnesia database if:
§ You need to store and access data across a set of nodes, not just a single node.
§ You don’t want to have to think about whether you’re going to store data in memory or on a disk or both.
§ You need to be able to roll back transactions if something goes wrong.
§ You’d like a more approachable syntax for finding and joining data.
§ Management prefers the sound of “database” to the sound of “tables.”
You may even find that you use ETS for some aspects of a project and Mnesia for others.
NOTE
That isn’t “amnesia,” the forgetting, but “mnesia,” the Greek word for memory.
Starting up Mnesia
If you want to store data on disk, you need to give Mnesia some information. Before you turn Mnesia on, you need to create a database, using the :mnesia.create_schema/1 function. For now, because you’ll be getting started using only the local node, that will look like the following:
iex(1)> :mnesia.create_schema([node()])
:ok
By default, when you call :mnesia.create_schema/1, Mnesia will store schema data in the directory where you are when you start it. If you look in the directory where you started Elixir, you’ll see a new directory with a name like Mnesia.nonode@nohost. Initially, it holds aFALLBACK.BUP and schema.DAT file. The node/0 function just returns the identifier of the node you’re on, which is fine when you’re getting started.
NOTE
If you start Mnesia without calling :mnesia.create_schema/1, Mnesia will keep its schema in memory, and it will vanish if and when Mnesia stops.
Unlike ETS and DETS, which are always available, you need to turn Mnesia on:
iex(2)> :mnesia.start()
:ok
There’s also a :mnesia.stop/0 function if you want to stop it.
NOTE
If you run Mnesia on a computer that goes to sleep, you may get odd messages like Mnesia(nonode@nohost): ** WARNING ** Mnesia is overloaded: {dump_log, time_threshold} when it wakes up. Don’t worry, it’s a side effect of waking up, and your data should still be safe. You probably shouldn’t run production systems on devices that go to sleep, of course.
Creating Tables
Like ETS, Mnesia’s basic concept of a table is a collection of records. It also offers :set, :orderered_set, and :bag options, just like those in ETS, but doesn’t offer :duplicate_bag.
Mnesia wants to know more about your data than ETS, too. ETS pretty much takes data in tuples of any shape, counting only on there being a key it can use. The rest is up to you to interpret. Mnesia wants to know more about what you store, and takes a list of field names. The easy way to handle this is to define records and consistently use the field names from the records as Mnesia field names. There’s even an easy way to pass the record names to Mnesia, using record_info/2.
The planemos table can work just as easily in Mnesia as in ETS, and some aspects of dealing with it will be easier. Example 11-8, which is in ch11/ex7-mnesia, shows how to set up the planemo table in Mnesia. The setup/0 method creates a schema, then starts Mnesia, and then creates a table based on the planemo record type. Once the table is created, it writes the values from Table 11-1 to it.
Example 11-8. Setting up an Mnesia table of planemo properties
defmodule Drop do
def drop do
setup
handle_drops
end
def handle_drops do
receivedo
{from, planemo, distance} ->
send(from, {planemo, distance, fall_velocity(planemo, distance)})
handle_drops
end
end
def fall_velocity(planemo, distance) whendistance >= 0 do
{:atomic, [p | _]} = :mnesia.transaction(fn() ->
:mnesia.read(Planemo, planemo) end)
:math.sqrt(2 * p.gravity * distance)
end
def setup do
:mnesia.create_schema([node()])
:mnesia.start()
:mnesia.create_table(PlanemoTable, [{:attributes,
[:name, :gravity, :diameter, :distance_from_sun]},
{:record_name, :planemo}])
f = fn ->
:mnesia.write(PlanemoTable, Planemo.planemo(name: :mercury, gravity: 3.7,
diameter: 4878, distance_from_sun: 57.9), :write)
:mnesia.write(PlanemoTable, Planemo.planemo(name: :venus, gravity: 8.9,
diameter: 12104, distance_from_sun: 108.2), :write)
:mnesia.write(PlanemoTable, Planemo.planemo(name: :earth, gravity: 9.8,
diameter: 12756, distance_from_sun: 149.6), :write)
:mnesia.write(PlanemoTable, Planemo.planemo(name: :moon, gravity: 1.6,
diameter: 3475, distance_from_sun: 149.6), :write)
:mnesia.write(PlanemoTable, Planemo.planemo(name: :mars, gravity: 3.7,
diameter: 6787, distance_from_sun: 227.9), :write)
:mnesia.write(PlanemoTable, Planemo.planemo(name: :ceres, gravity: 0.27,
diameter: 950, distance_from_sun: 413.7), :write)
:mnesia.write(PlanemoTable, Planemo.planemo(name: :jupiter, gravity: 23.1,
diameter: 142796, distance_from_sun: 778.3), :write)
:mnesia.write(PlanemoTable, Planemo.planemo(name: :saturn, gravity: 9.0,
diameter: 120660, distance_from_sun: 1427.0), :write)
:mnesia.write(PlanemoTable, Planemo.planemo(name: :uranus, gravity: 8.7,
diameter: 51118, distance_from_sun: 2871.0), :write)
:mnesia.write(PlanemoTable, Planemo.planemo(name: :neptune, gravity: 11.0,
diameter: 30200, distance_from_sun: 4497.1), :write)
:mnesia.write(PlanemoTable, Planemo.planemo(name: :pluto, gravity: 0.6,
diameter: 2300, distance_from_sun: 5913.0), :write)
:mnesia.write(PlanemoTable, Planemo.planemo(name: :haumea, gravity: 0.44,
diameter: 1150, distance_from_sun: 6484.0), :write)
:mnesia.write(PlanemoTable, Planemo.planemo(name: :makemake, gravity: 0.5,
diameter: 1500, distance_from_sun: 6850.0), :write)
:mnesia.write(PlanemoTable, Planemo.planemo(name: :eris, gravity: 0.8,
diameter: 2400, distance_from_sun: 10210.0), :write)
end
:mnesia.transaction(f)
end
end
In the setup, the :mnesia.create_table call gives the attributes for the table explicitly because, as of this writing, there is no easy way to extract all the field names for a record. Ordinarily, Mnesia presumes that the table name is the same as the first field of the record, but in this case, the table is PlanemoTable and the record starts with :planemo. You give the record name explicitly with this code: {:record_name, :planemo}
The :mnesia_write calls take three parameters: the table name, the record, and the type of lock to use on the database (in this case, :write).
Apart from the setup, the key thing to note is that all of the writes are contained in a fn that is then passed to :mnesia.transaction to be executed as a transaction. Mnesia will restart the transaction if there is other activity blocking it, so the code may get executed repeatedly before the transaction happens. Because of this, do not include any calls that create side effects in the function you’ll be passing to :mnesia.transaction, and don’t try to catch exceptions on Mnesia functions within a transaction. If your function calls :mnesia.abort/1 (probably because some condition for executing it wasn’t met), the transaction will be rolled back, returning a tuple beginning with aborted instead of atomic.
NOTE
You may also want to explore the more flexible :mnesia.activity/2 when you need to mix more kinds of tasks in a transaction.
Your interactions with Mnesia should be contained in transactions, especially when your database is shared across multiple nodes. The main :mnesia.write, :mnesia.read, and :mnesia.delete methods work only within transactions, period. There are dirty_ methods, but every time you use them, especially to write data to the database, you’re taking a risk.
NOTE
Just as in ETS, you can overwrite values by writing a new value with the same key as a previous entry.
If you want to check on how this function worked out, try the :mnesia.table_info function, which can tell you more than you want to know. The following listing is abbreviated to focus on key results.
iex(1)> c("drop.ex")
[Drop]
iex(2)> Drop.setup
{:atomic,:ok}
iex(3)> :mnesia.table_info(PlanemoTable, :all)
[access_mode: :read_write,
active_replicas: [:"nonode@nohost"],
all_nodes: [:"nonode@nohost"],
arity: 5,
attributes: [:name,:gravity,:diameter,:distance_from_sun],
...
ram_copies: [:"nonode@nohost"],
record_name: :planemo,
record_validation: {:planemo,5,:set},
type: :set,
size: 14,
...]
You can see which nodes are involved in the table (nonode@nohost is the default for the current node). arity in this case is the count of fields in the record, and attributes tells you what their names are. ram_copies plus the name of the current node tells you that this table is stored in memory locally. It is, as in the ETS example, of type set, and there are 14 records.
NOTE
By default, Mnesia will store your table in RAM only (ram_copies) on the current node. This is speedy, but it means the data vanishes if the node crashes. If you specify disc_copies (note the spelling), Mnesia will keep a copy of the database on disk, but still use RAM for speed. You can also specify disc_only_copies, which will be slow. Unlike ETS, the table you create will still be around if the process that created it crashes, and will likely survive even a node crash so long as it wasn’t only in RAM on a single node. By combining these options and (eventually) multiple nodes, you should be able to create fast and resilient systems.
The table is now set up, and you can start to use it. If you’re running the observer, you can take a look at the contents of your Mnesia tables as well as your ETS tables. Choose the Table Viewer tab, then, in the View menu, choose Mnesia Tables. The interface is similar to that for ETS tables.
Reading Data
Just like writes, you should wrap :mnesia.read calls in a fn, which you then pass to :mnesia.transaction. You can do that in the shell if you want to explore:
iex(5)> :mnesia.transaction(fn()->:mnesia.read(PlanemoTable, :neptune) end)
{:atomic, [{:planemo, :neptune, 11.0, 30200, 4497.1}]}
The result arrives as a tuple, which when successful contains atomic plus a list with the data from the table. The table data is packaged as a record, and you can get to its fields easily.
You can rewrite the fall_velocity/2 function from Example 11-8 to use an Mnesia transaction instead of an ETS call. The ETS version looked like the following:
def fall_velocity(planemo, distance) whendistance >= 0 do
p = hd(:ets.lookup(:planemos, planemo))
:math.sqrt(2 * Planemo.planemo(p, :gravity) * distance)
end
Line 2 of the Mnesia version is a bit different.
def fall_velocity(planemo, distance) whendistance >= 0 do
{:atomic, [p | _]} = :mnesia.transaction(fn() ->
:mnesia.read(PlanemoTable, planemo) end)
:math.sqrt(2 * Planemo.planemo(p, :gravity) * distance)
end
Because Mnesia returns a tuple rather than a list, this uses pattern matching to extract the first item in the list contained in the second item of the tuple (and throws away the tail of that list with _). This table is a set, so there will always be only one item there. Then the data, contained in p, can be used for the same calculation as before.
If you compile and run this, you’ll see a familiar result:
iex(6)> c("drop.ex")
drop.ex:1: warning: redefining module Drop
[Drop]
iex(7)> Drop.fall_velocity(:earth, 20)
19.79898987322333
iex(8)> pid1 = spawn(MphDrop, :mph_drop, [])
#PID<0.115.0>
iex(9)> send(pid1, {:earth, 20})
On earth, a fall of 20 meters yields a velocity of 44.289078952755766 mph.
{:earth, 20}
For these purposes, the simple :mnesia.read is enough. You can tell Mnesia to build indexes for fields other than the key, and query those with :mnesia.index_read as well.
NOTE
If you want to delete records, you can run :mnesia.delete/2, also inside of a transaction.
All materials on the site are licensed Creative Commons Attribution-Sharealike 3.0 Unported CC BY-SA 3.0 & GNU Free Documentation License (GFDL)
If you are the copyright holder of any material contained on our site and intend to remove it, please contact our site administrator for approval.
© 2016-2026 All site design rights belong to S.Y.A.