The Book of F#: Breaking Free with Managed Functional Programming (2014)
Chapter 2. F# Interactive
If the prospect of doing true functional programming against the .NET Framework isn’t compelling enough, the productivity gains available through F# Interactive (FSI) should be. FSI is a read-evaluate-print loop (REPL) utility you can use to explore problem domains and test code as you write. It also doubles as a script host that allows you to leverage the elegance of F# and the power of the .NET Framework to automate common tasks. How can a compiled language like F# be used interactively? Because behind the scenes FSI compiles its input to dynamically generate assemblies.
Running F# Interactive
There are two ways to work in FSI: via the F# Interactive window in Visual Studio or the fsi.exe console application. The choice is usually one of convenience. I typically prefer to work in the F# Interactive window because it easily integrates into my Visual Studio development workflow. I generally use the window for exploratory tasks and reserve the console for script execution.
To open the F# Interactive window in Visual Studio, press CTRL-ALT-F; you should see a prompt like that shown in Figure 2-1. By default, fsi.exe is available only through the Visual Studio command prompt shortcuts and not through the basic Windows command prompt. If you want to makefsi.exe available from another prompt, you’ll need to add its location to your path environment variable. By default, F# is installed to %PROGRAMFILES(x86)%\Microsoft SDKs\F#\3.0\Framework\v4.0\ (%PROGRAMFILES% on 32-bit systems).
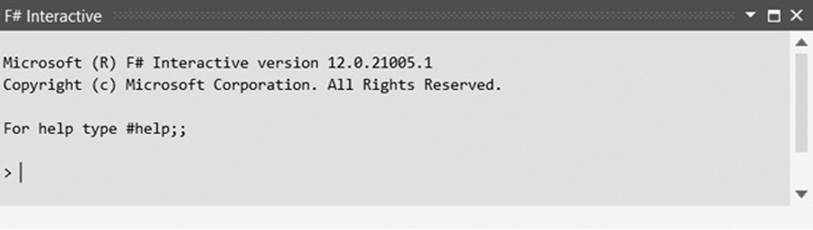
Figure 2-1. The F# Interactive window in Visual Studio 2013
In addition to just opening the Interactive window, you can send code to the window with ALT-ENTER, in which case the results from executing that code will also be shown. This makes it very easy to test new concepts: If you’re not sure how well something will work, you can typically try it immediately by writing a bit of code, sending it to FSI, and inspecting the result.
Sending code from the text editor isn’t the only way to evaluate expressions in FSI; you can also run code directly from its prompt. This flexibility is great for productivity because you can work on a block of code in the text editor, send it to FSI, and then experiment with it interactively in the FSI window itself.
There is an important difference between entering code directly in the Interactive window versus sending code from the text editor. When you send code from the editor, it’s compiled and executed automatically, whereas code entered directly won’t execute until you terminate it with a double semicolon pattern (;;). For example, to perform simple addition you could either enter 1 + 1 into the text editor and send it to FSI, or enter 1 + 1;; directly at the FSI prompt. Both approaches yield the same result, but because double semicolons must be used to denote the end of the code input, FSI lets you enter and execute multiple lines of code directly at the prompt.
NOTE
Even though multiple-line entry at the prompt is possible, it’s often more trouble than it’s worth because if you make a silly typing mistake you must start over. I tend to use single-line statements at the prompt as much as possible. (Fortunately, recovering from such mistakes is usually just a matter of correcting the mistake and trying again.)
F# Interactive Output
One thing that makes FSI so useful is that it reports back everything that it does. Whenever you execute code in FSI, it displays val followed by the identifier name, data type, and value for each binding it creates. For example, when you define and invoke a function, FSI will create two bindings: one for the function itself and one for the result, as shown here.
> let add a b = a + b
let sum = add 1 2;;
val add : a:int -> b:int -> int
val sum : int = 3
The it Identifier
You don’t always have to explicitly define bindings in FSI; in most interactive sessions you can simply evaluate an expression. For example, you can call the add function without defining the sum identifier like this.
> add 1 2;;
val it : int = 3
When you don’t explicitly name something (as when performing a simple calculation or checking the output of a function), FSI automatically binds the result to the it identifier. You can refer to it in subsequent evaluations but be aware that, as in Highlander, there can be only one; whenever FSI implicitly binds something, the value is replaced. You can see this behavior by evaluating multiple expressions without explicitly binding the results to an identifier, as shown here.
> it;;
val it : int = 3
> add 3 4;;
val it : int = 7
> it;;
val it : int = 7
The bottom line when it comes to the it identifier is love it, use it, but don’t rely on it.
Playing in the Sandbox
Even when running within Visual Studio, FSI is a sandbox that’s isolated from and completely unaware of any code you haven’t explicitly told it about. This isolation provides a layer of protection between “work” and “play,” but it also means that in order for it to be useful you’ll need ways to interact with the outside world. For this we turn to directives.
FSI provides several directives that you can invoke in an interactive session or a script. Among these are directives for refreshing your memory about which directives are available, loading code from other F# source files, referencing assemblies, and even providing some performance statistics.
#help
If you forget any of the directives, you can invoke the #help directive at the FSI prompt for a listing of available directives and a brief description of each.
#quit
If you need to get out of FSI from the command prompt, use the #quit directive to end the session. Although you can use #quit within the FSI window in Visual Studio, I suggest using the Reset Interactive Session context menu item shown in Figure 2-2 because it clears previous output and begins a new session automatically.
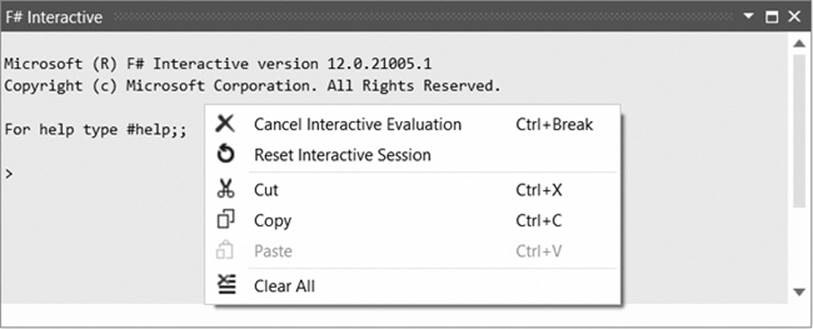
Figure 2-2. Reset Interactive Session context menu item
#load
One way to load existing code into an FSI session is with the #load directive as shown next. The #load directive accepts one or more string parameters containing the absolute or relative paths to external source files. FSI should load, compile, and execute the listed files (in order) and make their contents available in the current session.
> #load @"D:\Dev\FSharp\Samples\Chapter2\MySourceFile.fs";;
[Loading D:\Dev\FSharp\Samples\Chapter2\MySourceFile.fs]
-- snip --
LOADING MADE EASY
The F# project templates in Visual Studio encourage you to load multiple files by including a script that you can update to include any new files. By keeping this script synchronized with your project structure, you can easily load code from your project into FSI and experiment away.
Although you can include multiple source files in a single #load directive, it’s often easier to include each with a separate directive. The reason is that if you’re actively working on one of the files and you break something, the compiler highlights the entire directive as a problem. By using multiple directives, you can more quickly isolate the troublesome file.
#r
The #r directive is to assemblies what the #load directive is to source files. You can use #r to reference any .NET assembly (with the usual restrictions around target framework and platform). If the assembly you need is already located in one of the folders included in the assembly search path, identify it by name or you’ll need to include the full path. For example, if you need to load System.Configuration, you can use:
> #r "System.Configuration";;
--> Referenced 'C:\Program Files (x86)\Reference Assemblies\Microsoft\
Framework\.NETFramework\v4.5\System.Configuration.dll'
FSI responds with the full path of each assembly it loads in this manner.
#I
When you need to reference multiple assemblies from a folder that is not already included in the search path, you can add the folder to the assembly search path in FSI with the #I directive.
> #I @"D:\Dev\FSharp\Samples\Chapter2\Bin\Debug";;
--> Added 'D:\Dev\FSharp\Samples\Chapter2\Bin\Debug' to library include path
Once the folder is added to the search path, you should be able to reference assemblies in it by name instead of by their full path.
#time
The #time directive provides extra visibility into what your code is doing by printing some statistics along with its output. You can enable timing information by using the #time directive with the on string argument.
> #time "on";;
-- > Timing now on
With timing enabled, the statistics will be computed each time code is executed in FSI. These statistics include real time, CPU time, and the number of garbage collection operations over all three generations. For example, to help optimize a slow function you could invoke it with timing enabled and see something like this:
> DoSomethingSlow();;
Real: 00:00:01.095, CPU: 00:00:01.107, GC gen0: 25, gen1: 23, gen2: 23
val it : unit = ()
When you’re done with the statistics and no longer want to see them in the FSI output, disable them with the #time directive and the off string argument.
> #time "off";;
--> Timing now off
Scripting
As F# is a .NET language, most of your F# code will be placed in .fs files and compiled into assemblies to be used by larger applications. When coupled with FSI, though, F# can serve as a scripting language so you can leverage its power to automate common tasks with full support from the .NET Framework.
For example, say you want to concatenate several PDF files into one document. You could write a console application for this, but it’s trivial to write it as a script using the open source PDFsharp library to manipulate the individual PDFs. That script would take about 30 lines of code, including blank lines. By providing terse syntax and exposing the power of the .NET Framework, F# is ideal for such a task.
Creating scripts as .fsx files offers a few benefits. For one, the directives described in Playing in the Sandbox are FSI features, so they aren’t allowed in standard source files. Also, because .fsx files are associated with fsi.exe, you can execute them directly from a shell context menu as shown in Figure 2-3. This makes it easy to run scripts like the PDF concatenation as needed.
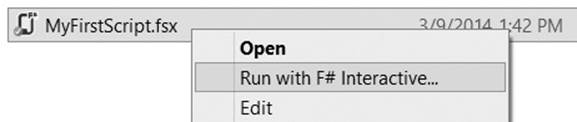
Figure 2-3. Run with F# Interactive context menu item
To add scripts to a project, select the project in Solution Explorer, press CTRL-SHIFT-A to open the Add New Item dialog, and select F# Script File as shown in Figure 2-4.
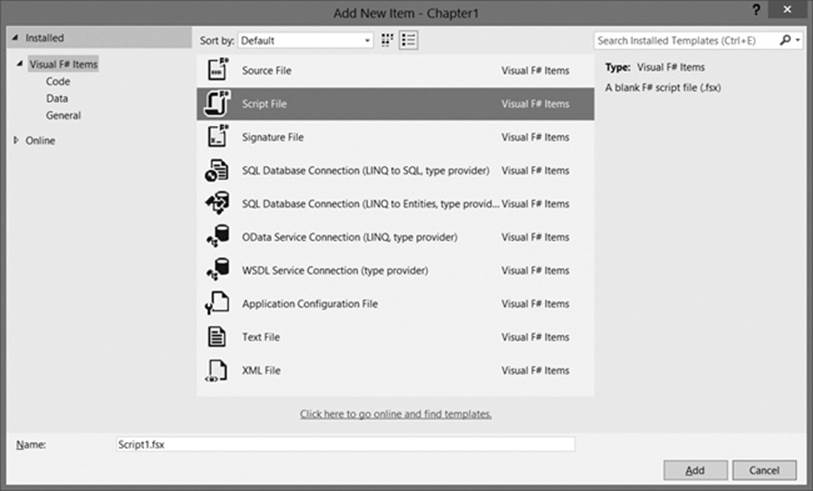
Figure 2-4. Adding an F# script file to a project
To quickly create a standalone .fsx file in Visual Studio 2013, press CTRL-N to open the New File dialog, select Script from the menu on the left, and locate the F# Script File option as shown in Figure 2-5.
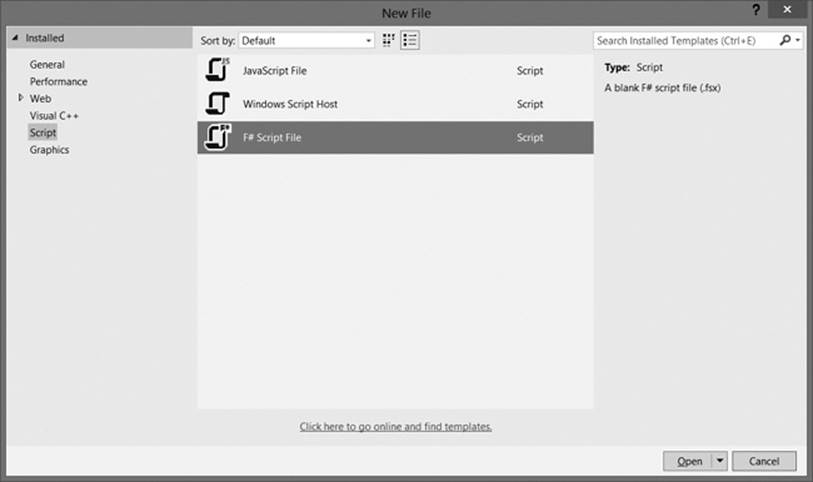
Figure 2-5. Creating a standalone F# script file
F# Interactive Options
In addition to the directives discussed in Playing in the Sandbox, FSI provides several command-line options that allow you to control it. Some of these options offer alternatives to the functionality of the FSI directives, while others control compiler behavior. I won’t cover all of the available options here, but I will highlight the ones you’re most likely to use. (For a complete listing of FSI options, run fsi.exe –help.) These options apply regardless of whether you’re running FSI through the command prompt or the F# Interactive window. To set the options in Visual Studio, go to Tools ◂ Options, find F# Tools in the list on the left, and type the new options into the F# Interactive options text box as shown in Figure 2-6.
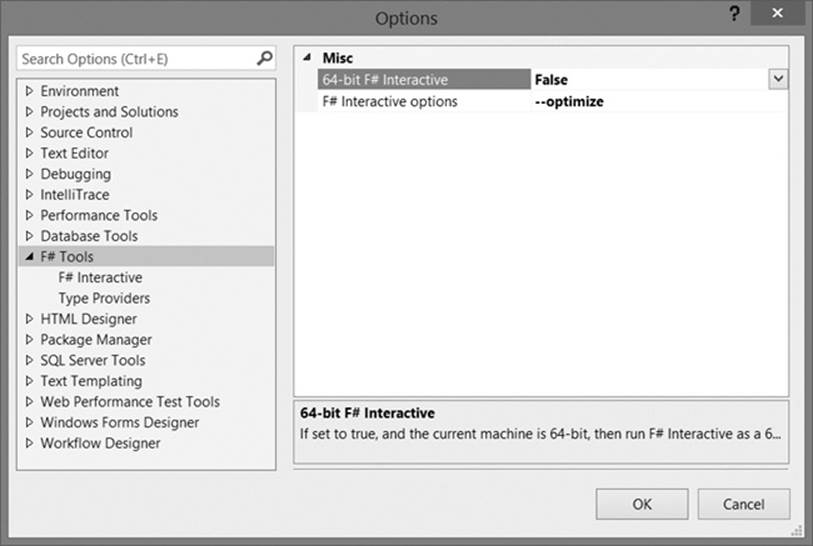
Figure 2-6. Setting F# Interactive options
NOTE
The F# Interactive options setting in Visual Studio is a global setting. Changing it will affect all instances of the window.
--load
The --load option is the command-line equivalent of the #load directive. It allows you to specify external source files for FSI to compile and load into the session at startup, like this:
fsi --load:MyFirstScript.fsx
The --load option doesn’t process any directives in the specified file, so if any directives must be evaluated use the --use option instead.
--use
Like --load, the --use option loads external source files, but it also processes directives such as #load or #I upon loading the file.
fsi --use:MyFirstScript.fsx
--reference
Just as you can use --load or --use to import a source file, you can use the --reference option (or its short form, -r) to reference an external assembly. This has the same effect as the #r directive.
fsi --reference:System.Configuration
As with the #r directive, be sure to include the full path to the assembly if it’s not in a location already included in the search path.
--lib
The --lib option serves the same role as the #I directive by adding the specified folder to the assembly search path. Its short form is -I.
fsi --lib:D:\Dev\FSharp\Samples\Chapter2\Bin\Debug
--define
As with other .NET languages, F# allows you to define conditional compilation symbols (like the predefined DEBUG and RELEASE symbols in Visual Studio) that can affect how code is compiled. To define symbols for use within an FSI session, use the --define option.
fsi --define:DEBUG
FSI and the F# compiler automatically define certain symbols for you, depending on how your code is compiled. For example, when you are running code compiled in an FSI session, whether by entering it at a prompt, sending it from the text editor, or importing another file, FSI defines theINTERACTIVE symbol. Directly compiled F# code gets the COMPILED symbol instead. These symbols become important when code must behave differently under an FSI session than in a compiled assembly due to environmental differences.
--exec
By default the FSI process doesn’t terminate when it finishes evaluating a script. To force it to quit rather than return you to the FSI prompt, specify the --exec option.
fsi --load:MyFirstScript.fsx --exec
Now, when the script completes you’ll automatically be returned to the command prompt.
--
If your code expects command-line arguments, you can send them to FSI with the -- option; this is essentially a delimiter that tells FSI to treat all remaining arguments as arguments to the code rather than to FSI itself.
fsi --load:MyFirstScript.fsx --exec -- Dave
When code that’s dependent on command-line arguments might be executed from either an FSI session or a compiled assembly, you should use the INTERACTIVE and COMPILED symbols to ensure that the parameters are read correctly. For example, in a typical .NET application you’d useSystem.Environment.GetCommandLineArgs() to resolve the arguments. The same holds true for COMPILED code, but in INTERACTIVE code the execution process is actually FSI rather than your assembly. Therefore, the GetCommandLineArgs method returns all arguments passed to the FSI process rather than only the ones intended for your script! To account for this difference, interactive code should typically call fsi.CommandLineArgs instead. You can easily change this behavior with conditional compilation, like this.
let getCommandLineArgs() =
#if INTERACTIVE
fsi.CommandLineArgs
#else
System.Environment.GetCommandLineArgs()
#endif
getCommandLineArgs() |> printfn "%A"
Fortunately, both functions return the same result: a string array that includes the script/executable name as the first item. This greatly simplifies any argument-parsing code you have, because the end result is the same.
--quiet
Depending on what your script is doing, FSI can be pretty chatty and sometimes results can get lost in the noise. To tell FSI to be quiet, use the --quiet option.
fsi --quiet
The --quiet option suppresses virtually everything FSI would normally output, including bindings, file loads, and assembly references (but not statistics when timing is enabled). FSI will still display error messages and anything your code sends to the console.
--optimize
The --optimize option controls whether compiler optimizations will be applied to the code. It’s enabled by default in Visual Studio.
--tailcalls
We’ll look at tail recursion in detail in Chapter 5, but for now just know that the --tailcalls option controls whether the compiler will optimize for tail-recursive functions. This option is enabled by default in FSI.
Summary
In this chapter you’ve learned how F#’s REPL tool, F# Interactive, can help you explore a problem and find a path to the solution. You’ve also learned how you can customize the behavior of FSI through directives and command-line options. In the next chapter, we’ll begin exploring the F# language itself by learning about a variety of key features that apply regardless of whether you’re programming in a functional, object-oriented, or imperative style.
All materials on the site are licensed Creative Commons Attribution-Sharealike 3.0 Unported CC BY-SA 3.0 & GNU Free Documentation License (GFDL)
If you are the copyright holder of any material contained on our site and intend to remove it, please contact our site administrator for approval.
© 2016-2026 All site design rights belong to S.Y.A.