Creating Apps in Kivy (2014)
Chapter 8. Advanced Widgets
Your weather app is now fully functional and you could do an initial release already. However, there are a few things you can do to make it better. This chapter is a large code refactor. The functionality won’t change very much, but the usability will improve and the amount of code involved will shrink, which means fewer bugs and easier maintenance.
Kivy has an abundant collection of built-in widgets, and this book can’t cover all of them. In this chapter, you’ll see three of them in detail: the Carousel, ModalView, and ActionBar. These widgets will largely replace much of the screen management code you have written manually so far.
Be prepared. This will be a large refactor, and you will probably have to do quite a bit of debugging to get everything working correctly. This is great real-world practice, though, as reworking existing code is an important part of the software development process. Applications that don’t evolve over time are inevitably superceded.
Before you start, remove your brand new gesture_box.py file altogether and revert the two classes in main.py to extend BoxLayout instead of GestureBox. You’ll also need to remove an import statement.
Also remove the custom gesture event listeners (such as on_right_to_left_line) from the KV language file.
If your refactor begins with removing entire files of custom code that you no longer have to maintain, you’re probably doing something right!
Carousel
The Carousel widget allows for swiping between multiple widgets in a screen. This is a large part of what you implemented manually in Chapter 7 (if you’re wondering why I didn’t implement Carousel in the first place, it’s because I wanted to give you some lower-level experience with Kivy events). However, Carousel adds fancy animation and takes care of several edge cases that I ignored while presenting that chapter.
The three widgets Carousel will switch between are Locations, CurrentWeather, and ForecastLabel. Ignore the AddLocationForm widget for now. You will now be adding all these widgets in the KV file instead of trying to create them dynamically in Python. Hook each existingObjectProperty to a widget id, as shown in Example 8-1, and remember to add a new carousel = ObjectProperty() to the WeatherRoot widget in main.py.
Example 8-1. Adding a carousel to WeatherRoot
<WeatherRoot>:
carousel: carousel
locations: locations
current_weather: current_weather
forecast: forecast
Carousel:
id: carousel
Locations:
id: locations
CurrentWeather:
id: current_weather
Forecast:
id: forecast
CAUTION
Crash alert: you’ll probably have to delete your weather_store.json file before running this example successfully, and don’t click the Add Location button. This will get fixed in the next section.
If you run the program now, you’ll discover that all the weather functionality is broken, but you can drag the mouse left and right on the screen to easily switch between the three widgets. That’s progress… right?
You’ll also find that the buttons on the bottom bar only sort of work. As you’ll recall, each of these manually replaces the contents of the WeatherRoot widget with a new child. This means that the Carousel is removed. Thus, after you’ve clicked a button, the swipe actions no longer work.
To solve this, set the button clicks to do nothing more than change slides on the Carousel. For example, in the CurrentWeather widget, the two buttons will look like Example 8-2.
Example 8-2. Event handlers on the CurrentWeather buttons
Button:
text: "Locations"
on_press: app.root.carousel.load_slide(app.root.locations)
Button:
text: "Forecast"
on_press: app.root.carousel.load_slide(app.root.forecast)
Remember to make similar changes to the button on the Forecast slide.
You’ll be doing more refactoring on the code in main.py later, but in order to see those future changes working, fix up the AddLocationForm widget next.
The ModalView Widget
ModalView and its more featureful subclass, Popup, allow widgets to be displayed in front of existing widgets. This is what you should use for displaying the Add Location form instead of completely replacing the contents of the root widget.(((displays, popup windows))
This particular refactor involves just a few changes, but they’re spread all over both files. First make the AddLocationForm class in main.py extend ModalView (which you will need to import as from kivy.uix.modalview import ModalView). Then replace theshow_add_location_form method on WeatherRoot with Example 8-3, remembering to add a new add_location_form = ObjectProperty() to the WeatherRoot object.
Example 8-3. Using ModalView.open to render a view
def show_add_location_form(self):
self.add_location_form = AddLocationForm()
self.add_location_form.open()
If you run this code and click the Add Location button, you may be in for a bit of a surprise. As Figure 8-1 illustrates, the widgets were all drawn on top of each other instead of being laid out as expected.
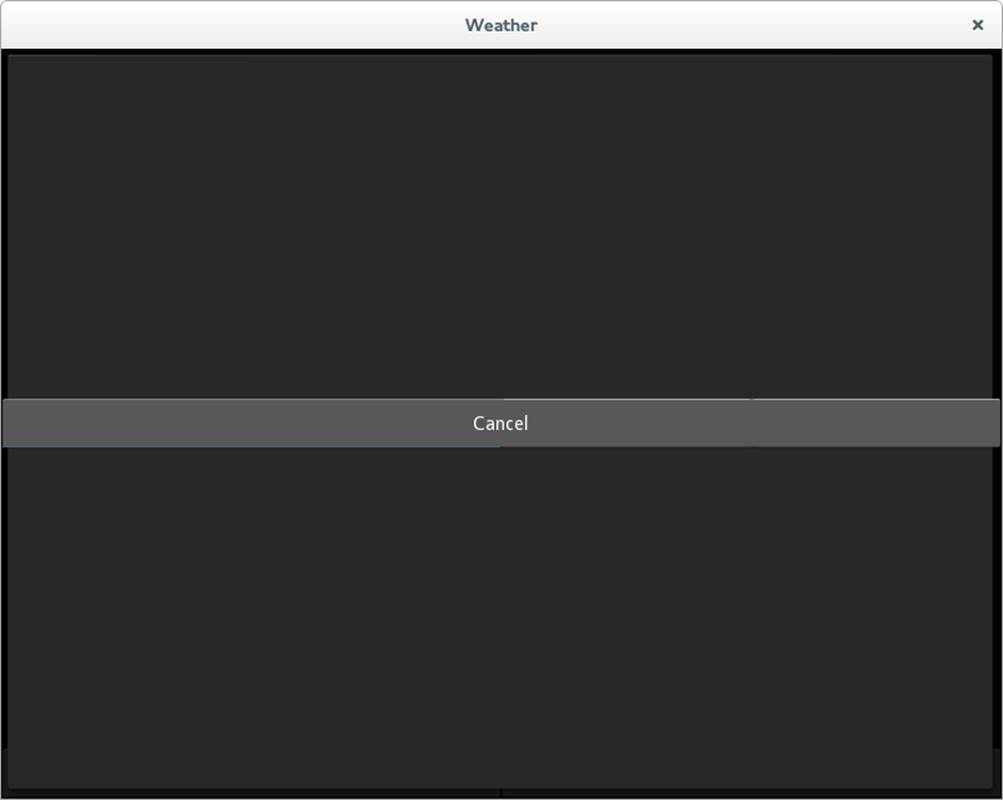
Figure 8-1. The layout of the form is completely broken
This oversight is because ModalView does not extend BoxLayout. To get the old behavior back, simply wrap the entire contents of AddLocationForm in the weather.kv file with an extra BoxLayout, as shown in Example 8-4.
Example 8-4. BoxLayout as the child of ModalView
<AddLocationForm>:
search_input: search_box
search_results: search_results_list
BoxLayout: ![]()
orientation: "vertical" ![]()
BoxLayout:
height: "40dp"
size_hint_y: None
TextInput:
id: search_box
![]()
The new BoxLayout now has everything below it further indented.
![]()
The orientation property is moved from the parent widget to the BoxLayout.
Now the form will render as you are used to. Change the on_press event on the Cancel button to dismiss the dialog instead of calling show_current_weather. Example 8-5 illustrates.
Example 8-5. The Cancel button event handler
Button:
height: "40dp"
size_hint_y: None
text: "Cancel"
on_press: root.dismiss()
Completing the Refactor
The next step is to clean up WeatherRoot, especially the show_current_weather method. Start, however, by outright removing a couple of methods that are no longer required:
§ show_locations has been superceded by the selection of a slide on the Carousel.
§ show_forecast has also been superceded. The act of updating the forecast will be moved into the show_current_weather method shortly.
Next, remove the code from show_current_weather that clears the current widget as well as the two conditionals that construct CurrentWeather and Locations widgets if they don’t exist. In the Carousel, these widgets always exist, even when they aren’t visible.
Before removing the locations conditional, note that it contains some code for updating the locations from a store. If you were doing this refactor without my guidance, I would recommend updating your to-do list (it’s a good idea to start refactors with a text file listing the things you need to complete) to include “update locations from the store” so you don’t forget that functionality when the refactor is complete.
Your code is no longer calling this method with a possible location=None parameter, so you can call the location-updating code without checking the conditional.
Now you have to add a couple of lines of code to set the location on the Forecast object as well. This slide needs to be updated as soon as the location is loaded now, instead of after it is displayed.
Next, replace the add_widget call with a call to load_slide, and finally, dismiss the add_location_form if it is visible. Remember that show_current_weather can be called both from AddLocationForm and from the Locations slide, so it may or may not be set at this time.
That was a lot of description. I hope it made sense, but if not, the new, much simpler method in Example 8-6 should compare favorably to your previous version.
Example 8-6. The new show_current_weather method
def show_current_weather(self, location):
if location notinself.locations.locations_list.adapter.data:
self.locations.locations_list.adapter.data.append(location)
self.locations.locations_list._trigger_reset_populate()
self.store.put("locations",
locations=list(self.locations.locations_list.adapter.data),
current_location=location)
self.current_weather.location = location
self.forecast.location = location
self.current_weather.update_weather()
self.forecast.update_weather()
self.carousel.load_slide(self.current_weather)
if self.add_location_form isnotNone:
self.add_location_form.dismiss()
Now fix up the __init__ method on WeatherRoot to set up the stored locations list as well as the current location when the widget is constructed. Additionally, if no stored location exists, automatically pop up the Add Location form on the next clock cycle. See Example 8-7.
Example 8-7. The updated on_config_change method
def __init__(self, **kwargs):
super(WeatherRoot, self).__init__(**kwargs)
self.store = JsonStore("weather_store.json")
if self.store.exists('locations'):
locations = self.store.get('locations')
self.locations.locations_list.adapter.data.extend(locations['locations'])
current_location = locations["current_location"]
self.show_current_weather(current_location)
else:
Clock.schedule_once(lambda dt: self.show_add_location_form())
Finally, make the on_config_change method on the WeatherApp update the weather on the CurrentWeather and Forecast widgets directly, as shown in Example 8-8. Otherwise, when you change the config setting, the values won’t get set.
Example 8-8. The updated __init__ method
def on_config_change(self, config, section, key, value):
if config isself.config andkey == "temp_type":
try:
self.root.current_weather.update_weather()
self.root.forecast.update_weather()
exceptAttributeError:
pass
This last change illustrates a danger inherent in refactoring. I didn’t notice this problem when I originally wrote this chapter. Because the exception being thrown happened to be caught by the nasty code, there were no errors to indicate that the values were not being updated when the user changed the preferred measurement unit. I picked up on it when I was writing Chapter 9, and had to come back and fix it. Be wary!
Adding an Action Bar
The Kivy API comes with an ActionBar widget that mimics the Android action bar, making it possible to integrate a little better with the Android ecosystem. Even without our worrying about Android integration, the ActionBar can give a better user experience than the buttons you have at the bottom of your existing Carousel widgets.
The ActionBar comes with its own set of widgets, including the following (it’s also possible to define your own ActionItem subclasses):
§ ActionCheck
§ ActionButton
§ ActionToggleButton
§ ActionSeparator
§ ActionGroup
§ ActionOverflow
§ ActionPrevious
These classes are mostly self-explanatory, with the exception of the last three. ActionPrevious renders an icon and title into the left side of the action bar. In typical Android usage, touching this icon behaves like pressing the back button: it goes to the previous screen. However, this can be disabled by setting a with_previous setting. ActionGroup is just a drop-down “menu” in which you can put other ActionItem objects. ActionOverflow can explicitly contain other ActionItems as well. However, the neat thing about ActionOverflow is that if the ActionBarbecomes too narrow, it will automatically move items into the ActionOverflow area so that they are still available in a drop-down. ActionOverflow is represented much like the menu icon on recent Android devices.
Example 8-9 shows the entire ActionBar on the WeatherRoot widget. It shows up in a BoxLayout above the Carousel. The Add Location and Settings buttons go inside an overflow, while the other buttons show up in the main view.
Example 8-9. Putting an ActionBar above the Carousel
<WeatherRoot>:
carousel: carousel
locations: locations
current_weather: current_weather
forecast: forecast
BoxLayout:
orientation: "vertical"
ActionBar:
ActionView:
use_separator: True
ActionPrevious:
title: "Kivy Weather"
with_previous: False
ActionOverflow:
ActionButton:
text: "Add Location"
on_press: app.root.show_add_location_form()
ActionButton:
text: "Settings"
on_press: app.open_settings()
ActionButton:
text: "Locations"
on_press: app.root.carousel.load_slide(app.root.locations)
ActionButton:
text: "Current"
on_press: app.root.carousel.load_slide(app.root.current_weather)
ActionButton:
text: "Forecast"
on_press: app.root.carousel.load_slide(app.root.forecast)
Carousel:
id: carousel
Locations:
id: locations
CurrentWeather:
id: current_weather
Forecast:
id: forecast
At this point, you can remove all the old BoxLayout and Button definitions that were showing up at the bottom of the other views. You’ll probably want to leave the Cancel button on the Add Location form, though. This makes the source code a lot neater, and as you can see from Figure 8-2, the interface also looks a lot cleaner!
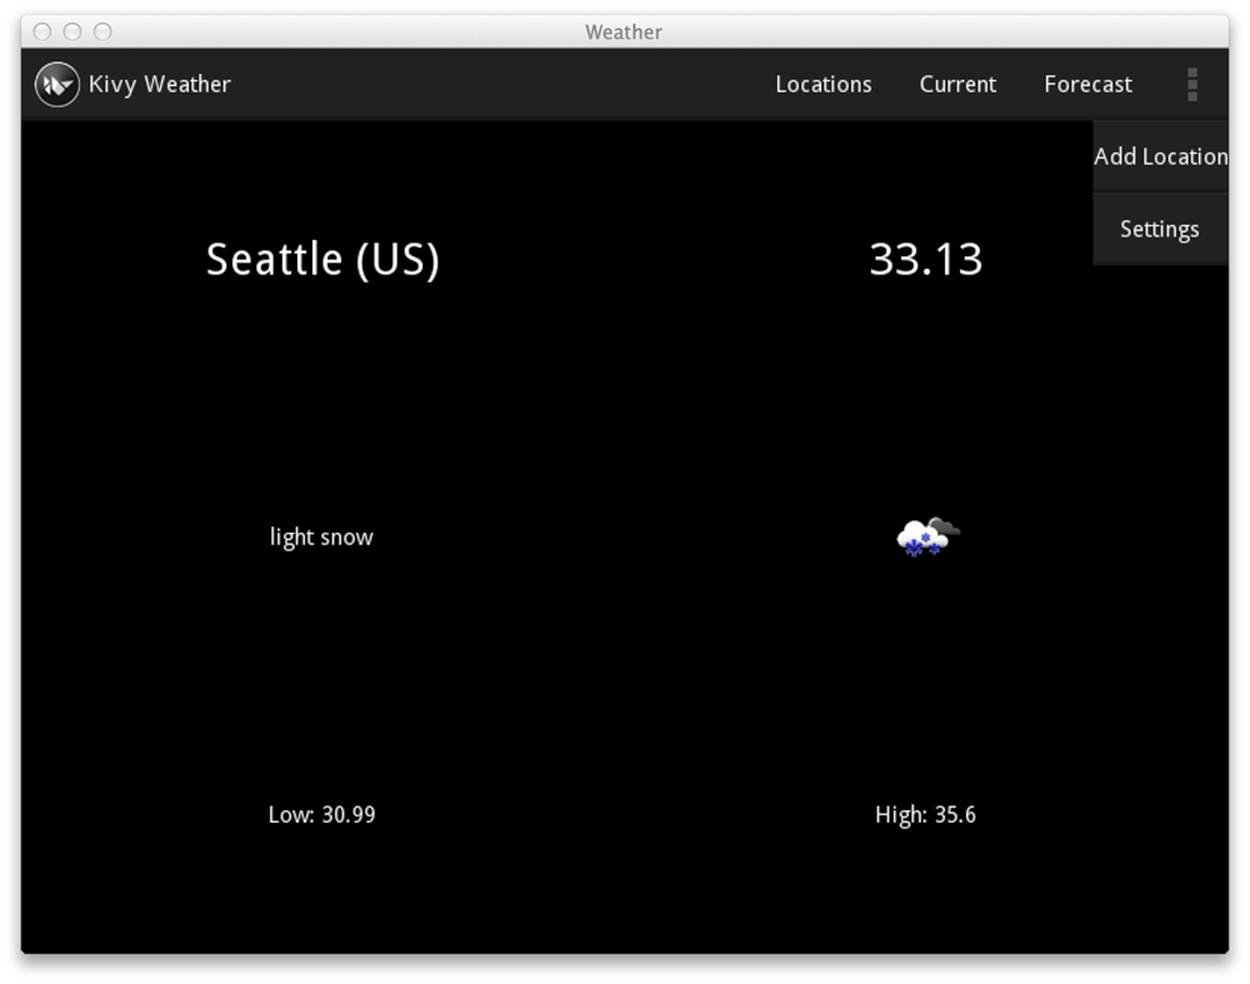
Figure 8-2. The ActionBar with the overflow area open
File It All Away
In this chapter, you did a fairly large code refactor and were introduced to three more advanced Kivy widgets—Carousel, ModalView, and ActionBar. Your application looks pretty good and might be considered production-ready. You’ll test that theory in the next chapter, when you deploy it to your Android or iOS device.
In the meantime, here are a few additional things you might want to try to enhance your understanding:
§ The location attribute on CurrentWeather and Forecast now seems somewhat redundant because those widgets are always updated at the same time, by show_current_weather (which should probably be named change_location at this point). It might make more sense to store just one current_location on the WeatherRoot and have the child widgets access it from there.
§ You might be able to enhance the look of the ActionBar by setting icons on the buttons. You could also put the metric/imperial switch directly into the ActionBar (as an ActionCheck) and do away with the settings overlay overhead.
§ You could turn the ActionBar buttons into an ActionToggle to indicate which slide you are on. You’ll need to listen to property changes on the Carousel to update the toggle button state when the slide changes.
§ Consider the advantages and disadvantages of using Popup instead of ModalView for AddLocationForm.
§ Take a look at the kivy.uix package for a wide variety of other useful Kivy widgets.