Excel VBA 24-Hour Trainer (2015)
Part II
Diving Deeper into VBA
Lesson 9
Making Decisions with VBA
So far, all the macros you've created share a common trait of being executed line by line, starting with the very first line of code below the Sub name, and ending at the End Sub line. You might think that this is the very purpose of a VBA macro, for all its code lines to be run in sequence from start to finish. After all, isn't that why VBA code is in a macro in the first place?
It turns out that VBA can do a lot more with your macros than just serve the purpose of executing every line of code in them. You will encounter many instances when you'll need to guide the user into making a decision about whether to do one thing or another. There are also times when you will want VBA to just go ahead and make a decision about something, without any input from the user.
Depending on the decisions that get made during the course of a macro, you'll want VBA to execute only the code relating to the selected choice, while bypassing the alternative code relating to which choice was not selected. This lesson shows you how to ask the user for information when the situation calls for it, and also how to simply let VBA do the decision-making on the fly, in circumstances when the user does not even need to be involved in the decision process.
Understanding Logical Operators
Logical operators are terms in VBA that you can use for evaluating or comparing a combination of individual expressions in order to make a decision in your macro, and for VBA to carry out the code relating to that decision. The three most commonly used logical operators are AND, OR, and NOT, and all three have the same logical effect in VBA as they do in Excel's worksheet functions.
To understand how and why to use these logical operators in your macro, it's important to take a look at the conditions under which each one will yield a positive (True) result or a negative (False) result. A truth table is a good way to illustrate each logical operator's True or False outcome, depending on the combinations of all possible results from the VBA expressions being compared. After you understand the theory of logical operators, you will see how to put them to practical use when your macros call for decisions to be made.
AND
The AND logical operator performs a conjunction by comparing two expressions. The result of the AND operation is True only if both conditions are True. If either or both conditions are False, the And operation evaluates to False.
For example, say you enter the number 500 in cell A1, and you enter the number 850 in cell B1. The following statement with the AND operator evaluates to True because both conditions are true at the same time:
Range("A1").Value > 300 AND Range("B1").Value > 700
Keeping the same numbers in cells A1:B1, the following statement would evaluate to False because, even though the first condition is True, the second condition is False:
Range("A1").Value > 300 AND Range("B1").Value > 900
This next statement would also evaluate to False, because even though the second condition is True, the first condition is False:
Range("A1").Value > 620 AND Range("B1").Value > 700
The final possibility is if both conditions are False, with this statement for example, which would evaluate to False:
Range("A1").Value < 200 AND Range("B1").Value < 700
Table 9.1 summarizes each possible result of the AND logical operator more succinctly.
Table 9.1 Truth Table for the AND Logical Operator
|
EXPRESSION 1 |
EXPRESSION 2 |
LOGICAL RESULT |
|
True |
True |
True |
|
True |
False |
False |
|
False |
True |
False |
|
False |
False |
False |
OR
The OR operator performs a logical disjunction, whereby if either condition is True, or if both conditions are True, the result is True. If both conditions are False, the OR operation results in False. For example, using the same cell values as the previous AND example, with 500 in cell A1 and 850 in cell B1, you can see how differently the four statements will evaluate, using OR instead of AND as the logical operator.
The first statement evaluates to True, not necessarily because both conditions are True, but because at least one condition is True:
Range("A1").Value > 300 OR Range("B1").Value > 700
The following statement would evaluate to True on the strength of the first condition being True, even though the second condition is False:
Range("A1").Value > 300 OR Range("B1").Value > 900
This next statement would also evaluate to True because, despite the first condition being False, the second condition is True:
Range("A1").Value > 620 OR Range("B1").Value > 700
The final possibility is if both conditions are False, meaning that in this case, because neither condition is True, the statement would evaluate to False:
Range("A1").Value < 200 OR Range("B1").Value < 700
Table 9.2 summarizes each possible result of the OR logical operator.
Table 9.2 Truth Table for the OR Logical Operator
|
EXPRESSION 1 |
EXPRESSION 2 |
LOGICAL RESULT |
|
True |
True |
True |
|
True |
False |
True |
|
False |
True |
True |
|
False |
False |
False |
NOTE Careful! Comparing logical expressions does not mean you can compare the impossible. Consider the following example:
Dim intNumber As Integer
intNumber = 0
MsgBox intNumber <= 5 Or 10 / intNumber > 5
Because it is impossible to divide a number by zero, this code produces an error even though the first condition evaluated to True.
NOT
The NOT operator performs logical negation. Similar to the negative sign in front of a worksheet formula, the NOT operator inverts an expression's True or False evaluation. For example, the following line of code toggles as on or off the display of gridlines on the active worksheet:
ActiveWindow.DisplayGridlines = Not ActiveWindow.DisplayGridlines
The logic behind this use of the NOT operator is to make the status of an object's property be opposite of whatever its current status is. In this case, the DisplayGridlines property of the ActiveWindow object can only be True (show the gridlines) or False (do not show the gridlines). Therefore, using the NOT operator in this way, you get the effect of toggling between showing and not showing the active worksheet's gridlines at each re-execution of this line of code.
Table 9.3 summarizes each possible result of the NOT logical operator.
Table 9.3 Truth Table for the NOT Logical Operator
|
EXPRESSION |
LOGICAL RESULT |
|
True |
False |
|
False |
True |
Choosing between this or that
This lesson began by mentioning that some code in your macros will need to be purposely bypassed. Most computer programming languages, VBA included, provide for the flexibility of structuring your code so that every command does not need to be run in every case. Many times, you will write macros wherein you will want the program to run certain commands if the user clicks Yes and alternative commands if the user clicks No. All of the commands are a part of the macro code, but only one set of them will execute.
If…Then
Among VBA's arsenal of decision-making commands, the If…Then statement is probably the simplest and most commonly utilized approach to structure your conditional scenarios. Consider this line of code:
If Weekday(VBA.Date) = 6 Then MsgBox "Have a nice weekend!", , "Today is Friday!"
If you have worked with Excel's WEEKDAY worksheet function, you may recall to Excel, weekday number 1 is Sunday, weekday number 2 is Monday, and so on. VBA would look at this line of code and display the message box only if the line of code is being executed on a Friday because Friday is weekday number 6. If the weekday is any day other than Friday, VBA bypasses this line of code.
NOTE In your prior VBA travels, you might have only seen an If statement with an accompanying End If statement below it, and you might be wondering why and how the previous example can be successfully executed without having or needing an End If statement. The previous example could have been written in “block” style like this:
If Weekday(VBA.Date) = 6 Then
MsgBox "Have a nice weekend!", , "Today is Friday!"
End If
When evaluating for a single condition, and the conditional code is one task as shown in this example, you can write the entire If…Then statement in a single line of code. Some programmers prefer a single If line for their one-condition evaluations, and other programmers prefer the block style. It comes down to a personal preference and whatever feels more intuitive to you.
If…Then…Else
More often than not, your evaluations will involve two or more conditions instead of just one. When you have two conditions and each has its own set of tasks to carry out, you need to separate the two conditions with the Else statement in a block If structure.
Expanding on the previous example, say you want to display a message box if today is Friday, but a different message box if today is not Friday. Here is the format you would use in your macro:
If Weekday(VBA.Date) = 6 Then
MsgBox "Have a nice weekend!", , "Today is Friday!"
Else
MsgBox "Alas, today is not Friday.", , "Not Friday yet!"
End If
Notice that the Else statement stands alone on its own dedicated line, separating the two conditions' respective commands. Only one condition can possibly evaluate to True in this example, because today is either Friday or it is some day other than Friday. This block of code is designed to always be executed such that only one of the message box commands would appear, but never both during the same run.
NOTE Here's a design tip to speed up your programs. In a block If structure with multiple conditions, VBA looks at each condition in turn, and basically stops at and executes the conditional code for the first condition that is found to evaluate to True. With two or three conditions, it might not be a big deal in which order you set your conditions in the If structure. But sometimes you will be programming for multiple conditions, and the point is, you will want VBA to execute its process as efficiently as possible. A good habit to get into is to design your If structures by setting the first condition to be the one that's most likely to be the case. That way, most of the time, the first condition will be the True condition and VBA will not waste time evaluating the alternative unlikelier scenarios. With this in mind, the previous example is a good opportunity to show how to make your code run faster. You can see that the first condition dealt with the current weekday being Friday. If you think about it, there is only one chance in seven that will be the case. Mostly, the macro will be run on one of the other days of the week. A better way to write the If code is to consider which condition will be True more often than the other condition(s). Six out of seven days will not be a Friday, so that condition should be placed first, as shown in this example:
If Weekday(VBA.Date) <> 6 Then
MsgBox "Alas, today is not Friday.", , "Not Friday yet!"
Else
MsgBox "Have a nice weekend!", , "Today is Friday!"
End If
If…Then…ElseIf
VBA provides an extended way to utilize the If…Then…Else conditional structure when more than two conditions must be evaluated. Say you want to display a custom message for every day of the traditional five-day work week. You need a way to express your conditions in a single If structure with five possible courses of action, depending on which day of the week the macro is run.
One way you can accomplish this is with an If…Then…ElseIf structure as shown in the following example. Recall from the discussion about logical operators at the beginning of this lesson that you can evaluate two or more conditions in one line of code. Notice that the first five conditions coincide with the five workdays from Monday to Friday. The final condition uses the OR operator to identify a weekend day of either Saturday or Sunday:
Sub WeekdayTest()
'Monday
If Weekday(VBA.Date) = 2 Then
MsgBox "Ugghhh - - Back to work.", , "Today is Monday"
'Tuesday
ElseIf Weekday(VBA.Date) = 3 Then
MsgBox "At least it's not Monday anymore!", , "Today is Tuesday"
'Wednesday
ElseIf Weekday(VBA.Date) = 4 Then
MsgBox "Hey, we're halfway through the work week!", , "Today is Wednesday"
'Thursday
ElseIf Weekday(VBA.Date) = 5 Then
MsgBox "Looking forward to the weekend.", , "Today is Thursday"
'Friday
ElseIf Weekday(VBA.Date) = 6 Then
MsgBox "Have a nice weekend!", , "Today is Friday!"
'Saturday or Sunday
ElseIf Weekday(VBA.Date) = 7 Or Weekday(VBA.Date) = 1 Then
MsgBox "Hey, it's currently the weekend!", , "Today is a weekend day!"
End If
End Sub
IIF
Yes, you read that correctly, that's an IF with an extra I, spelled IIF. Though it is similar in syntax to the familiar IF worksheet function, IIF is a lesser known and lesser utilized conditional function in VBA.
Why did Microsoft develop the IIF function? For the same reason elite swimming champions have swum the English Channel—because they could. You'll see IIF being used about as many times as the English Channel has been swum, which is not many, but I am including it here so you can say you know about it if the subject should come up at the water cooler.
The syntax for the IIF construction is IIF(Expression, TruePart, FalsePart).
Recall from earlier in this lesson that my example for If…Then…Else was this five-line construction:
If Weekday(VBA.Date) = 6 Then
MsgBox "Have a nice weekend!", , "Today is Friday!"
Else
MsgBox "Alas, today is not Friday.", , "Not Friday yet!"
End If
The IIF function can handle all that in one line, like this:
MsgBox IIf(Weekday(VBA.Date) = 6, "Today is Friday!", "Not Friday yet!")
Getting used to IIF's syntax and appearance is an acquired taste that most VBA programmers don't pursue. Beyond that, however, is the risky and inefficient nature of IIF whereby both the TruePart and FalsePartstatements are evaluated, even if the TruePart evaluates to True. Also, if your FalsePart statement should evaluate to an error, such as dividing a number by zero or referring to a named range that does not exist, the entire IIF statement will result in an error, even if the TruePart statement is True.
Select Case
As you are fully aware, the world is a complicated place and your macros will sometimes need to take into consideration not just one, two, or five courses of action, but possibly ten, hundreds, or even thousands depending on the situation. There are also times when several possible different conditions will require the same course of action. For these complex evaluations, the Select Case statement is a perfect solution.
You will want to become familiar with Select Case. It is simple to use, and it is easier to follow in your code than an extensive If structure. Similar to the If and ElseIf keywords, you use the Case keyword in a Select Case structure to test for the True evaluation of a particular condition or set of conditions. You can have as many Case statements as you want, and only the code associated with the first Case that evaluates to True will be executed.
The best way to understand Select Case is to see it in action with a few examples. The following macro named WeekdayTestSelectCase is actually the previous WeekdayTest macro, which accomplishes the same result, but uses Select Case structure instead of If…Then…ElseIf:
Sub WeekdayTestSelectCase()
Select Case Weekday(VBA.Date)
Case 2 'Monday
MsgBox "Ugghhh - - Back to work.", , "Today is Monday"
Case 3 'Tuesday
MsgBox "At least it's not Monday anymore!", , "Today is Tuesday"
Case 4 'Wednesday
MsgBox "Hey, we're halfway through the work week!", , "Today is Wednesday"
Case 5 'Thursday
MsgBox "Looking forward to the weekend.", , "Today is Thursday"
Case 6 'Friday
MsgBox "Have a nice weekend!", , "Today is Friday!"
Case 1, 7 'Saturday or Sunday
MsgBox "Hey, it's currently the weekend!", , "Today is a weekend day!"
End Select
End Sub
You'll notice less redundancy of each condition (each Case), because the primary item of interest, Weekday(VBA.Date), needs to be named only once in the Select Case statement, instead of in every ElseIf statement. Also, each Case is very clear, and the entire macro is just easier to read.
A useful tactic with Select Case is the ability to group several different conditions into a single Case if it satisfies a particular test. For example, if your company operates its budget on a calendar-year basis, that means the months of January, February, and March belong to Quarter 1; April, May, and June belong to Quarter 2, and so on.
With the Select Case structure, you can group different conditions into the same Case to arrive at a common result. It is not just that January has a one-to-one association with Quarter 1, because the months of February and March also comprise Quarter 1. If you want to produce a message box that displays the current quarter, this macro shows how to group the months into cases:
Sub CurrentQuarter()
Select Case Month(VBA.Date)
Case 1 To 3: MsgBox "Quarter 1"
Case 4 To 6: MsgBox "Quarter 2"
Case 7 To 9: MsgBox "Quarter 3"
Case 10 To 12: MsgBox "Quarter 4"
End Select
End Sub
As you can see, you don't need 12 separate statements to handle each conditional month; you can simply state the range of months using the To statement in each Case. I put a new wrinkle in that macro to point out a VBA feature, that being the colon character (:), which can be used to separate multiple statements on the same Case line that would otherwise each require their own line. I don't usually use the colon character this way, but sometimes it comes in handy by helping the readability of small macros like this.
Here's a final example while we're on this topic, to show how useful the Select Case structure is when the cases can include thousands of items that can all satisfy a Case criteria. Suppose the management of a football squad wants to enter the paid attendance of today's game into cell A1, and run a macro to assess the fans' paid attendance. You can see how valuable Select Case can be, if, say 85,000 people attended the game, with that situation being handled with mathematical operators in your Case statements:
Sub SelectCaseExample()
Dim PaidAttendance As Long
PaidAttendance = Range("A1").Value
Select Case PaidAttendance
Case Is < 1000: MsgBox "Small-sized crowd!"
Case Is < 5000: MsgBox "Medium-sized crowd!"
Case Is >= 5000: MsgBox "WOW! Excellent! Huge crowd!"
End Select
End Sub
Getting Users to Make Decisions
Thus far you have seen examples of VBA's decision-making abilities that have not required any input from the user. The time will come when you'll either want or need information from the user in order for decisions to be made that only the user can provide. Message boxes and input boxes are excellent tools to interact with your users in such situations.
Message Boxes
Up to this point in the book, you have seen many examples of code that include a message box. In all those examples, the message box was a simple pop-up box that displayed an informational text message, with an OK button for you to acknowledge the information.
Message boxes are flexible tools that allow you to customize the buttons while asking questions directly to the users that will force them to select one option or the other. Instead of OK, you can display a Yes button and a No button on your message box, and write the code that will be followed if the user clicks Yes or the user clicks No. An example of such a message box is shown in Figure 9.1.
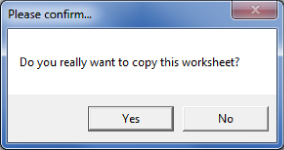
Figure 9.1
Say you have a macro to perform a task that your users should confirm they really want to do as a final OK. Some macros are quite large and virtually irreversible, or the task at hand will alter the workbook in a significant way. In the following simplified example, the active worksheet will be copied and placed before Sheet1, but only if the user first clicks the Yes button to confirm his intention for this to happen. If the user clicks No, a friendly message box advises the user that the macro will not run because No was clicked:
Sub ConfirmExample()
Select Case MsgBox( _
"Do you really want to copy this worksheet?", _
vbYesNo + vbQuestion, _
"Please confirm…")
Case vbNo
MsgBox _
"No problem, this worksheet will not be copied.", _
vbInformation, _
"You clicked No."
Exit Sub
Case vbYes
MsgBox _
"Great - - click OK to run the macro.", _
vbInformation, _
"Thanks for confirming."
ActiveSheet.Copy Before:=Sheets("Sheet1")
End Select
End Sub
As you look at the MsgBox line, note that the message box arguments are contained within parentheses. A message box has two mandatory arguments: the prompt, which is the text you place in the body of the message box, and the button configuration. Other combinations of buttons include OKCancel, YesNoCancel, and AbortRetryIgnore. The title of the message box is optional, but I always enter it to offer a more customized experience for the user.
NOTE In the Try It section at the end of Lesson 7, you worked with VBA's IntelliSense feature. I recommend you activate IntelliSense if you have not already done so, because when composing message boxes, you'll be reminded of the available arguments and their proper syntax while you are writing your code.
Input Boxes
When you need a piece of specific information from the user, such as a text string or a number, an InputBox was made for the job. An input box looks like a distant cousin of a message box, with the prompted text that tells the user what to do, OK and Cancel buttons (which cannot be reconfigured as a message box's buttons can), and an optional title argument.
An InputBox requires a prompt argument, and it provides a field wherein the user would enter the kind of information as needed for the macro to continue. The entry would return a String type variable. If no entry is made, that is, the text field is left empty, the InputBox would return a null string, which is usually regarded by VBA the same as if the user clicked the Cancel button.
The following example uses an input box to ask the user to enter a number to represent how many rows will be inserted below the active cell's row. Figure 9.2 shows what the input box looks like for this macro.
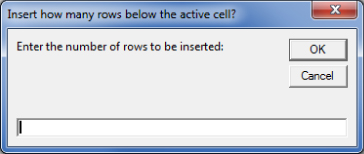
Figure 9.2
Sub InsertRows()
'Declare the string variable for the InputBox entry.
Dim CountInsertRows As String
'Define the String variable as the InputBox entry.
CountInsertRows = InputBox( _
"Enter the number of rows to be inserted:", _
"Insert how many rows below the active cell?")
'Verify that a number was entered.
'The Val function returns the numbers contained in a string as a numeric value.
If CountInsertRows = "" Or Val(CountInsertRows) < 1 Then Exit Sub
'Insert as many rows as the number that was entered.
'The Resize property returns a Range object based on the number of rows
'and columns in the new range. The number that was entered in the InputBox
'represents how many rows shall be inserted. The count of columns, which is
'the other optional argument for Resize, need not be specified because it is
'only rows being inserted.
Rows(ActiveCell.Row + 1).Resize(Val(CountInsertRows)).Insert
End Sub
Try It
For this lesson, the active worksheet is currently protected with a password, and you ask the workbook's users if they want to unprotect the worksheet. If they answer No, the macro terminates. If they answer Yes, the macro proceeds to ask them for the password. If the attempted password is incorrect, the user is informed of that, the worksheet remains protected, and the macro terminates. If the attempted password is correct, the user is then allowed to unprotect the worksheet.
Lesson Requirements
To get the sample workbook file you can download Lesson 9 from the book's website at www.wrox.com/go/excelvba24hour.
Hints
It's a wise practice to ask the user to confirm her intention to proceed with the macro. There are plenty of instances when a user mistakenly clicks a button or triggers a macro that she had no intention of running.
In Step 5, vbQuestion adds a user-friendly touch of a question mark icon in your message boxes that ask the user a question.
Step 9 shows this example of the single line If statement:
If myPassword = "" Then Exit Sub
Some VBA programmers (me included) find that syntax more efficient than the following three-line syntax. Try both styles yourself and see what works best for you.
If myPassword = "" Then
Exit Sub
End If
Step-by-Step
1. Start by opening a new workbook and password protecting Sheet1 with the password hello (without quotes, all lowercase just as you see it here).
2. With your Sheet1 worksheet protected, press Alt+F11 to go to the Visual Basic Editor.
3. From the menu bar at the top of the VBE, click Insert![]() Module.
Module.
4. In the module you just created, type Sub PasswordTest and press Enter. VBA automatically places a pair of empty parentheses at the end of the Sub line, followed by an empty line, and the End Sub line below that. Your macro should look like this so far:
5. Sub PasswordTest()
End Sub
5. Begin a Select Case structure with a Yes No Question message box to ask the users to confirm their intention to unprotect the worksheet:
6. Select Case MsgBox( _
7. "Do you want to unprotect the worksheet?", _
8. vbYesNo + vbQuestion, _
"Please confirm your intentions.")
6. Handle the case for a No answer by informing the user that the macro will not continue, and then exit the macro with the Exit Sub statement:
7. Case vbNo
8. MsgBox "No problem -- this macro will end.", vbInformation, "You clicked No."
Exit Sub
7. Handle the case for a Yes answer:
Case vbYes
8. Provide an InputBox for the user to enter the password. Declare a String type variable, and define it as the text that will be entered into the InputBox:
9. Dim myPassword As String
10. myPassword = _
11. InputBox("Please enter the case-sensitive password:", _
"A password is required to unprotect this worksheet.")
9. Here is an opportunity to add a single-line If statement to end the macro if the user clicks Cancel, or clicks OK without entering anything into the InputBox. The pair of double quotes with nothing between them is interpreted by VBA as a zero-length string:
If myPassword = "" Then Exit Sub
10.Begin an If…Then structure to determine if the InputBox entry matches the password hello that was used to protect the worksheet:
If myPassword <> "hello" Then
11.If the InputBox entry is anything other than hello, enter the code you would want to be executed when an incorrect password is entered, which you can do with a friendly message box:
12. MsgBox _
13. "Sorry, " & myPassword & " is not the correct Password.", _
14. vbCritical, _
"Incorrect."
12.Enter your Else statement and supply the code to be executed only if the correct password is entered:
13. Else
14. MsgBox _
15. "Thank you. Please click OK to unprotect the worksheet.", _
16. vbInformation, _
17. "You entered the correct password!!"
ActiveSheet.Unprotect "hello"
13.End the If structure that determined if the InputBox entry matched the password hello:
End If
14.End the Select Case structure for the users to confirm their intention of unprotecting the worksheet:
End Select
15.Here is what the complete macro would look like:
16. Sub PasswordTest()
17. 'Ask the user if they want to unprotect the worksheet.
18. Select Case MsgBox( _
19. "Do you want to unprotect the worksheet?", _
20. vbYesNo + vbQuestion, _
21. "Please confirm your intentions.")
22. 'Handle the case for a No answer by informing the user
23. 'that the macro will not continue,
24. 'and then exit the subroutine with the Exit Sub statement.
25. Case vbNo
26. MsgBox "No problem -- this macro will end.", vbInformation, "You clicked No."
27. Exit Sub
28. 'Handle the case for a Yes answer by providing an InputBox
29. 'for the user to enter the password.
30. Case vbYes
31. 'Declare a String type variable.
32. Dim myPassword As String
33. 'Define the String variable as the text that will be entered into the InputBox.
34. myPassword = _
35. InputBox("Please enter the case-sensitive password:", _
36. "A password is required to unprotect this worksheet.")
37. 'A one-line If statement to end the macro if the user clicks Cancel,
38. 'or clicks OK without entering anything into the InputBox.
39. If myPassword = "" Then Exit Sub
40. 'If structure to determine if the InputBox entry matches the password "hello"
41. 'that was used to protect the worksheet.
42. If myPassword <> "hello" Then
43. 'The code line to be executed if an incorrect password is entered.
44. MsgBox _
45. "Sorry, " & myPassword & " is not the correct Password.", _
46. vbCritical, _
47. "Incorrect."
48. Else
49. 'The code to execute only if the correct password is entered.
50. MsgBox _
51. "Thank you. Please click OK to unprotect the worksheet.", _
52. vbInformation, _
53. "You entered the correct password!!"
54. ActiveSheet.Unprotect "hello"
55. 'End the If structure that determined if the InputBox entry
56. 'matched the password "hello".
57. End If
58. 'End the Select Case structure for the users to confirm their intention
59. 'of unprotecting the worksheet.
60. End Select
End Sub
REFERENCE Please select the video for Lesson 9 online at www.wrox.com/go/excelvba24hour. You will also be able to download the code and resources for this lesson from the website.
All materials on the site are licensed Creative Commons Attribution-Sharealike 3.0 Unported CC BY-SA 3.0 & GNU Free Documentation License (GFDL)
If you are the copyright holder of any material contained on our site and intend to remove it, please contact our site administrator for approval.
© 2016-2026 All site design rights belong to S.Y.A.