Real-Time Communication with WebRTC (2014)
Chapter 2. Handling Media in the Browser
In this chapter, we start delving into the details of the WebRTC framework, which basically specifies a set of JavaScript APIs for the development of web-based applications. The APIs have been conceived at the outset as friendly tools for the implementation of basic use cases, like a one-to-one audio/video call. They are also meant to be flexible enough to guarantee that the expert developer can implement a variegated set of much more complicated usage scenarios. The programmer is hence provided with a set of APIs which can be roughly divided into three logical groups:
1. Acquisition and management of both local and remote audio and video:
o MediaStream interface (and related use of the HTML5 <audio> and <video> tags)
2. Management of connections:
o RTCPeerConnection interface
3. Management of arbitrary data:
o RTCDataChannel interface.
WebRTC in 10 Steps
The following 10-step recipe describes a typical usage scenario of the WebRTC APIs:
1. Create a MediaStream object from your local devices (e.g., microphone, webcam).
2. Obtain a URL blob from the local MediaStream.
3. Use the obtained URL blob for a local preview.
4. Create an RTCPeerConnection object.
5. Add the local stream to the newly created connection.
6. Send your own session description to the remote peer.
7. Receive the remote session description from your peer.
8. Process the received session description and add the remote stream to your RTCPeerConnection.
9. Obtain a URL blob from the remote stream.
10.Use the obtained URL blob to play the remote peer’s audio and/or video.
We will complete the above recipe step by step. In the remainder of this chapter we will indeed cover the first three phases of the entire peer-to-peer WebRTC-based communication lifecycle. This means that we will forget about our remote peer for the moment and just focus on how to access and make use of local audio and video resources from within our browser. While doing this, we will also take a look at how to play a bit with constraints (e.g., to force video resolution).
WARNING: WEBRTC SUPPORTED BROWSERS
At the time of this writing, the WebRTC API is available in Chrome, Firefox, and Opera. All of the samples contained in this book have been tested with these browsers. For the sake of conciseness (and since Opera and Chrome act almost identically when it comes to the API’s implementation) we will from now on just focus on Chrome and Firefox as running client platform examples.
Media Capture and Streams
The W3C Media Capture and Streams document defines a set of JavaScript APIs that enable the application to request audio and video streams from the platform, as well as manipulate and process the stream data.
MediaStream API
A MediaStream interface is used to represent streams of media data. Flows can be either input or output, as well as either local or remote (e.g., a local webcam or a remote connection). It has to be noted that a single MediaStream can contain zero or multiple tracks. Each track has a corresponding MediaStreamTrack object representing a specific media source in the user agent. All tracks in a MediaStream are intended to be synchronized when rendered. A MediaStreamTrack represents content comprising one or more channels, where the channels have a defined, well-known relationship to each other. A channel is the smallest unit considered in this API specification. Figure 2-1 shows a MediaStream composed of a single video track and two distinct audio (left and right channel) tracks.
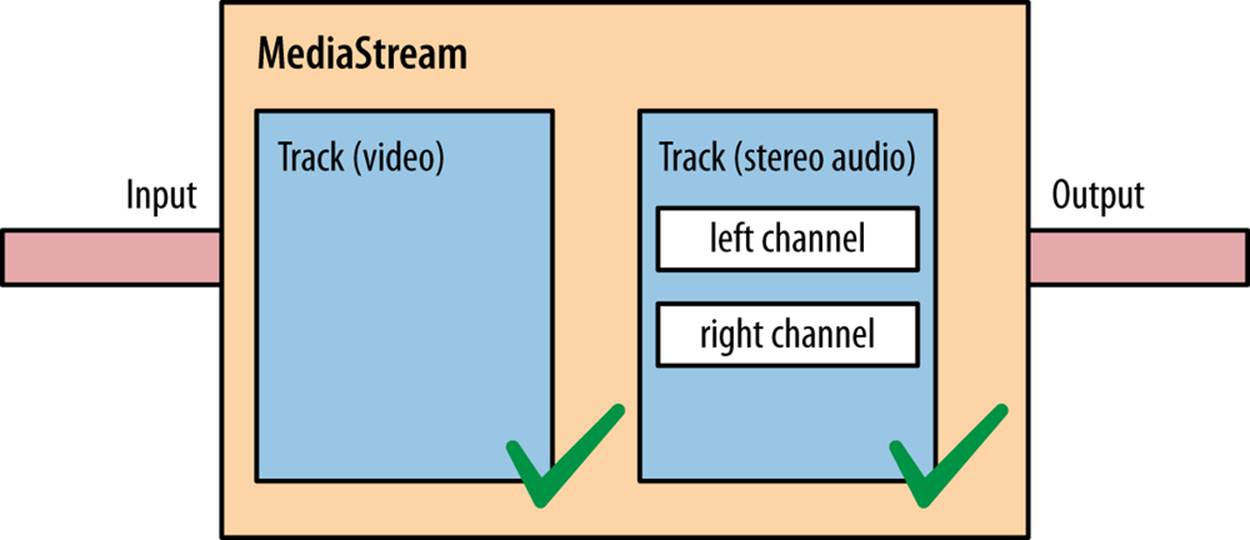
Figure 2-1. A MediaStream made of one video track and two audio tracks
The W3C Media Capture and Streams API defines the two methods getUserMedia() and createObjectUrl(), which are briefly explained in the following sections.
Obtaining Local Multimedia Content
The getUserMedia() API allows web developers to obtain access to local device media (currently, audio and/or video), by specifying a set of (either mandatory or optional) constraints, as well as proper callbacks for the asynchronous management of both successful and unsuccessful setup:
getUserMedia(constraints, successCallback, errorCallback)
getUserMedia() prompts the user for permission to use their webcam or other video or audio input.
URL
The createObjectUrl() method instructs the browser to create and manage a unique URL associated with either a local file or a binary object (blob):
createObjectURL(stream)
Its typical usage in WebRTC will be to create a blob URL starting from a MediaStream object. The blob URL will then be used inside an HTML page. This procedure is actually needed for both local and remote streams.
Playing with the getUserMedia() API
So, let’s get started with the getUserMedia() API call and its returned MediaStream object. We will prepare a simple HTML page with some JavaScript code allowing us to access local video resources and display them inside an HTML5 <video> tag. Example 2-1 shows the very simple page we have built for our first example.
Example 2-1. Our first WebRTC-enabled HTML page
<!DOCTYPE html>
<html>
<head>
<title>getUserMedia very simple demo</title>
</head>
<body>
<div id="mainDiv">
<h1><code>getUserMedia()</code> very simple demo</h1>
<p>With this example, we simply call <code>getUserMedia()</code> and display
the received stream inside an HTML5 <video> element</p>
<p>View page source to access both HTML and JavaScript code...</p>
<video autoplay></video>
<script src="js/getUserMedia.js"></script>
</div>
</body>
</html>
Example 2-1 contains a reference to a JavaScript file (getUserMedia.js), whose content is shown in Example 2-2.
Example 2-2. The getUserMedia.js file
// Look after different browser vendors' ways of calling the getUserMedia()
// API method:
// Opera --> getUserMedia
// Chrome --> webkitGetUserMedia
// Firefox --> mozGetUserMedia
navigator.getUserMedia = navigator.getUserMedia || navigator.webkitGetUserMedia
|| navigator.mozGetUserMedia;
// Use constraints to ask for a video-only MediaStream:
var constraints = {audio: false, video: true};
var video = document.querySelector("video");
// Callback to be called in case of success...
function successCallback(stream) {
// Note: make the returned stream available to console for inspection
window.stream = stream;
if (window.URL) {
// Chrome case: URL.createObjectURL() converts a MediaStream to a blob URL
video.src = window.URL.createObjectURL(stream);
} else {
// Firefox and Opera: the src of the video can be set directly from the stream
video.src = stream;
}
// We're all set. Let's just play the video out!
video.play();
}
// Callback to be called in case of failures...
function errorCallback(error){
console.log("navigator.getUserMedia error: ", error);
}
// Main action: just call getUserMedia() on the navigator object
navigator.getUserMedia(constraints, successCallback, errorCallback);
The following screenshots show how the page looks when we load it into either Chrome (Figure 2-2) or Firefox (Figure 2-3).
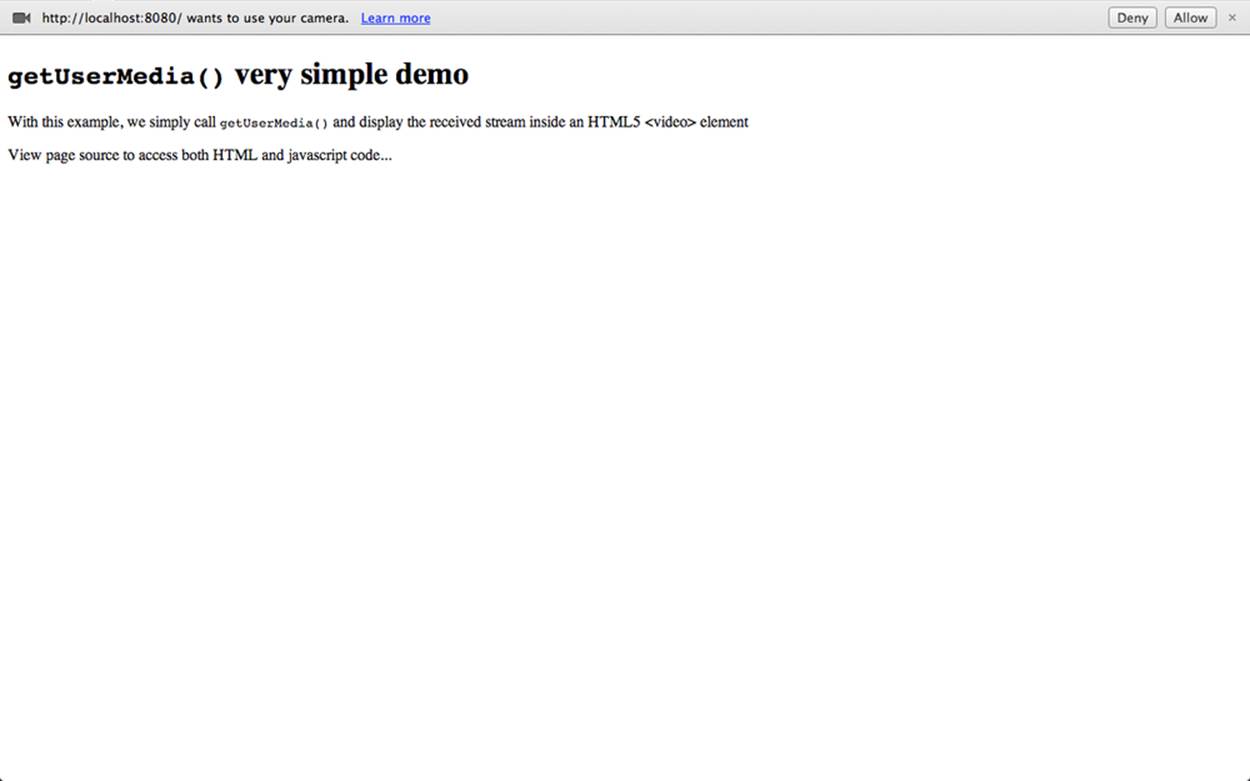
Figure 2-2. Opening our first example in Chrome
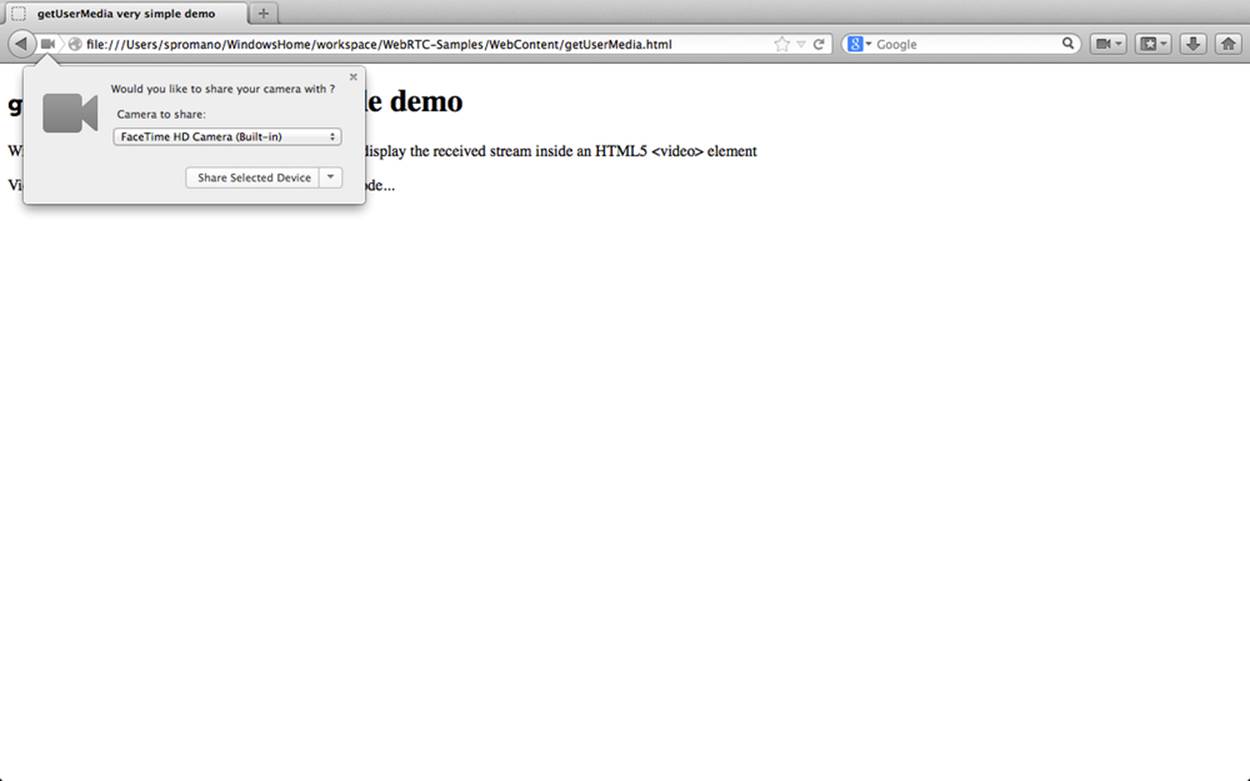
Figure 2-3. Opening our first example in Firefox
WARNING: OPENING JAVASCRIPT FILES IN CHROME
If you want to test the code in Google Chrome on your local machine, you are going to face some challenges, since Chrome will not load local files by default due to security restrictions. In order to overcome such issues you’ll have to either run a web server locally on your machine and use it to serve the application’s files, or use the --allow-file-access-from-filesoption when launching your browser.
As you can see from the figures above, both browsers ask for the user’s consent before accessing local devices (in this case, the webcam). After gathering such an explicit consent from the user, the browser eventually associates the acquired MediaStream with the page, as shown in Figures2-4 and 2-5.
It is important to note that the permission grant is tied to the domain of the web page, and that this permission does not extend to pop ups and other frames on the web page.
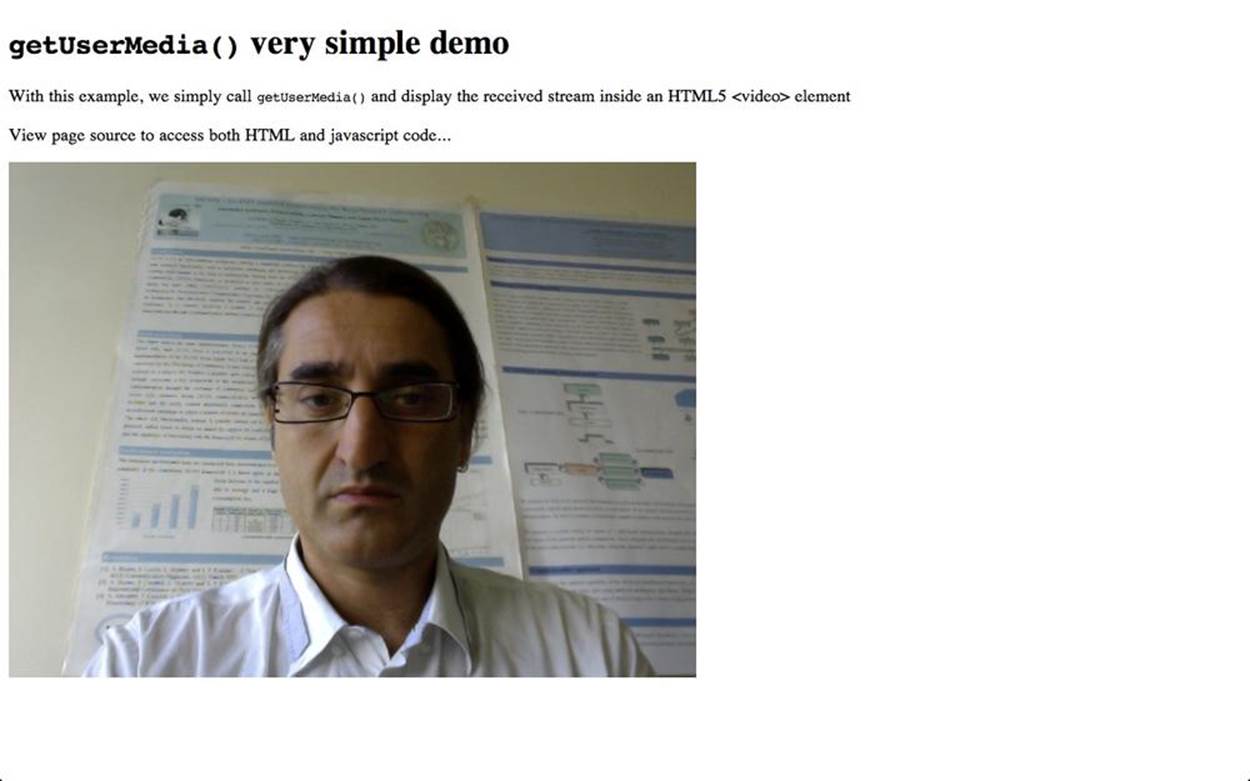
Figure 2-4. Showing the acquired MediaStream in Chrome
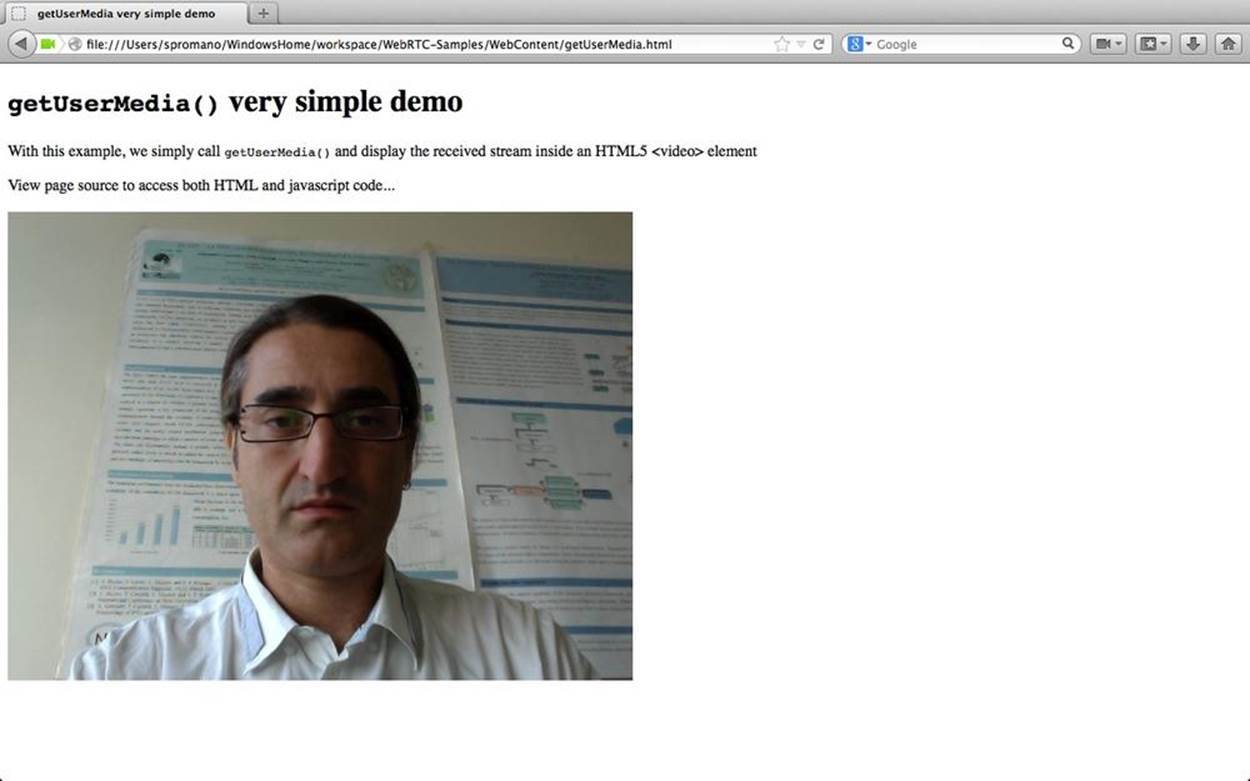
Figure 2-5. Showing the acquired MediaStream in Firefox
Delving into some of the details of the simple code reported above, we can highlight how we make a call to the API method getUserMedia(constraints, successCallback, errorCallback), whose arguments have the following meaning:
§ A constraints object (see Media Constraints), used to specify that we are interested in gathering just the local video (constraints = {audio: false, video: true}).
§ A success callback which, if called, is passed a MediaStream. In our case, such a MediaStream is first made available to the console for the user’s inspection (window.stream = stream;). Then, it is attached to the <video> element of the HTML5 page and eventually displayed. With reference to console inspection of the returned object, Figure 2-6 shows a snapshot of the output of such an activity within the developer’s tool window in Chrome. Each MediaStream is characterized by a label and contains one or more MediaStreamTracks representing channels of either audio or video.
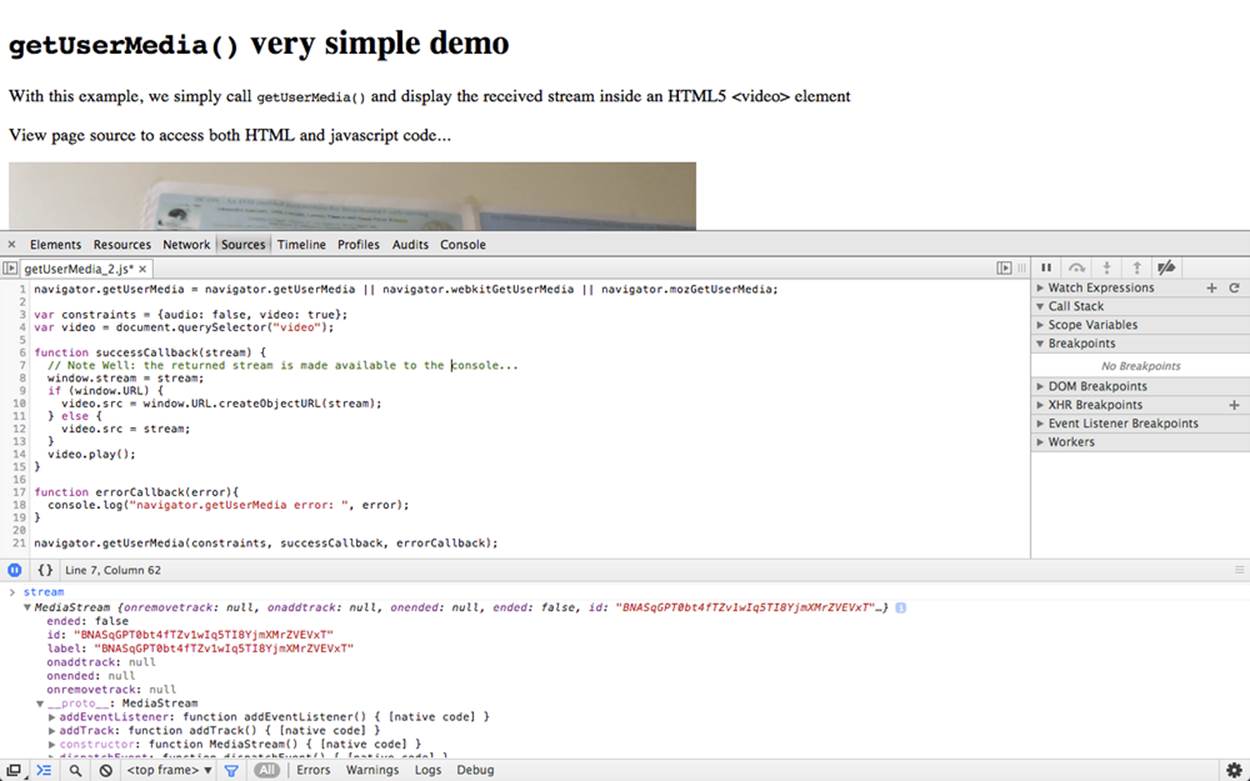
Figure 2-6. Inspecting a MediaStream in Chrome’s console
With reference to how the returned stream is attached to the <video> element, notice that Chrome calls for a conversion to a so-called blob URL (video.src = window.URL.createObjectURL(stream);), whereas the other WebRTC-enabled browsers allow you to use it as is (video.src = stream;).
§ A failure callback which, if called, is passed an error object. In our basic example, the mentioned callback just logs the returned error to the console (console.log("navigator.getUserMedia error: ", error);).
The Media Model
Browsers provide a media pipeline from sources to sinks. In a browser, sinks are the <img>, <video>, and <audio> tags. A source can be a physical webcam, a microphone, a local video or audio file from the user’s hard drive, a network resource, or a static image. The media produced by these sources typically do not change over time. These sources can be considered static. The sinks that display such sources to the users (the actual tags themselves) have a variety of controls for manipulating the source content.
The getUserMedia() API method adds dynamic sources such as microphones and cameras. The caracteristics of these sources can change in response to application needs. These sources can be considered dynamic in nature.
Media Constraints
Constraints are an optional feature for restricting the range of allowed variability on a source of a MediaStream track. Constraints are exposed on tracks via the Constrainable interface, which includes an API for dynamically changing constraints.
The getUserMedia() call also permits an initial set of constraints to be applied (for example, to set values for video resolution) when the track is first obtained.
The core concept of constraints is a capability, which consists of a property or feature of an object together with the set of its possible values, which may be specified either as a range or as an enumeration.
Constraints are stored on the track object, not the source. Each track can be optionally initialized with constraints. Otherwise, constraints can be added afterwards through the dedicated constraint APIs.
Constraints can be either optional or mandatory. Optional constraints are represented by an ordered list, while mandatory constraints are associated with an unordered set.
The aim is to provide support for more constraints before the final version of the API is released; such constraints will include things like aspect ratio, camera facing mode (front or back), audio and video frame rate, video height and width, and so on.
Using Constraints
In this section, we will take a quick look at how you can apply an initial set of constraints when the track is obtained using the getUserMedia() call.
WARNING: GETUSERMEDIA() CONSTRAINTS SUPPORT IN WEBRTC BROWSERS
getUserMedia() constraints are currently only supported in Chrome. The example in this section will assume that you use this browser.
Let’s first build the HTML page in Example 2-3.
Example 2-3. Playing with constraints: The HTML page
<!DOCTYPE html>
<!DOCTYPE html PUBLIC "-//W3C//DTD HTML 4.01 Transitional//EN"
"http://www.w3.org/TR/html4/loose.dtd">
<html>
<head>
<title>getUserMedia() and constraints</title>
</head>
<body>
<div id="mainDiv">
<h1><code>getUserMedia()</code>: playing with video constraints</h1>
<p>Click one of the below buttons to change video resolution...</p>
<div id="buttons">
<button id="qvga">320x240</button>
<button id="vga">640x480</button>
<button id="hd">1280x960</button>
</div>
<p id="dimensions"></p>
<video autoplay></video>
<script src="js/getUserMedia_constraints.js"></script>
</div>
</body>
</html>
As you can see from both the code snippet in Example 2-3 and the snapshot in Figure 2-7, the page contains three buttons, each associated with the local video stream represented at a specific resolution (from low resolution, up to high-definition video).
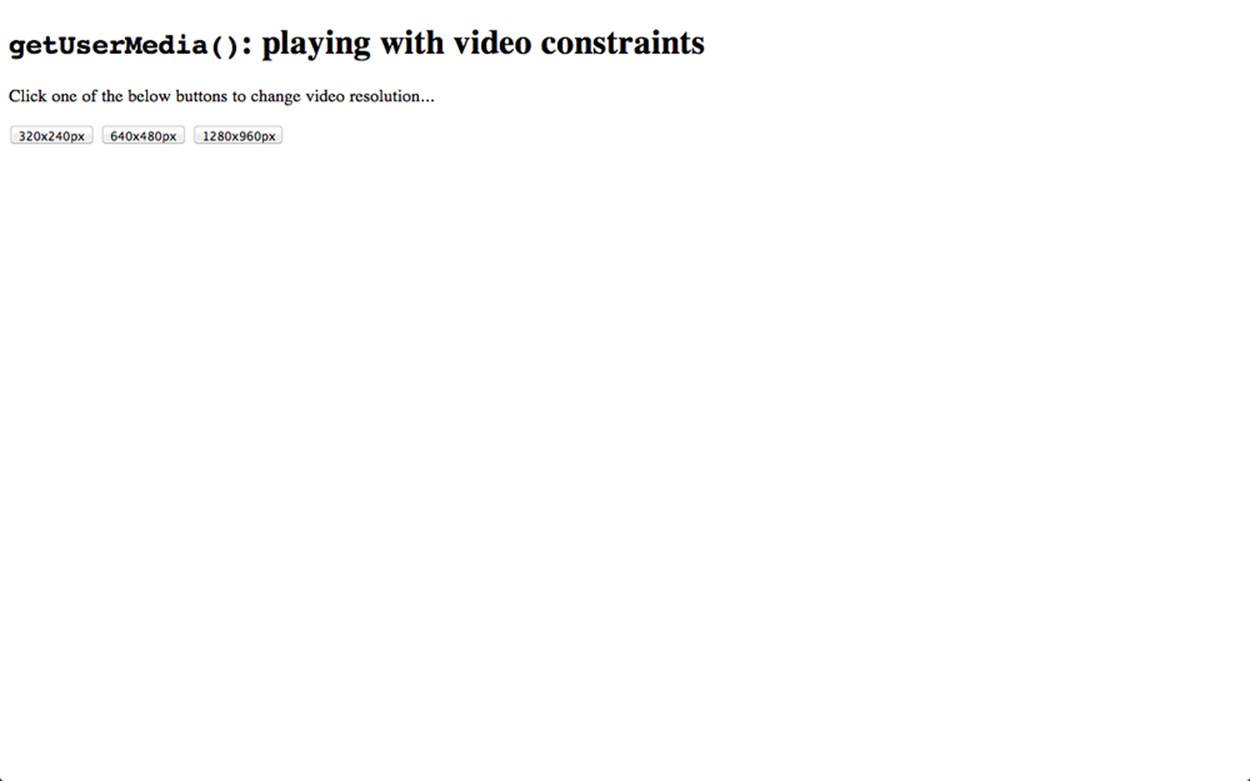
Figure 2-7. A simple HTML page showing the use of constraints in Chrome
Example 2-4 shows the JavaScript code used to both acquire the local video stream and attach it to the web page with a well-defined resolution.
Example 2-4. Playing with constraints: The getUserMedia_constraints.js file
// Define local variables associated with video resolution selection
// buttons in the HTML page
var vgaButton = document.querySelector("button#vga");
var qvgaButton = document.querySelector("button#qvga");
var hdButton = document.querySelector("button#hd");
// Video element in the HTML5 page
var video = document.querySelector("video");
// The local MediaStream to play with
var stream;
// Look after different browser vendors' ways of calling the
// getUserMedia() API method:
navigator.getUserMedia = navigator.getUserMedia ||
navigator.webkitGetUserMedia || navigator.mozGetUserMedia;
// Callback to be called in case of success...
function successCallback(gotStream) {
// Make the stream available to the console for introspection
window.stream = gotStream;
// Attach the returned stream to the <video> element
// in the HTML page
video.src = window.URL.createObjectURL(stream);
// Start playing video
video.play();
}
// Callback to be called in case of failure...
function errorCallback(error){
console.log("navigator.getUserMedia error: ", error);
}
// Constraints object for low resolution video
var qvgaConstraints = {
video: {
mandatory: {
maxWidth: 320,
maxHeight: 240
}
}
};
// Constraints object for standard resolution video
var vgaConstraints = {
video: {
mandatory: {
maxWidth: 640,
maxHeight: 480
}
}
};
// Constraints object for high resolution video
var hdConstraints = {
video: {
mandatory: {
minWidth: 1280,
minHeight: 960
}
}
};
// Associate actions with buttons:
qvgaButton.onclick = function(){getMedia(qvgaConstraints)};
vgaButton.onclick = function(){getMedia(vgaConstraints)};
hdButton.onclick = function(){getMedia(hdConstraints)};
// Simple wrapper for getUserMedia() with constraints object as
// an input parameter
function getMedia(constraints){
if (!!stream) {
video.src = null;
stream.stop();
}
navigator.getUserMedia(constraints, successCallback, errorCallback);
}
The code in Example 2-4 is quite straightforward. The core part is related to the proper definition of constraints objects, each of which can be passed as an input parameter to the getUserMedia() function. The three sample objects therein contained simply state that video is to be considered mandatory and further specify resolution in terms of lower bounds on both its width and height. To give the reader a flavor of what this means, Figures 2-8 and 2-9 show, respectively, a 320×240 and a 640×480 resolution stream.
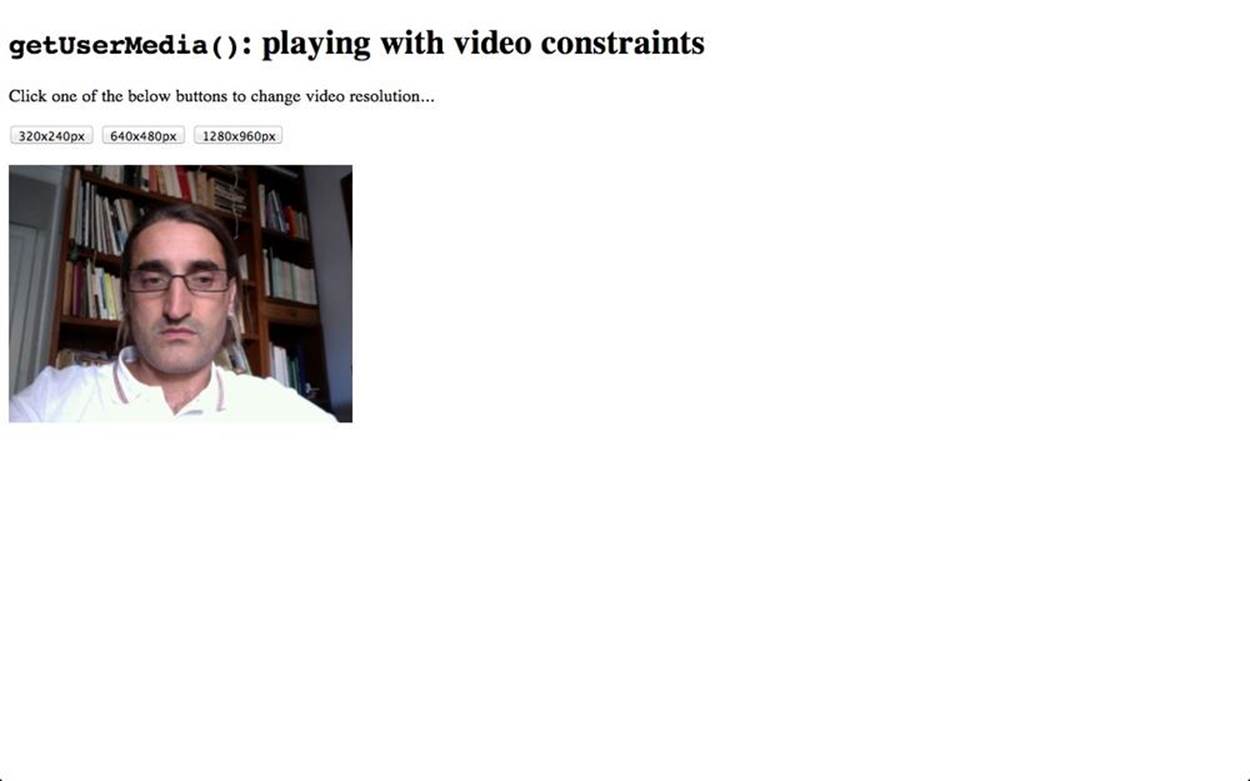
Figure 2-8. Showing 320×240 resolution video in Chrome
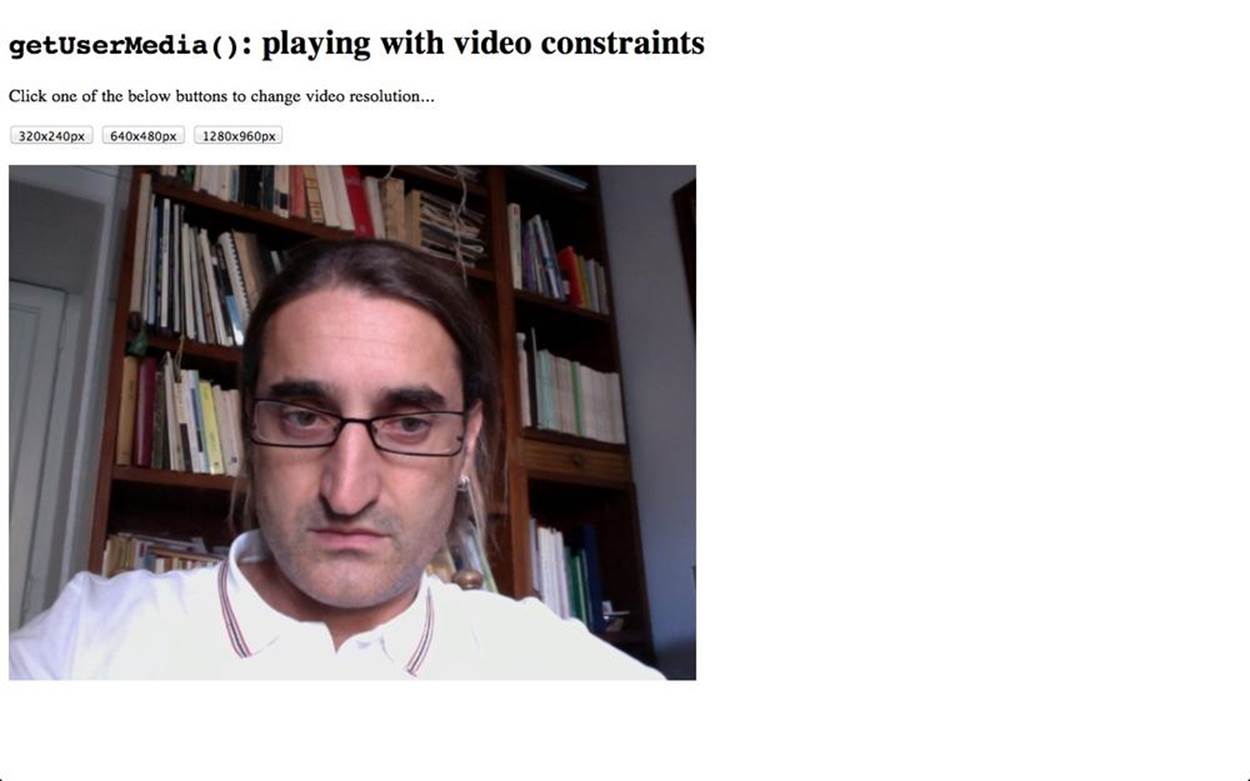
Figure 2-9. Showing 640×480 resolution video in Chrome
All materials on the site are licensed Creative Commons Attribution-Sharealike 3.0 Unported CC BY-SA 3.0 & GNU Free Documentation License (GFDL)
If you are the copyright holder of any material contained on our site and intend to remove it, please contact our site administrator for approval.
© 2016-2026 All site design rights belong to S.Y.A.