Teach Your Kids to Code: A Parent-Friendly Guide to Python Programming (2015)
Chapter 5. Conditions (What If?)
In addition to speed and accuracy, one quality that makes computers powerful is their ability to evaluate information and make small decisions quickly: a thermostat checks the temperature continuously and turns on heating or cooling as soon as the temperature goes below or above a certain number; sensors on new cars react and apply brakes more quickly than we can when another car suddenly stops ahead; spam filters turn away dozens of emails to keep our inboxes clean.
In each of these cases, the computer checks a set of conditions: Is the temperature too cold? Is there something in the path of the car? Does the email look like spam?
In Chapter 4, we saw a statement that uses a condition to make a decision: the while statement. In those examples, the condition told the while loop how many times to run. What if we wanted to make decisions about whether to run a set of statements at all? Imagine if we could write one program and let the user decide whether they wanted circles or other shapes on their spiral. Or what if we wanted circles and other shapes, like in Figure 5-1?
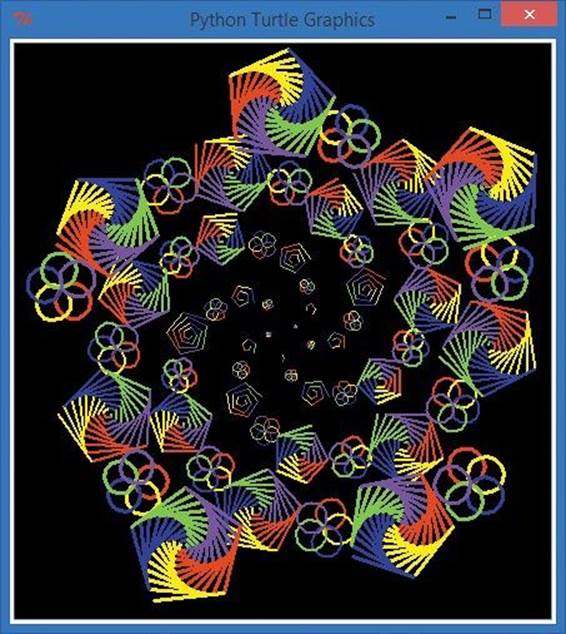
Figure 5-1. A spiral of rosettes and smaller spirals, courtesy of an if statement

The statement that makes all this possible is the if statement. It asks if something is true, and based on the answer, it decides whether to perform a set of actions or skip over them. If the temperature in a building is fine, the heating and cooling system doesn’t run, but if it’s too hot or too cold, the system turns on. If it’s raining outside, you bring an umbrella; otherwise, you don’t. In this chapter, we’ll learn how to program the computer to make decisions based on whether a condition is true or false.
If Statements
The if statement is an important programming tool. It allows us to tell the computer whether to run a group of instructions, based on a condition or set of conditions. With an if statement, we can tell the computer to make a choice.
The syntax of the if statement — that is, the way we code an if statement so the computer understands it — looks like this:
if condition:
indented statement(s)
The condition we’re testing in an if statement is usually a Boolean expression, or a true/false test. A Boolean expression evaluates to either True or False. When you use a Boolean expression with an if statement, you specify an action or set of actions that you want performed if the expression is true. If the expression is true, the program will run the indented statement(s), but if it’s false, the program will skip them and continue with the rest of the program at the next unindented line.
IfSpiral.py shows an example of an if statement in code:
IfSpiral.py
➊ answer = input("Do you want to see a spiral? y/n:")
➋ if answer == 'y':
➌ print("Working...")
import turtle
t = turtle.Pen()
t.width(2)
➍ for x in range(100):
➎ t.forward(x*2)
➏ t.left(89)
➐ print("Okay, we're done!")
The first line of our IfSpiral.py program ➊ asks the user to enter y or n for whether they would like to see a spiral and stores the user’s response in answer. At ➋, the if statement checks to see if answer is equal to 'y'. Notice that the operator to test “is equal to” uses two equal signs together,==, to distinguish it from the assignment operator, which is a single equal sign like at ➊. The == operator checks to see if answer and 'y' are equal. If they are, the condition in our if statement is true. We use a pair of single quotation marks (') around a letter or other character when we’re testing a variable to see if it contains a single character entered by the user.
If our condition at ➋ is true, we print Working... on the screen at ➌, then draw a spiral on the screen. Notice that the print statement at ➌ and the statements that draw the spiral all the way down to ➏ are indented. These indented statements will be executed only if the condition at ➋ is true. Otherwise, the program will skip all the way to ➐ and just print Okay, we're done!.
The statements after our for loop at ➍ are indented farther (➎ and ➏). This is because they belong to the for statement. Just as we added a loop inside another loop in Chapter 4 by indenting the nested loop, we can put a loop inside an if statement by indenting the whole loop.
Once the spiral is complete, our program picks back up at ➐ and tells the user we’re done. This is also the line our program jumps to if the user typed n or anything other than y at ➊. Remember, the whole if block from ➌ through ➏ is skipped if the condition at ➋ is False.
Type IfSpiral.py in a new IDLE window or download it from http://www.nostarch.com/teachkids/, and run it a few times, testing different answers. If you enter the letter y when prompted, you’ll see a spiral like the one in Figure 5-2.


Figure 5-2. If you answer y to the question in IfSpiral.py, you’ll see a spiral like this one.
If you enter a character other than a lowercase y — or more than one character — the program prints Okay, we're done! and ends.
Meet the Booleans
Boolean expressions, or conditional expressions, are important programming tools: the computer’s ability to make decisions depends on its ability to evaluate Boolean expressions to True or False.
We have to use the computer’s language to tell it the condition we’d like to test. The syntax of a conditional expression in Python is this:
expression1 conditional_operator expression2
Each expression can be a variable, a value, or another expression. In IfSpiral.py, answer == 'y' was a conditional expression, with answer as the first expression and 'y' as the second. The conditional operator was ==, to check if answer was equal to 'y'. There are many other conditional operators in Python besides ==. Let’s learn about some of them.
Comparison Operators
The most common conditional operators are comparison operators, which let you test two values to see how they compare to each other. Is one of the values bigger or smaller than the other? Are they equal? Each comparison you make using a comparison operator is a condition that will evaluate to True or False. One real-world example of a comparison is when you enter a passcode to access a building. The Boolean expression takes the passcode you entered and compares it to the correct passcode; if the input matches (is equal to) the correct passcode, the expression evaluates to True, and the door opens.
The comparison operators are shown in Table 5-1.
Table 5-1. Python Comparison Operators
|
Math symbol |
Python operator |
Meaning |
Example |
Result |
|
< |
< |
Less than |
1 < 2 |
True |
|
> |
> |
Greater than |
1 > 2 |
False |
|
≤ |
<= |
Less than or equal to |
1 <= 2 |
True |
|
≥ |
>= |
Greater than or equal to |
1 >= 2 |
False |
|
= |
== |
Equal to |
1 == 2 |
False |
|
≠ |
!= |
Not equal to |
1 != 2 |
True |
As we saw with math operators in Chapter 3, some of the operators in Python are different from math symbols to make them easier to type on a standard keyboard. Less than and greater than use the symbols we’re used to, < and >.
For less than or equal to, Python uses the less than sign and equal sign together, <=, with no space in between. The same goes for greater than or equal to, >=. Remember not to put a space between the two signs, as that will cause an error in your program.
The operator to see if two values are equal is the double equal sign, ==, because the single equal sign is already used as the assignment operator. The expression x = 5 assigns the value 5 to the variable x, but x == 5 tests to see if x is equal to 5. It’s helpful to read the double equal sign out loud as “is equal to” so you can avoid the common mistake of writing the incorrect statement if x = 5 instead of the correct if x == 5 (“if x is equal to five”) in your programs.

The operator that tests to see if two values are not equal is !=, an exclamation point followed by the equal sign. This combination may be easier to remember if you say “not equal to” when you see != in a statement. For example, you might read if x != 5 aloud as “if x is not equal to five.”
The result of a test involving a conditional operator is one of the Boolean values, True or False. Go to the Python shell and try entering some of the expressions shown in Figure 5-3. Python will respond with either True or False.
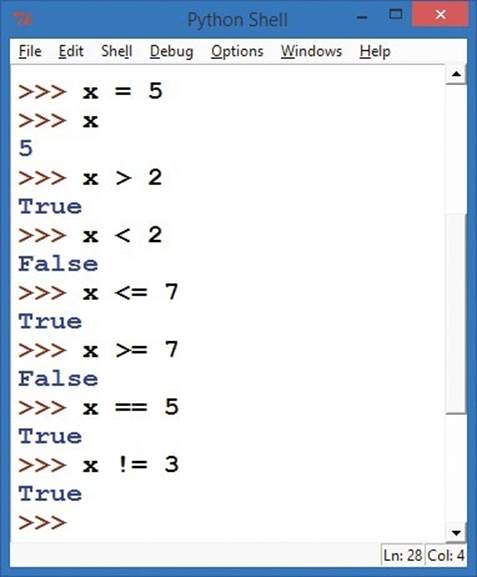
Figure 5-3. Testing conditional expressions in the Python shell
We start by going to the shell and entering x = 5 to create a variable called x that holds the value 5. On the second line, we check the value of x by typing it by itself, and the shell responds with its value, 5. Our first conditional expression is x > 2, or “x is greater than two.” Python responds with True because 5 is greater than 2. Our next expression, x < 2 (“x is less than two”), is false when x is equal to 5, so Python returns False. The remaining conditionals use the <= (less than or equal to), >= (greater than or equal to), == (is equal to), and != (not equal to) operators.
Every conditional expression will evaluate to either True or False in Python. Those are the only two Boolean values, and the capital T in True and capital F in False are required. True and False are built-in constant values in Python. Python will not understand if you type True as true without the capital T, and the same goes for False.
You’re Not Old Enough!
Let’s write a program that uses Boolean conditional expressions to see if you’re old enough to drive a car. Type the following in a new window and save it as OldEnough.py.
OldEnough.py
➊ driving_age = eval(input("What is the legal driving age where you live? "))
➋ your_age = eval(input("How old are you? "))
➌ if your_age >= driving_age:
➍ print("You're old enough to drive!")
➎ if your_age < driving_age:
➏ print("Sorry, you can drive in", driving_age - your_age, "years.")
At ➊, we ask the user for the legal driving age in their area, evaluate the number they enter, and store that value in the variable driving_age. At ➋, we ask for the user’s current age and store that number in your_age.

The if statement at ➌ checks to see if the user’s current age is greater than or equal to the driving age. If ➌ evaluates to True, the program runs the code at ➍ and prints, "You're old enough to drive!". If the condition at ➌ evaluates to False, the program skips ➍ and goes to ➎. At ➎, we check if the user’s age is less than the driving age. If so, the program runs the code at ➏ and tells the user how many years it’ll be until they can drive by subtracting driving_age from your_age and printing the result. Figure 5-4 shows the results of this program for my son and me.
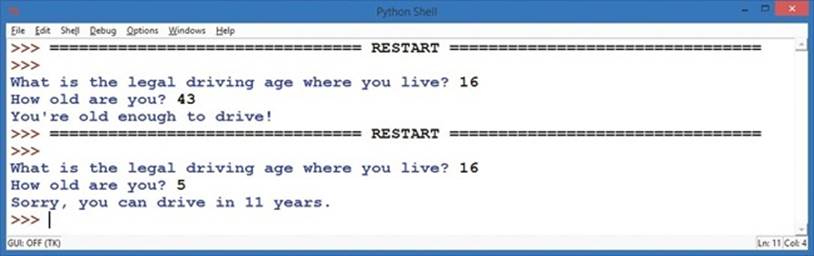
Figure 5-4. I’m old enough to drive in the United States, but my five-year-old son isn’t.
The only catch is that the last if statement at ➎ feels redundant. If the user is old enough at ➌, we shouldn’t need to test to see if they’re too young, because we already know they’re not. And if the user isn’t old enough at ➌, we shouldn’t need to test to see if they’re too young at ➎, because we already know they are. If only Python had a way of getting rid of that unnecessary code . . . well, it just so happens that Python does have a shorter, faster way to handle situations like this one.
Else Statements
Often we want our program to do one thing if a condition evaluates to True and something else if the condition evaluates to False. This is so common, in fact, that we have a shortcut, the else statement, that allows us to test if the condition is true without having to perform another test to see if it’s false. The else statement can only be used after an if statement, not by itself, so we sometimes refer to the two together as an if-else. The syntax looks like this:
if condition:
indented statement(s)
else:
other indented statement(s)
If the condition in an if statement is true, the indented statements under the if are executed, and the else and all its statements are skipped. If the condition in the if statement is false, the program skips directly to the else’s other indented statements and runs those.
We can rewrite OldEnough.py with an else statement to remove the extra conditional test (your_age < driving_age). This not only makes the code shorter and easier to read, but it also helps prevent coding errors in the two conditions. For example, if we test your_age > driving_age in the first if statement and your_age < driving_age in the second if statement, we might accidentally leave out the case where your_age == driving_age. By using the if-else statement pair, we can just test if your_age >= driving_age to see if you’re old enough to drive and inform you if you are, and otherwise go to the else statement and print how many years you must wait to drive.
Here’s OldEnoughOrElse.py, a revised version of OldEnough.py with an if-else instead of two if statements:
OldEnoughOrElse.py
driving_age = eval(input("What is the legal driving age where you live? "))
your_age = eval(input("How old are you? "))
if your_age >= driving_age:
print("You're old enough to drive!")
else:
print("Sorry, you can drive in", driving_age - your_age, "years.")
The only difference between the two programs is that we replaced the second if statement and condition with a shorter, simpler else statement.
Polygons or Rosettes
As a visual example, we can ask the user to input whether they’d like to draw a polygon (triangle, square, pentagon, and so on) or a rosette with a certain number of sides or circles. Depending on the user’s choice (p for polygon or r for rosette), we can draw exactly the right shape.
Let’s type and run this example, PolygonOrRosette.py, which has an if-else statement pair.
PolygonOrRosette.py
import turtle
t = turtle.Pen()
# Ask the user for the number of sides or circles, default to 6
➊ number = int(turtle.numinput("Number of sides or circles",
"How many sides or circles in your shape?", 6))
# Ask the user whether they want a polygon or rosette
➋ shape = turtle.textinput("Which shape do you want?",
"Enter 'p' for polygon or 'r' for rosette:")
➌ for x in range(number):
➍ if shape == 'r': # User selected rosette
➎ t.circle(100)
➏ else: # Default to polygon
➐ t.forward (150)
➑ t.left(360/number)
At ➊, we ask the user for a number of sides (for a polygon) or circles (for a rosette). At ➋, we give the user a choice between p for polygon or r for rosette. Run the program a few times, trying each option with different numbers of sides/circles, and see how the for loop at ➌ works.
Notice that ➍ through ➑ are indented, so they are part of the for loop at ➌ and are executed the number of times the user entered as the number of lines or circles at ➊. The if statement at ➍ checks to see if the user entered r to draw a rosette, and if that’s true, ➎ is executed and draws a circle at this location as part of the rosette. If the user entered p or anything other than r, the else statement at ➏ is selected and draws a line at ➐ by default, to make one side of a polygon. Finally, at ➑ we turn left by the correct number of degrees (360 degrees divided by the number of sides or rosettes) and keep looping from ➌ to ➑ until the shape is finished. See Figure 5-5 for an example.
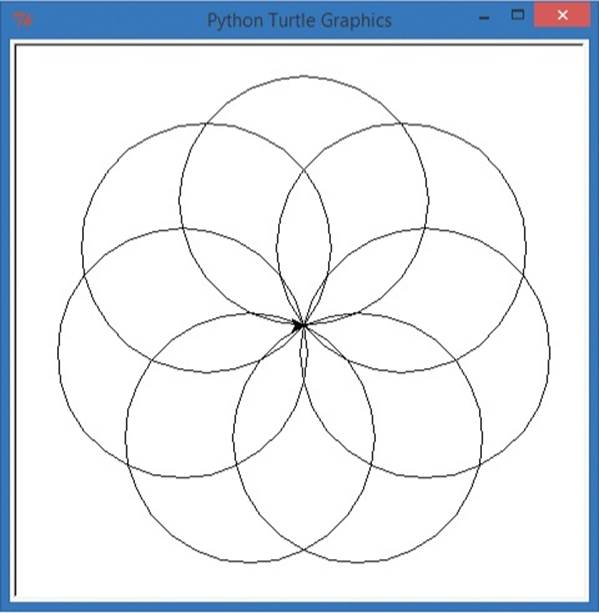
Figure 5-5. Our PolygonOrRosette.py program with user input of 7 sides and r for rosette
Even or Odd?
The if-else statement can test more than user input. We can use it to alternate shapes, like in Figure 5-1, by using an if statement to test our loop variable each time it changes to see if it’s even or odd. On every even pass through the loop — when our variable is equal to 0, 2, 4, and so on — we can draw a rosette, and on every odd pass through the loop, we can draw a polygon.
To do this, we need to know how to check if a number is odd or even. Think about how we decide if a number is even; that means the number is divisible by two. Is there a way to see if a number is evenly divisible by two? “Evenly divisible” means there’s no remainder. For example, four iseven, or evenly divisible by two, because 4 ÷ 2 = 2 with no remainder. Five is odd because 5 ÷ 2 = 2 with a remainder of 1. So even numbers have a remainder of zero when they’re divided by two, and odd numbers have a remainder of one. Remember the remainder operator? That’s right: it’s our old friend the modulo operator, %.
In Python code, we can set up a loop variable m and check to see if m is even by testing m % 2 == 0 — that is, checking to see if the remainder when we divide m by two is equal to zero:
for m in range(number):
if (m % 2 == 0): # Tests to see if m is even
# Do even stuff
else: # Otherwise, m must be odd
# Do odd stuff
Let’s modify a spiral program to draw rosettes at even corners and polygons at odd corners of a big spiral. We’ll use a big for loop for the big spiral, an if-else statement to check whether to draw a rosette or a polygon, and two small inner loops to draw either a rosette or a polygon. This will be longer than most of our programs so far, but comments will help explain what the program is doing. Type and run the following program, RosettesAndPolygons.py, and be sure to check that your indentation is correct for the loops and if statements.
RosettesAndPolygons.py
# RosettesAndPolygons.py - a spiral of polygons AND rosettes!
import turtle
t = turtle.Pen()
# Ask the user for the number of sides, default to 4
sides = int(turtle.numinput("Number of sides",
"How many sides in your spiral?", 4))
# Our outer spiral loop for polygons and rosettes, from size 5 to 75
➊ for m in range(5,75):
t.left(360/sides + 5)
➋ t.width(m//25+1)
➌ t.penup() # Don't draw lines on spiral
t.forward(m*4) # Move to next corner
➍ t.pendown() # Get ready to draw
# Draw a little rosette at each EVEN corner of the spiral
➎ if (m % 2 == 0):
➏ for n in range(sides):
t.circle(m/3)
t.right(360/sides)
# OR, draw a little polygon at each ODD corner of the spiral
➐ else:
➑ for n in range(sides):
t.forward(m)
t.right(360/sides)
Let’s look at how this program works. At ➊, we set up a for loop over the range 5 to 75; we’re skipping 0 to 4 because it’s hard to see shapes that are 4 pixels across or smaller. We turn for our spiral; then, at ➋ we use integer division to make the pen wider (thicker) after every 25th shape.Figure 5-6 shows the lines getting thicker as the shapes get bigger.
At ➌, we lift our turtle’s pen off the screen and move forward so we don’t draw lines between rosettes and polygons. At ➍, we put the pen back down and get ready to draw a shape at the corner of the big spiral. At ➎, we test our loop variable m to see if we’re drawing at an even corner. If m is even (m % 2 == 0), we draw the rosette with the for loop at ➏. Otherwise, the else at ➐ tells us to draw a polygon using the for loop beginning at ➑.


Figure 5-6. Two runs of our RosettesAndPolygons.py program with user inputs of 4 sides (top) and 5 sides (bottom)
Notice that when we use an even number of sides, the alternating shapes form separate legs of the spiral, as shown at the top in Figure 5-6. But when the number of sides is odd, each leg of the spiral alternates with the even (rosette) shape and the odd (polygon) shape. With color and some thought, you can make this program draw a design like the one in Figure 5-1. The if-else statements add another dimension to our programming toolkit.
Elif Statements
There’s one more useful add-on to an if statement: the elif clause. No, that’s not one of Santa’s helpers! An elif is a way to string together if-else statements when you need to check for more than two possible outcomes. The keyword elif is short for “else if.” Think about letter grades in school: if you score 98 percent on an exam, the teacher might assign a grade of A or A+ depending on the grading scale. But if you score lower, there’s not just one grade (there are more options than A or F, thank goodness). Instead, there are several possible grades your teacher might use: A, B, C, D, or F.
This is a case where an elif statement or a set of elif statements can help. Let’s take the example of a 10-point grading scale, where 90 or above is an A, 80–89 is a B, and so on. If your score is 95, we can print the letter grade A and skip all other options. Similarly, if you earned an 85, we don’t need to test further than a B. The if-elif-else construct helps us do this in a straightforward way. Try running the following program, WhatsMyGrade.py, and entering different values between 0 and 100.
WhatsMyGrade.py
➊ grade = eval(input("Enter your number grade (0-100): "))
➋ if grade >= 90:
print("You got an A! :) ")
➌ elif grade >= 80:
print("You got a B!")
➍ elif grade >= 70:
print("You got a C.")
➎ elif grade >= 60:
print("You got a D...")
➏ else:
print("You got an F. :( ")
At ➊, we ask the user for a numeric grade from 0 to 100 with an input() prompt, convert it to a number with the eval() function, and store it in the variable grade. At ➋, we compare the user’s grade to the value 90, the cutoff for a letter grade of A. If the user entered a score of 90 or greater, Python will print You got an A! :), skip the other elif and else statements, and continue with the rest of the program. If the score is not 90 or greater, we proceed to ➌ to check for a grade of B. Again, if the score is 80 or greater, the program prints the correct grade and skips past the elsestatement. Otherwise, the elif statement at ➍ checks for a C, the elif statement at ➎ checks for a D, and, finally, any score less than 60 makes it all the way to ➏ and results in the else statement’s You got an F. :(.
We can use if-elif-else statements to test a variable across multiple ranges of values. Sometimes, though, we need to test multiple variables. For example, when deciding what to wear for the day, we want to know the temperature (warm or cold) and the weather (sun or rain). To combine conditional statements, we need to learn a few new tricks.
Complex Conditions: If, and, or, not
There are times when a single conditional statement isn’t enough. What if we want to know if it’s warm and sunny or cold and rainy?
Think back to our first program in this chapter, in which we answered y if we wanted to draw a spiral. The first two lines asked for input and checked to see if that input was y:
answer = input("Do you want to see a spiral? y/n:")
if answer == 'y':
To see a spiral, the user has to enter y exactly; only this one answer is accepted. Even something similar, like capital Y or the word yes, doesn’t work because our if statement checks only for y.
One easy way to solve the Y versus y problem is to use the lower() function, which makes strings all lowercase. You can try it in IDLE:
>>> 'Yes, Sir'.lower()
'yes, sir'
The lower() function changed the capital Y and capital S in Yes, Sir to lowercase, leaving the rest of the string unchanged.
We can use lower() on the user’s input so that no matter which they enter, Y or y, the condition in our if statement will be True:
if answer.lower() == 'y':
Now, if a user enters either Y or y, our program checks to see if the lowercase version of their answer is y. But if we want to check for the full word Yes, we need a compound if statement.
Compound if statements are like compound sentences: “I’m going to the store, and I’m going to buy some groceries.” Compound if statements are useful when we want to do a bit more than just test whether one condition is true. We might want to test if this condition and another condition are both true. We might test if this condition or another condition is true. And we might want to see if the condition is not true. We do this in everyday life, too. We say, “If it’s cold and raining, I’ll wear my heavy raincoat,” “If it’s windy or cold, I’ll wear a jacket,” or “If it’s not raining, I’ll wear my favorite shoes.”
When we build a compound if statement, we use one of the logical operators shown in Table 5-2.
Table 5-2. Logical Operators
|
Logical operator |
Usage |
Result |
|
and |
if(condition1 and condition2): |
True only if both condition1 and condition2 are True |
|
or |
if(condition1 or condition2): |
True if either of condition1 or condition2 are True |
|
not |
if not(condition): |
True only if the condition is False |
We can use the or operator to check if the user entered y or yes; either one will do.
answer = input("Do you want to see a spiral? y/n:").lower()
if answer == 'y' or answer == 'yes': # Checks for either 'y' or 'yes'
Now we’re testing if either of two conditions is True. If either is True, the user gets to see the spiral. Notice that we write the full conditional on either side of the or keyword: answer == 'y' or answer == 'yes'. One common error for new programmers is trying to shorten or conditions by leaving out the second answer ==. To remember the right way to use an or statement, think about each condition separately. If any of the conditions joined by an or evaluates to True, the whole statement is true, but each condition has to be complete for the statement to work.
A compound condition using and looks similar, but and requires every condition in the statement to be true for the overall statement to evaluate to True. For an example, let’s write a program to decide what to wear based on the weather. Type WhatToWear.py in a new window or download it from http://www.nostarch.com/teachkids/, and run it:
WhatToWear.py
➊ rainy = input("How's the weather? Is it raining? (y/n)").lower()
➋ cold = input("Is it cold outside? (y/n)").lower()
➌ if (rainy == 'y' and cold == 'y'): # Rainy and cold, yuck!
print("You'd better wear a raincoat.")
➍ elif (rainy == 'y' and cold != 'y'): # Rainy, but warm
print("Carry an umbrella with you.")
➎ elif (rainy != 'y' and cold == 'y'): # Dry, but cold
print("Put on a jacket, it's cold out!")
➏ elif (rainy != 'y' and cold != 'y'): # Warm and sunny, yay!
print("Wear whatever you want, it's beautiful outside!")
At ➊, we ask the user whether it’s raining outside, and at ➋, we ask if it’s cold or not. We also make sure the answers stored in rainy and cold are lowercase by adding the lower() function to the end of the input() functions on both lines. With these two conditions (whether it’s rainy and whether it’s cold), we can help the user decide what to wear. At ➌, the compound if statement checks to see if it’s both rainy and cold; if it is, the program suggests a raincoat. At ➍, the program checks to see if it’s both rainy and not cold. For rainy but not cold weather, the program recommends an umbrella. At ➎, we check to see if it’s not raining (rainy not equal to 'y') but still cold, requiring a jacket. Finally, at ➏, if it’s not raining and it’s not cold, wear whatever you want!
Secret Messages
Now that we understand how to use conditions, we’re going to learn to encode and decode secret messages using a Caesar cipher. A cipher is a secret code, or a way of changing messages to make them harder to read. The Caesar cipher is named after Julius Caesar, who is said to have liked sending private messages by shifting letters in the alphabet:
SECRET MESSAGES ARE SO COOL! -> FRPERG ZRFFNTRF NER FB PBBY!
We can create a simple Caesar cipher by using an encoder ring like the one shown in Figure 5-7. To create the encoded message, decide on the key, or the number of letters you want to shift each letter by. In the coded message and in Figure 5-7, each letter is being shifted by a key value of 13, meaning we take the letter we want to encode and count 13 letters past it in the alphabet to get our encoded letter. An A becomes an N, a B becomes an O, and so on.
We sometimes call this shift a rotation because by the time we get to M (which becomes Z), we’re at the end of the alphabet. To be able to encode an N, we wrap around to A again. O wraps around to B, all the way to Z, which becomes an M. Here’s an example of a Caesar cipher lookup table for the key value of 13, where each letter is shifted by 13 letters for encoding or decoding:
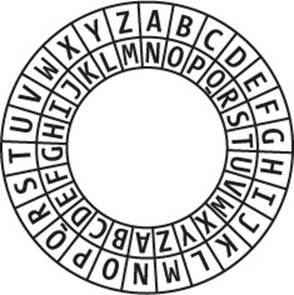
Figure 5-7. A Caesar cipher
A B C D E F G H I J K L M N O P Q R S T U V W X Y Z
N O P Q R S T U V W X Y Z->A B C D E F G H I J K L M
Notice a pattern? The letter A is encoded as an N, and N is encoded as an A. We call this a symmetric cipher or symmetric code because it has symmetry — it’s the same in both directions. We can encode and decode messages using the same key of 13 because the English alphabet has 26 letters, and the key value of 13 means that we shift every letter exactly halfway around. You can try it with a message of your own: HELLO -> URYYB -> HELLO.
If we can write a program that looks at each letter in a secret message, then encodes that letter by shifting it 13 letters to the right, we can send encoded messages to anyone who has the same program (or who can figure out the pattern in the cipher). To write a program that manipulates individual letters in a string, we need to pick up more skills for working with strings in Python.
Messin’ with Strings
Python comes with powerful functions for working with strings. There are built-in functions that can change a string of characters to all uppercase, functions that can change single characters into their number equivalents, and functions that can tell us whether a single character is a letter, number, or other symbol.
Let’s start with a function to change a string to uppercase letters. To make our encoder/decoder program easier to understand, we’re going to change the message to all uppercase so that we’re encoding only one set of 26 letters (A to Z) instead of two (A to Z and a to z). The function that converts a string to all uppercase letters is upper(). Any string followed by the dot (.) and the function name upper() will return the same string with letters in uppercase and other characters unchanged. In the Python shell, try typing your name or any other string in quotes, followed by.upper(), to see this function in action:
>>> 'Bryson'.upper()
'BRYSON'
>>> 'Wow, this is cool!'.upper()
'WOW, THIS IS COOL!'
As we saw earlier, the lower() function does the opposite:
>>> 'Bryson'.lower()
'bryson'
You can check to see whether a single character is an uppercase letter with the isupper() function:
>>> 'B'.isupper()
True
>>> 'b'.isupper()
False
>>> '3'.isupper()
False
And you can check whether a character is a lowercase letter with the islower() function:
>>> 'P'.islower()
False
>>> 'p'.islower()
True
A string is a collection of characters, so looping through a string in Python with a for loop will break the string into individual characters. Here, letter will loop through each character in the string variable message:
for letter in message:
Finally, we can use the regular addition operator + (plus) to add strings together or add letters onto a string:
>>> 'Bry' + 'son'
'Bryson'
>>> 'Payn' + 'e'
'Payne'
Here, we add the second string onto the end of the first. Adding strings together is called appending. You may also see string addition referred to as concatenation; just remember that’s a fancy word for adding two or more strings together.
The Value of Character(s)
The final tool we need to build our encoder/decoder program is the ability to perform math on individual letters, like adding 13 to the value of the letter A to get the letter N. Python has a function or two that can help.
Every letter, number, and symbol is turned into a number value when stored on a computer. One of the most popular numbering systems is ASCII (American Standard Code for Information Interchange). Table 5-3 shows the ASCII values of some keyboard characters.
Table 5-3. Numeric Values for Standard ASCII Characters
|
Value |
Symbol |
Description |
|
32 |
Space |
|
|
33 |
! |
Exclamation mark |
|
34 |
" |
Double quote |
|
35 |
# |
Hash mark |
|
36 |
$ |
Dollar sign |
|
37 |
% |
Percent |
|
38 |
& |
Ampersand |
|
39 |
' |
Single quote, apostrophe |
|
40 |
( |
Opening parenthesis |
|
41 |
) |
Closing parenthesis |
|
42 |
* |
Asterisk |
|
43 |
+ |
Plus |
|
44 |
, |
Comma |
|
45 |
- |
Hyphen |
|
46 |
. |
Period, dot, full stop |
|
47 |
/ |
Slash or divide |
|
48 |
0 |
Zero |
|
49 |
1 |
One |
|
50 |
2 |
Two |
|
51 |
3 |
Three |
|
52 |
4 |
Four |
|
53 |
5 |
Five |
|
54 |
6 |
Six |
|
55 |
7 |
Seven |
|
56 |
8 |
Eight |
|
57 |
9 |
Nine |
|
58 |
: |
Colon |
|
59 |
; |
Semicolon |
|
60 |
< |
Less than |
|
61 |
= |
Equals |
|
62 |
> |
Greater than |
|
63 |
? |
Question mark |
|
64 |
@ |
At symbol |
|
65 |
A |
Uppercase A |
|
66 |
B |
Uppercase B |
|
67 |
C |
Uppercase C |
|
68 |
D |
Uppercase D |
|
69 |
E |
Uppercase E |
|
70 |
F |
Uppercase F |
|
71 |
G |
Uppercase G |
|
72 |
H |
Uppercase H |
|
73 |
I |
Uppercase I |
|
74 |
J |
Uppercase J |
|
75 |
K |
Uppercase K |
|
76 |
L |
Uppercase L |
|
77 |
M |
Uppercase M |
|
78 |
N |
Uppercase N |
|
79 |
O |
Uppercase O |
|
80 |
P |
Uppercase P |
|
81 |
Q |
Uppercase Q |
|
82 |
R |
Uppercase R |
|
83 |
S |
Uppercase S |
|
84 |
T |
Uppercase T |
|
85 |
U |
Uppercase U |
|
86 |
V |
Uppercase V |
|
87 |
W |
Uppercase W |
|
88 |
X |
Uppercase X |
|
89 |
Y |
Uppercase Y |
|
90 |
Z |
Uppercase Z |
|
91 |
[ |
Opening bracket |
|
92 |
\ |
Backslash |
|
93 |
] |
Closing bracket |
|
94 |
^ |
Caret, circumflex |
|
95 |
_ |
Underscore |
|
96 |
` |
Grave accent |
|
97 |
a |
Lowercase a |
The Python function to turn a character into its ASCII number value is ord():
>>> ord('A')
65
>>> ord('Z')
90
The reverse function is chr():
>>> chr(65)
'A'
>>> chr(90)
'Z'
This function turns a numeric value into the corresponding character.
Our Encoder/Decoder Program
With all these pieces, we can put together a program that takes in a message and makes it all uppercase. It then loops through each character in the message and, if the character is a letter, shifts it by 13 to encode or decode it, adds the letter to an output message, and prints the output message.
EncoderDecoder.py
message = input("Enter a message to encode or decode: ") # Get a message
➊ message = message.upper() # Make it all UPPERCASE :)
➋ output = "" # Create an empty string to hold output
➌ for letter in message: # Loop through each letter of the message
➍ if letter.isupper(): # If the letter is in the alphabet (A-Z),
➎ value = ord(letter) + 13 # shift the letter value up by 13,
➏ letter = chr(value) # turn the value back into a letter,
➐ if not letter.isupper(): # and check to see if we shifted too far
➑ value -= 26 # If we did, wrap it back around Z->A
➒ letter = chr(value) # by subtracting 26 from the letter value
➓ output += letter # Add the letter to our output string
print("Output message: ", output) # Output our coded/decoded message
The first line prompts the user for an input message to encode or decode. At ➊, the upper() function makes the message all uppercase to make the letters easier for the program to read and to make the encoding simpler to write. At ➋, we create an empty string (nothing between the double quotes, "") named output, in which we’ll store our encoded message, letter by letter. The for loop at ➌ makes use of the fact that Python treats strings like collections of characters; the variable letter will iterate over, or loop through, the string message one character at a time.
At ➍, the isupper() function checks each character in the message to see if it’s an uppercase letter (A to Z). If it is, then at ➎ we get the numeric value of the letter in ASCII using ord() and add 13 to that value to encode it. At ➏, we turn the new, encoded value back into a character withchr(), and at ➐, we check to see if it’s still a letter from A to Z. If not, we wrap the letter back around to the front of the alphabet at ➑ by subtracting 26 from the encoded value (that’s how Z becomes an M), and we turn the new value into its letter equivalent in ➒.
At ➓, we add the letter to the end of the output string (appending the character onto the end of the string) using the += operator. The += operator is one of a handful of shortcut operators that combine math (+) and assignment (=), and output += letter means output gets letter added to it. This is the last line in our for loop, so the whole process is repeated for each character in the input message until output has been built up one letter at a time to hold the encoded version of the entire message. When the loop is finished, the last line of the program prints the output message.
You can use this program to send coded messages for fun, but you should know that it’s not as secure as modern ways of encoding messages — anyone who can solve a puzzle in the Sunday paper can read the encoded messages you’ve sent — so use it only for fun with friends.
Do a web search for encryption or cryptography to learn about the science of making secret messages secure.
What You Learned
In this chapter, you learned how to program a computer to make decisions based on conditions in code. We saw that the if statement lets a program execute a set of statements only if a condition is true (like age >= 16). We used Boolean (true/false) expressions to represent the conditions we wanted to check for, and we built expressions using conditional operators like <, >, <=, and more.
We combined if and else statements to run one piece of code or the other, so that if our if statement is not executed, the else statement runs. We extended this further by selecting among multiple options using if-elif-else statements, like in our letter grade program that gave out grades of A, B, C, D, or F depending on the numeric score entered.
We learned how to test multiple conditions at the same time using the and and or logical operators to combine conditions (like rainy == 'y' and cold == 'y'). We used the not operator to check whether a variable or expression is False.
In our secret message program at the end of the chapter, you learned that all letters and characters are converted into numeric values when stored on a computer and that ASCII is one method of storing text as number values. We used the chr() and ord() functions to convert characters into their ASCII values and back again. We changed strings of letters to all uppercase or lowercase with upper() and lower(), and we checked whether a string was uppercase or lowercase with isupper() and islower(). We built a string by adding letters one at a time onto the end of the string using the + operator, and we learned that adding strings together is sometimes called appending or concatenating.
At this point you should be able to do the following:
§ Use if statements to make decisions using conditionals.
§ Use conditionals and Boolean expressions to control program flow.
§ Describe how a Boolean expression evaluates to True or False.
§ Write conditional expressions using comparison operators (<, >, ==, !=, <=, >=).
§ Use if-else statement combinations to choose between two alternative program paths.
§ Test a variable to see if it is odd or even using the modulo operator, %.
§ Write if-elif-else statements that select from among a number of options.
§ Use and and or to test multiple conditions at once.
§ Use the not operator to check whether a value or variable is False.
§ Explain how letters and other characters are stored as numeric values in computers.
§ Use ord() and chr() to convert characters into their ASCII equivalents and vice versa.
§ Manipulate strings using various string functions like lower(), upper(), and isupper().
§ Add strings and characters together using the + operator.
PROGRAMMING CHALLENGES
To practice what you’ve learned in this chapter, try these challenges. (If you get stuck, go to http://www.nostarch.com/teachkids/ for sample answers.)
#1: COLORFUL ROSETTES AND SPIRALS
For a more visual challenge, look back at the colorful spiral and rosette image in Figure 5-1. You should be able to modify RosettesAndPolygons.py to make it more colorful and, if you like, replace the polygons with small spirals to match the illustration in Figure 5-1.
#2: USER-DEFINED KEYS
For a more text-based challenge, create an advanced version of our EncoderDecoder.py program by allowing the user to input their own key value, from 1 to 25, to determine how many letters to shift the message by. Then, at the line marked ➎ in EncoderDecoder.py (Our Encoder/Decoder Program), instead of shifting by 13 every time, shift by the user’s key value.
To decode a message sent with a different key (let’s use 5 as a key value, so A becomes F, B becomes G, and so on), the person receiving the message needs to know the key. They retrieve the message by encoding again with the reverse key (26 minus the key value, 26 – 5 = 21) so that F wraps around to A, G becomes B, and so on.
If you’d like to make this program easier to use, start by asking the user whether they’d like to encode or decode (e or d) and then ask them for a key value that you store as key (the number of letters to shift by). If the user chooses to encode, add the key value to each letter at ➎, but if they choose to decode, add 26 - key to each letter. Send this program to a friend and message away!
All materials on the site are licensed Creative Commons Attribution-Sharealike 3.0 Unported CC BY-SA 3.0 & GNU Free Documentation License (GFDL)
If you are the copyright holder of any material contained on our site and intend to remove it, please contact our site administrator for approval.
© 2016-2025 All site design rights belong to S.Y.A.