Modern Cryptography: Applied Mathematics for Encryption and Informanion Security (2016)
Appendix A. Implementing Cryptography
This appendix provides brief tutorials for several cryptography products, including those for file/drive and e-mail encryption. It also includes tools to aid in learning cryptography that can provide you with options for implementing cryptography to secure your data. If this book is used as a textbook, the tutorials can be used as labs for the class.
Hard Drive/File Encryption
This section includes tutorials regarding how to use some common tools for encrypting hard drives or individual files. Clearly, government agencies and many businesses store confidential data on computers. The need to encrypt data is not limited to large corporations and government entities, however. Most computer users have some data on their computer that they want to keep confidential, such as financial records or tax returns. Using the following tools, you’ll find that encrypting a file or an entire partition is a very easy task. A variety of drive/file encryption solutions are available, including many free and open source tools.
VeraCrypt
VeraCrypt has the advantage of being available for Macintosh, Linux, and Windows. It is based on the earlier product, TrueCrypt 7.1a. VeraCrypt is open source, and you can download the source code from https://veracrypt.codeplex.com/. VeraCrypt can use AES, Serpent, Twofish, or cascade cryptographic algorithms. For hashing, it can use SHA-256, SHA-512, RIPEMD-160, or Whirlpool.
Note
TrueCrypt was once one of the most widely used open source drive/letter encryption tools available. However, it is no longer supported, so any new security issues are not being patched. VeraCrypt works exactly like TrueCrypt, however, and it can even mount TrueCrypt-encrypted drives.
VeraCrypt has an easy graphical user interface that enables you to create an entire encrypted volume or a specific file. The initial interface is shown in Figure A-1.
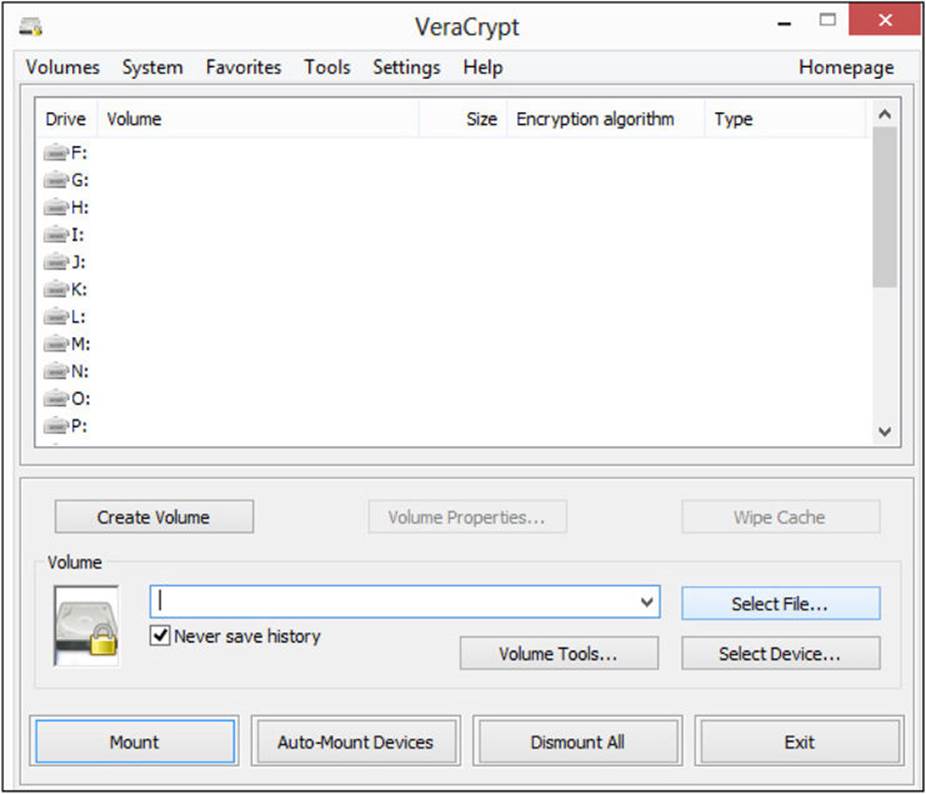
FIGURE A-1 VeraCrypt main screen
To create a volume, click the Create Volume button to launch the Select A VeraCrypt Volume screen, shown in Figure A-2.
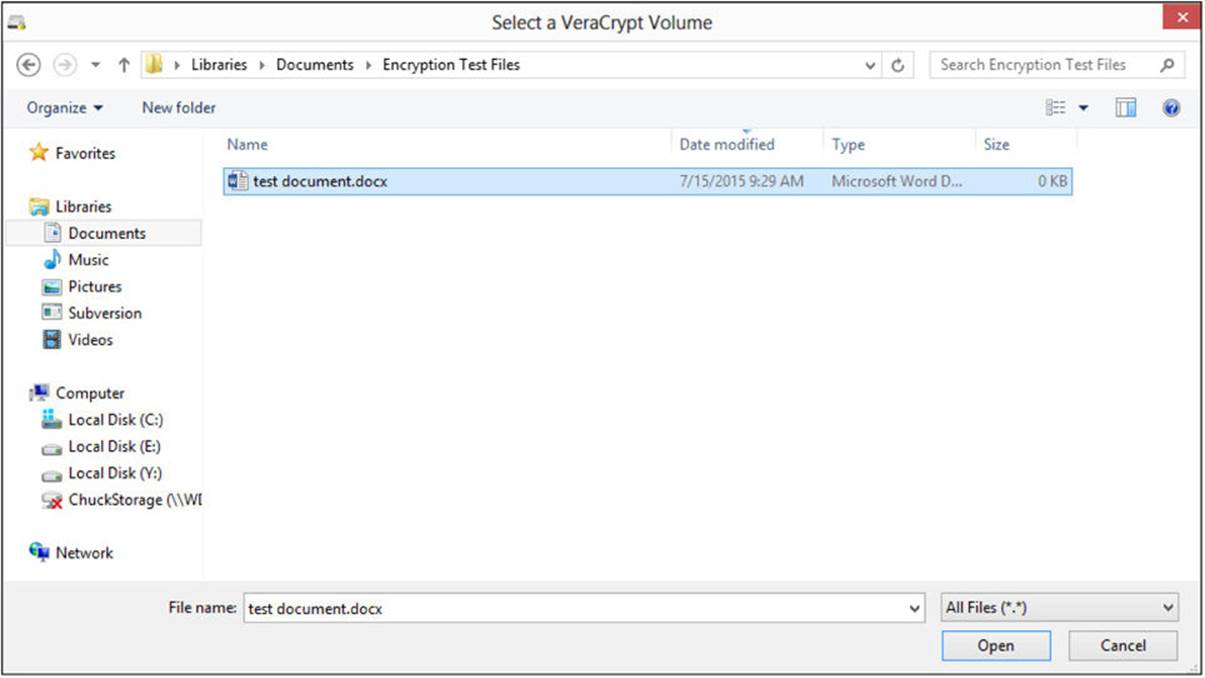
FIGURE A-2 Select a VeraCrypt volume from this screen.
As you go through the process, you will be presented with three options regarding what you wish to create:
![]() Create an encrypted file container. This is recommended for new users.
Create an encrypted file container. This is recommended for new users.
![]() Encrypt a non-system drive. This is a very common option if you want to encrypt a USB external drive.
Encrypt a non-system drive. This is a very common option if you want to encrypt a USB external drive.
![]() Encrypt the system partition. This is not recommended for new users. If an error is encountered, the system drive could be rendered unusable.
Encrypt the system partition. This is not recommended for new users. If an error is encountered, the system drive could be rendered unusable.
Select the first option. Then, in the Volume Type screen, choose to create a standard volume or a hidden volume, as shown in Figure A-3. Then click Next.
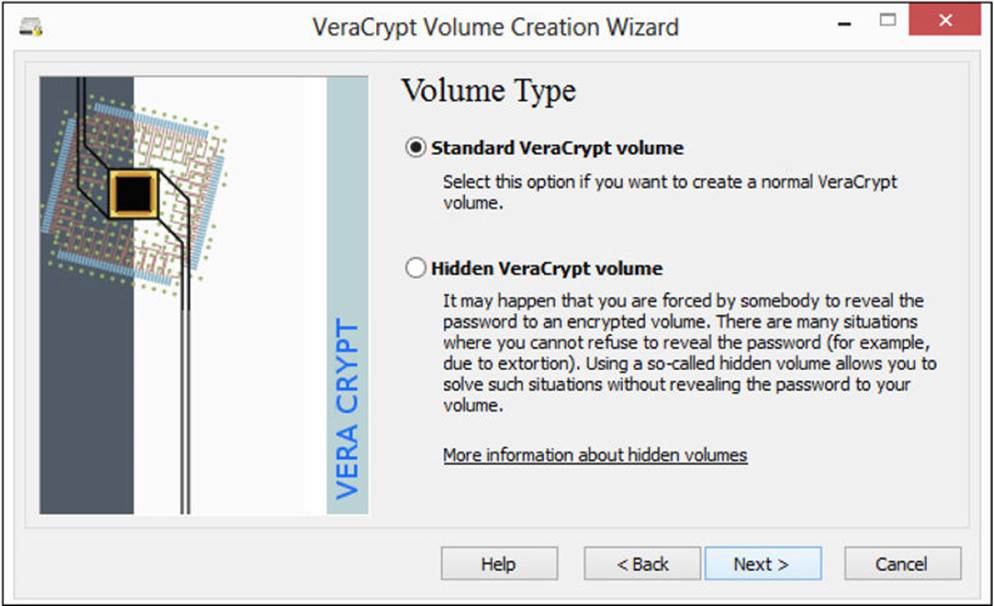
FIGURE A-3 Choose a hidden or standard volume.
Next, in the Volume Location screen, select a file for the encrypted volume, as shown in Figure A-4. Notice that each screen of the encryption wizard includes instructions detailing what a specific step entails. Then click Next.
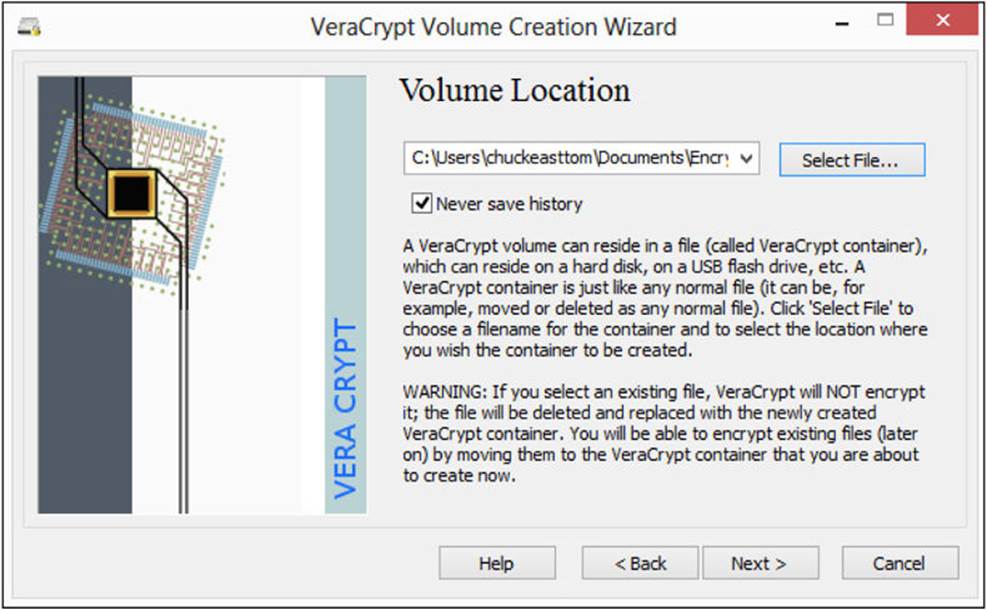
FIGURE A-4 Select a volume file.
In the next screen of the wizard, the Encryption Options screen, shown in Figure A-5, select the specific cryptographic algorithms you want to use. Then click Next.
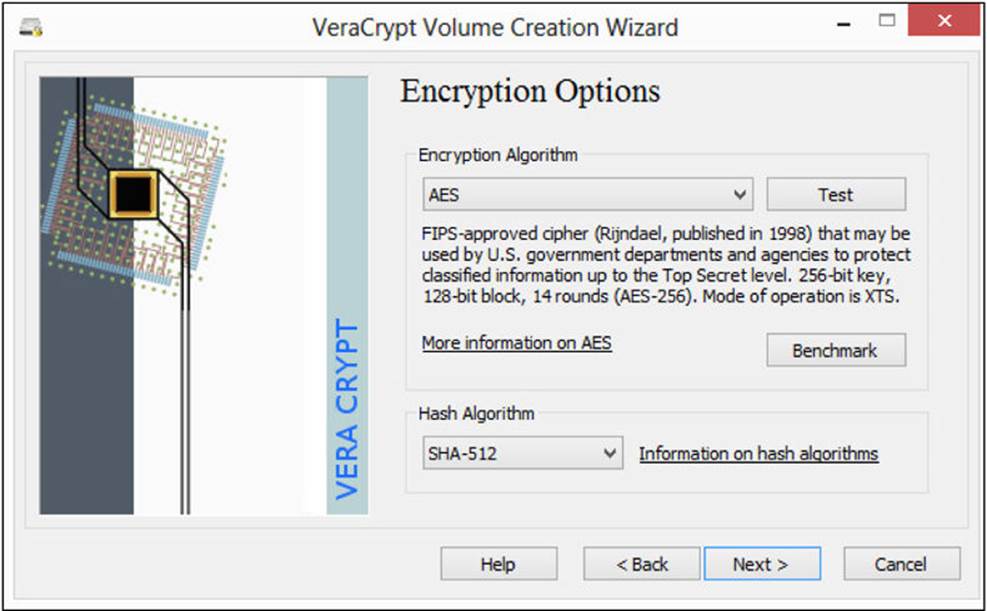
FIGURE A-5 Choose a cryptographic algorithm.
Next, in the Volume Size screen shown in Figure A-6, select the size of the partition you want to create. The amount of free space on the existing partition is displayed to help you choose an appropriate-sized encrypted partition. Then click Next.
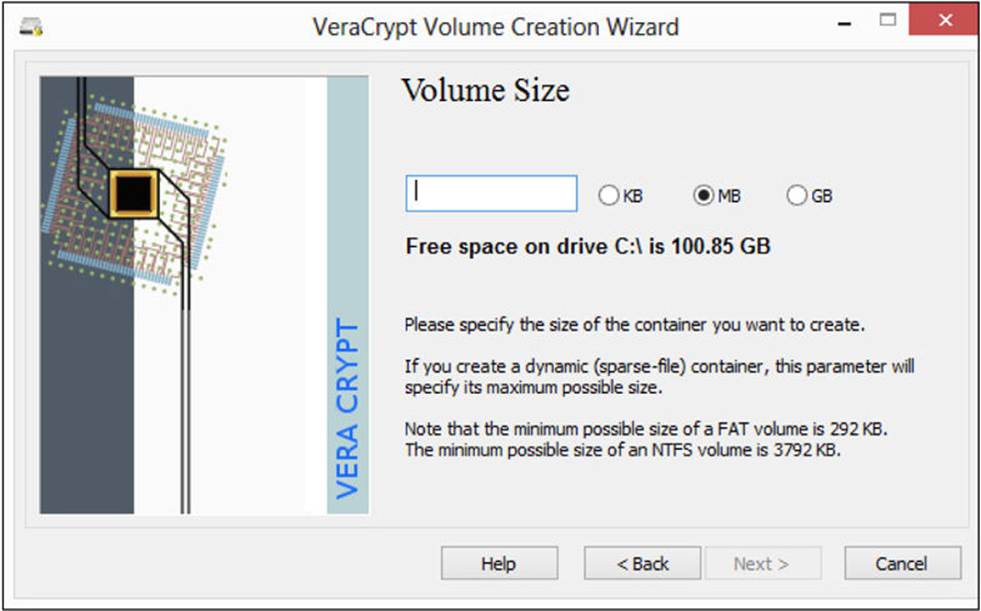
FIGURE A-6 Choose a volume size.
The final step is to type in a password, as shown in Figure A-7.
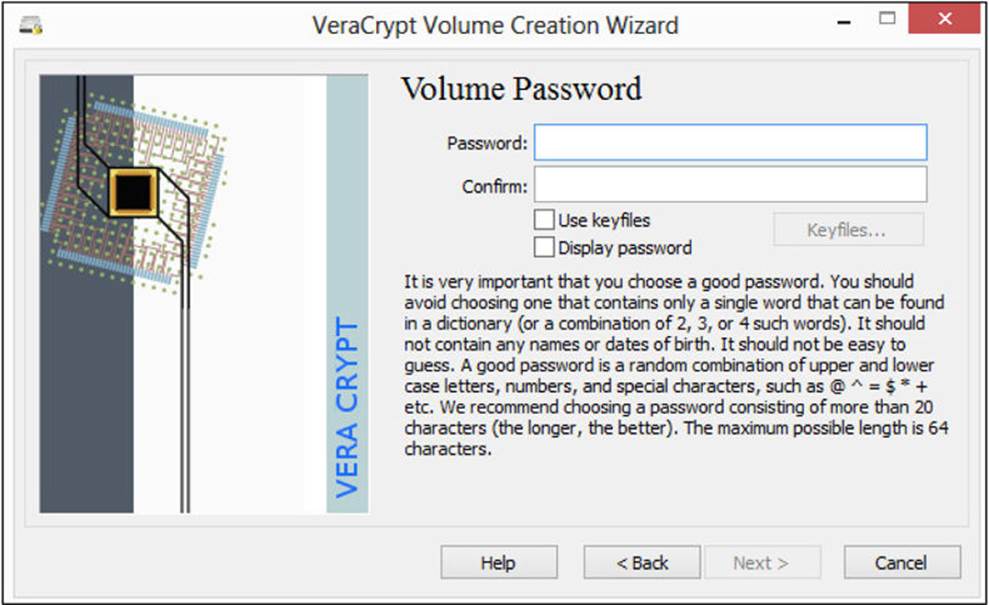
FIGURE A-7 Type a password.
The last step is the most critical step in any drive or file encryption, because this is the weakest point in your drive/file encryption. No matter how secure the cryptographic algorithm, or how robust the pseudo-random-number generator (PRNG) used to generate cryptographic keys, if the password you select is easily bypassed, the rest of the security measures become moot points.
Note
Of course, you must select a password that you can remember. I often suggest that people use passwords that are phrases that they can easily remember, with some letters changed to numbers or symbols. For example, you might select “I like cheeseburgers from burger king,” since that is 32 characters long, but change it like so:
!l!k3ch33s3burg3rsfromburg3rk!ng
This is a very strong password that should be resistant to any attempts to break it.
VeraCrypt PRNG
As you know from this book, the selection of a pseudo-random-number generator to generate keys is a critical element in implementing cryptographic solutions. VeraCrypt provides extensive details on their PRNG implementation. According to the VeraCrypt documentation:
The VeraCrypt random number generator (RNG) is used to generate the master encryption key, the secondary key (XTS mode), salt, and keyfiles. It creates a pool of random values in RAM (memory). The pool, which is 320 bytes long, is filled with data from the following sources:
Mouse movements
Keystrokes
Mac OS X and Linux: Values generated by the built-in RNG (both /dev/ random and /dev/urandom)
MS Windows only: MS Windows CryptoAPI (collected regularly at 500-ms interval)
MS Windows only: Network interface statistics (NETAPI32)
MS Windows only: Various Win32 handles, time variables, and counters (collected regularly at 500-ms interval)
Before a value obtained from any of the above-mentioned sources is written to the pool, it is divided into individual bytes (e.g., a 32-bit number is divided into four bytes). These bytes are then individually written to the pool with the modulo 28 addition operation (not by replacing the old values in the pool) at the position of the pool cursor. After a byte is written, the pool cursor position is advanced by one byte. When the cursor reaches the end of the pool, its position is set to the beginning of the pool. After every 16th byte written to the pool, the pool mixing function is automatically applied to the entire pool (see below).
Pool Mixing Function
The purpose of this function is to perform diffusion.[2] Diffusion spreads the influence of individual “raw” input bits over as much of the pool state as possible, which also hides statistical relationships. After every 16th byte written to the pool, this function is applied to the entire pool.
Description of the pool mixing function:
1. Let R be the randomness pool.
2. Let H be the hash function selected by the user (SHA-512, RIPEMD-160, or Whirlpool).
3. l = byte size of the output of the hash function H (i.e., if H is RIPEMD-160, then l = 20; if H is SHA-512, l = 64)
4. z = byte size of the randomness pool R (320 bytes)
5. q = z / l – 1 (e.g., if H is Whirlpool, then q = 4)
6. R is divided into l-byte blocks B0…Bq.
For 0 ≤ i ≤ q (i.e., for each block B) the following steps are performed:
1. M = H (B0 || B1 || … || Bq) [i.e., the randomness pool is hashed using the hash function H, which produces a hash M]
2. Bi = Bi ^ M
3. R = B0 || B1 || … || Bq
For example, if q = 1, the randomness pool would be mixed as follows:
1. (B0 || B1) = R
2. B0 = B0 ^ H(B0 || B1)
3. B1 = B1 ^ H(B0 || B1)
4. R = B0 || B1
Generated Values
The content of the RNG pool is never directly exported (even when VeraCrypt instructs the RNG to generate and export a value). Thus, even if the attacker obtains a value generated by the RNG, it is infeasible for him to determine or predict (using the obtained value) any other values generated by the RNG during the session (it is infeasible to determine the content of the pool from a value generated by the RNG).1
This detailed description of the PRNG provides you with enough information to evaluate whether or not the PRNG is sufficiently random for your security needs. The online documentation provided by VeraCrypt has even more details.
Windows EFS
Because Windows is such a common operating system, it is appropriate to examine the Encrypted File System (EFS), which was introduced in Windows 2000. At that time it was present in all Windows editions. Since Windows XP, EFS has been available only in Windows Professional or better editions of the operating system.
The original (Windows 2000) process of EFS is described by Howard Wright in a SANS Institute research document:
The first time a file is encrypted, EFS assigns the user a public key/private key pair for the account. If a certificate service is available, it will generate the keys. For standalone systems, EFS will generate a self-signed certificate. When a file is encrypted, EFS generates a random number for that file called a file encryption key (FEK). The FEK is used to encrypt the file contents using data encryption standard (DESX). DESX is an enhanced version DES. Basically, DESX processes the data three times with three different keys. The FEK is stored on the system and is encrypted using the user’s public key with the RSA public key encryption algorithm.2
The encrypted FEK is stored in the $EFS alternate data stream of the encrypted file. To decrypt the file, EFS uses the private key that matches the EFS digital certificate (used to encrypt the file) to decrypt the symmetric key that is stored in the $EFS stream. The process is actually very simple:
1. Right-click the file or folder you want to encrypt, and then select properties to open the Properties dialog shown in Figure A-8.
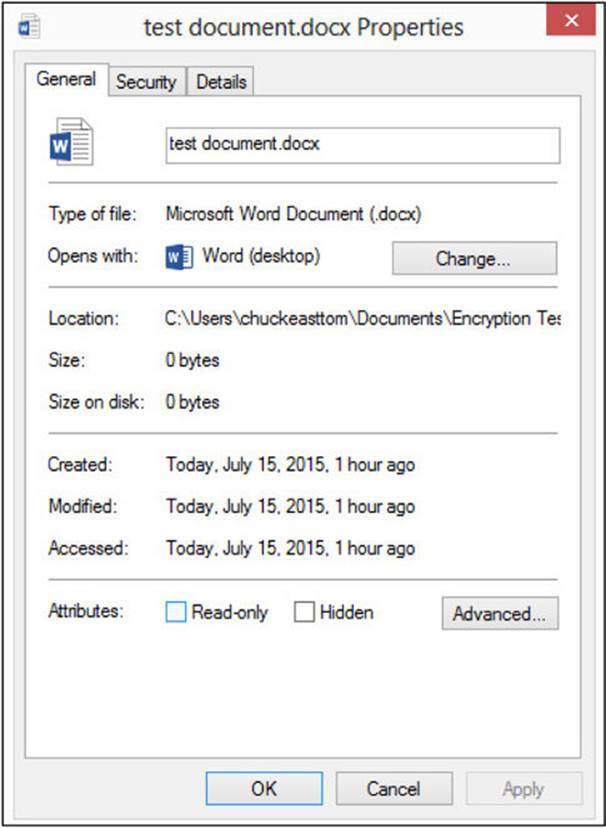
FIGURE A-8 EFS File Properties dialog
2. Click the Advanced button, and on the Advanced Attributes screen, select the Encrypt Contents To Secure Data check box, as shown in Figure A-9. Then click OK.
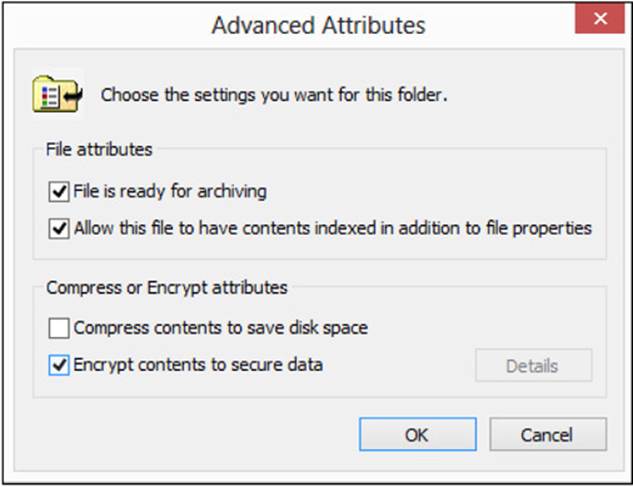
FIGURE A-9 Encrypting the EFS file
The filename will then appear in green in Windows Explorer.
Note
It is important that you back up the EFS key. If you do not, and the system crashes, you will have no way to recover the key and decrypt the files, and the data that was encrypted will be permanently lost. Fortunately, Microsoft provides easy-to-follow instructions on how to back up the key at http://windows.microsoft.com/en-us/windows/back-up-efs-certificate#1TC=windows-7.
BitLocker
Microsoft expanded on the concept of EFS with Windows 7 and included BitLocker, which can encrypt the entire drive. It is available only in Windows Professional Edition or better versions. It uses AES in cipher block chaining mode, and the user can select either a 128- or 256-bit key. You’ll find BitLocker in the Control Panel, under System and Security, as shown in Figure A-10.
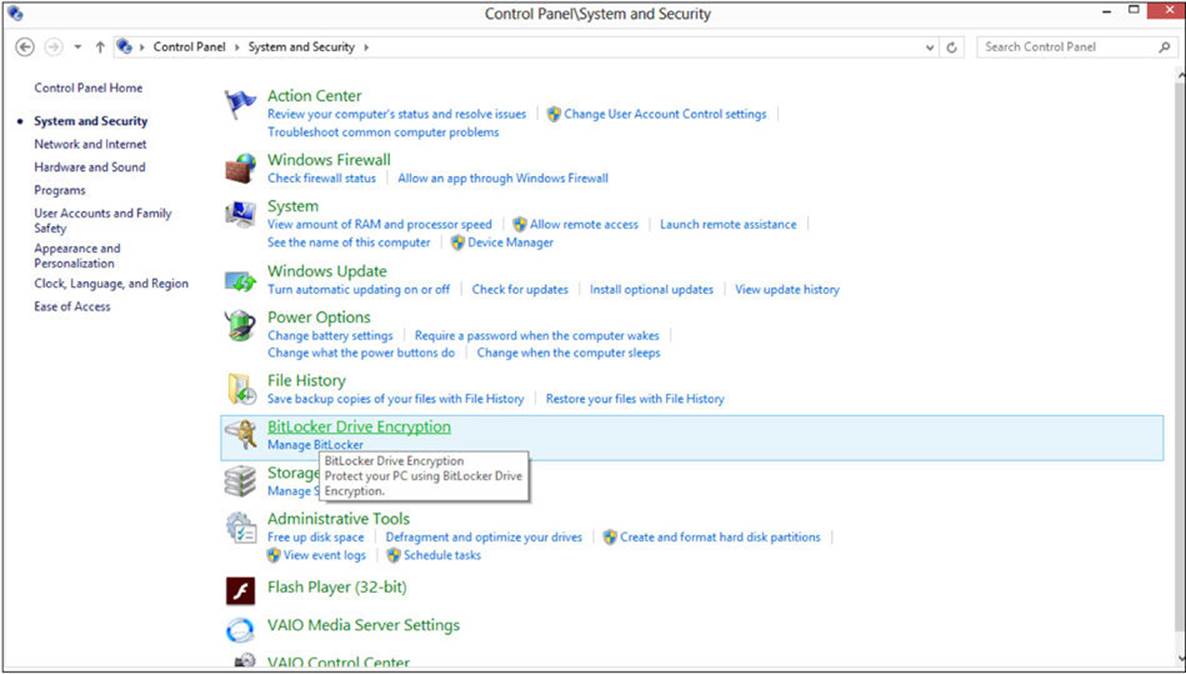
FIGURE A-10 Windows BitLocker
The process of encrypting the drive is very simple: The user selects the option to Turn On BitLocker, as shown in Figure A-11.
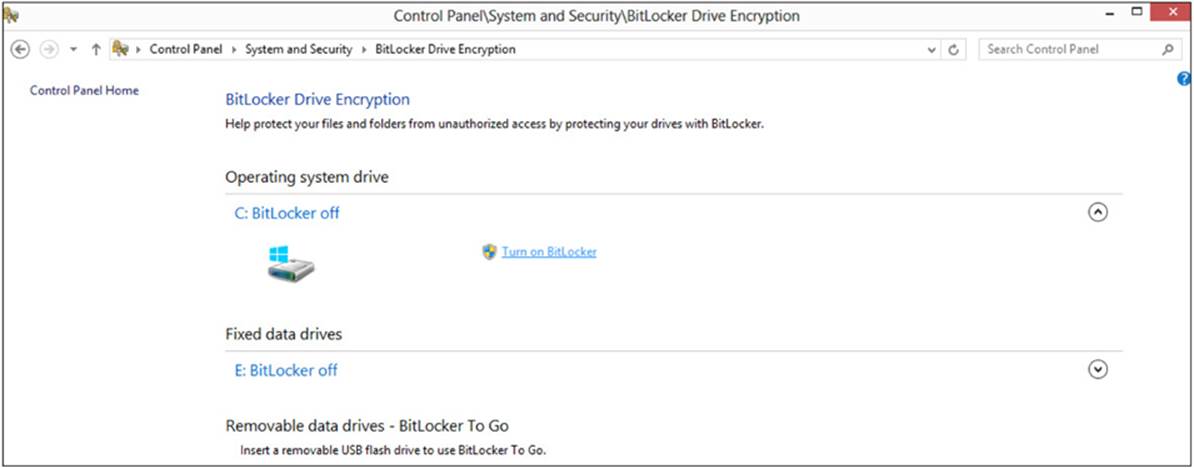
FIGURE A-11 Turning on BitLocker
Note
As with EFS, it is important that you back up the BitLocker key and keep that backup in a secure location. Microsoft details several options for backing up this key at https://technet.microsoft.com/en-us/library/dd875529(v=ws.10).aspx.
AxCrypt
AxCrypt is for Windows only, but it is an open source product available at www.axantum.com. It has some similarities to EFS, but it contains some features that are not included with EFS. For example, AxCrypt allows the user to create self-decrypting files that decrypt based on the password only. AxCrypt supports the use of AES 128-bit for encryption and SHA1 128-bit for cryptographic hashes.
After AxCrypt is installed on the computer, you can right-click any file or folder, and the AxCrypt menu will provide several options, as shown in Figure A-12.
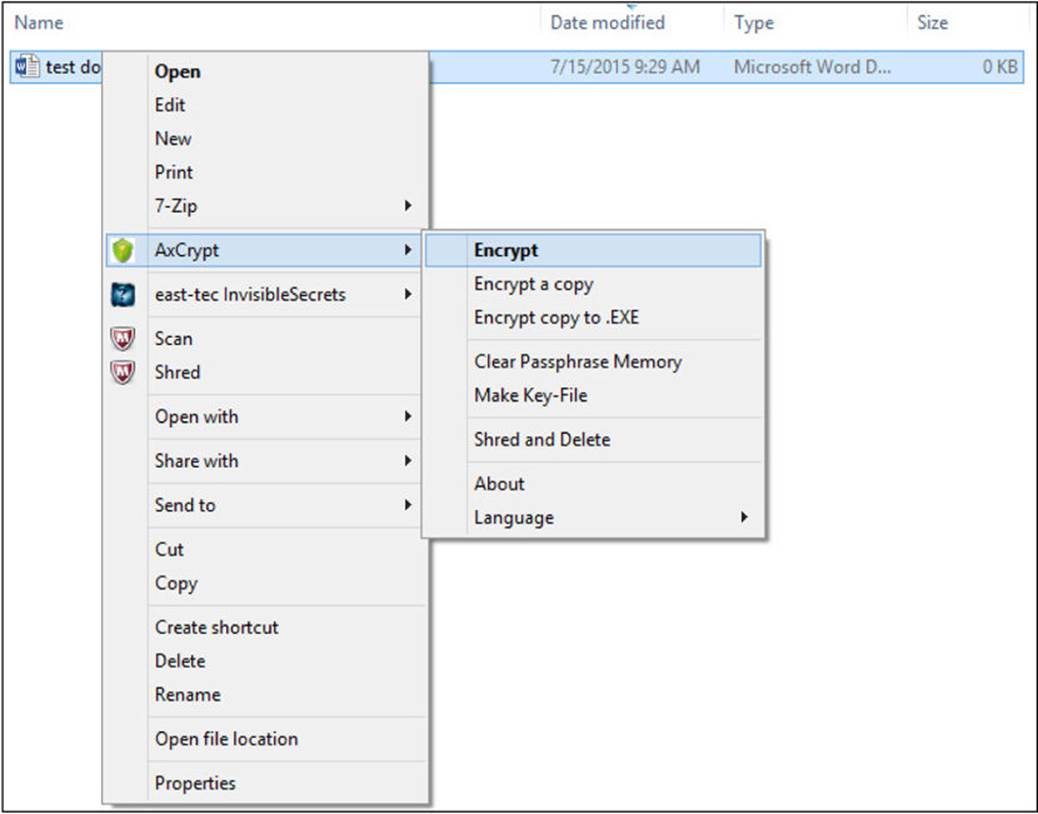
FIGURE A-12 AxCrypt menu options
If you select the Encrypt option, you will be prompted to select a passphrase for decrypting the file. It is important that this passphrase be long enough and complex enough to deter attempts to break or guess it—but also something you can remember. The passphrase dialog is shown inFigure A-13.
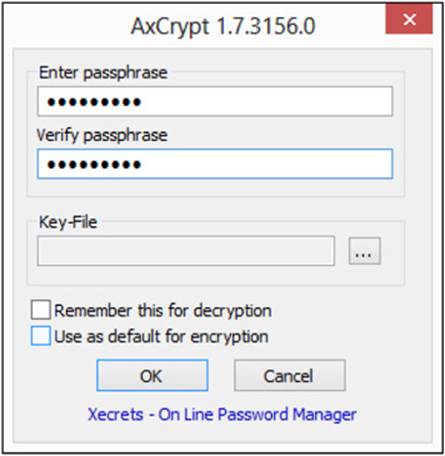
FIGURE A-13 AxCrypt encryption passphrase dialog
The file extension for encrypted filenames changes to .axx to indicate that they are encrypted with AxCrypt. The option to encrypt to an executable functions in exactly the same manner, but it generates an executable that can be sent to anyone. The recipient then needs only the passphrase to decrypt the file. AxCrypt can encrypt entire folders as well as individual files.
FileVault
FileVault is the encryption tool available with the Mac OS. It is roughly equivalent to Microsoft BitLocker. FileVault was first introduced with Mac OS X version 10.3. It uses AES with a 256-bit key to encrypt data. It is relatively easy to use and well documented in the Apple online documentation at https://support.apple.com/en-us/HT204837.
Much like BitLocker, the user merely needs to turn on FileVault, as shown in Figure A-14. It will then encrypt that user’s file directories. Each user of a Macintosh can choose whether or not to use FileVault. Although FileVault does not provide full drive encryption, as BitLocker does, it is easy to use and will encrypt all of a user’s files, including sensitive files.
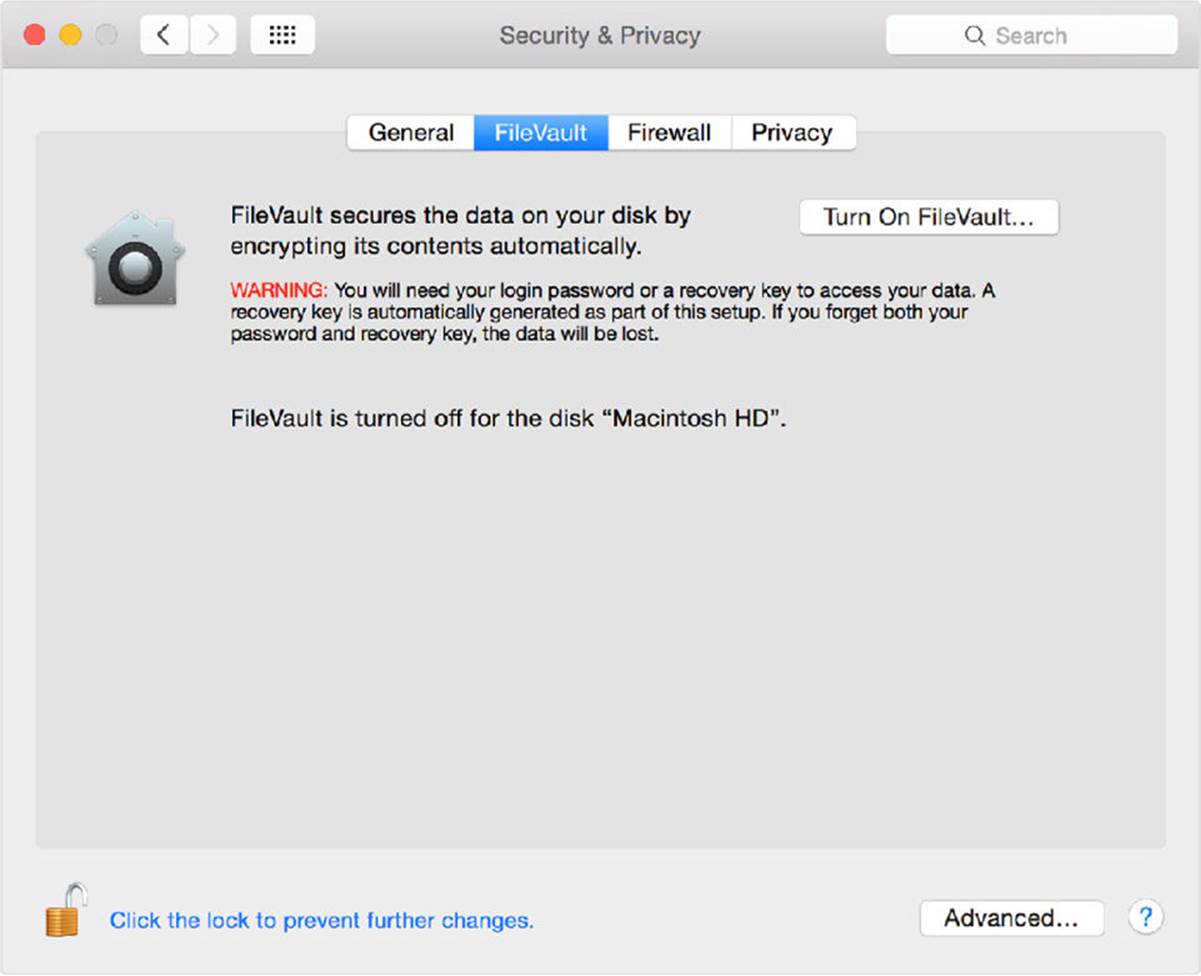
FIGURE A-14 Turning on FileVault
AES Crypt
AES Crypt is free and open source and can run on Windows, Linux, Macintosh, and even some mobile device operating systems. Java and C# libraries enable programmers to integrate AES Crypt into programs. AES Crypt uses 256-bit AES to encrypt files.
Once you’ve installed AES Crypt, you can right-click any file and AES Encrypt will be displayed as an option, as shown in Figure A-15.
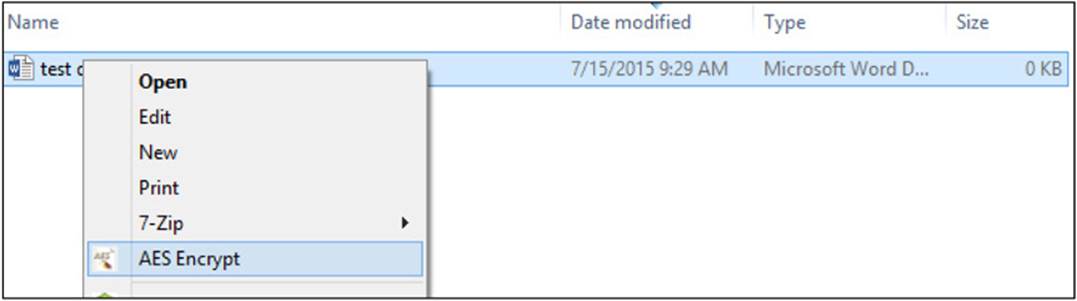
FIGURE A-15 AES Crypt options
After choosing AES Crypt, you’ll be prompted to select a password for the file, as shown in Figure A-16. As with other drive/file encryption tools, the selection of a password is important because this can be the weakest link in cryptographic security.
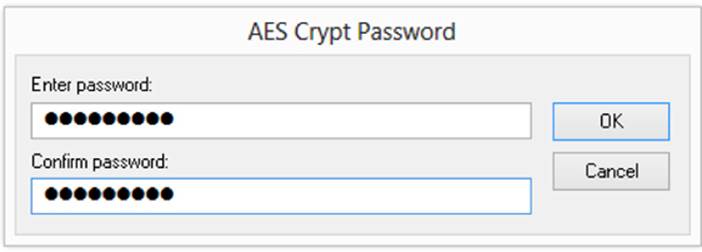
FIGURE A-16 AES Crypt Password dialog
AES Crypt has two issues: it encrypts only files, not folders; and it actually makes a copy of the file and encrypts that. You then need to delete the unencrypted original.
E-mail Encryption
Most of us occasionally need to send e-mails that contain confidential information. If the only issue is a confidential attachment, then you can use one of the previously described file encryption tools to encrypt the file before attaching it. However, if the e-mail itself needs to be encrypted, that presents a different challenge. In this section you will learn about several different options for encrypting e-mail.
In general, most e-mail options center around PGP (Pretty Good Privacy), which was described in detail earlier in this book. If you use a different e-mail client and find that none of the solutions discussed in this section work for you, you can simply perform an Internet search for “PGP” and the name of your e-mail client. It is virtually certain that there will be a PGP solution for your e-mail software.
Encrypting in Outlook
Microsoft Outlook provides some built-in support for encryption. This, however, is not PGP-based and depends on the user having digital certificates, usually a X.509 certificate. Before you can send encrypted messages, both you and the recipient need to have a digital certificate that can be exchanged. Use the following steps to encrypt an e-mail.
1. First, open a message you want to send and click the Options tab at the top of the message screen. The Options Ribbon appears. Click the arrow beside More Options, as shown next:
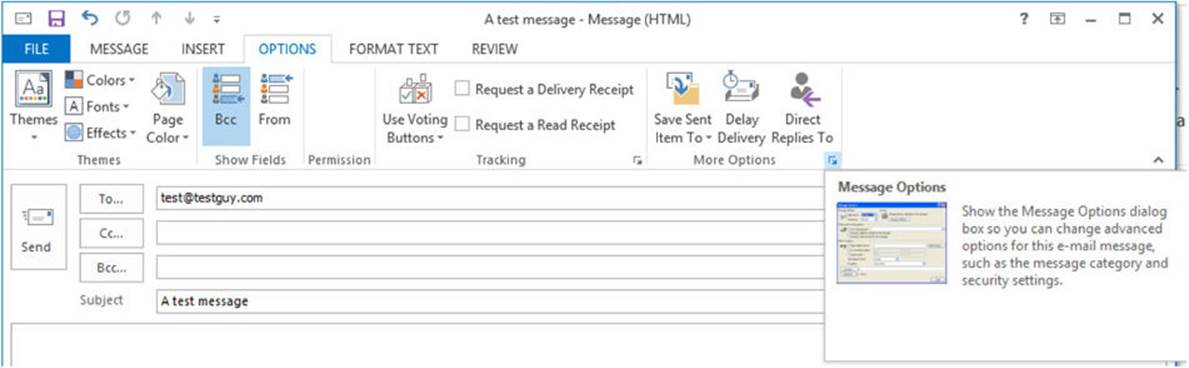
2. In the Properties dialog, click the Security Settings button, as shown next:
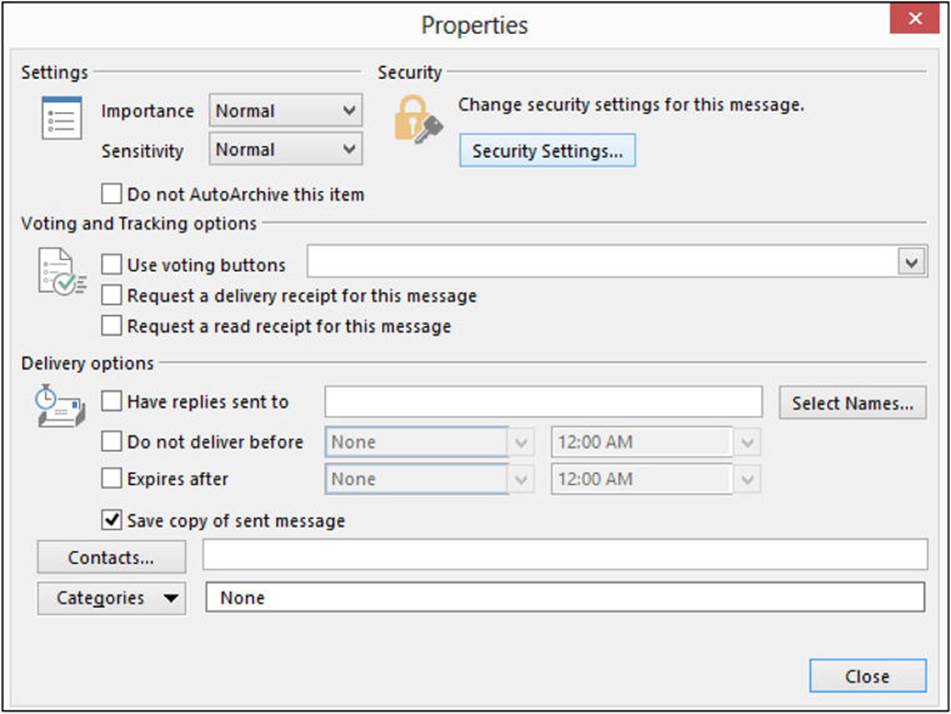
3. In the Security Properties dialog, select the Encrypt Message Contents And Attachments check box and click OK. This opens the Signing Data With The Your Private Exchange Key dialog. After you click Close, and the message is encrypted, digitally signed, and ready to send.
Encrypting with gpg4o
gpg4o is an e-mail add-in that provides PGP encryption for Microsoft Outlook. You can get a free trial or purchase the product at www.giepa.de/products/gpg4o/?lang=en. During the installation, you will be prompted either to use a current key pair (asymmetric cryptography) on your machine or to generate a new key pair, as shown in Figure A-17.
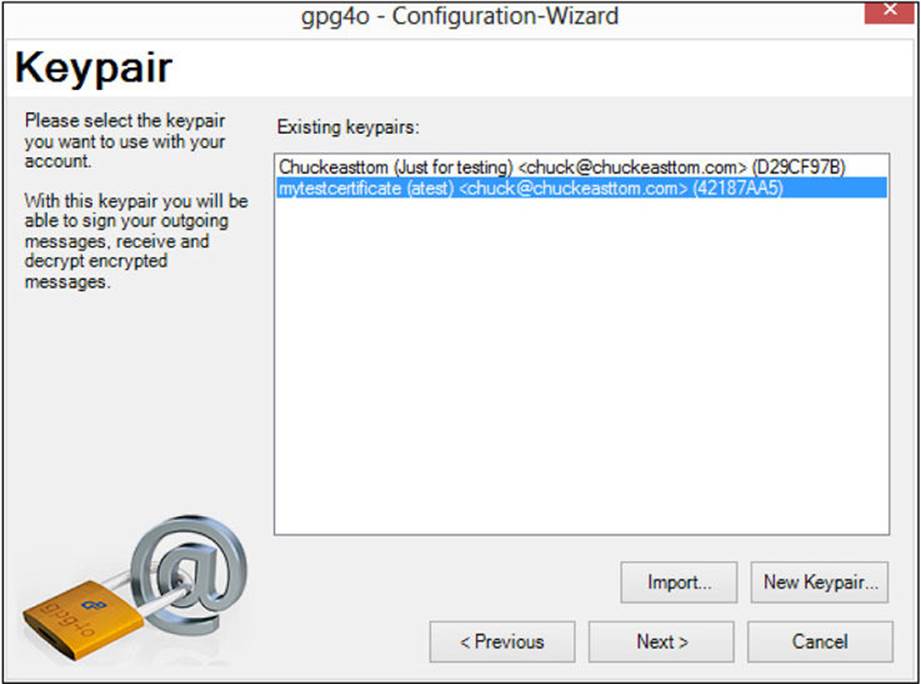
FIGURE A-17 gpg4o configuration
Note you can have many different key pairs if you want. For example, if you have multiple e-mail accounts, you might want to use a different key pair with each account. During the configuration process, a test e-mail will be sent to yourself. Once you’ve installed gpg4o, an additional option will be provided in Outlook that enables you to configure gpg4o, including generating and managing keys, as shown in Figure A-18.

FIGURE A-18 gpg4o Key Management
When you’re creating key pairs, gpg4o asks you to create a password/passphrase to access encrypted messages. It then evaluates the strength and security of your password/passphrase, as shown in Figure A-19.
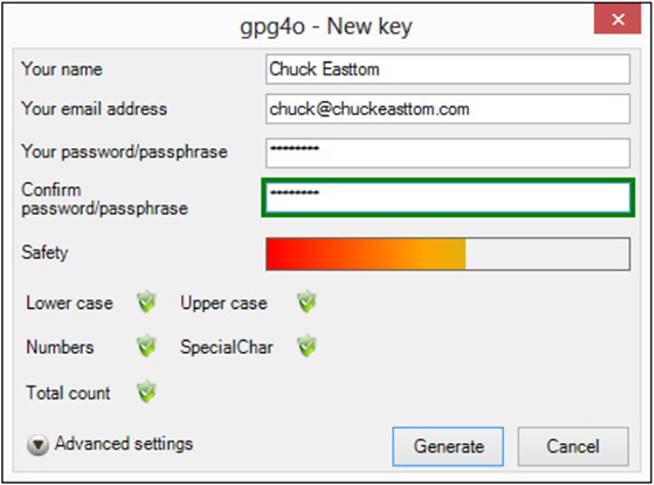
FIGURE A-19 gpg4o password/passphrase strength
You can use the default settings, which are currently RSA with a 4096-bit key, or you can configure the settings yourself, as shown in Figure A-20.
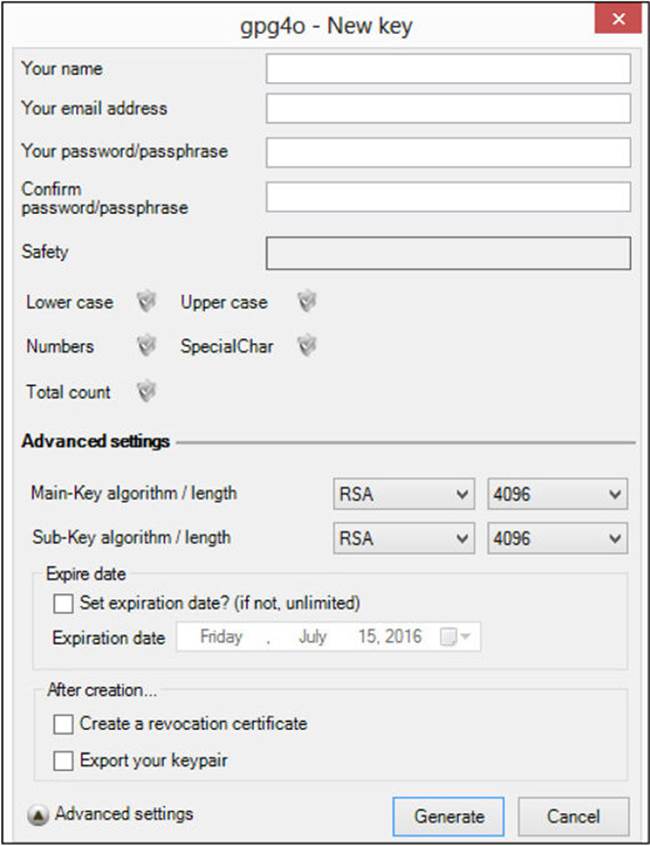
FIGURE A-20 gpg4o cryptography settings
After gpg4o is installed and configured, when you create a new e-mail message you are provided with several options: You can choose not to encrypt the e-mail, encrypt just the attachment, or encrypt the entire e-mail. You can also choose whether or not to digitally sign the e-mail, and whether or not to send your public key along to the recipient in the screen shown in Figure A-21.
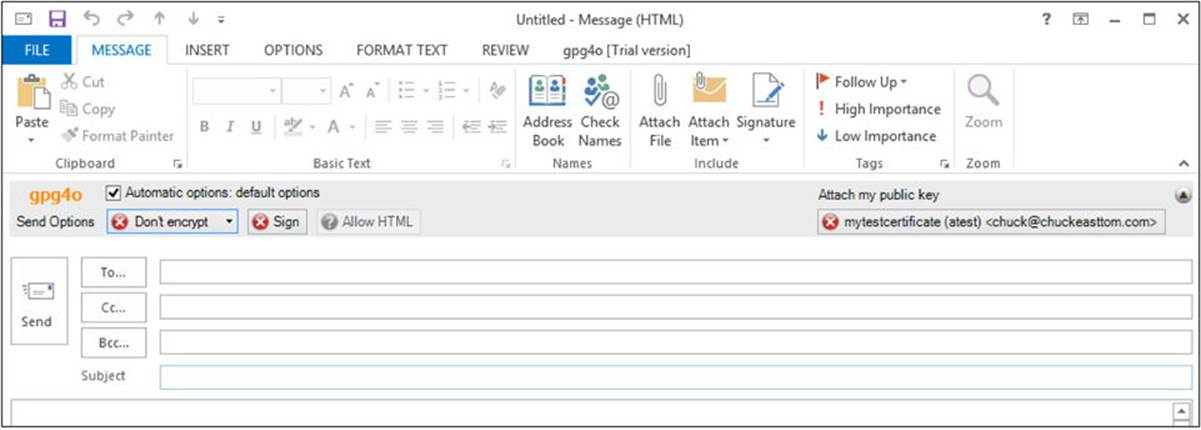
FIGURE A-21 gpg4o e-mail options
The e-mail will then be encrypted and unreadable to anyone who does not have access to the encryption keys needed to decrypt, as shown in Figure A-22.
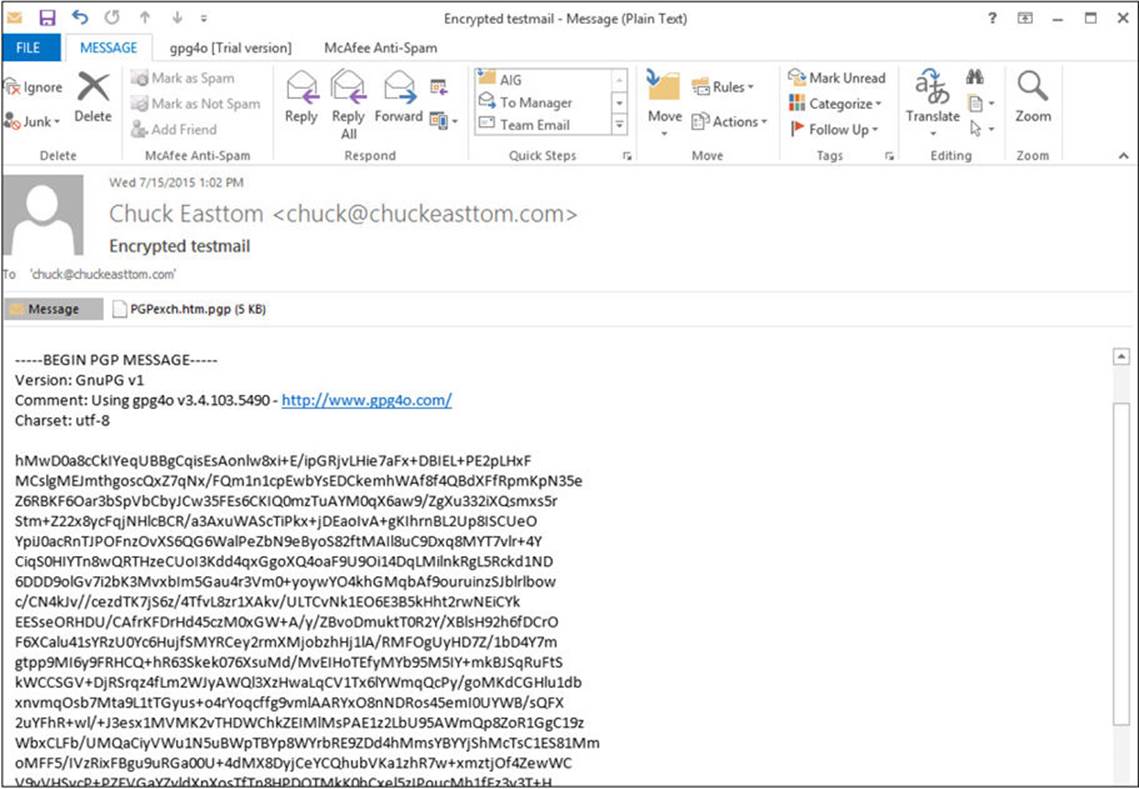
FIGURE A-22 gpg4o encrypted text
Usually, you will want to import the recipient’s public key in order to encrypt messages to that recipient. gpg4o gives you the option of sending your public key to whomever you want. The product is not free, so after the trial period is over you must purchase the product to continue using it. It is relatively inexpensive and, as you have seen, easy to use.
CrypTool
Some software tools can assist you in learning more about cryptography, and perhaps the most widely known of these tools is CrypTool, which was briefly introduced earlier in this book.
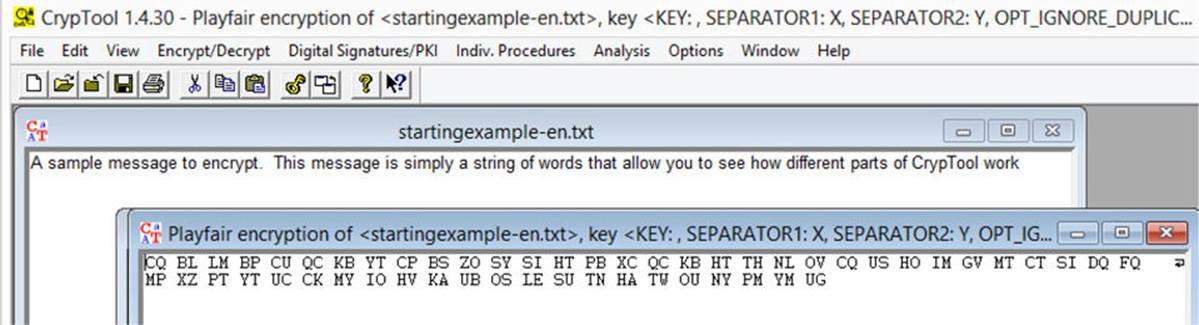
The main screen of CrypTool provides a number of options. The text message shown in Figure A-23 will be used throughout this tutorial.
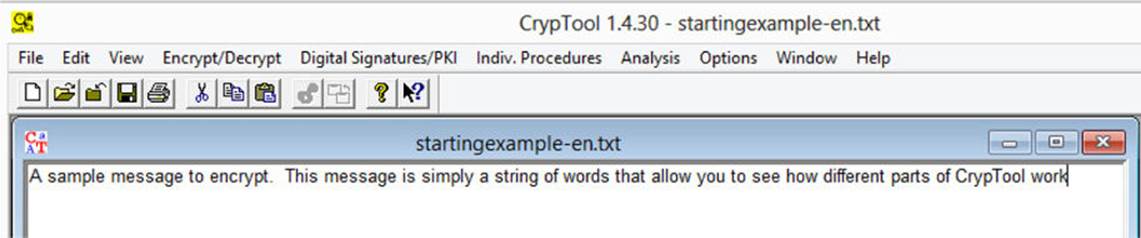
FIGURE A-23 CrypTool main screen and sample text
From the Encrypt/Decrypt menu, you can select from a wide range of classic ciphers, modern symmetric ciphers, and modern asymmetric ciphers, as shown next:
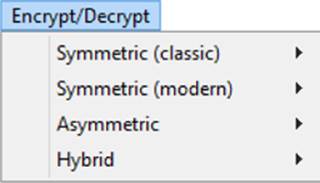
Regardless of the type of cipher you select, you can experiment with cryptographic algorithms and look at the output produced. For example, if you select Encrypt/Decrypt | Symmetric (Classic) | Playfair, the cipher text produced is shown next:
If you select Encrypt/Decrypt | Symmetric (Modern), regardless of which algorithm is selected, you need to supply a key in hexadecimal format, as shown next:
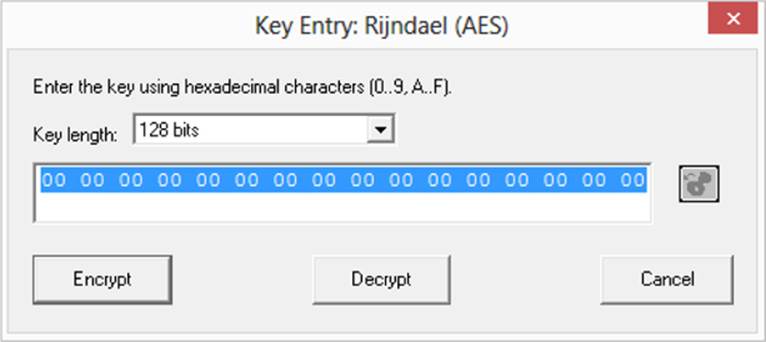
For testing and learning purposes, the randomness of the key is not critical, and you can type in any key you want, simply creating one as needed to see how the encrypted text is produced.
The next menu, Digital Signatures/PKI, and its options are shown here:
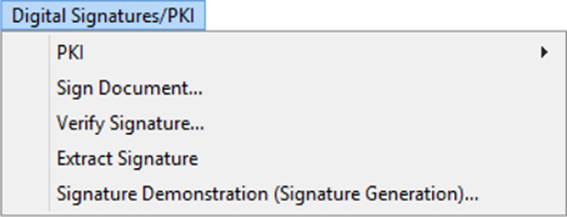
Most of the options in this menu demonstrate a specific function, but they are not very useful as learning tools. The last option, Signature Demonstration (Signature Generation), is very useful for educational purposes, however. It provides an interactive demo of the digital signature process, as shown in Figure A-24.
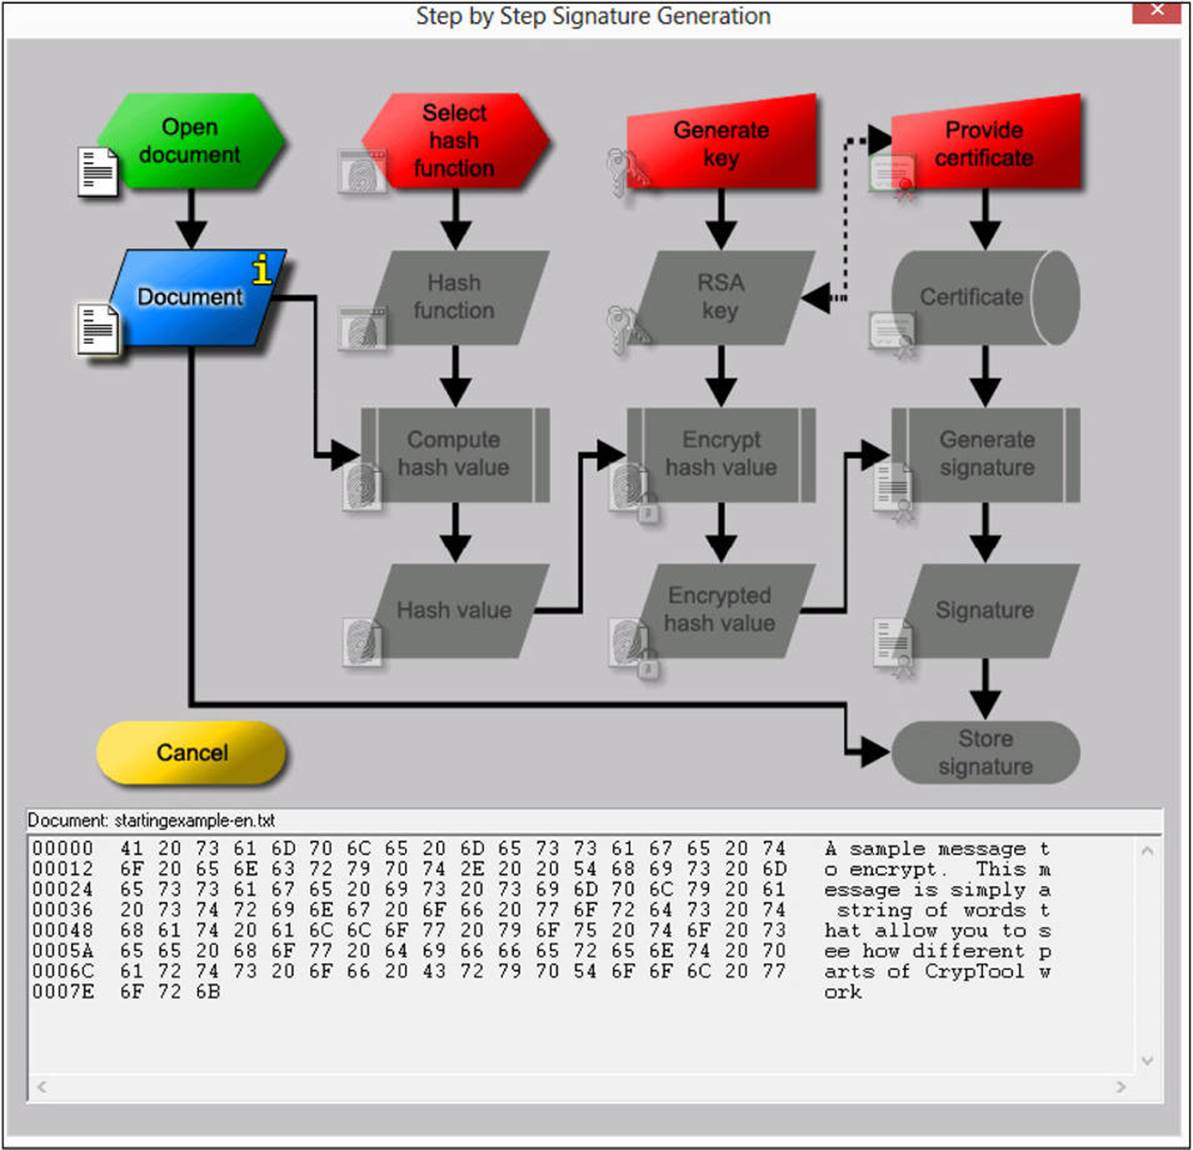
FIGURE A-24 CrypTool digital signature demonstration
Each step in the process is interactive. After you click a step, you are prompted to enter the required data or make a selection (such as which hashing algorithm to use), and then the process proceeds to the next step. This useful demonstration gives you a step-by-step tutorial on the digital signature process.
The next menu option, Indiv. Procedures, includes several sub-options, described briefly here:
![]() Hash Provides a tool that will compute a hash using one of several algorithms including MD4, SHA1, SHA2, and RIPEMD.
Hash Provides a tool that will compute a hash using one of several algorithms including MD4, SHA1, SHA2, and RIPEMD.
![]() RSA In addition to providing tools to generate RSA keys and prime numbers, this interesting option includes an RSA demonstration, which enables you to provide or generate the prime numbers for RSA, then generate keys, and then encrypt a text using RSA.
RSA In addition to providing tools to generate RSA keys and prime numbers, this interesting option includes an RSA demonstration, which enables you to provide or generate the prime numbers for RSA, then generate keys, and then encrypt a text using RSA.
![]() Protocols Allows you to experiment with demonstrations of various protocols, such as Diffie-Hellman. The Diffie-Hellman demonstration is also an interactive process, as shown in Figure A-25.
Protocols Allows you to experiment with demonstrations of various protocols, such as Diffie-Hellman. The Diffie-Hellman demonstration is also an interactive process, as shown in Figure A-25.
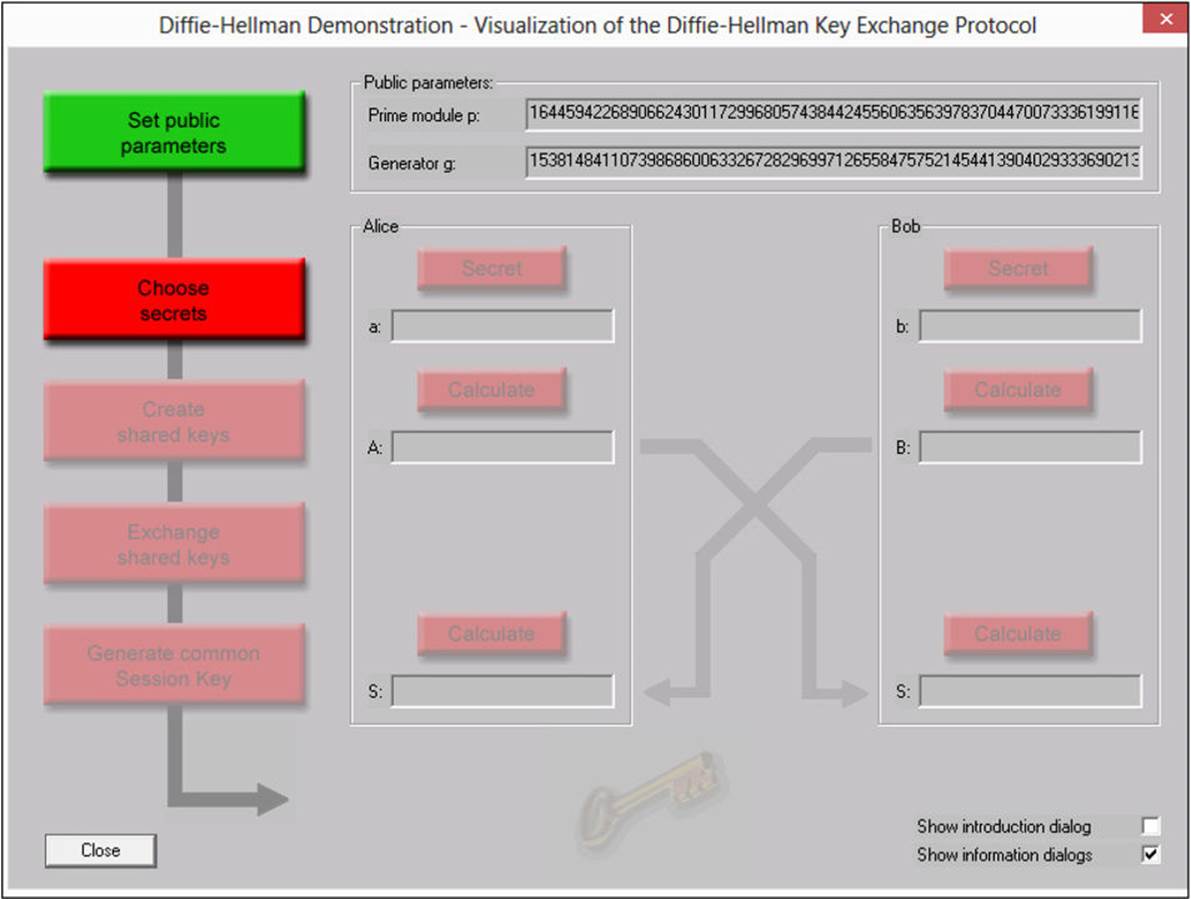
FIGURE A-25 CrypTool Diffie-Hellman demonstration
![]() The Chinese Remainder Theorem This is of interest in factoring numbers. This mathematical process is demonstrated with three separate demonstration options.
The Chinese Remainder Theorem This is of interest in factoring numbers. This mathematical process is demonstrated with three separate demonstration options.
![]() Visualization of Algorithms This option is very important for learning cryptographic algorithms. It contains visual demonstrations of several algorithms including DES, Vigenère, and AES. The Rijndael animation is particularly interesting and useful. It walks the user through the entire Rijndael algorithm as a flash animation. You can see one screen of that animation in Figure A-26.
Visualization of Algorithms This option is very important for learning cryptographic algorithms. It contains visual demonstrations of several algorithms including DES, Vigenère, and AES. The Rijndael animation is particularly interesting and useful. It walks the user through the entire Rijndael algorithm as a flash animation. You can see one screen of that animation in Figure A-26.
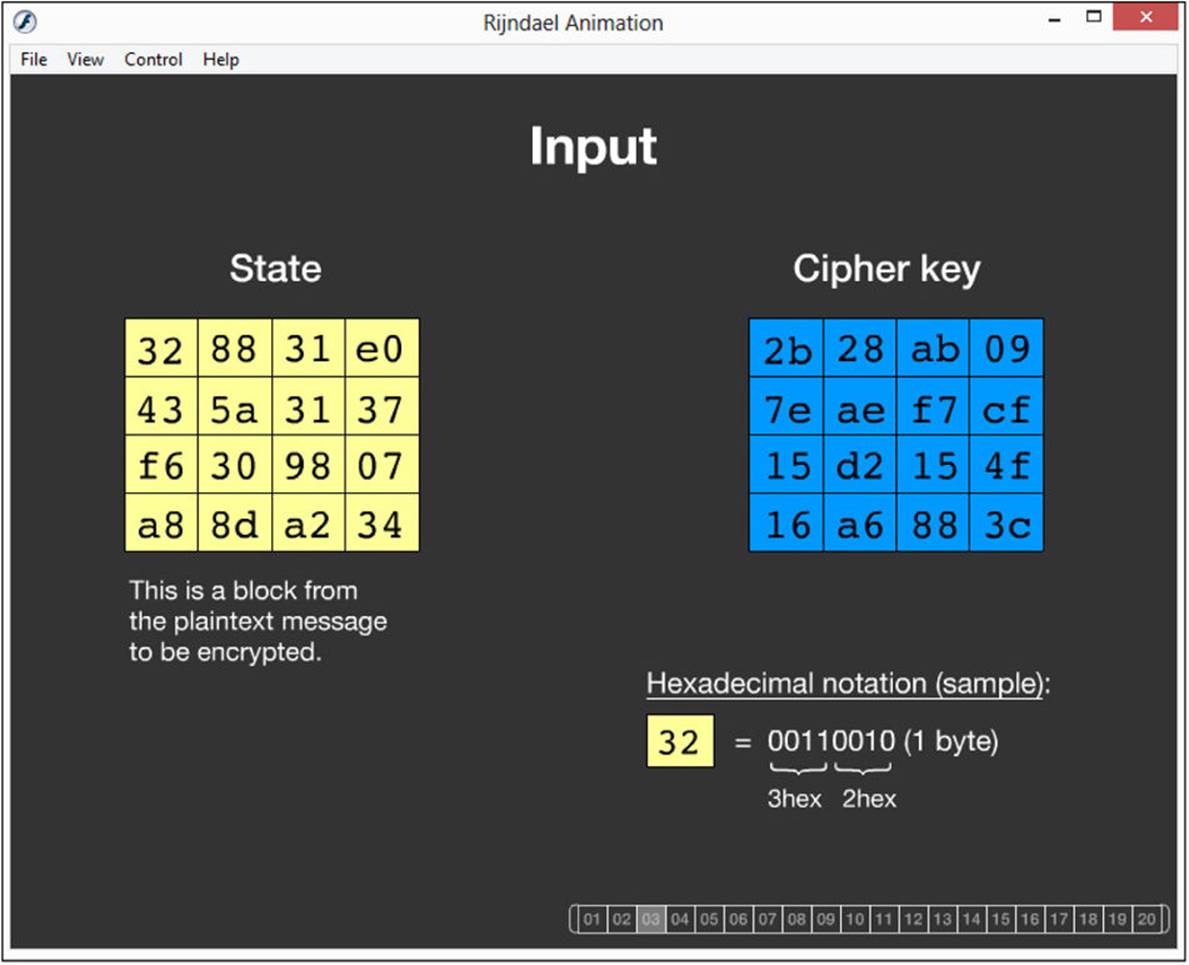
FIGURE A-26 CrypTool Rijndael demonstration
![]() The Secret Sharing Demonstrates one option for generating a shared secret. It is not as educationally useful as the other options.
The Secret Sharing Demonstrates one option for generating a shared secret. It is not as educationally useful as the other options.
![]() Tools Provides several tools, including random number generation, compression tools, and password quality measures. The random number generator is particularly useful because it provides a clear demonstration of several PRNGs. For example, a random number generator is shown inFigure A-27.
Tools Provides several tools, including random number generation, compression tools, and password quality measures. The random number generator is particularly useful because it provides a clear demonstration of several PRNGs. For example, a random number generator is shown inFigure A-27.
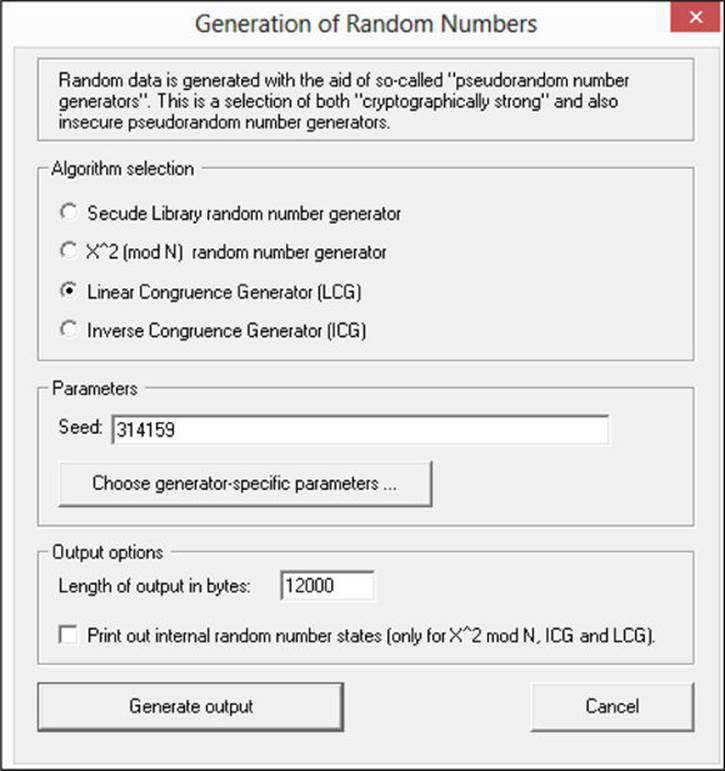
FIGURE A-27 CrypTool random number generator
The last two tools provide games to help you learn basic number theory concepts. Each can be used to augment your learning of some small elements of number theory.
The next major menu option is the Analysis menu. Several analysis tools are included here. I will introduce you to a few that are the most educational.
Begin by encrypting the sample text shown in Figure A-23 with the Caesar cipher. Then proceed by choosing Encrypt/Decrypt | Symmetric (Classic) | Cipher Text Only | Caesar. You will notice that several screens show up, each providing a different analysis. The final screen provides the tool’s best guess at the key, and will then decrypt the message for you. With ciphers such as Caesar, the decrypting is always quite fast and very accurate.
Another useful analysis tool is the Analyze Randomness tool, which offers a number of randomness tests, many of which were described earlier in this book. You can see these options next:
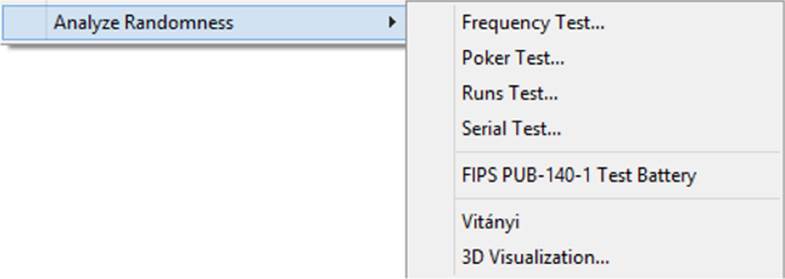
As you can see, CrypTool is an excellent resource for those who are learning cryptography. It includes several demonstration tools that can help you visualize algorithms, digital signatures, and more. The various tools for analyzing randomness are quite useful when you’re evaluating a PRNG.
Endnotes
1. VeraCrypt, “Random Number Generator,” https://veracrypt.codeplex.com/wikipage?title=Random%20Number%20Generator.
2. H. Wright, “The Encrypting File System: How Secure Is It?” 2001, www.sans.org/reading-room/whitepapers/win2k/encrypting-file-system-secure-it-211.
All materials on the site are licensed Creative Commons Attribution-Sharealike 3.0 Unported CC BY-SA 3.0 & GNU Free Documentation License (GFDL)
If you are the copyright holder of any material contained on our site and intend to remove it, please contact our site administrator for approval.
© 2016-2026 All site design rights belong to S.Y.A.