Malware Analyst’s Cookbook and DVD: Tools and Techniques for Fighting Malicious Code (2011)
Chapter 3. Malware Classification
One of the most common tasks malware analysts perform is initial triage, or classification of unknown content. Classification ranges from the simple, as in detecting the type of file, to the more complex, such as detecting the percent similarity with other samples in the wild and determining which behaviors are shared between variants of the same malware.
This chapter shows how to use various free and open source tools such as ClamAV and YARA to quickly identify and classify malware. There are a number of companion Python scripts in this chapter for converting from one signature format to another, scanning files with multiple antivirus products, creating your own heuristic-based malicious file detector, and so on.
Classification with ClamAV
ClamAV is an open source antivirus engine owned by Sourcefire, the makers of the Snort intrusion-detection engine. ClamAV offers a fast and flexible framework for detecting malicious code and artifacts. The uses for ClamAV include incident response, forensics, and general malware protection or malware discovery. You can also use ClamAV to supplement or replace existing antivirus scanners on desktops, file servers, mail servers, and other places you might use an antivirus scanner.
ClamAV has a number of built-in scanning capabilities for handling archive files, packed executables, HTML, mail, and other data types. This functionality allows you to write signatures and scan a broad range of content without writing specific parsers. Additionally, the ClamAV package includes the libclamav library as well as the command-line executables that interface with it. To keep signatures updated, you can invoke the command-line tool called freshclam manually or install it as a cron job.
The most recent production-quality version of ClamAV is available from http://www.clamav.net/download/sources/, but you can also use a package manager to install it. On your Ubuntu machine, type the following commands:
$ apt-get install clamav clamav-freshclam
Alternatively, if you’d like to use a more cutting-edge snapshot, you can download the latest development release using git, like this:
$ git clone http://git.clamav.net/clamav-devel.git
Sourcefire maintains the latest documentation for ClamAV at http://www.clamav.net/doc/latest/. This documentation provides an excellent reference for writing ClamAV signatures. Additionally, the next few recipes discuss real-world scenarios where modifying ClamAV signatures allows you to detect samples not already included in the ClamAV database.
The primary detection databases in ClamAV include:
· MD5 hashes of known malicious binaries (stored in .hdb)
· MD5 hashes of PE sections (stored in .mdb)
· Hexadecimal signatures (stored in .ndb)
· Archive metadata signatures (stored in .zmd or .rmd)
· White list database of known good files (stored in .fp)
Starting with ClamAV version 0.96, archive metadata signatures are deprecated. However, the developers added the following new features:
· Matching signatures (stored in .ldb)
· Icon signatures (stored in .ldb)
· PE metadata strings (stored in .ldb or .ndb)
· Container metadata (stored in .cdb)
These detection capabilities provide a strong framework for you to build new signatures and detect specific characteristics in a collection of unknown, potentially malicious files.
Recipe 3-1: Examining Existing ClamAV Signatures
The ClamAV signatures by default exist in compressed, binary files. You may want to see the criteria for an existing rule so that you can confirm or deny a false positive, or build a modified version of an existing signature. Luckily, ClamAV comes with a tool that allows you to decompress and inspect the signatures in its database.
Typically, the ClamAV signatures exist in /usr/local/share/clamav or /usr/lib/clamav on Linux systems. You should expect to find main.cld and daily.cld (alternately they may have .cvd extensions). The main.cld file contains the primary base of signatures and daily.cld contains incremental daily updates.
To unpack the signature files, use sigtool, which is provided with the ClamAV source package.
$ sigtool -u /var/lib/clamav/main.cld
$ sigtool –u /var/lib/clamav/daily.cld
These commands should result in the creation of the following files:
$ ls –Al
total 61684
-rw-r--r-- 1 root root 17992 Jul 7 20:49 COPYING
-rw-r--r-- 1 root root 288 Jul 7 20:49 daily.cfg
-rw-r--r-- 1 root root 25622 Jul 7 20:49 daily.db
-rw-r--r-- 1 root root 16556 Jul 7 20:49 daily.fp
-rw-r--r-- 1 root root 6891 Jul 7 20:49 daily.ftm
-rw-r--r-- 1 root root 967678 Jul 7 20:49 daily.hdb
-rw-r--r-- 1 root root 1425 Jul 7 20:49 daily.hdu
-rw-r--r-- 1 root root 12542 Jul 7 20:49 daily.idb
-rw-r--r-- 1 root root 686 Jul 7 20:49 daily.ign
-rw-r--r-- 1 root root 397 Jul 7 20:49 daily.ign2
-rw-r--r-- 1 root root 1790 Jul 7 20:49 daily.info
-rw-r--r-- 1 root root 7249 Jul 7 20:49 daily.ldb
-rw-r--r-- 1 root root 4908268 Jul 7 20:49 daily.mdb
-rw-r--r-- 1 root root 37626 Jul 7 20:49 daily.mdu
-rw-r--r-- 1 root root 317426 Jul 7 20:49 daily.ndb
-rw-r--r-- 1 root root 13229 Jul 7 20:49 daily.ndu
-rw-r--r-- 1 root root 4064 Jul 7 20:49 daily.pdb
-rw-r--r-- 1 root root 3687 Jul 7 20:49 daily.wdb
-rw-r--r-- 1 root root 8689 Jul 7 20:49 daily.zmd
-rw-r--r-- 1 root root 4731085 Jul 7 20:49 main.db
-rw-r--r-- 1 root root 13533 Jul 7 20:49 main.fp
-rw-r--r-- 1 root root 1502569 Jul 7 20:49 main.hdb
-rw-r--r-- 1 root root 901 Jul 7 20:49 main.info
-rw-r--r-- 1 root root 34403973 Jul 7 20:49 main.mdb
-rw-r--r-- 1 root root 15994685 Jul 7 20:49 main.ndb
-rw-r--r-- 1 root root 217 Jul 7 20:49 main.zmd
Now, when you scan a file and ClamAV detects it, you can search the uncompressed signature file to see the byte pattern that produced the alert.
$ clamscan 76ed99f6a94c542f81bf6af35d829744
76ed99f6a94c542f81bf6af35d829744: XF.Sic.E FOUND
----------- SCAN SUMMARY -----------
Known viruses: 726064
Engine version: 0.96
Scanned directories: 0
Scanned files: 1
Infected files: 1
Data scanned: 2.72 MB
Data read: 1.36 MB (ratio 2.00:1)
Time: 3.680 sec (0 m 3 s)
$ grep "XF.Sic.E" *
daily.ndb:XF.Sic.E:2:*:2a2a536574204f75722056616c75657320616e642050\
617468732a2a??00002a2a416464204e657720576f726b626f6f6b\
2c20496e666563742049742c205361766520497420417320426f6f\
6b312e
If you convert this hexadecimal signature into ASCII (there’s an online conversion tool here: http://www.dolcevie.com/js/converter.html), you’ll find the signature is looking for the following content.
**Set Our Values and Paths**???**Add New Workbook, Infect It, Save It As Book1.
You could modify this signature to detect similar variations of the string, such as one that ends with Book2 instead of Book1. However, you cannot include your modified signatures in the default signature database. Any signature that you modify and save must go into a new database file that we’ll discuss more in the next recipe.
Recipe 3-2: Creating a Custom ClamAV Database
![]()
You can find supporting material for this recipe on the companion DVD.
Writing new signatures for a custom ClamAV database allows you to scan for patterns that the default signatures do not currently detect. This recipe shows how ClamAV’s flexible syntax for writing signatures allows you to write anything from simple hexadecimal signatures to complex logical signatures.
ASCII Signatures (Hello World)
To create a simple ASCII-based signature, you can use sigtool to convert the text to hexadecimal. To use sigtool for this purpose, you execute it with the --hex-dump flag. sigtool expects you to provide your text via STDIN and it outputs the hexadecimal version to STDOUT. One common mistake when entering text via STDIN is failing to remove the trailing line feed character, which is appended when you hit the enter key.
The example that follows shows how you can use sigtool to generate the hexadecimal output of hello world. Note the trailing 0a that must be removed to match the original pattern.
$ sigtool --hex-dump
hello world
68656c6c6f20776f726c640a
To convert this into a usable signature, you need to format it according to the ClamAV signature syntax. Starting with ClamAV version 0.96, the basic signature format is deprecated in favor of an extended signature format. This recipe focuses only on the extended signature format, which consists of the following four fields separated by colons:
SigName:Target:Offset:HexadecimalSignature
The SigName field is a unique, descriptive name for your signature. The Target parameter can be any of the following values.
0 = Any file type
1 = Windows PE
2 = OLE (e.g. Office, VBA)
3 = Normalized HTML
4 = E-mail file (e.g. RFC822 message, TNEF)
5 = Image files (e.g. jpeg, png)
6 = ELF
7 = Normalized ASCII file
8 = Unused
9 = Mach-O binaries (new in v0.96)
Assuming you want to detect any file containing the hello world string, you would create the following signature:
TestHelloWorld:0:*:68656c6c6f20776f726c64
This is a simple example using text, but you can create more complex signatures using wildcards. For example, let’s say you want to detect hello and world but not necessarily with a space between them. You can do that with the following signature, which uses a wildcard (??) to match any byte value between 0 and FF.
TestHelloWorldAnySeparator:0:*:68656c6c6f??776f726c64
You can also specify that hello world occur at a fixed offset within a file.
TestHelloWorldOffset45:0:45:68656c6c6f20776f726c64
And you can also specify a range of offsets. The following signature will only trigger if ClamAV detects hello world between offsets 200 and 250 of a file.
TestHelloWorldBetween200And250:0:200,50:68656c6c6f20776f726c64
Finally, you can specify that hello and world occur in that order at any offset in the file.
TestHelloWorldAnyDistance:0:*:68656c6c6f*776f726c64
To use these signatures, you need to place them into a file with a .ndb extension. For convenience, we’ve added the signatures to a file named clam_helloworld.ndb on the book’s DVD. For testing purposes, we created a file with the following content:
"This is the data I'd like to scan looking for 'hello' and 'world'.
I'm not picky how close these words are together."
When using the custom signature database, you need to specify its location on the command line for clamscan using the -d flag.
$ clamscan -d clam_helloworld.ndb test.txt
test.txt: TestHelloWorldAnyDistance.UNOFFICIAL FOUND
----------- SCAN SUMMARY -----------
Known viruses: 5
Engine version: 0.96
Scanned directories: 0
Scanned files: 1
Infected files: 1
Data scanned: 0.00 MB
Data read: 0.00 MB (ratio 0.00:1)
Time: 0.015 sec (0 m 0 s)
Note that any time you create and use a signature that is not in the project signature base, it will display with the extension .UNOFFICIAL. ClamAV adds this extension to any signatures that are not in the default project signature set. If you have multiple custom databases, you can place all of the .ndb files into a directory and call clamscan with the –d DIRNAME argument.
Binary Signatures (Shellcode)
With the basic building blocks that we’ve discussed thus far, you can detect more complicated malicious artifacts, such as shellcode. For example, consider the following disassembly of shellcode from a malicious Microsoft Office document:
Offset Instruction Byte codes
00000000 xor ecx,ecx 33c9
00000002 mov cx,0x147 66b94701
00000006 xor byte [edx+ecx],0xe9 80340ae9
0000000A loop 0xfffffffc e2fa
0000000C jmp 0xc eb0a
You can use the byte code values to create a binary signature, like this:
ShellcodeXOR:0:*:33c966b9470180340ae9e2faeb0a
This signature detects the specific shellcode block but fails to detect shellcode with different length values in CX, or different XOR mask values. You can broaden your signature by inserting wildcards for the length value, XOR mask, and jump length. Here is the final signature:
shellcode_xor:0:*:33c966b9????80340a??e2??eb
This signature detects shellcode that performs the following list of actions:
· zeroes-out the CX register (33c9)
· moves a length into CX (66b9????)
· uses XOR to modify the data located at [edx+ecx] (80340a??)
· loops back to start (e2??)
· executes a jump to the resultant data (eb) when the loop is complete
Effectively, this signature detects the following pseudocode, which matches any pattern of activity without regard to specific values.
xor ecx, ecx
mov cx, ??
xor byte [edx+ecx], ??
loop ??
jmp ??
To use this signature, you can simply add it to your custom signature database (.ndb file) and use the -d parameter with clamscan.
Logical Signatures (New in v0.96)
One of the most powerful new features in recent versions of ClamAV is the capability to understand complex signatures based on logical expressions. This capability allows you to write signatures where you need to include optional values or only trigger alerts when multiple conditions are met. The format for logical signatures is:
SigName;Target;Expression;Sig0;Sig1;..;SigN
The SigName and Target fields have the same meaning as we described when discussing the extended signature format. The Expression field consists of a logical expression where each signature is represented by its index value. Thus, the number 0 refers to Sig0 and the number 1 refers to Sig1 and so on. Each signature can be combined with the logical operators OR (|) and AND (&). Further, by using the =, <, and > operators, you can control the number of occurrences of each signature that must be found in a file before producing an alert. For example, the expression (0>5)&(1=3) will trigger an alert when signature 0 occurs more than five times and signature 1 matches exactly three times.
Using the original hello world example, you can write a signature to detect the presence of both hello and world without regard to their ordering or position.
HelloWorldLogic;Target:0;0&1;68656c6c6f;776f726c64
This signature has two sub-signatures, 68656c6c6f (hello) and 776f726c64 (world), and a logical expression, 0&1. The values 0 and 1 represent the indices of the sub-signatures. You should also specify a file type target value of 0 that results in the scanning of any file type.
For a more realistic example, consider malware that uses code injection to execute within another process. One common way malware performs code injection is detectable using the following criteria:
· The WriteProcessMemory and CreateRemoteThread strings: These are names of API functions used to perform the injection.
· The SeDebugPrivilege string: The name of the debug system privilege, which a process must enable before calling either of the above API functions.
· A string such as iexplore.exe or explorer.exe: The name of the target process.
Logically, you can express this scenario by looking for any executable with either the string iexplore.exe or explorer.exe, both WriteProcessMemory and CreateRemoteThread strings, and the string SeDebugPrivilege. In other words, you want to match:
("iexplore" | "explorer.exe") & \
("WriteProcessMemory" & "CreateRemoteThread" & "SeDebugPrivilege")
Using the logical signature syntax, you could express that as the following rule.
ProcessInjector;Target:1;(0|1)&(2&3&4);696578706c6f72652e6578\
65;6578706c6f7265722e657865;53654465627567507\
26976696c656765;43726561746552656d6f746554687\
2656164;577269746550726f636573734d656d6f7279
This signature is named clam_inject.ldb and it is included on the DVD that accompanies this book. If you want an alert for malware that injects a different target process, then you’ll need to modify the signature. Also, keep in mind this is just a simple example. If the malware is packed, the strings we’re using for detection may not be visible to ClamAV.
Note Also see http://www.clamav.net/doc/webinars/Webinar-Alain-2009-03-04.ppt for additional examples of writing ClamAV signatures.
Classification with YARA
YARA (http://code.google.com/p/yara-project/) is an extremely flexible identification and classification engine written by Victor Manuel Alvarez of Hipasec Sistemas. Using YARA, you can create rules that detect strings, instruction sequences, regular expressions, byte patterns, and so on. Then you can scan files using the command-line yara utility or integrate the scanning engine into your own C or Python tools with YARA’s API. In the next few recipes, we’ll show you how to get started with YARA and we’ll introduce you to other usage scenarios throughout the book.
Recipe 3-3: Converting ClamAV Signatures to YARA
![]()
You can find supporting material for this recipe on the companion DVD.
This recipe provides a script for converting ClamAV signatures to YARA format. Generally, ClamAV is able to perform scans quicker than YARA, so it is not useful to convert all ClamAV signatures. However, it is also not useful to “reinvent the wheel” and manually convert signatures if you need to use them with YARA.
The clamav_to_yara.py script included on the book’s DVD handles the conversion process for you by modifying ClamAV signatures to meet the requirements of YARA. In particular, ClamAV jumps of more than 255 bytes, or where the end of the jump is more than 255 bytes, require special handling. For example, the following ClamAV signature uses {100000-} to indicate that there must be 100,000 or greater bytes between the first sequence of hex bytes and the second sequence of hex bytes.
Trojan.Dropper-554:0:33107:4d5a80000100000004001000ffff0000\
400100000000000040{100000-}646c6c00446c6c43616\
e556e6c6f61644e6f7700446c6c476574436c
In order to convert this signature to YARA format, you must change the {100000-} tag to comply with YARA’s rules. YARA allows a maximum jump of 255 bytes, thus the ClamAV signature must be split into two sequences of hex bytes joined with an AND clause. In addition, the script automatically converts rule names to a YARA-compatible syntax. YARA does not allow non-alphanumeric characters, except the underscore (_), in rule names.
rule Trojan_Dropper_554
{
strings:
$a0 = { 4d5a80000100000004001000ffff0000400100000000000040 }
$a1 = { 646c6c00446c6c43616e556e6c6f61644e6f7700446c6c476574436c }
condition:
$a0 and $a1
}
This rule is less specific than the original ClamAV rule, because the second string could theoretically occur within fewer than 100,000 bytes. Furthermore, the second string could exist after the first string and still trigger a hit. One method of fine-tuning the conversion process involves using YARA’s first occurrence operator (@) in the condition field. If you precede the name of a string with the @ operator, you can get the offset of the first occurrence of the string. For example, @a0 stores the first occurrence of $a0 and @a1 stores the first occurrence of $a1. By using a condition of @a0 < @a1 you can ensure that $a0 exists first. You could also use (@a1 - @a0) >= 10000 to ensure that at least 10,000 bytes are between the two strings.
ClamAV and YARA use the same syntax for wildcards (?? for byte wildcards and (aa|bb|cc) for explicit selection). In these cases, the conversion script does not perform any modifications. The only exception is that YARA does not allow a signature to start with any type of wildcard so the script skips any signature that starts with a wildcard.
The clamav_to_yara.py script requires two parameters, -f for the input file name that must be a ClamAV-formatted signature file and -o for the output file name. Optionally, the script accepts a -s flag to filter the results only to those that match the specified string. Using -s is the recommended use; otherwise, the script will create over 60,000 signatures from the standard ClamAV database. The following command shows how to convert all signatures that contain the term “Agent”:
$ python clamav_to_yara.py -f main.ndb -o clamav.yara -s Agent
[+] Read 61123 lines from main.ndb
[+] Wrote 3894 rules to test
Scanning files using the new clamav.yara rules shows that YARA can properly interpret the converted ClamAV signatures. In the output below, we scanned a directory of files recursively with YARA and started getting hits:
$ yara -r clamav.yara /data/malcode
Trojan_Agent_13844 /data/malcode/mft.exe
Trojan_Agent_78 /data/malcode/file.php
Trojan_Agent_130266 /data/malcode/payload.exe
Recipe 3-4: Identifying Packers with YARA and PEiD
![]()
You can find supporting material for this recipe on the companion DVD.
PEiD1 is a GUI tool for Windows that you can use to detect packers. The PEiD signatures are stored in a plain-text file that you can extend with new signatures and/or parse with your own tools. The syntax for PEiD signatures is very similar to YARA, allowing you to easily use PEiD signatures within YARA. Identifying packers in YARA allows you to leverage the detection from PEiD in a more flexible way. For example, when using YARA as part of a Python script, you could automatically take additional actions if you detect a particular packer.
The YARA project’s wiki2 provides a handful of sample packer rules based on the PEiD database. You can download the default PEiD database from the PEiD website (look for UserDB.zip). Each PEiD rule is in the following format:
[signature name]
signature = hex_signature
ep_only=(true|false)
Here is an example signature:
[$PIRIT v1.5]
signature = B4 4D CD 21 E8 ?? ?? FD E8 ?? ?? B4 51 CD 21
ep_only = true
According to its name, the signature detects files packed with v1.5 of the $PIRIT packer. Setting ep_only to true means that PEiD should only check for the signature at the program’s entry point. Otherwise, PEiD should check for the signature in the entire file. Using the peid_to_yara.py script on the book’s DVD, you can convert the entire PEiD ruleset into a YARA-compatible rule file. Here is an example of using the script:
$ python peid_to_yara.py -f UserDB.TXT -o packer.yara
The resulting signatures in the packer.yara file will look like the following:
rule PIRITv15
{
strings:
$a0 = { B4 4D CD 21 E8 ?? ?? FD E8 ?? ?? B4 51 CD 21 }
condition:
$a0 at entrypoint
}
Here are some key points about the conversion process:
· The at entrypoint keywords in the condition of a YARA rule have the same effect as setting ep_only to true.
· Some PEiD rules leverage wildcards at the beginning of the rule, which YARA does not support; therefore those rules are not converted.
· In some cases, the name of the YARA rule may be different from the PEiD rule name (for example, $PIRIT v1.5 versus PIRITv15). This is because YARA does not allow non-alphanumeric rule names.
You can use the new packer.rules file in the same manner as any other YARA ruleset. This gives you a cross-platform (Windows, Linux, Mac OS X, etc.) method of detecting packed files on command line.
$ yara -r packer.yara /data/malcode
UPXv20MarkusLaszloReiser bad_file.exe
WinUpackv030betaByDwing e1.exe
WiseInstallerStub NoWinDvdUpdate.EXE
In the output, we found files that triggered UPX, WinUpack, and WiseInstallerStub signatures. For demonstration purposes, we wrote a script with YARA’s Python API that automatically unpacks files if they’re packed with UPX. You’ll need the UPX utility, which you can get by typing apt-get install upx-ucl on your Ubuntu machine. Here is the code and example usage:
$ cat sample_script.py
#!/usr/bin/python
import sys, yara, commands
rules = yara.compile(sys.argv[1])
data = open(sys.argv[2], 'rb').read()
matches = rules.match(data=data)
isupx = [m for m in matches if m.rule.startswith("UPX")]
if isupx:
outp = commands.getoutput("upx -d %s" % sys.argv[2])
print outp
$ python sample_script.py packer.yara /data/malcode/bad_file.exe
Ultimate Packer for eXecutables
Copyright (C) 1996 - 2009
UPX 3.04 Markus Oberhumer, Laszlo Molnar & John Reiser Sep 27th 2009
File size Ratio Format Name
-------------------- ------ ----------- -----------
422400 <- 176128 41.70% win32/pe bad_file.exe
As you can see, the Python script calls upx –d (for decompress) after bad_file.exe triggered the UPX packer signature. To extend this into a more useful script, you would need to add handlers for any packers on which you want to conduct further analysis.
1 http://www.peid.info/BobSoft/Downloads/UserDB.zip
2 http://code.google.com/p/yara-project/wiki/PackerRules
Recipe 3-5: Detecting Malware Capabilities with YARA
![]()
You can find supporting material for this recipe on the companion DVD.
This recipe shows how you can use YARA to design rules for detecting malware capabilities. The common argument against using signature- or pattern-based detection is that packers and encryption can evade your efforts. While this is true, the number of malware samples that you can detect with creative YARA signatures will far exceed the few samples that slip through the cracks. The capabilities.yara file on the book’s DVD contains the rules presented in this recipe.
The following rule detects embedded PE files, which is a common characteristic of droppers and installers. It produces an alert only if the string is found at an offset greater than 1024 in the file, which is outside of the typical PE header (otherwise it would produce an alert on every PE file). The filesize keyword represents the total number of bytes in the file or data buffer being scanned.
rule embedded_exe
{
meta:
description = "Detects embedded executables"
strings:
$a = "This program cannot be run in DOS mode"
condition:
$a in (1024..filesize)
}
The following rule detects several attempts to identify virtual machines, emulators, sandboxes, or behavior-monitoring applications. The nocase keyword indicates a case-insensitive string.
rule vmdetect
{
meta:
description = "Detects VMs/EMUs/Mons"
strings:
$vm0 = "VIRTUAL HD" nocase
$vm1 = "VMWARE VIRTUAL IDE HARD DRIVE" nocase
$vm2 = "QEMU HARDDISK" nocase
$vm3 = "VBOX HARDDRIVE" nocase
$vm4 = "The Wireshark Network Analyzer"
$vm5 = "C:\\sample.exe"
$vm6 = "C:\\windows\\system32\\sample_1.exe"
$vm7 = "Process Monitor - Sysinternals: www.sysinternals.com"
$vm8 = "File Monitor - Sysinternals: www.sysinternals.com"
$vm9 = "Registry Monitor - Sysinternals: www.sysinternals.com"
condition:
any of them
}
The following rule detects malware that is static-linked with Zlib or OpenSSL libraries. If you get positive hits with this rule, it’s highly likely that the malware uses encoding and/or encryption to obfuscate its network communications. Instead of specifying $zlib0 and $zlib1 and $zlib2[…] in the condition, you can specify all of $zlib*, which has the same effect.
rule encoding
{
meta:
description = "Indicates encryption/compression"
strings:
$zlib0 = "deflate" fullword
$zlib1 = "Jean-loup Gailly"
$zlib2 = "inflate" fullword
$zlib3 = "Mark Adler"
$ssl0 = "OpenSSL" fullword
$ssl1 = "SSLeay" fullword
condition:
(all of ($zlib*)) or (all of ($ssl*))
}
The following rule detects malware that utilizes IRC. Because the strings may exist frequently in files that do not utilize IRC, this rule produces an alert only if any file contains at least four of the strings.
rule irc
{
meta:
description = "Indicates use of IRC"
strings:
$irc0 = "join" nocase fullword
$irc1 = "msg" nocase fullword
$irc2 = "nick" nocase fullword
$irc3 = "notice" nocase fullword
$irc4 = "part" nocase fullword
$irc5 = "ping" nocase fullword
$irc6 = "quit" nocase fullword
$irc7 = "chat" nocase fullword
$irc8 = "privmsg" nocase fullword
condition:
4 of ($irc*)
}
The following rule detects attempts to sniff network traffic based on the existence of “sniffer” in the file (believe it or not, this yields a good number of positive hits). It also detects the names of WinPcap API functions, since many malware families drop or download WinPcap DLLs for sniffing packets.
rule sniffer
{
meta:
description = "Indicates network sniffer"
strings:
$sniff0 = "sniffer" nocase fullword
$sniff1 = "rpcap:////" nocase
$sniff2 = "wpcap.dll" nocase fullword
$sniff3 = "pcap_findalldevs" nocase
$sniff4 = "pcap_open" nocase
$sniff5 = "pcap_loop" nocase
$sniff6 = "pcap_compile" nocase
$sniff7 = "pcap_close" nocase
condition:
any of them
}
The following rule detects malware that attempts to spread through autorun functionality. The rule includes strings necessary for building an autorun.inf file that uses the open action to execute a program.
rule autorun
{
meta:
description = "Indicates attempt to spread through autorun"
strings:
$a = "[autorun]"
$b = "open="
condition:
all of them
}
The following rule detects attempts to send spam e-mails (or just e-mails in general based on SMTP commands). The number of required matches can be increased to detect spam or other strings that won’t be found in normal SMTP communication.
rule spam
{
meta:
description = "Indicates spam-related activity"
strings:
$spam1 = "e-cards@hallmark.com" nocase
$spam2 = "hallmark e-card" nocase
$spam3 = "rcpt to:" nocase
$spam4 = "mail from:" nocase
$spam5 = "smtp server" nocase
$spam6 = "cialis" nocase fullword
$spam7 = "pharma" nocase fullword
$spam8 = "casino" nocase fullword
$spam9 = "ehlo " nocase fullword
$spama = "from: " nocase fullword
$spamb = "subject: " nocase fullword
$spamc = "Content-Disposition: attachment;" nocase
condition:
3 of ($spam*)
}
The following rule detects malware that uses the wrmsr instruction to patch the SYSENTER_EIP_MSR register. The operands for wrmsr are placed in EAX, ECX, and EDX, but they can be initialized in any order and using any source (a 32-bit immediate constant or a stack variable). Therefore, the rule uses wildcards to detect many possible variations of the behavior.
rule write_msr
{
meta:
description = "Writing MSR"
strings:
/*
mov ecx, [ebp+??]
mov eax, [ebp+??]
mov edx, [ebp+??]
wrmsr
*/
$wr0 = {8B 4D ?? 8B 55 ?? 8B 45 ?? 0F 30}
$wr1 = {8B 4D ?? 8B 45 ?? 8B 55 ?? 0F 30}
$wr2 = {8B 55 ?? 8B 4D ?? 8B 45 ?? 0F 30}
$wr3 = {8B 55 ?? 8B 45 ?? 8B 4D ?? 0F 30}
$wr4 = {8B 45 ?? 8B 55 ?? 8B 4D ?? 0F 30}
$wr5 = {8B 45 ?? 8B 4D ?? 8B 55 ?? 0F 30}
/*
mov ecx, imm32
mov eax, imm32
mov edx, imm32
wrmsr
*/
$wr6 = {B8 ?? ?? ?? BA ?? ?? ?? B9 ?? ?? ?? 0F 30}
$wr7 = {B8 ?? ?? ?? B9 ?? ?? ?? BA ?? ?? ?? 0F 30}
$wr8 = {B9 ?? ?? ?? B8 ?? ?? ?? BA ?? ?? ?? 0F 30}
$wr9 = {B9 ?? ?? ?? BA ?? ?? ?? B8 ?? ?? ?? 0F 30}
$wra = {BA ?? ?? ?? B8 ?? ?? ?? B9 ?? ?? ?? 0F 30}
$wrb = {BA ?? ?? ?? B9 ?? ?? ?? B8 ?? ?? ?? 0F 30}
condition:
any of them
}
Here are a few additional ways you can use YARA signatures:
· Create a rules file with common passwords to catch malware that attempts to brute force accounts and logins.
· Create a rules file with login strings, URL fields, or bank domains to catch malware that targets financial institutions.
· Create a rules file with names of antivirus processes, services, and domains to catch malware that attempts to terminate or disable A/V products.
Putting It All Together
The best part about all of the tools described in this chapter thus far is that you can incorporate them into tools that automate several actions at once. You can use a single script to scan files with ClamAV, scan files with YARA, determine file type, detect packers, compute checksums, and various other tasks. The next few recipes show how to combine some of the aforementioned functionality and build your own multi-AV scanner and PE file scanner.
Recipe 3-6: File Type Identification and Hashing in Python
![]()
You can find supporting material for this recipe on the companion DVD.
This recipe shows how to determine file type and calculate cryptographic hashes in Python. A common way to organize malware collections is in a directory structure based on file type and/or hash value. For example, you might have a layout like this:
malware/639ff32e13aa789324c112d9cfad31b9
malware/69e46a1967b4dacce63fa9fa6f342209
malware/be72b15fa85a65ce9fa12c97d60b14a3
Or you may have a layout like this:
malware/dll/639ff32e13aa789324c112d9cfad31b9
malware/pdf/69e46a1967b4dacce63fa9fa6f342209
malware/exe/be72b15fa85a65ce9fa12c97d60b14a3
When you get new malware samples, you can process them automatically and save them to the proper directory. Of course, if you plan to store samples in a database, you can also use similar techniques.
Determining File Type
On a Linux system, you can use the file command to determine a file’s type. The output of the following command shows that the ack388 file is a PE executable despite its missing file extension.
$ file ack388
ack388: MS-DOS executable PE for MS Windows (GUI) Intel 80386 32-bit
In Python, you can determine file type using the python-magic package (apt-get install python-magic). Once installed, you can use the following commands in a Python script:
>>> import magic
>>> ms = magic.open(magic.MAGIC_NONE)
>>> ms.load()
>>> data = open("ack388", "rb").read()
>>> print ms.buffer(data)
MS-DOS executable PE for MS Windows (GUI) Intel 80386 32-bit
As an alternate method, you can also write YARA signatures for detecting file types. On the book’s DVD, you can find a file named magic.yara, which contains signatures such as the following:
rule pdf_document
{
strings:
$a = "%PDF-"
condition:
$a at 0
}
rule zip_file
{
strings:
$magic1 = { 50 4b 03 04 }
$magic2 = { 50 4b 05 06 }
$magic3 = { 50 4b 07 08 }
condition:
($magic1 at 0) or ($magic2 at 0) or ($magic3 at 0)
}
rule mz_executable // from YARA user's manual
{
condition:
// MZ signature at offset 0 and ...
uint16(0) == 0x5A4D and
// ... PE signature at offset stored in MZ header at 0x3C
uint32(uint32(0x3C)) == 0x00004550
}
Here is an example of using the YARA rules for file type detection:
$ yara –r magic.yara ack388
mz_executable ack388
Calculating Hashes
On a Linux system, you can use commands such as md5sum, sha1sum, sha256sum, and sha512sum to generate hashes for files.
$ md5sum ack388
69e46a1967b4dacce63fa9fa6f342209 ack388
$ sha1sum ack388
4c570b44c8dac70af742af446d8a475be702dc97 ack388
In Python, you can use the built-in hashlib module or the PyCrypto module (see Chapter 12 for more details). Here is an example:
>>> import hashlib
>>> data = open("ack388", "rb").read()
>>> print hashlib.md5(data).hexdigest()
69e46a1967b4dacce63fa9fa6f342209
>>> print hashlib.sha1(data).hexdigest()
4c570b44c8dac70af742af446d8a475be702dc97
Calculating Fuzzy Hashes
Fuzzy hashes can help you determine similarity among files. We present various usage scenarios in Recipe 3-9, so for now we’ll just show how to calculate the hashes. You can use the ssdeep command (apt-get install ssdeep) in the following manner:
$ ssdeep ack388
ssdeep,1.0--blocksize:hash:hash,filename
6144:DrIx6zNhlY7zJc3VesoteSAV/EfjAyGXElheAt[REMOVED],"ack388"
If you install the pyssdeep3 module (Python bindings for ssdeep), you can also generate fuzzy hashes in your Python scripts, as shown in the following commands:
>>> from ssdeep import ssdeep
>>> s = ssdeep()
>>> print s.hash_file("ack388")
6144:DrIx6zNhlY7zJc3VesoteSAV/EfjAyGXElheAt[REMOVED]
This recipe summarized a few of the ways you can identify files for organization and determine if they already exist in your collection. In the next few recipes, you’ll learn how to start gathering more detailed information on the samples.
3 http://code.google.com/p/pyssdeep/
Recipe 3-7: Writing a Multiple-AV Scanner in Python
![]()
You can find supporting material for this recipe on the companion DVD.
Many antivirus products include a command-line utility that you can execute from your own scripts to scan files. If you install several of these antivirus products, you can leverage the signatures and detection capabilities of the multiple vendors without the potential privacy issues associated with public online services. All you need to do is create a script that invokes each of the command-line utilities sequentially, captures the results, and produces a report in the format of your choice.
Note Scanning malware samples has inherent risks. A file could be specially crafted to exploit an antivirus engine and thus compromise your system. For example, Alex Wheeler and Neel Mehta showed how to get remote, unauthenticated system-level access to a machine running ClamAV due to a flaw in the scanner’s file format parsers (seewww.blackhat.com/presentations/bh-usa-05/bh-us-05-wheeler.pdf). We highly recommend you perform all scanning of malware in a controlled environment that can be monitored for suspicious activity.
Choosing the Scanners
Selecting antivirus products for your multi-scanner typically depends on several factors including the availability of a command-line version, supported platforms, and licensing. When deciding which scanners to use, make sure that you properly license any scanners according to their acceptable use policies. Often, antivirus products have different licenses for research, home, and corporate use. Table 3-1 shows a few antivirus vendors that provide free personal or research command-line scanners.
Table 3-1: Available AV Vendors with Free, Personal Command-Line Scanners
|
Vendor |
Description |
Web Site |
|
ClamAV |
An open source, free version |
http://www.clamav.net |
|
AntiVir |
A free Windows personal edition |
http://www.free-av.com/en/products/index.html |
|
AVG |
A free Linux/FreeBSD edition |
http://free.avg.com/us-en/download?prd=afl |
|
BitDefender |
A free Windows personal version |
http://www.bitdefender.com/PRODUCT-14-en--BitDefender-Free-Edition.html |
|
Panda |
A free research and academic command-line scanner for Windows |
http://research.pandasecurity.com/free-commandline-scanner/ |
|
F-Prot |
A free Linux/FreeBSD for personal use |
http://www.f-prot.com/products/home_use/linux/ |
Many other vendors, such as Sophos and McAfee, provide 30-day free trials of their antivirus products. If you are interested in testing this type of script, a 30-day trial can allow you to tweak your parameters and reports before you decide to buy.
Choosing an OS
The operating system on which you want to run your multi-scanner may also limit your choices. Virtually all vendors support Windows, a few support Linux, and very few support Mac OS X. In some cases, you may be able to use Wine to run some scanners on Linux or Mac OS X. Wine emulates Windows API calls, and we’ll show you how to use it in this recipe.
The Book’s Example Multi-Scanner
On the book’s DVD, you can find an example multi-scanner Python script named av_multiscan.py. This version of the script is not a comprehensive scanner; rather, it provides you with a starting point to add your own antivirus products. The version on the DVD allows you to use the following:
· ClamAV with default signatures
· ClamAV with custom signatures
· YARA
· f-prot using default signatures
· OfficeMalScanner
· Team CYMRU MHR44 (Malware Hash Registry) score
The most important part of the multi-scanner is the execution of the command-line utilities and the interpretation of their results. This is handled by using the Python subprocess5 module, which allows you to spawn a new process, specify command-line parameters, and redirect STDIN, STDOUT, and STDERR. In the multi-scanner, we launch the various command-line scanners with the appropriate options and capture STDOUT. After execution, you need to parse STDOUT to find the results from the scan.
Scanning with ClamAV
If a file triggers a signature in the ClamAV database, clamscan prints a line of output with the name of the file and the name of the signature, separated by a colon, like this:
$ clamscan 5728c58b8f21678a2317abcf7fdffe6b
5728c58b8f21678a2317abcf7fdffe6b: Exploit.PDF-1880 FOUND
The following function demonstrates how av_multiscan.py processes results from the ClamAV engine.
clam_conf_file = "clam_shellcode.ndb"
path_to_clamscan = "/usr/local/bin/clamscan"
def clam_custom(fname):
# check to see if the right path for the scanner and
# the custom configuration file exist
if os.path.isfile(path_to_clamscan) and \
os.path.isfile(clam_conf_file):
output = subprocess.Popen([path_to_clamscan, \
"-d", clam_conf_file, fname], \
stdout = subprocess.PIPE).communicate()[0]
result = output.split('\n')[0].split(': ')[1]
else:
result = 'ERROR - %s not found' % path_to_clamscan
return ({'name': 'clam_custom', 'result': result })
Make sure you configure the path_to_clamscan (location of the clamscan binary) and clam_conf_file (location of your custom signature database) variables by modifying the av_multiscan.py script before using it.
Scanning with OfficeMalScanner
If you install Wine6 (apt-get install wine) you can run many Windows command-line antivirus scanners directly on Linux or Max OS X. For example, if you’re developing your multi-scanner on a non-Windows platform, you can still integrate Windows executables such as OfficeMalScanner.exe by using Wine. The following function demonstrates how to use Wine.
path_to_officemalscanner = "/data/OfficeMalScanner/OfficeMalScanner.exe"
def officemalscanner(fname):
if os.path.isfile(path_to_officemalscanner):
env = os.environ.copy()
env['WINEDEBUG'] = '-all'
output = subprocess.Popen(["wine", path_to_officemalscanner,
fname, "scan", "brute"],
stdout = subprocess.PIPE,
stderr = None, env=env).communicate()[0]
if "Analysis finished" in output:
output = output.split('\r\n')
while "Analysis finished" not in output[0]:
output = output[1:]
result = output[3]
else:
result = "Not an MS Office file"
else:
result = 'ERROR - %s not found' % path_to_officemalscanner
return ({'name': 'officemalscanner', 'result': result})
To suppress the standard Wine debug messages, the code creates a new environment variable named WINEDEBUG with the value -all. This way, the output of the command only contains the OfficeMalScanner.exe results. In particular, the code extracts the malicious index value calculated by OfficeMalScanner (a numerical value that represents how malicious a file is). For more information about OfficeMalScanner and its scoring system, see Recipe 6-11.
Using the Multi-Scanner
The av_multiscan.py script requires one parameter, -f, which specifies the file you would like to scan. You can use it in the following manner:
$ python av_multiscan.py -f sample.exe
filename: sample.exe
filesize: 22016
md5: 66a736c5f37d1769db3a2028e7a1c5b4
ssdeep: 384:OG7iQzd6Iw+wyMHtwMF/x4GTTIpABkG[...]
clamav: OK
clam_custom: OK
yara: 'mz_executable'
yara_packer: 'ASPackv1061bAlexeySolodovnikov'
officemalscanner: Not an MS Office file
cymru_hash_db: Sat, 12 Dec 2009 11:32:50 - 60
As you can see, sample.exe is packed with AsPack. The file didn’t trigger any ClamAV signatures, but Team Cymru’s MHR score is 60 (which indicates 60 percent detection across antivirus scanners that they use).
The -v flag to av_multiscan.py produces more verbose output. The example that follows shows how to scan a Microsoft Word document using the verbose flag.
$ python av_multiscan.py -v -f bad.doc
[+] Using YARA signatures magic.yara
[+] Using ClamAV signatures clam_shellcode.ndb
filename bad.doc
filesize 568832
md5 a5f8f82d2e5ad953bb986bb2bbcd20ee
ssdeep 6144:L4Rz0Q/DMtI+XDpiUxchygVNFGGsOkxh:mz0Q/F4
clamav OK
clam_custom shellcode_xor.UNOFFICIAL FOUND
yara 'office_magic_bytes' 'word_document'
yara_packer
officemalscanner bad.doc seems to be malicious! Malicious Index = 31
cymru_hash_db Sun, 14 Mar 2010 14:13:28 - NO_DATA
The results show that bad.doc did not trigger any signatures in the default ClamAV database and the file’s hash isn’t recognized by MHR. However, it did trigger the custom ClamAV signature we presented in Recipe 3-2 and OfficeMalScanner assigned a malicious index value of 31 (which is quite high). Here are some ideas you may find useful to implement in your multi-scanner:
· Write a plug-in that stores the output in a database for easy searching and retrieval.
· Add additional antivirus products to the scanning engine.
· Perform extra actions based on file type (for example, scan executables with the PE file scanner presented in Recipe 3-8).
4 http://www.team-cymru.org/Services/MHR/
5 http://docs.python.org/library/subprocess.html
6 http://www.winehq.org/
Recipe 3-8: Detecting Malicious PE Files in Python
![]()
You can find supporting material for this recipe on the companion DVD.
Executables on Windows must conform to the PE/COFF (Portable Executable/Common Object File Format) specification. This includes, but is not limited to, console and GUI applications (.exe), Dynamic Link Libraries (.dll), kernel drivers (.sys), and ActiveX controls (.ocx). We don’t cover the PE file basics, because you can find that in many other books and online articles. For a good introduction, see Matt Pietrek’s two-part series: Peering Inside the PE7 and An In-Depth Look into the Win32 Portable Executable File Format.8
In this recipe, the authors show you several ways to detect suspicious files based on values in the PE header. Thus, independent of any antivirus scanners, you can use heuristics to quickly determine which files exhibit suspicious attributes. The code for this recipe uses Ero Carrera’s pefile,9 which is a Python module for parsing PE headers. You can find the script, named pescanner.py, on the book’s DVD. It currently detects the following criteria:
· Files with TLS entries: TLS entries are functions that execute before the program’s main thread, thus before the initial breakpoint set by debuggers. Malware typically uses TLS entries to run code before your debugger gets control. The pescanner.py script prints the addresses of all TLS callback functions.
· Files with resource directories: Resource directories can contain arbitrary data types such as icons, cursors, and configurations. If you’re scanning an entire system32 directory, then you will likely find many false positives because resource directories are legitimate. However, if you’re scanning a folder full of malware, the presence of a resource directory likely indicates that the file drops another executable at run-time. The pescanner.py script extracts all resources from the PE file and runs them through the file type identification process described in Recipe 3-6.
· Suspicious IAT entries: Imported functions can indicate how a program behaves at run-time. You can create a list of API functions that are suspicious and then produce an alert whenever you find a malware sample that imports a function from your list. The pescanner.py script has a default list of about 15 APIs, but it’s up to you to add additional ones.
· Suspicious entry point sections: An entry point section is the name of the PE section that contains the AddressOfEntryPoint. The AddressOfEntryPoint value for legitimate, or non-packed, files typically resides in a section named .code or .text for user mode programs, and PAGE or INIT for kernel drivers. Therefore, you can detect potentially packed files if the entry point resides in a section that is not in your list of known-good sections.
· Sections with zero-length raw sizes: The raw size is the amount of bytes that a section requires in the file on disk (as opposed to bytes required when the section is mapped into memory). The most common reason a raw size would be zero on disk but greater than zero in memory is because packers copy decrypted instructions or data into the section at run-time.
· Sections with extremely low or high entropy: Entropy is a value between 0 and 8 that describes the randomness of data. Encrypted or compressed data typically has high entropy, whereas a long string of the same character has low entropy. By calculating entropy, you can get a good idea of which sections in a PE file contain packed or abnormal code.
· Invalid timestamps: The TimeDateStamp field is a 32-bit value (the number of seconds since December 31st, 1969, 4 P.M.) that indicates when the linker or compiler produced the PE file. Malware authors (and packers) obscure this value to hide the true build date. If pescanner.py detects an invalid date, it produces an alert.
· File version information: A PE file’s version information may contain the name of the person or company who created the file, a description of the file, a version and/or build number, the original file name, and other comments. This type of information is not available in all PE files, but many times malware authors will accidentally leave it in or intentionally forge the values. In both cases, the information yields interesting forensic evidence.
Example 1: UPX
The command that follows shows example output from a malware sample packed with UPX. The entry point (EP) is 0x4292e0, which lands in the section named UPX1. Therefore, pescanner.py adds the [SUSPICIOUS] tag on that line. The PEiD signatures can report the exact version of UPX (2.90). Under the sections header, UPX0 and UPX1 are tagged as suspicious, but for different reasons. UPX0 is suspicious because its raw size is zero. UPX1 is suspicious because its entropy score is very high (7.91 out of 8.00).
$ python pescanner.py /samples/22a9c61c71fa5cef552a94e479dfe41e
Meta-data
============================================================
File: /samples/22a9c61c71fa5cef552a94e479dfe41e
Size: 72704 bytes
Type: MS-DOS executable PE for MS Windows (GUI) Intel 80386 32-bit
MD5: 22a9c61c71fa5cef552a94e479dfe41e
SHA1: 14ac258df52d0131c5984b00dc14960ee94e6aad
ssdeep: 1536:JxXOg1j5jBWSNzrpGhDZuiq3AC+wcnG4Pqvtuz+[REMOVED]
Date: 0x49277573 [Sat Nov 22 02:58:59 2008 UTC]
EP: 0x4292e0 (UPX1) [SUSPICIOUS]
Packers: UPX 2.90 [LZMA] -> Markus Oberhumer, Laszlo Molnar & John Reiser
Sections
============================================================
Name VirtAddr VirtSize RawSize Entropy
------------------------------------------------------------
UPX0 0x1000 0x17000 0x0 0.000000 [SUSPICIOUS]
UPX1 0x18000 0x12000 0x11600 7.912755 [SUSPICIOUS]
UPX2 0x2a000 0x1000 0x200 2.71365
Example 2: Trojan Droppers
The command that follows shows the pescanner.py output for a trojan dropper. The file triggered our YARA rule for embedded PE files. The information in the resource section validates this finding—there is a resource named BIN at RVA 0x3580 with an executable file type. You can expect that this malware would drop a 0x4200 byte file when executed on a system.
$ python pescanner.py /samples/01C96CD0699DD2C0_Winlr66_sys.PE
Meta-data
============================================================
File: /samples/01C96CD0699DD2C0_Winlr66_sys.PE
Size: 31616 bytes
Type: MS-DOS executable PE for MS Windows (native) Intel 80386 32-bit
MD5: d884094437fe2d8fac33da75de2e96be
SHA1: 8b57624f954b0baefd4941bf44ad8ef7cad3b463
ssdeep: 768:oxQK0HWA4bci5neO8NCxpW2ghFHTVMgscZ4Rw:oxQVUci5eO8ExY2grzVTsx
Date: 0x48B531A2 [Wed Aug 27 10:51:14 2008 UTC]
EP: 0x10b90 (.text)
Signature scans
============================================================
YARA: embedded_exe
0x35ce => This program cannot be run in DOS mode
Resource entries
============================================================
Name RVA Size Type
------------------------------------------------------------
BIN 0x3580 0x4200 MS-DOS executable PE
Sections
============================================================
Name VirtAddr VirtSize RawSize Entropy
------------------------------------------------------------
.text 0x480 0x26f4 0x2700 5.705293
.rdata 0x2b80 0x180 0x180 3.830066
.data 0x2d00 0x2d5 0x300 0.316915 [SUSPICIOUS]
INIT 0x3000 0x4d8 0x500 5.202389
.rsrc 0x3500 0x4280 0x4280 7.088351 [SUSPICIOUS]
.reloc 0x7780 0x394 0x400 4.373185
The names of resource entries are similar to names of PE sections in the sense that they can easily be forged. Just because a section is named .rdata doesn’t mean it contains read-only data. Likewise, attackers can load an executable into a resource with one of the standard names such as RT_ICON, RT_STRING, or RT_CURSOR. This is why we scan the entire file with YARA signatures and also perform individual file type identification on each resource entry.
Example 3: IAT and Version Information
The following command shows the output for a 2007 Zeus sample (date based on the timestamp). You can see that the file imports API functions related to code injection (WriteProcessMemory) and launching processes (CreateProcess, WinExec). The version information has clearly been obscured or randomized. For the sake of brevity, we’ve removed the PE sections and resources.
$ python pescanner.py /samples/sdra64.exe
Meta-data
============================================================
File: /samples/sdra64.exe
Size: 124416 bytes
Type: MS-DOS executable PE for MS Windows (GUI) Intel 80386 32-bit
MD5: a99889e994e8e2248f5779b54505aa81
SHA1: 93437058ddfdd2c97b3ff07e3c7853bd0441065c
ssdeep: 3072:CNIl9M0O6M6PYpfaUmhylsDXczSYilhnJ+toJ+T0nW1paaM[REMOVED]
Date: 0x471FB71B [Wed Oct 24 21:20:27 2007 UTC]
EP: 0x416c33 (.text)
Suspicious IAT alerts
============================================================
ReadProcessMemory
WriteProcessMemory
CreateProcessW
VirtualAllocEx
CreateProcessA
WinExec
Version info
============================================================
LegalCopyright: Gaaqnewicyvee
InternalName: Maamduas
CompanyName: Leepcaseuzevwee
LegalTrademarks: Eludpuuhcaidgyv
ProductName: Toxiwoewikaxoq
FileDescription: Kunuwihycuap
OriginalFilename: Calyi
Translation: 0x0409 0x04b0
Here are some additional facts about pescanner.py and malicious PE attributes that you may find useful:
· You can pass pescanner.py a directory instead of an individual file name. The script will recursively parse all PE files found in the directory and sub-directories.
· The main code for pescanner.py is implemented as a Python class named PEScanner. Therefore, instead of using it on command-line, you can import the module from your own Python scripts. Recipe 8-7 shows how to import PEScanner into an automated sandbox.
· You can use several additional heuristics to detect malicious PE files. For other ideas, reference the Parsing Malicious and Malformed Executables10 document by researchers at Sunbelt Software.
7 http://msdn.microsoft.com/en-us/magazine/ms809762.aspx
8 http://msdn.microsoft.com/en-us/magazine/cc301805.aspx
9 http://code.google.com/p/pefile/
10 http://www.sunbelt-software.com/ihs/alex/vb07_paper.pdf
Recipe 3-9: Finding Similar Malware with ssdeep
Ssdeep11 is an application by Jesse Kornblum that calculates context-triggered piecewise hashes, also known as fuzzy hashes. Using the ssdeep command, you can determine the percent similarity between two or more files. For example, you could perform the following tasks:
· Detecting source code reuse: Given a file containing several functions, you could search through archives looking for any files that may contain the same functions.
· Finding related malware: Given the ssdeep hash of a malware sample, you could find variants of the same family.
· Finding forensic artifacts on disk: Given all or part of an image, document, or e-mail, you could scan a raw disk looking for sectors that contain similar content. This could reveal content on suspect machines even if the original files were deleted.
· Detecting infections across computers on a network: Given a memory dump of a machine infected with malware, you could extract the memory segments of all machines in the network and detect if the same or similar malware has infected other systems.
· Detecting self-modifying code: Given the ssdeep hash of a file on disk, you could compare it to the ssdeep hash of the file running in memory. If the two hashes are less than 75–80 percent similar, then the file is probably packed or self-modifying.
Finding Similar Malware
The following commands show how to use ssdeep for comparing two arbitrary binary files. As you can see, although the MD5 checksum is different, the files are 49 percent similar.
$ md5sum INSTALL.COM Attach.exe
MD5 (INSTALL.COM) = a85bd266f431cf2a4bcc466f8bfa5b01
MD5 (Attach.exe) = 9f922a71356c177202a7b88538c234ef
$ ssdeep -b INSTALL.COM > hash.txt
$ ssdeep -bm hash.txt Attach.exe
Attach.exe matches INSTALL.COM (49)
The following example shows how to use ssdeep to find related malware in an archive of samples. The first command shows that there are just over 6,000 files in the directory, and the second command generates the similarity output.
$ ls Malware | wc –l
6346
$ ssdeep -brd Malware/
01C84D3BB350E080_ap2_exe.PE matches 01C84D3BB34F5950_002[1]_gif.PE (100)
01C84D3BBDBB5EB0_ap1_exe.PE matches 01C84D3BBDA2EBB0_003[1]_gif.PE (100)
726769232.exe matches 01C72E743C20AE50_944983008_exe.PE (100)
944983008.exe matches 01C96CD01D196A30_csrssc_exe.PE (100)
944983008.exe matches 01C96CD1C6F237D0_3239120928_exe.PE (100)
_812.COM matches _737.COM (79)
api32.dll matches 01C96CCF695F44C0_ld_exe.PE (75)
api32.dll matches 01C96CCF6980E2E0_api32_dll.PE (100)
api32.dll matches 01C96CCFA48FAC00_ld_exe.PE (75)
Backdoor.IRC.Cloner.j matches Backdoor.IRC.Cloner (69)
Backdoor.IRC.Cloner.k matches Backdoor.IRC.Cloner.g (47)
Backdoor.IRC.Cloner.r matches Backdoor.IRC.Cloner.o (44)
Backdoor.IRC.Cloner.x matches Backdoor.IRC.Cloner.o (99)
Backdoor.IRC.Cloner.x matches Backdoor.IRC.Cloner.r (44)
Finding Similar Malware (in Memory)
The following example shows you how to extract suspicious memory segments using the malfind Volatility plug-in (see Recipe 16-6) and then compare them with ssdeep. The first command dumps suspicious memory segments to the samples directory. The second command lists the contents of the samples directory, and shows (based on the file name) that the plug-in identified suspicious content in memory range 1f00000–1f27fff in process with PID 1064, and so on. The third command shows that most of the memory segments from one process are at least 50 percent similar to the segments extracted from all other processes. This is indicative of malware that injects the same body of code into multiple processes.
$ python volatility.py malfind -d samples –f memory.dmp > /dev/null
$ ls -Al samples/
total 6160
163840 Mar 31 11:14 1064.1f00000-1f27fff.dmp
163840 Mar 31 11:14 1112.880000-8a7fff.dmp
163840 Mar 31 11:14 1156.9c0000-9e7fff.dmp
163840 Mar 31 11:14 1320.6b0000-6d7fff.dmp
163840 Mar 31 11:14 1488.ec0000-ee7fff.dmp
4096 Mar 31 11:14 1624.1b50000-1b50fff.dmp
28672 Mar 31 11:14 1624.1d80000-1e7ffff.dmp
163840 Mar 31 11:14 1624.ac0000-ae7fff.dmp
163840 Mar 31 11:14 1740.800000-827fff.dmp
163840 Mar 31 11:14 1760.3c0000-3e7fff.dmp
163840 Mar 31 11:14 1768.b00000-b27fff.dmp
[REMOVED]
$ ssdeep -brd samples/
1112.880000-8a7fff.dmp matches 1064.1f00000-1f27fff.dmp (54)
1156.9c0000-9e7fff.dmp matches 1064.1f00000-1f27fff.dmp (58)
1156.9c0000-9e7fff.dmp matches 1112.880000-8a7fff.dmp (57)
1320.6b0000-6d7fff.dmp matches 1064.1f00000-1f27fff.dmp (54)
1320.6b0000-6d7fff.dmp matches 1112.880000-8a7fff.dmp (57)
1320.6b0000-6d7fff.dmp matches 1156.9c0000-9e7fff.dmp (58)
1488.ec0000-ee7fff.dmp matches 1064.1f00000-1f27fff.dmp (58)
1488.ec0000-ee7fff.dmp matches 1112.880000-8a7fff.dmp (54)
1488.ec0000-ee7fff.dmp matches 1156.9c0000-9e7fff.dmp (57)
1488.ec0000-ee7fff.dmp matches 1320.6b0000-6d7fff.dmp (50)
1624.ac0000-ae7fff.dmp matches 1064.1f00000-1f27fff.dmp (50)
[REMOVED]
When you use ssdeep, you can pass it a parameter such as –t 60 to only display matches above a given threshold. If 60 percent isn’t what you need, you’ll have to adjust it depending on your objectives.
11 http://ssdeep.sourceforge.net
Recipe 3-10: Detecting Self-modifying Code with ssdeep
![]()
You can find supporting material for this recipe on the companion DVD.
This recipe shows how you can use ssdeep to compare processes in memory with their corresponding files on disk. It is normal for processes to change slightly at run-time—for example, when the program modifies global variables. However, code that is packed or that self-mutates (such as polymorphic viruses) will change significantly at run-time. Therefore, the copy of the code in memory will be much different from the code on disk.
Using ssdeep_procs.py
To use the ssdeep_procs.py script on the book’s DVD, you need to install the ctypes and pywin3212 modules for Python on the target system. pywin32 provides wrappers around Windows API functions so you can call them from Python. If you want to run the script from a USB drive, you can convert ssdeep_procs.py to an executable with py2exe.13
The following command demonstrates how to use the ssdeep_procs.py script. The test bed consisted of an XP system running processes packed with VMProtect, FSG, Neolite, and UPX. Notice how the four packed processes are 55 percent, 72 percent, 75 percent, and 0 percent similar, respectively, to their files on disk. All other processes are between 83 percent and 99 percent similar to their files on disk.
C:\> python ssdeep_procs.py
Process Pid Matched
smss.exe 588 96%
csrss.exe 660 96%
winlogon.exe 692 97%
services.exe 736 94%
lsass.exe 748 96%
vmacthlp.exe 904 96%
svchost.exe 928 91%
svchost.exe 1000 91%
Explorer.EXE 1584 97%
spoolsv.exe 1724 99%
wscntfy.exe 1276 91%
alg.exe 2076 94%
wuauclt.exe 3724 86%
TSCHelp.exe 3168 83%
IEXPLORE.EXE 3664 97%
cmd.exe 1036 94%
p-vmprotect.exe 372 55% possible packed exe
p-fsg.exe 3200 72% possible packed exe
p-neolite.exe 4084 75% possible packed exe
p-upx.exe 3860 0% possible packed exe
python.exe 4044 96%
The ssdeep_procs.py script can detect another malicious behavior called “hollow processes” (which we discuss more in Recipe 15-8). Hollow processes are legitimate programs (such as notepad.exe) started by malware. Once the program is running, the malware replaces the body, or executable instructions, of the legitimate program with malicious instructions. This is a form of code injection that you can detect using ssdeep, because the notepad.exe file on disk will differ significantly from the one in memory.
12 http://sourceforge.net/projects/pywin32/
13 http://www.py2exe.org/
Recipe 3-11: Comparing Binaries with IDA and BinDiff
![]()
You can find supporting material for this recipe on the companion DVD.
Binary diffing is a fundamental technique used in reverse engineering. It is especially popular in the vulnerability research realm (for analyzing vendor patches). However, it also has a place in malware research. While ssdeep can help you identify variants of the same malware family, it cannot tell you exactly what changed. If you have two files that are 75 percent similar, you still have some work to do before your analysis is complete. For example, did the attackers remove the brute-force password guessing code? Did they add a rootkit component to hide files on disk? Perhaps both files exhibit all of the same behaviors, but the attackers just used a different packer. This recipe shows you how to address these types of questions using BinDiff,14which is an IDA Pro plug-in for binary diffing.
BinDiff examines files after you load them into IDA Pro. It determines which functions exist in both files based on attributes such as the function’s CRC or hash value, the number of instructions in each basic block of a function, the number of cross-references to and from a function, and a variety of other algorithms (see the online BinDiff manual15 for more details). Once you know which functions exist in both binaries, you can use BinDiff’s color-coded GUI to zoom-in and examine the changes at the instruction-level.
Good Old Zeus . . .
The following summary describes the context and objective for the demonstration that we present in this recipe.
In November 2006, the authors wrote a research paper16 on one of the first Zeus variants seen in the wild. During the reverse engineering phase, we loaded the Zeus binary in IDA Pro and named as many functions as possible based on their behavior. Zeus stole information from victim computers, compressed it, encrypted it, and sent it over the network to the attackers. Based on the algorithm we saw in the Zeus binary, we wrote a decryption tool to recover the stolen data. However, after a while, the tool stopped working. Clearly, the Zeus authors had updated the code in some way that prevented our old decryption algorithm from working, and we needed to figure out how to fix it.
Using BinDiff
The following steps describe how to use BinDiff to quickly locate the decryption function and determine exactly how it changed.
1. Create an IDA database (IDB) for both of the files that you plan to diff. Designate one as the primary and one as the secondary. In our case, we’ll use new_zeus.idb (a sample from December 2008) as the primary and old_zeus.idb (the original sample from November 2006) as the secondary.
2. With the primary IDB open in IDA and the secondary IDB closed, click Edit⇒ Plugins⇒ zynamics BinDiff 3.0 (or use the keyboard shortcut Shift+D).
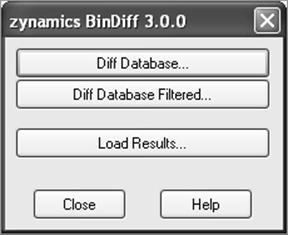
3. When you see the prompt shown in Figure 3-1, click Diff Database and select your secondary IDB.
Figure 3-1: BinDiff’s main selection menu
When the diff is complete, you’ll have the following new tabs in IDA:
· Statistics: A summary of the overall similarity between the two files
· Matched functions: Functions that exist in both files. This tab shows the degree of similarity (from 0 to 1.00), the degree of confidence (0 to 1.00), the address and names of the functions in both files, the algorithm BinDiff used to match, and statistics regarding the exact number of basic blocks, instructions, and edges that matched.
· Primary unmatched: Functions in the primary file that cannot be matched with any functions in the secondary.
· Secondary unmatched: Functions in the secondary file that cannot be matched with any functions in the primary.
4. Examine the matched functions tab. As you can see in Figure 3-2, the functions in the “name secondary” column (from old_zeus.idb) are labeled according to their functionality. BinDiff found a possible match for the function we labeled as DecodeData in 2006. The similarity score is .70/1.00 and the confidence level is .98/1.00.
Figure 3-2: Invoking a Visual Diff from the Matched Functions tab

5. To take a closer look at the two functions, right-click the line and select Visual Diff. This brings up the BinDiff GUI, as shown in Figure 3-3. The window is split into two parts. On the left, you see the potential match for the DecodeData function. On the right, you see the DecodeData function.
Figure 3-3: A Side-by-side flow graph of both functions in BinDiff

6. You can zoom and pan the graph as necessary in order to see exactly which instructions were added, removed, or modified. Remember, we’re dealing with samples that were created more than two years apart, so some of the differences that you see may be due to the attackers using a new compiler version or operating system to develop the malware.
7. You can view the two functions from a different perspective by clicking the Assembler tab in the BinDiff GUI, as shown in Figure 3-4. Then use the scrollbar in the middle for navigation.
Figure 3-4: The secondary function uses compression, but the primary does not.
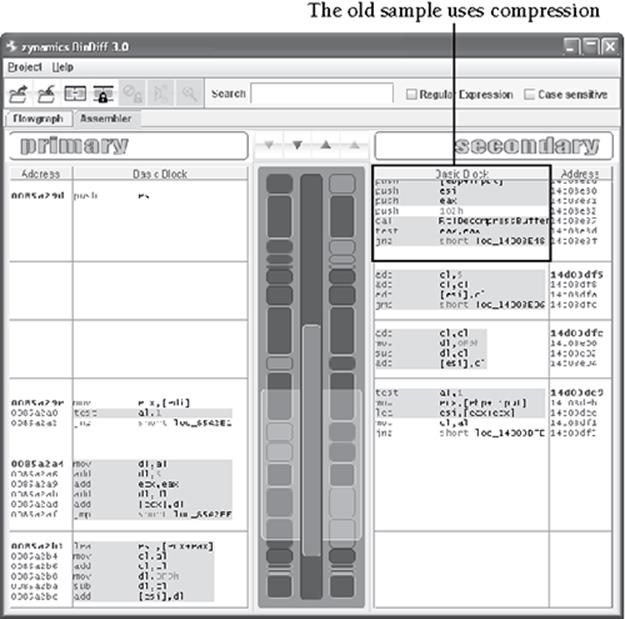
In Figure 3-4, you can see that the function in the secondary IDB calls RtlDecompressBuffer, whereas the function in the primary IDB does not. Both functions exhibit a similar algorithm that involves adding 5 to a number and subtracting 0xF9 from a number. Despite using different registers for temporary storage, the algorithms perform the same tasks. Thus, the only apparent difference between these two functions is the removal of RtlDecompressBuffer. In fact, the Zeus sample from 2006 uses compression and the sample from 2008 doesn’t. This was the key to fixing our decryption tool.
Note See the following resources for more information on determining relationships among binary files:
· Zynamics VxClass: http://www.zynamics.com/vxclass.html
· The State of Malware Family Ties by Ero Carerra and Peter Silberman: http://blog.mandiant.com/archives/934
· DarunGrim: http://www.darungrim.org/
· Tenable Security’s PatchDiff2: http://cgi.tenablesecurity.com/tenable/patchdiff.php
· CoreLabs’ turbodiff: http://corelabs.coresecurity.com/index.php?module=Wiki&action=view&type=tool&name=turbodiff
14 http://www.zynamics.com/bindiff.html '
15 http://www.zynamics.com/downloads/bindiff30-manual.zip
16 http://www.mnin.org/write/ZeusMalware.pdf
All materials on the site are licensed Creative Commons Attribution-Sharealike 3.0 Unported CC BY-SA 3.0 & GNU Free Documentation License (GFDL)
If you are the copyright holder of any material contained on our site and intend to remove it, please contact our site administrator for approval.
© 2016-2026 All site design rights belong to S.Y.A.