Introducing GitHub: A Non-Technical Guide (2014)
Chapter 3. Editing
In this chapter we’ll look at how you can contribute to a project. We’ll start by looking at how to contribute to a project that you don’t have permission to push to by creating a fork and a pull request. We’ll then look at how you can add, edit, rename, or delete a file directly on GitHub. We’ll also look at how to work with directories on GitHub, and finally we’ll discuss what to do when you want to make multiple changes as part of a single commit.
Contributing via a Fork
If you want to contribute directly to a project, you either need to own it or have been added to it as a collaborator. If you want to contribute to a project that you don’t own and are not a collaborator on, you’ll need to make a copy of it on GitHub under your user account. That process is calledforking. Once you’ve forked a project, you’ll be able to make any changes you want to your fork (copy) and you’ll be able to request that your changes get incorporated into the original project by using a pull request. Let’s go through that process now.
Go to https://github.com/pragmaticlearning/github-example. Click the Fork button in the top right corner of the page, as shown in Figure 3-1.

Figure 3-1. The Fork button
When you click the Fork button, if you are a member of any organizations, you’ll see a list of all of the organizations you’re involved with as well as your username. You’ll be asked where you want to fork the repository. Figure 3-2 shows what that dialog looks like.
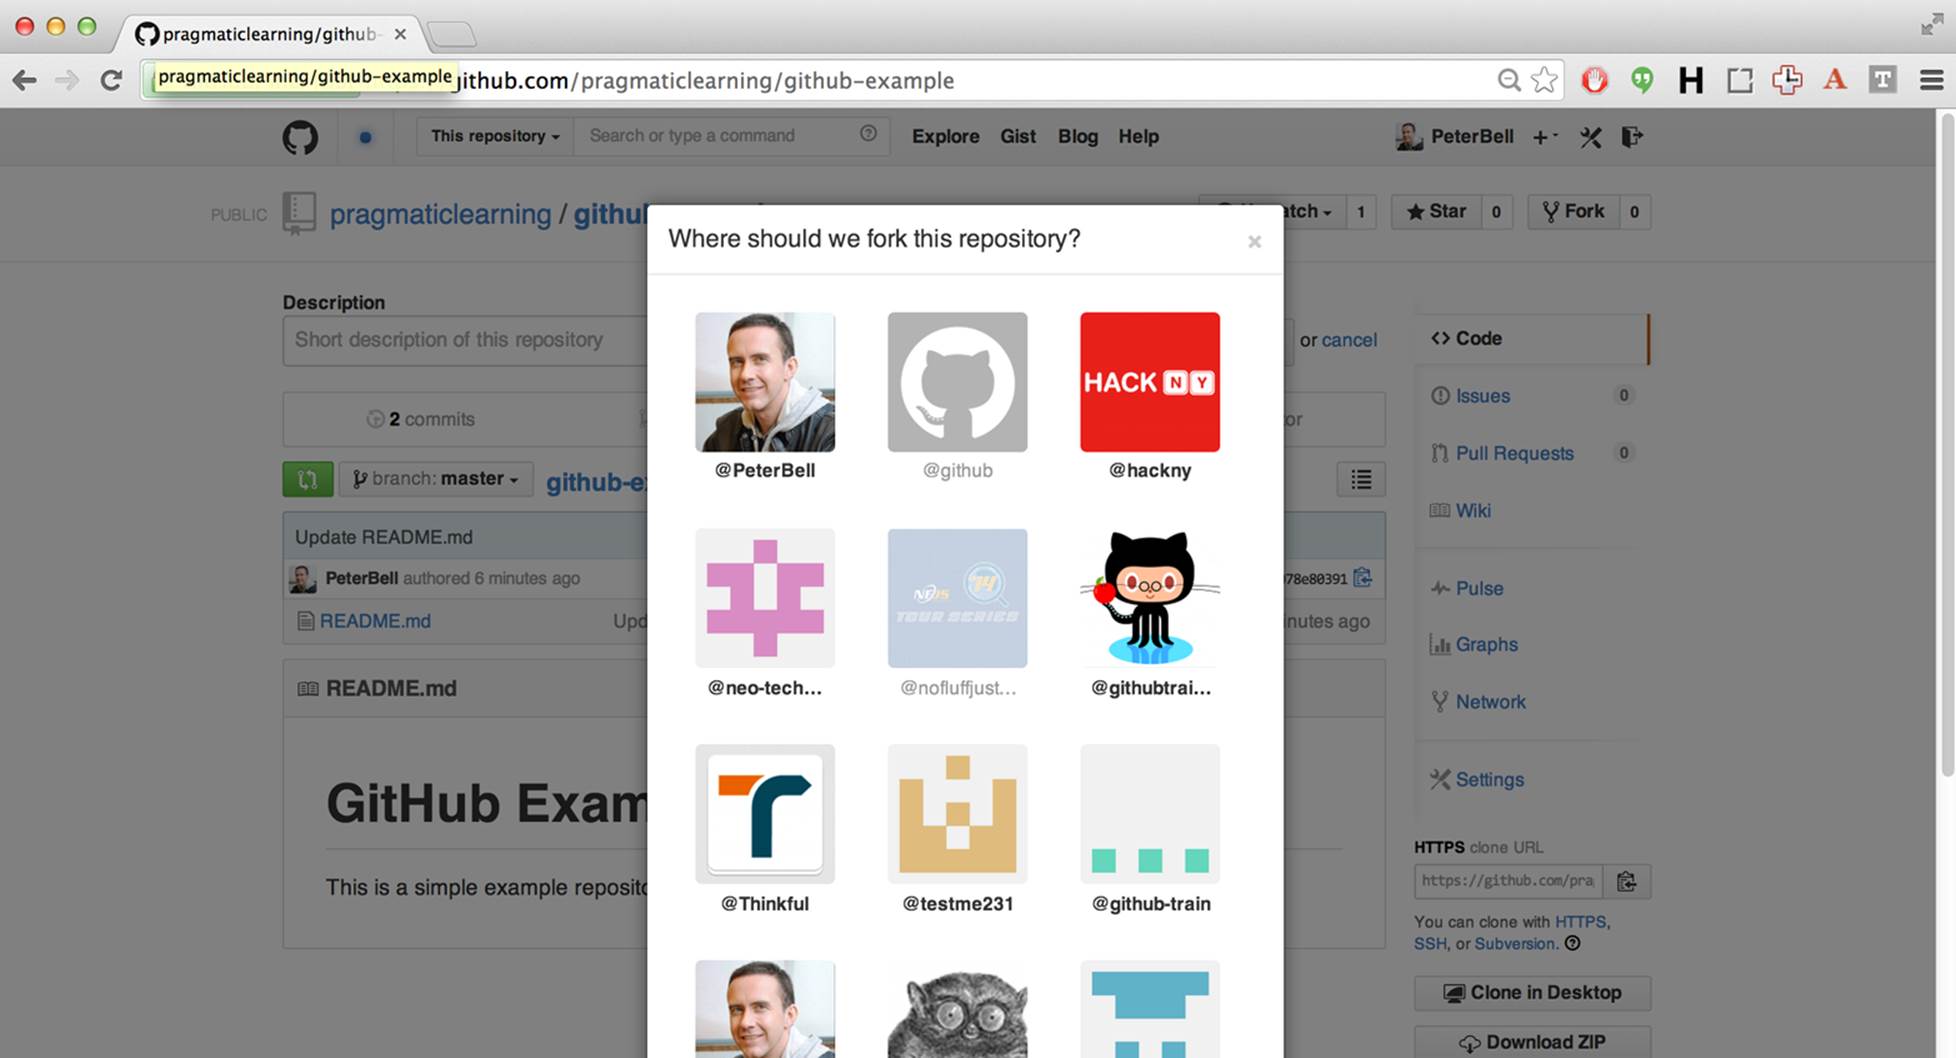
Figure 3-2. Selecting where to fork a repo
After you select where you want to fork the repository (repo), or if you are not a member of any organizations, you’ll be taken to your new project page. Once you’ve forked the repo, you can make any changes you want to your fork (copy). In the next section we’ll look at how you can add a new file, and then how to create a pull request to try to get your change incorporated into the original project.
Adding a File
In this section we’ll look at how to add a new file to a project. As you can see in Figure 3-3, there is a small plus sign (+) to the right of the project name.

Figure 3-3. The “add new file” link
Click the plus sign and you’ll be taken to a screen in Figure 3-4.
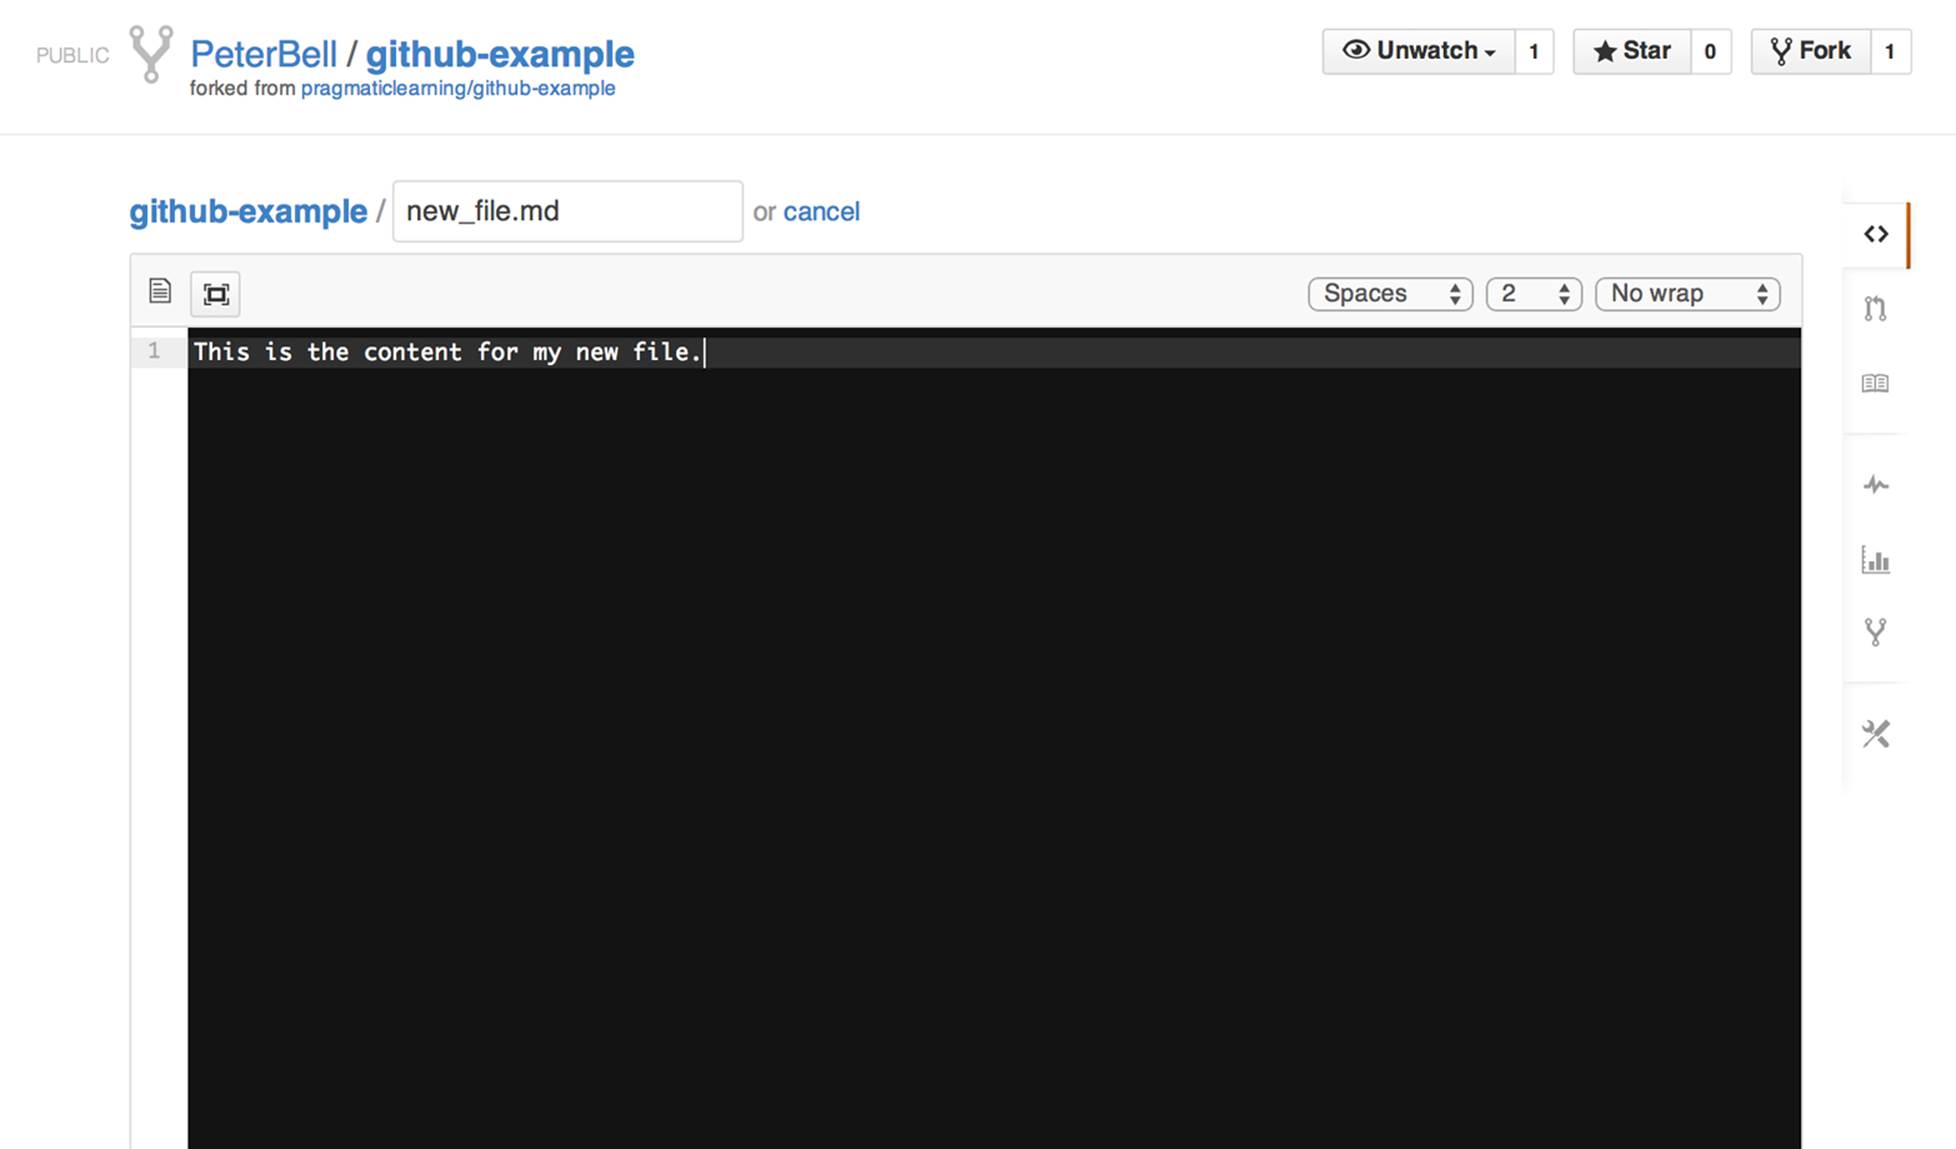
Figure 3-4. The “add new file” screen
Toward the top of the page is a text box just to the right of the project name, where you can enter the name of the file you want to add to the project. Below that is a text area where you can enter the content you’d like to put in the file. Scroll down the page when you’re done naming the file and entering the content, and as shown in Figure 3-5, you’ll see a couple of text boxes where you can create a (required) short description and an optional extended description of the change that you’re making.
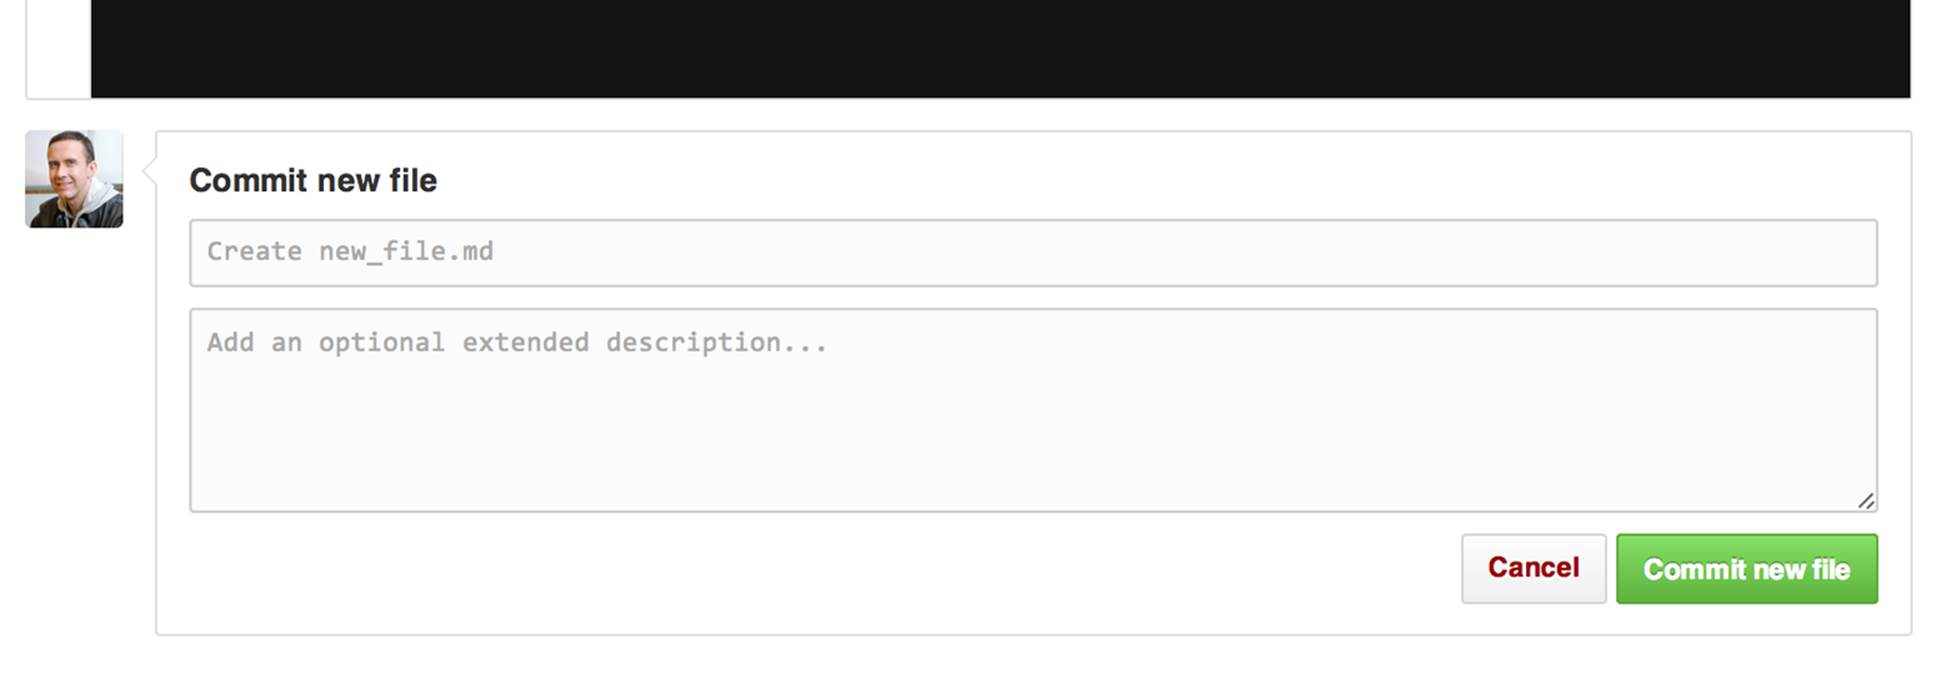
Figure 3-5. The bottom of the “add new file” screen
These descriptions will be saved as the commit message for your commit. If you don’t enter anything, the default commit message will be “Create (filename).” Generally, you’ll want to enter a meaningful commit message so other people viewing the project will understand what you did and why you did it. Click the green “Commit new file” button, and your new file will be added to the project and your commit will be added to the commit history. You can see in Figure 3-6 that new_file.md has been added to the list of files and that, in my case, there are now three commits—the latest of which is the commit I just made by adding this file.
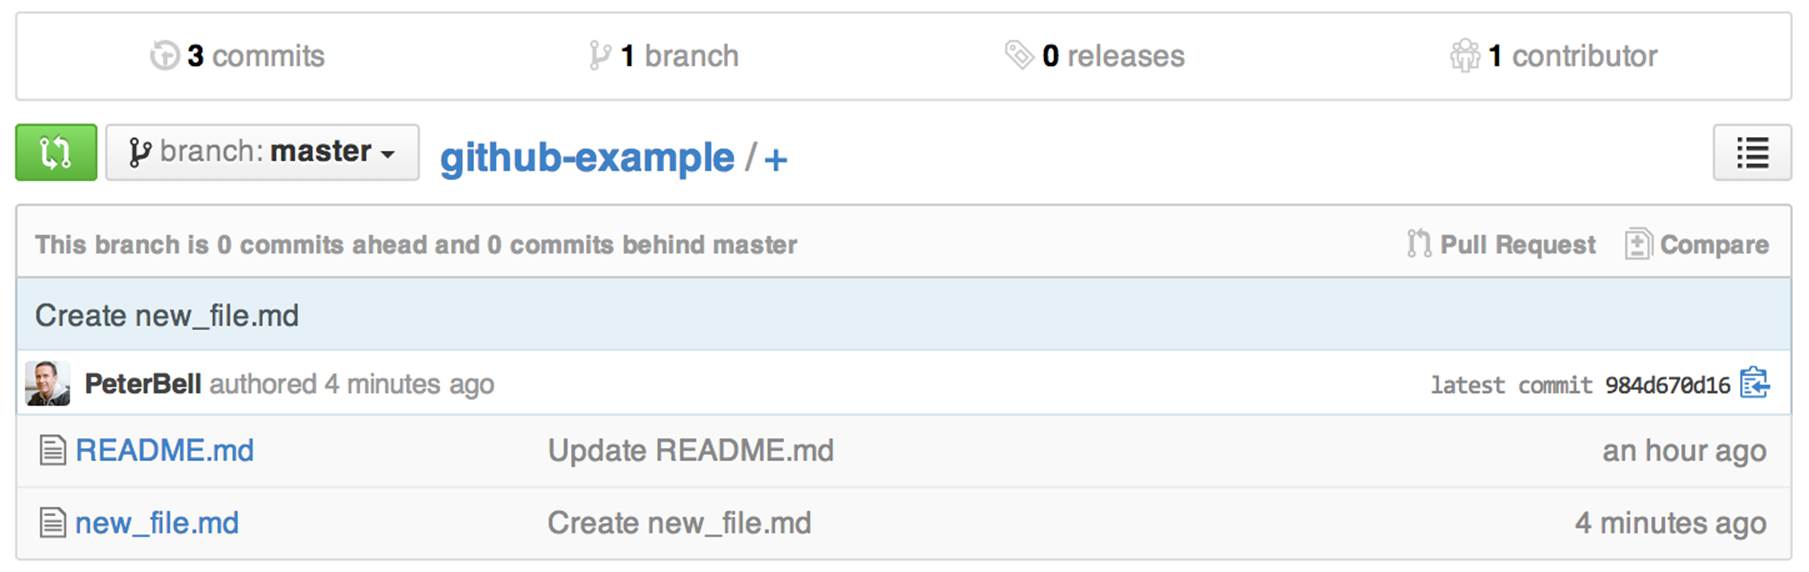
Figure 3-6. The project home page after adding the new file
Creating a Pull Request
We’ve made a change to our fork of the project, but the change hasn’t propagated back to the original project. That makes sense. Anyone can fork any public project, and the project owner wouldn’t want just anyone editing all of their files. However, sometimes it’s great to allow other people to propose changes to a project. This allows a large number of people to easily contribute to an open source project or a smaller team to work together on an internal project. That is what pull requests are for.
With a pull request, you can request that changes you’ve made on a fork be incorporated into the original project. Let’s go through the process now. As you can see in Figure 3-7, on the right side of the page there is a Pull Requests tab.
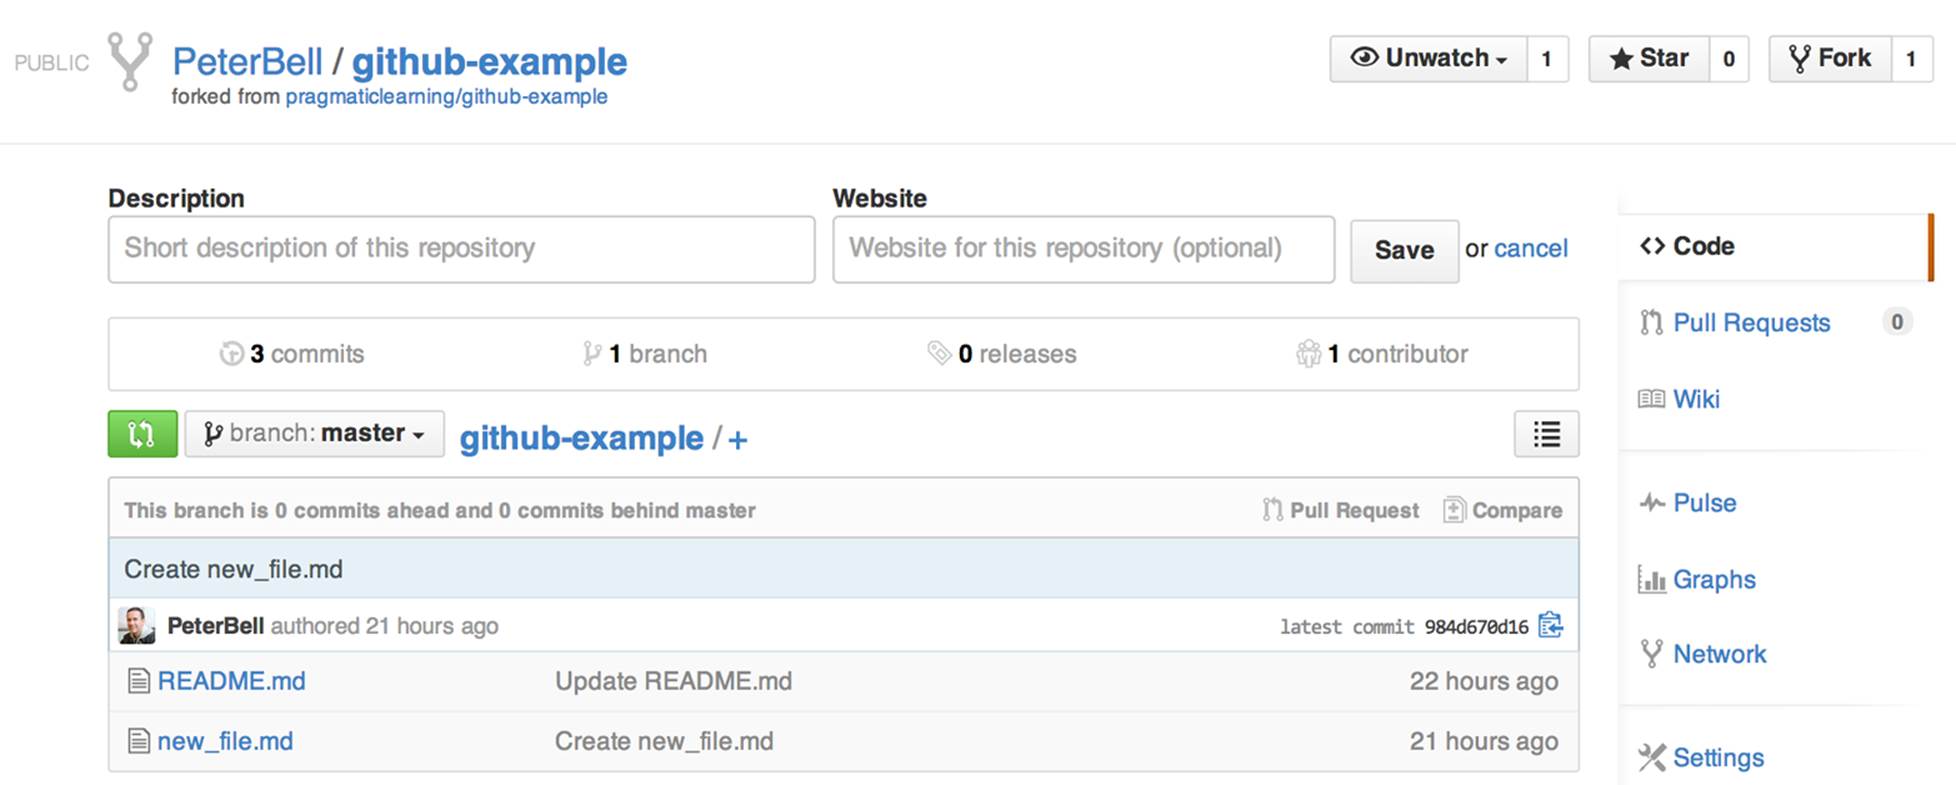
Figure 3-7. The Pull Requests tab on the project home page
Click the Pull Requests tab, and you’ll see a screen similar to Figure 3-8 showing that currently you don’t have any outstanding pull requests. Click the green “New pull request” button at the top right of the screen.
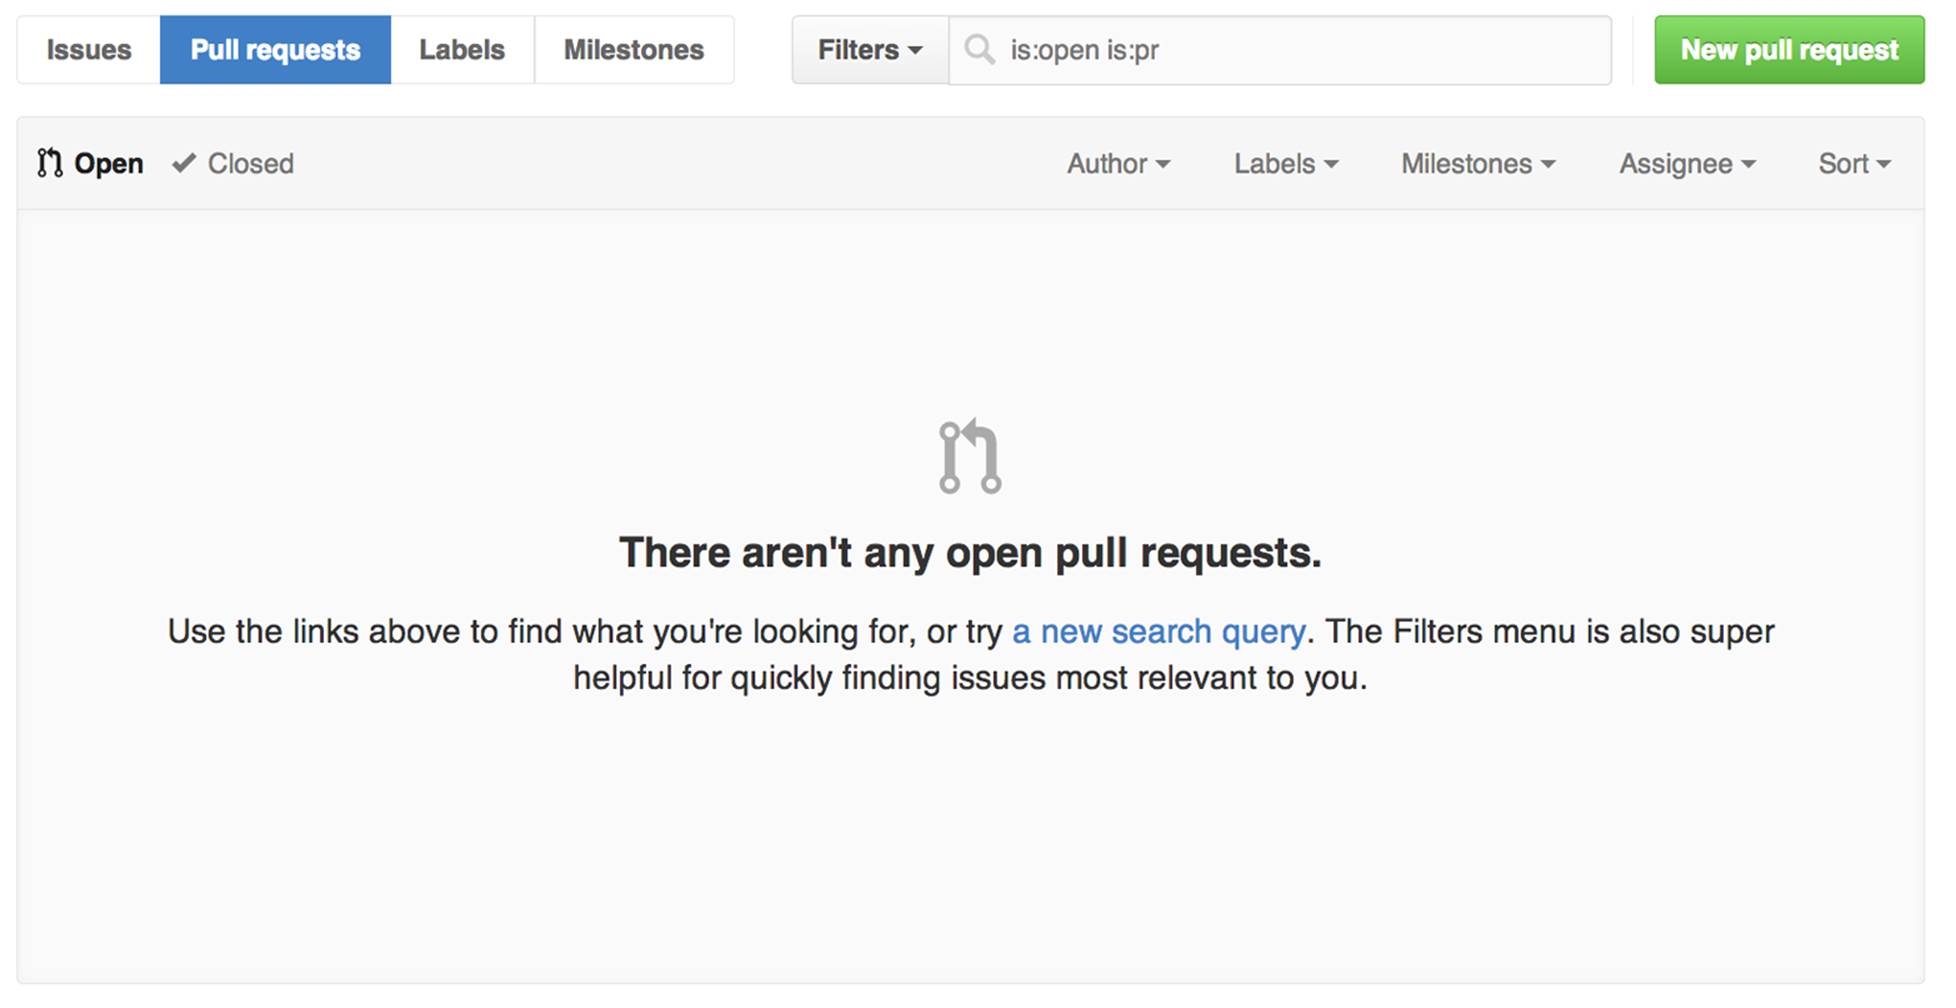
Figure 3-8. The pull requests screen
When you click the button, you’ll see a screen similar to Figure 3-9.
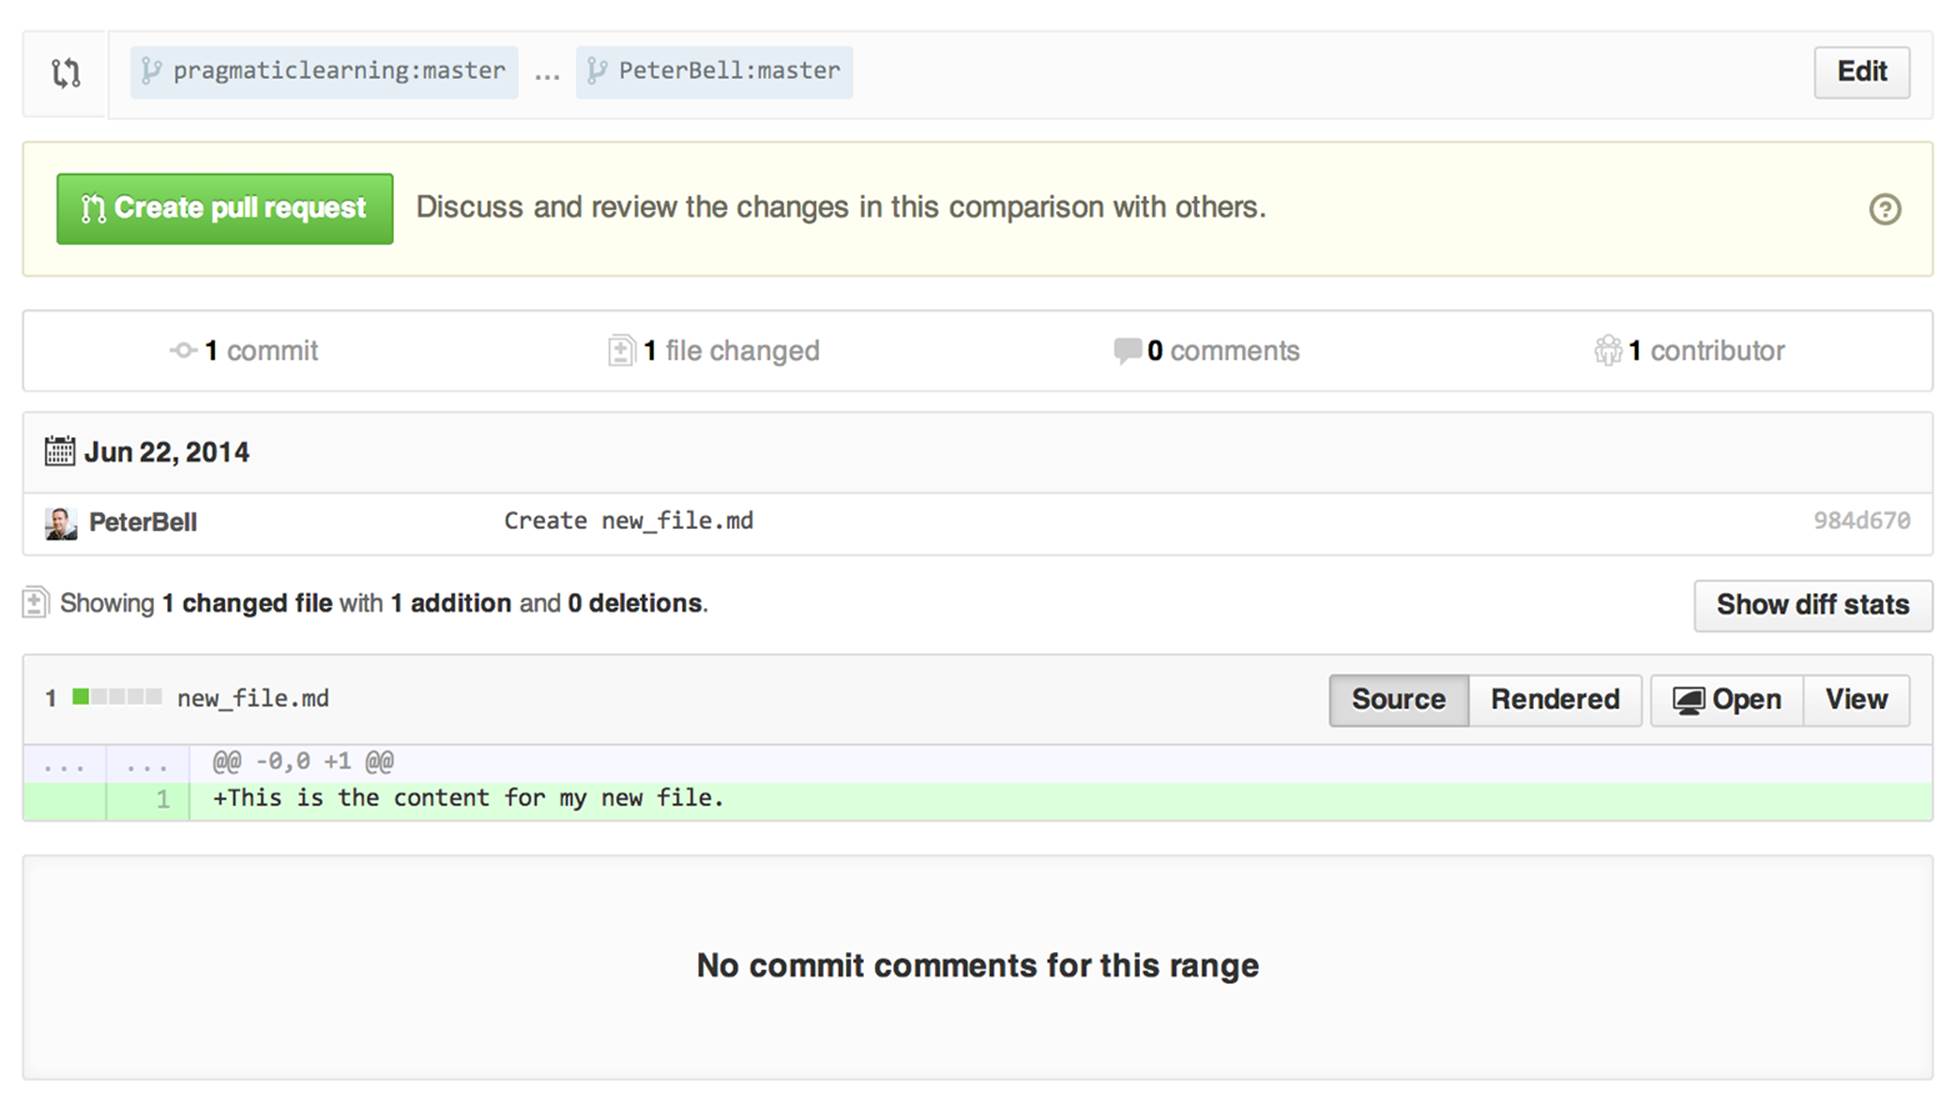
Figure 3-9. The “preview pull request” screen
One of the first things you see in Figure 3-9 is that it is proposing a pull request between pragmaticlearning:master and PeterBell:master. Pull requests are requests to incorporate the changes from one branch (stream of history) into another. In this case, GitHub has correctly guessed that I want to take the change that I made on the master branch on my fork (the new file I added) and have that merged back into the master branch on the original project that I forked from. Note that the branch with the changes that you want merged in is on the right, and the target branch you’d like it to be merged into is on the left.
As you look lower down on Figure 3-9, you’ll also see that it provides a summary of the changes that would occur if that pull request was merged—I did indeed make one commit that changed a single file. It even shows in green the new content that would be added to new_file.md. If I click the “Show diff stats” button, it would even show numerically that one line of content was being added and no lines of content were being removed.
Once we’ve confirmed that the proposed pull request is the one we want to create, the next step is to click the large green “Create pull request” button. Doing so will take you to a page similar to Figure 3-10.
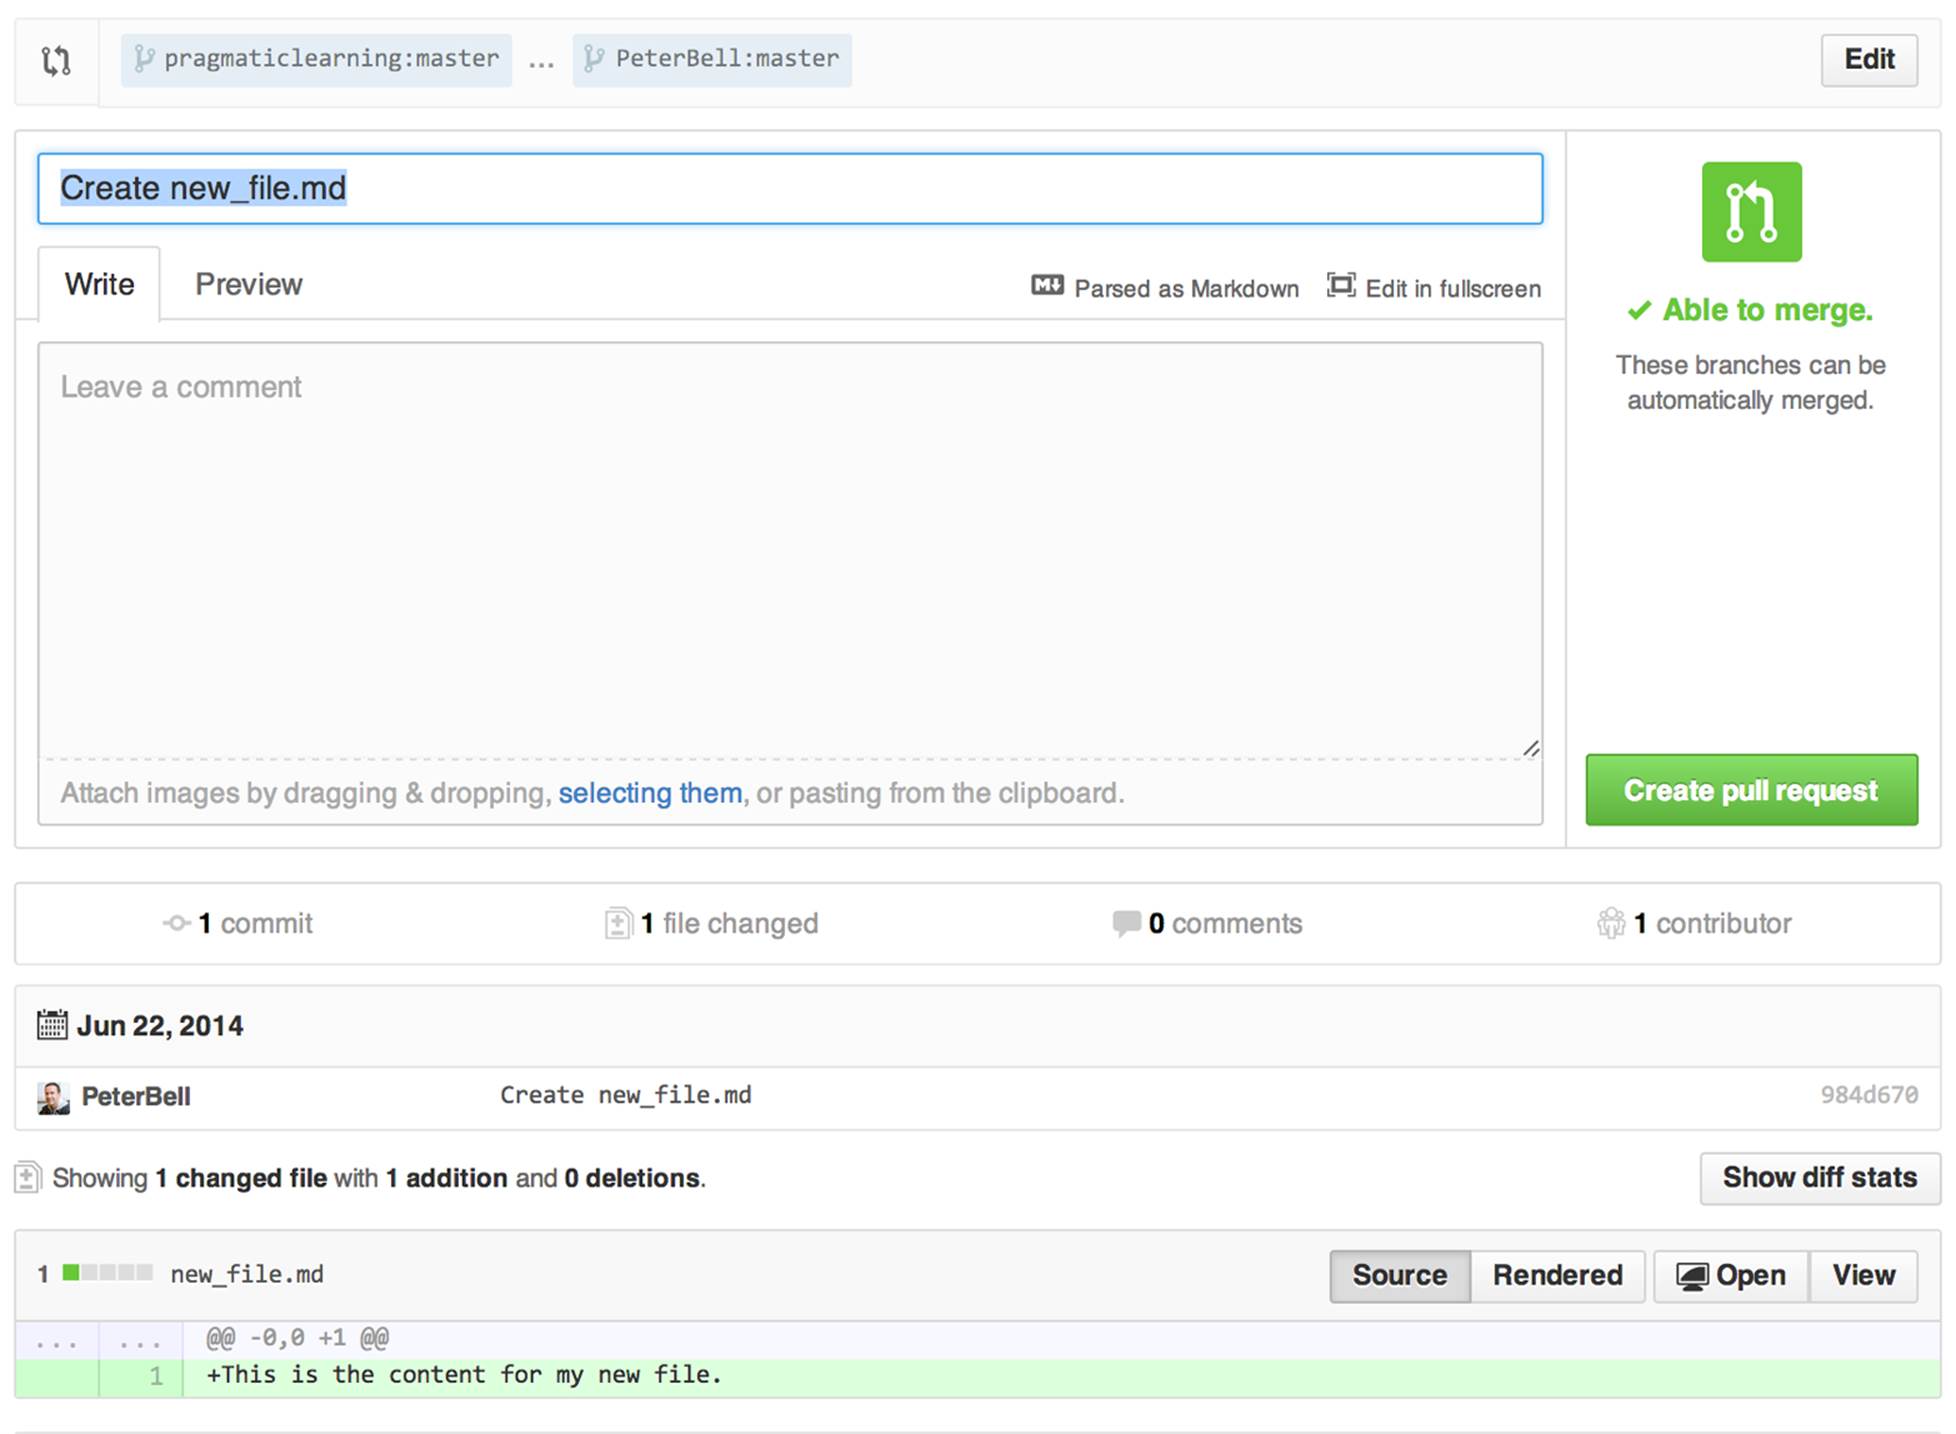
Figure 3-10. The “create pull request” screen
This screen is your chance to tell the story about why your changes should be incorporated in the other project, so take the time to create a meaningful title and description of the changes you’ve made. By default the title will be the first line of your commit message for your most recent commit, and if you’ve made more than one commit on the branch you’re trying to have merged, the description will have a bulleted list of the first line of all of the commit messages that are part of the pull request. That’s a fine starting point, but you’re going to want to take a little bit of time to describe not only what changes you’ve made, but why you made them and why they’d be a good addition to the project.
Once you’ve finished describing your pull request, click the “Create pull request” button and you’ll see a page that looks like Figure 3-11.

Figure 3-11. A created pull request
There are a couple of things that you should notice in Figure 3-11. First, notice that we’re now in the original project—under pragmaticlearning. This makes sense. We wanted to create a request to pull our work into that project, so the pull request is part of that project—not our fork. You can see that “PeterBell wants to merge 1 commit into pragmaticlearning:master from PeterBell:master,” and it shows you the pull request (title and description) followed by the commit that was made. Clicking that commit displays the details of the commit, as you can see in Figure 3-12.
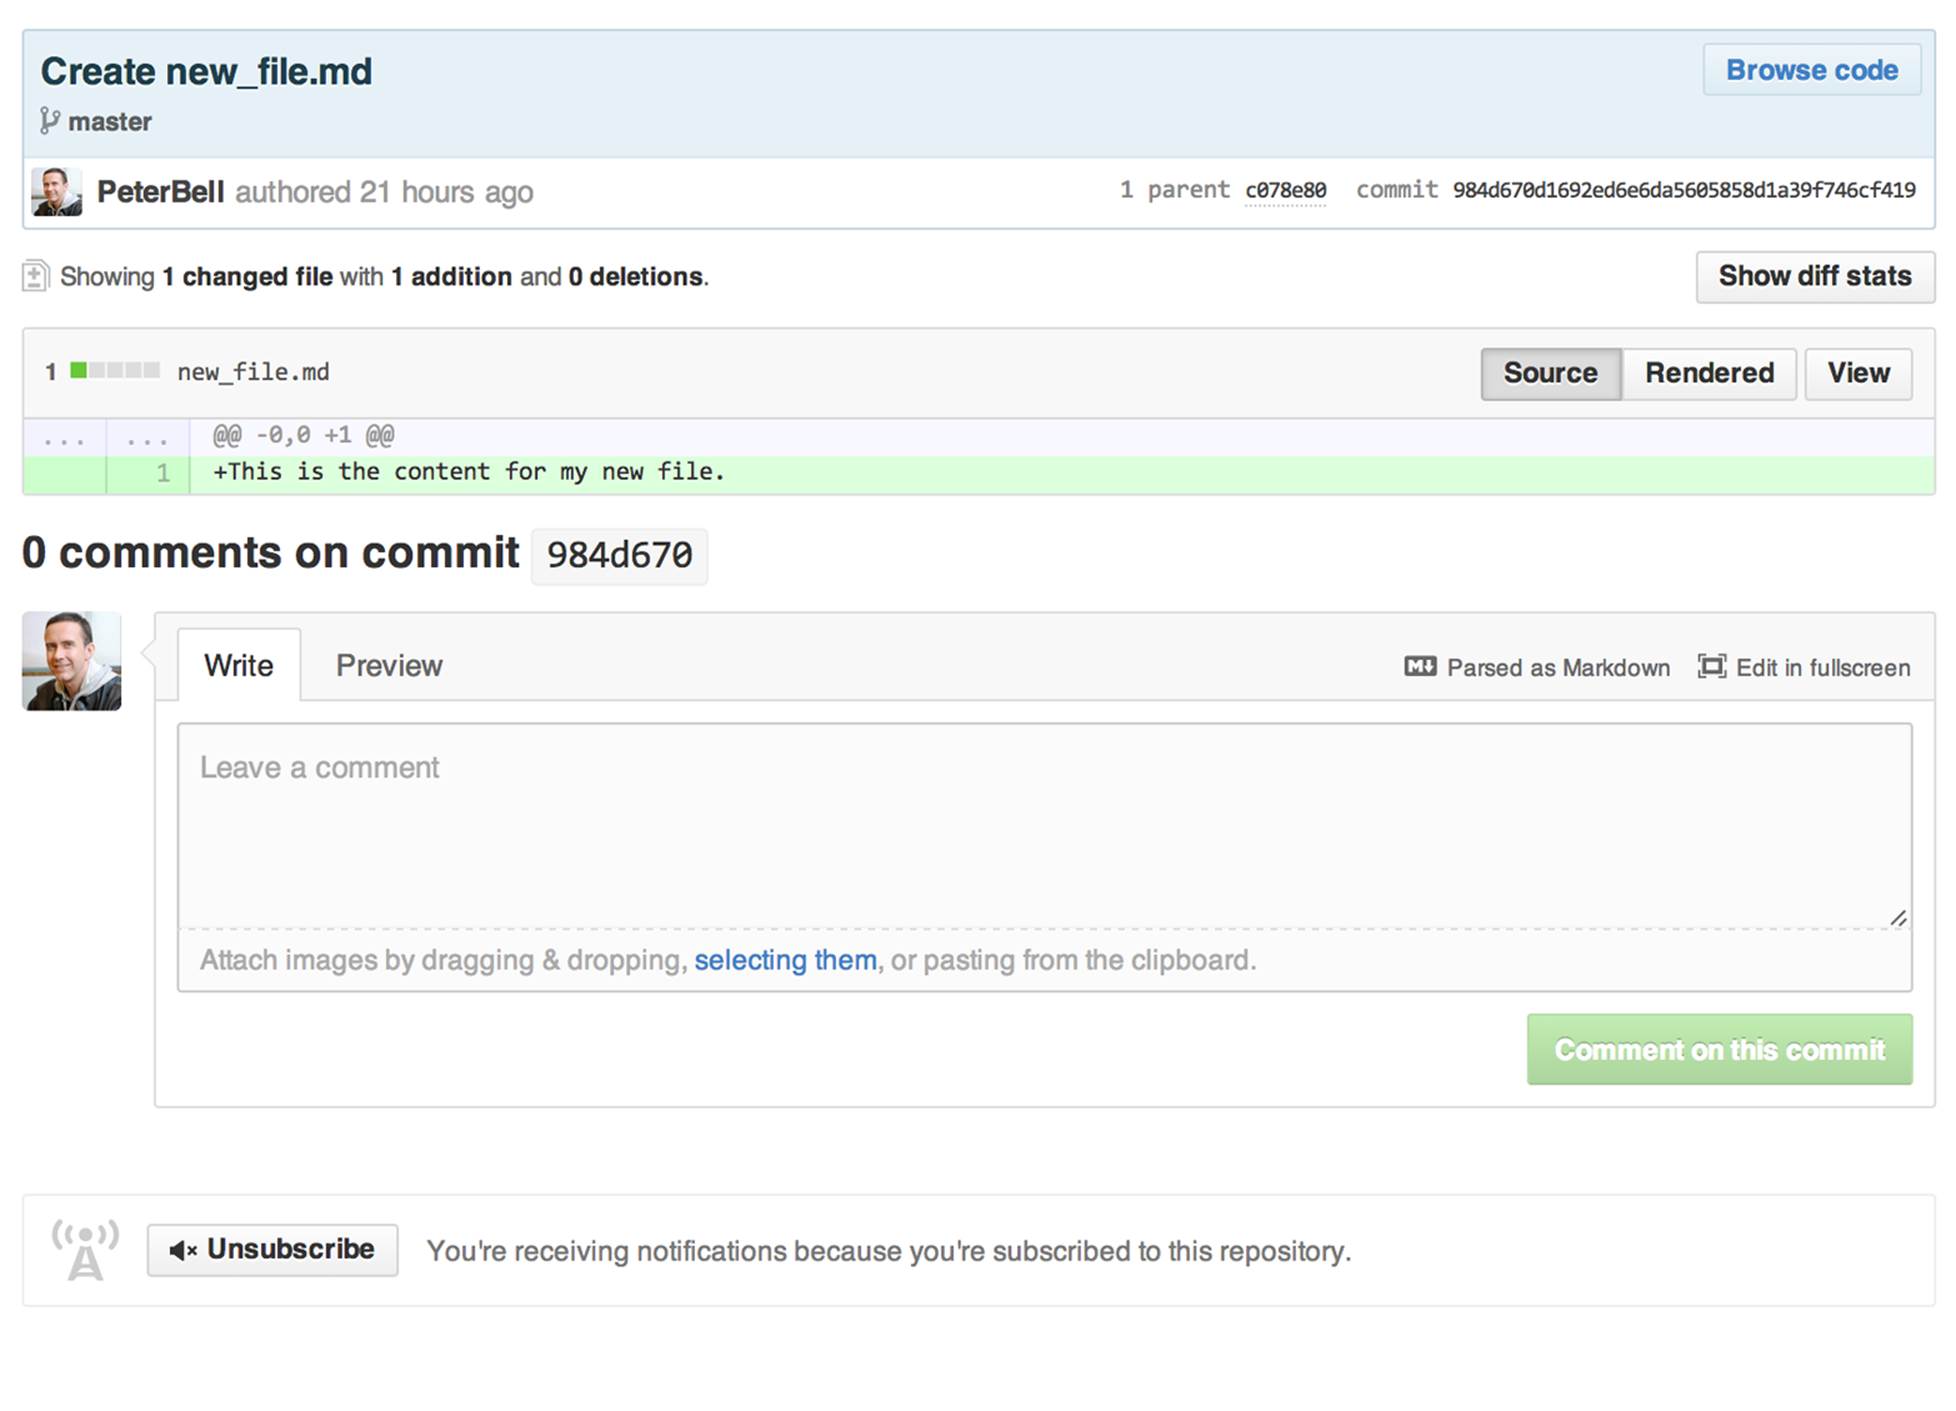
Figure 3-12. Viewing the commit from the pull request
Notice that the commit link has taken us back to the PeterBell version of the repo because that is where the commit was made. It shows you the commit message, who made the change, and the changes that were introduced in that commit.
Going back to the pull request in Figure 3-11, you’ll see that there is an option to merge the pull request. That option is visible only to the owner of the project or to anyone the owner has added as collaborators. If someone without those permissions was looking at the page, he would not be able to merge the pull request. For example, in Figure 3-13 I’ve logged in as another user, and when I view the same page, I don’t get the option to merge in the pull request, although I can still comment on it if I want.
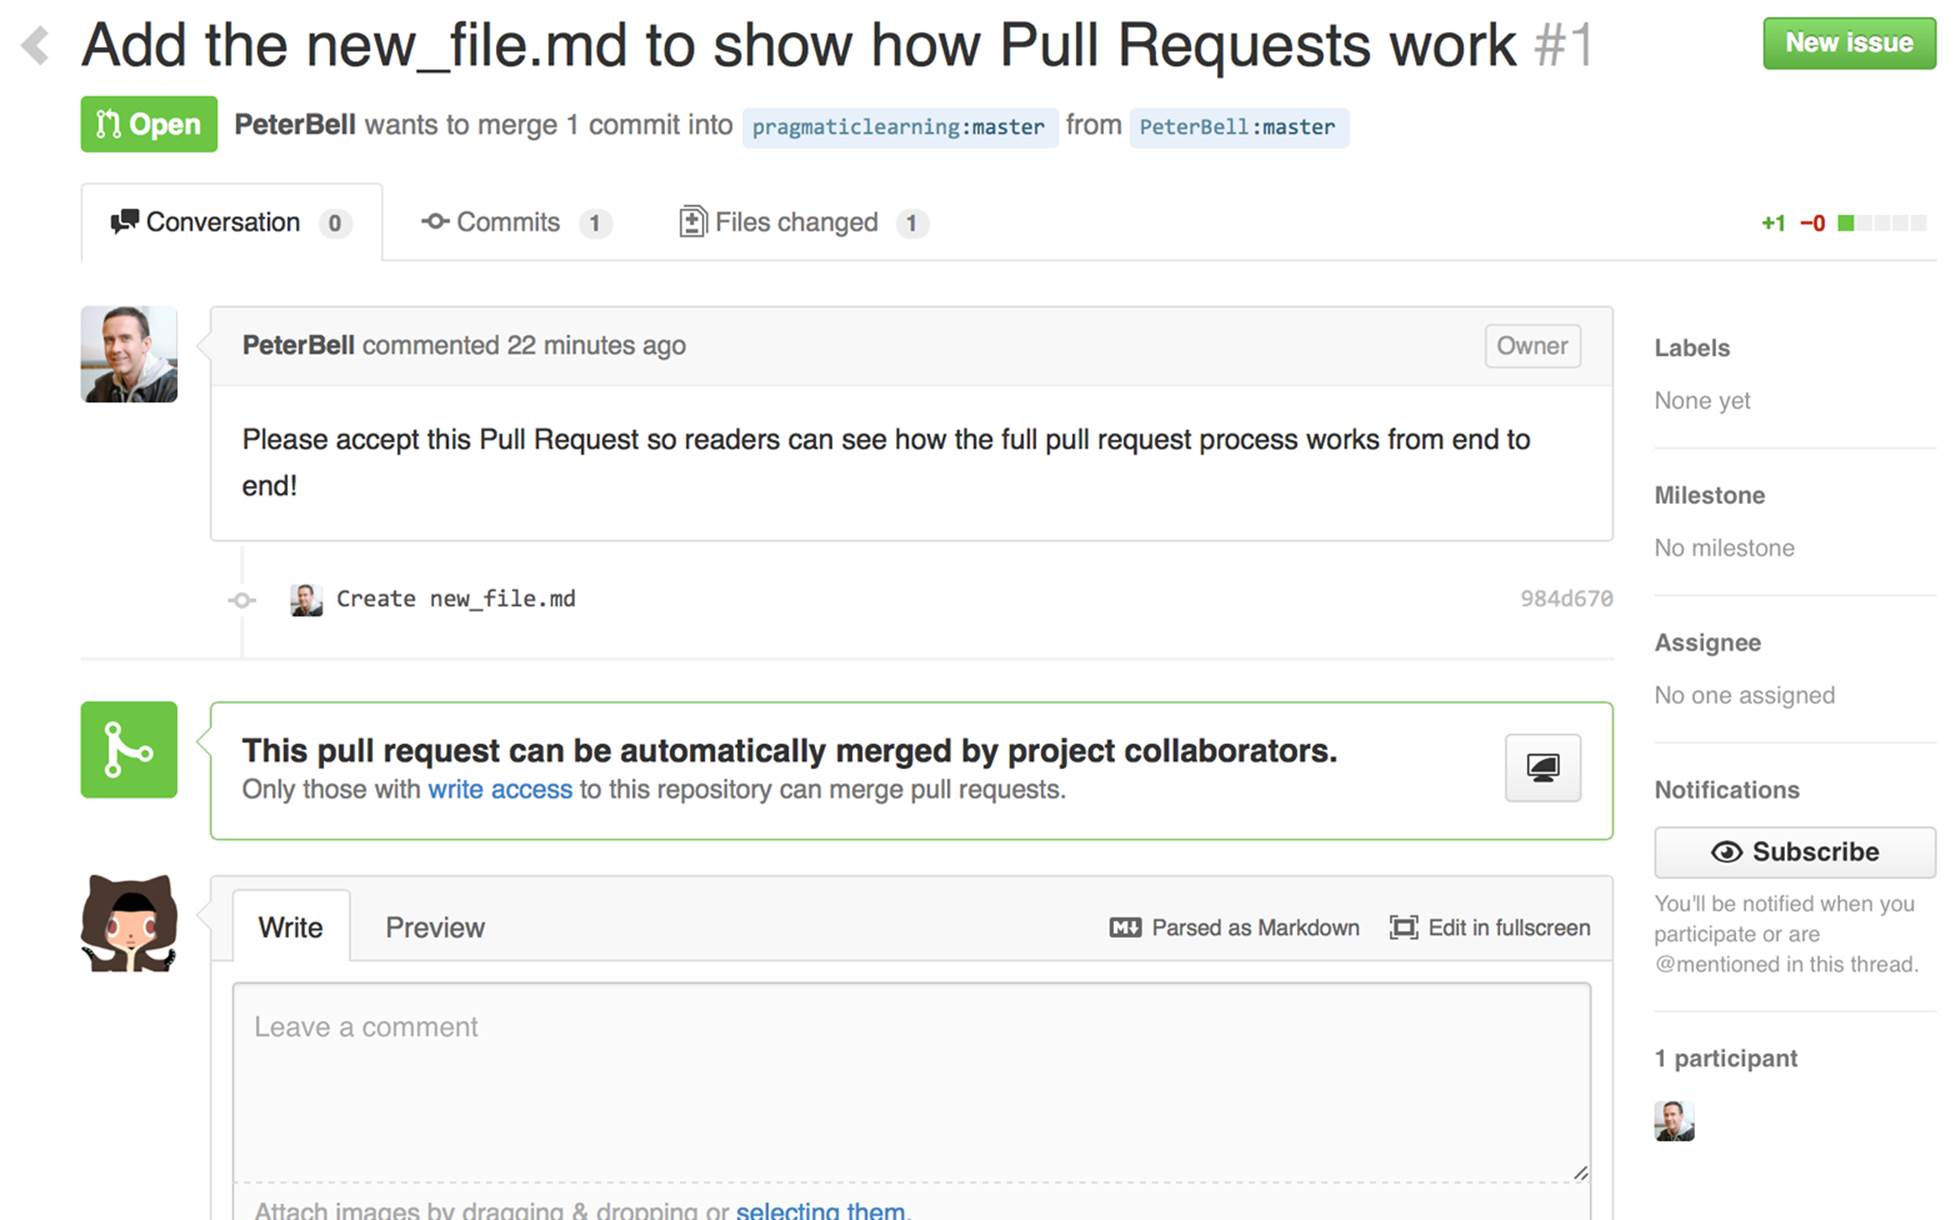
Figure 3-13. Viewing a pull request without being able to merge it
Often there will be a discussion before a pull request is merged, but we’ll look at that more in Chapter 4. For now I’m just going to accept the pull request and merge it in. I can just click the “Merge pull request” button, which adds a text box where I get the option to customize the commit message for merging the pull request, as shown in Figure 3-14.
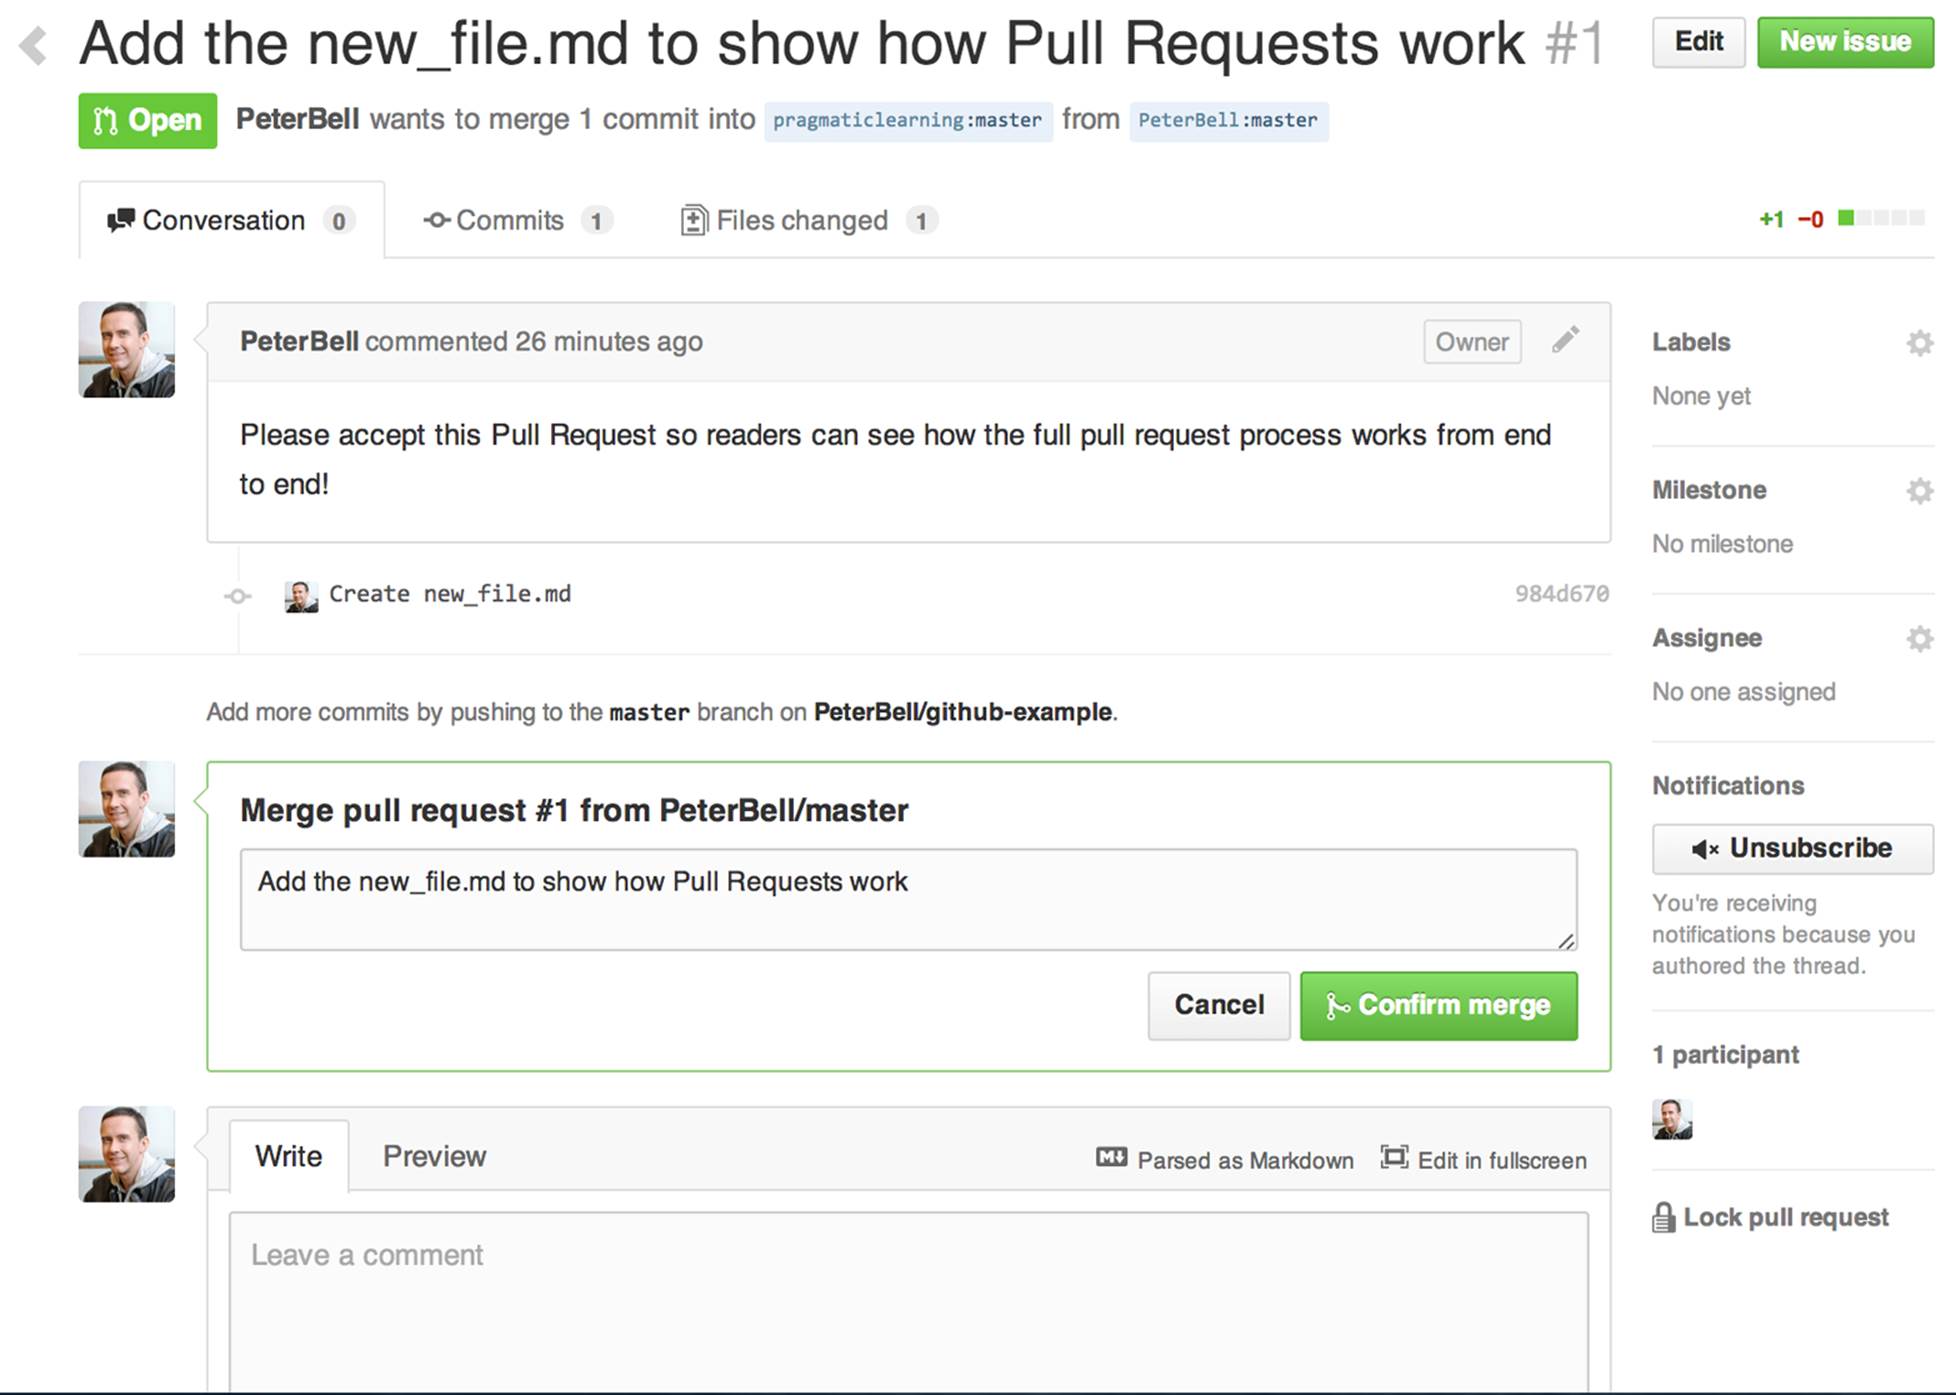
Figure 3-14. Getting ready to merge a pull request
Once I’ve made any changes I want to the commit message, I can just click the “Confirm merge” button below and to the right. The pull request is then merged, and the output is displayed, as in Figure 3-15.
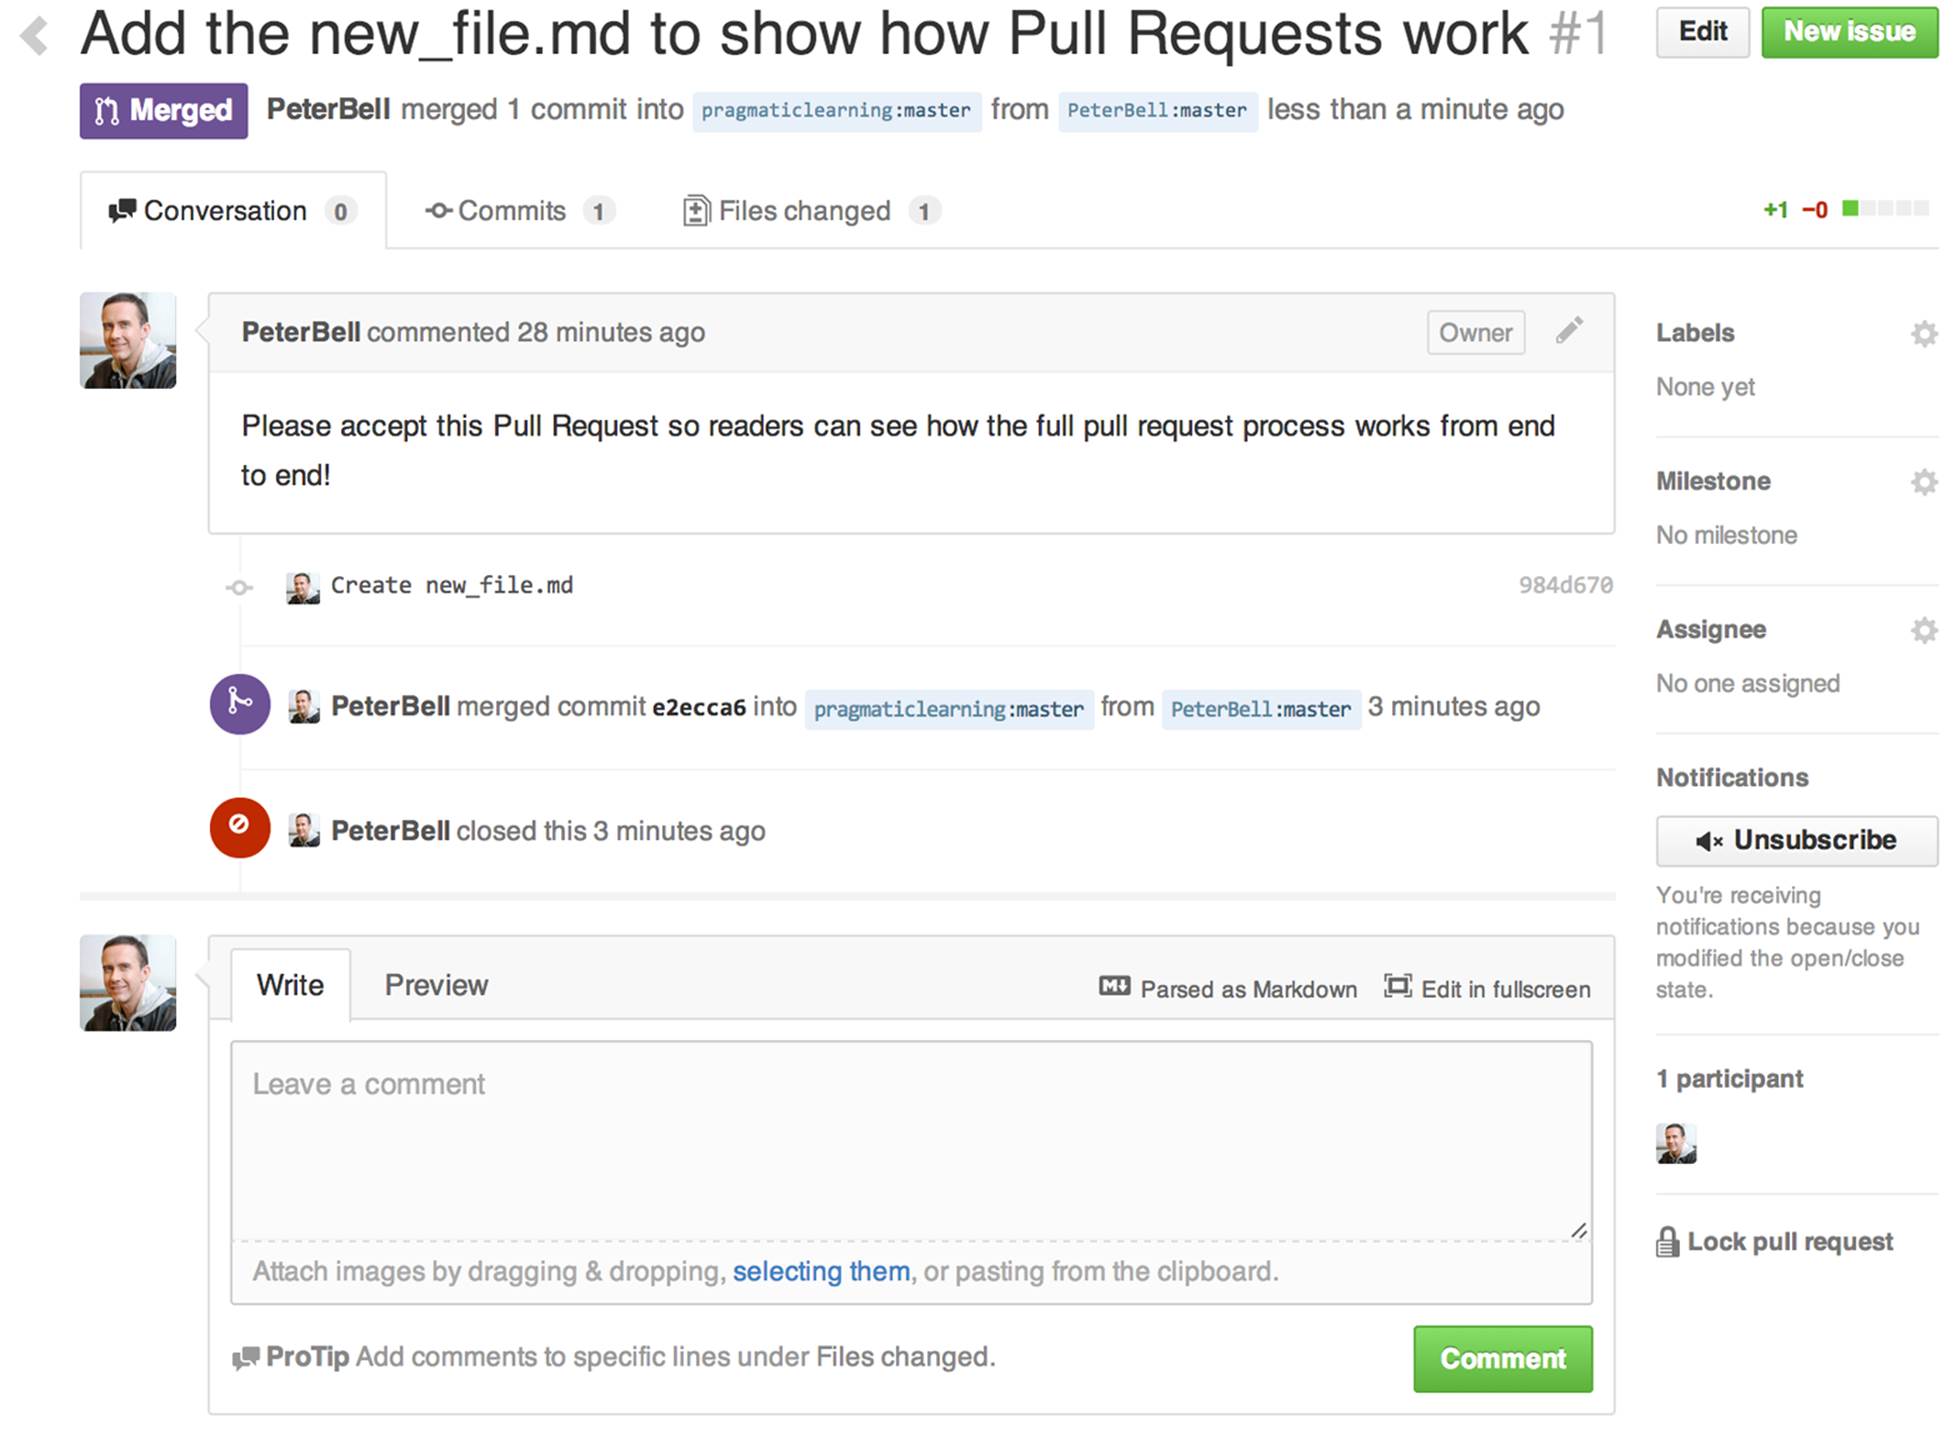
Figure 3-15. Viewing a closed (merged) pull request
Notice that we can still see the pull request message and the commit, but now we can also see who merged in the pull request and approximately when they did so. It also shows that the pull request was closed, which happens automatically when you merge it. Finally, if we look at the project page in Figure 3-16, we’ll notice a couple of things.
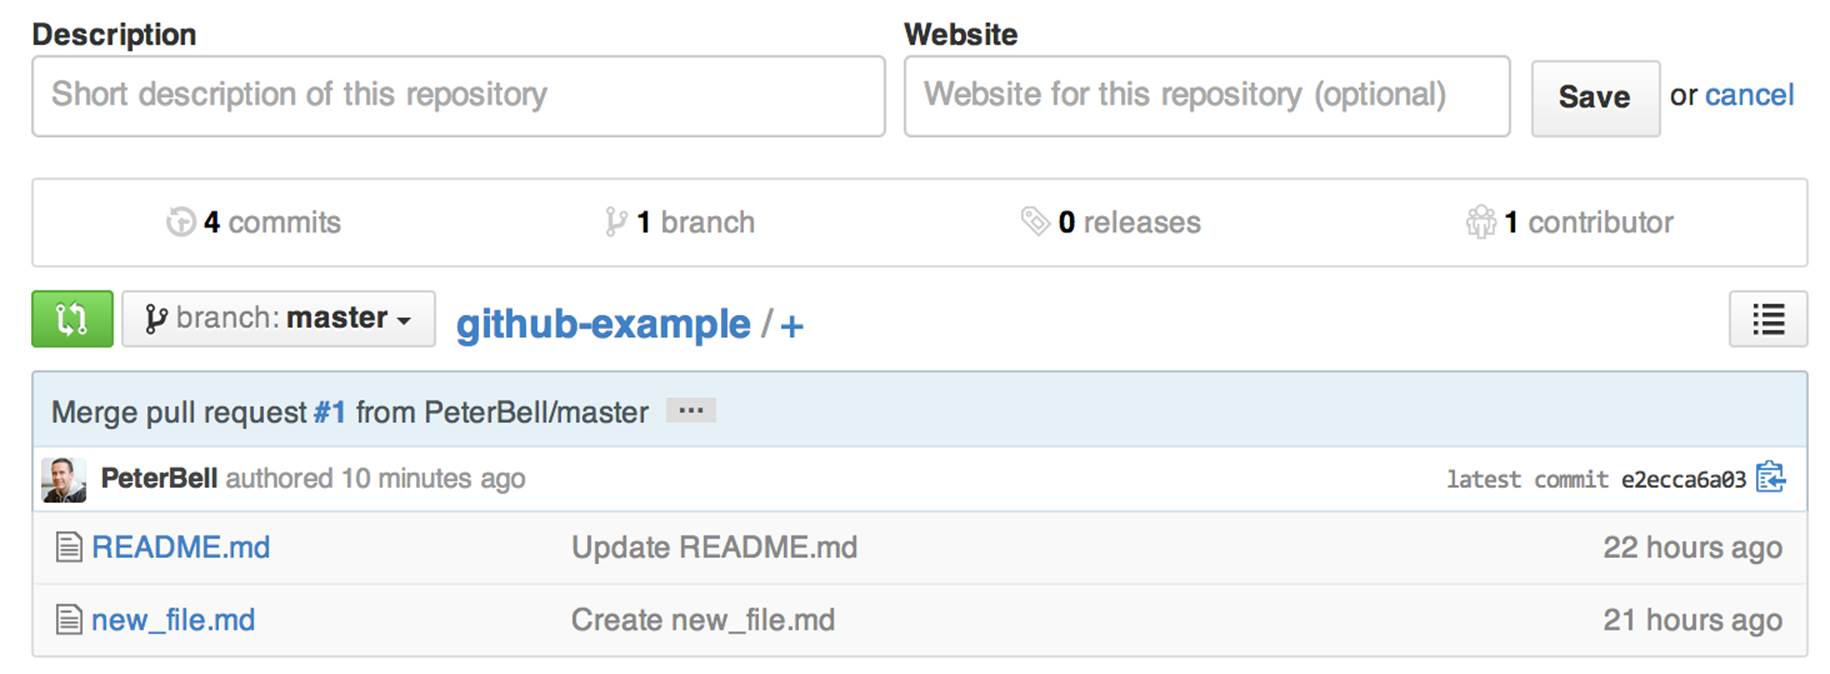
Figure 3-16. The original (pragmaticlearning) project after merging the pull request
First, new_file.md has been added to the project. Second, there are four commits now in the original project. If we click the “4 commits” link, we can see why (see Figure 3-17).

Figure 3-17. The original project commit history
There were the two original commits in the project, there is the “Create new_file.md” commit that was made on my fork, and there is a new merge commit that brought the work into the original project when we merged the pull request. Whenever you merge a pull request, it will create one of these merge commits. They are really useful because the commit message (which you can edit when you merge a pull request) allows you to document why you decided to include the work; if you ever wanted to get rid of all of the work you merged in from a pull request, you could ask one of your developers to “revert the merge commit for that pull request” and she’d be able to easily remove all of the changes that got merged in.
Editing a File
Sometimes you might want to add a new file to a project, but most of the time you’re going to want to make changes to an existing file. Let’s say we wanted to edit README.md to let people know how to contribute to the project. Starting on the home page of your fork of the project, if you click the README.md filename, it’ll take you to a page like Figure 3-18.
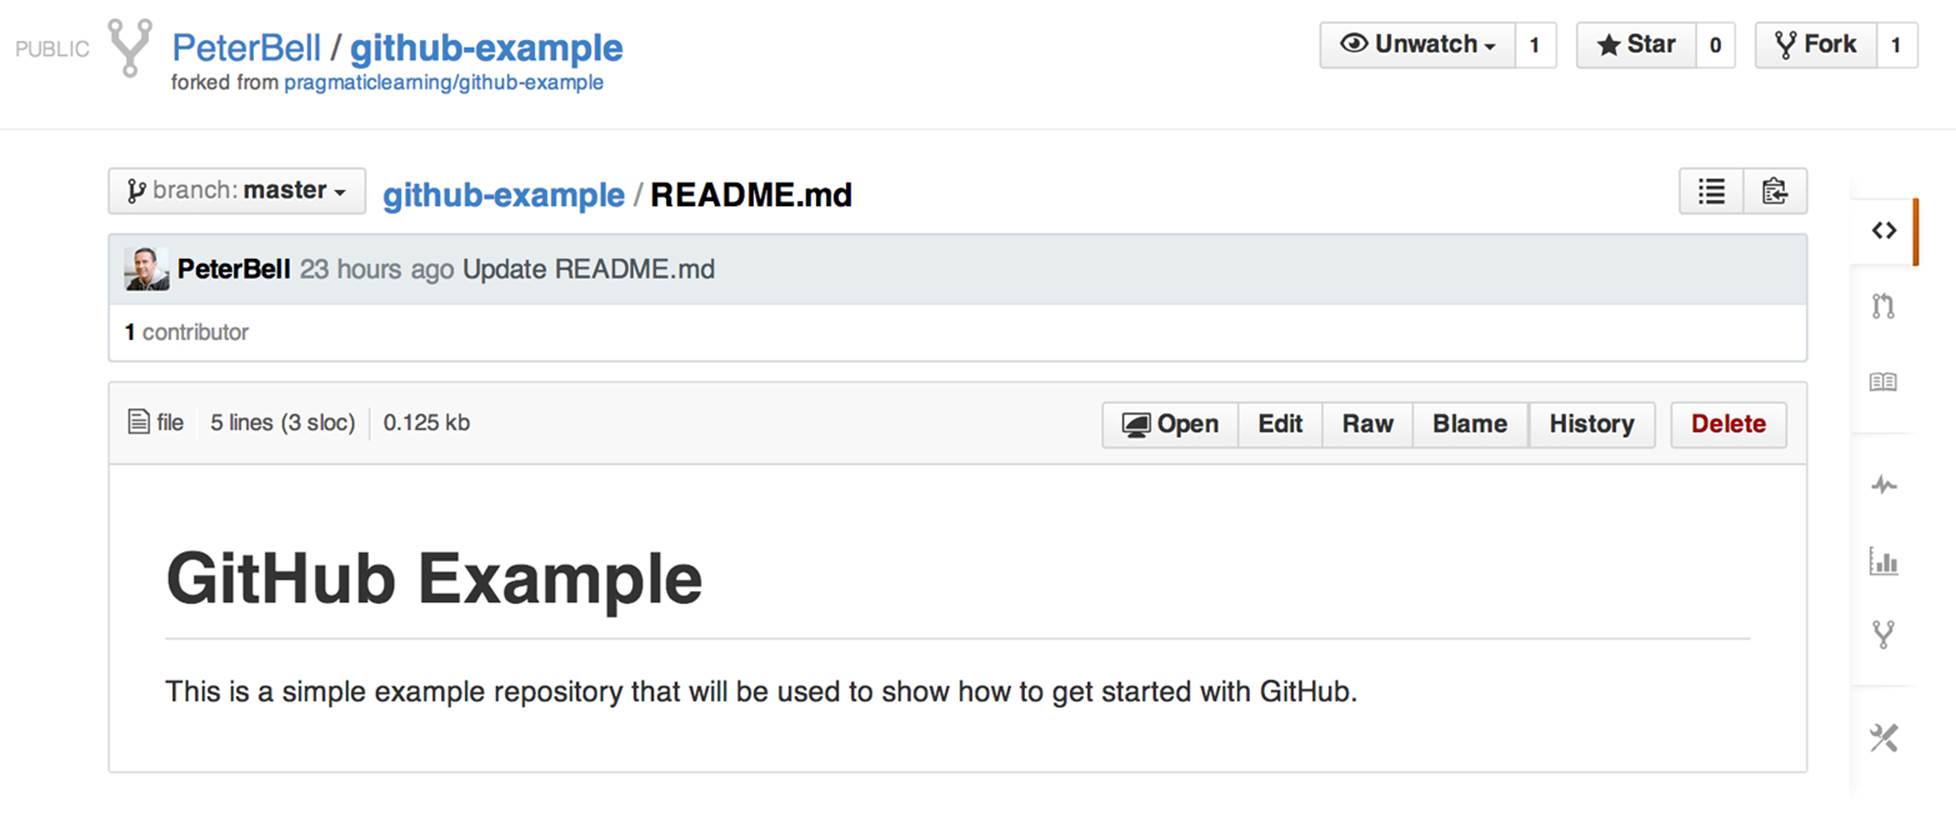
Figure 3-18. Viewing the README.md file
In Figure 3-18, you can see who last made a change to the file, how long ago the change was made, the first line of the commit message, and how many people have contributed content to the file. Above the display of the content are a number of buttons. The option we’re going to use right now is the Edit button. Clicking that button takes you to the screen shown in Figure 3-19, which will allow you to change the content of the file.
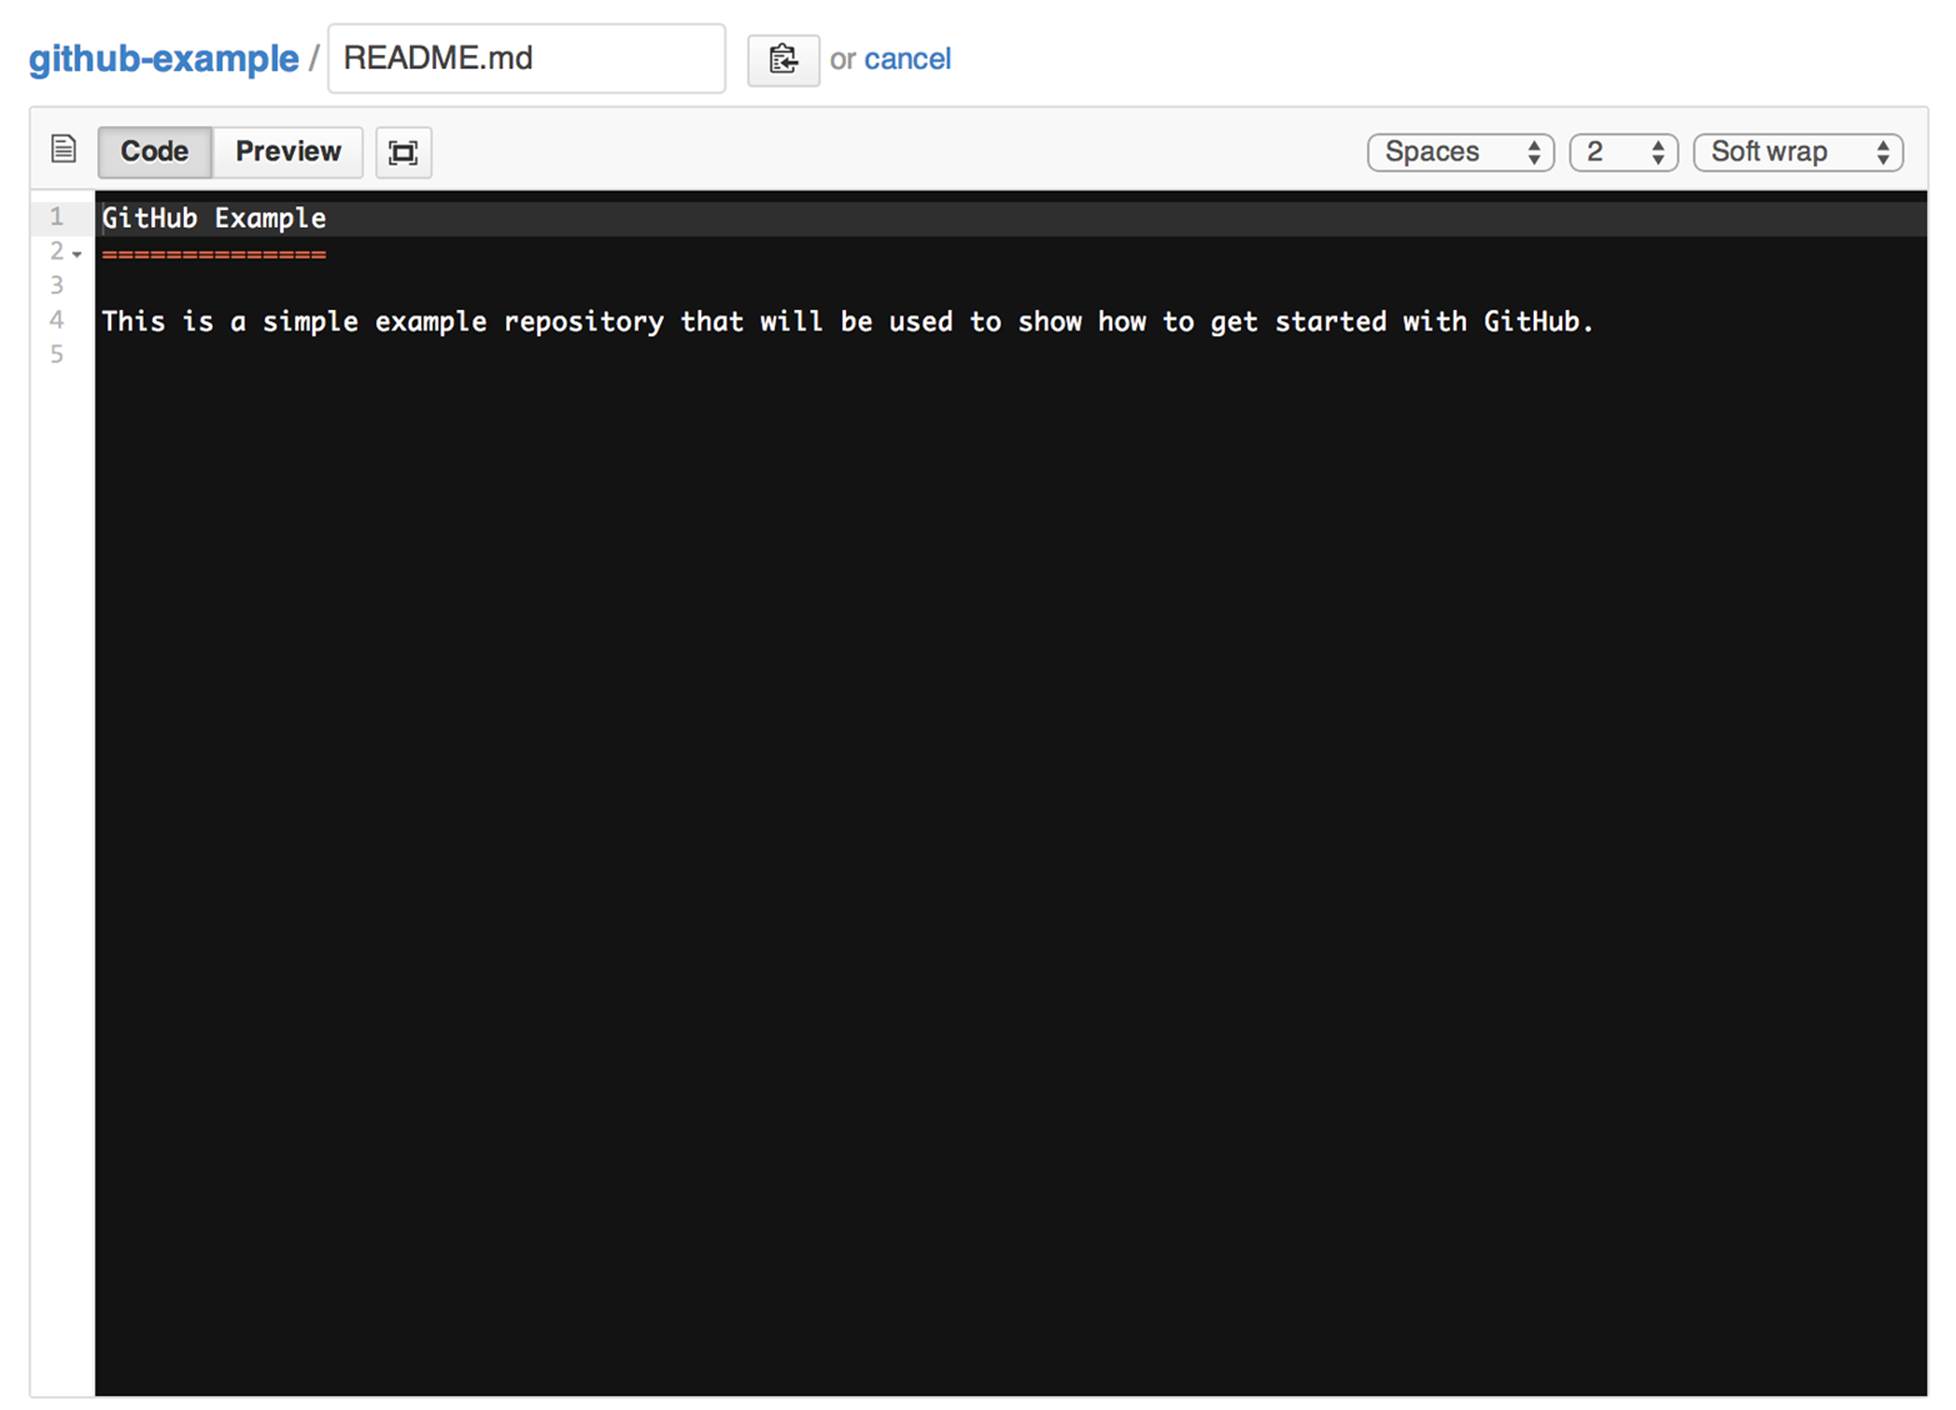
Figure 3-19. Editing the README.md file
As with the screen for adding a file, once you’re done with your changes, scroll down the page, enter a meaningful commit message, and click the “Commit changes” button. Once you’ve done that, you’ll see the page displaying the README.md file and any additional content you added. InFigure 3-20 you can see the “how to contribute” information I just added to the file. As with the addition, if you just want to make changes to your fork, you’re done. If you’d like these changes to get incorporated into the original project at pragmaticlearning/github-example, you’d have to create a pull request. Figure 3-20 shows the closed pull request after I created it and then merged it into the original project.
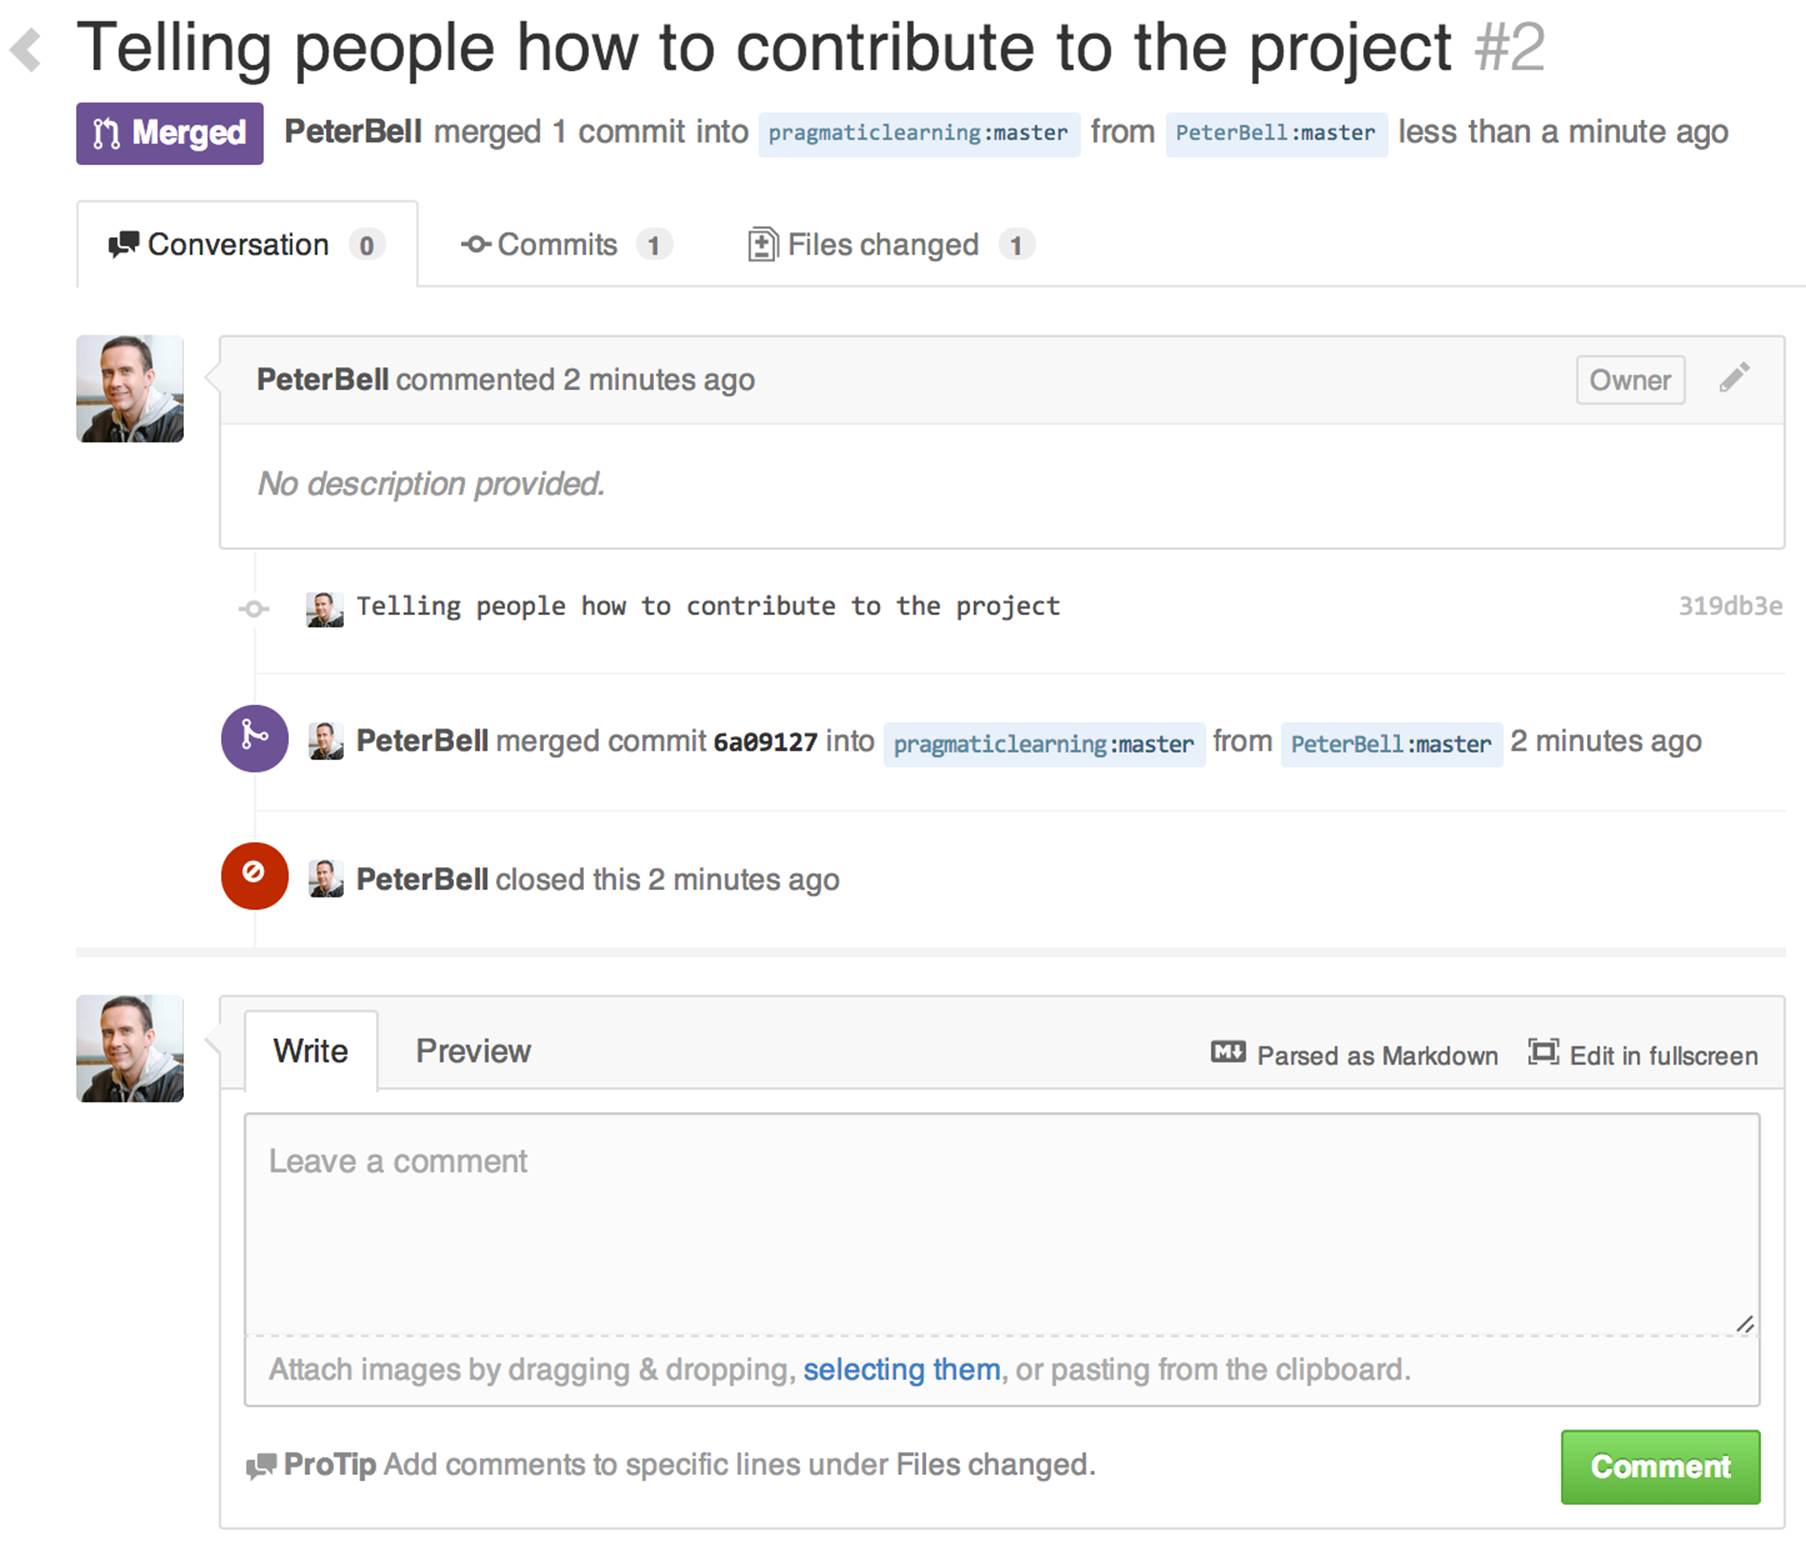
Figure 3-20. The merged pull request for the edited README.md
Renaming or Moving a File
Often you want to rename a file or move it from one folder to another. As far as Git and GitHub are concerned, both are the same process: you’re changing the full name for the file, and optionally including the name of its folder. In this section, I’m going to move the new_file.md I created to a folder called documentation and I’m going to rename it chapter_1.md.
To start, I’m going to go to the project page for my fork of the repo, and then I’ll click the new_file.md filename to go to the view page for new_file.md. Then I’ll click the Edit link as I did in “Adding a File”. Doing that gets me to a screen that looks like Figure 3-21.
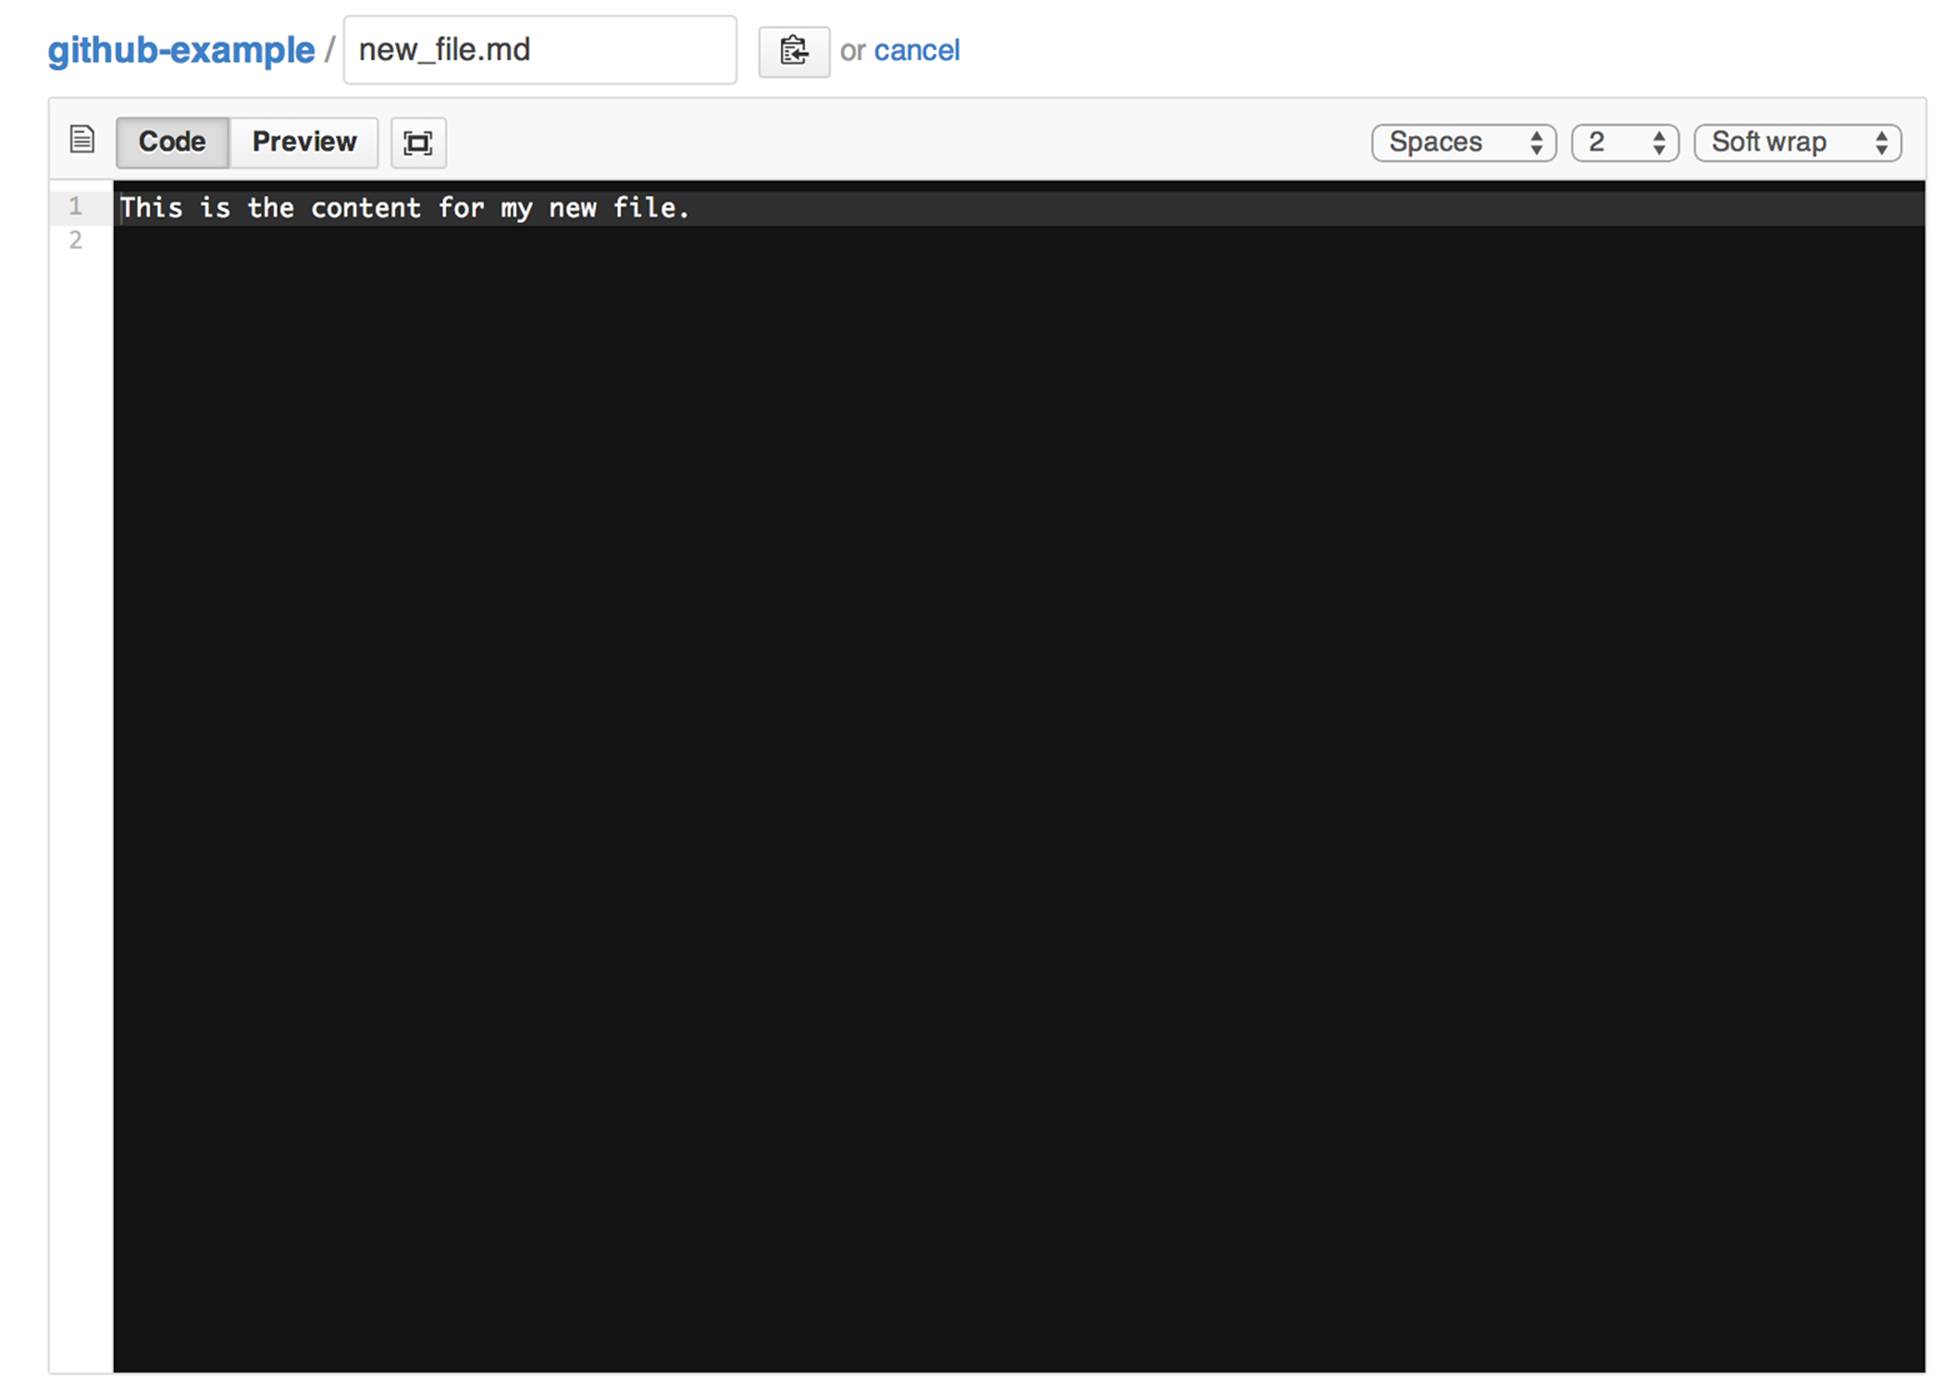
Figure 3-21. The edit screen for new_file.md
This time, instead of editing the content of the file, I’m going to go to the text box further up the page with the filename. If I just want to rename the file but keep it in the same folder, I’d just change the name of the file. If I want to put this file in another folder (whether or not it exists already), all I have to do is include a forward slash (/) in the filename. So in this case I just need to type documentation/chapter_1.md into the filename box. As you can see in Figure 3-22, as soon as I enter the forward slash, GitHub breaks that out as a new folder in the interface. If I wanted to move the file up a folder, I could just start by typing ../ into the filename and the file is moved up a folder.

Figure 3-22. Editing the folder or filename for a file
If you misspell the folder name, just click the cancel button shown in Figure 3-22 to start over. Once you’re done with the renaming or moving of a file, scroll down the page and commit the change. Figure 3-23 shows the renamed file, now in the /documentation folder.
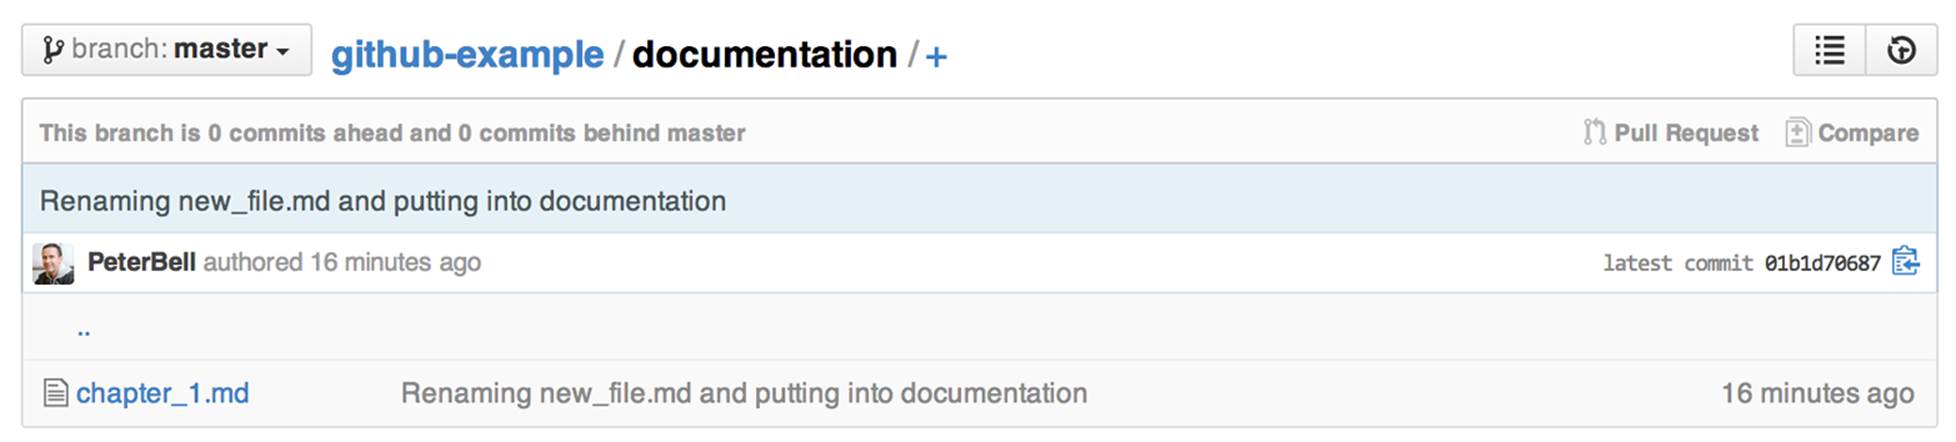
Figure 3-23. The renamed file in the /documentation folder
Working with Folders
It is important to understand how Git thinks about folders—it doesn’t! Git is concerned only with files. As far as it is concerned, folders are simply a place to store those files. Because of that, there is no way to add a folder to a project unless it includes at least one file.
Sometimes this is a problem. For example, in many software projects there needs to be a /build folder where automatically generated files will be saved when compiling the software. With some systems, if you don’t have such a folder, you’ll be unable to use the project.
Creating a Folder
A common pattern that has emerged is to create an empty file called .gitkeep in any folder that you need to create but that doesn’t really need to have any files. It seems a bit strange, but it works well and it is a well-understood convention, so if you ever need to create a folder, just create a.gitkeep file (see Figure 3-24.
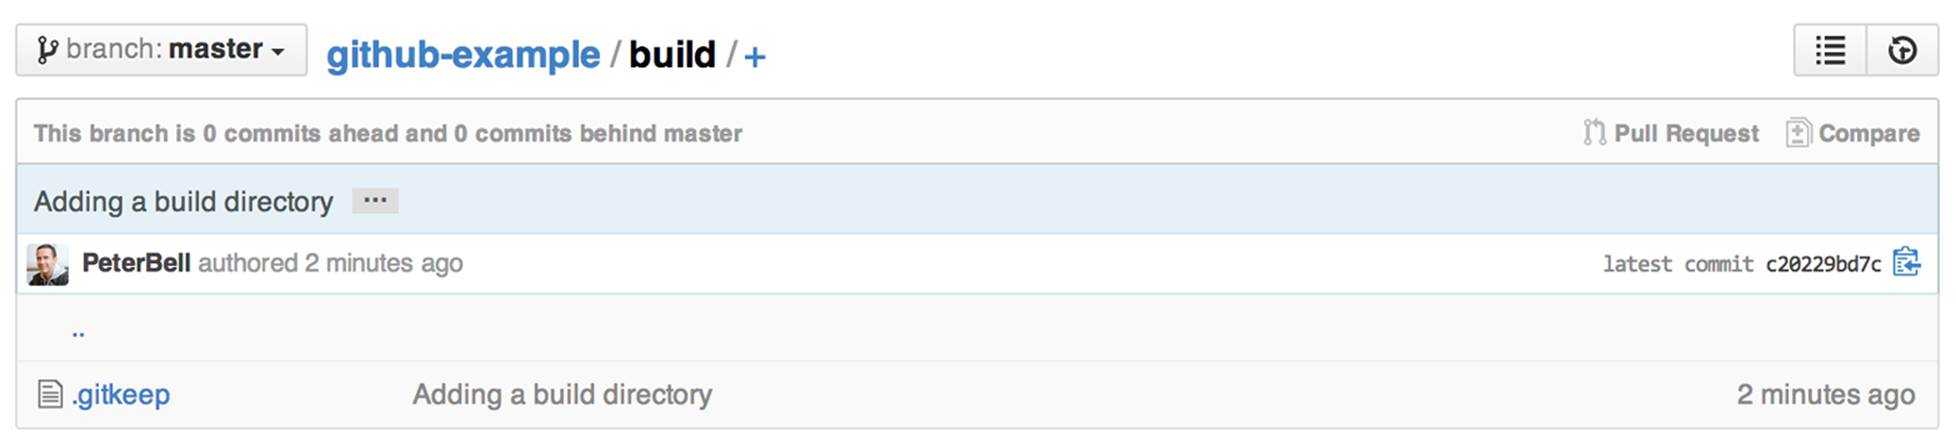
Figure 3-24. A .gitkeep file to create a /build folder
Renaming a Folder
You might have guessed that just as you can’t create a folder directly, you can’t rename it directly either. If you want to move a single file from one folder to another, you can do that by renaming it. For example, if I wanted to move chapter_1.md from documentation to new_docs, I can just go to the view page for the chapter_1.md file, click the Edit link, and at the start of the filename box type ../ to go up a folder, followed by new_docs to create or put the file into that folder instead. However, there is no way you can just rename a folder on GitHub. You’d have to rename each of the files in the folder one at a time to move them to the new folder.
The Limits of Editing on GitHub
We have just run into one of the limitations of editing on GitHub. Originally GitHub was designed to allow developers to share their Git repositories with each other. Developers would make changes to their projects locally on their laptops, save those changes in Git, and then push the results to GitHub. Now that more and more nontechnical people are collaborating via GitHub, it’s possible to do much of your editing right on the site, but there are a number of things that you can’t do via the web-based interface.
Currently, GitHub doesn’t allow you to rename folders or to make any other changes to more than one file in a single commit. It also doesn’t give you the power of Git to rewrite history, and it doesn’t allow you to resolve conflicts online, so if there is a pull request that conflicts with another change, someone is going to have to download (clone) a copy of the repo, fix the changes, and push them back up to GitHub.
If you want to learn the basics of working with Git locally, check out the instructions in Chapter 6 for getting started with GitHub for Mac or Windows. For now, though, we’re going to look at how to collaborate effectively with your team using GitHub.
All materials on the site are licensed Creative Commons Attribution-Sharealike 3.0 Unported CC BY-SA 3.0 & GNU Free Documentation License (GFDL)
If you are the copyright holder of any material contained on our site and intend to remove it, please contact our site administrator for approval.
© 2016-2026 All site design rights belong to S.Y.A.