Introducing GitHub: A Non-Technical Guide (2014)
Chapter 6. Downloading
You may never need to clone (download) a copy of a repository at all. As we’ve seen in this book, you can use the GitHub web interface to view the state of a project, edit content, collaborate with your team, and set up and configure a repository. However, sometimes it’s necessary to clone a repository. In this chapter we look at why you might want to clone a repo and how you would do so using either GitHub for Mac or GitHub for Windows. If you’re running Linux, you’ll probably be better off just installing Git directly and learning the command-line interface for working with Git repositories, but that’s outside of the scope of this book.
Why Clone a Repository?
There are a number of reasons why you might decide to clone a repository. Some of the most common ones include the following:
Creating a backup
When you clone a repository, it creates a full copy of the project—including all branches, tags, and history—on your computer. Sometimes it’s worth cloning a repository and pulling the changes down regularly just to know that you have a full copy of the project safely on your machine.
Editing in an IDE
The web-based interface isn’t as powerful as editing in an IDE (Integrated Development Environment) or your favorite text editor, so if you’re editing content all day, you’re going to want to do that locally on your machine.
Editing offline
You can’t edit directly on GitHub unless you have an Internet connection, so if you want to be able to keep working on your project whether or not you’re connected, you’re going to want to clone your repo and work on it locally.
Editing multiple files
One of the key limitations when editing on GitHub directly is that there is no way to group a set of related changes and make them as a single commit.
Running the code
Sometimes you’ll want to be able to run the code locally to test exactly how it works.
Running the tests
If you have automated tests for a project, it’s also good to be able to run those tests locally to confirm that recent changes haven’t broken the software.
If you need to do any of the preceding things, you’ll need to either install the Git version control system directly onto your computer or you’ll need to install a GUI (graphical user interface) that makes it easier for you to use Git to perform common operations.
A number of different applications are available that provide a GUI for working with your Git repositories. In this chapter, we’re going to cover the GUIs provided by GitHub: GitHub for Mac and GitHub for Windows.
GitHub for Mac
To get a copy of GitHub for Mac, start by going to https://mac.github.com/. You should see a screen similar to Figure 6-1.
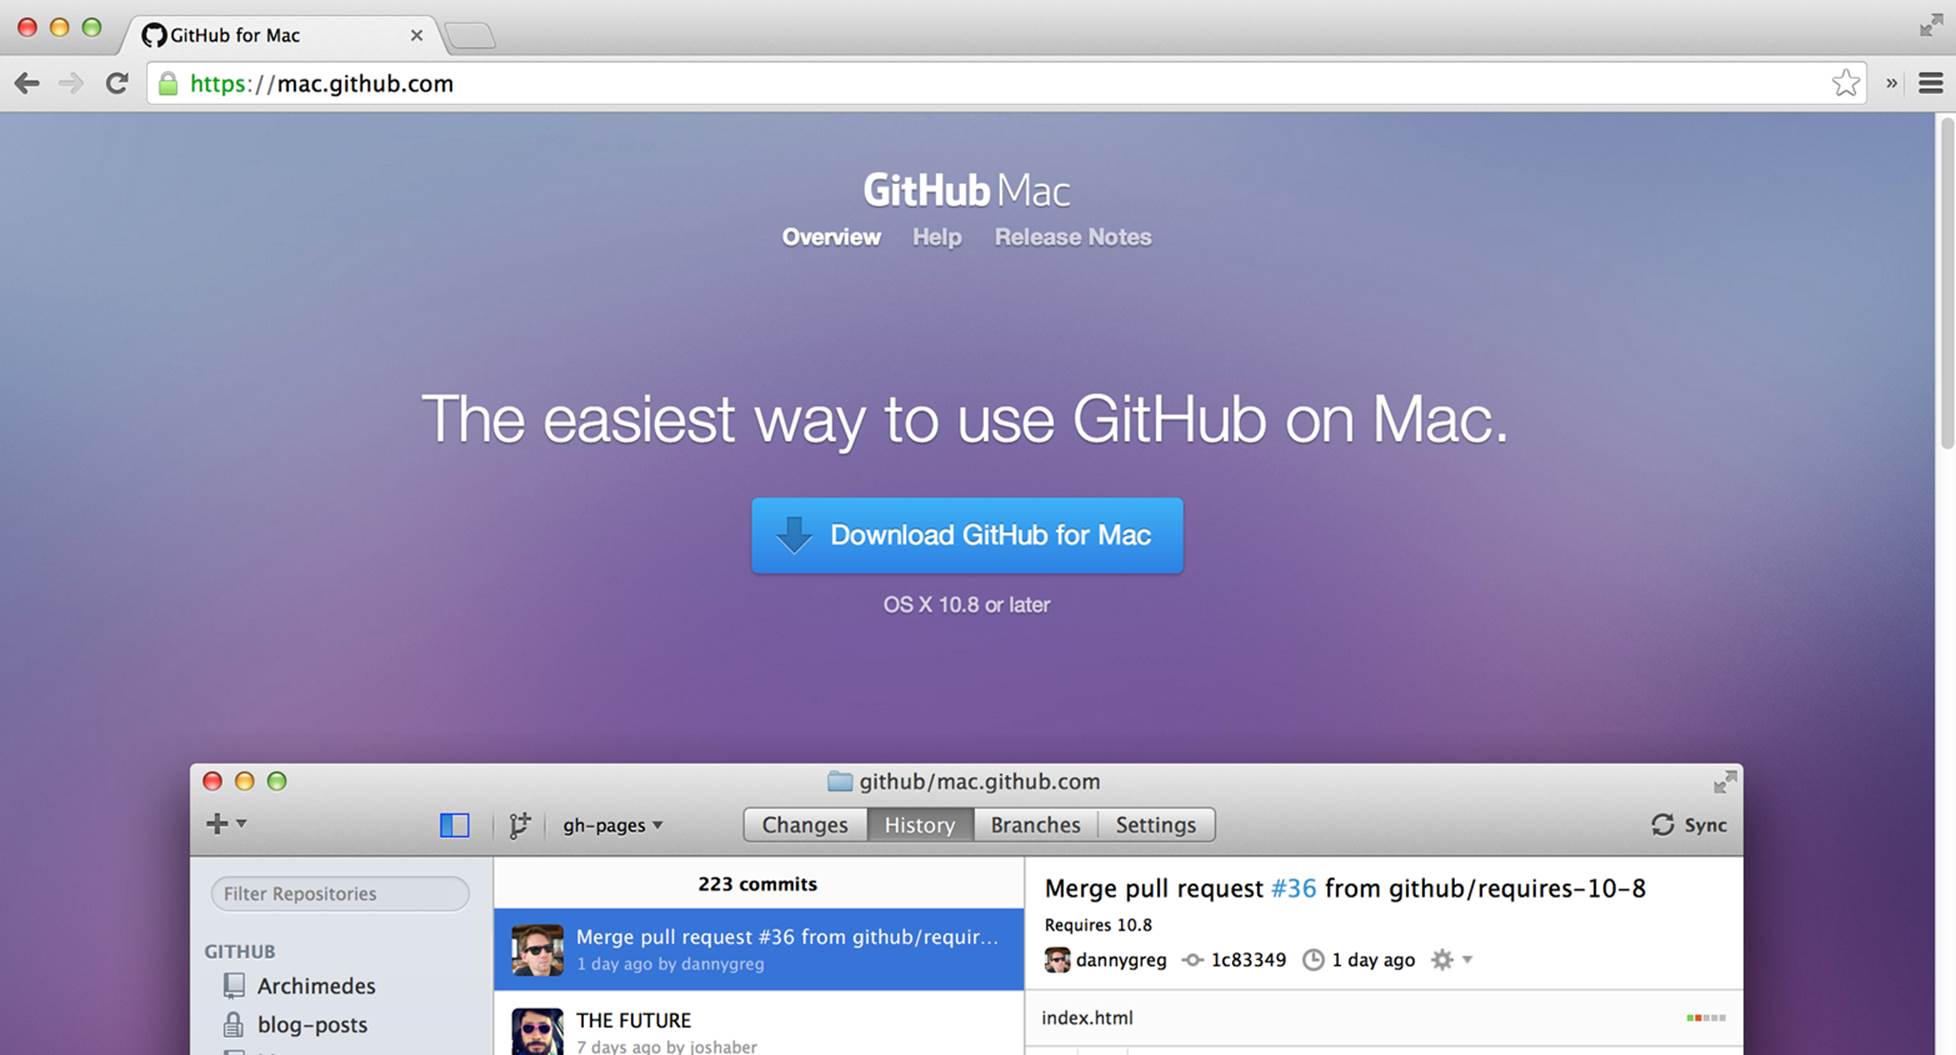
Figure 6-1. The GitHub Mac web page
Click the “Download GitHub for Mac” link to download a ZIP file to the folder that your browser downloads files to—usually that will be your Downloads folder. Double-click the ZIP file, and it should expand to a file called GitHub.app in the same folder, as shown in Figure 6-2.

Figure 6-2. The GitHub for Mac ZIP file and application file
Drag the GitHub.app file into your Applications folder. Then click the Applications folder, and double-click the GitHub.app file. You might see a security warning to let you know that GitHub.app is an application downloaded from the Internet, as shown in Figure 6-3. That’s fine—just click the Open button in that dialog box, and the GitHub application will start.
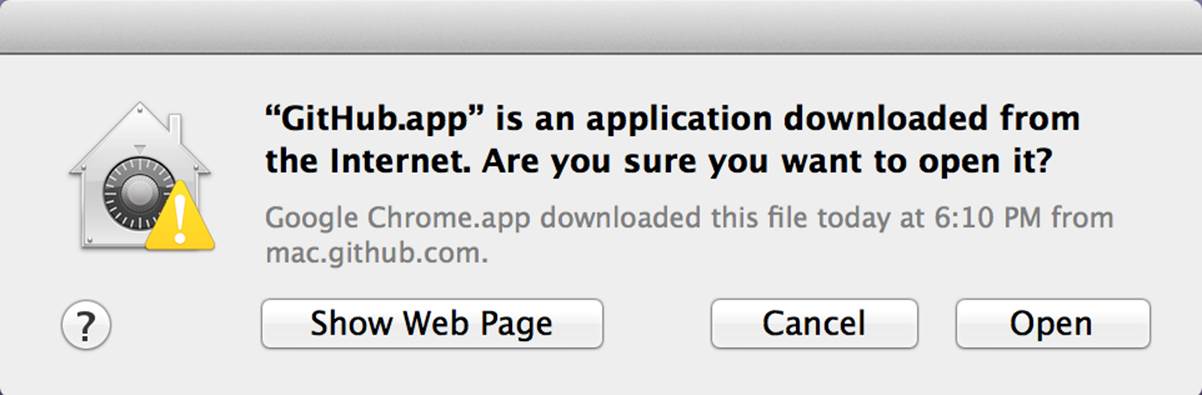
Figure 6-3. The warning that you’re running a program downloaded from the Internet
You should see a screen similar to Figure 6-4 thanking you for trying GitHub for Mac.
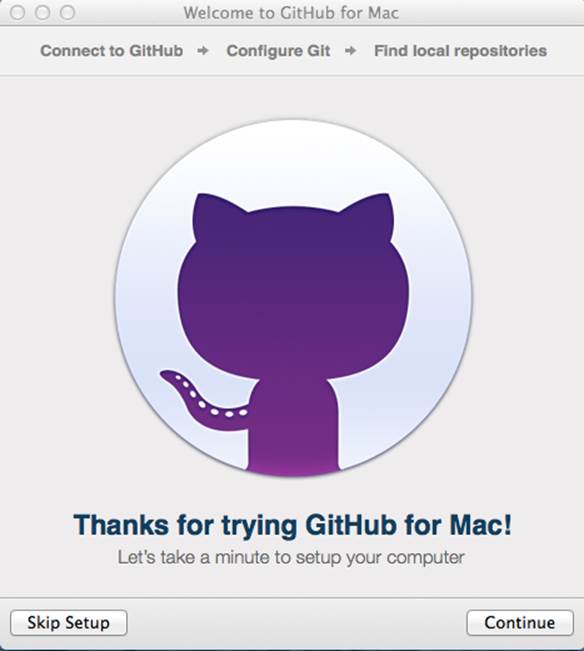
Figure 6-4. The setup wizard for GitHub for Mac
Click Continue, enter your login and password for GitHub, and click the “Sign in” button. If you have enabled two-factor authentication to make your account more secure, you’ll be asked to enter the code that was texted to your mobile phone.
Once you’ve done this, you should see a screen similar to Figure 6-5.
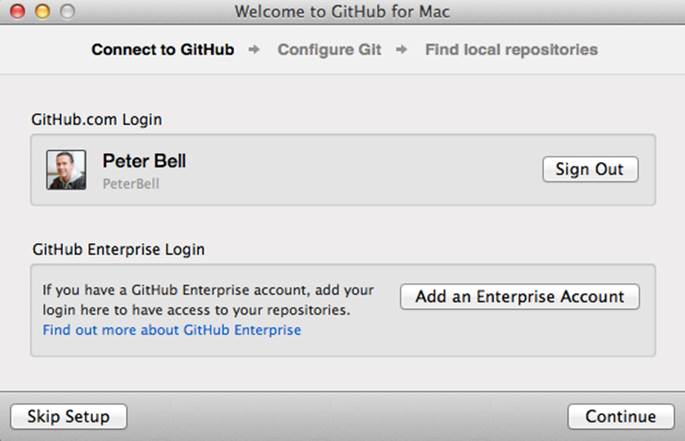
Figure 6-5. Confirming your user account in GitHub for Mac
Click the Continue button again, and you’ll be prompted for some information to configure Git. In the first text box, enter the name you want to be known by, and in the second, enter the email address you’d like your commits to be associated with. Usually you’ll enter your full name into the first text box and the same email address you use for your GitHub account in the second one, as I’ve done in Figure 6-6.
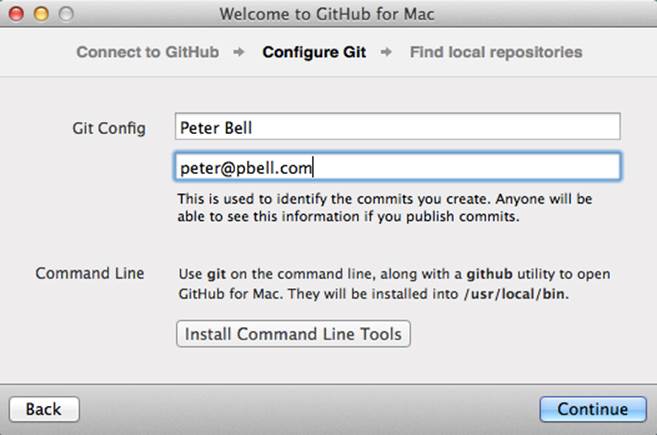
Figure 6-6. Configuring your Git settings
Just below the text boxes is a section called Command Line. Click the Install Command Line Tools button. By installing these tools, if you do ever want to use Git on the command line, you’ll be able to. You will have to enter your system’s administrative credentials. When you’re done, you should see a screen similar to Figure 6-7 showing that the installation is complete and the command-line tools have been installed successfully.

Figure 6-7. The command-line tools have been installed successfully
Click the OK button and then the Continue button and you’ll be taken to a screen that allows you to find local repositories. For now, just click the Done button and you’ll go to the home screen in GitHub for Mac that looks like Figure 6-8.
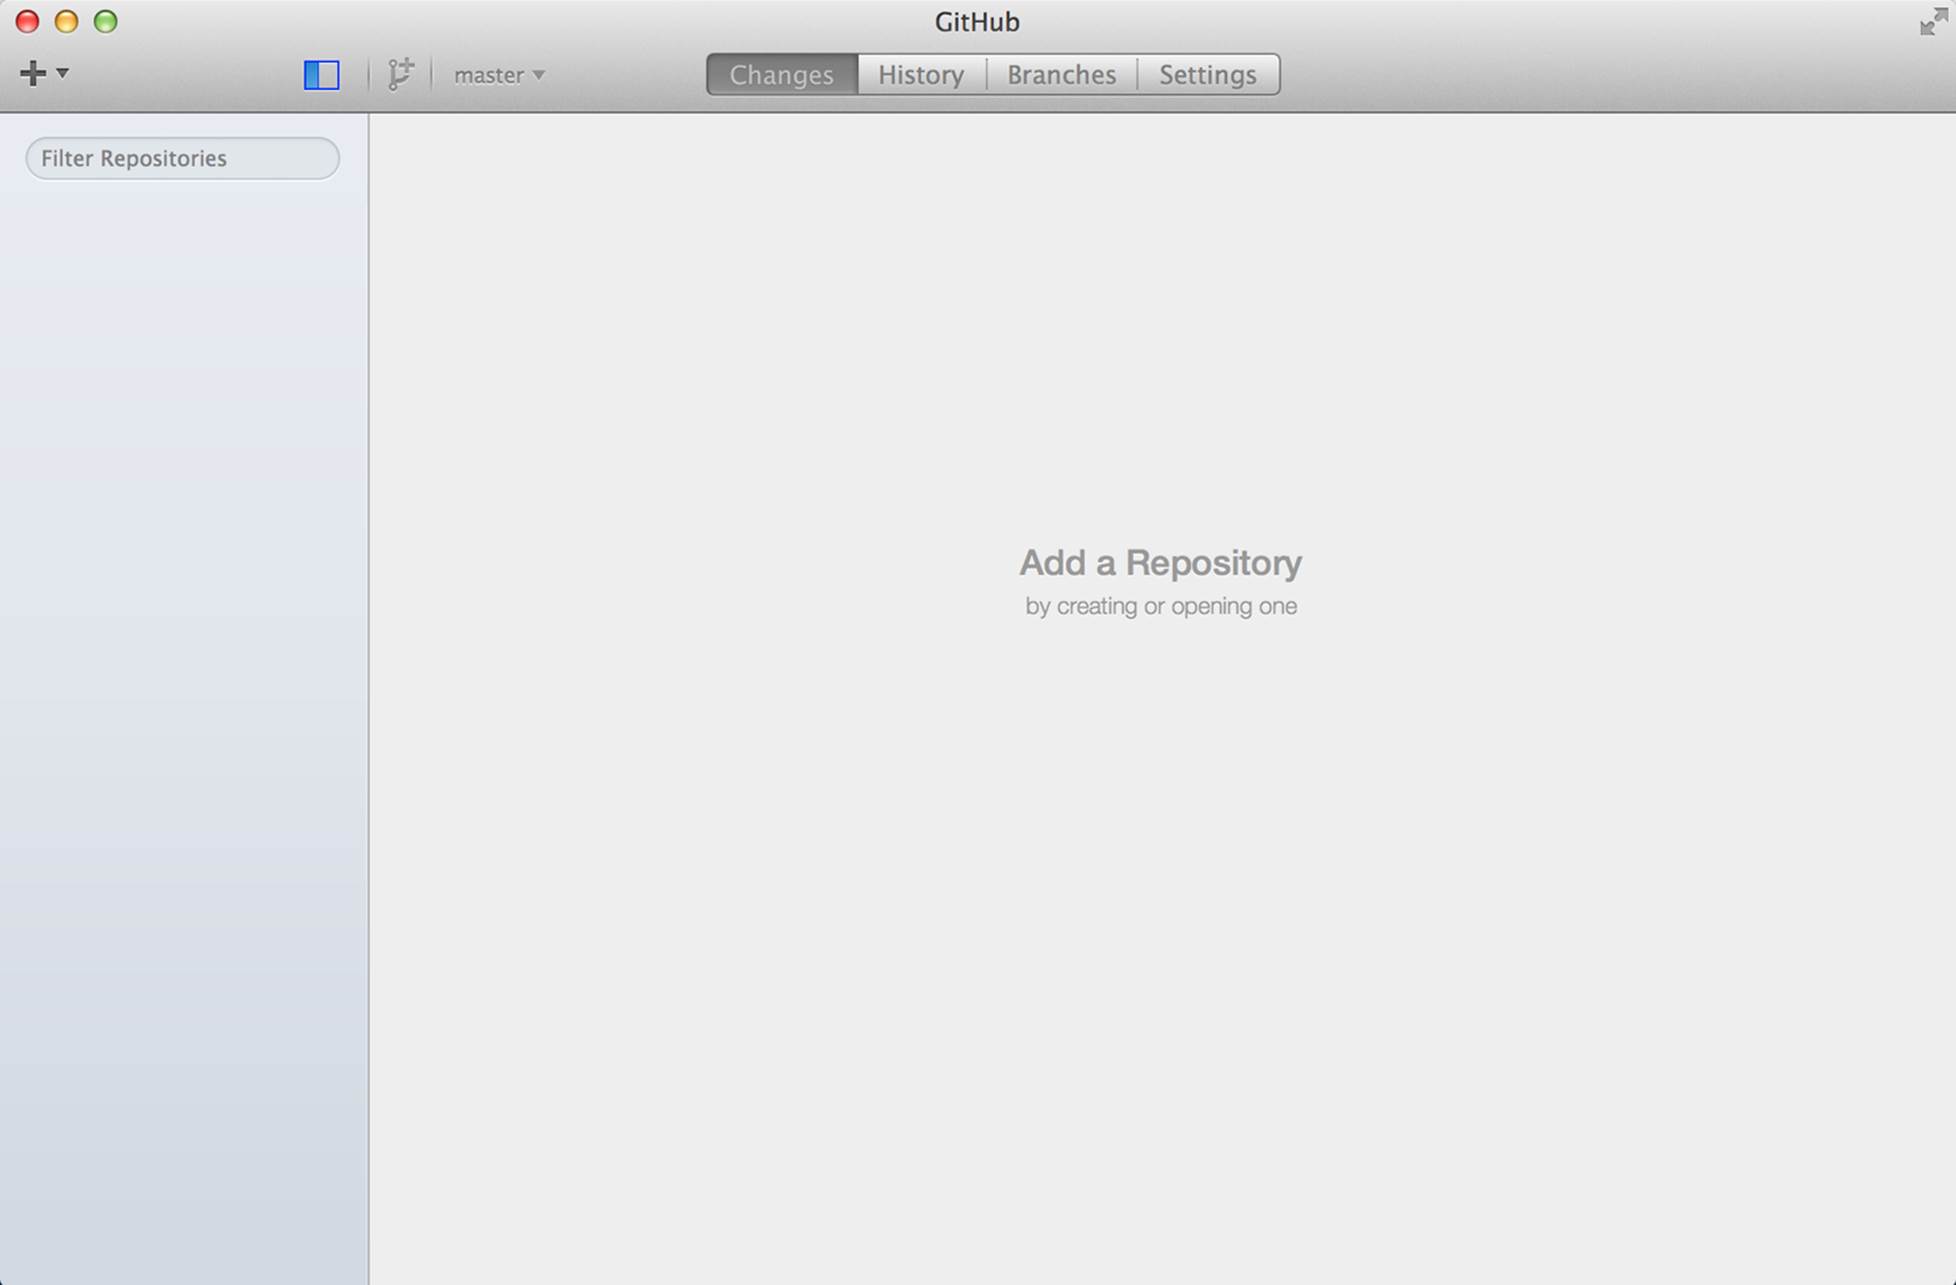
Figure 6-8. The home screen in GitHub for Mac
Once you’ve configured GitHub for Mac, don’t worry if you get an email similar to the one shown in Figure 6-9 letting you know that “A new public key was added to your account.” This is just GitHub letting you know that you’ve successfully connected GitHub for Mac to your GitHub account. It does that by adding a new public key that will allow GitHub for Mac to connect to your GitHub account.
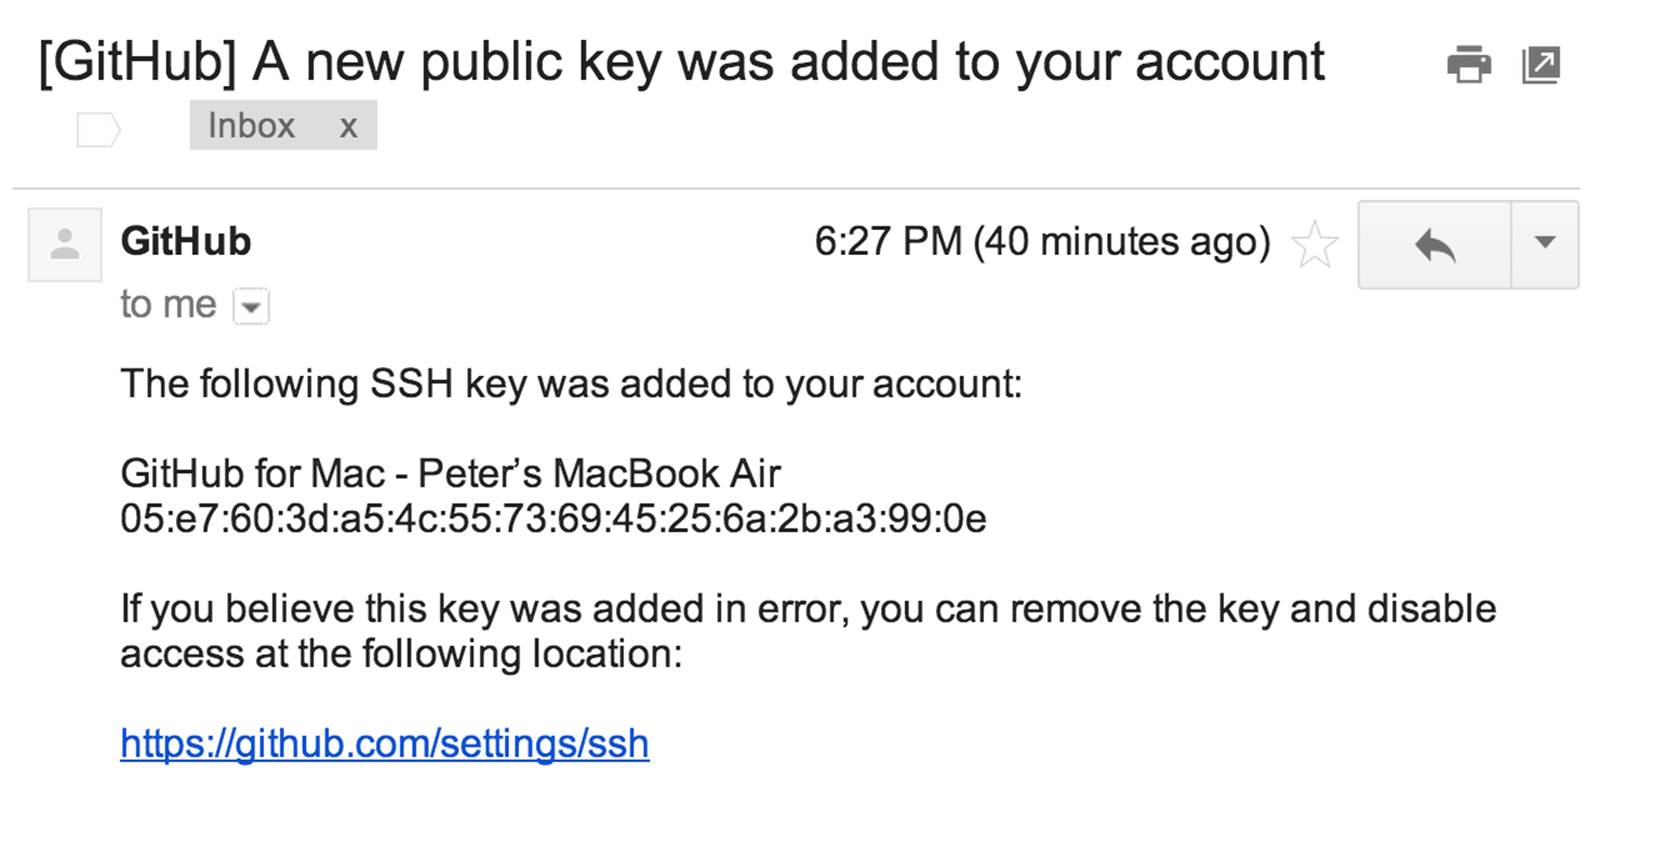
Figure 6-9. The email from GitHub letting you know you’ve added a new public key
Now that you’ve installed GitHub for Mac, go to a repository that you’d like to clone (download) and that you own or are a collaborator on. You can clone any public repo, but you won’t be able to push your changes back up to GitHub unless you’re either an owner or a collaborator. If you look at the bottom-right corner of the page, you should see the “Clone in Desktop” button, as shown at the bottom right of Figure 6-10.

Figure 6-10. A repo with the “Clone in Desktop” button
Click the “Clone in Desktop” button. The exact result when you click the button will depend on the browser and version that you’re running. In Chrome, I get the pop-up in Figure 6-11 asking whether I should let the browser talk to GitHub.app. You should get something similar.
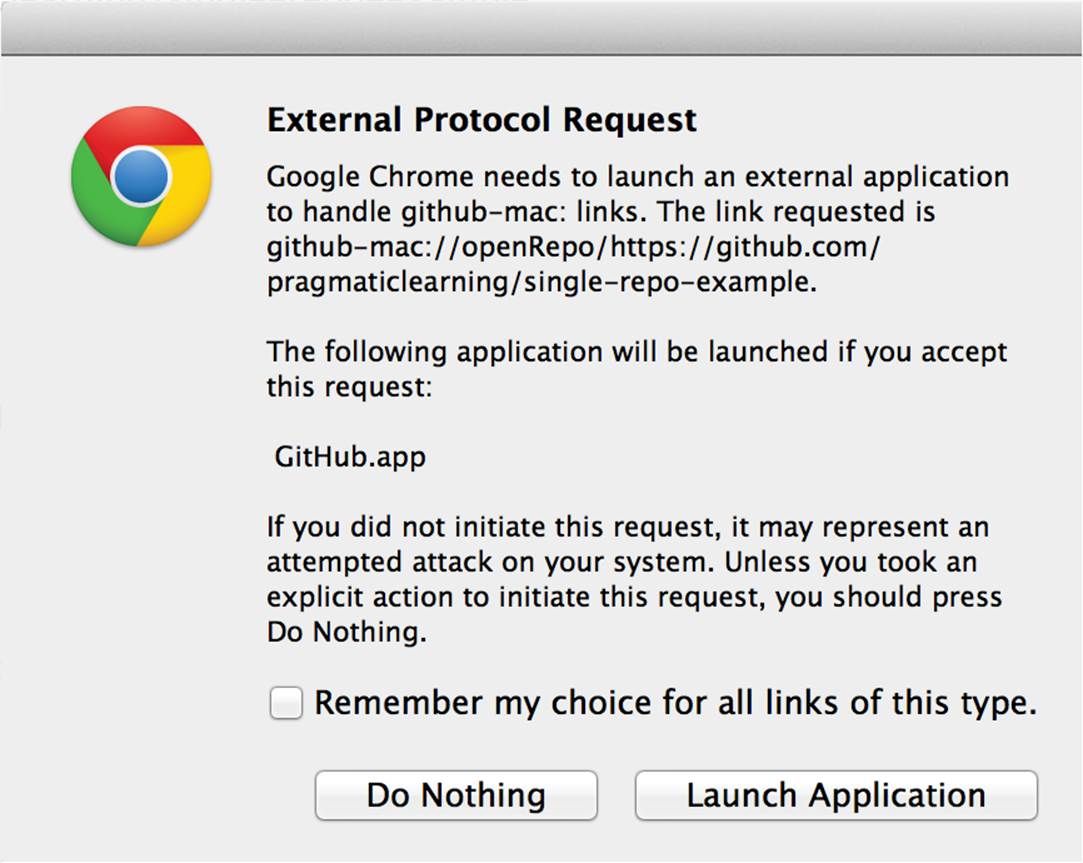
Figure 6-11. External protocol request to launch GitHub for Mac
You should allow the connection—in my case, I click the Launch Application button to launch GitHub for Mac and open a file explorer window, as shown in Figure 6-12.
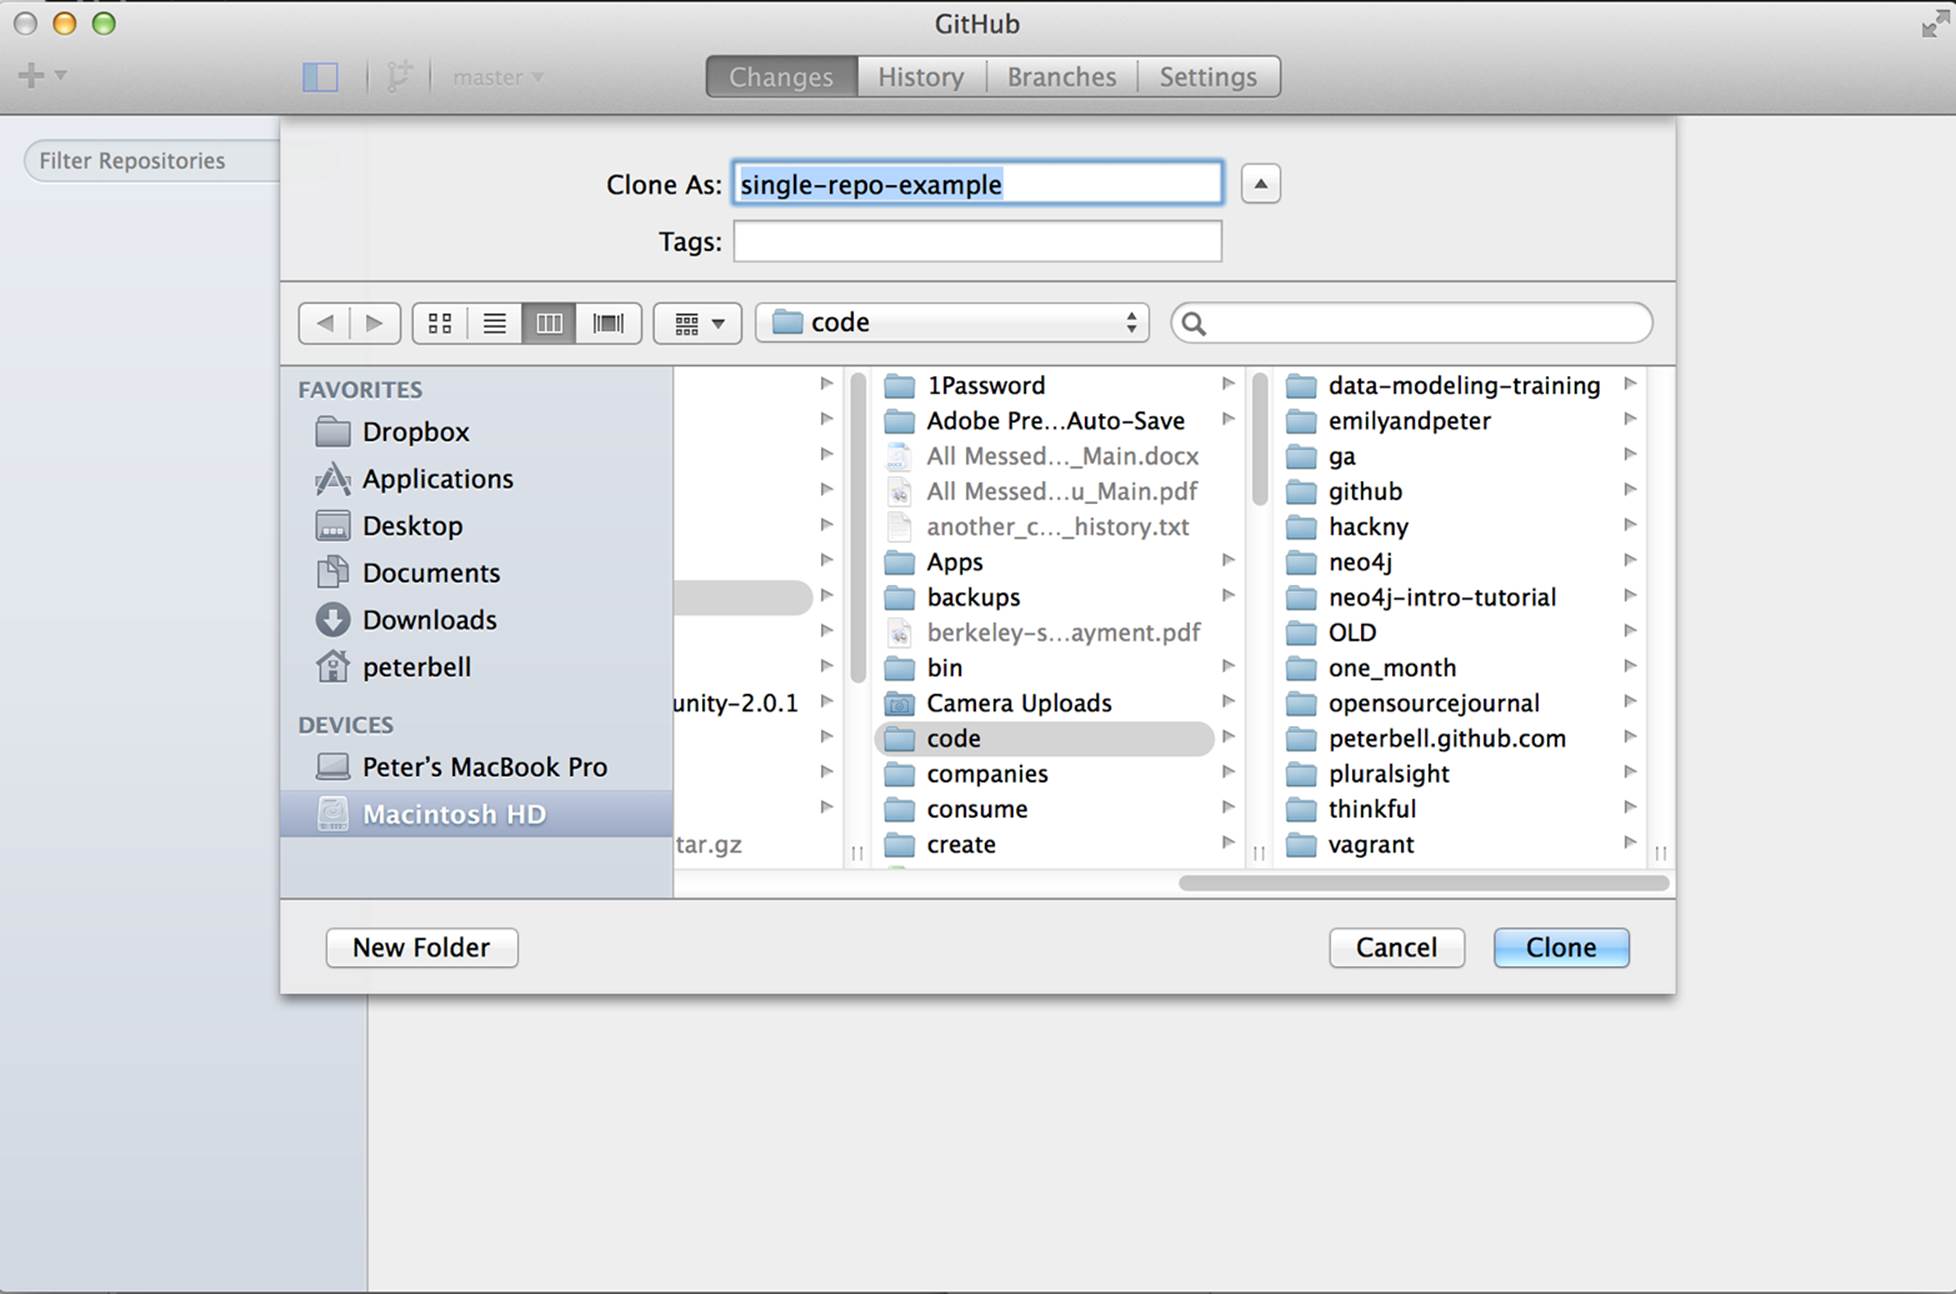
Figure 6-12. Selecting a directory to clone a repo into
Select the directory you’d like to clone the repo into, click the Clone button, and GitHub for Mac will clone the repository for you. Once the repo has been successfully cloned, you should see a screen similar to Figure 6-13.
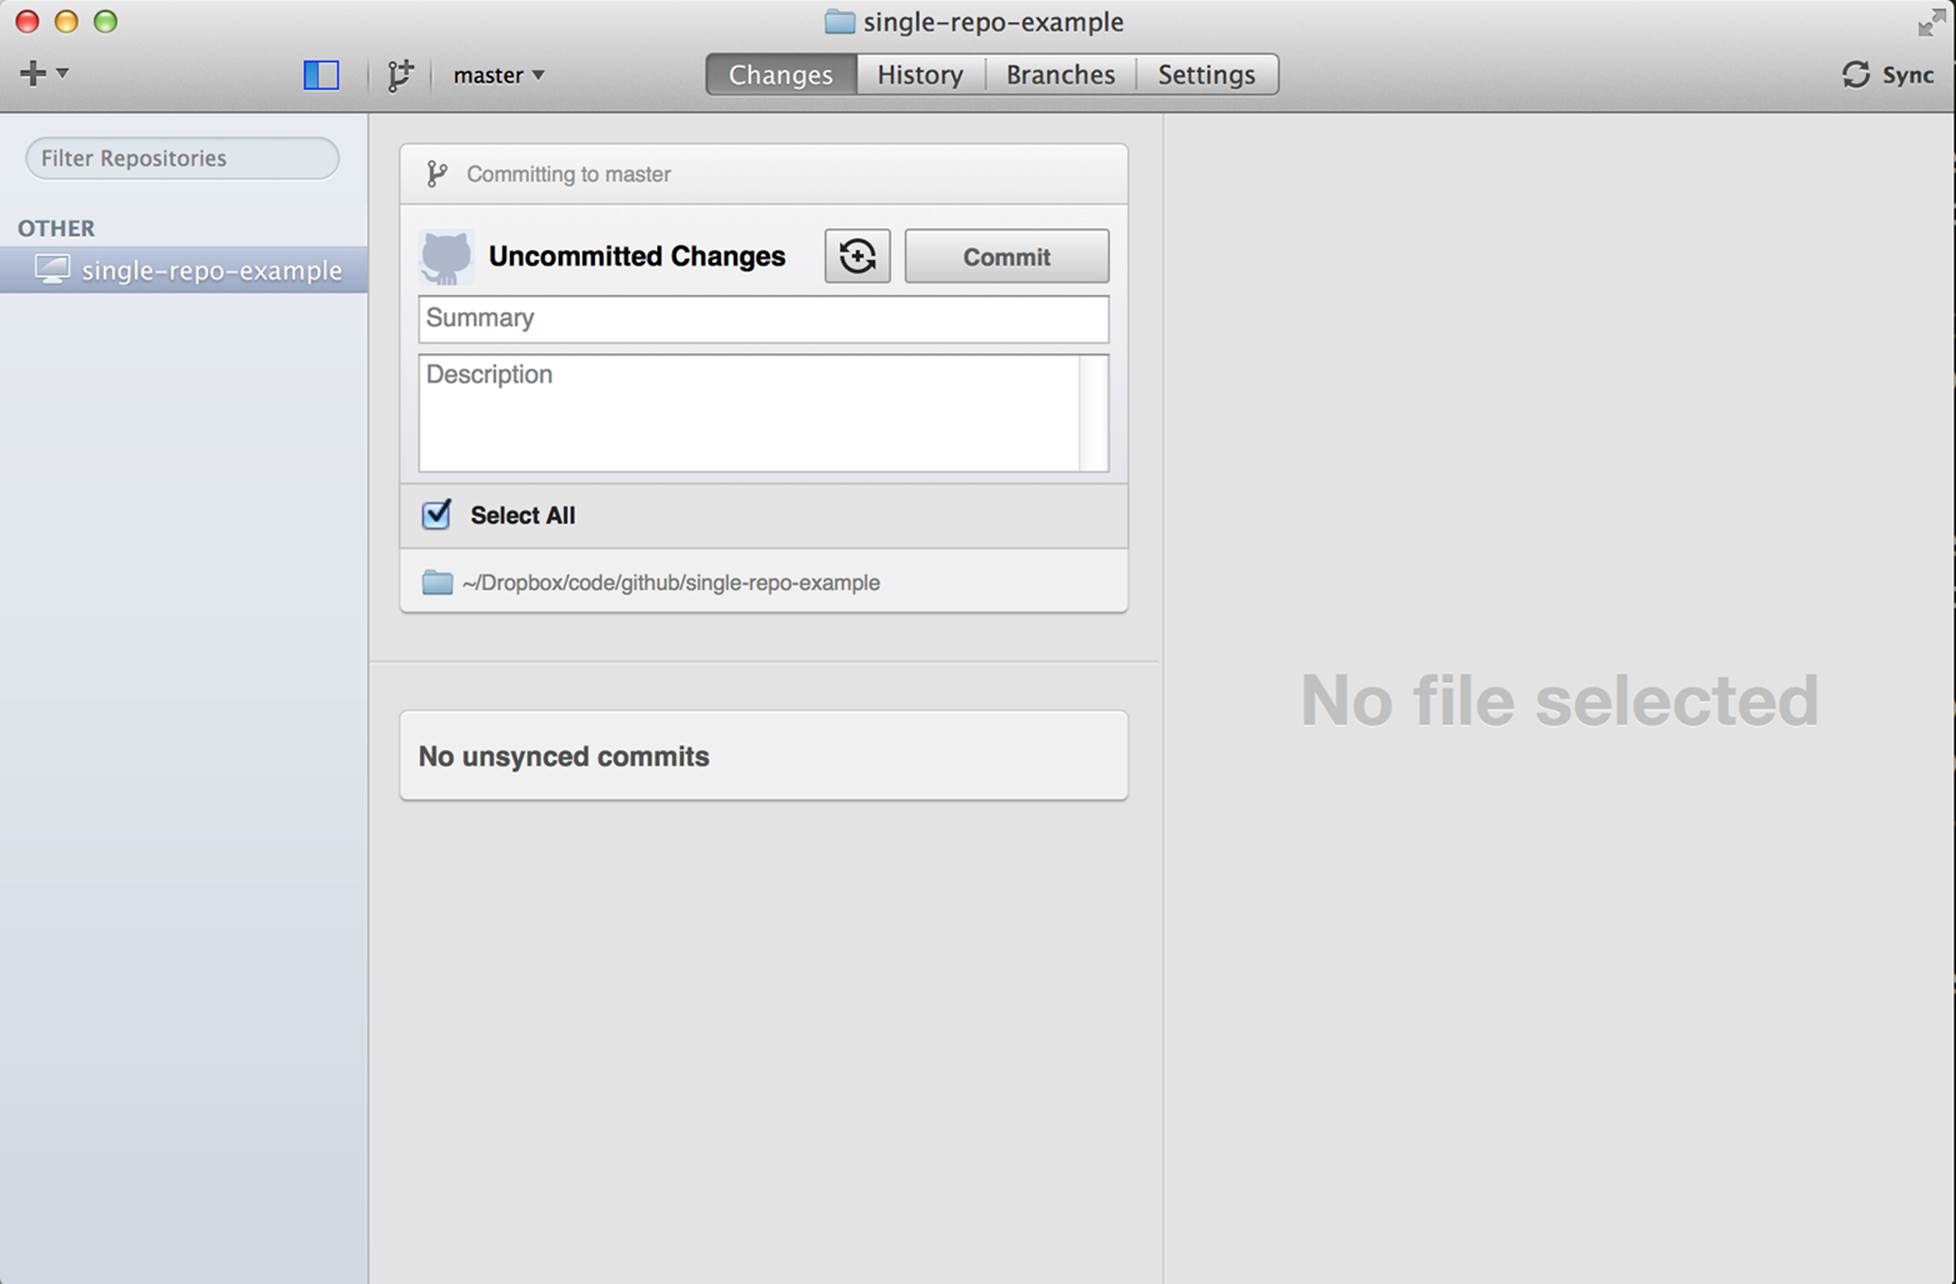
Figure 6-13. Viewing a repo in GitHub for Mac
At the top left is a + icon that you can use to create a new repository in a given directory or clone a repo from GitHub. Below that, the left panel shows a list of the repositories that you’re working with locally, and it can be hidden by clicking the blue box at the top of the page.
At the top of the screen, just to the right of the blue box is an icon that you can click to create a new branch, and a drop-down list for selecting which branch you want to be looking at and working on. Below that, when you select the default Changes tab, you can see a text box where you would enter a commit message if you had changes to commit.
Making a Commit Using GitHub for Mac
To make a new commit using GitHub for Mac, you probably want to start by creating a new branch. In Figure 6-14 you can see that I’m creating a branch called “new_feature.”
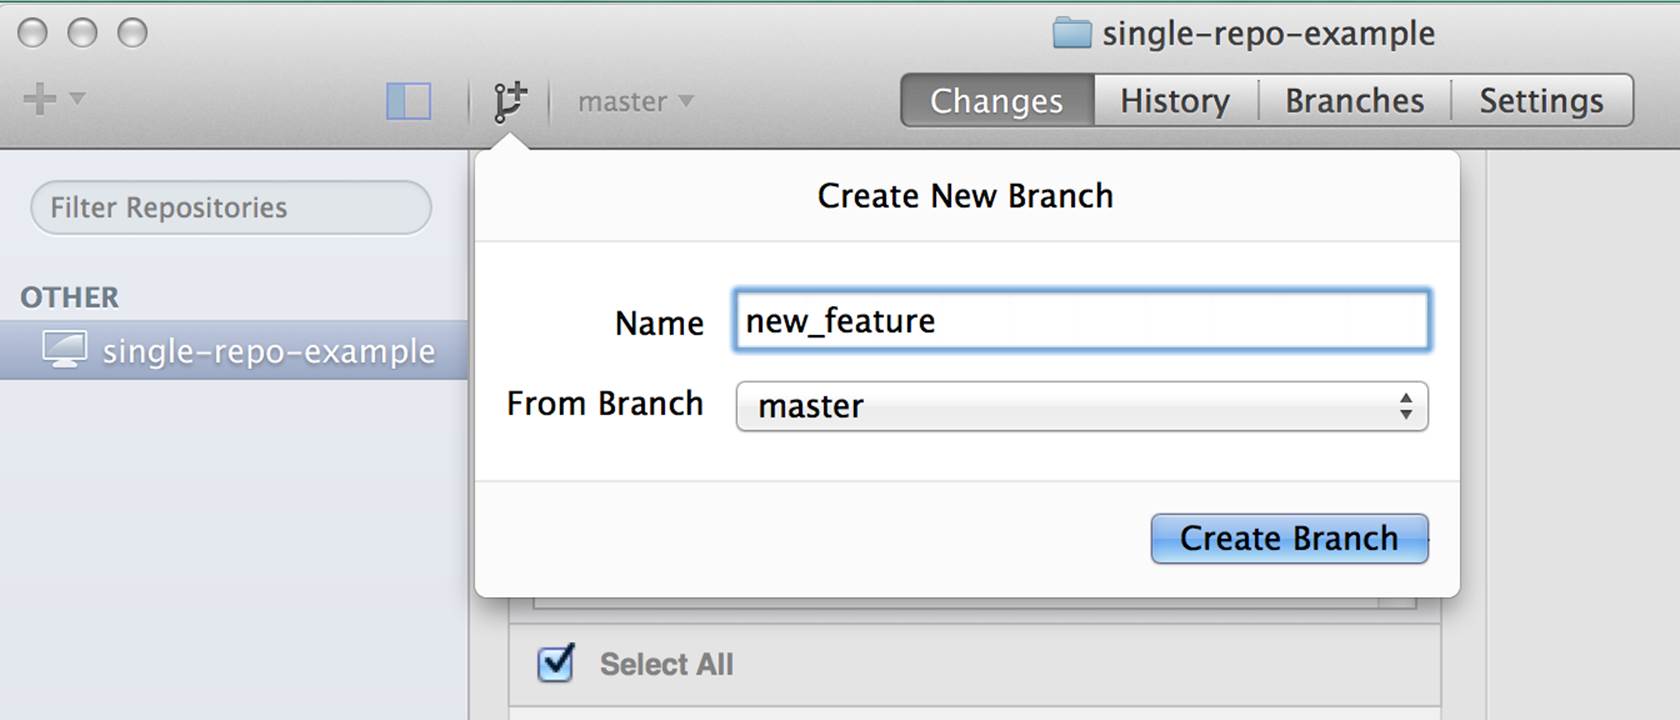
Figure 6-14. Creating a new branch
If you look to the right of the button you used to create the branch, you should now see that you’re on the branch you just created. Now you need to add the content. GitHub for Mac isn’t an IDE or a text editor. It’s just a tool for committing your changes to Git, so you’re going to need to use a text editor or some other tool to create a new file and put it in your project directory. I created a new file called new_feature.html and saved it in the project directory. Create a new file using a text editor, save it in the project folder, and then go back to GitHub for Mac. You should see your changes in a screen similar to Figure 6-15.
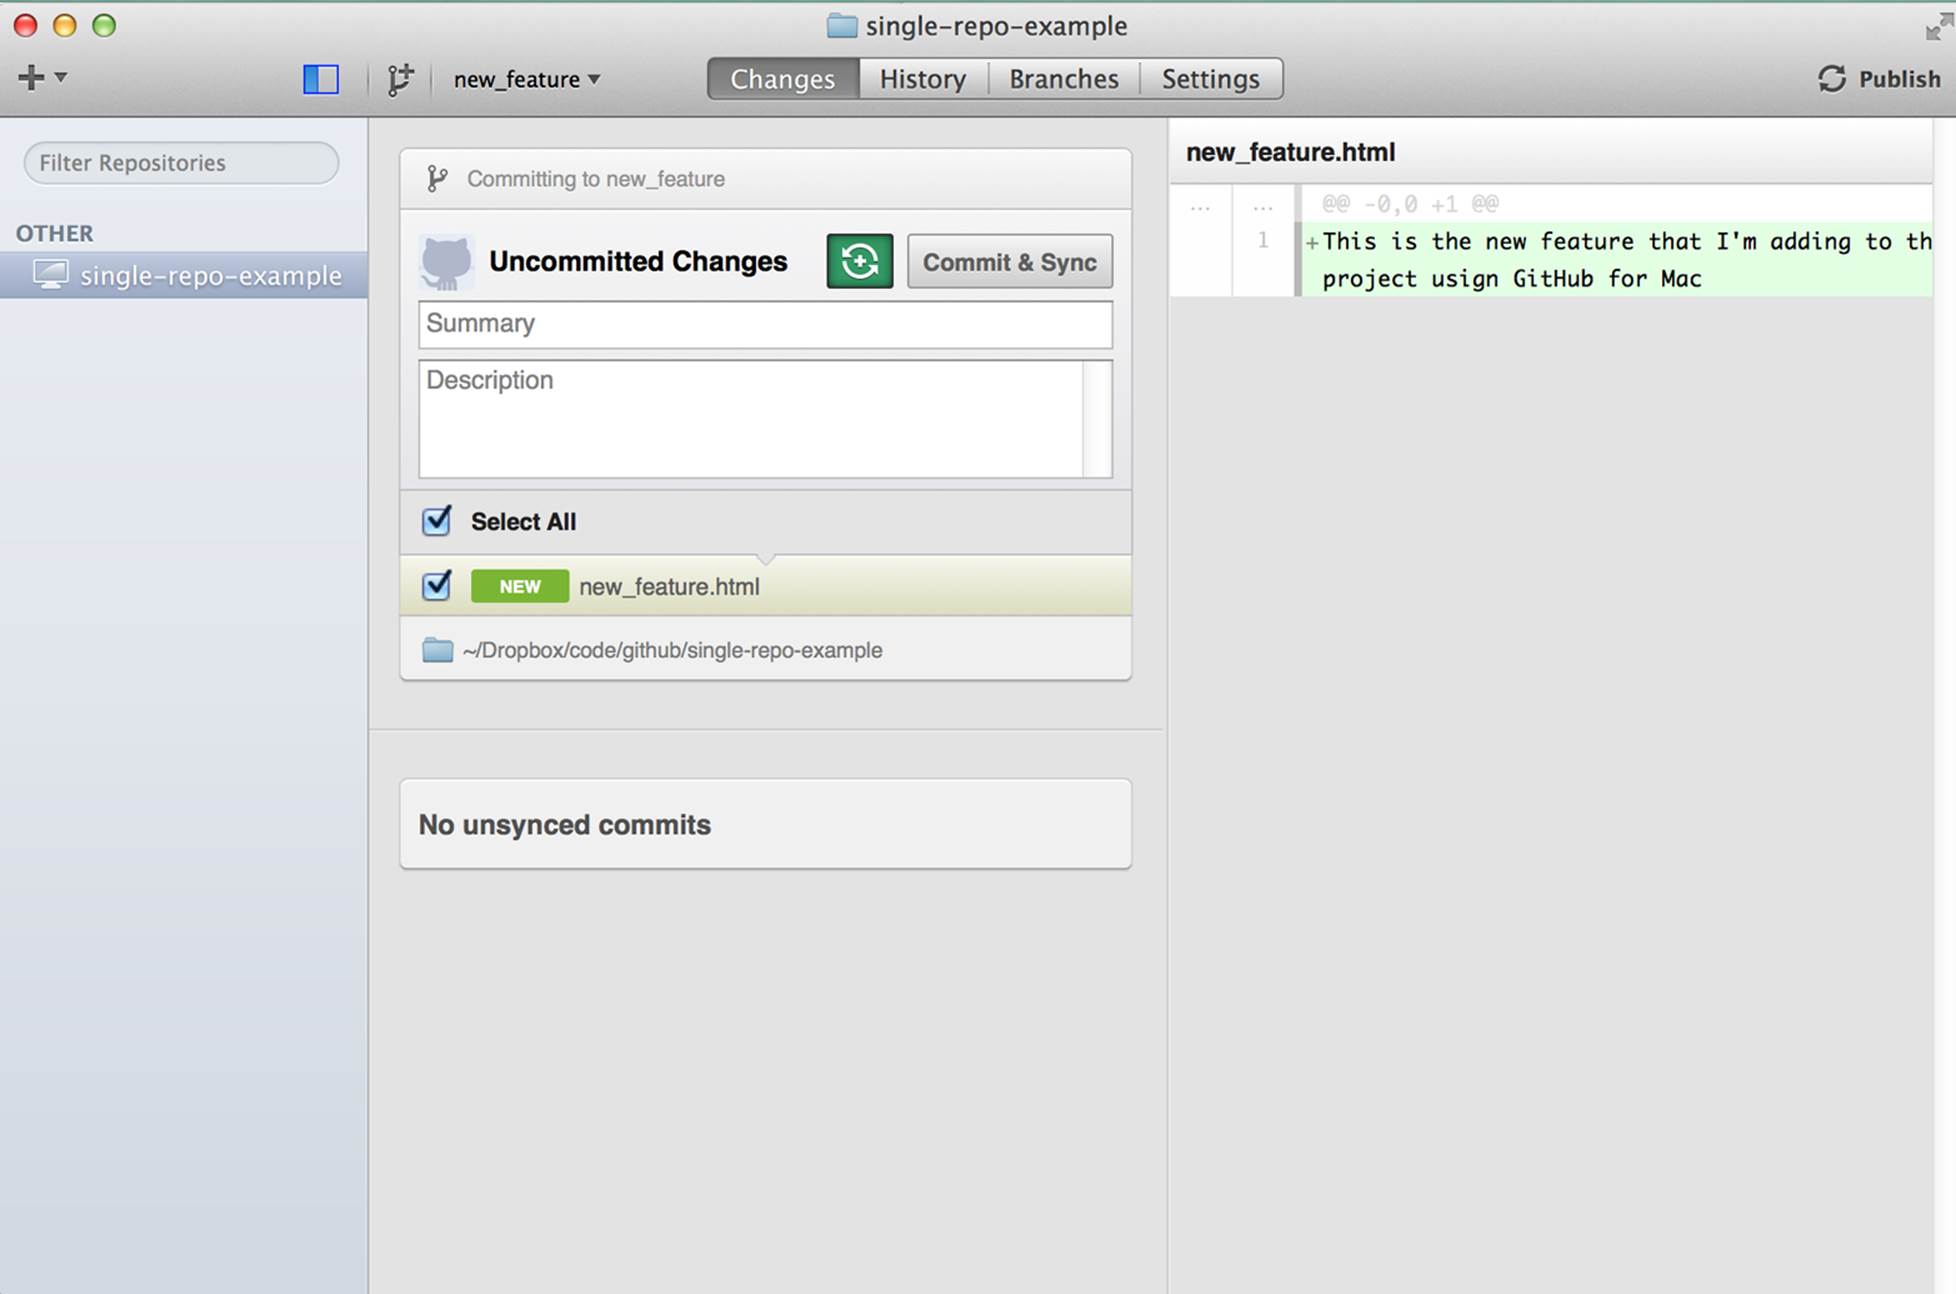
Figure 6-15. GitHub for Mac showing changes to be committed
Click in the Uncommitted Changes→Summary text box, enter a commit message, and then click the Commit & Sync button, and your changes will be saved to history and then pushed up to the remote repository.
If you do not have permission to push to the remote repository or if you are not signed into GitHub for Mac, you will see a screen similar to Figure 6-16.
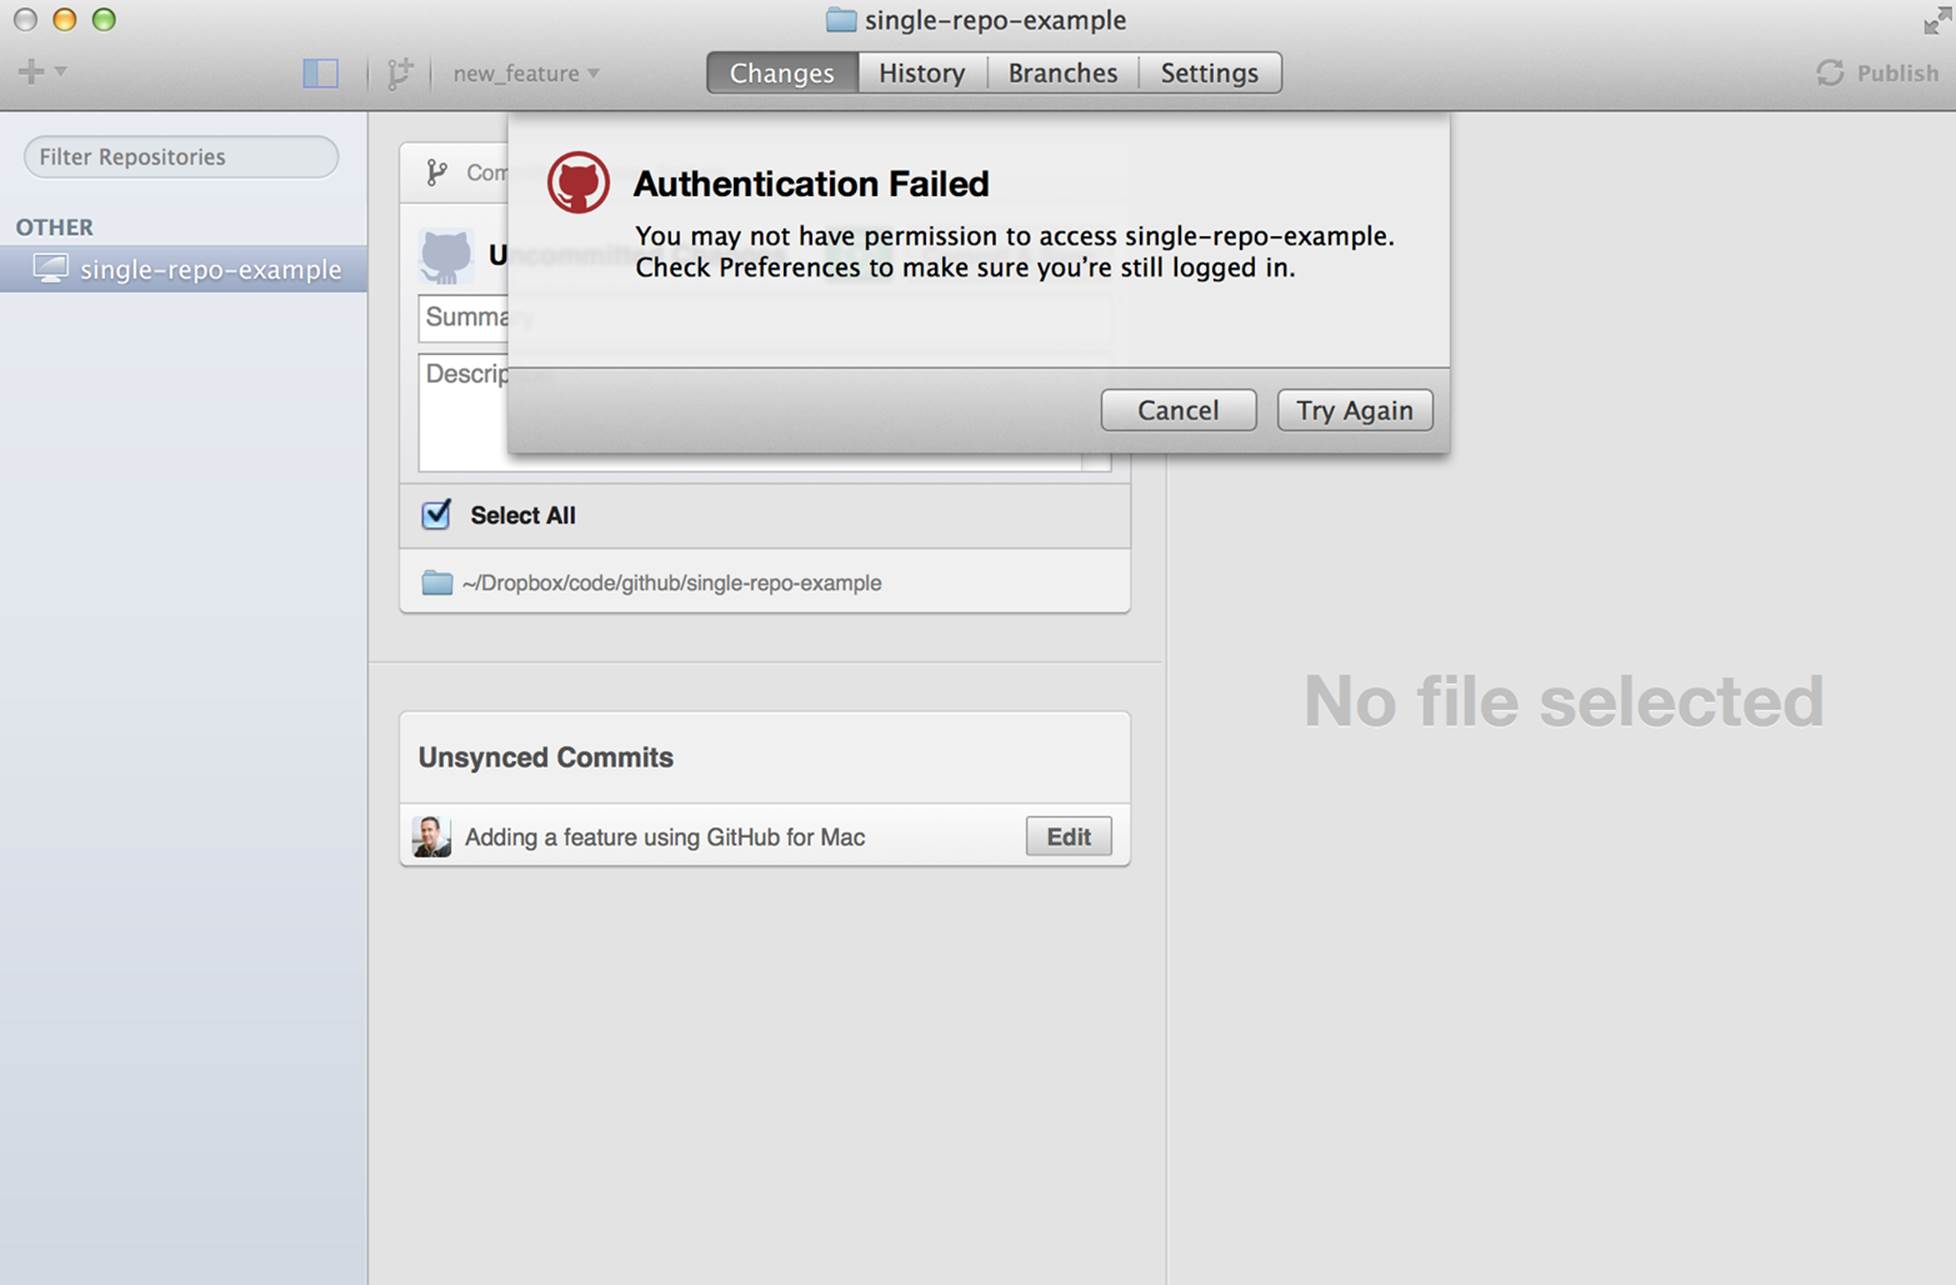
Figure 6-16. Authentication failed message
If that happens, check your credentials by opening the “Preferences - Accounts” window. Once you’ve successfully authenticated and confirmed that you are either an owner or collaborator for the project, you can click the green button to the right of the Commit button to sync your unsynchronized changes, uploading them to GitHub.
Viewing Changes in GitHub for Mac
There are three other tabs in the top bar of GitHub for Mac: History, Branches, and Settings. History shows you a list of commits on your current branch, as shown in Figure 6-17.
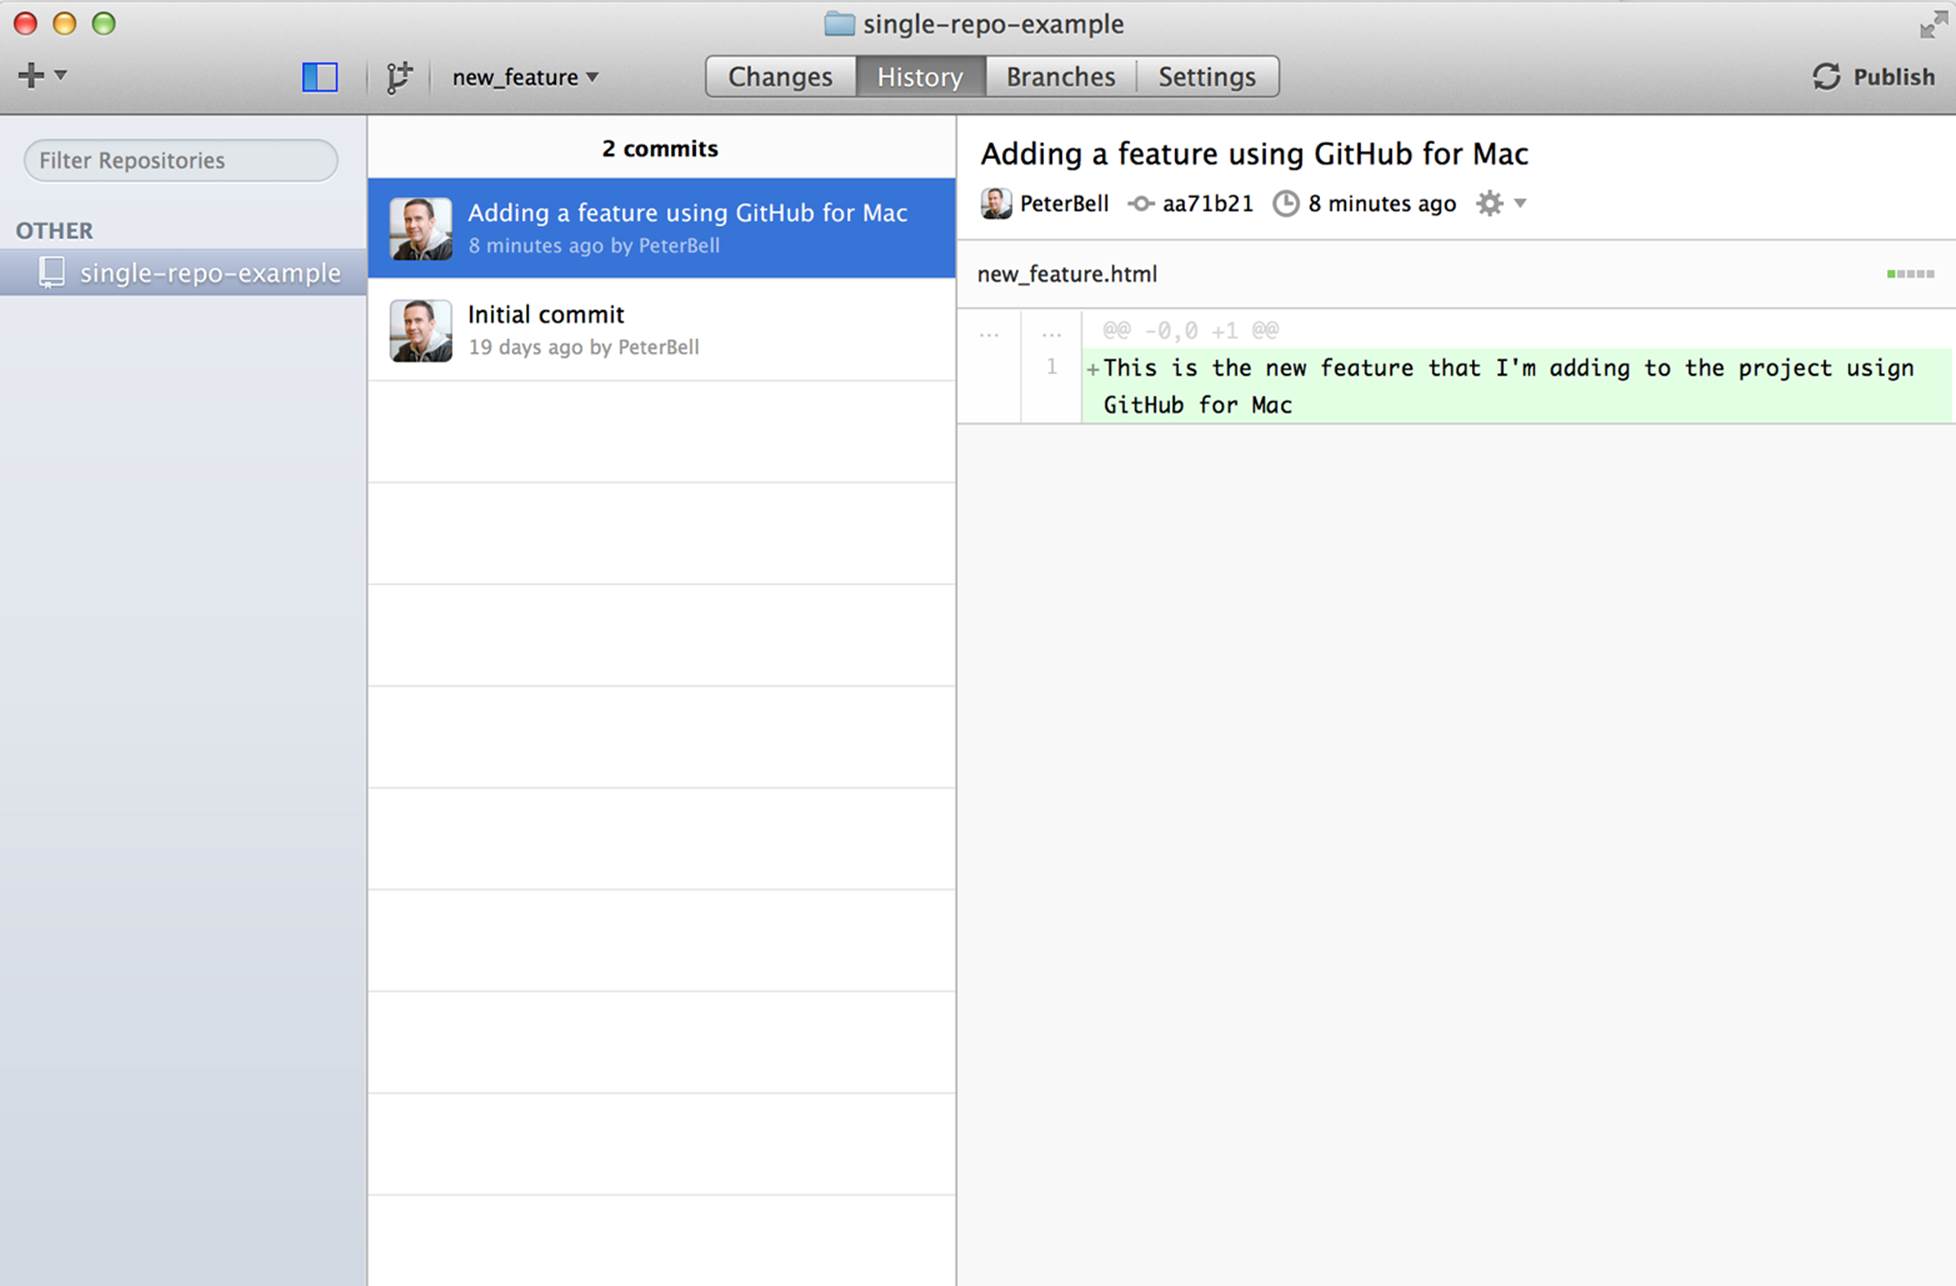
Figure 6-17. The history view
If you click the Branches tab, you’ll see a screen similar to Figure 6-18.
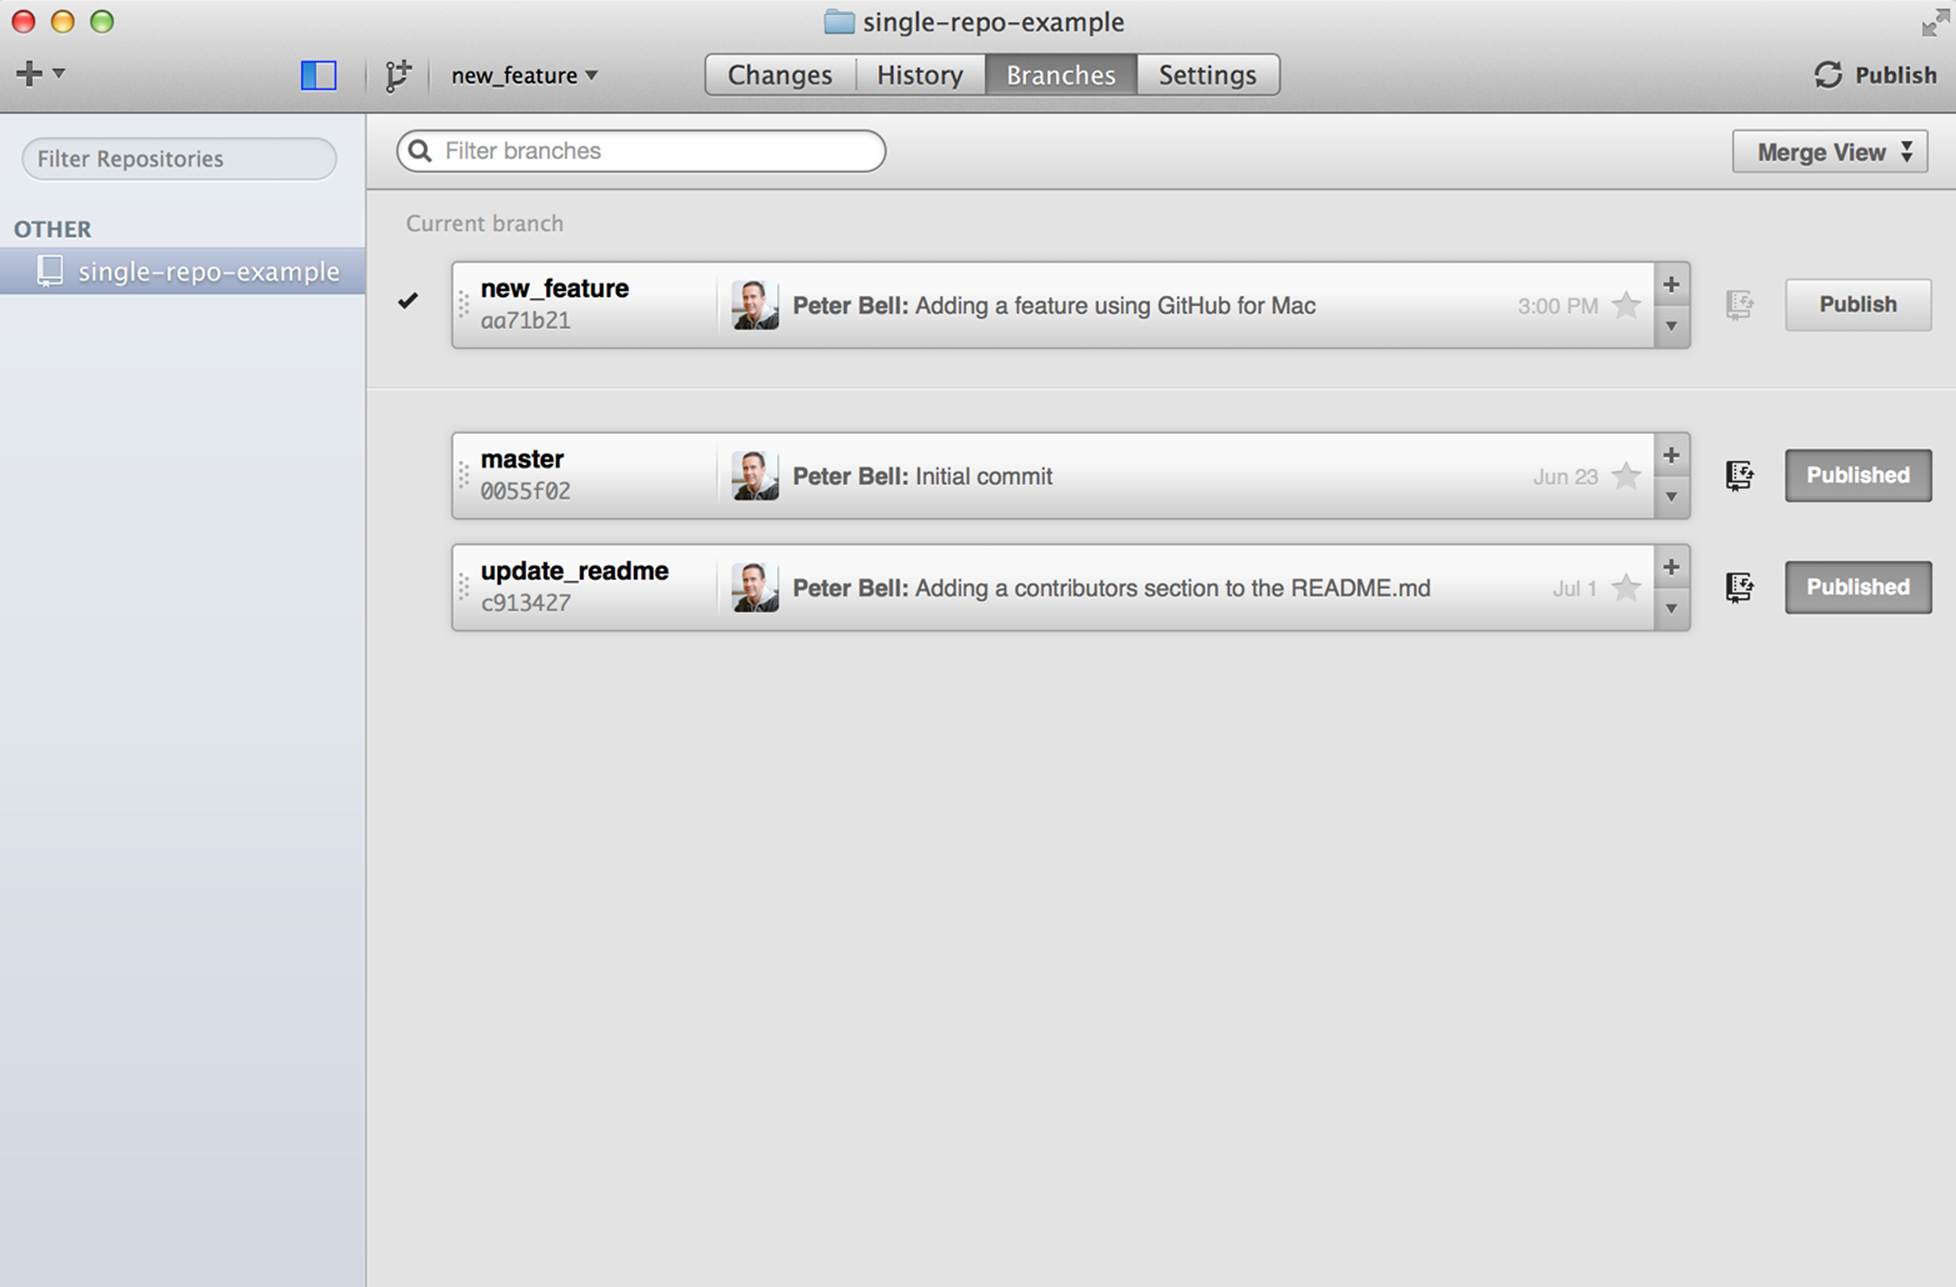
Figure 6-18. The branches view
This shows a list of all of the branches that you’ve created locally and all of the other branches that are on GitHub. Finally, if you click the Settings tab, you’ll see a screen similar to Figure 6-19.
Figure 6-19. The settings view
In the Settings screen, you get the ability to configure two things. You could change the remote—something you’re not likely to do very often. However, you can also tell Git to ignore certain files. Typically, you don’t want to upload operating system files (like .DS_Store files from a Mac), IDE configurations, executable files, log files, or large binary files into a Git repository. If you put the names of any such files into “Ignored files,” it’ll add those to a .gitignore file that you can then commit and sync so nobody else on your project will accidentally commit those files either.
Hopefully, now you have enough information to be able to clone and commit to a repository locally should you need to do so using the GitHub for Mac application. Now we’re going to look at the comparable application for Windows.
GitHub for Windows
To get a copy of GitHub for Windows, start by going to https://windows.github.com/. You should see a screen similar to Figure 6-20.
Figure 6-20. The GitHub Windows web page
Click the Download GitHub for Windows link and specify whether you want to Run, Save, or Cancel. You should click Run. You may see an application install security warning such as Figure 6-21. If so, just click the Install button, and the app will be downloaded and installed.
Figure 6-21. An application install security warning
Start up the GitHub for Windows app, and you should see a screen similar to Figure 6-22 welcoming you and asking you to sign in.
Figure 6-22. The setup wizard for GitHub for Windows
Enter your username or email and password for GitHub and click the “Log in” button. If you have enabled two-factor authentication to make your account more secure, you’ll be asked to enter the code that was texted to your mobile phone, as shown in Figure 6-23.
Figure 6-23. Two-factor authentication
Once you’ve done this, you should see a screen asking you for some information to configure Git. In the first text box, you should enter the name you want to be known by, and in the second, enter the email address you’d like your commits to be associated with. Usually you’ll enter your full name into the first box and the same email address you use for your GitHub account in the second one, as I’ve done in Figure 6-24.
Figure 6-24. Configuring your Git settings
Click the Continue button and you’ll be taken to a screen that allows you to find local repositories. For now, just click the Skip button to go to the home screen in GitHub for Windows that looks like Figure 6-25.
Figure 6-25. The home screen in GitHub for Windows
Once you’ve configured GitHub for Windows, don’t worry if you get an email like the one shown in Figure 6-26 letting you know that “A new public key was added to your account.” This is just GitHub letting you know that you’ve successfully connected GitHub for Windows to your GitHub account. It does that by adding a new public key that allows GitHub for Windows to connect to your GitHub account.
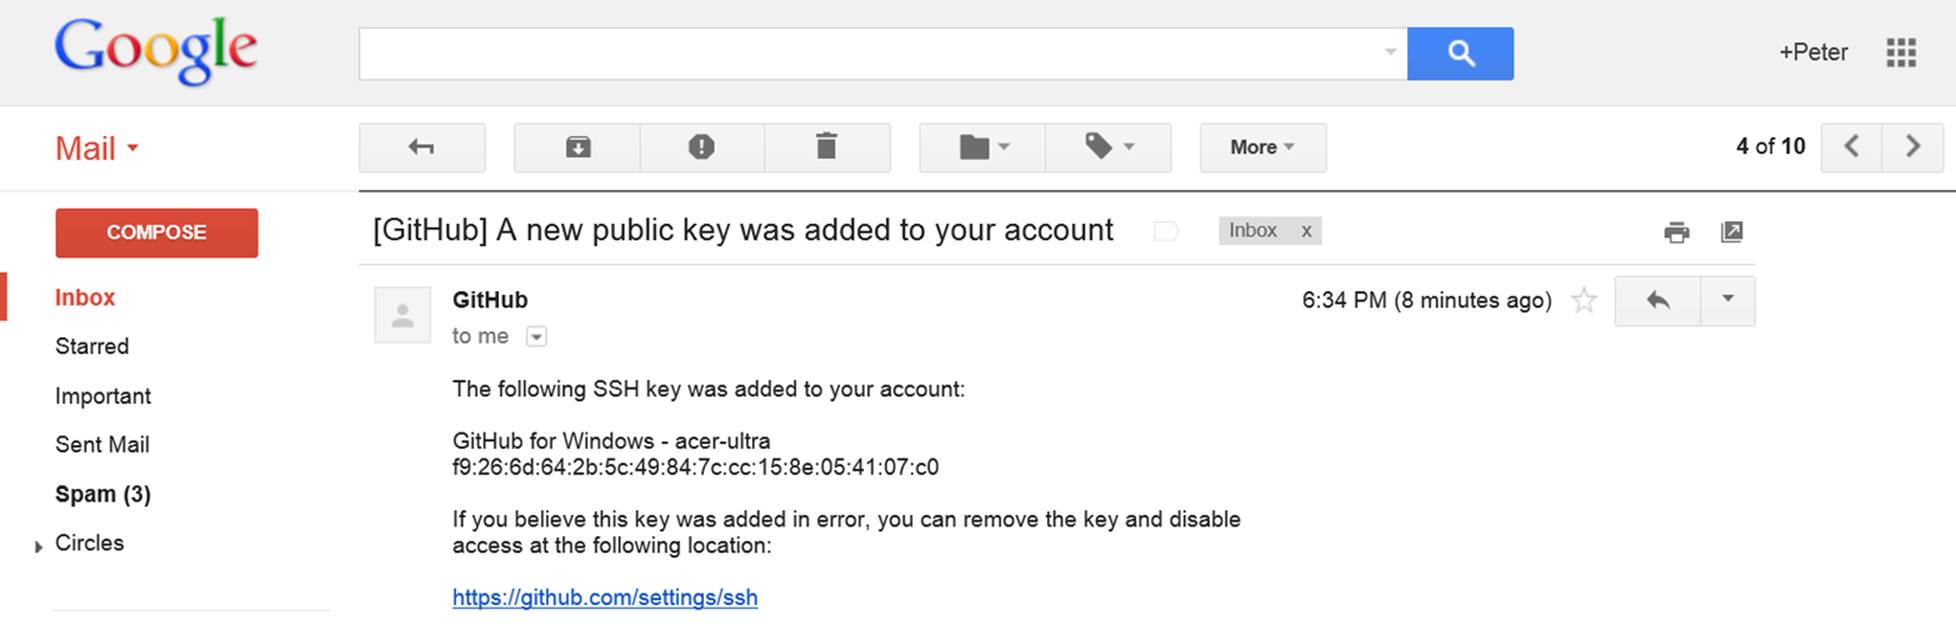
Figure 6-26. The email from GitHub letting you know you’ve added a new public key
Now that you’ve installed GitHub for Windows, go to a repository that you’d like to clone (download) and that you own or are a collaborator on. You can clone any public repo, but you won’t be able to push your changes back up to GitHub unless you’re either an owner or a collaborator. If you look at the bottom-right corner of the page, you should see the “Clone in Desktop” button, as shown at the bottom right of Figure 6-27.
Figure 6-27. A repo with the “Clone in Desktop” button
Click the “Clone in Desktop” button. The exact result when you click the button may depend on the browser and version that you’re running. In Internet Explorer, I get the pop-up in Figure 6-28 asking whether I meant to switch apps. You should get something similar.
Figure 6-28. Confirming that you wanted to open GitHub
Click the Yes button to launch GitHub for Windows and open a file explorer window, as shown in Figure 6-29.
Figure 6-29. Saving your cloned repository in GitHub for Windows
Select the directory you’d like to clone the repo into, click the Clone button, and GitHub for Windows will clone the repository for you. Once the repo has been successfully cloned, you should see a screen similar to Figure 6-30.
Figure 6-30. Viewing a repo in GitHub for Windows
At the top left is a + icon that you can use to create a new repository in a given directory or clone a repo from GitHub. Below that, the left panel shows a list of the repositories that you’re working with locally.
At the top of the screen, just to the right of the blue box is a drop-down list that you can click to select an existing branch or to create a new branch. Below that, you can see a text box where you would enter a commit message if you had changes to commit.
Making a Commit Using GitHub for Windows
To make a new commit using GitHub for Windows, you probably want to start by creating a new branch. In Figure 6-31, you can see I’m creating a branch called “windows_feature.”
Figure 6-31. Creating a new branch
If you click the Create button below your new branch name, then look above where you created the branch, you should now see that you’re on the branch you just created. Now you need to add the content. GitHub for Windows isn’t an IDE or a text editor. It’s just a tool for committing your changes to Git, so you’re going to need to use a text editor or some other tool to create a new file and put it in your project directory. I created a new file called windows_feature.html and saved it in the project directory. Create a new file using a text editor, save it in the project folder, and then go back to GitHub for Windows. You should see a new “Uncommitted changes” message. Click it and you should see a screen similar to Figure 6-32.
Figure 6-32. GitHub for Windows showing changes to be committed
Click in the Uncommitted Changes→Summary text box, enter a commit message, and then click the Commit & Sync button, and your changes will be saved to history. Then click the Publish button at the top right, and the changes will be uploaded to GitHub.
Configuring Command-Line Tools in GitHub for Windows
Sometimes it’s useful to be able to use Git on the command line. If you want to be able to do that, the command-line tools are installed by default, but it’s worth clicking the Settings icon at the top right of GitHub for Windows. A drop-down list will appear, as shown in Figure 6-33. Click the Options link.
Figure 6-33. Settings in GitHub for Windows
When you click Options, you’ll see a screen similar to Figure 6-34.
Figure 6-34. Options in GitHub for Windows
One change that’s worth making is to change the default shell from PowerShell to Git bash. It means that when you launch Start→GitHub→GitHub Shell, it’ll put you in a shell that will provide access to more applications that you might need such as vi (a text editor). Once you’re done, click the Update button at the bottom left of the page to save your changes.
Hopefully, now you have enough information to be able to clone and commit to a repository locally should you need to do so using the GitHub for Windows application.
All materials on the site are licensed Creative Commons Attribution-Sharealike 3.0 Unported CC BY-SA 3.0 & GNU Free Documentation License (GFDL)
If you are the copyright holder of any material contained on our site and intend to remove it, please contact our site administrator for approval.
© 2016-2026 All site design rights belong to S.Y.A.