The Maker's Manual: A Practical Guide to the New Industrial Revolution 1st Edition (2015)
Part III. From Bits to Atoms
Chapter 12. 3D Printing
Noted science fiction author Arthur C. Clarke once said: “Any sufficiently advanced technology is indistinguishable from magic”. If you look at a 3D printer at work, you can understand what he meant. Seeing an object taking shape layer by layer, or emerging from a resin bath for the first time, is like witnessing magic. These technologies are entering our homes and they are accessible at reasonable cost. With a device that costs approximately as much as a mid- to high-end laser printer--around $600 to $2,500 at the time of writing this book--you can create nearly any kind of object you like, or fix broken objects which nobody sells or manufactures anymore. Welcome to the world of self-production!
3D printers can be simple to operate. Most recent printers require nothing more than spooling up the source material (usually some form of thermoplastic), inserting an SD card that contains the design file, and pushing a button. The printer reads the design file, melts the source material, and layers it up until the desired object is completed.
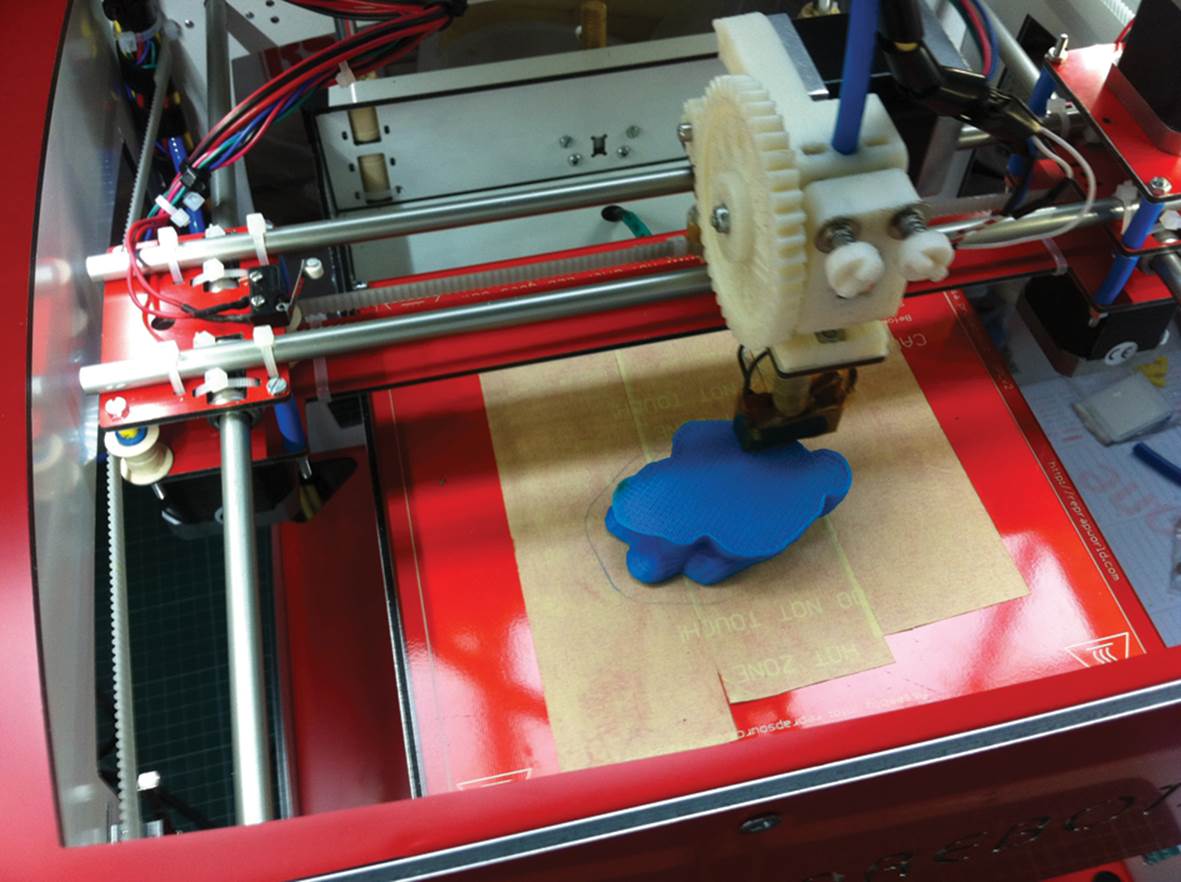
Figure 12-1. Printing an object, layer by layer, on a Sharebot KIWI
This kind of additive technology is called FDM, which stands for Fused Deposition Modeling and is, at the moment, the most accessible and cost-effective, so it’s the one we’ll be talking about. Other technologies involve sintering (hardening of powders) by means of a laser, stereolithography (polymerization of resins by exposure to a light source), and layering of shaped plates (laser cut or milled).
How Does it Work?
An FDM printer builds the object on a platform which moves vertically, on its z-axis. An extruder--a device with a nozzle and a heating element, very much like a hot glue gun--moves on the x- and y-axes and melts a plastic material, placing it layer by layer on the platform. Thanks to the high quality stepper motors used, many FDM printers can reach a precision of movement of a few tens of microns on the x- and y-axes, and 2.5 microns (about 0.0001”) on the z-axis. However, because of the extruder dimensions, the resolution is generally between 100 and 350 microns (0.004” to 0.014”) per printed layer. There is at least one motor for each axis and one for the extruder, even though in some cases two motors can be placed on one axis. The circuits that direct the steppers are called drivers.
The extrusion nozzle, a kind of metallic funnel with a tiny hole, is connected to a resistor which heats up to around 250°C (some types of extruder can reach temperatures of over 300°C). The extruder is heated up to a higher temperature than the melting point of the materials used, so that the materials reach a perfect flow and can be layered on the platform without drooping too much.
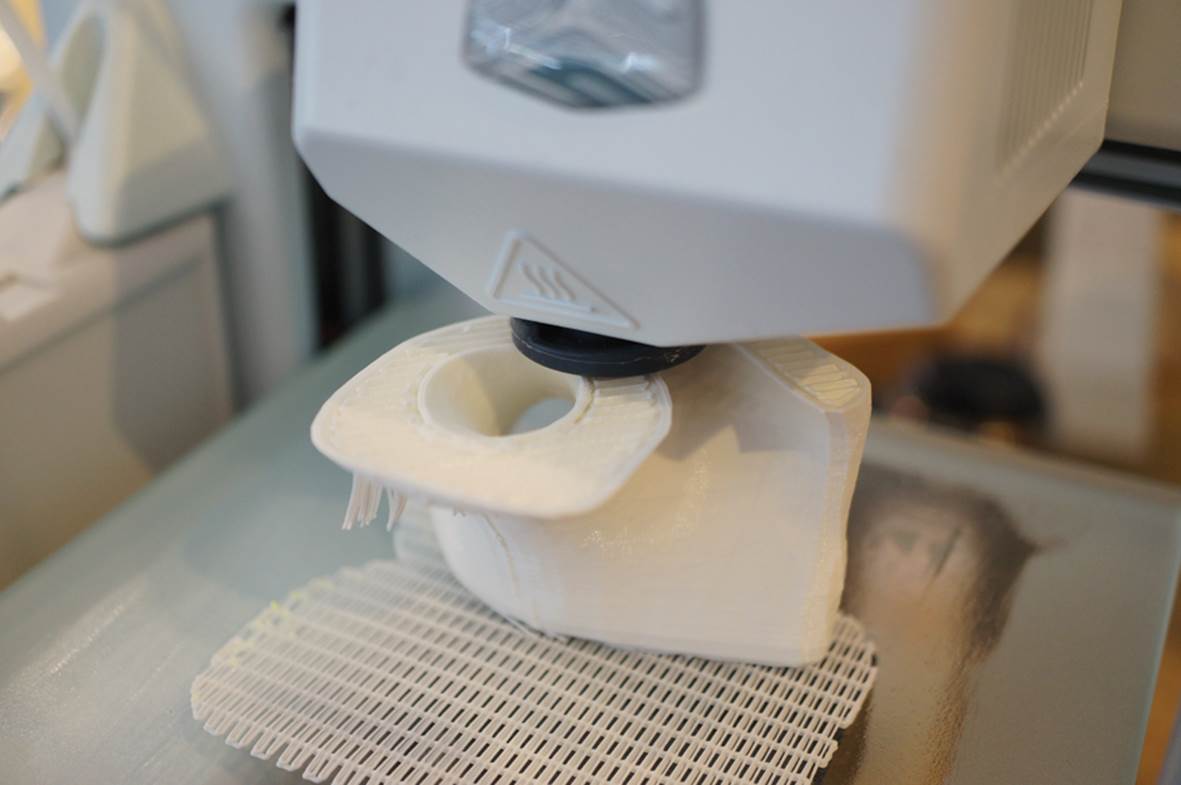
Figure 12-2. An extruder at work at the FabCafe in Tokyo.
The size and structure of the printer define the printing area. In the early models, the working area was a few centimeters across; today the most widely used area is 20x20x20 cm, because that is the best compromise for a desktop printer, even though some models can work on a larger area. While this printing area might seem small, you can easily make larger objects by making them in pieces and assembling them later. Some printers have minimal structure, with no frills, making them inexpensive and easy to assemble. Other printers have an external structure that makes them look like vintage televisions or microwave ovens.
Materials
The two most common printing materials, which come in spools of filament of different thickness and colors, are ABS, which stands for acrylonitrile-butadiene-styrene and PLA, or polylactic acid. They look similar, but they have very different properties. For supporting structures, PVA, orpolyvinyl alcohol, is also used.
ABS
This is a thermoplastic material, easy to get and widely used in injection molding. Even if you haven’t heard the name before, it is famous for being the material LEGO building blocks are made of. It melts at 105°C, though in 3D printers it is extruded between 215°C and 250°C. Even though it smells like burnt plastic during printing, it is not toxic-- well, maybe; the actual plastic itself is safe to handle, but the vapors it gives off when heated can be irritating. Most makers will only use ABS in a well-ventilated room, or with a fume extraction system.
ABS also has a tendency to deform as it cools down at different rates in different printed areas; to avoid this you could use a kind of oven which keeps the whole object at a steady temperature, but this technology is still covered by patent.
PLA
This is a natural, biodegradable thermoplastic material derived from corn or potato starch; it is extruded between 160°C and 220°C and, once cold, it is slightly more rigid than ABS, but more fragile. It can be printed on a non-heated platform and does not pose any deformation issue while cooling down, as ABS does. However, the quality of the printed objects is slightly lower. PLA also suffers from its own virtue: if it is used or stored in conditions of over 90% humidity, or a temperature of 60°C, its biodegradation process starts, and it slowly turns into mush.
PVA
This is easy to use for printing because it melts at a lower temperature than ABS and PLA, and doesn’t need a heated platform. It is much easier to remove since it dissolves in water. Its filament poses the same storage issues as PLA.
For information on new and interesting materials for 3D printing, be sure to check the archives of Matt Stulz’ posts for Make:, many of which feature news and reviews of various 3D printing materials.
3D printers
In the industrial world, 3D printing technology goes back to the 1980s. How did it make it to the desktops of the 2010s?
An early pioneer of desktop 3D printing was Dr. Adrian Bowyer, a mechanical engineering professor at the University of Bath in England. In 2005, Bowyer started prototyping a low-cost, open source machine, the RepRap, which stands for Replicating Rapid Prototyper. The eventual goal was to have the RepRap make all the necessary plastic parts to assemble its own replica. The machine has a simple structure, made out of threaded bars and easily available components. The first prototypes were sold in kits.
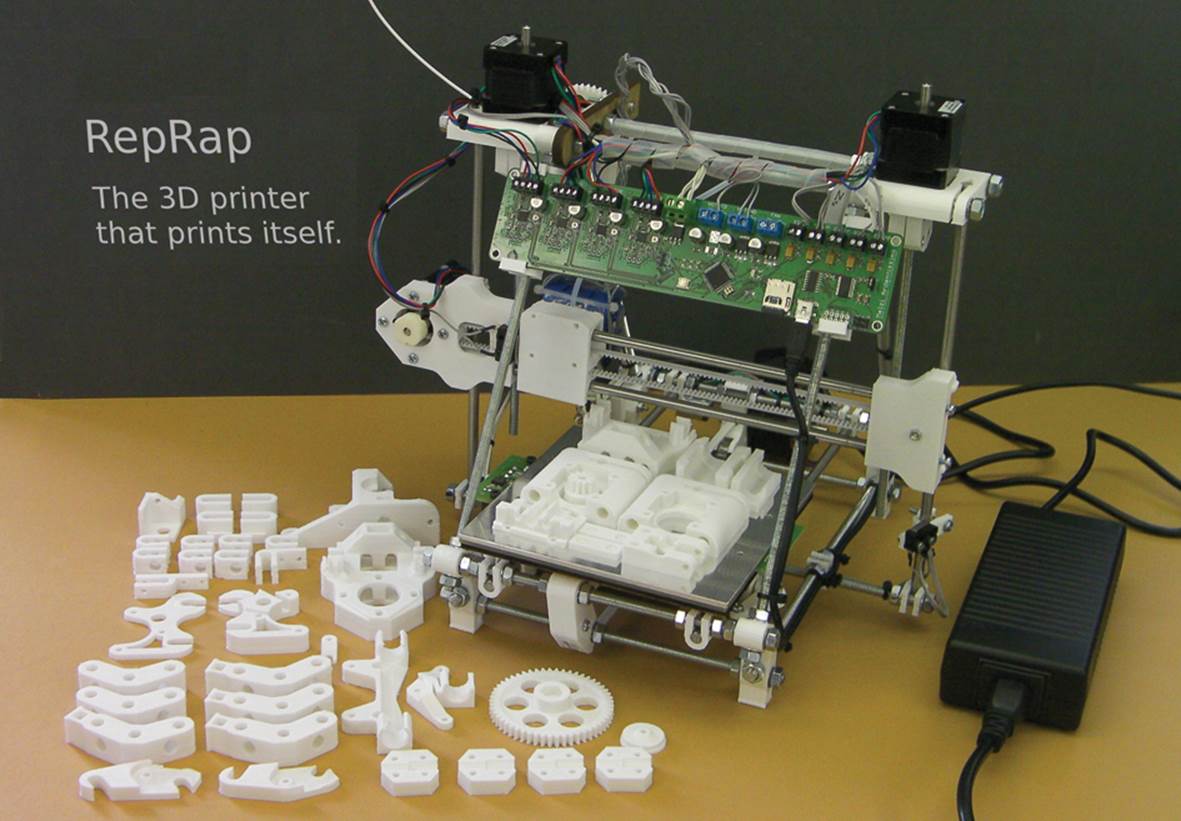
Figure 12-3. The RepRap Huxley 3D Printer by RepRapPro Ltd.
Later, with the RepRap project as a starting point and with a few changes to its structure and mechanisms, many people designed and made their own version of a 3D printer. Here are just a few:
MakerBot
In 2009, some time after the appearance of the RepRap project, Bre Pettis, Adam Mayer, and Zach “Hoeken” Smith founded a company called MakerBot (http://www.makerbot.com), manufacturing open source 3D printers. Cupcake, their first model, was a great success; later, Replicator and Replicator2 came along. MakerBot no longer makes open source 3D printers.
Kentstrapper
In Florence, Italy, three generations of the Cantini family have given life to an established start-up named Kentstrapper, where they develop, manufacture, and sell printers derived from the RepRap model. They have been the pioneers of 3D in Italy. Their most popular models are Kentstrapper Volta, Mendel Max, and RepRap Galileo.
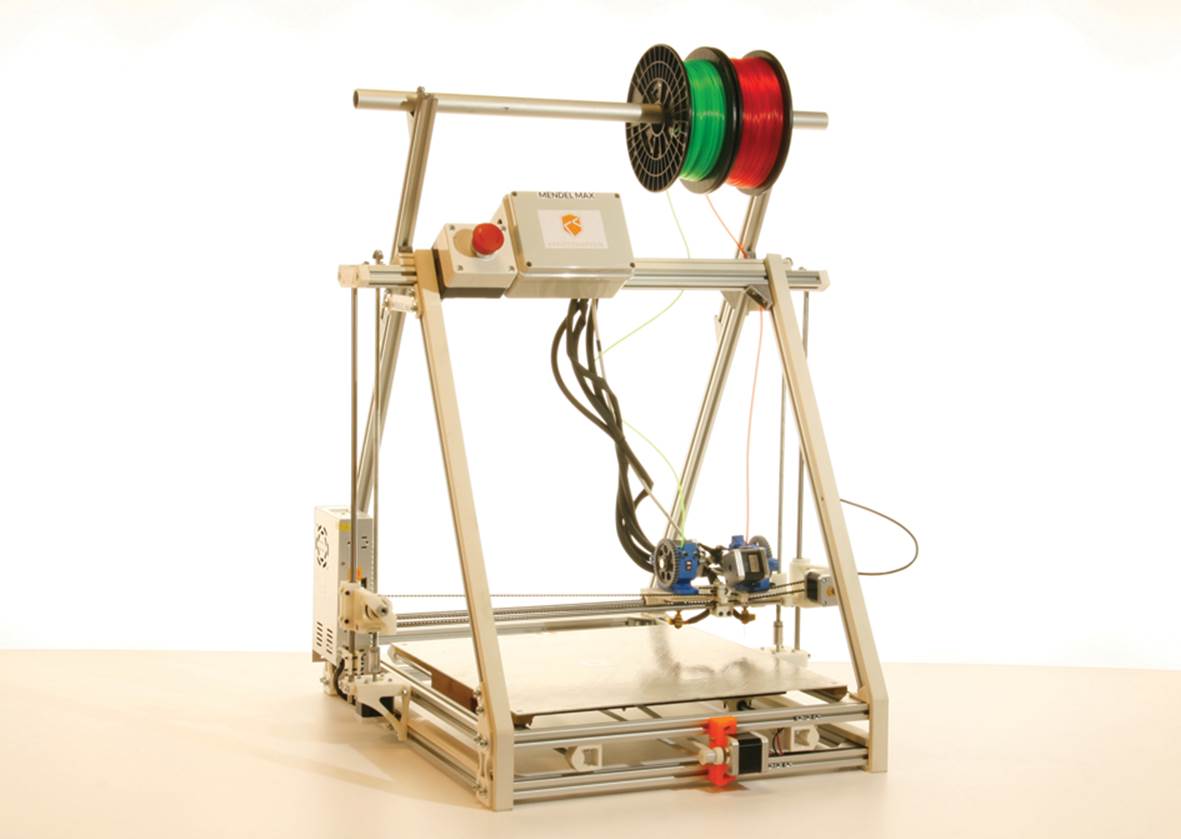
Figure 12-4. A Mendel Max with an oversized platform for large printings (Kentstrapper)
WASP
Massimo Moretti, fascinated by the creations of thread-waisted wasps and with the help of a group of students of the ISIA Design University, started WASP (World’s Advanced Saving Project) and produced PowerWASP, a desktop personal factory that can print plastic and clay and carry out light milling work. Massimo’s idea is to one day build a machine able to print clay dwellings, in the way wasps do.
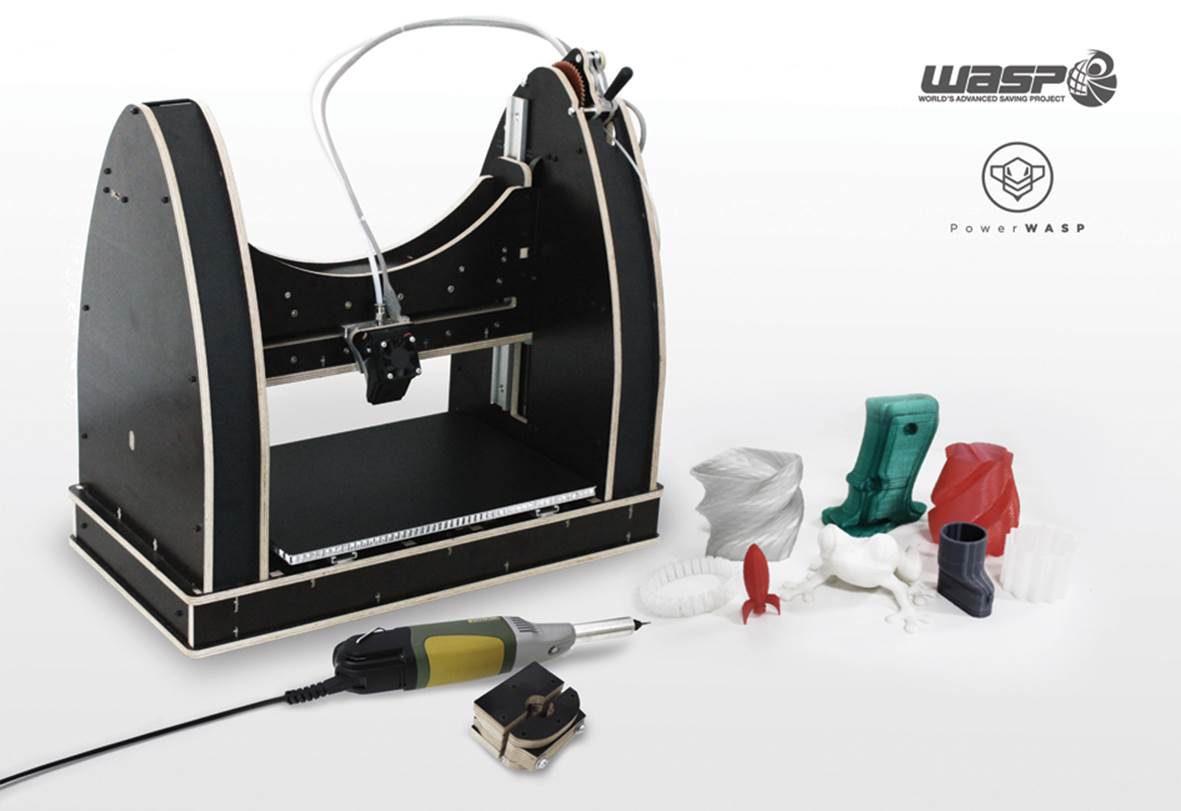
Figure 12-5. The PowerWASP printer can also print clay and do milling work (WASP)
Many 3D printer manufacturers offer their printers as kits. This way, the price can be kept reasonable and you get the pleasure of assembling a complex object with your own hands. The task might require a few days and some manual work, but it is worth it, because in the end it will be “your” printer, and you will will be familiar with every single screw. Printrbot and Ultimaker both make printers that are very popular with makers; some of their models are available as kits, such as Printrbot’s Simple Maker’s Kit ($350), and Ultimaker’s Ultimaker Original+ (about $1500).
There are many more printers listed in the RepRap Family Tree).
The Workflow
The first step to print a 3D object is to design, or obtain, a three dimensional model. You can create it with one of the software programs you got to know in Chapter 11, or search online to find out if anyone has already created what you need. Two places to start are Thingiverse andYouMagine, websites that contain many open source 3D models for you to download, modify, and print. Starting from a model someone else has created is a great idea, because you can learn from people who are more experienced how to design a model.
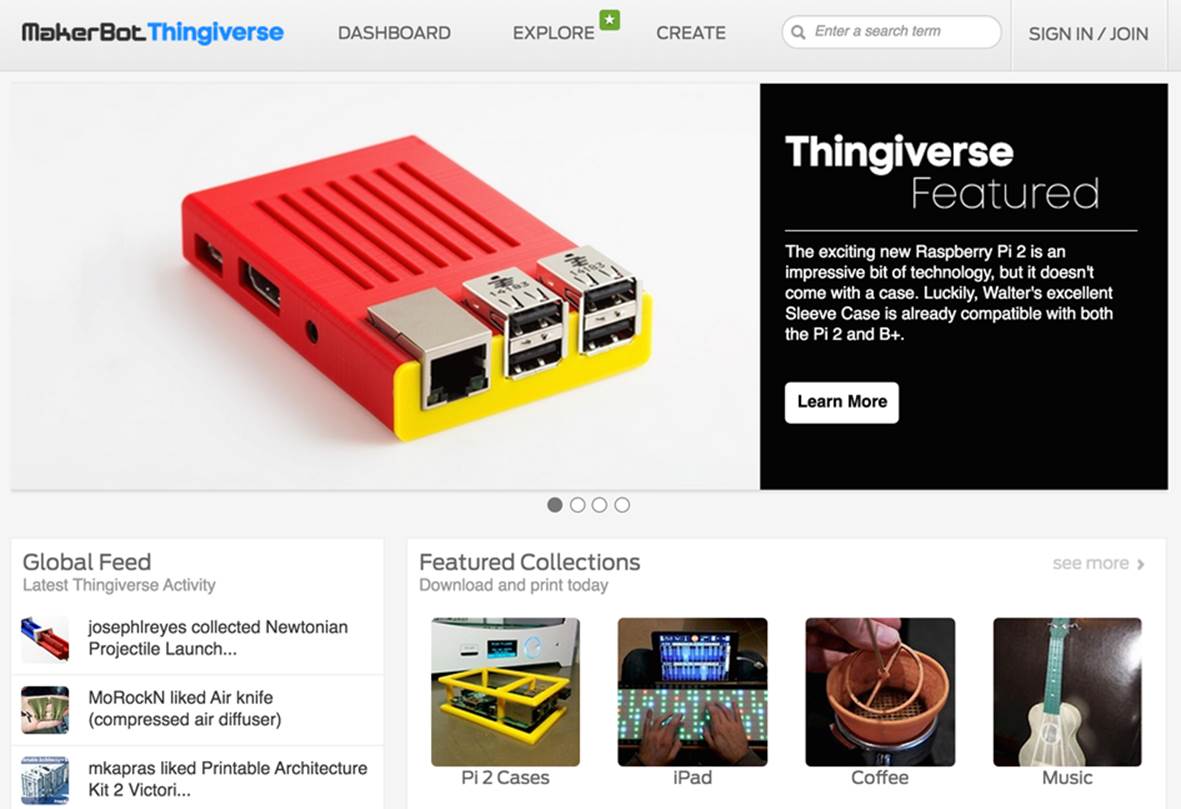
Figure 12-6. Thingiverse
In the construction of movable parts, you mustn’t overlook tolerances, or the ability to cope with imperfections. Even precision gear manufacturers always consider tolerances and leave room for movement, and you have to as well. Producing all the parts of you moving object with pinpoint accuracy is not a great idea, because they will hardly ever fit together as gracefully as they do on your computer screen. You have to always keep in mind the mechanical features, the printing area, and the resolution of the machine that is going to produce the object: metaphorically speaking, there is no point in designing finely chiseled details when the only equipment you have is a chainsaw.
If you wish to reproduce something that already exists, you can try to 3D scan it and then print it. You can use a dedicated 3D scanner, or you can look at some of the 3D scanning apps for the Microsoft Kinect or Structure Scanner, or you can take a sequence of pictures from many different angles and use an application like Autodesk 123D Catch to use the pictures to reconstruct a model of the object. These techniques require some expertise, because scan-generated files often contain defects that need to be rectified with specific programs; still, this method can be quicker than creating a brand new model.
Corrections
Sometimes your computer models look perfect because you are observing and handling three-dimensional objects with two-dimensional screens and tools. In fact, such seemingly “perfect” models may actually have so many serious defects as to make printing impossible.
Perpendiculars to the Plane
We said that models are approximated through polygons; for the STL format, for instance, a triangle mesh is used. As regards the model, each one of the polygons has an internal and an external face. You can represent the external face with an arrow perpendicular to the surface or, to be more precise, with a vector which is normal to the plane as shown in Figure 12-7.
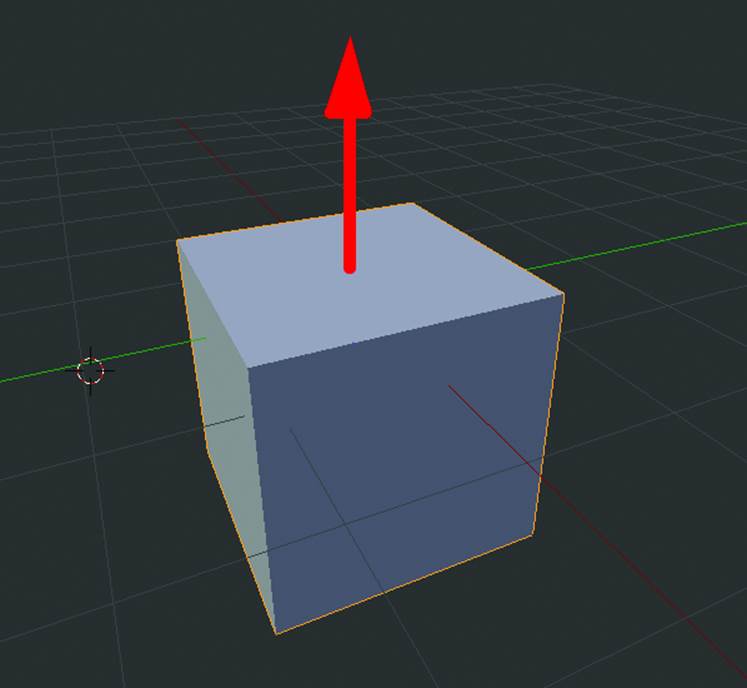
Figure 12-7. The normal to a cube plane
In a correct model, all normals have to point outside. Even though this doesn’t seem very relevant, it is important for a printing program, because it needs to understand what the internal and the external parts of the object are.
Watertight Models
Another issue is the presence of gaps and unclosed surfaces: all models need to be watertight (see Figure 12-8). This problem often arises when you create a model starting from a 3D scan.
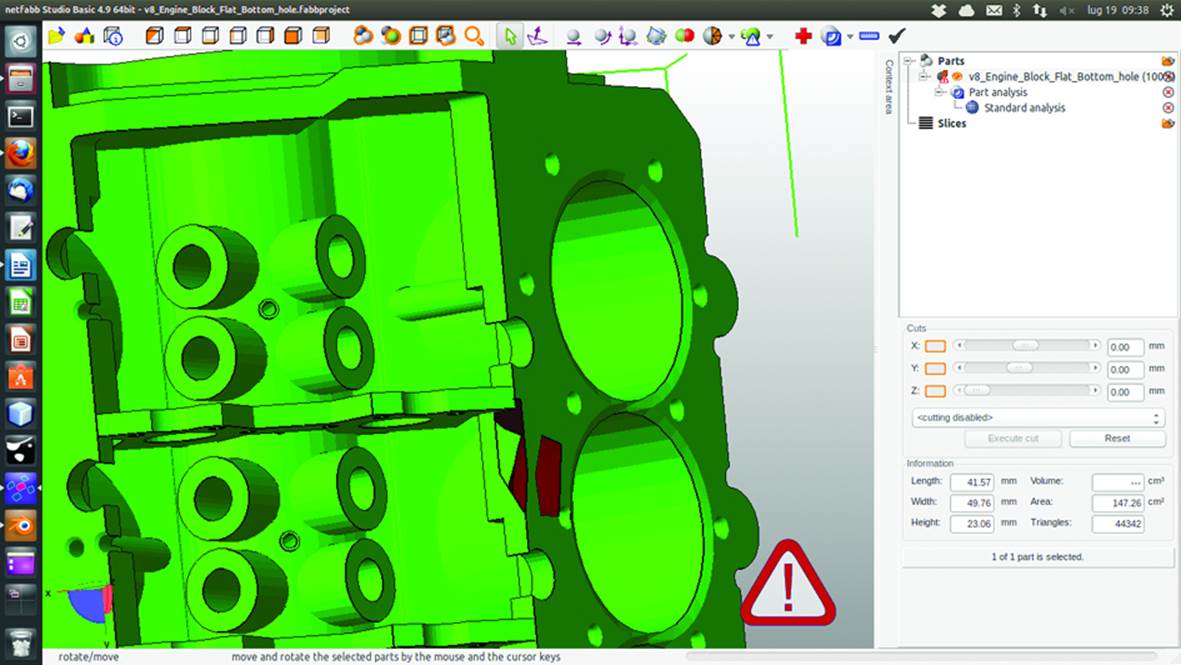
Figure 12-8. In this model, the red surface is not “watertight”
Before printing, you can use software to check whether everything is in order. These programs are basically viewers with simple editing features, like resizing objects or moving them to an ideal position for printing. They are not as complex as a CAD program, even though some can identify and amend the most frequent mistakes that models can present, such as closing gaps and merging unconnected parts.
Netfabb Studio Basic (Figure 12-9) is a free program which displays, analyzes, corrects, and edits STL files on Windows, Linux, and Mac. It can detect models that are not watertight.
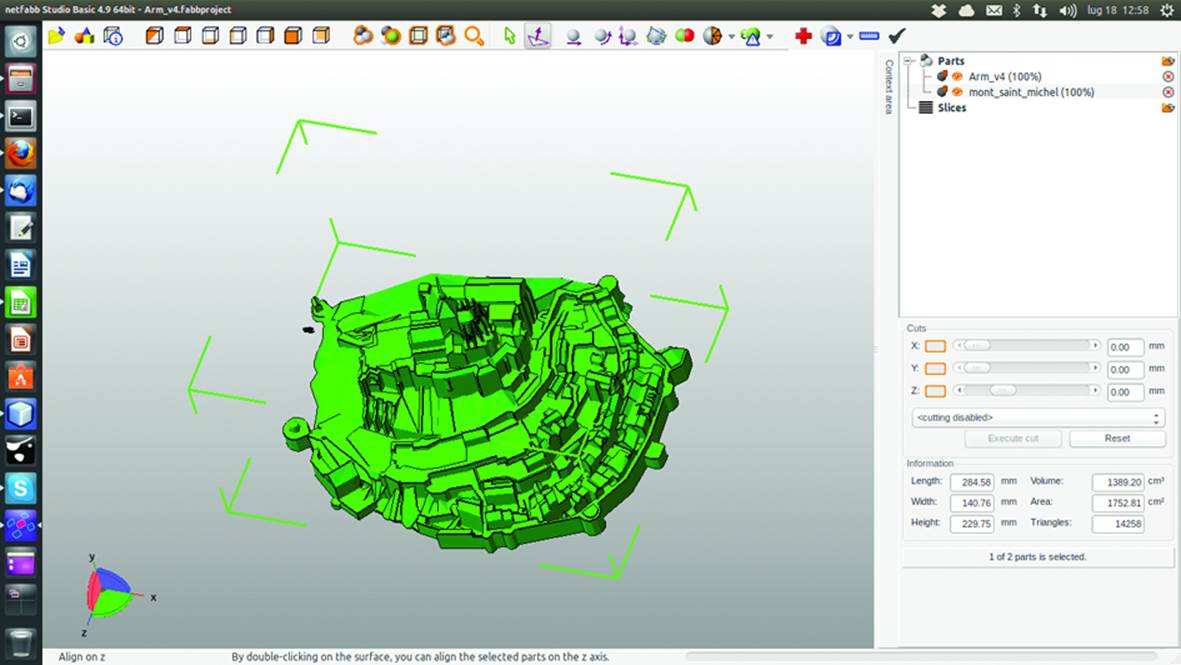
Figure 12-9. Netfabb Studio Basic
Pleasant3D (Figure 12-10) is only available for Mac and allows users to make small changes to files: -- rotation, resizing, centering--in order to obtain the best possible printing of the file. It can also read the format that is actually used for printing, thus allowing you to see how the extruder is going to place the material, layer by layer.
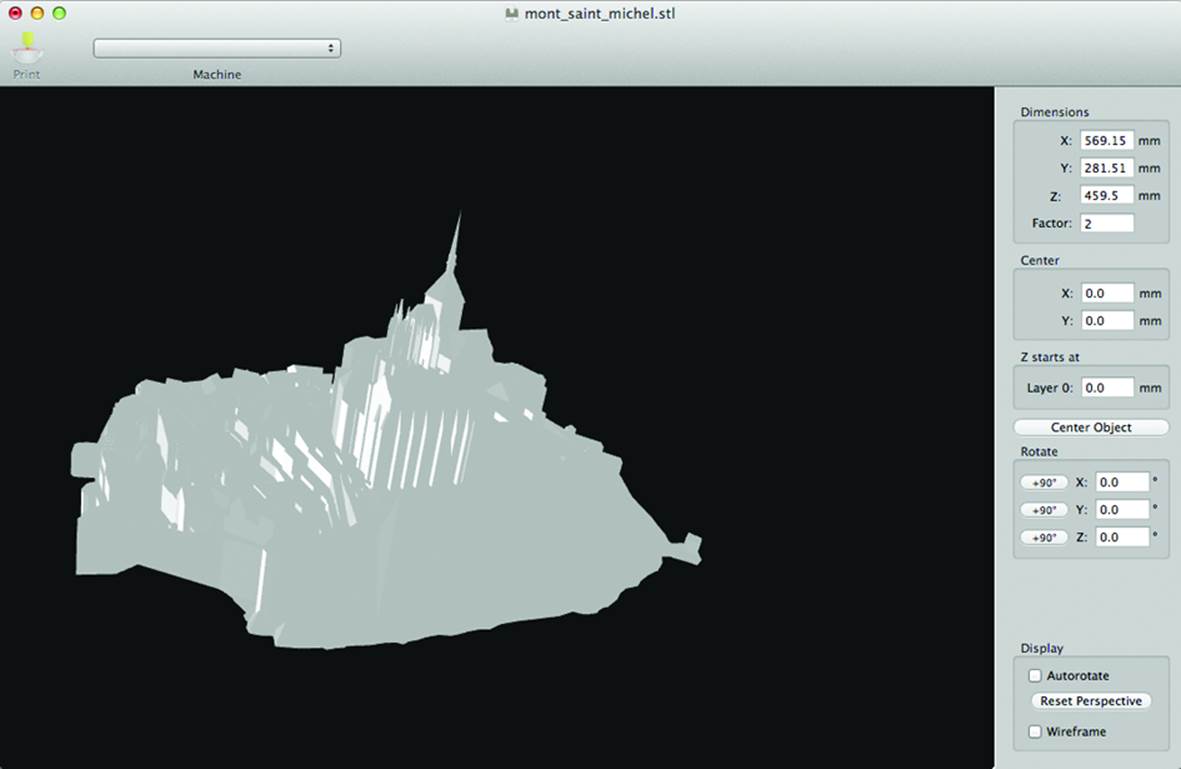
Figure 12-10. Pleasant3D
MeshMixer (Chapter 12) is freeware, but not open source software. Created by Autodesk, it can modify STL files and create 3D models. It can detect non-watertight files.
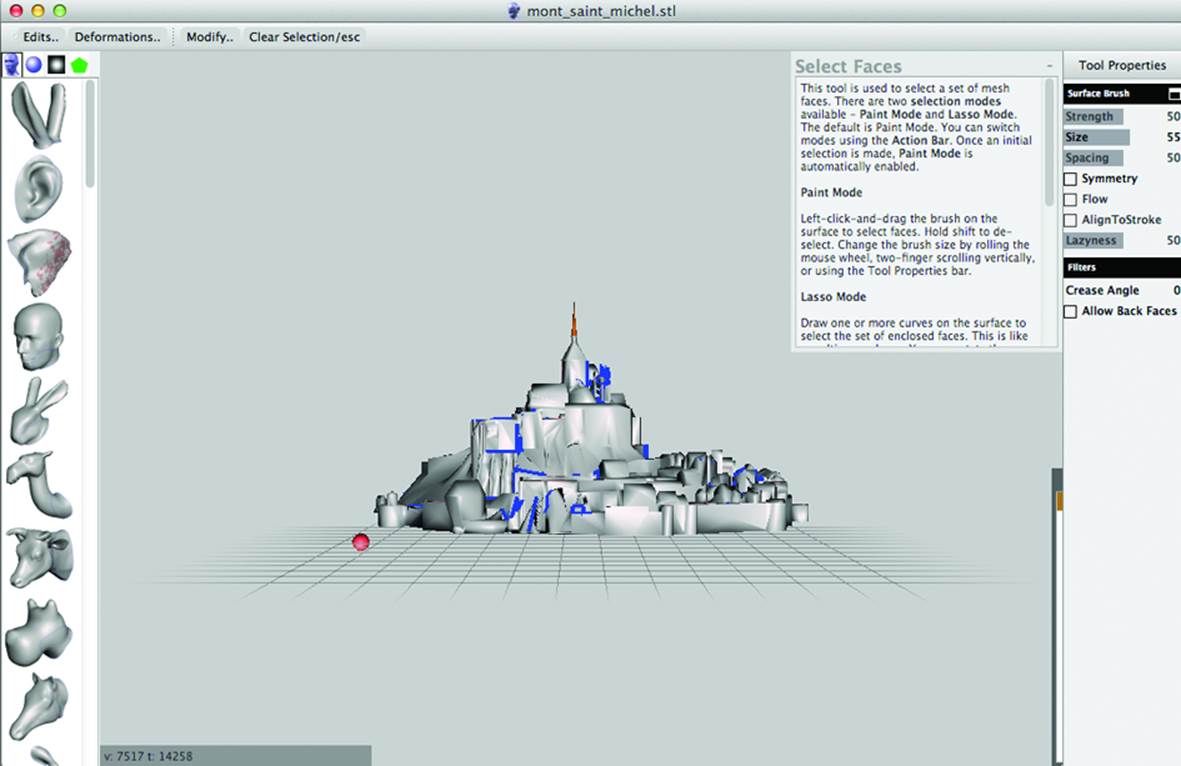
Figure 12-11. MeshMixer
MeshLab (Figure 12-12) is another open source package to visualize and modify STL files, available for Windows, Linux, and Mac.
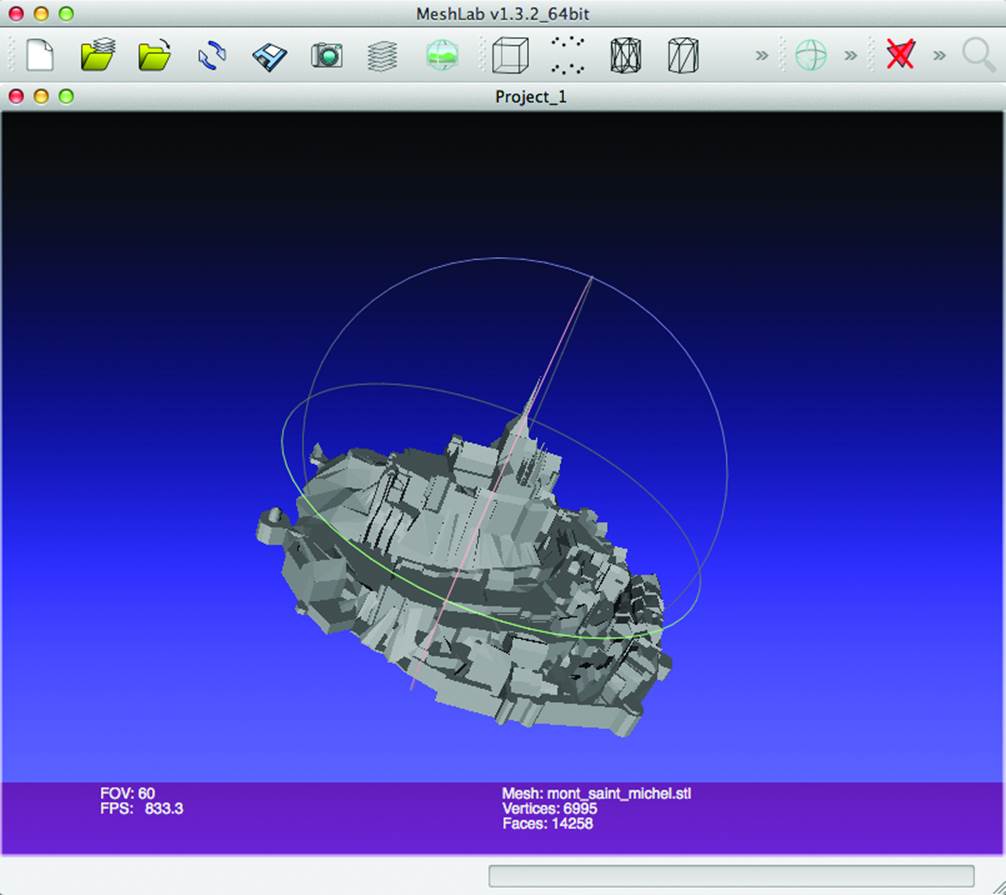
Figure 12-12. MeshLab
Slice it up!
Although one of the most common formats for 3D models is STL, 3D printers cannot use this format directly, so you have to first convert STL into a sequence of commands which coordinate movement and operations. The standard language for this is called G-code.
In the G-code conversion, you have to consider the fact that the extruder will have to layer up the material, so basically you have to “slice” your model horizontally: in fact, the term slicing is often used. Again, there are software programs which can help here; one of the most popular isSlic3r (Figure 12-13) , an open source program by the Italian Alessandro Ranellucci. It is a simple program, easy to use, and can manage complex tasks; it makes use of many mathematical algorithms which assess the best paths to produce the object. Among other things, Slic3r can also evaluate the amount of material to be extruded and check temperature, fans and cool down time.
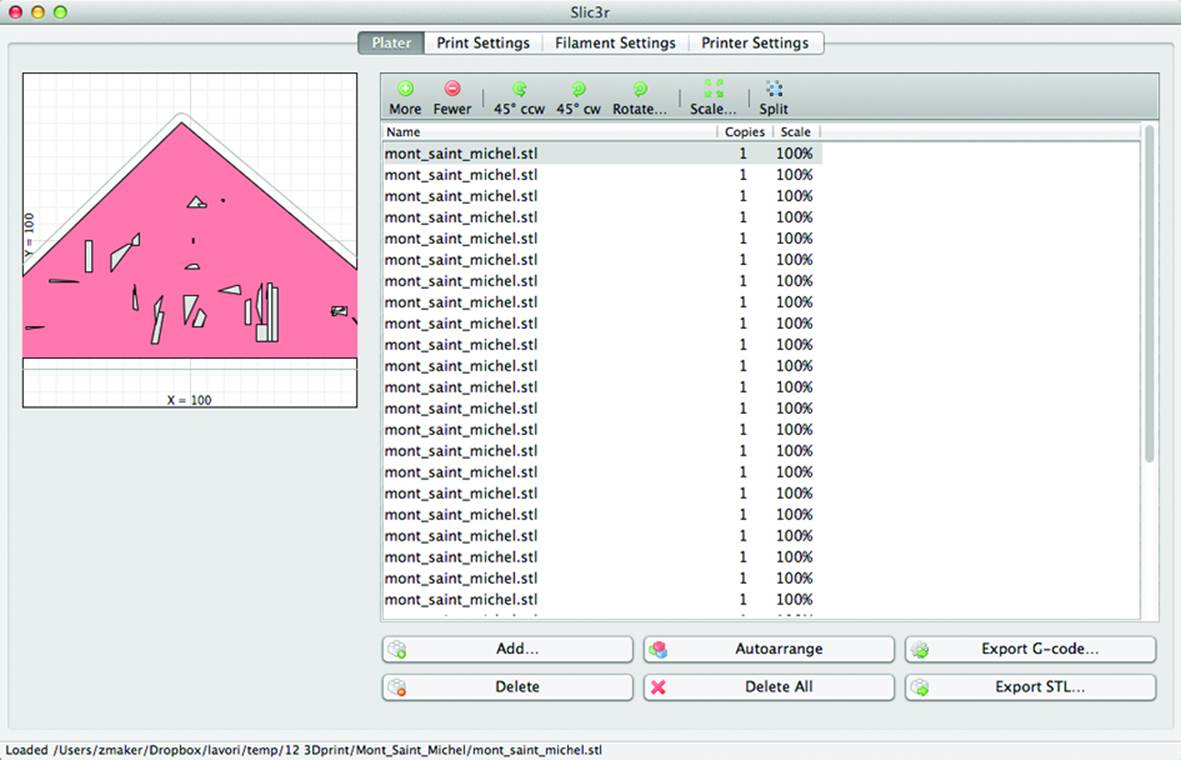
Figure 12-13. The Slic3r software at work
Setting up the Printer
A 3D printer is an object with moving parts that are not always protected, and one or two extruders which reach very high temperatures, so it is good to place it on a secure and stable surface such as a table or a desk, away from smaller, less intelligent creatures like dogs and toddlers. Check carefully the positioning of the power cable, of the USB cable for the computer connection, if any, and of the plastic filament spool.
Adjusting
The first thing you need to do before printing is to adjust the printing platform, which needs to be at the right distance from the nozzle: not too close and not too far. If it is too distant, the extruded thread won’t be laid in place; if it’s too close, it might clog the extruder. With the current generation of printers, the aligning procedure is very easy: just select the relevant feature and follow the instruction on the display. In older models, the procedure is manual and the extruder has to be moved along the platform and the distance checked by hand.
It is good to follow this procedure for pre-assembled printers just out of the box, because the transportation vibrations might alter the factory settings.
Extruder Feeding
From the PLA or ABS spool, examine the free end of the filament line: it needs to show a clean cut, or it might not fit in properly or get stuck. Check that the line and the runner tube, if any, are well positioned; the spool must be free to spin. Slide the line through the runner tube and into the extruder. The extruder must have reached the right temperature; be careful, since it will be over 180°C.
Older extruders are made of 3D printed parts and comprised some sort of trigger which pressed the filament against a little knurled wheel, which forced the filament into the nozzle. These models were open and it was possible to see where the filament went as well as any possible obstruction. Figure 12-14 shows such an extruder close-up.
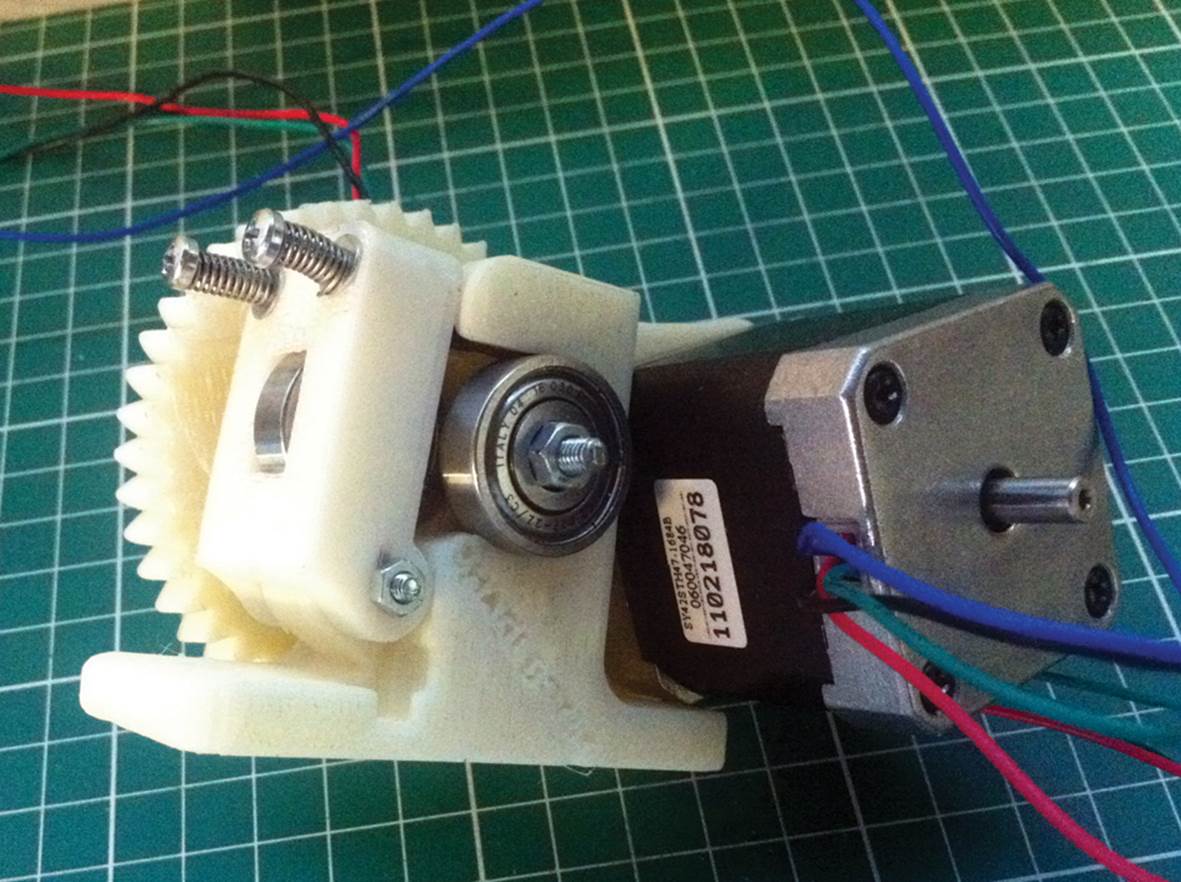
Figure 12-14. The extruder of a ShareBot Kiwi
Modern extruders are compact and have a little opening to insert the plastic filament into, as shown in Figure 12-15. The filament must be pushed in firmly and as soon as a thin trickle of plastic starts to drip from the nozzle, they are ready to print.
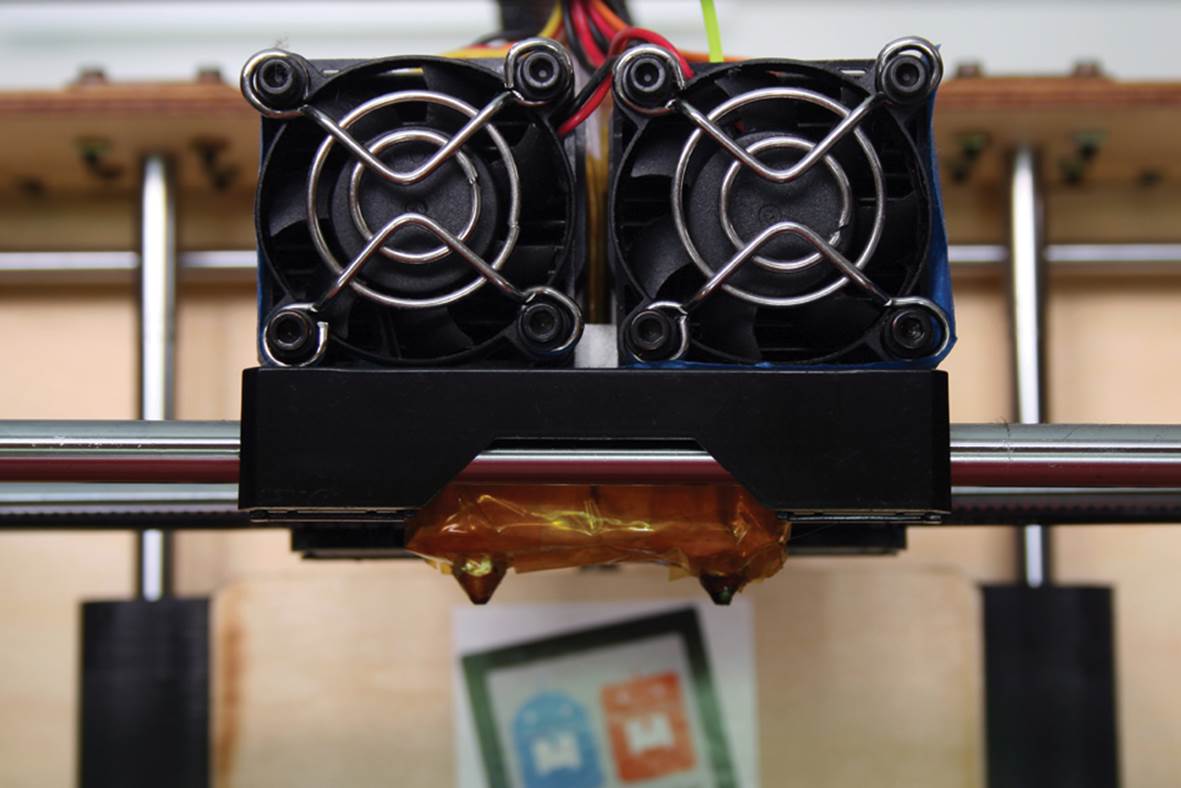
Figure 12-15. A more modern extruder
Operating the Printer
If you don’t print from an SD card, you can operate the printer from a computer which can execute a program able to send out manual input, receive diagnostic information, check on the work and temperatures, and also estimate time and layers that will be produced. The most popular ones are PrintRun (Figure 12-16) and Repetier-Host (Figure 12-16) .
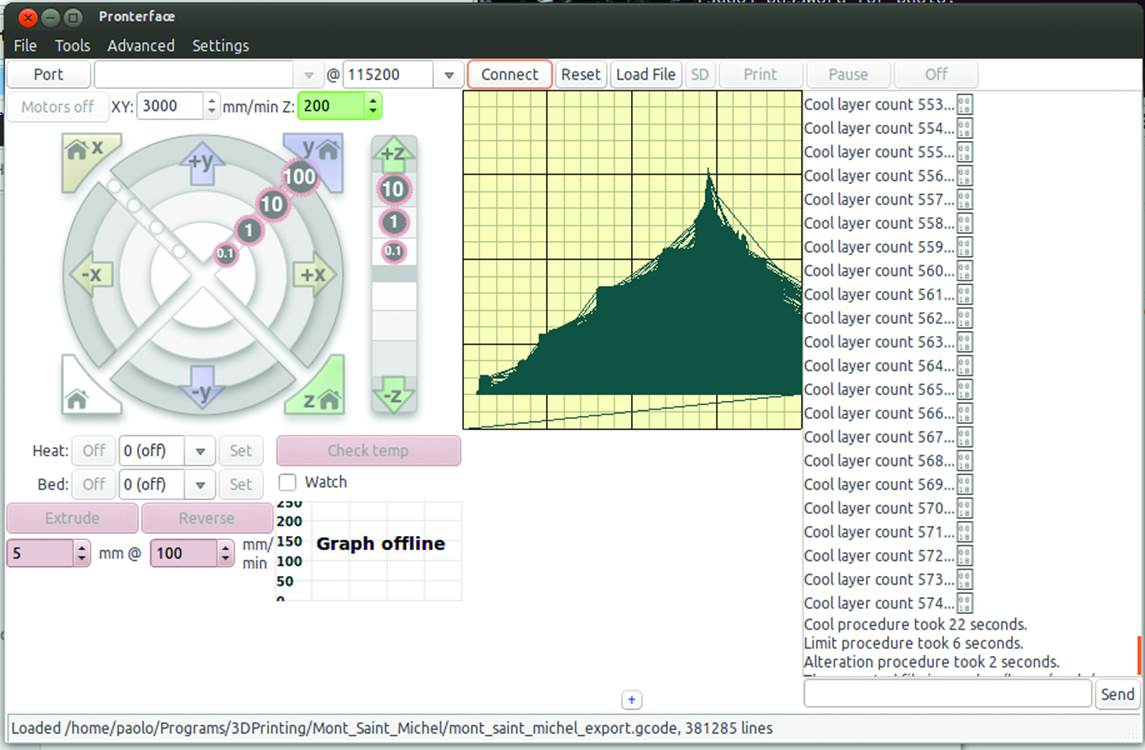
Figure 12-16. PrintRun
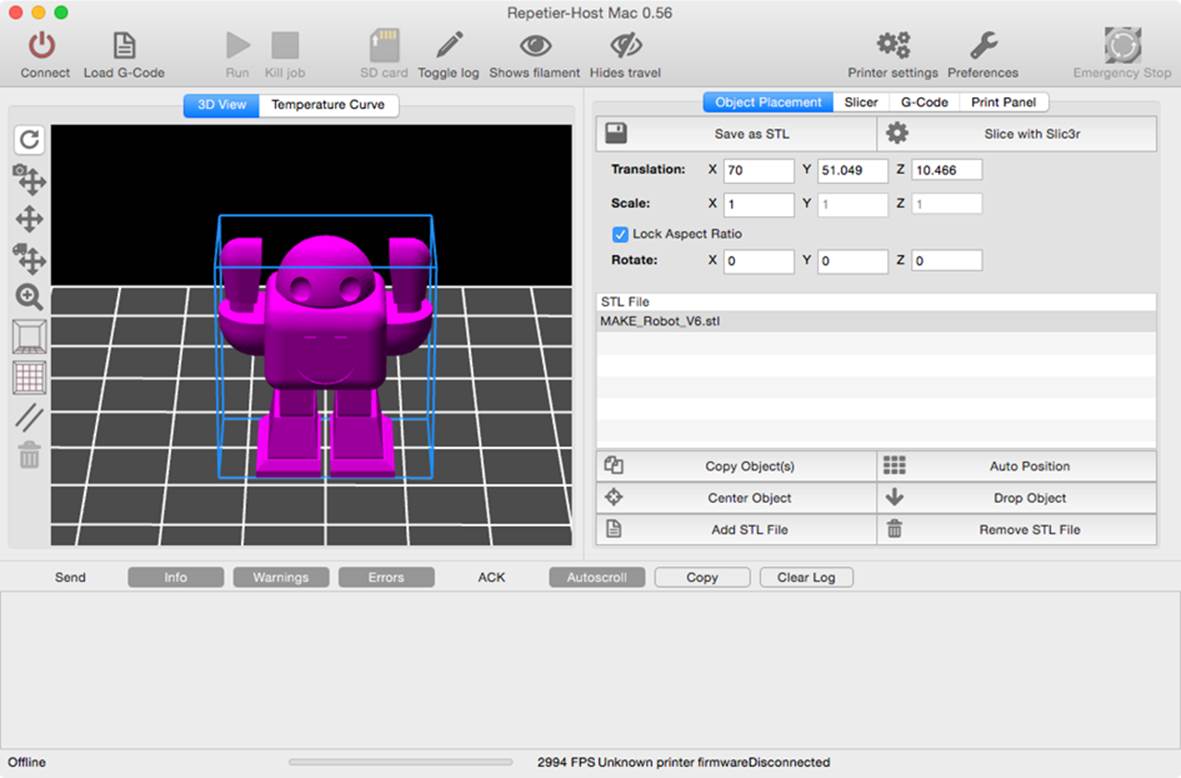
Figure 12-17. Repetier-Host
An SD card comes in very handy when you want to print an object which you have already tested and for which you have already set up all the printing parameters, or if you don’t feel like carrying your laptop along, or if you have more than a couple printers working in parallel. In all other cases, operating the printer through a computer is a fine choice.
Here are some of the options you can configure in your slicing software:
Shell
Each layer of the object you are printing is made up of an outer shell as well as interior infill, described next. You can change the thickness of this shell by specifying the number of perimeters: the perimeters are concentric and are added inwards to keep the external dimensions of the object consistent, so the more perimeters (3 is a good choice), the less infill you’ll get. A thicker shell makes the object more rigid.
Infill
Most 3D printed models are mostly hollow. They’re not usually completely hollow, because they need some sort of internal structural support to keep from falling apart. The infill is the extent to which the interior of the object is filled. It is usually determined by the algorithms used for the model slicing. Its typical value is 10%, meaning that everything inside the shell will be 10% material and 90% hollow. An object with 100% infill will be heavy, compact, with no internal empty space; it will require a higher amount of material and a long printing time. A high infill value makes the objects stronger and more resistant. Your slicing software may allow you to choose different infill patterns, from rectangles to hexagons, so you should experiment to find out what gives you the strongest object.
Bridging
Printers can print objects with an overhang (sections of the print that hang over empty space), though only with a maximum angle of 45°. Some of the solutions to printing over empty space are managed directly by bridging algorithms, which take care of the necessary adjustments. The final outcome will usually show some frayed edges (Figure 12-18) . It is also possible to create structures with sharper angles or with bridging parts, though in these cases it is necessary to create supporting structures such as very thin and regular walls and include them in the model. In both cases, at the end of the printing process you will get rid of the supporting structures. You could also enable support structures, but these will need to be removed and may leave unsightly marks on your object.
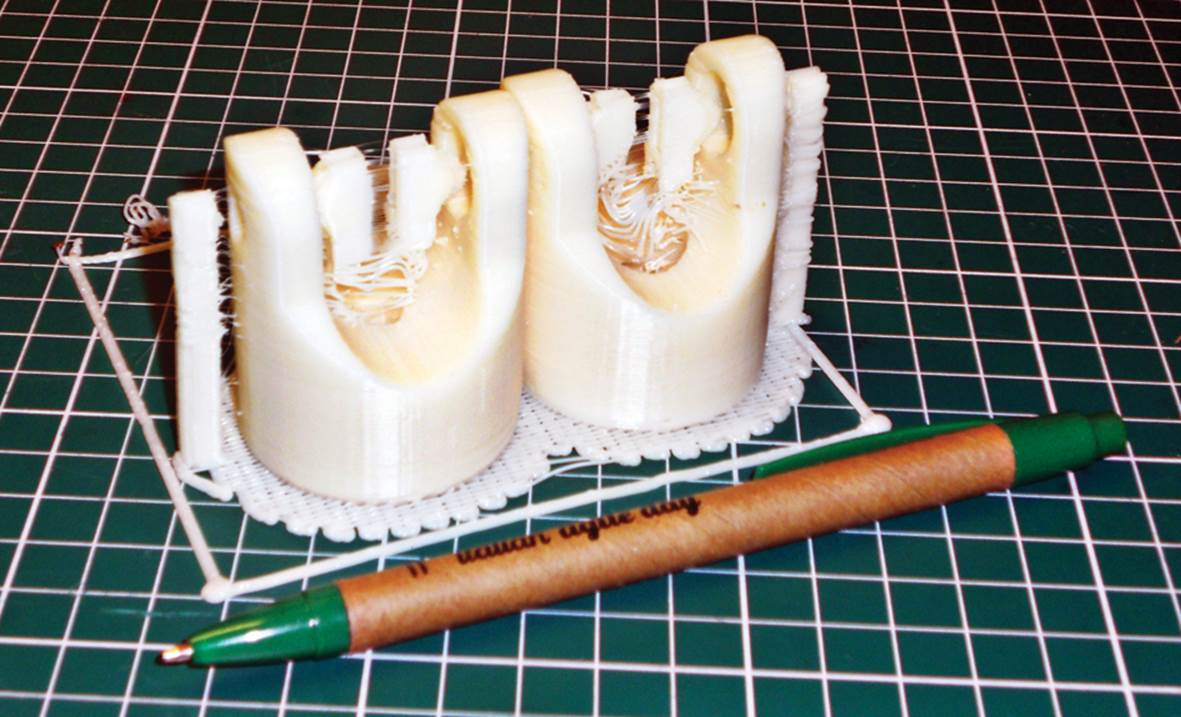
Figure 12-18. Two elements of a universal joint with suspended parts: note the inevitable “smudges” around the suspended parts
If you have a dual extruder, you can use different materials for the supporting structures, such as polyvinyl alcohol (PVA) which dissolves in water.
Raft
To prevent corner warping problems, you can place a thin layer, called a raft ([Link to Come]) , on the platform and print your object on top of it. The raft is also helpful to improve bonding with the printing platform. Another technique used to improve bonding is to use a glass platform sprayed with hair spray or covered with glue stick. Never spray hair spray directly on the printer, because the gears might seize up. Another technique used to prevent the object from deforming during the printing process is to add structures called shields, baffles, or mouse ears in appropriate positions.
Finishing off a Printed Object
The printed parts show a sometimes an unwanted surface texture. It is possible to refine the objects with sand paper, varnishes, or other finishing, to make the object perfect. If sand paper is used, it is important to avoid inhaling the filings derived from the process. For a good result it is better to start with coarse paper and proceed towards a finer and finer one; even though it feels time-saving, starting with fine paper will never lead to good outcomes.
In the end, you can use a heat gun to heat up the surface slightly and make it more glossy, as cake designers do with chocolate frosting.
Figure 12-19. [Figure to Come] Production of a complex object with supporting material (Matt Stultz, 3dppvd.org)
What If You Don’t Have a Printer?
If you don’t have a 3D printer yet, you mustn’t despair: you can make use of one of the many online prototyping services. Some popular ones are Ponoko, 3D Hubs i.materialise, Shapeways, and Sculpteo.
After creating an account, all you have to do is to upload a file and choose a material from their extensive catalogues, which may include some metals depending on who you order your print from. In a few clicks you can finalize your purchase, and after a few days or weeks your high-definition creation will be shipped to your doorstep. The cost depends basically on the chosen material, size, and filling parameters. Pretty much all services offer advice for the creation of the models you wish to print; some will even point out errors and problems of your model, if any.
How is this Useful?
Nowadays, desktop 3D printers give makers many opportunities in the most diverse fields:
§ They can print robot parts, as they do, for instance, at the Robotics and Artificial Intelligence Laboratory of the Politecnico of Milan, or in the workshop of robot maker Michael Overstreet;
§ They can fix objects by producing parts that don’t come as spare parts, saving you the purchase of a brand new object: for instance, a joint for a design bookshelf, the detergent compartment of a washing machine, etc.;
§ They can make customized objects, such as universal joints for a laser cut steadycams, mobile phone cases, electric guitar bodies, any size, shape and feature and boxes of any size, shape, and feature for electronic projects.;
§ During product development they provide a fast iteration cycle: A Maker designs a part, prints it, tests it in the available parts, and if it’s not quite as she likes it the computer file can get easily changed and printed again--repeating the cycle;
§ They can make replicas of no-longer-marketed objects, like toys from your childhood;
§ In the hobby crafts field, they can create toys, models, soldiers, and landscape details;
§ They can print small busts portraying your friends: at Disney it is even possible to buy a stormtrooper with your face or get frozen in carbonite!
§ In architecture, they can create building models; some people are even considering the possibility of making houses;
§ They can create artistic objects.
All materials on the site are licensed Creative Commons Attribution-Sharealike 3.0 Unported CC BY-SA 3.0 & GNU Free Documentation License (GFDL)
If you are the copyright holder of any material contained on our site and intend to remove it, please contact our site administrator for approval.
© 2016-2026 All site design rights belong to S.Y.A.