Redmine Plugin Extension and Development (2014)
Chapter 3. Permissions and Security
Our knowledgebase plugin adds extra content to Redmine projects in the form of categories and articles. These new content areas may contain sensitive information, which we would want to restrict certain users from accessing.
As there are different levels of users in Redmine for issue reporting and management, it is only natural that we would want to restrict access to the content in our knowledgebase plugin in a similar fashion.
This chapter will introduce the Redmine permission system and tells us how we can take advantage of it to restrict access to content areas within our plugin.
We will cover the following topics in this chapter:
· Summarizing Redmine's permissions system
· Declaring custom permissions
· Ensuring access restrictions in models, views, and controllers
· Understanding custom content access control
Summarizing Redmine's permission system
As we'll be extending Redmine's access control layer with our own custom permissions, our first course of action should be to better understand this system.
Redmine doesn't apply permissions directly to users; instead, it encapsulates permissions within roles. These roles in turn can have one to many users associated with them and are used to control access to content areas within projects, modules, and plugins.
The following screenshot shows the Administration | Roles and permissions view where new roles can be created, or existing roles can be modified:

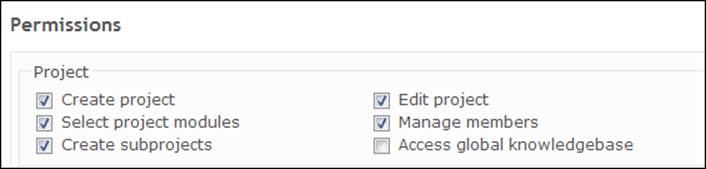
Each role contains a subset of the available permissions, which are further grouped by project module, which can be toggled on or off. The following screenshot shows the Manager role that is available as a default in Redmine along with the available Project Permissions all toggled:

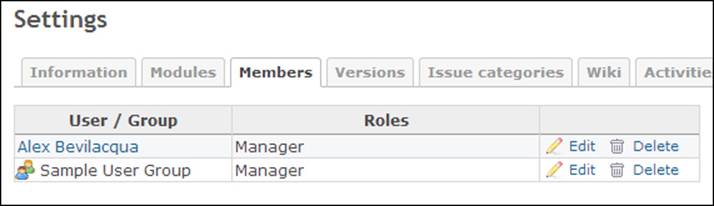
As Redmine is a project-oriented system, a project association must be made in order for the role to be applied. This is done by a project administrator or any user assigned to a role with the :manage_members permission in Settings | Members for the project window.
Permissions can be applied directly to users via roles, or they can be applied to groups of users. Groups are configured by a Redmine system administrator by navigating to Administration | Groups.
Declaring custom permissions
As we saw briefly in Chapter 1, Introduction to Redmine Plugins, permissions are registered in our plugin's init.rb file as part of the Redmine::Plugin.register block.
While registering a new permission, we populate a hash, which takes a controller as key, and an array of actions as the value. The syntax for this command is as follows:
permission(name, actions, options = {})
The permission helper that is available to us (plugin authors) is actually just a wrapper around Redmine::AccessControl#map, which is located in /path/to/redmine/lib/redmine/access_control.rb.
Before registering our permissions, we need to understand the two scopes of permissions that are available: global and project module.
Global permissions are a bit deceptive as they aren't actually "global" in nature. In fact, they belong to the Project category and are essentially just a sum of a user's permissions across all projects for which they are members.
Note that global permissions can mean different things depending on what context they're being used in:
· Permissions that are not tied to (defined within) a project module (definition)
· Permissions a user has for at least one project within the entire Redmine system (used for several cross-project features)
In order to demonstrate, let's register the following permission:
permission :access_global_knowledgebase, {
:knowledgebase => :index
}
If we were to check the roles editor now by navigating to Administration | Roles and Permissions and selecting any role to edit, this new permission would in fact appear under the Project category.
Note that for a user to be able to take advantage of this permission, they would still need to be a member of a project. If a user should only have access to this feature, but not additional projects, a new project should be created that all users can be a member of.
Project module permissions are declared almost identically, but are contained within a project_module block.
project_module :knowledgebase do
permission :view_kb_articles, {
:articles => [:index, :show, :tagged],
:categories => [:index, :show]
}
end
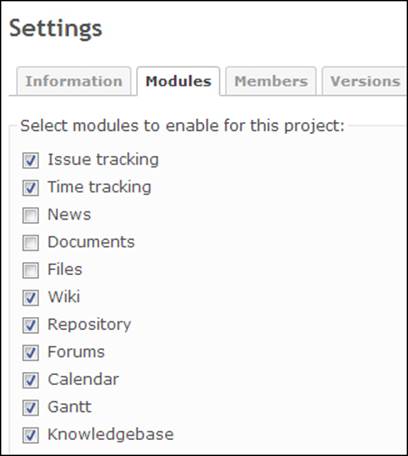
This block allows the permissions to be encapsulated and is therefore dependent on the project module being enabled in a project's module list before the permissions are applicable.
The previous example allows any user with the :view_kb_articles permission applied to be able to access the articles#index, articles#show, articles#tagged, categories#index, and categories#show routes.
Note
As permissions target a controller action, we cannot provide more granular access control—for example, restricting access to individual articles—using the built-in permissions system.
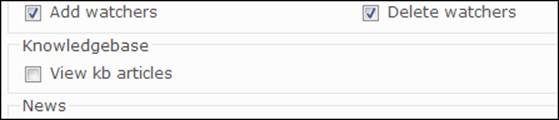
Editing any role will now contain a new group for the project module :knowledgebase with the single permission we've defined.
Ensuring access restrictions in models, views, and controllers
Now that we know how to declare and apply permissions for our plugin, we need to ensure that those permissions are honored in the context we intended.
Checking if the current user has the permission to perform a specific action is done using the allowed_to? function of the User model, the syntax for which is as follows:
allowed_to?(action, context, options={}, &block)
The action parameter of this method can either take a parameter Hash (such as :controller => "project", :action => "edit") or a permission Symbol (for example :edit_project).
There is also a User model method, allowed_to_globally?, that uses the same syntax, which is used to check for global permissions.
Note that, as model methods, neither allowed_to? nor allowed_to_globally? are used to actually restrict access to content areas based on defined permissions but are used to test a user instance to see if they have the permission to a content area. For example, in our plugin, we have a permission defined that allows users to add comments to existing knowledgebase articles.
If we check the init.rb file, we find the permission declaration as follows:
permission :comment_and_rate_articles, {
:articles => [:index, :show, :tagged, :rate,
:comment, :add_comment],
:categories => [:index, :show]
}
Comments are added via a modal dialog, which is shown when the user clicks on the New Comment link, which we only want to make available to authenticated users who have the permission we mentioned enabled.
In our view, we would add a check for this permission against the current user and current project, as follows:
<% if User.current.allowed_to?(:comment_and_rate_articles, @project) %>
<%= link_to l(:label_new_comment), { :controller => "articles",:action => "comment", :article_id => @article, :project_id=> @project },}, :remote => true, :method => :get %>
<% end %>
To actually restrict access based on the permissions we've defined for our plugin, we need to employ the authorize or authorize_global methods provided by Redmine in ApplicationController.
The most common implementation is to add a before_filter action callback to our controller that calls the authorize method. This method assumes that an instance variable named @project exists and is valid; therefore, before calling authorize we should call either the find_project or find_project_by_project_id method (both provided by ApplicationController and to be used depending on how we've set up our plugin's routing in routes.rb).
class ArticlesController < ApplicationController
# ...
before_filter :find_project_by_project_id, :authorize
# ...
end
One of the most common uses for this type of permission check is to toggle the visibility of links. In these cases, Redmine offers a more succinct helper function, which we can use to simplify the example provided earlier by using the link_to_if_authorized method, as follows:
<%= link_to_if_authorized l(:label_new_comment), { :controller => "articles", :action => "comment", :article_id => @article, :project_id => @project }, :remote => true, :method => :get %>
The link_to_if_authorized view helper method is part of Redmine's ApplicationHelper module and is simply a convenience function that calls the standard Rails link_to method (for more information, visithttp://api.rubyonrails.org/classes/ActionView/Helpers/UrlHelper.html#method-i-link_to) if the current user is authorized to access the link target's controller action.
The authorize_for view helper method is itself just a wrapper around the User#allowed_to? method. The syntax is provided as follows for reference:
def authorize_for(controller, action)
User.current.allowed_to?({:controller => controller,:action => action}, @project)
End
Unlike the allowed_to? and allowed_to_globally? model methods, or the authorize and authorize_global controller methods, the link_to_if_authorized and authorize_for helper methods should be used within the context of a view or partial.
Understanding custom content access control
The Redmine access control layer is modeled around controlling access to RESTful routes. Although this approach allows us to manage access to content areas, it falls short when it comes to actually locking down access to content itself.
The case study we're going to explore adds an additional layer of security to our knowledgebase plugin by restricting access to specific categories as well as the articles contained within those categories.
The first step we need to take is to decide how we're going to add our new permission. Ruby on Rails applications are very easy to extend using Rubygems (visit http://rubygems.org), and there are a number of access control gems available on GitHub that allow for some extremely complex permissions and access management schemes.
Instead of adding a new dependency to Redmine via an external library, since our needs are relatively simple, we're just going to extend our category model with a user whitelist.
The goals of this whitelist are to:
· Allow administrative users with the proper permissions the ability to manage whitelist membership
· Ensure content is not visible to members who are not explicitly added to a whitelist
· Ignore whitelists if no members have been added
The plugin that we're extending is hosted at https://github.com/alexbevi/redmine_knowledgebase, and any references to the models, views, or controllers are assumed to be derived from the code of the 3.0 developer and 3.0 final Versions.
As we're extending an existing model, we'll add a migration in the standard Ruby on Rails fashion and put the new file in our plugin's db/migrate directory. All our migration will do is add a new column to the category model.
class AddUserWhitelistToCategories < ActiveRecord::Migration
def change
add_column :kb_categories, :user_whitelist, :string,:default => ""
end
end
Note
For a refresher on Ruby on Rails migrations, visit http://guides.rubyonrails.org/migrations.html.
In order to actually apply the change, we need to rerun the Redmine plugin migration Rake task from the root of the Redmine deployment directory.
$ rake redmine:plugins:migrate
Migrating redmine_knowledgebase (Knowledgebase)...
== AddUserWhitelistToCategories: migrating ===================================
-- add_column(:kb_categories, :user_whitelist, :string, {:default=>""})
-> 0.0011s
== AddUserWhitelistToCategories: migrated (0.0013s) ==========================
Managing user whitelists
The new field we added to our category model will take a comma-separated string of user IDs that represents users we are explicitly granting access to.
Before we can start adding any users, we need to ensure that access to this functionality is properly restricted. We'll begin by adding a new permission to our plugin's init.rb file.
permission :manage_category_whitelist, {
:articles => :index,
:categories => [:index, :show, :edit, :update]
}
Using this new permission, the form partial that is used to create and edit new categories will be extended to check whether the current user has the appropriate permission to manage user whitelists.
<% if User.current.allowed_to?(:manage_category_whitelist, @project) %>
<%= render :partial => "categories/members" %>
<% end %>
The contents of the_members.html.erb partial referenced in the preceding code is included here as well, in order to provide a more complete picture of the implementation:
<% whitelisted = @category.user_whitelist.split(",") %>
<p>
<label><%= l(:label_user_whitelist) %></label>
<% @project.users.sort.each do |user| %>
<%= check_box_tag 'user_whitelist[]', user.id, whitelisted.include?(user.id.to_s) %> <%= h user %><br/>
<% end %>
</p>
As the following screenshot illustrates, the users who have been explicitly granted access to the project our knowledgebase plugin is enabled on are presented in a checkbox list under a User whitelist section:
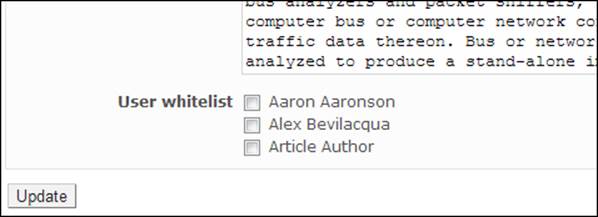
Our category creation and update view now contains a section for whitelist management based on the associated project's user list, as can be seen in the previous screenshot.
In order to actually save the changes when Update is clicked, the update method of the CategoriesController needs to be adjusted slightly.
After the category is loaded, but before the attributes are updated, we'll just inject a quick assignment of the submitted data.
@category.user_whitelist = if params["user_whitelist"].blank?
""
else
params["user_whitelist"].join(",")
end
Restricting access via whitelists
Now that administrators have the ability to add and update category whitelists, we need to update our views in order to disable access to specific content.
The choice to implement a whitelist (as opposed to a blacklist) is to ensure that the default behavior would reflect the standard permissive nature the plugin had before we implemented this change.
Since the default access logic is to allow all unless a whitelist is explicitly defined, we're going to add a blacklisted? method to our category model to help us determine whether a user should be allowed to view the category and its contents.
def blacklisted?(user)
return false if self.user_whitelist.blank?
whitelisted = self.user_whitelist.split(",").include?(user.id.to_s)
!whitelisted
end
Since our categories are configured as nested sets, we'll need to check our whitelists when fetching the root nodes as well as the subsequent children.
In both cases, the code would be modified in a similar fashion.
@categories = @project.categories.where(:parent_id => nil).delete_if { |cat| cat.blacklisted?(User.current) }
The delete_if method is added to the standard category lookup above in order to prune out any content the user doesn't have access to.
Enforcing the whitelist
The content we removed in the previous section only limits non-whitelisted users from seeing the restricted content.
If they were to navigate directly to the URL of a page they weren't supposed to see, that content would still be displayed as there is no logic to prevent them from accessing it.
To prevent unauthorized access to a category, we need to modify the show method of the CategoriesController in order to check whether a user is blacklisted before the page is rendered.
if @category.blacklisted?(User.current)
render_403
return false
end
Note
This can also be enforced by moving the necessary functionality to a separate method and then calling that from before_filter.
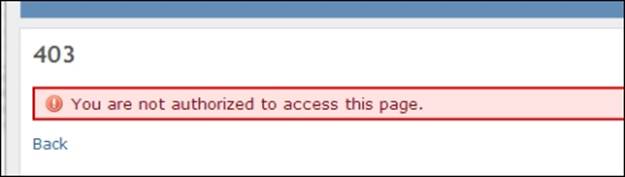
If a user tries to access a category they have been denied access to, they will now be presented with a standard access denied message.
The same logic should be applied to the articles contained within categories. If a user tries to access an article directly but the category the article belongs to has a whitelist, the user should be redirected away from the restricted content.
This is accomplished almost identically to how CategoriesController was modified, but in this case, we'll update the show method of ArticlesController.
if @article.category.blacklisted?(User.current)
render_403
return false
end
The example that is provided here is meant to illustrate how a basic content-specific access control layer can be implemented using as much of Redmine's internals as possible.
If this method is going to be used in production systems where sensitive information needs to be protected in a more granular fashion, a couple of deficiencies need to be listed as they were glossed over:
· This example does not validate siblings or parents in the hierarchy when rendering the category tree
· This example doesn't limit Redmine search results based on whitelist membership
Summary
Restricting access to various content areas and limiting what users can do with existing content are the primary functions of Redmine's permission system.
In this chapter, we learned how Redmine manages permissions, how we can add our own controllers and actions to a permissions list, and how to enforce these permissions in our views.
We also explored a case study and provided a whitelist approach to restricting content in a more granular fashion than Redmine provides in its core libraries.
In the next chapter, we'll be adding file attachments to our plugin's models.
All materials on the site are licensed Creative Commons Attribution-Sharealike 3.0 Unported CC BY-SA 3.0 & GNU Free Documentation License (GFDL)
If you are the copyright holder of any material contained on our site and intend to remove it, please contact our site administrator for approval.
© 2016-2026 All site design rights belong to S.Y.A.