Implementing Samba 4 (2014)
Chapter 5. Upgrading from Samba Server Version 3
In this chapter, the reader will learn some of the biggest differences between the Samba software Versions 3 and 4, and based on that, will understand the impact and the relevant considerations before planning a successful upgrade. The main aspects of such differences will be focused on the different working models and the new features and benefits that the upgrade can leverage. We will go over the plan, tests, and validations that the reader needs to pay attention in order to be able to execute and help evaluate the success of such an upgrade procedure.
Scripts and command-line examples will be used to help the readers identify where to look, what information might be important to gather, and how to compare the final result to the prior environment from a functional standpoint.
We will learn about a step-by-step procedure to execute the upgrade and all the commands and scripts needed to go from Samba 3 to Samba 4's fully functional Domain Controller network services.
We will describe a guideline that can be well suited and requires just a few changes for small and medium installations, but bigger and more complex environments will need adjustments and customizations. The variety of configurations in production of the Samba Server Version 3 use cases are huge, and we will not be able to handle all the variations that our readers have implemented in their respective environments, but all the procedures and use case examples presented here should work as a rich base.
Distinguishing between Samba Versions 3 and 4
From the Samba Version 4 release notes made by the Samba project [16], we got information on the addition of the DNS server and NTP protocols that are integrated in the new Samba 4 code, LDAP server and Kerberos Key Distribution Center (KDC)—both accounted within the Active Directory Services, support for SMB Version 2.1 with preliminary support for Version 3.0, and the Python scripting interface—all of which we will highlight as great and bold, new capabilities.
These new features can make the Samba Server Version 4 look appealing from an upgrade perspective for the Samba Server Version 3 users. It can also stimulate new installations, as it can be a strong choice to provide full network services as open source and as a free alternative in comparison to Microsoft Windows Servers.
The classic model (NT4 Domains) is still supported and present in the Samba Server Version 4, but the new version's real gain for users and system administrators is the ability to use all the new features introduced by Microsoft with the development of the Active Directory Domain Controller services. All these are associated with the concepts of delegations, group policies, new security model, and so on.
The fact is that the Samba Server Version 3 is a rock-solid software. The file and print's server code is very stable and has been working for many, many years. Besides this, the Samba Server Version 4 has implemented a new approach and daemons for these services; the new project's software version still has support for the old and bulletproof file/print server daemons and those are the ones that are recommended for production purposes at the time of this writing.
Many users are really happy with the file and print services from Samba Server Version 3. As a great portion of the use cases and base installations of the Samba Server is for the purpose of these services, many users remain with the Version 3 in production, where the scary problem is to support the new Microsoft Windows Operating System versions.
So, for the users who are looking at and exploring the upgrade process, the real difference and the main feature that encourages them to take the upgrade path most of the time, which are the Active Directory services present on Samba 4. The new code has integrated the DNS and LDAP server and KDC. So, many users from the previous versions that could be intimidated by the need to deal with external and complex software combinations (for example, DNS/Bind or OpenLDAP) for small and medium installations can now have a really robust and complete solution for the Samba project's new release.
Key points for consideration before the upgrade
It's never too much to remember that the only guarantee we can have when dealing with technology services and maintenance procedures on production systems is the backup—straight and simple.
The upgrade process from the Samba Server Version 3 to Version 4 will have a phase where the software's rollback can be a very difficult task or maybe not even possible. So, a backup not just of the Samba Servers involved, but of the domain's other important machines is really crucial too. This is to make sure that the environment can be brought back online to a consistent and operational state at any time.
Another important point in the planning phase is to take into consideration the size and complexity of the network services' environment. We need to consider how many clients, servers (directly or indirectly involved), and how much time is needed (and available) for the upgrade procedure. Different environments may require different approaches, and a big network and/or a short maintenance windows may require a staged upgrade.
We will focus, as is the sole objective of this book, on the Samba 4 Server as a complete system to provide all services for which it is intended. In a real scenario, we need take a look at the auxiliary services that we use, instead of Samba or other services that are not involved in the upgrade process directly but can or might get impacted. This is a case-by-case analysis, and the reader needs to pay serious attention to these services, and having a checklist and enumeration of all these services and applications is a mandatory step.
Prepare the upgrade procedure taking into account the time that will be available to execute the whole upgrade process, and remember that the time to validate and test it is a part of the process. Take notes on the number of users, groups, machines, and all configured resources that are relevant for the upgrade process. This information is the key for the validation of the whole procedure. Create a checklist of service names (for example, endpoints) and applications that can be impacted, and schedule the upgrade accordingly. We will use some scripts and command-line examples to extract the information from the system, but it is a good idea to have some kind of checklist with quick access to the global aspects of the environment to facilitate and help spot on any issues.
As the Samba Server Version 3 has no built-in DNS server, we'll cover a Bind9 implementation in the upgrade procedure as an example of the DNS side of the upgrade process and its integration with the ISC-DHCP server it's a very common implementation among users of Samba 3. The reader has a choice to maintain Bind as the DNS server after the upgrade or move the resolution services for the Samba Server Version 4 (in this book, we will implement the latter option). Last but not least, the Samba Server Version 4 software needs to be installed and tested prior to the upgrade process with all needed dependencies in all Samba 3 systems that we will upgrade.
Establishing an upgrade plan
The upgrade plan needs to be created focusing on the environment that it will be applied, but we will have some general rules that can be a base for many environments, a generic procedure for the gathering of information, tests, validations, and a practical upgrade example that can be used as a base for a final plan.
In our example case, we will deal with a Microsoft Windows NT4-like domain for one of the EALL Company sites, based in Porto Alegre/RS – Brazil. This site is controlled by one Samba Server Version 3 as the Primary Domain Controller (PDC) for that region (for example, POA), and two Samba Servers Version 3 acting as Domain Member Servers for each Division/Department of the EALL site in Porto Alegre.
The company is very inclined towards Microsoft products, and the three GNU/Linux systems were installed for the POA's network services as a global decision to lower the IT costs. EALL is successful with Samba's adoption, and as the company has other offices in many places around the world, it has resulted in big savings year over year, as dozens of Debian GNU/Linux PDCs and print/file servers do not need license fees.
Another big advantage the company has while implementing Samba 3 to provide the network services is that it has more flexibility to scale as the file servers present performance problems from time to time, so other filers can be easily deployed without incurring additional license costs. This provided us with a big gain in the quality of the services for the users, better architecture (services are decoupled), reducing complexity, and lowering overall downtime in hardware and software maintenance.
Now, the company sees a huge opportunity to evolve its Microsoft Network with the new Samba 4 release and use it as a free and open source pilot for the Active Directory Services (ADS). At some of its other sites, the company is already using ADS on newer versions of the Microsoft Windows operating system.
Our Samba 3 upgrade will be focused on three basic sets of services:
· Authentication services: These include machines, users, and groups (Samba3)
· File/print services: These include files and printer shares (Samba3)
· DNS services: These include the name resolution (Bind9)
Every Samba 3 installation needs to have a combination of the core services listed earlier: at least one name resolution system and one (usually both) set of Samba 3 services (in one or more servers).
The Samba services can be provided completely in just one server or distributed in different servers for performance, architecture decision, company policies, and so on. As we go through this procedure, we will see that it is much easier to manage and deal with a medium to big network complexity, with the services that are decoupled. Also, we can handle the whole upgrade procedure in small and separate steps.
In any case, if your specific environment has just one server providing all the services we have mentioned here, there is no problem, as in the end, the process that will be executed will be focused on the services, and thus will be executed on the server where that service resides. Therefore, if we have a site where we have decentralization of services in different servers or in just one server, then all the services are provided by a standalone server. We should notice that the downtime needed to execute all the upgrade procedures in one server alone, which provides all services, can be bigger and much more complex, though. This is why this upgrade can be a very good opportunity to review the architecture of the Samba services and adjust it as needed.
Another important aspect of handling the process at these three different sets of services is that we have specific procedures for each step. So, the upgrade step for the file and print servers, for example, can be replicated as we have more than two Domain Member Servers that are the exact same way. Then, we can establish priorities, and for bigger and more complex environments, we can execute a staged upgrade.
In our example case, we have the file and print services in specific Domain Member Servers that are dedicated to the departments of our company. So, we can handle them with the different priorities and department's maintenance windows, accordingly.
Here is some general information we need at hand for our network, and soon, we will see how to gather them all:
|
General system and environment information |
|
|
Server #1 |
|
|
The Samba Server version |
3.6.6 |
|
Role |
Primary Domain Controller (Network Logon Services and User's profiles) |
|
Hostname |
PDC |
|
IPs |
192.168.1.1 (eth1), 10.10.10.1 (eth0) |
|
Other services |
DHCP Server (ISC), DNS Server (Bind9), NTP, and CUPS |
|
Shares |
Profiles (/home/POA/) |
|
Backend |
Tdbsam |
|
Server #2 |
|
|
The Samba Server version: |
3.6.6 |
|
Role |
Domain Member Server (file and print services) |
|
Hostname |
ACCSRV01 |
|
IPs |
192.168.1.5 (eth0) |
|
Other services |
CUPS |
|
Shares |
ACC Division (/shares/*) |
|
Server #3 |
|
|
The Samba Server version |
3.6.6 |
|
Role |
Domain Member Server (file and print services) |
|
Hostname |
DEVSRV01 |
|
IPs |
192.168.1.6 (eth0) |
|
Other Services |
CUPS |
|
Shares |
Devel department (/shares/*) |
|
General Samba network information |
|
|
Domain |
POA.MSDCBRZ.EALL.COM.BR |
|
Network |
192.168.1.0 |
|
Netmask |
255.255.255.0 |
|
Default router |
192.168.1.1 |
|
DHCP Server |
192.168.1.1 |
|
DNS zone files |
/var/lib/bind/db.poa.msdcbrz.eall.com.br{rev} |
|
Number of users |
51 |
|
Number of groups |
9 |
|
General Samba network information |
|
|
Workstations/desktops |
Microsoft Windows 2003 and XP |
|
Application servers |
Microsoft Windows Server 2003 |
|
Maintenance time |
2 hours |
The preceding information is presented here as a basic example, and we will look at how we actually gathered it in the next section. We will save much of the information in the text files to facilitate the validations after we have concluded the upgrade, but this information is very important to provide quick access to very crucial information; it also works as a formal document that can be attached to the maintenance plan.
After all tests and validations, our upgrade procedure will be executed in a single place for all the Samba Servers. Feel free to add any other information that you think is necessary to the preceding document or attention points to check before and/or after the upgrade. One good example is some consideration about external storage devices, if any (for example, volumes/luns), backing shares. In our example, the EALL Company uses local disks (for example, Direct Attached) to all Samba shares, so there was no need to mention it in the preceding document.
Tip
If you followed our Samba 4 installation instruction, the binaries should be compiled with all features needed for the upgrade as we have installed the main dependencies, and the Samba's configuration script should automatically detect and enable them. Don't proceed to the upgrade phase without making sure that all the features that are needed are present on the Samba 4 installation (for example, CUPS and ADS).
Creating tests and validations before the upgrade
Our tests' and environment's validations will start on a clone of the currently installed software—a subset that is representative of our production environment. So, the first task is to establish a small group of machines to clone in a virtual or physical environment to be used to create our tests and validations, and also to exercise our upgrade procedure. After the upgrade, we will execute the same tests described here, and we will know exactly what the expected results are.
The best way to do this is to create a lab in a virtual environment, we will not test any hardware upgrade, and all the device drivers and components needed for the proper execution of the production software are assumed to be in place and in a working condition. So a virtual environment is a perfect fit, and we will execute some checks on it to guarantee that the environment is working as expected and no misconfigurations exist.
Tip
In case you use a virtual environment for your tests, create snapshots of all machines in this environment after you have it all set up to be able to go back and forth on the procedure and restart the whole process when necessary.
In software upgrade procedures, it's very common to face problems after the upgrade that actually were present before the upgrade process. This can mislead the result or unhide a latent issue at the wrong time. Thus, we will use this phase and test environment to validate the current system configuration, and if any issues are discovered, they can be fixed prior to the maintenance. On top of that, we can use this procedure until we have a bulletproof process.
So, we will present some commands and scripts that can be used to make sure that Samba 3 is working as expected this is very important for the upgrade process to work.
Tip
Do not execute any script directly in the production stage; or, make sure you know what you are doing, because we are not responsible for any disruption or data loss that you may incur while executing scripts and commands in a production network without prior testing.
Let's start with the PDC Server and basic tests, such as listing users and groups. Using a command prompt at the Primary Domain Controller, execute the following command:
root@pdc:/root# wbinfo -u
…
miwallace
bekiddo
jocabot
jabrown
…
root@pdc:/root#
The preceding command is wbinfo, a tool to query information from the winbind daemon, and we used the -u option to list all the users in the domain. Now, let's see how many users we have:
root@pdc:/root# wbinfo -u | wc -l
51
root@pdc:/root#
As we can see in our plan, we have 51 users in the domain, which is exactly what we've got as an output from the preceding script (one user is the root account, which is mapped to the administrator on the EALL Samba 3 installation). It's important to note that Debian GNU/Linux has some other personal administrative accounts that are not included on that list as the domain users are totally separated from the host operating system's accounts. EALL's architecture choice is not to authenticate the Debian GNU/Linux host on the Samba 3 PDC itself. Still using the wbinfo utility, execute the following command:
root@pdc:/root# wbinfo -g
eall group
eall domain users
eall domain admins
…
root@pdc:/root# wbinfo -g | wc -l
9
root@pdc:/root#
In the preceding output, we have two other important points of information about the system that we will upgrade: the list of groups and the total number of groups in the domain. As we did in the users listing, we have omitted the whole list of names in each group for brevity. However, it's a good idea to save both the full listings for future validation:
root@pdc:/root# wbinfo -u | sort > samba3users.txt && echo OK
OK
root@pdc:/root# wbinfo -g | sort > samba3groups.txt && echo OK
OK
root@pdc:/root#
The preceding two commands have been created in the /root directory, two text files (sorted) with the lists of users, and groups in the domain. Feel free to organize it in a specific directory or send the files to an external server (this is recommended because it's good to have this listing but not on the server on which we will actually execute the upgrade procedure).
Tip
Another command that will provide some of the preceding information is net rpc info.
Another good test is to use the smbclient utility, and authenticate it against our Samba 3 Server (PDC) and get a good view of the network resources and other important insights about our main Samba 3 Server. Using a test account for the domain (or any other specific account that you know the password), execute the following command:
root@pdc:/root# smbclient -L pdc -U 'frorange%w1ndow$$'
Enter frorange's password:
Domain=[POA] OS=[Unix] Server=[Samba 3.6.6]
Sharename Type Comment
--------- ---- -------
Profiles Disk EALL Roaming Profiles Share
IPC$ IPC IPC Service (EALL Network Services)
Domain=[POA] OS=[Unix] Server=[Samba 3.6.6]
Server Comment
--------- -------
ACCSRV01 ACCDivision Office Server
DEVSRV01 DEV Office Server
PDC EALL Network Services
Workgroup Master
--------- -------
POA PDC
root@pdc:/root#
This is one of the most important commands because it gives us a good view of how our services are decoupled. The preceding output tells us some of the following interesting things:
· We have the main IPC Service for our Samba 3 Server PDC
· One share (Profiles) for the roaming profiles of our domain
· Our workgroup name, POA, and the Samba Server Version 3.6.6
· The PDC server is the master of our domain (Primary Domain Controller)
· We have two other servers: ACCSRV01 and DEVSRV01
Tip
You can use the following syntax to execute the smbclient command that provides the password directly on the command line:
user%password.
See the following example:
smbclient -L pdc -U ' 'kischultz%w1ndow$$'
So, this server has two important roles on the EALL network: it is the PDC (controls authentication and authorization) and the Profiles' share. To enhance the decoupling of services on this network, a good option would be to create a specific file server to hold the users' profiles (for example, an HA Filer) and to leave the PDC with just one role in this network. This would facilitate the backup and recovery of this server as it is the only PDC, and if we have the backup of the DB and smb.conf files, we can quickly recover from a failure on the main PDC (our most important network service). On top of that, we could focus on an HA solution for the filer that is responsible for the users' Profiles to have a better resilience (for example, a Storage backed Profile share).
The preceding test helped us indirectly validate another important function of our Samba 3 Server—authentication. However, we can use the ntlm_auth command to specifically test it, as exemplified in the following command execution:
root@pdc:~# ntlm_auth --username=jobrittle --domain=POA
password:
NT_STATUS_LOGON_FAILURE: Logon failure (0xc000006d)
root@pdc:~# ntlm_auth --username=jobrittle --domain=POA
password:
NT_STATUS_OK: Success (0x0)
Remember that it is important to test with the wrong password (as we did earlier). Sometimes, we fail to identify problems in our environment because we just test using the same pattern. It's important to test with wrong pathnames, wrong passwords, usernames that in fact do not exist, and so on. Many misconfigurations have been a result of a configuration that permits access for any user or any password. Now that's a really bad misconfiguration!
It's recommended that you have your infrastructure automated with recipes and tests. A long time ago, I implemented a system to programmatically provision, test, and validate the infrastructure resources, Battery of Tests and Validations (BTVA) of the environment, and it was a really powerful tool to identify and even fix issues on the operating system configuration. Since then, I have used that model when managing any kind of system.
The system was based on Makefiles and many scripts to test and validate every corner of the environment that was needed to run a specific application. The essential point about this approach is that you just add tests, and over time, the whole environment just gets better coverage. After a test is written, the same error does not happen twice, and after some time, we have a really strong system to validate our environment.
Now, with devOps [17] and new approaches to handle and implement these kind of automations, it is highly recommended that you have the tests described here incorporated in your tools and provisioning systems.
Here is an example of how we can quickly create a script to execute a good validation of our user's database (we can save the listing for future reference):
root@pdc:~# for x in `wbinfo -u`; do wbinfo --name-to-sid $x; done
…
S-1-5-21-1214754503-652539266-1573105461-1023 SID_USER (1)
S-1-5-21-1214754503-652539266-1573105461-1028 SID_USER (1)
S-1-5-21-1214754503-652539266-1573105461-1044 SID_USER (1)
S-1-5-21-1214754503-652539266-1573105461-1008 SID_USER (1)
…
root@pdc:~#
If we have any user who is not properly mapped in the Samba database, or if we fail to actually translate a SID to a user/group, we'll have problems ahead. So, I just want to make sure that the reader understands that the more tests and automations we do, the better it will be to validate our upgrade. The examples that have been shown here can be enhanced, and if one test is made for one user as an example, it can be simply modified to make the same test for all users as we just did on the example script earlier.
Now it's time to test our two file/print servers: ACCSRV01 and DEVSRV01. We will use the smbclient utility to execute the same test that we performed for PDC as it will show us very detailed information about our two Domain Member Servers. From the command prompt on our PDC Server, execute the following command:
root@pdc:~# smbclient -L accsrv01 -U 'legecko'
Enter legecko's password:
Domain=[POA] OS=[Unix] Server=[Samba 3.6.6]
Sharename Type Comment
--------- ---- -------
--------- ---- -------
IPC$ IPC IPC Service (ACCDivision Office Server)
ACCPRTMM01 Printer 1F Printer MM
ACCPRTLS01 Printer 2F Printer
PRINT$ Disk Drivers for Dep. Printers
ACCPUBLIC Disk Public Share
ACCDIVDOCS Disk Accdivision Prospects
ACCDIVRPTS Disk Accdivision Reports
Domain=[POA] OS=[Unix] Server=[Samba 3.6.6]
Server Comment
--------- -------
--------- -------
ACCSRV01 ACCDivision Office Server
PDC EALL Network Services
Workgroup Master
--------- -------
--------- -------
POA PDC
root@pdc:~#
Again, we could test name resolution and authentication, but on one of our Domain Member Servers this time as this is really important, or users will not be able to access the services from that server. Here is the information we that we got from the preceding test:
· We have the main IPC Service for our Samba 3 Domain Member Server
· We have four file shares: ACCDIVRPTS, ACCDIVDOCS, PRINT$, and ACCPUBLIC
· We have two printers: ACCPRTMM01 and ACCPRTLS01
· Our workgroup name, POA and Samba Server Version 3.6.6
· The Primary Domain Controller Server for our Domain: PDC
So, let's take a look at the execution output of this same command, but this time, for our second Domain Member Server:
root@pdc:~# smbclient -L devsrv01 -U ' 'zojarratt'
Enter zojarratt's password:
Domain=[POA] OS=[Unix] Server=[Samba 3.6.6]
Sharename Type Comment
--------- ---- -------
--------- ---- -------
DEVPRT01 Printer General DEV Printer
DEVCODDS Disk DEV COD CODDS
DEVSRCAP Disk DEV SRC AP
IPC$ IPC IPC Service (DEV Office Server)
Domain=[POA] OS=[Unix] Server=[Samba 3.6.6]
Server Comment
--------- -------
--------- -------
DEVSRV01 DEV Office Server
PDC EALL Network Services
Workgroup Master
--------- -------
--------- -------
POA PDC
root@pdc:~#
Here is the interpretation of the preceding output:
· We have the main IPC Service for our Samba 3 Domain Member Server
· We have two shares: DEVCODDS and DEVSRCAP
· We have one printer: DEVPRT01
· Our workgroup name is POA and Samba Server Version 3.6.6
· The Primary Domain Controller Server for our Domain PDC
In Samba, we need to have the domain groups mapped to our Unix groups on the PDC to provide the same authorization to each share that our Domain Member Server provides to our network. So, based on that mapping, it's a good idea to test some of our users and groups to validate that our associations are working as expected.
For an example, take a look at the Unix group, accdivision, and its members as this group is mapped to the domain group, accdivision:
root@pdc:~# grep accdivision /etc/group
accdivision:x:1002:zafalca,cafreeman,qumichael,zisala
root@pdc:~#
Executing the following command, we can validate the mapping and save the results:
root@pdc:~# net rpc group members "accdivision group" "| tee >accdivisiongroupmembers.txt
Enter root's password:
POA\zafalca
POA\cafreeman
POA\qumichael
POA\zisala
root@pdc:~#
In all the Member Servers, we need to validate the users/group resolutions. So, let's take a look at the NSS configuration for the DEVSRV01 server as an example:
root@devsrv01:~# id djfox
uid=2031(djfox) gid=1513(domain users) grupos=1513(domain users),2051(eall domain users),2053(devel group)
root@devsrv01:~# getent passwd djfox
djfox:*:2031:1513:djfox:/home/POA/djfox:/bin/false
root@devsrv01:~#
Another test that we need to make is to have a Microsoft Windows system test a join into the domain and do some normal activities, such as logon and roaming profiles. We can create one test user and add it to some groups to test the access to the different shares/printers, and after that, we can remove the user. This will test our DHCP Server and its integration with DNS too, helping us guarantee a proper configuration of the whole system. Let's execute some commands to actually test the machine's name resolution on the EALL network:
root@pdc:~# host -t A pdc
pdc.poa.msdcbrz.eall.com.br has address 192.168.1.1
root@pdc:~# host 192.168.1.1
1.1.168.192.in-addr.arpa domain name pointer pdc.poa.msdcbrz.eall.com.br.
root@pdc:~# host -t A windowsxp
windowsxp.poa.msdcbrz.eall.com.br has address 192.168.1.11
root@pdc:~# host -t MX poa.msdcbrz.eall.com.br
poa.msdcbrz.eall.com.br mail is handled by 10 mail.poa.msdcbrz.eall.com.br.
root@pdc:~# host -t SOA poa.msdcbrz.eall.com.br
poa.msdcbrz.eall.com.br has SOA record pdc.poa.msdcbrz.eall.com.br. root.poa.msdcbrz.eall.com.br. 2007010408 3600 600 86400 600
root@pdc:~#
Tests and validations are executed, and no misconfigurations were found, and that's good. We have saved files with the user and group listings, and we have a plan with all the information about our upgrade maintenance. Now, we are ready to proceed to the upgrade process in our lab environment so that we can validate each step of the upgrade and have an opportunity to fix the process inconsistencies, if any.
Executing the Samba Server upgrade procedure
We will execute our plan following the three service approaches that we mentioned earlier, and we need to start with the PDC Server that provides the Authentication/Authorization Service. The other two will be executed in a sequence, starting with the DNSServices, and the last one will be the file/print services provided by the ACCSRV01 and DEVSRV01 servers. The file/print servers can be executed in any order, so we have the flexibility to prioritize one over the other based on factors such as the business impact. In this specific example case, there is no priority or preference, so we have chosen to start with the ACCSRV01.
Tip
When executing the procedure in the production, remember that we need to have a backup for our PDC and Domain Member Servers, and for any other servers or clients that we know have crucial data and can't be recreated or easily rebuilt. This is because it can be really difficult to fix/remove a Microsoft Windows Machine after it finds the new Active Directory Server in case we need to rollback our upgrade. So, it's advised that you block the network access for the PDC while you think that it is still not ready to provide the full services.
So, let's turn our attention for the procedure on the main element of our Samba 3 implementation, the Primary Domain Controller (PDC). The PDC server is the one with this role at the EALL Network, and it has important auxiliary services, such as NTP, DNS, and DHCP servers too. We will work on this server for the two initial phases, and when we have that done, we should have the main functionality of our POA Domain fully working (for example, users, groups, machines, and name resolution).
First, we need to make sure that we don't have groups with the same name as usernames in our Samba 3 Domain, as in the Active Directory, we cannot have usernames and groups sharing the same name, and in case we have, we will need to rename them. If we make use of these groups in the Samba 3 Domain (for example, for file/print services), then we need to replace any references to them on the smb.conf files of our file/print servers to reflect the new naming.
So, it's important to take note of all groups that we have renamed, and when we start to work on the file/print servers, we can execute the same change as they reference the groups by names. Here are examples of how we have renamed the two groups:
root@pdc:~# export PATH=/usr/local/samba/sbin:\
/usr/local/samba/bin:$PATH
root@pdc:~# net rpc group rename "Domain Users" "EALL Domain Users"
Enter root's password:
root@pdc:~# net rpc group rename "Domain Admins" "EALL Domain Admins"
Enter root's password:
root@pdc:~#
Tip
The preceding export command is very important as it prefixes the newly installed Samba 4 binaries on our PATH, and we will execute all the upgrade procedure commands in this shell. It's a good idea to add this command to our shell startup files (for example,.bashrc and/or .bash_profile), so we'll always have the new Samba 4 utilities in precedence in our PATH. Before we are able to actually remove the old Samba 3 installation, it is very important to reference the right tools.
As we can see in the preceding command execution, we just needed to provide the administrator's password (for example, root) and the group's name gets changed. Another recommendation is to change the name for other standard groups that come with Samba Server 4 if they are present in our Samba 3 installation for any reason; for example, Domain Guests, Domain Computers, and Domain Controllers. All the mapping between the Unix and Domain groups that we may have should still work without issues after the renaming, as the mapping is made by the GID to SID.
To create default group names with the same name as the newly created user is the default behavior of many GNU/Linux distributions, and I have personally never used this group that is created exclusively for a user to implement anything. I prefer actually to get rid of this on the systems I manage. Thus, every new user is created with the default group assigned to the users, and this group is mapped to the EALL Domain Users group. For example, if you want to do the same, but you don't have more than 1000 users, and your GNU/Linux distribution starts to assign users and groups IDs from 1000 onwards (for example, Debian GNU/Linux), the following script will create a new file with the existing users reassigned the primary group of users (GID 100):
root@pdc:~#sed 's/[0-9]\{4\}::/100::/g' /etc/passwd > >/etc/passwd-`date +%Y%m%d-%T` `&& cd && echo OK
OK
root@pdc:~#
If the preceding command returned OK, a new file will be created with a name like this: passwd-20130619-13:16:14 (with your execution date and time). Take a closer look at this file and if it is right, you can replace the original /etc/passwd with it. Pay attention to the system users to make sure that they were not impacted, but as the system users have very low UIDs and GIDs, they should not be affected by this script. If everything is good, you can edit the /etc/group file and delete all the groups that have the same names as the users.
Tip
Normally, default UMASK for users is to permit them to read/execute for the primary group (usually, the group specifically created for that same user, as it does not have any other members). If you choose to follow this path, make sure that any security policy or applications will not present any issues. After this change, you will need to fix the directories and files that are pointing to GIDs that actually do not exist anymore. Remember that this is not a necessary configuration for the Samba 3 to 4 upgrade, as the only requisite is to not have groups and users with the same name as the ones in the Samba 3 database.
Stopping and disabling Samba and winbind daemons
Now, we will stop the Samba and winbind daemons, and remove the execution bit for the initialization scripts to guarantee that they will not start inadvertently (for example, after a reboot). So, let's execute the following commands at the PDC server:
root@pdc:~# /etc/init.d/samba stop && &&/etc/init.d/winbind stop && chmod -x /etc/init.d/{samba,winbind} }&& echo OK
[ ok ] Stopping Samba daemons: nmbd smbd.
[ ok ] Stopping the Winbind daemon: winbind.
OK
root@pdc:~#
After the execution of the preceding script, if the results are OK, we must stop the smbd/nmbd and winbind daemons, and have both the startup scripts disabled. As our PDC server is the default gateway for our private LAN, we have a public interface configured on this server. The Samba script will use and try to configure all the interfaces configured on the server; thus, we will disable the public interface and enable just the interface that has the connection with the Microsoft Windows network that we are interested:
root@pdc:~# ifdown eth0 && echo OK
OK
root@pdc:~#
As the preceding command returned OK, the interface eth0 (public) is disabled properly, and we can go to the next step. In this stage, we have the environment ready to execute the classicupgrade function of the Samba 4 tool. Just issue the following command as root at a terminal window on the PDC server:
root@pdc:~# samba-tool domain classicupgrade --dbdir=/var/lib/samba/ /--use-xattrs=yes --realm=poa.msdcbrz.eall.com.br /etc/samba/smb.conf && echo "---===--- Upgrade from Samba 3 to Samba 4 OK 4OK---===---"
…
Fixing provision GUIDs
A Kerberos configuration suitable for Samba 4 has been generated at /usr/local/samba/private/krb5.conf
---===--- Upgrade from Samba 3 to Samba 4 OK ---===---
root@pdc:~# cp -pf /usr/local/samba/private/krb5.conf /etc && echo OK
OK
root@pdc:~#
The preceding command should produce a very verbose output with important information about the upgrade process. This information includes the import of users, groups, machines, the creation of new standard groups, and so on. One such information was highlighted earlier, where the script tells us that a Kerberos configuration file was automatically generated and is ready for the utilization of our domain. We received this message: Upgrade from Samba 3 to Samba 4 OK. So, we have copied the Kerberos file to its definitive location.
Editing the Samba 4 configuration file
Now we need to edit the Samba 4 configuration file that was automatically created for us by the samba-tool utility, and add the following lines to the global section:
(/usr/local/samba/etc/smb.conf):
interfaces = lo,eth1
bind interfaces only = Yes
dns forwarder = 8.8.8.8
The first two lines of the previous command specify the interfaces in which we want the Samba 4 Server to listen (in our case, the loopback and eth1 interfaces; adapt it accordingly to your needs), and in the last line, we added a DNS forwarder configuration to be used for our internal network (Microsoft Windows clients and servers) to resolve names that are not the responsibility of our local DNS Server (for example, not in poa.msdcbrz.eall.com.br zone). In a real world, you will need to replace the preceding example's IP address (for example, 8.8.8.8) with the right IP address of the DNS resolver of your network.
We need to make sure that the NTP Server is configured to signed updates, so basically, we need to have the following lines at the end of our /etc/ntp.conf file:
ntpsigndsocket /usr/local/samba/var/lib/ntp_signd/
restrict default mssntp
Let's restart our NTP Server:
root@pdc:~# /etc/init.d/ntp restart
[ ok ] Stopping NTP server: ntpd.
[ ok ] Starting NTP server: ntpd.
root@pdc:~#
We need to copy the scripts that we have on the netlogon standard share to their new location in our Samba 4 installation:
root@pdc:~# cp -pRf /var/lib/samba/netlogon/scripts/* /usr/local/samba/var/locks/sysvol/poa.msdcbrz.eall.com.br/scripts/ /&& echo OK
OK
root@pdc:~#
The preceding result OK is the signal that we have finished upgrading Samba 3 from the Primary Domain Controller's perspective, but we have not finished our work on the PDC server just yet as we still have to migrate the DNS Services to the Samba 4 Server. Thesamba-tool utility should have already created all the needed SRV and other DNS basic records for a proper Active Directory installation, but it does not know about some static contents that we may have on our DNS Services for servers and services such as e-mail, pop, and www. So, we can now stop the Bind9, start the Samba 4 services, and execute the following script just by passing the database file for our DNS Server, and it should populate our Samba 4 internal DNS with the missing entries:
root@pdc:~# /etc/init.d/bind9 stop
[....] Stopping domain name service...: bind9
waiting for pid 2220 to die
. ok
root@pdc:~# chmod -x /etc/init.d/bind9 && echo OK
OK
root@pdc:~# /usr/local/samba/sbin/samba && echo "Samba 4 Started OK"
Samba 4 Started OK
root@pdc:~# kinit && echo OK
Password for root@POA.MSDCBRZ.EALL.COM.BR:
OK
root@pdc:~# grep -w 'A\|CNAME' /var/lib/bind/db.poa | |\
awk '{print "samba-tool dns add pdc poa.msdcbrz.eall.com.br", \
$1, $2, $NF}' | /bin/sh
Record added successfully
…
root@pdc:~#
After the confirmation of the initialization of the Samba 4 Server and each successful entry creation on our Samba 4 DNS Server's database, we should have our static CNAME and the records from our BIND9 configuration added to the Samba 4 built-in DNS Server. If some record already exists in the Samba 4 database, it is not an issue as the command will indicate that and will not duplicate it. One last record that needs to be created by hand, if needed, is the MX:
root@pdc:~# samba-tool dns add 192.168.1.1 poa.msdcbrz.eall.com.br @ mx "mail.poa.msdcbrz.eall.com.br 10"
Password for [root@POA.MSDCBRZ.EALL.COM.BR]:
Record added successfully
root@pdc:~#
Configuring the reverse zone
With our DNS main zone configured and populated with the static records, we just need to create and add the records for the reverse zone. For that, we just need to execute the following commands at the pdc server:
root@pdc:~# samba-tool dns zonecreate 192.168.1.1 \
1.168.192.in-addr.arpa -U Administrator%'w1ndow$$!'
Zone 1.168.192.in-addr.arpa created successfully
root@pdc:~#
The reverse zone is created, but remember that you will need to replace the network (for example, 1.168.192.in-addr.arpa) with the real network in your environment. Just as an example, if your network is 10.10.2.0/24, you would use 2.10.10.in-addr.arpa instead. Now, to create the PTR records for our hosts, we can use the next script to do the dirty work for us. We are providing the password in the script, so all the records are created without an interaction:
root@pdc:~# grep -w 'A' /var/lib/bind/db.poa | |\
awk '{split($3,IP,/\./); print "samba-tool dns add pdc \
1.168.192.in-addr.arpa",IP[4], ],"PTR",$1".poa.msdcbrz.eall.com.br \
-U \x27Administrator%w1ndow$$!\x27"}' | /bin/sh
Record added successfully
Record added successfully
…
root@pdc:~#
Tip
Remember the security policies, and as a general rule, it is not a good idea to have passwords in scripts or commands that will be saved on the history file.
Adding the profiles share to the configuration
Now, we can add the Profiles share to our Active Directory Domain Controller, which is the only share our PDC is providing to the network. For this, we only need to edit our /usr/local/samba/etc/smb.conf file and add the following lines (copied from the Samba 3'ssmb.conf file):
[Profiles]
comment = EALL Roaming Profiles Share
path = /home/POA
read only = No
As we have edited our main configuration file, we need to reload it, and so we can bring back online our eth0 interface:
root@pdc:~# smbcontrol all reload-config && echo OK
OK
root@pdc:~# ifup eth0 && echo OK
OK
root@pdc:~#
Welcome to our brand new Samba 4 Active Directory Domain Controller!
Deciding the upgrade approach for Member Servers
At this time, we can go to the next topic's upgrade tests and validations for the PDC and execute all the checks that have been described until this phase of the procedure. The main services for our Active Directory Network must be fully functional (for example, users, groups, and machines). In case we found any issues that we can fix, rollback before going to the other servers (for example, file/print servers).
After we have confirmed that the right services are working up to this point and as our services are decoupled sufficiently, we have two options for each Domain Member Server at this point:
· Move forward and upgrade them both as and when our maintenance window permits
· Perform just a quick reconfiguration on the Samba 3 Servers (for example, join it to the Active Directory Domain), and continue their upgrade at another opportunity
Tip
For the Domain Member Servers, we should not have any problems if we leave the smbd/nmbd daemons running as our PDC should be unconnected from our network. However, it is a good practice to have the Samba 3 services (for example, smbd/nmbd andwinbindd) stopped, and after we finish the upgrade or reconfiguration, we start the services again. However, remember that the Microsoft Windows machines must not contact the new AD before we have everything tested and are sure that a successful upgrade is confirmed.
In both options, all the services will still be working as usual. However, as the reconfiguration of the Samba 3 is quicker than Samba 4, it can be one good option for network environments where many servers need to be upgraded and do not fit in just one maintenance window (the staged upgrade that we mentioned earlier).
Let's use our two Domain Member Servers and exemplify an upgrade to Samba 4 in one and the integration of the Samba 3 to our new Active Directory on the other. We will show you the second option first, and we will use the ACCSRV01 server for that. Let's edit the Samba 3 Server's configuration file, change the security option, and add the realm for our Domain:
[global]
…
Security = ads
realm = POA.MSDCBRZ.EALL.COM.BR
Notice that the security option was already present on our smb.conf file for our Samba 3 installation, so we just needed to change it to ads (earlier, it was domain) and add the realm directive to it. Now let's use the same Kerberos file that the Samba tool has created for us in the PDC upgrade process (/etc/krb5.conf):
[libdefaults]
default_realm = POA.MSDCBRZ.EALL.COM.BR
dns_lookup_realm = false
dns_lookup_kdc = true
Now, on a shell at the ACCSRV01 server, execute the following command:
root@accsrv01:~# net ads join -U administrator -S pdc
Using short domain name -- POA
Joined 'ACCSRV01' to realm 'poa.msdcbrz.eall.com.br'
DNS Update for accsrv01.poa.msdcbrz.eall.com.br failed: ERROR_DNS_UPDATE_FAILED
DNS update failed!
root@accsrv01:~# /etc/init.d/winbind start
[ ok ] Starting the Winbind daemon: winbind.
root@accsrv01:~# /etc/init.d/samba start
[ ok ] Starting Samba daemons: nmbd smbd.
From now on, our old friend, Samba 3, is up and running and ready to continue to provide the file/print services for our Active Directory network, as always. The error about the DNS update is because the ACCSRV01 server is already registered on our Active Directory Domain Controller's DNS. So, our users can now log in to the Domain (PDC) and access the shares and use the print services from this server, as usual.
At this point, we can go to the next topic, which is Upgrade tests and validations for Member Servers, and execute the tests for this phase—listing and using the shares/printers, using some desktop to browse the ACCSRV01 server, and so on. As we finish the validations (and if everything is fine), we can go back to this topic and continue to the next and final step of upgrading the DEVSRV01 Domain Member Server to Samba 4.
In Chapter 3, Managing the Samba Active Directory Server, we have an example of the configuration of a Domain Member Server where the Debian GNU/Linux are authenticated and integrated on our Active Directory Domain. We can refer to this chapter if we need a similar solution, but here, we will show you a quick configuration to have our DEVSRV01 file/print server up and running in the same scenario as before, taking into account that in the EALL network, the GNU/Linux host is administrated with the users who are not getting authenticated on the Samba's Domain.
First, we need to create a minimal Samba 4 configuration file for the Domain Member Server function (/usr/local/samba/etc/smb.conf):
[global]
workgroup = POA
netbios name = DEVSRV01
server string = DEV Office Server
security = ads
realm = POA.MSDCBRZ.EALL.COM.BR
encrypt passwords = true
winbind use default domain = Yes
winbind enum users = yes
winbind enum groups = yes
Tip
Remember to match the idmap configuration that comes in ranges for your Samba 3 installation. We can add other environments' specific global configuration from Samba 3 that we want to maintain on our Samba 4 installation (for example, log file, bind interfaces, and so on).
We want to add our idmap configuration and shares from Samba 3 too:
idmap config *:backend = rid
idmap config *:range = 1000-20000
[DEVCODDS]
comment = DEV COD DS
path = /var/lib/samba/devcodds
read only = No
valid users = @"POA\Domain Admins"
browseable = Yes
[DEVSRCAP]
comment = DEV SRC AP
path = /var/lib/samba/devsrcap
read only = No
valid users = @"POA\Devel Group"
browseable = Yes
[PRINTERS]
Comment = DEV Dep. Printers
path = /var/spool/samba
Printable = yes
Printing = CUPS
[DEVPRT01]
comment = General DEV Printer
Printer Name = devprt01
path = /var/spool/samba/
printable = yes
browseable = yes
Let's copy our Kerberos configuration file to /etc/krb5.conf:
[libdefaults]
default_realm = POA.MSDCBRZ.EALL.COM.BR
dns_lookup_realm = false
dns_lookup_kdc = true
As we have our new Samba 4 and Kerberos configuration files in place, we just need to issue the following commands at the DEVSRV01 server:
root@devsrv01:~# export PATH=/usr/local/samba/sbin:\
/usr/local/samba/bin:$PATH
root@devsrv01:~# net ads join -U administrator
Enter administrator's password:
Using short domain name -- POA
Joined 'DEVSRV01' to dns domain 'poa.msdcbrz.eall.com.br'
DNS Update for devsrv01.poa.msdcbrz.eall.com.br failed: ERROR_DNS_UPDATE_FAILED
DNS update failed: NT_STATUS_UNSUCCESSFUL
Now, we have our second Domain Member Server upgraded to the Samba 4 software release! The error about the DNS update is the same as our previous one when configuring the ACCSRV01 server (the DNS entry already exists).As we are working with a 64-bit system, we should use the following commands to configure the Debian NSS libraries to our system:
root@devsrv01:~# cd /lib/x86_64-linux-gnu && &&\
mv libnss_winbind.so.2{,-old} && }&&\
ln -s /usr/local/samba/lib/libnss_winbind.so.2 && &&\
ln -s slibnss_winbind.so.2 2libnss_winbind.so && cd && echo OK
OK
root@devsrv01:~#
The last step is to start the winbind and Samba daemons (notice that for a Samba 4 member server, we do not start the Samba Server, but we have the specific daemons instead):
root@devsrv01:~# winbindd && echo "Winbind Started OK"
Winbind Started OK
root@devsrv01:~# smbd && nmbd && echo "Samba Daemons Started OK"
Samba Daemons Started OK
root@devsrv01:~#
The next step is to execute all the tests and validations for the file/print servers in the same way as we did for the ACCSRV01 server, and if we do not have any failures, our upgrade procedure plan and execution is validated. It's important to keep in mind that the quality of our upgrade process is highly dependent on the quality of our tests and validations, so every test and check that we can add to our validation's kit is welcome!
Upgrading tests and validations for the PDC
As our upgrade procedure started with the PDC (now the Active Directory Domain Controller for our Domain), we need to test and validate it after we have upgraded the PDC server as follows:
root@pdc:~# wbinfo -u | wc -l
54
root@pdc:~#
From the preceding output, we can see, based on our upgrade plan, that the number of users are diverging (51 before the upgrade and 54 now). So, let's save the user list in one file and use the diff command to see what these differences really are:
root@pdc:~# wbinfo -u | sort > samba4users.txt && echo OK
OK
root@pdc:~# diff samba3users.txt samba4users.txt
0a1
> Administrator
12a14
> Guest
23a26
> krbtgt
No problem at all. The three users are the default users from the new Samba 4 installation: Administrator, Guest, and krbtgt. Let's take a look at our groups:
root@pdc:~# wbinfo -g | wc -l
16
root@pdc:~#
Again, we have a different number of objects in comparison to the environment before the upgrade, so let's identify what exactly these differences are:
root@pdc:~# wbinfo -g | sort > samba4groups.txt && echo OK
OK
root@pdc:~# diff –Naur samba3groups.txt samba4groups.txt
--- samba3groups.txt 2013-08-31 19:52:21.917725440 -0300
+++ samba4groups.txt 2013-08-31 20:15:30.262715229 -0300
@@ -1,5 +1,16 @@
-accdivision group
-devel group
-domain admins
-domain users
-eall group
+Accdivision Group
+Devel Group
+DnsUpdateProxy
+Domain Admins
+Domain Computers
+Domain Controllers
+Domain Guests
+Domain Users
+EALL Domain Admins
+EALL Domain Users
+EALL Group
+Enterprise Admins
+Enterprise Read-Only Domain Controllers
+Group Policy Creator Owners
+Read-Only Domain Controllers
+Schema Admins
Tip
We can use the comm utility to perform a comparison between files. Take a look at man comm for the options and to learn how to interpret the output.
Again, the only groups that are different on both the files are the new ones created by the new Samba 4 software version. Looking closely, we can see that the two groups that we renamed are present in the list because we have saved the file before we renamed them. Other minor differences are there because of the capital letters changed on Samba 4 (for example, Domain Admins). We can now use the smbclient utility to execute a bunch of minor validations on our new Active Directory Domain Controller server:
root@pdc:/root# smbclient -L pdc -U 'frorange%w1ndow$$'
Domain=[POA] OS=[Unix] Server=[Samba 4.0.9]
Sharename Type Comment
--------- ---- -------
netlogon Disk
sysvol Disk
Profiles Disk EALL Roaming Profiles Share
IPC$ IPC IPC Service (Samba 4.0.9)
Domain=[POA] OS=[Unix] Server=[Samba 4.0.9]
Server Comment
--------- -------
Workgroup Master
--------- -------
Based on the preceding output, we can see that our server was upgraded from Samba 3.6.6 to Samba 4.0.9, the authentication is working for our test user, and we have the Profiles share available. With a simple script, we can validate our user's database:
root@pdc:~# for x in `wbinfo -u`; do wbinfo --name-to-sid $x; done
…
S-1-5-21-1214754503-652539266-1573105461-1047 SID_USER (1)
S-1-5-21-1214754503-652539266-1573105461-1048 SID_USER (1)
S-1-5-21-1214754503-652539266-1573105461-1049 SID_USER (1)
S-1-5-21-1214754503-652539266-1573105461-1055 SID_USER (1)
root@pdc:~#
Before we proceed to the final tests of our Active Directory Domain Controller (for example, add a machine to the domain, log in, create users, and so on), let's see if the DNS services are working as they should, and all the records that we need are configured properly:
root@pdc:~# host -t SRV _ldap._tcp.poa.msdcbrz.eall.com.br.
_ldap._tcp.poa.msdcbrz.eall.com.br has SRV record 0 100 389 pdc.poa.msdcbrz.eall.com.br.
root@pdc:~# host -t SRV _kerberos._tcp.poa.msdcbrz.eall.com.br.
_kerberos._tcp.poa.msdcbrz.eall.com.br has SRV record 0 100 88 pdc.poa.msdcbrz.eall.com.br.
root@pdc:~# host -t CNAME `ldbsearch -H \
/usr/local/samba/private/sam.ldb '(invocationid=*)' \
--cross-ncs objectguid | grep objectGUID | \
awk '{print $2}'`._msdcs.poa.msdcbrz.eall.com.br.
2319316b-e10b-4568-b3e8-13735c9d6bd9._msdcs.poa.msdcbrz.eall.com.br is an alias for pdc.poa.msdcbrz.eall.com.br.
root@pdc:~#
Now, we can take a look at the specific commands for the samba-tool utility to query and verify our Samba's internal DNS server. First, execute the following command:
root@pdc:~# samba-tool dns serverinfo pdc \
-U 'Administrator-U'Administrator%w1ndow$$!' | grep psz
pszServerName : PDC.poa.msdcbrz.eall.com.br
pszDsContainer : CN=MicrosoftDNS,DC=DomainDnsZones,\
DC=poa,DC=msdcbrz,DC=eall,DC=com,DC=br
pszDomainName : poa.msdcbrz.eall.com.br
pszForestName : poa.msdcbrz.eall.com.br
pszDomainDirectoryPartition : DC=DomainDnsZones,DC=poa,DC=msdcbrz,\
DC=eall,DC=com,DC=br
pszForestDirectoryPartition : DC=ForestDnsZones,DC=poa,DC=msdcbrz,\
DC=eall,DC=com,DC=br
root@pdc:~#
The preceding output is very important and gives us a good overview of the DNS configuration. Using the samba-tool utility, we can get another good insight into our Samba DNS configuration and the records that are registered, so we can list the entries for our zone as follows:
root@pdc:~# samba-tool dns query pdc pdcpoa.msdcbrz.eall.com.br @ ALL -U 'Administrator%w1ndow$$!'
Name=, Records=5, Children=0
SOA: serial=9, refresh=900, retry=600, expire=86400, ns=pdc. poa.msdcbrz.eall.com.br., email=hostmaster.poa.msdcbrz.eall.com.br. (flags=600000f0, serial=9, ttl=3600)
NS: pdc.poa.msdcbrz.eall.com.br. (flags=600000f0, serial=1, ttl=900)
A: 192.168.1.1 (flags=600000f0, serial=1, ttl=900)
AAAA: 0000:0000:0000:0000:0000:0000:0000:0001 (flags=600000f0, serial=110, ttl=900)
MX: mail.poa.msdcbrz.eall.com.br. (10) (flags=600000f0, serial=9, ttl=900)
Name=_msdcs, Records=0, Children=0
Name=_sites, Records=0, Children=1…
root@pdc:~#
The preceding output can be very long, as it will depend on how many entries we had on our DNS server (hosts, aliases, and so on). We can use the samba-tool utility to show general information and list our entries for the DNS reverse zone too:
root@pdc:~# samba-tool dns zonelist pdc --reverse \
-U 'Administrator-U'Administrator%w1ndow$$!'
1 zone(s) found
pszZoneName: 1.168.192.in-addr.arpa
Flags : DNS_RPC_ZONE_DSINTEGRATED DNS_RPC_ZONE_UPDATE_SECURE
ZoneType : DNS_ZONE_TYPE_PRIMARY
Version : 50
dwDpFlags : DNS_DP_AUTOCREATED DNS_DP_DOMAIN_DEFAULT DNS_DP_ENLISTED
pszDpFqdn : DomainDnsZones.poa.msdcbrz.eall.com.br
root@pdc:~#
Here is how we can use samba-tool to list our reverse zone entries:
root@pdc:~# samba-tool dns query pdc 1.168.192.in-addr.arpa \
@ ALL -U 'Administrator%w1ndow$$!'
Name=, Records=2, Children=0
SOA: serial=6, refresh=900, retry=600, expire=86400, ns=pdc.poa. msdcbrz.eall.com.br., email=hostmaster.poa.msdcbrz.eall.com.br. (flags=600000f0, serial=6, ttl=3600)
NS: pdc.poa.msdcbrz.eall.com.br. (flags=600000f0, serial=1, ttl=0)
Name=1, Records=1, Children=0
PTR: pdc.poa.msdcbrz.eall.com.br (flags=f0, serial=4, ttl=0)
Name=10, Records=1, Children=0
PTR: WINDOWS2K3.poa.msdcbrz.eall.com.br (flags=f0, serial=5, ttl=0)
Name=11, Records=1, Children=0
PTR: windowsxp.poa.msdcbrz.eall.com.br (flags=f0, serial=6, ttl=0)
Name=5, Records=1, Children=0
…
root@pdc:~#
We can use the net command to give us other important information about our Active Directory Services:
root@pdc:~# net ads info
LDAP server: 192.168.1.1
LDAP server name: pdc.poa.msdcbrz.eall.com.br
Realm: POA.MSDCBRZ.EALL.COM.BR
Bind Path: dc=POA,dc=MSDCBRZ,dc=EALL,dc=COM,dc=BR
LDAP port: 389
Server time: Qui, 29 Ago 2013 16:30:50 BRT
KDC server: 192.168.1.1
Server time offset: 0
root@pdc:~#
With all the preceding tests passed, we can pick a Microsoft Windows machine (for example, 2003 or XP) and try to add it to the Active Directory Domain, and as we already have tested the authentication for test users, we can validate the login from the new joined machine. It's important to test a Microsoft Windows machine that was already in the domain too, and see if the machine will work as usual. Everything must work as if we had not executed any upgrade. After this point, we can go back to the upgrade procedure (the previous topic) to continue upgrading the Domain Member Servers.
Upgrading tests and validations for Member Servers
To validate the upgrade process for our Domain Member Servers, we need to test the file/print shares. The same tests that we will execute here for one file/print server must be executed for all the file/print servers that we have in our environment. So, in our example scenario, we have two Domain Member servers on the EALL POA network, so we need to execute the following tests twice.
First, we need to make sure that we are able to list the users:
root@pdc:~# wbinfo -u
…
wiwolf
zisala
joliu
…
root@pdc:~#
And groups:
root@pdc:~# wbinfo -g
allowed rodc password replication group
enterprise read-only domain controllers
denied rodc password replication group
read-only domain controllers
…
root@pdc:~#
The preceding output is something that is pretty familiar to us, as we already know that Samba 4 has some default Active Directory groups and users, and we have performed the tests and validations of the users and groups when we were validating the upgrade at the PDC phase. So, we just need to make sure that the Domain Members could list the Domain users and groups. We need to confirm that the users' issues are being resolved and the name service switch is working as it should. Take a look at the following command execution:
root@devsrv01:~# id djfox
uid=2031(djfox) gid=1513(domain users) grupos=1513(domain users),\
2051(eall domain users),2053(devel group)
root@devsrv01:~# getent passwd djfox
djfox:*:2031:1513:djfox:/home/POA/djfox:/bin/false
root@devsrv01:~#
Using smbclient, we can get all sort of information that we are used to, and we will be able to see the new Samba version and test the authentication when directly accessing the file/print servers:
root@accsrv01:~# smbclient -L accsrv01 -U 'cafreeman%w1ndow$$'
Domain=[POA] OS=[Unix] Server=[Samba 3.6.6]
Sharename Type Comment
--------- ---- -------
--------- ---- -------
ACCPRTMM01 Printer 1F Printer MM
ACCPRTLS01 Printer 2F Printer
PRINT$ Disk Drivers for Dep. Printers
ACCPUBLIC Disk Public Share
ACCDIVDOCS Disk Accdivision Prospects
ACCDIVRPTS Disk Accdivision Reports
IPC$ IPC IPC Service (ACCDivision Office Server)
Domain=[POA] OS=[Unix] Server=[Samba 3.6.6]
Server Comment
--------- -------
--------- -------
ACCSRV01 ACCDivision Office Server
Workgroup Master
--------- -------
--------- -------
POA ACCSRV01
root@accsrv01:~
Notice that the Samba version will still be 3.6.6 for our upgrade procedure of the ACCSRV01 output that we got previously as we had not upgraded this server. When testing the DEVSRV01 server, we should see a different Samba version (for example, 4.0.9).
Using one of the Microsoft Windows machines that are already in the domain, let's perform some print and file share tests, creating two files—one in the ACCSRV01 server and the other on the DEVSRV01 server. We will use a test user that has access to the shares on both the servers; use one file to print in at least one printer in each server. After we have logged in to our Microsoft Windows 2003 test machine, we navigate to the network's share and see something similar to the following screenshot:
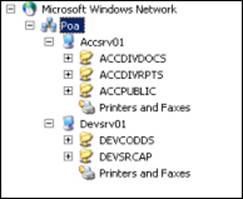
So, we just need to create a file on one folder of each file/print server and send it to at least one printer in each server (for example, ACCSRV01 and DEVSRV01). After this, we can change our desktop background, for example, and log in to another machine to validate that our roaming profiles are working fine, so we can finish our upgrade and welcome our users to the brand new EALL's Active Directory Domain.
Tip
After everything is checked, we can remove the old Samba 3 Server installation: apt-get removes Samba winbind.
Summary
In this chapter, we learned about the main difference between the Samba Server Version 3 and 4, how to plan and execute an upgrade procedure of the Samba Server, and a step-by-step process to test and validate the upgrade as well. Using the command-line examples and scripts, we showed you how to gather important information from the Samba 3 environment and how to use that information to compare it with the upgraded system and be sure that the transition from Samba 3 to 4 was successful.
A very detailed Samba 3 example scenario was presented with three Samba 3 Servers playing different roles on the network. So, we showed you how to execute a staged upgrade, discussing the benefits of having different servers for different sets of services and providing flexibility to manage the maintenance window, which is very useful for real use cases.
In the next chapter, we will learn about the file and print service capabilities of the Samba 4 Server, and we will discuss some differences between file and print services from Versions 3 and 4 as well as Microsoft Point and Print feature, print drivers versions, and so on.
All materials on the site are licensed Creative Commons Attribution-Sharealike 3.0 Unported CC BY-SA 3.0 & GNU Free Documentation License (GFDL)
If you are the copyright holder of any material contained on our site and intend to remove it, please contact our site administrator for approval.
© 2016-2026 All site design rights belong to S.Y.A.