SEO for 2016: The Complete Do-It-Yourself SEO Guide (2015)
Chapter 3. What do I need to do first for SEO?
Okay let’s say you have a brand new website that is live on the Internet, have the Meta tags on like we talked about in the last chapter, you also have the keywords chosen and a page dedicated to each keyword. But a month later no one is coming to visit. What needs to be done first to tell the world you exist? You first have to tell the biggest search engine, Google about your website. Telling Bing, Yahoo!, MSN, and AOL wouldn’t hurt either. Then there are over 150 other search engines that are smaller and you’ll want to list your website in directories. Also if you have a brick and mortar location you want to make sure you show up on all the GPS's as those have become just like a search engine.
You can spend days and weeks going to all the websites or you can do the short cut I use. For a very small charge you can get it all done for you in just a few days at www.SubmissionComplete.com. They will submit your web site to the 200+ little search engines and another 500 or so directories for about $35.00. This will save you about 100 hours of your precious time, if not more trying to get listed on all the search engines. It is kind of a little secret that good SEO's use. You can also submit your website to www.GPSListingService.com to allow all the GPS units to get updated with your brick and mortar location.
After you have submitted your website to all the search engines you will want to create a Google account for Google Webmasters. This is only one tool of many that we will walk you through configuring in the next few sections.
Adding Your Website to Google Webmaster Tools
Google Webmaster Tools is the primary way that Google uses to communicate with webmasters. It provides great traffic data and insight about your site, helps you to identify issues with your site and even lets you know if your site has been infected with malware. Simply start by going to:
www.google.com/webmasters/tools/
To start using Google’s Webmaster Tools you have to verify that you are an authorized representative of your site. This is done through a process of verification.
How to Add and Verify A Site:
1. Sign into Google Webmaster Tools with your Google Account.
2. Click the Add a site button, and type the URL of the site you want to add. Make sure you type the entire URL, such as http://www.example.com/
3. Click Continue. The Site verification page opens.
4. (Optional) In the Name box, type a name for your site (for example, My Blog).
5. Select the verification method you want, and follow the instructions.
Verification Process
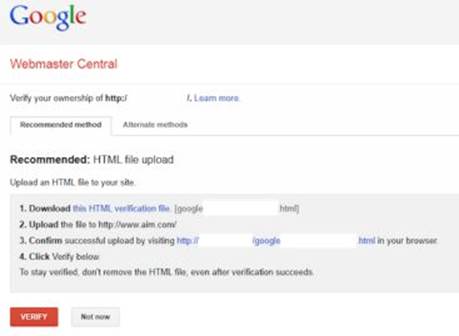
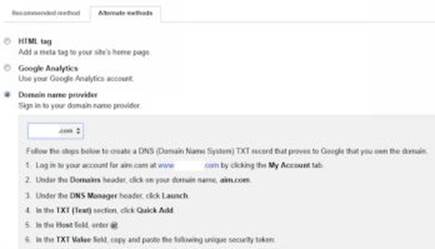
There are four methods of verification to prove you are the webmaster of the domain you are submitting. I really have no real preference as to which method you use. Here are the four ways:
· The HTML file upload. Google provides you with a blank, specially named file that you just have to drop in the root directory of your site. After you do this, just click on the verify button and you will have access to your Google Webmaster Tool data for this site.
· Adding an HTML tag. Clicking on this option will provide you with a Meta tag that you can insert into the header of your home page. Once it’s there click on the verify button to view your Google Webmaster Tool data.
· The Google Analytics option. If the Google account you’re using for Google Webmaster Tools is the same account as your Google Analytics and you’re using the asynchronous tracking code (with the code being in the head of your home page), then you can verify the site this way.
· The DNS Method. Select your Domain Name provider from the drop down list and Google will give you a step by step guide for verification along with a unique security token for you to use.
When you login to Google webmaster tools you will get a screen which lists all the domains you have associated with your account.
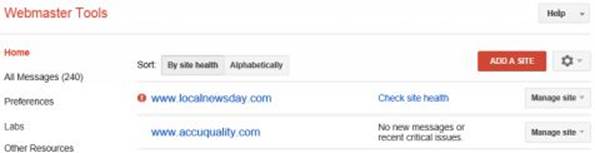
If you see a red exclamation mark next to a domain such as the one above noting www.LocalNewsDay.com, it indicates that there is a problem with the website and you need to look at the message from Google to see what issue Google has found with the website.
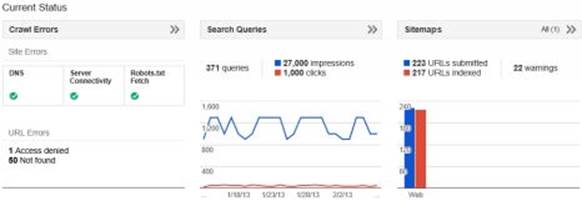
The Google Webmaster Tools Dashboard
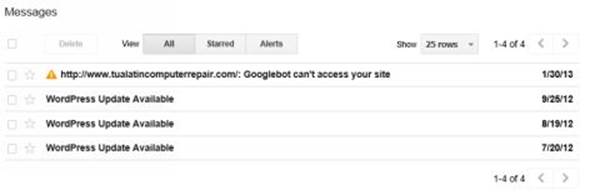
Once you have completed the verification process, you can log in and start to examine the data for your site. If you have just one domain, the Dashboard is the first screen you will be taken to. This gives you a quick view into some of the more pertinent information for your site, along with any new messages you may have from Google.
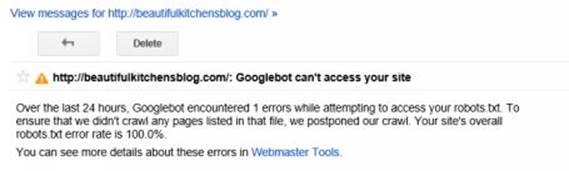
Google Webmaster Tools is where you receive messages about your site directly from Google. There may be messages that inform you that your site has pages infected with malware/spam, errors, issues with indexing your website, or just informational message such as Google warning you that your WordPress installation really needs to be updated. Please note, you can also have your messages forwarded to any email address associated with your Google account. Some examples of alerts are shown on the next figure.
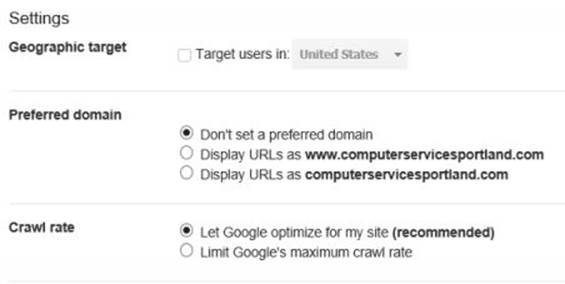
Configuring Webmaster Tool Settings
Here you can tell Google some basic things about your site. For example, you can inform Google of the geographic location your site is targeting, your preferred domain (eg. www.yoursite.com or yoursite.com), and even the crawl rate indicating how often Google should crawl the website. Please note the preferred domain option just informs Google whether you want the site to show up in the search results with the www or without the www. Most sites will redirect a visitor from one to the other.
Sitelinks
If your site is an authority on a particular subject which is determined by Google, then Google will display links below your site in the search results.
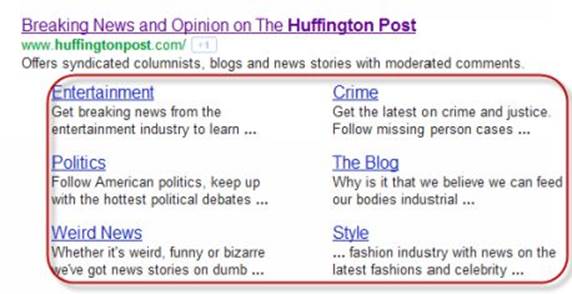
These links point to what Google deems to be the most important links on your site’s page. Sometimes Google will show a link that you don’t particularly want to be displayed in the search results, and this is where you can demote that link so that it won’t appear. Simply enter the URL of the page with the sitelinks (not always just the homepage), and then type in the URL of the sitelink that you want to be removed.
 A demoted link may reappear in your search results after 90 days, so be sure to check this section.
Setting URL Parameters
This feature allows you to specify the URL query string parameters that shouldn’t be considered by Google when examining URLs on the site to determine if they are unique URLs. For example, if you had a tracking parameter that you use for a particular campaign, then the page is obviously the exact same page as when it’s reached without the tracking parameter. Thus Google might consider both URL’ to be separate pages and contain duplicate information which is a big issue in Googles eyes. Entering the tracking parameter in here tells Google that they should ignore the tracking parameter when looking at the URL.

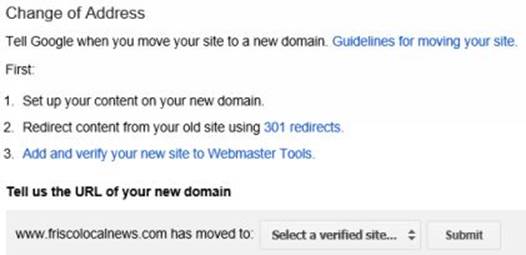
Change of Address
If you change your entire site to a new domain, then this is where you let Google know. Once you’ve set up your new site, 301’d the content from your old site to your new, added and verified your new site on Google Webmaster Tools, then you inform Google of the move here. Basically, this helps Google’s index be updated a little quicker.
Creating Users
This is where you can view and control all authorized webmasters on your account. For example, a new user can be added here and you can set their level of privilege level or what they are authorized to view. Owners have permission to access every item and every piece if information in Google Webmaster Tools. Any users who has been granted “Full” permissions can do everything except add users, link a Google Analytics account or inform Google of a change of address which are separately configurable options. Users with “Restricted” permission have the same restrictions as those with “Full” permission plus the following: they only have viewing capabilities on configuration data, cannot submit sitemaps, cannot request URL removals, cannot submit URLs, cannot submit reconsideration requests, and only have the capability to view crawl errors and malware notifications.
Associates
This section allows you to associate different Google accounts with your Google Webmaster Tools account so that they can be designated as officially connected to the account or websites in the account. This is available for sites that are in the YouTube Partners Program and the Chrome Web Store. To associate an account simply click on the “Add a New User” button which is red, enter the Google account email address that’s associated with the YouTube or Chrome Web Store account you’re associating, click the appropriate checkbox and hit the add button.
Crawl Errors
Here’s where you find out about the errors that Google has detected when crawling your website. This is an invaluable tool as it can absolutely help you in identifying a variety of issues on your website these issues can include server errors, missing pages, and much more. This tool also shows you the number of crawl errors, lists the pages and seven shows a graph of your error count over time so you can easily see whether it’s been a gradual issue or a more sudden occurrence. This is a good tool to keep tabs on frequently so that you catch these errors as they crop up.
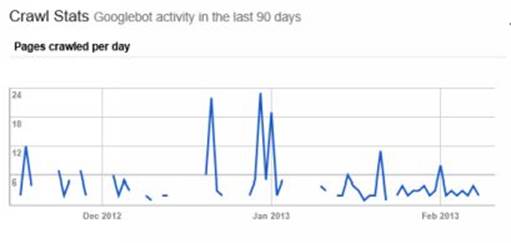
Crawl Stats
This section simply provides you with an idea of how fast the crawlers are able to read your pages. Please note that spikes are to be expected here, but if you see a sustained drop in pages crawled, or a sustained spike in time spent downloading a page, or in the size of a page, then this tells you that you should take a look at what’s changed recently on your web site or how it is configured or hosted.
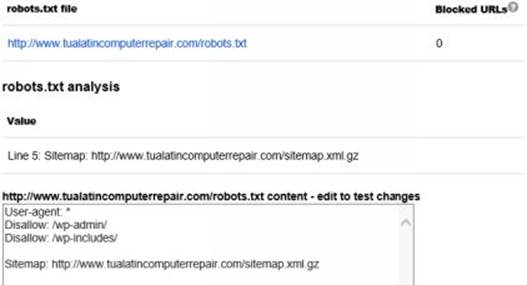
Blocked URLs
This is where you can test out your current robots.txt file that is associated with your website. You can also see if any pages on your web site to had an issue being crawled or not. You also have the ability to test out modifications to your robots.txt file to see whether they will worked as you anticipate against various pages on your site.
Fetch as Google
This function allows you to view your pages as Google sees them. This tool is designed to help webmasters troubleshoot potential issues with the crawling of their site. It will return the HTTP response, the date and time, and the HTML code, including the first 100kb of visible text on the page. This is a great way of verifying that the Google crawler sees the page as you expect it. If the page looks how you expect it to, then you can submit it to the index. You are allowed 500 fetch submissions per week, and 10 linked page submissions per week.

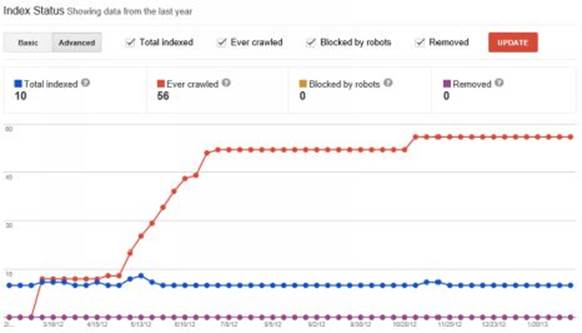
Index Status
The Index Status page provides stats about how many of your URLs Google was able to crawl and/or index. A steady increase in the number of crawled and indexed pages indicates that Google can regularly access your content, and that your site is being indexed. If you see a sudden drop in the number of indexed pages, it may mean that your server is down or overloaded, or that Google is having trouble accessing your content. This is definitely an area that you will want to consistently monitor.
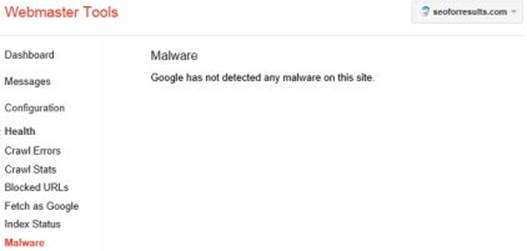
Malware
If Google has detected any malware/spam on your site then it will be displayed here. Please note that you will also be notified of this in your messages. If you see a page listed here then you will want to get it fixed as soon as possible and click on the “Request a Review” button that will be displayed here.
Traffic Search Queries
This page gives information about Google Web Search queries that have returned pages from your site. In addition, you can also see information about the pages on your site that were seen most often in search results (top pages). Hence, you can get an overview of the top keywords that returned a page from your site in the search results. Note the data shown here is collected in a slightly different way from your analytics platform, so don’t expect the number an exact match. What this does is give you is an idea of the top traffic driving keywords for your site, the number of impressions and clicks, and therefore the Click Through Rate (CTR), and the average position that your page was ranking for that particular query.
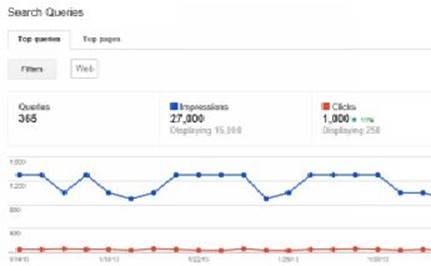
You can also view the same data by page rather than by keyword. This shows you the top traffic generating pages on your site, and perhaps help you identify those that you should concentrate on optimizing, as a high traffic generator in 11th position would be a much higher traffic generator in 8th.
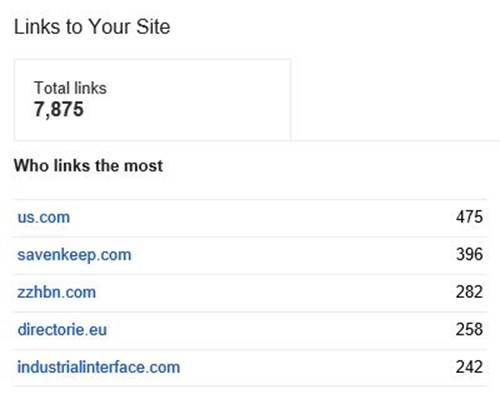
Links to Your Site
This section displays the domains that link to your site the most and your most linked to content. Please note that you can also attain this data if you went to Google.com and performed a search for “Link: yoursite.com”, but this section will display more so it is very informative.
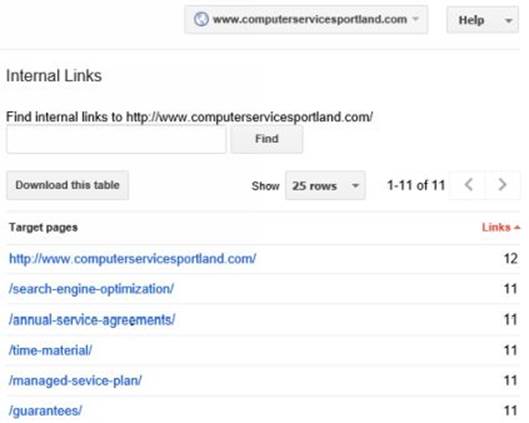
Internal Links
The Internal Links page lists a sample of pages from your site that have incoming links from other internal pages. The number of internal links pointing to a page is a signal to search engines about the relative importance of that page. This serves as an indicator of your authority on a subject as well as provides you with a glimpse of a page that Google deems as important.
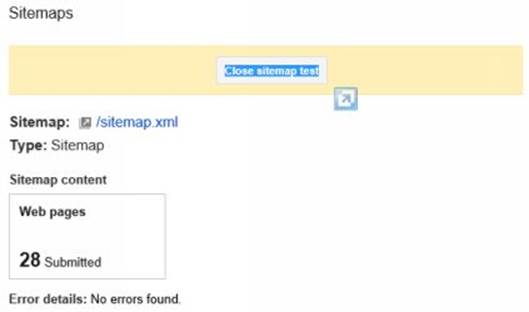
Sitemaps
Sitemaps basically tell Google the exact URL’s to use to find the pages on your website. This gives Google a comprehensive picture of your site. An XML Sitemap is just a list of the URL’s on your website. It is imperative that you create and submit your sitemap to Google correctly.
Later in this book we will discuss how to create a site map correctly. However, Google Webmaster tools allows you to upload your sitemap to test it. To do this simply click the Add/Test Sitemap button, and you will discover if your sitemap is valid. If yours passes the test, then simply add the sitemap by clicking the Add Sitemap button and you upload it directly to Google.
Please note that the default view here is to only show the sitemaps that you have uploaded or added. To view those that have been added by other authorized users on the account click the “All” tab. The Sitemap test page in Google Webmaster Tools shows you the sitemaps that you’ve submitted, the number of pages they found in each sitemap, and the number of those pages that they’ve indexed. You can also see quite clearly if there are any errors or misconfiguration issues that Google has detected within your sitemaps. Simply click on the warnings hyperlink to view them all as well as suggestions on how to fix the issues.
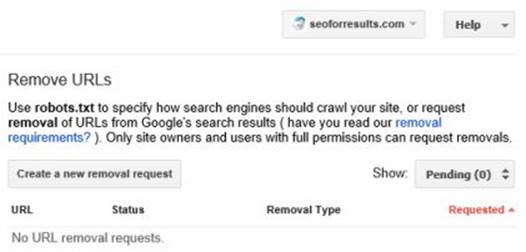
Remove URLs Option
If for some reason you need to remove one of a URL from being indexed, then this is where you perform that. The first step is to either remove the page itself or us a 301 redirect to move the page elsewhere so that it can’t be crawled and indexed in the future. Once removed you can no longer get to the page so you can use this tool to inform Google you want the URL removed from their index.
To do this simply enter the URL that you want to remove, click continue, then select whether you want it removed from the search results and the cache, or just from the cache. Clicking the Submit Request adds it to the removal queue. Please note that typically Google honors these requests quickly and will usually process them within about two to twelve hours.
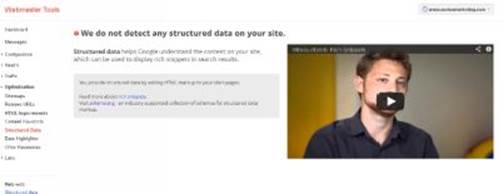
Structured Data
The Structured Data page on the Google Webmasters Tools lists each type of structured data discovered on your website. It also states the number of pages that were discovered for each type of Structured Data. To see the source URL’s, click the data type. In the Source URL’s list, click any of the links that are listed to see the structured data Google was able to extract from that page. Google Webmaster Tools will then show you a preview of how the pages render in Google’s SERPs by clicking Rich snippets preview option.
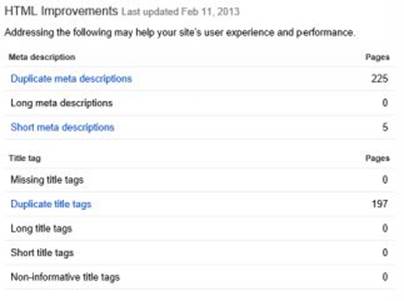
HTML Improvements
This page on Google Webmaster Tools shows you any potential issues Google has found when crawling and indexing your site with an emphasis on your site’s Title and Description tags. Your Titles and Descriptions tags should be unique for each URL and should be within certain character length ranges. This is a major mistake that many web masters make and Google identifies those pages here.
If all of your pages have the same Description tag you’re not telling really the search engines much about what the focus is on those pages. By clicking on each URL listed you will get a descriptive overview of the error Google found and it will also give you a list of other pages where the same error was detected.
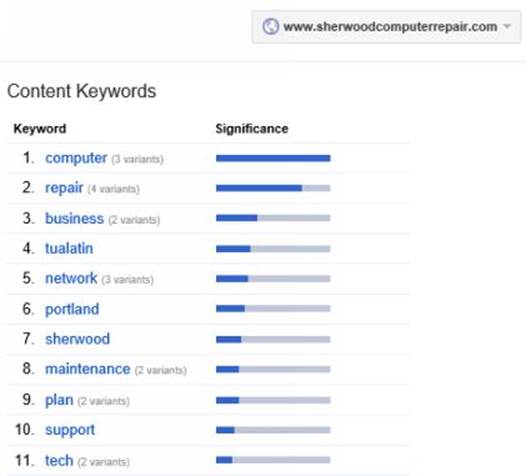
Content Keywords
The Content Keywords section of the Google Webmaster Tools displays the most common keywords on your pages as determined by the Google crawler. Please note if you see an unexpected or unrelated keyword(s), that’s usually an indication that your site may have been hacked, so definitely visit this section regularly.
Data Highlighter
The Data Highlighter Tool is used to teach Google about the pattern of event-related or object-related data on a web page. You simply use Data Highlighter to tag the data fields on each URL with a mouse. Google reads the coding it gives you for the page and can present your data more attractively and in new ways in the SERPs.
One of the new ways is in a new feature we will talk about later the Google Knowledge Graph.
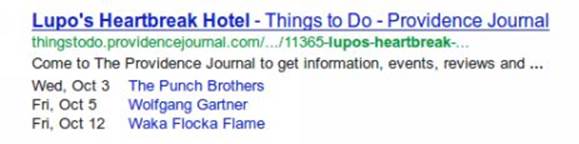
For example, if you use Data Highlighter to tag data such as the business name, location, date, and so on for the events on your site, the next time Google crawls your site the event data will be available for rich snippets on search results pages:
Tagging a page is easy. You don’t need to change your site’s HTML. Just highlight data items with your mouse and select their type from the Google Webmaster Tools Data Highlighter.
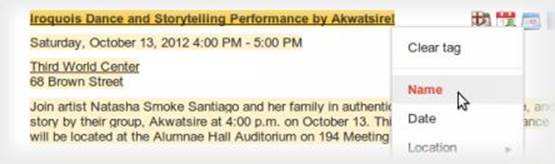
You can also highlight a set of similar pages all at once. Start with one typical page. Data Highlighter will then automatically tag similar pages for you and stay in sync with updates to your site.
Other Resources

This section contains links to tools that are outside of Google’s regular list of Webmaster Tools, but are of interest to webmasters. Tools include the Rich Snippet Testing tool, which enables webmasters to test their schema implementations.
Labs
The labs section of the Google Webmaster Tools contains functionality that’s in testing mode. When Google deems that it is ready to be used and incorporated with the other regular tools or get its own section.
Author Stats
If you want your authorship information to appear in search results for the content you create, you'll need a Google Plus Profile with a good, recognizable headshot as your profile photo. Then, verify authorship of your content by associating it with your profile using either of the methods below. Google doesn't guarantee to show author information in Google Web Search or Google News results.

Google News
Custom Search
This allows you to set up Google customized search for your own site. There is a step by step guide that you can follow here.
Instant Previews
This tool allows you to see how your site looks using Google’s Instant Preview feature (the view of your site that can be seen in the search results when you mouse over the double arrows that show up next to a result).
Next Step, Add a Local Business Listing To Google Places
First off you need to know where to go. For Google the local business listings are added at the Local Business Center as below at the following address:
http://www.google.com/local/addU
If you are already logged in to Google and you have been here before it will list all your current business listings as shown below.
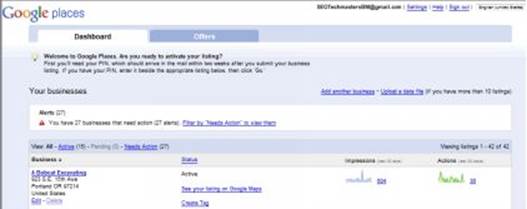
You will notice from screen shot above that there are a few options to configure. Also you see how many times your business was shown on the listings and how many people clicked on it. Only recent information is shown. Notice the option to “View Report" will show you legacy information and give you a more accurate view of the numbers of searches and clicks.
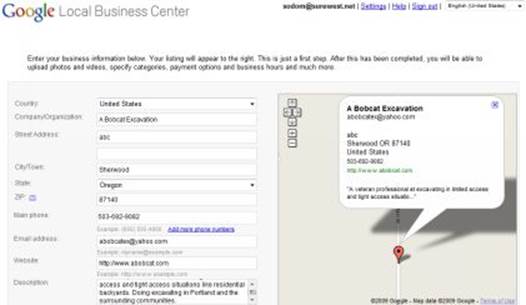
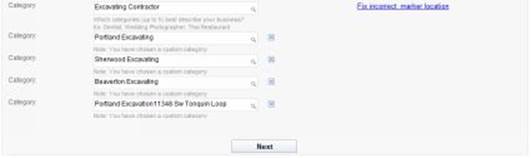
In the next two screen shots you will see how to add the client you saw in the previous screen shot step by step.
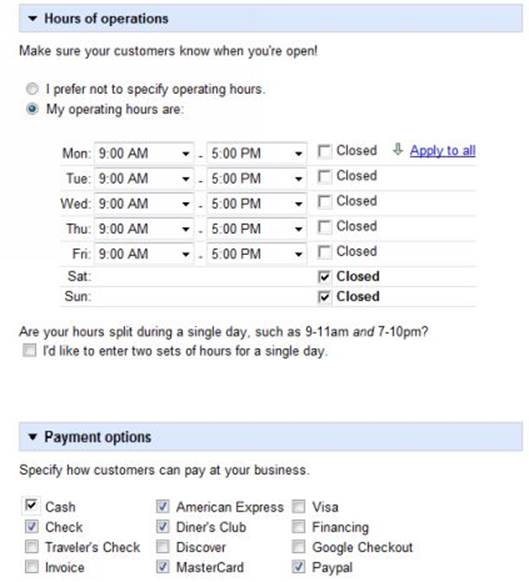
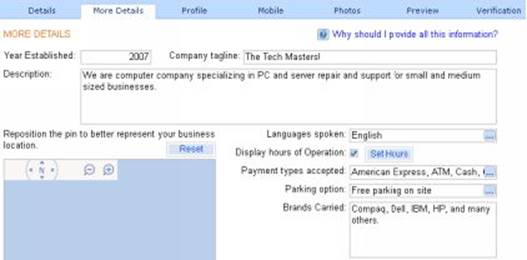
This next screen shot shows how you to enter the hours of operation and the payment types that your business accepts.
NOTE: Google has a complete guide to Google
Places at: http://www.google.com/support/place
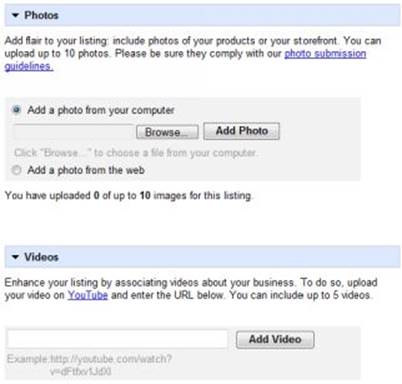
The next screen shows you how to add a logo, picture, and even video describing your business.
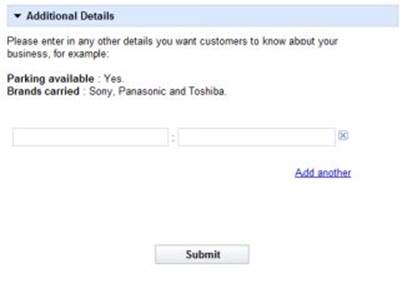
The last option shown below gives you the option to add brands you carry and other details about your business.
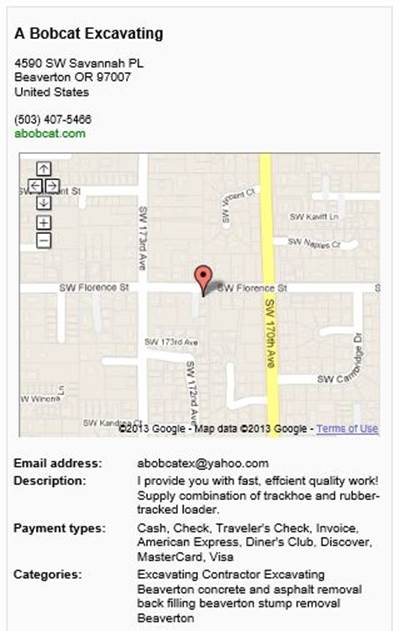
The last screen below sums up all the information you have entered. You will see in the figure my customer's information on Google Local Business Listings which is all the information entered previously.
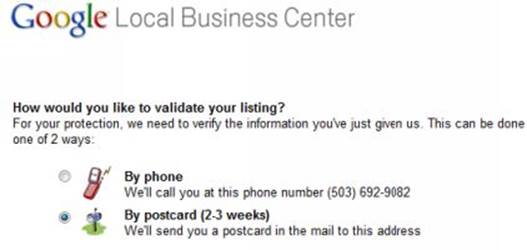
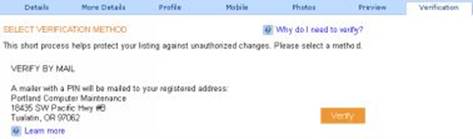
The last thing we have to do is choose how we want Google to verify our business. Google allows you to either verify the phone number by calling you and giving you a pin number over the phone or you can verify the address by waiting for them to send you a pin number by mail as shown below.
Verifying by phone is the quickest way to verify your listing. To do this you do need to have the phone sitting right next to you because it is less than 10 seconds sometimes before the phone rings to give you your pin number which you need to enter on the main listing screen which lists all the businesses you have listed on the Google Business Listing as shown below.
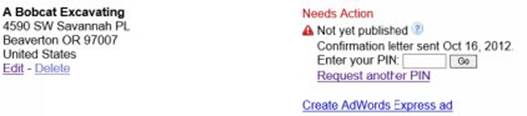
One more really interesting thing you can do in the Google Business Listing’s offer and AdWords Express ad. This is basically a link to create an ad quickly in Google AdWords.
NOTE: If you have multiple locations you can add a store code which is a unique ID that you can assign to each of your business locations. A store code must refer to the exact same store across multiple versions of a bulk upload. These codes can help you identify your businesses at a glance.
Examples:
store1, store2
location: NY, locationFL, locationCA
101, 102, 103
The store code must be under 60 characters in length and not contain any leading or trailing whitespace.
Next Step, Adding Your Site to Bing Webmaster Tools
Bing's Webmaster Tools provide some great as well as necessary data for users to assist them with optimizing their website. These tools help you to understand more about your website’s traffic, issues with you website, and this tools from a search engine actually provides you with a more comprehensive view of your SEO performance. To get started using these tools you need to first visit the Bing Webmaster Tools page at:
http://www.bing.com/toolbox/webmaster
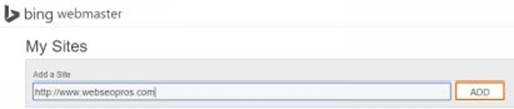
The first step is to set up your Microsoft account if you don’t have one. Just follow the instructions to do this and then you can add your site. Simply enter the URL of your home page and then click on the ADD button. This takes you to a screen to enter a sitemap URL and some basic traffic information about your site.
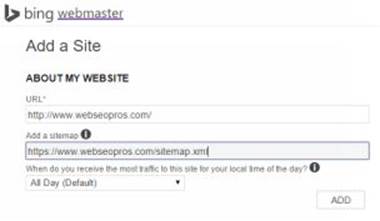
You then get a little longer form to complete to add the Sitemap link and the time of day you think you get the most traffic.
After clicking the ADD button you’ll be taken to the Bing Webmaster’s dashboard page where you’ll see a thumbnail of your home page. The next step is to verify your site. To do this, click on the “Verify Now” text.
Verification Process
Bing offers three verification methods.
Option 1: Place an XML file on your web server
With this option you’ll download a file named “BingSiteAuth.xml” which will automatically have an entry keyed to your account. This file will need to be placed in the root directory of your site. Once it’s there you click the Verify button at the bottom of the page.
Option 2: Copy and paste a <meta> tag in your default webpage
With this option you’ll take the line of code provided and place it in the <head> section of the home page of your site. Once it’s there you click the Verify button at the bottom of the page.
Option 3: Add CNAME record to DNS
This option is more technical than the previous 2, but if you only have access to your hosting solution, and don’t have the ability to either modify the head of your home page or to drop files in the root of your domain, then this is the only option that will work for you.
You’ll need to add a CNAME record with the name provided to the value verify.bing.com. Please note, there are instructions on how to do this for many well-known hosting solutions.
Once this has been done, you just have to click the Verify button at the bottom of the page. If Bing Webmaster Tools is able to verify your site, you will see a green message saying that your domain is verified and your site information will begin to populate over the next couple of days. If you see a red text message stating "We weren't able to verify your site", review the information in the steps above and try again.
Bing Webmaster Dashboard
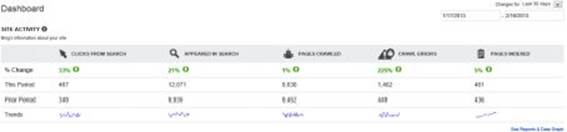
Clicking on your site takes you to the dashboard. Here you’ll see data showing trending data over the last month – clicks, impressions, pages crawled, crawl errors and pages indexed. You’ll also see some basic information on your sitemaps, top keywords, and top pages linked to.
Configuring Your Site
Clicking on this tab will give you a dashboard of data for items that you can adjust when configuring your site. For example, clicking on the sub-tabs will give you more detail and let you make changes.
Sitemaps
Here’s where you can submit new sitemaps, as well as learn about the success or error status of them.
Submit URLs
If you feel that you have to submit some new content urgently, and you don’t believe that you’re crawled often enough for it to get into the Bing index as quickly as you want, you can use this feature to submit up to 10 pages per day, 50 per month. Simply enter the URLs, just one per line, and then click the Submit button.

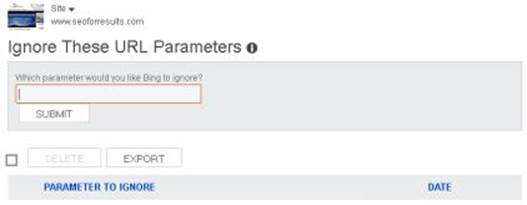
Ignore URL Parameters
On this tab you have the option to tell the Bing crawler (Bingbot) to ignore URL parameters that have no impact upon the content of the page which typically are tracking parameters. The reason that this option is available was because of the concern over duplicate content – same content different URLs. By instructing the crawlers to ignore certain parameters, the idea was that this would reduce the potential for duplicate content. If you are using canonical tags you have no need to use this option as the canonical tags will take care of normalizing your URLs.
If you’re not using canonical tags, simply enter the key element of the parameter to be ignored and click submit (then get a canonical tag project on your product roadmap so you can ignore this in the future).
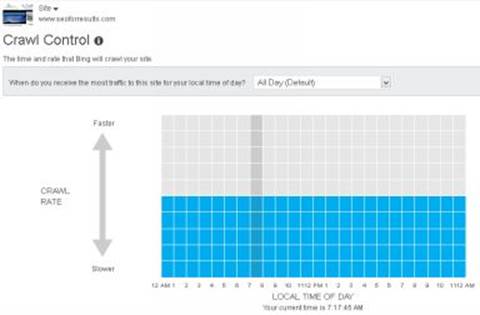
Crawl Control
In this tab you are able to customize when Bing crawls your site for content. Search engines want to get as much good content from your site as possible, so they can provide that content to users to improve their search results, but they also recognize that they don’t want to harm your business while they perform this task. Basically, you can adjust when Bing crawls your site for content so they’re hitting your site the hardest when your traffic is low and not when your traffic is at its peak. You can choose one of their default options or set the best times for you to be crawled.
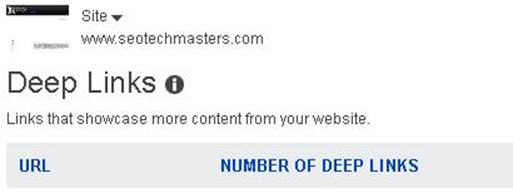
Deep Links
Deep Links helps to give your page more visibility in the search results by providing additional content options for users to choose. These are automatically populated based on the pages that Bing feels is most relevant to users. (Please Note- You don’t have the ability to add Deep Links, but by clicking on one of the URLs that’s been populated you’ll be taken to a page that shows the deep links in order. On this page, you have the option to either block one or more of them, and if you choose you can reorder them by rating them via importance.
Block URLs
On this page, you can remove either a page or a directory from the Bing index if you need to. Just select page or directory, enter the URL, and click on either of the block buttons depending on whether you are blocking it from just the cache or completely. (Please Note- Bing doesn’t require that you’ve removed or redirected the original content. Instead, they block it for 90 days, and if after that time period the website is crawlable and you have not extended the block, they’ll re-index it again.
Disavow Links
On this page, you can inform Bing of any links that you don’t want. Simply select page, directory or domain and enter the URL that houses the link to your site.

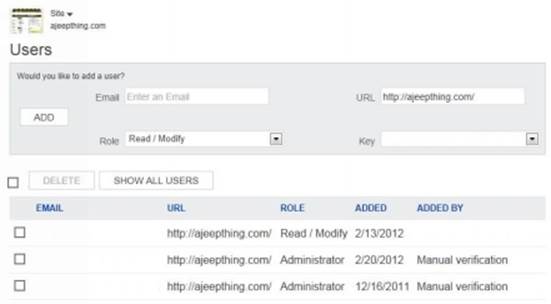
Users
Here you have the ability to add new users without going through the verification process for each one. Just add a valid LiveID email address, then select their role (Read only, Read/Modify, or Administrator) and click ADD. The user you added will then see this site displayed in their Bing Webmaster Tool’s dashboard.
Reports and Data
This section gives you access to reports and data on the effectiveness and performance of your site on Bing. In most of these sections you have the ability just like Google offers to export the data into a spreadsheet.
Page Traffic Report
Page Traffic shows you the traffic stats for the top performing pages on a site. You get to see click data, impression data, CTR Data, the average position when clicked, and the average position when viewed. The View hyperlink at the end opens up a window that shows you the keywords for that URL and their data.

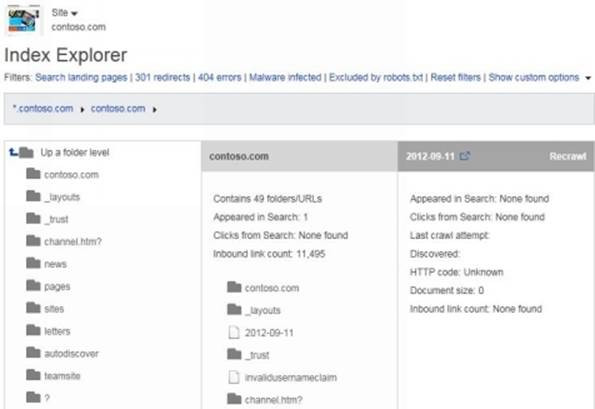
Index Explorer
This section provides you with a unique view of how Bing sees your site. It reflects all the URLs Bing has seen on the web, including redirects, broken links, or those blocked by robots.txt, organized in an file explorer-like fashion. This view can help you get some really detailed insights into how your site was seen by the search engine during recent crawls. It can help discover both issues on your site as well as opportunities. A nice feature here is that it shows the sub domains that have been crawled. You can also filter the data to show only pages with 301 redirects, 404 errors or identified malware infections with a single click.
Additionally, if you want to see pages that have returned other error codes (i.e., 500 series), then all you have to do is select that range from the HTTP code drop down.
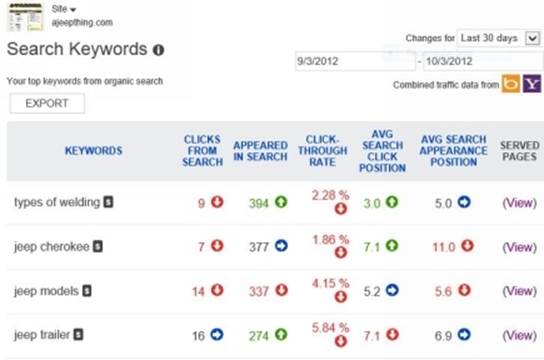
Search Keywords Report
This report shows some analytics and data on your top performing keywords in Bing which come from organic/non-paid search. You’ll be able to view the clicks to your site, the impressions, the Click Through Rate (CTR), the average position when clicked, and the average position overall. Clicking on the View hyperlink shows all of the pages that were served up when that keyword was searched.
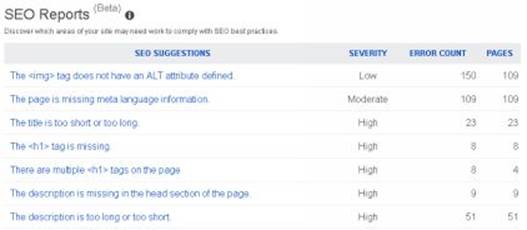
SEO Reports
This is where you get all of the SEO recommendations that will help your site comply with SEO best practices. The SEO Reports provide aggregated counts of all the issues found, across the entire website scanned. Clicking on an item in the SEO Suggestions list takes you to SEO Analysis Detail page where the issue is explained and it even shows a sample of pages affected by this non-compliance. Simply click on the error to get a full description of the problem along with a list of the top 50 pages that were non-compliant.
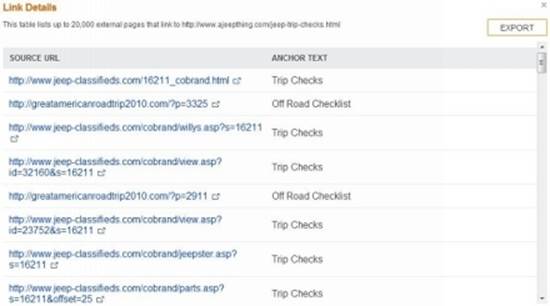
Inbound Links
This section shows the external links that Bing has discovered that point to your site. The trending information on the graph displays whether you are increasing or decreasing links. Clicking on any URL, or the number to the right of the URL, will open a popup window which displays the URL that contains the link to your site and shows the anchor text that is used for the link on that page.

Clicking on any URL, or the number to the right of the URL, will open a popup window which displays the URL that contains the link to your site and shows the anchor text that is used for the link on that page.
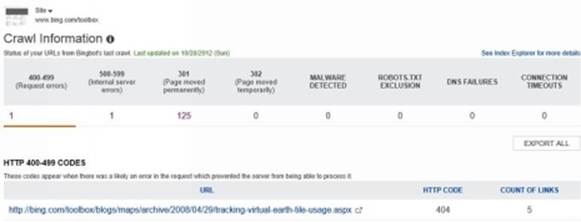
Crawl Information
Here you can view information about crawl issues that Bing has found on your site. This section contains similar data to the Index Explorer section, but provides a different view of the data. To see the pages where errors have been reported, click on the number under the error type.
This section contains similar data to the Index Explorer section, but gives a different view into the data. To see the pages that the errors have been reported for, click on the number under the error type and they’ll be displayed below.
Diagnostics and Tools
This new section currently has five useful tools that any webmaster can use.
Keyword Research
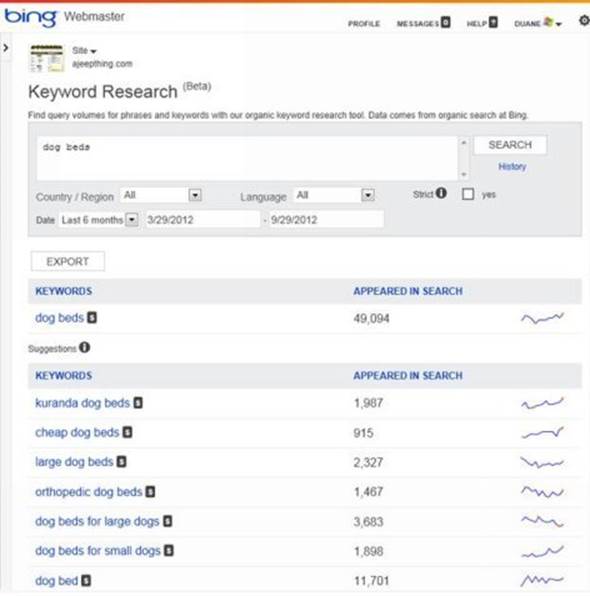
Keyword research is one of the fundamental tasks of any SEO campaign. Here Bing gives you access to their keyword research data so you can see the query volumes on Bing for the keywords you’re interested in, along with related keywords which can give you ideas for other areas that you may want to target.
Filters
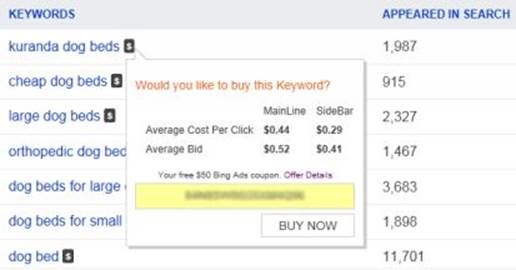
You can select multiple countries in the same language now: for example Canada, the United States, and the United Kingdom combined with English. In addition, you can filter by date ranges (going back up to 6 months) and also filter by language or region. The money icon ($) will display cost-per-click information from Bing Ads when hovered over and provides you with a quick way to buy the keyword. Clicking on a phrase refines the research data round that phrase and reruns the request in the tool. Clicking any column title sorts the data either alphabetically (for keywords) or by number.
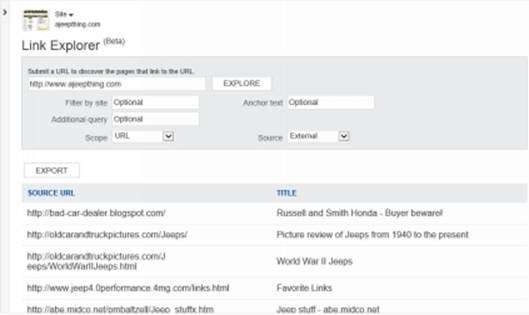
Link Explorer
In this section you can enter any URL and get a list of pages that link to it. This is a great tool to do some competitive and market research since you can use it to learn more about what sites links link to sites similar to yours. There are other filter options available, you can filter by site to get a list of the pages that link to that URL, you can filter by anchor text so you can see who links with “Click Here” and who links with the brand name, and you can filter by the source – internal, external or both.
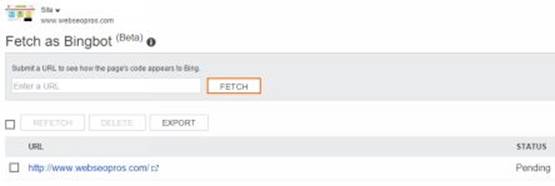
Fetch as Bingbot
If you’d like to see your page as Bing’s crawler, Bingbot, sees it, just enter your URL here and click Fetch. You will then see the headers and content for the page displayed. It’s a great tool for determining if a page on your site can be crawled.
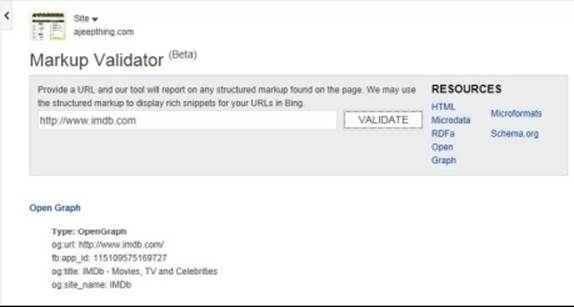
Markup Validator
The purpose of this tool is to help you understand if you have implemented your selected structured markup language in a way which allows Bing to read the information properly for its search results. This tool can be used on any URL to view the special markup applied in the page's source code. The markup languages recognized by this tool are the following: Microformats, RDFa, Open Graph, Schema.org, and HTML Microdata). If the markup has been applied correctly in the code of the scanned page, it will show the markup in a report below the input space.
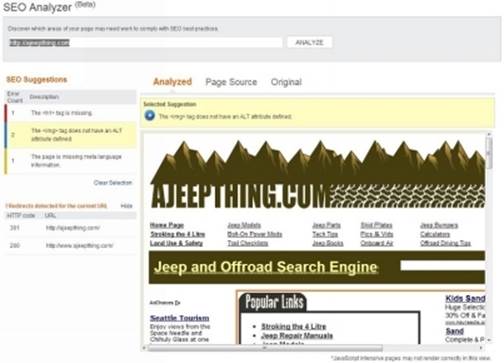
SEO Analyzer
In this section you can receive analysis of an individual page on your site to see what work is required for the page to comply with SEO best practices.
Message Center
This is where Bing will communicate with you in regards to issues from malware detection to crawl speed concerns. You can filter by site if you have multiple ones, and if you have lots of messages you can also filter by message type.
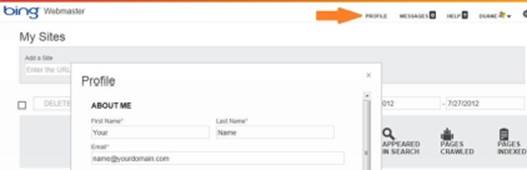
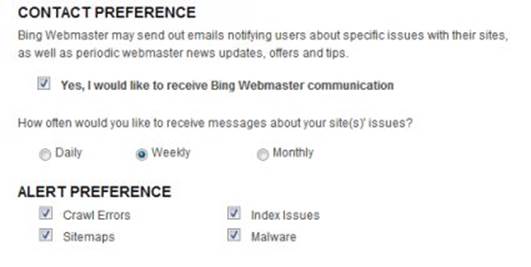
It’s very intuitive. Further, you can also have Bing email these messages to you. Just click on the Profile link in the top right of the page and check the appropriate boxes to indicate how often you’d like to receive emails, and what types of errors you’d like to be notified about.
Next Step, Add a Bing Business Portal Listing
First off you need to know where to go. And for Bing local business listings which are now the Bing Business Portal are added at the Local Listing Center as shown below:
http://www.bing.com/businessportal

Here you can add a new listing and create a login. I already have a login, so I will login and immediately it shows my current listings as shown below.
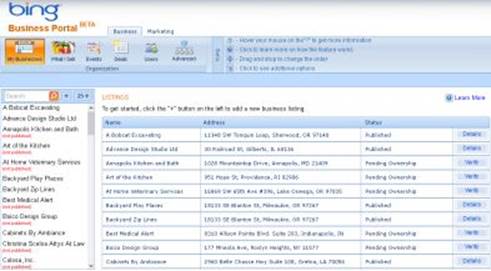
Click on the plus symbol next to the search bar and it allows you to enter a new listing as shown below.
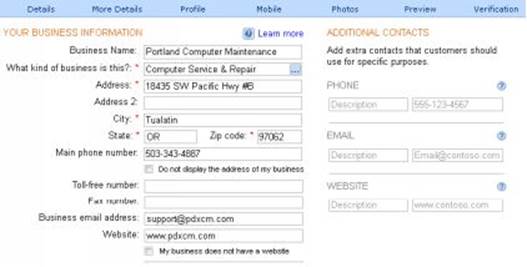
Under more details you can add additional information about the business as well as set the hours and the types of payment you take as seen below.
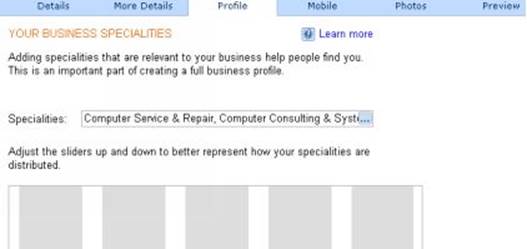
You can set your specialties from a drop down list provided by Bing and also scale the percentage of services or products you provide in the screen below called "Profile".
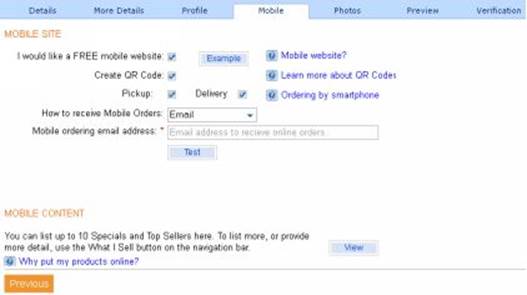
Next you have a unique screen where Bing actually helps you to create a mobile version for your website as shown below.
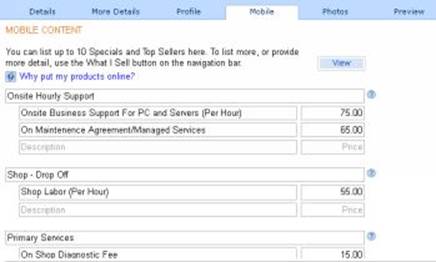
In the next screen you can set the items you sell and the prices as seen below:
The final screen before the verification process you can upload pictures or logos of your business as seen below.
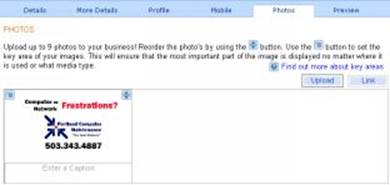
Lastly you have to verify that you are at the phone number or address by selecting the method you want to verify with. Your listing will not run until it is verified.
Next, Add a Business Listing To Yahoo!
Yahoo is still in the top 3 search engines and since Marissa Mayer has taken over it has high hopes this year of making an even better turn around. It still maintains its advertising partnership with Bing.com, so you can bet their share of the search engine market will only grow. Here are the instructions to add your website to the local business listings of Yahoo!. Go to local listing to add your business at the following URL as shown in the figure below:
http://listings.local.yahoo.com/csubmit/index.php
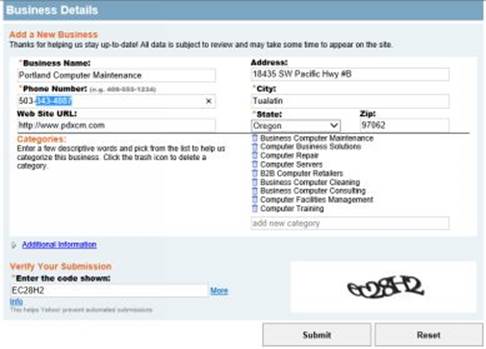
You can also add multiple business types and hit submit to submit your website. There is only one screen to enter information so it is rather simple. When you are done you will see the screen below.
Next Step, Make Sure Your Website Has Good Mechanics
Throughout 2015 Google’s algorithm has really taken a strong look at how well a website is designed and coded. So much so that if your website has a high number of broken links, it is almost impossible to get ranked. There are more deal breakers with Google as well such as are your pages too big over 180Kb? Is your website compatible with all the different web browsers including IE, Firefox, Safari, IPod, IPad, IPhone, and the Android browsers? How do you find out if you have problems?
Every client I take on gets a SEO Audit by an independent authority. AccuQuality.com Reports provide the most comprehensive reports for the money, however a less expensive report can be obtained from SEOAudits.com. I highly recommend that every website have an audit initially after the design is completed and every year at a minimum. Standards change and their reports keep up. Secondly, if changes you make to the website create broken links or links change to outside websites, they can be effecting your search engine rankings and you will never know it!
If you have ever visited a grading website that looks at your websites homepage in 30 seconds and give you a score, this is not what AccuQuality.com Reports are. These sites provide a basic report and score for only your homepage doing only a dozen or so tests to give your website a grade. AccuQuality.com and SEOAudits.com test every page of your website and each of them do over 400 tests per page. Testing everything from broken links, W3C compliance, browser compatibility, search ability, and much more. They both even spell check your entire website and deliver a huge report online.
Not only do they do a complete comprehensive website report on your entire website, but the report also identifies the line in the code on each page with an issue and instructions on how to correct every issue that the report identifies. For every issue the report identifies, if it is not fixed you lose those imaginary ranking points toward getting ranked well.
Every website I have personally tested with AccuQulaity.com has been found to have over 200+ critical errors identified and many would have never ranked well because of the issues the report identified.
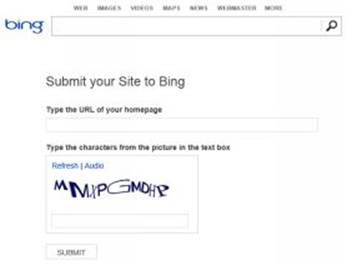
Next, Submit Your Website to Bing
By submitting your website to Bing Business and to the Webmaster Tools you might think...Bing should know I am here right? Well, you want to tell the search engines you are there in hopes they will be quicker to index and rank your website. So don't miss this step because it also tells Yahoo!, MSN, Live, and many other smaller search sites your website exists.
To submit your web site to Bing.com, complete the information at the following link:
http://www.bing.com/docs/submit.aspx
Next Step, Submit Your Website to DMOZ
DMOZ (also known as the Open Directory Project), as shown in Figure below as many search engines increase the ranking of your site if they are listed there and rank well. Follow these rules and instructions for submitting your site there:
1. Go to http://www.dmoz.org
2. First find the category that best fits your web site.
3. Choose “Suggest URL” in the top right corner. If it is not available it means that there are more subcategories and you need to drill down and choose the one that best fits your business.
4. Add the Site URL, title and description as shown below. Then select submit at the bottom of the page.
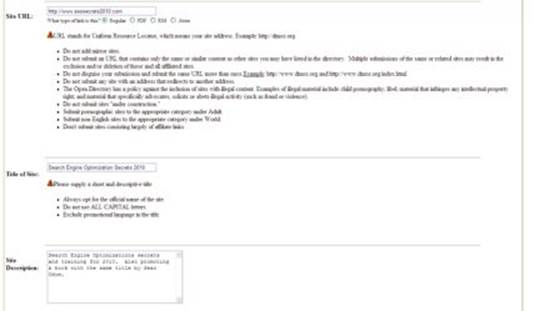
DMOZ has certain rules to follow, as seen on their web site:
· Don’t add mirror sites.
· Don't submit an URL that contains only the same or similar content as other sites you may have listed in the directory. Multiple submissions of the same or related sites may result in the exclusion and/or deletion of those and all affiliated sites.
· Don't disguise your submission and submit the same URL more than once.
Example: http://www.dmoz.org and http://www.dmoz.org/index.html.
· Don't submit any site with an address that redirects to another address.
· Don't submit a site that sells illegal services or products.
· Don't submit sites "under construction."
· Only submit adult or pornographic sites to the appropriate category under Adult.
· You must submit non-English sites to the appropriate category under World.
· Don't submit sites consisting largely of affiliate links.
Violating any of these rules can get your URL removed or not listed at all.
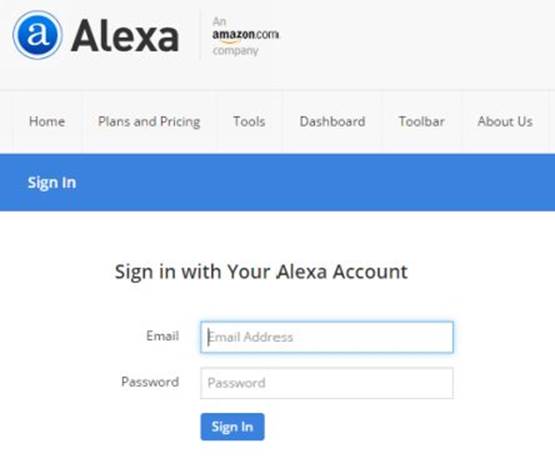
Next Step, Submit Your Website to Alexa
Submitting your web site to Alexa is important as this is another site that helps demonstrate your website’s importance to major search engines. To add your web site complete the questions at:
http://www.alexa.com/edit
Next step? Use A Major Shortcut! Use Submission Complete to Make the Rest of this Job Easy
There are hundreds of other smaller search engines and services and products directories you need to also submit to. There are also major search engines for other countries. You never know when someone is going to use one of these smaller search engine that might benefit your website. The more places your website can be found the more likely the chance a web user will find your website and buy your products or see the message you are trying to deliver. To have Submission Complete, do all the hard work which might take you weeks on your own go to:
http://www.SubmissionComplete.com
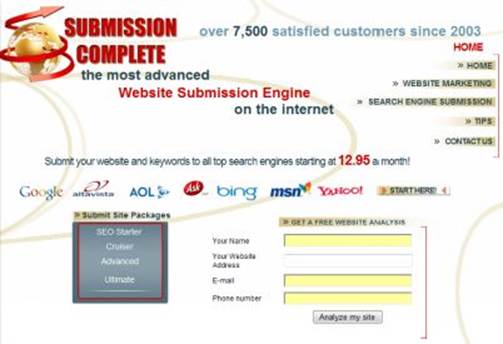
Time is not on your side when you are trying to get a website started or on the right track for SEO. You might have figured out that getting your site included in each search engine and directory is no easy task. There are submission websites which use custom tools that are automated software programs and applications that remember the repetitive information that must be provided in order to get your website listed in hundreds of search engine and directories.
There are also many submission websites that try to scam website owners by promising to submit their site to thousands of search engines and directories for one low fee but just take your money and run. Submission Complete is the only one I use and trust. Every new client I bring on, the first thing I do is use Submission Complete to submit all them all over the web. It would take you months to add your site to every one of these sites on your own. However, for about $19.95 you can have a company that specializes in submitting web sites do it instantly.
All materials on the site are licensed Creative Commons Attribution-Sharealike 3.0 Unported CC BY-SA 3.0 & GNU Free Documentation License (GFDL)
If you are the copyright holder of any material contained on our site and intend to remove it, please contact our site administrator for approval.
© 2016-2026 All site design rights belong to S.Y.A.