iOS Components and Frameworks: Understanding the Advanced Features of the iOS SDK (2014)
Chapter 15. Integrating Twitter and Facebook Using Social Framework
Social Integration
Social networking is here to stay, and users want to be able to access their social media accounts on everything from the newest iOS game to their refrigerators (Samsung Model RF4289HARS). Before iOS 5, adding Twitter and Facebook to an app was a frustrating and challenging endeavor; third-party libraries written by people who didn’t understand the platform were rampant, often not even compiling. Starting with iOS 5, Apple introduced Social Framework, which allowed developers to directly integrate Twitter services into their apps with little effort. With iOS 6, Apple expanded the Social Framework functionality to include Facebook and Sina Weibo (China’s leading social network).
Not only are users craving social integration in just about everything with a screen, but social integration can be highly beneficial to the app developer as well. When a user tweets a high score from your game or shares a Facebook message about an app, it will reach a market that a developer would not be able to penetrate. Not only is the app reaching new customers, but it is getting a personalized endorsement from a potential new customer’s friends. There are few apps that could not benefit from the inclusion of social media and, with iOS 6, it has become easier than ever to add this functionality.
The Sample App
The sample app for this chapter is called SocialNetworking (see Figure 15.1). The app features a single text view with a character-count label and a button to attach an image. There are two buttons on the title bar as well that allow the user to access Twitter and Facebook functionality. The sample app enforces a 140-character count on Facebook posts and Twitter; in reality, Facebook supports much longer text posts.
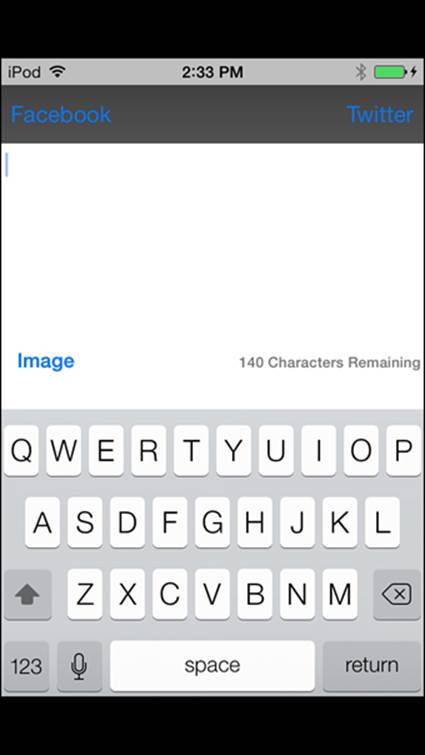
Figure 15.1 A first look at the sample app, SocialNetworking, for this chapter.
Tapping the buttons for each of the services brings up three options: composer, auto-post, and timeline. The composer option will take you to the built-in SLComposeViewController and is the easiest and fastest way to post a message to a social service. The auto-post option will post the text and optional image from the main screen without the user needing to take any additional steps; this step can also be considered programmatic posting. The timeline option will bring up the user’s Twitter timeline or Facebook feed. The sample app does not include functionality for Sina Weibo, although either service can be adapted with relative ease.
Logging In
The Social Framework uses a centralized login system for Facebook and Twitter, which can be found under the Settings.app, as shown in Figure 15.2.
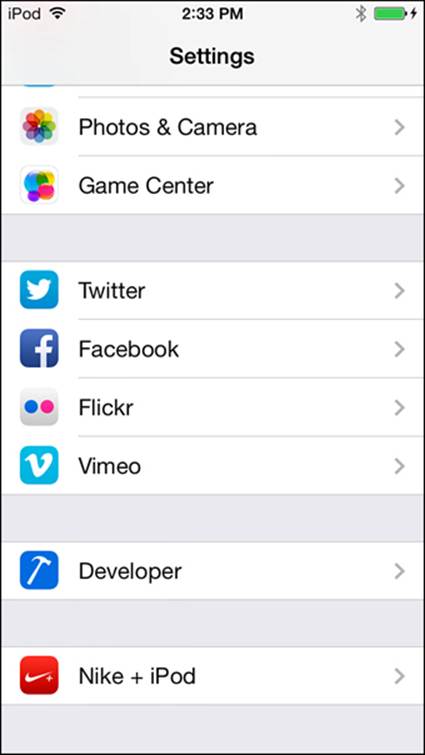
Figure 15.2 Logging in to a social service on iOS requires the user to leave the app and visit the settings app.
In the event that a user is not currently logged in to Twitter or Facebook and attempts to access Twitter and Facebook functionality, he will be prompted to set up a new account, as shown in Figure 15.3. This system works only when the SLComposeViewController is being used; otherwise, a simple access-denied message is presented if no accounts are configured. In addition to the no-accounts message, you might occasionally see an Error 6 returned if the accounts in Settings.app are not properly configured. This is typically caused by an account set with incorrect credentials.
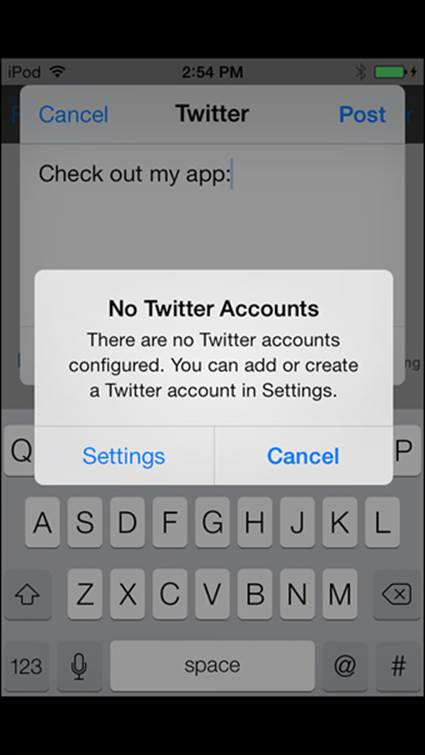
Figure 15.3 The user being prompted to configure a Twitter account for the device.
Note
There is currently no Apple-approved method of loading the user directly into the configure screen for Twitter and Facebook outside of the SLComposeViewController built-in message.
Using SLComposeViewController
The easiest way to post a new message to Twitter or Facebook is to use the SLComposeViewController. It requires no fiddling with permissions and, if the user has not set up an account, it prompts them to configure one. The downside of SLComposeViewController is that there is no way to customize the appearance of the view that the user is presented with, as shown in Figure 15.4.
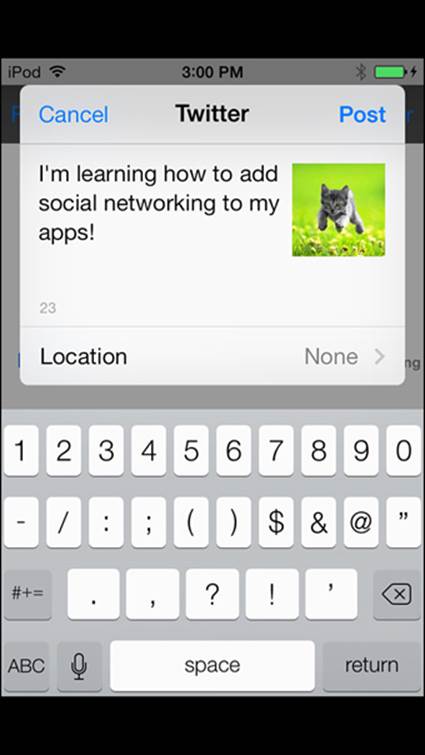
Figure 15.4 Posting a new tweet with an image using the SLComposeViewController.
Before anything can be done with SLComposeViewController, the Social.framework must first be imported into the project. In addition, the header file "Social/Social.h" will need to be imported; note the capitalization of the header files.
The following code is the most effortless method of presenting a SLComposeViewController for Twitter. The first step is a call to isAvailableForServiceType; in the event that the device is not capable of posting to Twitter, it will gracefully exit here. A newSLComposeViewController is created and a new block is made to handle the results of the action. The completion handler for the SLComposeViewController is set to the newly created block and it is presented with presentViewController. These are the bare minimum steps that need to be completed in order to post from an iOS app to Twitter. This option is demonstrated in the sample app as the Composer option under the Twitter menu.
if([SLComposeViewController isAvailableForServiceType:SLServiceTypeTwitter])
{
SLComposeViewController *controller = [SLComposeViewController composeViewControllerForServiceType: SLServiceTypeTwitter];
SLComposeViewControllerCompletionHandler myBlock =
^(SLComposeViewControllerResult result){
if (result == SLComposeViewControllerResultCancelled)
{
NSLog(@"Cancelled");
}
else
{
NSLog(@"Done");
}
[controller dismissViewControllerAnimated:YES completion:nil];
};
controller.completionHandler = myBlock;
[self presentViewController:controller animated:YES completion:nil];
}
else
{
NSLog(@"Twitter Composer is not available.");
}
You can also customize an SLComposeViewController by setting the initial text, images, and URLs.
[controller setInitialText:@"Check out my app:"];
[controller addImage:[UIImage imageNamed:@"Kitten.jpg"]];
[controller addURL:[NSURL URLWithString:@"http://amzn.to/Um85L0"]];
Multiple images and URLs can also be added.
[controller addImage:[UIImage imageNamed:@"Kitten1.jpg"]];
[controller addImage:[UIImage imageNamed:@"Kitten2.jpg"]];
In the event that it is necessary to remove URLs or images from the SLComposeViewController after they have been added, it can be done with a single method call.
[controller removeAllImages];
[controller removeAllURLs];
The approach for SLComposeViewController with Facebook is identical to Twitter with one exception: Both uses of SLServiceTypeTwitter should be replaced with SLServiceTypeFacebook.
Posting with a Custom Interface
It might become necessary to move beyond the capabilities of the SLComposeViewController and implement a ground-up solution. Luckily, Social Framework fully supports this kind of interaction. When SLComposeViewController was used, the differences between posting to Facebook and posting Twitter were minor, but this will no longer be the case when dealing with customized interfaces. Twitter and Facebook support when working at a lower level are almost entirely different. This section is broken into two subsections: one for Twitter and one for Facebook. Twitter support is the simpler of the two, so that is covered first.
Posting to Twitter
In addition to importing the Social.framework and importing the "Social/Social.h" header from the SLComposeViewController, the "Accounts/Accounts.h" header will also need to be imported. To begin working with more direct access to Twitter’s APIs, two new objects first need to be created.
ACAccountStore *account = [[ACAccountStore alloc] init];
ACAccountType *accountType = [account accountTypeWithAccountTypeIdentifier: ACAccountTypeIdentifierTwitter];
The ACAccountStore will allow the code base to access the Twitter account that has been configured in the Settings.app, and the ACAccountType contains the information needed for a particular type of account. The accountType object can be queried to see whether access has already been granted to the user.
if(accountType.accessGranted)
{
NSLog(@"User has already granted access to this service");
}
To prompt the user to grant access to the Twitter account information, a call on the ACAccountStore for requestAccessToAccountsWithType:options:completion: is required. If the account has already been authorized, the completion block will return YES forgranted without prompting the user again.
[account requestAccessToAccountsWithType:accountType options:nil completion:^(BOOL granted, NSError *error)
If the user grants access or if access has already been granted, a list of the user’s Twitter accounts will need to be retrieved. A user can add multiple Twitter accounts to his device and you cannot determine which one he will want to post from. In the event that multiple accounts are found, the user should be prompted to specify which account he would like to use.
if (granted == YES)
{
NSArray *arrayOfAccounts = [account accountsWithAccountType: accountType];
}
In the sample app, after it checks to make sure that there is at least one properly configured account, the last one found in the array is simply selected. In an App Store app it will be important to present the user with an option to select which account she wants to use if more than one is found.
if ([arrayOfAccounts count] > 0)
{
ACAccount *twitterAccount = [arrayOfAccounts lastObject];
}
After a reference to the account is created and stored in an ACAccount, the post data can be configured. Depending on whether the post will include an image or other media, a different post URL is used.
NSURL *requestURL = nil;
if(hasAttachmentedImage)
{
requestURL = [NSURL URLWithString: @"https://upload.twitter.com/1.1/statuses/ update_with_media.json"];
}
else
{
requestURL = [NSURL URLWithString: @"http://api.twitter.com/1.1/statuses/update.json"];
}
Warning
Posting a tweet to the improper URL will result in its failing. You cannot post an image tweet to the update.json endpoint, and you cannot post a non-image tweet to the update_with_media.json endpoint.
After the endpoint URL has been determined, a new SLRequest object is created. The SLRequest is the object that will contain all the information needed to post the full tweet details to Twitter’s API.
SLRequest *postRequest = [SLRequest requestForServiceType:SLServiceTypeTwitter requestMethod:SLRequestMethodPOST URL:requestURL parameters:nil];
After the SLRequest has been created, an account must be defined for it. Using the account that was previously determined, the account property is set.
postRequest.account = twitterAccount;
To add text to this tweet, a call on the postRequest to addMultipartData:withName:type:filename: is used. The text is a simple string with NSUTF8StringEncoding. The name used here correlates to the Twitter API documentation; for text it is status. For type,multipart/form-data is used in accordance with the Twitter API. No filename is required for text.
[postRequest addMultipartData:[socialTextView.text dataUsingEncoding: NSUTF8StringEncoding] withName:@"status" type:@"multipart/form-data"filename:nil];
Note
For more information on Twitter’s API and where these constants are pulled from, visit https://dev.twitter.com/docs.
If the tweet has an image associated with it, add it next. A UIImage first needs to be converted to NSData using UIImageJPEGRepresentation. This example is similar to the preceding text-based example except that a filename is specified.
NSData *imageData = UIImageJPEGRepresentation(self.attachmentImage, 1.0);
[postRequest addMultipartData:imageData withName:@"media"
type:@"image/jpeg" filename:@"Image.jpg"];
Note
Multiple images can be added with repetitive calls to addMultipartData:withName:type:filename:.
After the postRequest has been fully populated with all the information that should appear in the tweet, it is time to post it to Twitter’s servers. This is done with a call to performRequestWithHandler:. A URLResponse code of 200 indicates a success; every other response code indicates a type of failure. A successful post from the sample is shown in Figure 15.5.
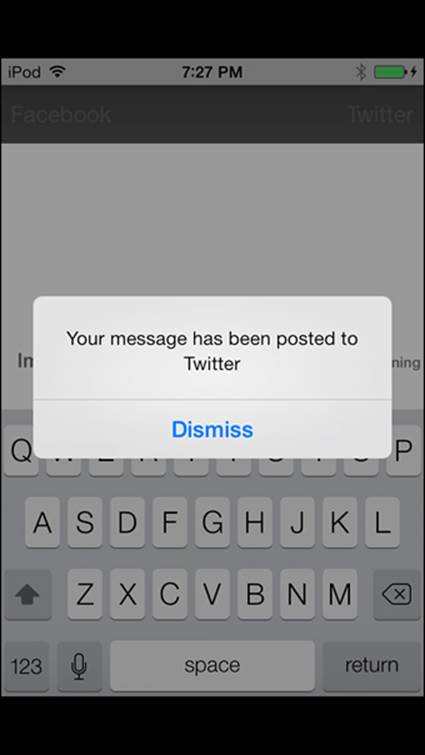
Figure 15.5 A successful tweet to Twitter using a custom interface as shown in the sample app.
Note
It is important to remember that UIAlertViews cannot be shown from within a completion block, since the completion block will not necessarily be executed on the main thread. In the sample app error messages are passed to a main thread method to display alerts.
[postRequest performRequestWithHandler:^(NSData *responseData, NSHTTPURLResponse *urlResponse, NSError *error)
{
if(error != nil)
{
[self performSelectorOnMainThread: @selector(reportSuccessOrError:) withObject:[error localizedDescription] waitUntilDone:NO];
}
if([urlResponse statusCode] == 200)
{
[self performSelectorOnMainThread: @selector(reportSuccessOrError:) withObject:@"Your message has been posted to Twitter" waitUntilDone:NO];
}
}];
This concludes all the required steps to post a string and an image to Twitter using a custom interface. In the following subsection, Facebook posting will be fully explored.
Tip
Inside of the sample app, the process of posting to Twitter is fully laid out in the method twitterPost.
Posting to Facebook
The same basic principles apply when working with a Facebook post as with Twitter. There are, however, multiple additional steps required to deal with a number of authentication and permission requirements. Unlike Twitter, Facebook has various levels of permissions. If a user authorizes an app to access her feed, she might not want the app to be able to publish to her feeds. To make matters more complex, permissions have to be requested in certain orders, and requests for read and write permission cannot be made at the same time.
Creating a Facebook App
To post or interact with Facebook from a mobile app, a Facebook app that corresponds to the mobile app must first be created.
Log in to https://developers.facebook.com/apps using a Facebook account that you want to have ownership of the app.
Select the button + Create New App, as shown in Figure 15.6. Enter values for App Name and App Namespace. Clicking the question mark icon next to any field will provide additional details.
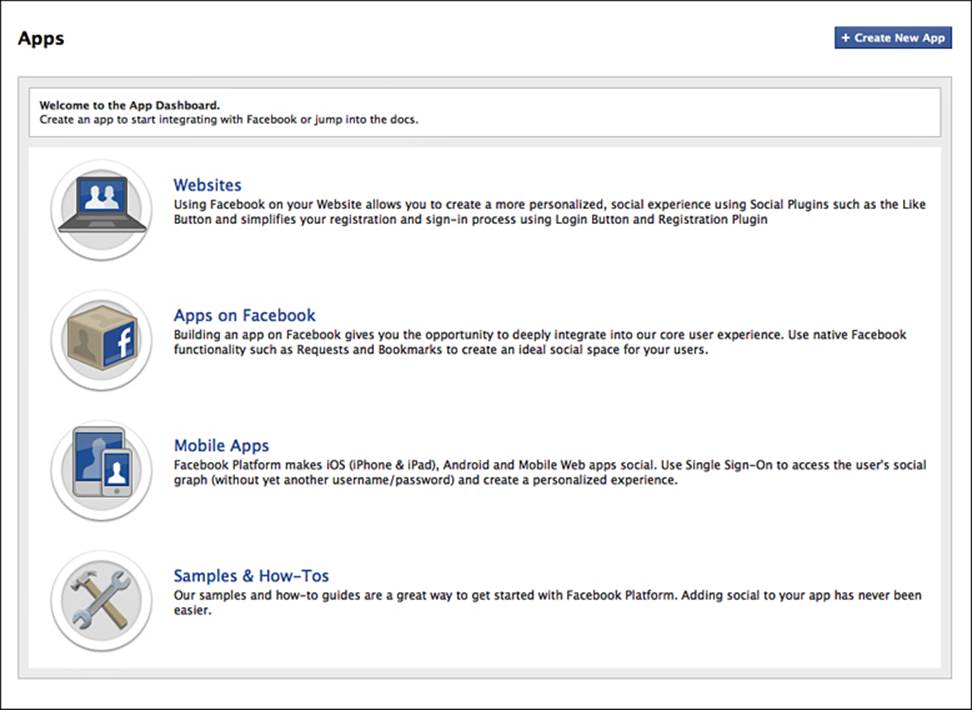
Figure 15.6 Creating a new Facebook App ID from the Developers Portal on Facebook’s website.
After a new Facebook App has been created (see Figure 15.7), copy down the App ID number. Browse through all the pages for the new app and ensure that it is configured to suit the needs of the iOS app. By default, there are no options that need to be changed to continue working through this section.
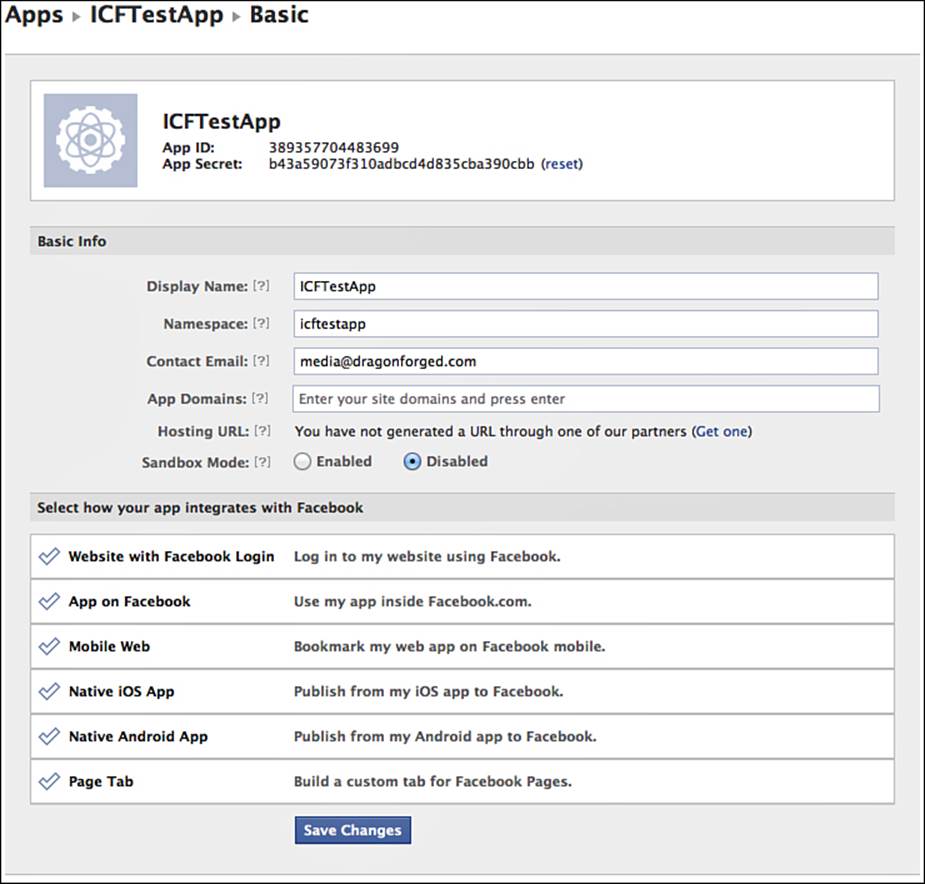
Figure 15.7 A newly created Facebook App. The App ID will be needed to make any Facebook calls from within an iOS app.
Basic Facebook Permissions
The first group of permissions that every Facebook-enabled app needs to request (except if you are using only the SLComposeViewController) is basic profile access. This is done by requesting any of the following attributes: id, name, first_name, last_name, link, username, gender, or locale. Requesting any of these items grants access to all the remaining items.
If the app has not yet been set up according to the instructions from the preceding section for Twitter, the proper headers and frameworks need to be first imported. Basic permission is requested upon app launch or entering into the section of the app that requires Facebook interaction. It is not recommended to access basic permissions after the user has already attempted to make a post; this will create a chain of pop-up alerts that a user will have trouble understanding. The following code is part of the viewDidLoad: method of ICFViewController.m in the sample app:
ACAccountStore *accountStore = [[ACAccountStore alloc] init];
ACAccountType *facebookAccountType = [accountStore accountTypeWithAccountTypeIdentifier: ACAccountTypeIdentifierFacebook];
NSDictionary *options = @{
ACFacebookAudienceKey : ACFacebookAudienceEveryone,
ACFacebookAppIdKey : @"363120920441086",
ACFacebookPermissionsKey : @[@"email"]};
[accountStore requestAccessToAccountsWithType:facebookAccountType options:options completion:^(BOOL granted, NSError *error)
{
if (granted)
{
NSLog(@"Basic access granted");
}
else
{
NSLog(@"Basic access denied");
}
}];
The ACAccountStore and ACAccountType are configured in the same fashion as for Twitter, as described in the preceding section. A new dictionary called options is created; this will be used to supply the API parameters for whatever call is to be made. For basic permissionsACFacebookAudienceEveryone is passed for ACFacebookAudienceKey. The ACFacebookAppIdKey is the App ID that was created in the section “Creating a Facebook App.” Since any of the basic permissions can be used to request access to all basic permissions, the emailattribute is used for the ACFacebookPermissionsKey. A call of requestAccessToAccountWithType:options:completion: is made on the accountStore. The user will be presented with a dialog similar to the one shown in Figure 15.8. The result of the user granting or denying permissions is logged.
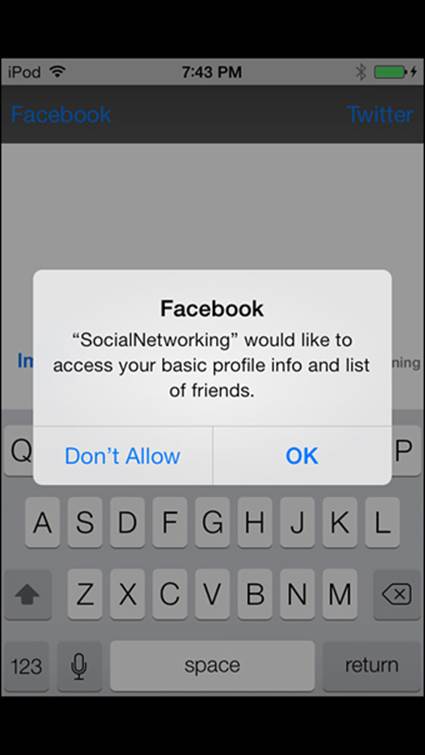
Figure 15.8 A user being prompted to allow the sample app SocialNetworking to access basic profile information.
Publishing to Stream Permissions
Before an app can post to a user’s stream, it first needs to request write permissions. This step must be done after basic permissions have been authorized. Requesting publish permissions is nearly identical to requesting permissions to the basic profile information. Instead of requesting access to email for ACFacebookPermissionsKey, permission is requested for publish_stream. The user will be prompted as shown in Figure 15.9. After a user has granted permission, he will not be prompted again unless he removes the app’s permissions from within Facebook.
ACAccountStore *accountStore = [[ACAccountStore alloc] init];
ACAccountType *facebookAccountType = [accountStore accountTypeWithAccountTypeIdentifier:ACAccountTypeIdentifierFacebook];
NSDictionarvy *options = @{
ACFacebookAudienceKey : ACFacebookAudienceEveryone,
ACFacebookAppIdKey : @"363120920441086",
ACFacebookPermissionsKey : @[@"publish_stream"]};
[accountStore requestAccessToAccountsWithType:facebookAccountType options:options completion:^(BOOL granted, NSError *error)
{
if (granted)
{
NSLog(@"Publish permission granted");
}
else
{
NSLog(@"Publish permission denied");
}
}];
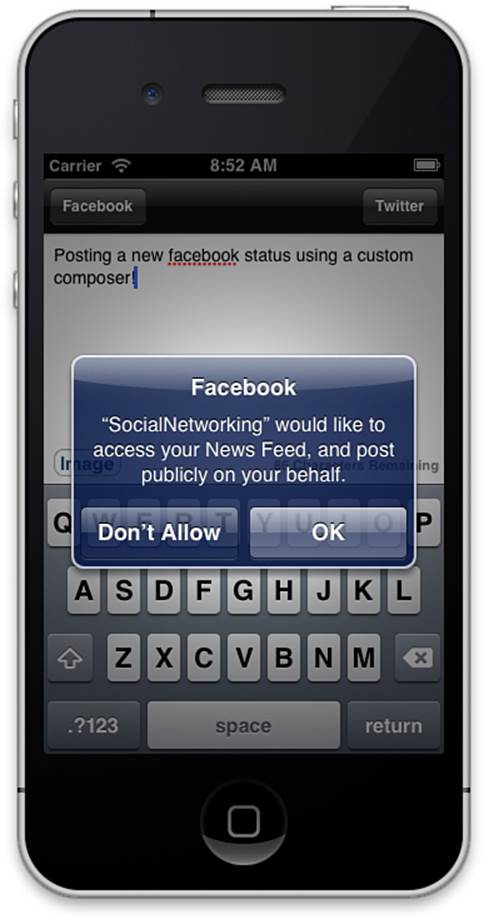
Figure 15.9 A user being prompted to allow the sample app SocialNetworking to access publishing privileges.
Note
Important: Do not forget to change the ACFacebookAppIdKey to match the ID of the Facebook App that you will be publishing under.
Posting to the Facebook Stream
After the user has granted permission to publish to her timeline on her behalf, the app is ready to create a new post. The first step to creating a new Facebook post is to create an NSDictionary that will store a single object under the key @"message". This key/value pair will hold the text that will appear in the post.
NSDictionary *parameters = [NSDictionary dictionaryWithObject:socialTextView.text forKey:@"message"];
If the post does not contain any media such as images, the message is posted to https://graph.facebook.com/me/feed; however, if the new post will contain photos or media, it will need to be posted to https://graph.facebook.com/me/photos. These URLs cannot be mixed; for example, posting a feed item with no image to https://graph.facebook.com/me/photos will result in a failure. The sample app performs a simple check to determine which endpoint to use.
if(self.attachmentImage)
{
feedURL = [NSURL URLWithString: @"https://graph.facebook.com/me/photos"];
}
else
{
feedURL = [NSURL URLWithString: @"https://graph.facebook.com/me/feed"];
}
After the proper URL for posting has been determined, a new SLRequest object is created specifying the URL and the parameters.
SLRequest *feedRequest = [SLRequest
requestForServiceType:SLServiceTypeFacebook
requestMethod:SLRequestMethodPOST
URL:feedURL
parameters:parameters];
In the event that the post contains an image, that data needs to be added to the feedRequest. This is done using the addMultipartData:withName:type:filename: method.
if(self.attachmentImage)
{
NSData *imageData = UIImagePNGRepresentation(self.attachmentImage); [feedRequest addMultipartData:imageData withName:@"source" type:@"multipart/form-data" filename:@"Image"];
}
After the optional image data is added, a performRequestWithHandler: is called in the same fashion as Twitter. Facebook will return a urlResponse code of 200 if the post was successful.
[feedRequest performRequestWithHandler:^(NSData *responseData, NSHTTPURLResponse *urlResponse, NSError *error)
{
NSLog(@"Facebook post statusCode: %u", [urlResponse statusCode]);
if([urlResponse statusCode] == 200)
{
[self performSelectorOnMainThread:@selector (reportSuccessOrError:) withObject:@"Your message has been posted to Facebook" waitUntilDone:NO];
}
else if(error != nil)
{
[self performSelectorOnMainThread: @selector(faceBookError:) withObject:error waitUntilDone:NO];
}
}];
Additional information about formatting posts and embedding media for Facebook can be found through the documentation at http://developers.facebook.com.
Accessing User Timelines
There might be times when posting a status update is not enough to satisfy an app’s social interaction requirements. Accessing a timeline on Twitter or Facebook is complex, and there is an abundance of tricky edge cases and data types to support, from Twitter’s retweets to Facebook embedded data. This section takes a cursory look at accessing the raw data from a timeline and displaying it to a tableview. It has been left simple because the subject of timelines is a rabbit hole that can very well occupy a book in and of itself.
As shown in previous sections, Twitter has been easier to interact with than the more complex Facebook APIs, due mainly to the multiple permission hierarchy implemented with Facebook. Accessing a user’s Twitter timeline begins in the same fashion as posting new a tweet; references toACAccountStore and ACAccountType are created.
ACAccountStore *account = [[ACAccountStore alloc] init];
ACAccountType *accountType = [account accountTypeWithAccountTypeIdentifier: ACAccountTypeIdentifierTwitter];
Continuing in the same fashion as posting a new tweet, a call to requestAccessToAccountWithType: is performed on the account object. Basic error handling is also set up here.
[account requestAccessToAccountsWithType:accountType options:nil completion:^(BOOL granted, NSError *error)
{
if(error != nil)
{
[self
performSelectorOnMainThread:@selector(reportSuccessOrError:) withObject:[error localizedDescription] waitUntilDone:NO];
}
}];
If no errors are returned and access is granted, a copy of the ACAccount object for the user is obtained. The sample app, once again, just uses the last object in the count array; however, it is important to keep in mind that some users might be logged in to several Twitter accounts at once and should be given the option of selecting which account they want to use. The request URL used to retrieve a copy of the users timeline is http://api.twitter.com/1.1/statuses/home_timeline.json. A number of options are also required to be supplied. The first option, count, specifies the number of tweets that will be retrieved per call. The second option is a Boolean value used to specify whether tweet entities should be included. A tweet entity will include additional details such as users mentioned, hashtags, URLs, and media.
After it has been created, the SLRequest is submitted in the same fashion used when posting to a new status update. The performRequestWithHandler success block will contain the responseData that can then be displayed. The following code is part of the twitterTimeline method of ICFViewController.m:
if (granted == YES)
{
NSArray *arrayOfAccounts = [account accountsWithAccountType:accountType];
if ([arrayOfAccounts count] > 0)
{
ACAccount *twitterAccount = [arrayOfAccounts lastObject];
NSURL *requestURL = [NSURL URLWithString:
@"http://api.twitter.com/1.1/statuses/home_timeline.json"];
NSDictionary *options = @{
@"count" : @"20",
@"include_entities" : @"1"};
SLRequest *postRequest = [SLRequest
requestForServiceType:SLServiceTypeTwitter
requestMethod:SLRequestMethodGET
URL:requestURL parameters:options];
postRequest.account = twitterAccount;
[postRequest performRequestWithHandler:^(NSData *responseData, NSHTTPURLResponse *urlResponse, NSError *error)
{
if(error != nil)
{
[self performSelectorOnMainThread:@selector (reportSuccessOrError:) withObject:[error localizedDescription] waitUntilDone:NO];
}
[self performSelectorOnMainThread: @selector(presentTimeline:) withObject: [NSJSONSerialization JSONObjectWithData:responseData options:NSJSONReadingMutableLeaves error:&error] waitUntilDone:NO];
}];
}
}
Provided is a sample of the responseData with tweet entities enabled from a typical Twitter timeline fetch; in addition, a sample of how this tweet shows up on the Twitter website is shown in Figure 15.10. As shown in the following console output, Twitter provides a considerable amount of information to which the developer has access. For more information on working with JSON data, refer to Chapter 7, “Working with and Parsing JSON.”

Figure 15.10 A fully rendered tweet as seen on the Twitter website. The data that makes up this tweet can be seen in the log statements earlier in this section.
2013-02-27 21:50:54.562 SocialNetworking[28672:4207] (
{
contributors = "<null>";
coordinates = "<null>";
"created_at" = "Thu Feb 28 02:50:41 +0000 2013";
entities = {
hashtags = (
{
indices = (
63,
76
);
text = bluesjamtime;
}
);
media = (
{
"display_url" = "pic.twitter.com/CwoYlbWaQJ";
"expanded_url" = "http://twitter.com/neror/status/306959580582248448/photo/1";
id = 306959580586442753;
"id_str" = 306959580586442753;
indices = (
77,
99
);
"media_url" = "http://pbs.twimg.com/media/BEKKHLlCAAEUQ6x.jpg";
"media_url_https" = "https://pbs.twimg.com/media/BEKKHLlCAAEUQ6x.jpg";
sizes = {
large = {
h = 768;
resize = fit;
w = 1024;
};
medium = {
h = 450;
resize = fit;
w = 600;
};
small = {
h = 255;
resize = fit;
w = 340;
};
thumb = {
h = 150;
resize = crop;
w = 150;
};
};
type = photo;
url = "http://t.co/CwoYlbWaQJ";
}
);
urls = (
);
"user_mentions" = (
);
};
favorited = 0;
geo = "<null>";
id = 306959580582248448;
"id_str" = 306959580582248448;
"in_reply_to_screen_name" = "<null>";
"in_reply_to_status_id" = "<null>";
"in_reply_to_status_id_str" = "<null>";
"in_reply_to_user_id" = "<null>";
"in_reply_to_user_id_str" = "<null>";
place = {
attributes = {
};
"bounding_box" = {
coordinates = (
(
(
"-95.90998500000001",
"29.537034"
),
(
"-95.01449599999999",
"29.537034"
),
(
"-95.01449599999999",
"30.110792"
),
(
"-95.90998500000001",
"30.110732"
)
)
);
type = Polygon;
};
country = "United States";
"country_code" = US;
"full_name" = "Houston, TX";
id = 1c69a67ad480e1b1;
name = Houston;
"place_type" = city;
url = "http://api.twitter.com/1/geo/id/1c69a67ad480e1b1.json";
};
"possibly_sensitive" = 0;
"retweet_count" = 0;
retweeted = 0;
source = "<a href=\http://tapbots.com/software/tweetbot/mac\ rel=\"nofollow\">Tweetbot for Mac</a>";
text = "Playing my strat always gets the creative coding juices going. #bluesjamtime http://t.co/CwoYlbWaQJ";
truncated = 0;
user = {
"contributors_enabled" = 0;
"created_at" = "Mon Sep 04 02:05:35 +0000 2006";
"default_profile" = 0;
"default_profile_image" = 0;
description = "Dad, iOS & Mac game and app developer, Founder of Free Time Studios, Texan";
"favourites_count" = 391;
"follow_request_sent" = "<null>";
"followers_count" = 2254;
following = 1;
"friends_count" = 865;
"geo_enabled" = 1;
id = 5250;
"id_str" = 5250;
"is_translator" = 0;
lang = en;
"listed_count" = 182;
location = "Houston, Texas";
name = "Nathan Eror";
notifications = "<null>";
"profile_background_color" = 1A1B1F;
"profile_background_image_url" = "http://a0.twimg.com/images/themes/theme9/bg.gif";
"profile_background_image_url_https" = "https://si0.twimg.com/images/themes/theme9/bg.gif";
"profile_background_tile" = 0;
"profile_image_url" = "http://a0.twimg.com/profile_images/1902659692/36A2FDF8-72F4- 485E-B574-892C1FF16534_normal";
"profile_image_url_https" = "https://si0.twimg.com/profile_images/1902659692/36A2FDF8-72F4- 485E-B574-892C1FF16534_normal";
"profile_link_color" = 2FC2EF;
"profile_sidebar_border_color" = 181A1E;
"profile_sidebar_fill_color" = 252429;
"profile_text_color" = 666666;
"profile_use_background_image" = 1;
protected = 0;
"screen_name" = neror;
"statuses_count" = 5091;
"time_zone" = "Central Time (US & Canada)";
url = "http://www.freetimestudios.com";
"utc_offset" = "-21600";
verified = 0;
};
}
)
Retrieving a Facebook timeline is done through the endpoint https://graph.facebook.com/me/feed. To begin, a new NSURL is created and then used to generate a new SLRequest. The following example assumes that the app has previously authenticated a user for permissions and was granted. See the earlier section on Facebook permissions for more details.
NSURL *feedURL = [NSURL URLWithString: @"https://graph.facebook.com/me/feed"];
SLRequest *feedRequest = [SLRequest
requestForServiceType:SLServiceTypeFacebook
requestMethod:SLRequestMethodGET
URL:feedURL
parameters:nil];
feedRequest.account = self.facebookAccount;
After the SLRequest has been set up, a call to performRequestWithHandler: is invoked on the feedRequest object. In the event of a success, Facebook will return a urlResponse status code of 200; any other status code indicates a failure.
[feedRequest performRequestWithHandler:^(NSData *responseData, NSHTTPURLResponse *urlResponse, NSError *error)
{
NSLog(@"Facebook post statusCode: %u", [urlResponse statusCode]);
if([urlResponse statusCode] == 200)
{
NSLog(@"%@", [[NSJSONSerialization JSONObjectWithData:responseData options:NSJSONReadingMutableLeaves error:&error] objectForKey:@"data"]);
[self performSelectorOnMainThread: @selector(presentTimeline:) withObject: [[NSJSONSerialization JSONObjectWithData:responseData options:NSJSONReadingMutableLeaves error:&error] objectForKey:@"data"] waitUntilDone:NO];
}
else if(error != nil)
{
[self performSelectorOnMainThread: @selector(faceBookError:) withObject:error waitUntilDone:NO];
}
}];
Facebook supports many types of post updates, from likes, comments, and new friends, to wall updates. Many of these dictionaries use different key sets for the information that is typically displayed. The sample app will handle the most common types of Facebook posts. Following are three standard post types with all the accompanying data. The first is a message indicating that a new Facebook friend has been connected. The second item in the array represents a post in which the user likes a link. The final example shows the user adding a comment to a post by another user. It is important to thoroughly test any use of Facebook timeline parsing on a wide selection of Facebook events to ensure proper compatibility. More information on the formatting and behavior of Facebook posts can be found at http://developers.facebook.com. For more information on working with JSON data, refer to Chapter 7.
(
{
actions = (
{
link = "http://www.facebook.com/1674990377/posts/4011976152528";
name = Comment;
},
{
link = "http://www.facebook.com/1674990377/posts/4011976152528";
name = Like;
}
);
comments = {
count = 0;
};
"created_time" = "2013-02-10T18:26:44+0000";
from = {
id = 1674990377;
name = "Kyle Richter";
};
id = "1674990377_4011976152528";
privacy = {
value = "";
};
"status_type" = "approved_friend";
story = "Kyle Richter and Kirby Turner are now friends.";
"story_tags" = {
0 = (
{
id = 1674990377;
length = 12;
name = "Kyle Richter";
offset = 0;
type = user;
}
);
17 = (
{
id = 827919293;
length = 12;
name = "Kirby Turner";
offset = 17;
type = user;
}
);
};
type = status;
"updated_time" = "2013-02-10T18:26:44+0000";
},
{
comments = {
count = 0;
};
"created_time" = "2013-01-03T00:58:41+0000";
from = {
id = 1674990377;
name = "Kyle Richter";
};
id = "1674990377_3785554092118";
privacy = {
value = "";
};
story = "Kyle Richter likes a link.";
"story_tags" = {
0 = (
{
id = 1674990377;
length = 12;
name = "Kyle Richter";
offset = 0;
type = user;
}
);
};
type = status;
"updated_time" = "2013-01-03T00:58:41+0000";
},
{
application = {
id = 6628568379;
name = "Facebook for iPhone";
namespace = fbiphone;
};
comments = {
count = 0;
};
"created_time" = "2013-01-02T19:20:59+0000";
from = {
id = 1674990377;
name = "Kyle Richter";
};
id = "1674990377_3784462784836";
privacy = {
value = "";
};
story = "\"Congrats!\" on Dan Burcaw's link.";
"story_tags" = {
15 = (
{
id = 10220084;
length = 10;
name = "Dan Burcaw";
offset = 15;
type = user;
}
);
};
type = status;
"updated_time" = "2013-01-02T19:20:59+0000";
})
Summary
This chapter covered the basics of integrating both Twitter and Facebook into an iOS app. Topics ranged from working with the built-in composer to writing highly customized posting engines. In addition, readers learned how to pull down the timeline and feed data and display it for consumption.
Social media integration has never been an easy topic, but with the enhancements made to Social Framework as well as Apple’s commitment to bring social intergeneration to more third-party apps, it continues to get easier. The skills required to build a rich social app that includes Twitter and Facebook interaction should now be much clearer.
Exercises
1. Build out the timeline views for both Twitter and Facebook, adding things such as shared images, usernames, dates, and tappable links.
2. Add additional support to Facebook postings such as captions, attached links, location, and tags.
3. Expand the functionality of the sample code by adding support for the user to select which account the user would like to use if they happen to be logged into multiple accounts.
All materials on the site are licensed Creative Commons Attribution-Sharealike 3.0 Unported CC BY-SA 3.0 & GNU Free Documentation License (GFDL)
If you are the copyright holder of any material contained on our site and intend to remove it, please contact our site administrator for approval.
© 2016-2026 All site design rights belong to S.Y.A.