Beginning iPhone Development: Exploring the iOS SDK, Seventh Edition (2014)
Chapter 15. Grand Central Dispatch, Background Processing, and You
If you’ve ever tried your hand at multithreaded programming, in any environment, chances are you’ve come away from the experience with a feeling of dread, terror, or worse. Fortunately, technology marches on, and Apple has come up with a new approach that makes multithreaded programming much easier. This approach is called Grand Central Dispatch, and we’ll get you started using it in this chapter. We’ll also dig into the multitasking capabilities of iOS, showing you how to adjust your applications to play nicely in this new world and work even better than before.
Grand Central Dispatch
One of the biggest challenges developers face today is to write software that can perform complex actions in response to user input while remaining responsive, so that the user isn’t constantly kept waiting while the processor does some behind-the-scenes task. If you think about it, that challenge has been with us all along; and in spite of the advances in computing technology that bring us faster CPUs, the problem persists. If you want evidence, you need look no further than your nearest computer screen. Chances are that the last time you sat down to work at your computer, at some point, your workflow was interrupted by a spinning mouse cursor of some kind or another.
So why does this continue to vex us, given all the advances in system architecture? One part of the problem is the way that software is typically written: as a sequence of events to be performed in order. Such software can scale up as CPU speeds increase, but only to a certain point. As soon as the program gets stuck waiting for an external resource, such as a file or a network connection, the entire sequence of events is effectively paused. All modern operating systems now allow the use of multiple threads of execution within a program, so that even if a single thread is stuck waiting for a specific event, the other threads can keep going. Even so, many developers see multithreaded programming as something of a black art and shy away from it.
Fortunately, Apple has some good news for anyone who wants to break up their code into simultaneous chunks without too much hands-on intimacy with the system’s threading layer. This good news is Grand Central Dispatch (GCD). It provides an entirely new API for splitting up the work your application needs to do into smaller chunks that can be spread across multiple threads and, with the right hardware, multiple CPUs.
Much of this new API is accessed using blocks, another Apple innovation that adds a sort of anonymous in-line function capability to C and Objective-C. Blocks have a lot in common with similar features in languages such as Ruby and Lisp, and they can provide interesting new ways to structure interactions between different objects while keeping related code closer together in your methods.
Introducing SlowWorker
As a platform for demonstrating how GCD works, we’ll create an application called SlowWorker, which consists of a simple interface driven by a single button and a text view. Click the button, and a synchronous task is immediately started, locking up the app for about ten seconds. Once the task completes, some text appears in the text view (see Figure 15-1).
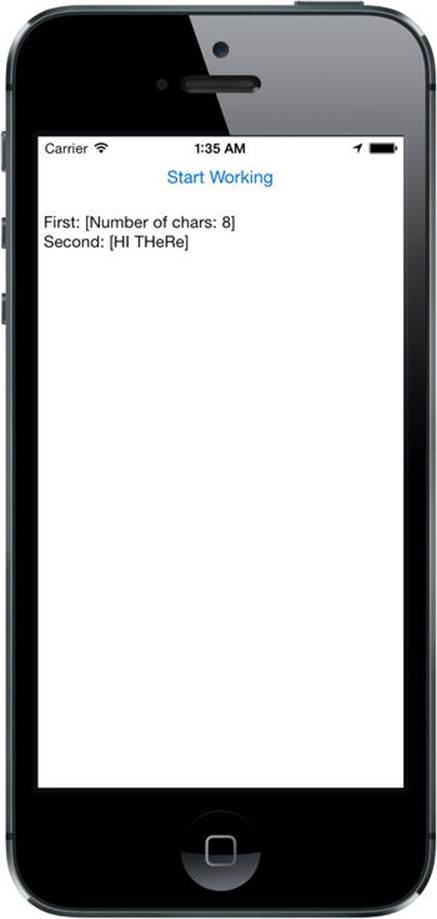
Figure 15-1. The SlowWorker application hides its interface behind a single button. Click the button, and the interface hangs for about ten seconds while the application does its work
Start by using the Single View Application template to make a new application in Xcode, as you’ve done many times before. Name this one SlowWorker, set Devices to Universal, click Next to save your project, and so on. Next, make the following additions to ViewController.m:
#import "ViewController.h"
@interface ViewController ()
@property (weak, nonatomic) IBOutlet UIButton *startButton;
@property (weak, nonatomic) IBOutlet UITextView *resultsTextView;
@end
This simply defines a couple of outlets to the two objects visible in our GUI.
Now continue by adding the following code in bold inside the @implementation section:
@implementation ViewController
- (NSString *)fetchSomethingFromServer
{
[NSThread sleepForTimeInterval:1];
return @"Hi there";
}
- (NSString *)processData:(NSString *)data
{
[NSThread sleepForTimeInterval:2];
return [data uppercaseString];
}
- (NSString *)calculateFirstResult:(NSString *)data
{
[NSThread sleepForTimeInterval:3];
return [NSString stringWithFormat:@"Number of chars: %lu",
(unsigned long)[data length]];
}
- (NSString *)calculateSecondResult:(NSString *)data
{
[NSThread sleepForTimeInterval:4];
return [data stringByReplacingOccurrencesOfString:@"E"
withString:@"e"];
}
- (IBAction)doWork:(id)sender
{
self.resultsTextView.text = @"";
NSDate *startTime = [NSDate date];
NSString *fetchedData = [self fetchSomethingFromServer];
NSString *processedData = [self processData:fetchedData];
NSString *firstResult = [self calculateFirstResult:processedData];
NSString *secondResult = [self calculateSecondResult:processedData];
NSString *resultsSummary = [NSString stringWithFormat:
@"First: [%@]\nSecond: [%@]", firstResult,
secondResult];
self.resultsTextView.text = resultsSummary;
NSDate *endTime = [NSDate date];
NSLog(@"Completed in %f seconds",
[endTime timeIntervalSinceDate:startTime]);
}
.
.
.
As you can see, the work of this class (such as it is) is split up into a number of small chunks. This code is just meant to simulate some slow activities, and none of those methods really do anything time-consuming at all. To make things interesting, each method contains a call to thesleepForTimeInterval: class method in NSThread, which simply makes the program (specifically, the thread from which the method is called) effectively pause and do nothing at all for the given number of seconds. The doWork: method also contains code at the beginning and end to calculate the amount of time it took for all the work to be done.
Now open Main.storyboard and drag a Button and a Text View into the empty View window, laying things out as shown in Figure 15-2. To set the auto layout constraints, start by selecting the Start Working button, then select Editor ![]() Align
Align ![]() Horizontal Center in Container in the menu bar. Next, Control-drag from the button to the top of the View window, release the mouse and select Top Space to Top Layout Guide. To complete the constraints for this button, Control-drag from the button down to the text view, release the mouse, and select Vertical Spacing. To fix the position and size of the text view, Control-drag from it to the View window. Release the mouse and, when the pop-up appears, hold down the Shift key and select Leading Space to Container Margin, Trailing Space to Container Margin, and Bottom Space to Bottom Layout Guide, and then click outside the pop-up to apply the constraints. That completes the auto layout constraints for this application.
Horizontal Center in Container in the menu bar. Next, Control-drag from the button to the top of the View window, release the mouse and select Top Space to Top Layout Guide. To complete the constraints for this button, Control-drag from the button down to the text view, release the mouse, and select Vertical Spacing. To fix the position and size of the text view, Control-drag from it to the View window. Release the mouse and, when the pop-up appears, hold down the Shift key and select Leading Space to Container Margin, Trailing Space to Container Margin, and Bottom Space to Bottom Layout Guide, and then click outside the pop-up to apply the constraints. That completes the auto layout constraints for this application.

Figure 15-2. The SlowWorker interface consists of a button and a text view. Be sure to uncheck the Editable check box for the text view and delete all of its text
Control-drag from File’s Owner to connect the view controller’s two outlets (i.e., the startButton and resultsTextView instance variables) to the button and the text view.
Next, Control-drag from the button to the view controller’s doWork: method so that it’s called when the button is pressed. Finally, select the text view, use the Attributes Inspector to uncheck the Editable check box (it’s in the upper-right corner), and delete the default text from the text view.
Save your work, and then select Run. Your app should start up, and pressing the button will make it work for about ten seconds (the sum of all those sleep amounts) before showing you the results. During your wait, you’ll see that the Start Working button fades visibly, never turning back to its normal color until the “work” is done. Also, until the work is complete, the application’s view is unresponsive. Tapping anywhere on the screen has no effect. In fact, the only way you can interact with your application during this time is by tapping the home button to switch away from it. This is exactly the state of affairs we want to avoid!
In this particular case, the wait is not too bad, since the application appears to be hung for just a few seconds; however, if your app regularly hangs this way for much longer, using it will be a frustrating experience. In the worst of cases, the operating system may actually kill your app if it’s unresponsive for too long. In any case, you’ll end up with some unhappy users—and maybe even some ex-users!
Threading Basics
Before we start implementing solutions, let’s go over some concurrency basics. This is far from a complete description of threading in iOS or threading in general. We just want to explain enough for you to understand what we’re doing in this chapter.
Most modern operating systems (including, of course, iOS) support the notion of threads of execution. Each process can contain multiple threads, which all run concurrently. If there’s just one processor core, the operating system will switch between all executing threads, much like it switches between all executing processes. If more than one core is available, the threads will be distributed among them, just as processes are.
All threads in a process share the same executable program code and the same global data. Each thread can also have some data that is exclusive to the thread. Threads can make use of a special structure called a mutex (short for mutual exclusion) or a lock, which can ensure that a particular chunk of code can’t be run by multiple threads at once. This is useful for ensuring correct outcomes when multiple threads access the same data simultaneously, by locking out other threads when one thread is updating a value (in what’s called a critical section of your code).
A common concern when dealing with threads is the idea of code being thread-safe. Some software libraries are written with thread concurrency in mind and have all their critical sections properly protected with mutexes. Some code libraries aren’t thread-safe.
For example, in Cocoa Touch, the Foundation framework (containing basic classes appropriate for all sorts of Objective-C programming, such as NSString, NSArray, and so on) is generally considered to be thread-safe. However, the UIKit framework (containing the classes specific to building GUI applications, such as UIApplication, UIView and all its subclasses, and so on) is, for the most part, not thread-safe. This means that in a running iOS application, all method calls that deal with any UIKit objects should be executed from within the same thread, which is commonly known as the main thread. If you access UIKit objects from another thread, all bets are off! You are likely to encounter seemingly inexplicable bugs (or, even worse, you won’t experience any problems, but some of your users will be affected by them after you ship your app).
By default, the main thread is where all the action of your iOS app occurs (e.g., dealing with actions triggered by user events). Thus, for simple applications, it’s nothing you need to worry about. Action methods triggered by a user are already running in the main thread. Up to this point in the book, our code has been running exclusively on the main thread, but that’s about to change.
Tip A lot has been written about thread safety, and it’s well worth your time to dig in and try to digest as much of it as you can. One great place to start is Apple’s own documentation. Take a few minutes and read through this page (it will definitely help):http://developer.apple.com/library/ios/documentation/Cocoa/Conceptual/Multithreading/ThreadSafetySummary/ThreadSafetySummary.html
Units of Work
The problem with the threading model described earlier is that, for the average programmer, writing error-free, multithreaded code is nearly impossible. This is not meant as a critique of our industry or of the average programmer’s abilities; it’s simply an observation. The complex interactions you must account for in your code when synchronizing data and actions across multiple threads are really just too much for most people to tackle. Imagine that 5% of all people have the capacity to write software at all. Only a small fraction of those 5% are really up to the task of writing heavy-duty multithreaded applications. Even people who have done it successfully will often advise others to not follow their example!
Fortunately, all hope is not lost. It is possible to implement some concurrency without too much low-level thread-twisting. Just as we have the ability to display data on the screen without directly poking bits into video RAM and to read data from disk without interfacing directly with disk controllers, we can also leverage software abstractions that let us run our code on multiple threads without requiring us to do much directly with the threads.
The solutions that Apple encourages us to use are centered on the ideas of splitting up long-running tasks into units of work and putting those units into queues for execution. The system manages the queues for us, executing units of work on multiple threads. We don’t need to start and manage the background threads directly, and we are freed from much of the bookkeeping that’s usually involved in implementing multithreaded applications; the system takes care of that for us.
GCD: Low-Level Queuing
This idea of putting units of work into queues that can be executed in the background, with the system managing the threads for you, is really powerful and greatly simplifies many development situations where concurrency is needed. GCD made its debut on OS X several years ago, providing the infrastructure to do just that. A couple of years later, this technology came to the iOS platform as well.
GCD puts some great concepts—units of work, painless background processing, and automatic thread management—into a C interface that can be used not only with Objective-C, but also with C , C++, and, of course, Swift. To top things off, Apple has made its implementation of GCD open source, so it can be ported to other Unix-like operating systems, as well.
One of the key concepts of GCD is the queue. The system provides a number of predefined queues, including a queue that’s guaranteed to always do its work on the main thread. It’s perfect for the non-thread-safe UIKit! You can also create your own queues—as many as you like. GCD queues are strictly first-in, first-out (FIFO). Units of work added to a GCD queue will always be started in the order they were placed in the queue. That said, they may not always finish in the same order, since a GCD queue will automatically distribute its work among multiple threads, if possible.
GCD has access to a pool of threads that are reused throughout the lifetime of the application, and it will try to maintain a number of threads that’s appropriate for the machine’s architecture. It will automatically take advantage of a more powerful machine by utilizing more processor cores when it has work to do. Until recently, iOS devices were all single-core, so this wasn’t much of an issue. But now that all iOS devices released in the past few years feature multicore processors, GCD is becoming truly useful.
Becoming a Blockhead
Along with GCD, Apple has added a bit of new syntax to the C language itself (and, by extension, Objective-C and C++) to implement a language feature called blocks (also known as closures or lambdas in some other languages), which are really important for getting the most out of GCD. The idea behind a block is to let a particular chunk of code be treated like any other C-language type. A block can be assigned to a variable, passed as an argument to a function or method, and (unlike most other types) executed. In this way, blocks can be used as an alternative to the delegate pattern in Objective-C or to callback functions in C.
Much like a method or function, a block can take one or more parameters and specify a return value. To declare a block variable, you use the caret (^) symbol along with some additional parenthesized bits to declare parameters and return types. To define the block itself, you do roughly the same, but follow it up with the actual code defining the block wrapped in curly braces:
// Declare a block variable "loggerBlock" with no parameters
// and no return value.
void (^loggerBlock)(void);
// Assign a block to the variable declared above. A block without parameters
// and with no return value, like this one, needs no "decorations" like the use
// of void in the preceding variable declaration.
loggerBlock = ^{ NSLog(@"I'm just glad they didn't call it a lambda"); };
// Execute the block, just like calling a function.
loggerBlock(); // this produces some output in the console
If you’ve done much C programming, you may recognize that this is similar to the concept of a function pointer in C. However, there are a few critical differences. Perhaps the biggest difference—the one that’s the most striking when you first see it—is that blocks can be defined in-line in your code. You can define a block right at the point where it’s going to be passed to another method or function.
Another big difference is that a block can access all variables available in the scope of its creation. By default, the block “captures” any variable you access this way. It duplicates the value into a new variable with the same name, leaving the original intact. Objective-C objects are automatically sent a retain message (and later, when the block is done, a release, effectively giving strong semantics to the variable inside the block) while scalar values such as int and float are simply copied. However, you can make an outside variable “read/write” by prepending the storage qualifier __block before its declaration. Note that there are two underscores before block, not just one. Or, if you want to pass in an object pointer with weak semantics, you can preface it with it with __weak:
// define a variable that can be changed by a block
__block int a = 0;
// define a block that tries to modify a variable in its scope
void (^sillyBlock)(void) = ^{ a = 47; };
// check the value of our variable before calling the block
NSLog(@"a == %d", a); // outputs "a == 0"
// execute the block
sillyBlock();
// check the values of our variable again, after calling the block
NSLog(@"a == %d", a); // outputs "a == 47"
As mentioned previously, blocks really shine when used with GCD, which lets you take a block and add it to a queue in a single step. When you do this with a block that you define immediately at that point, rather than a block stored in a variable, you have the added advantage of being able to see the relevant code directly in the context where it’s being used.
Improving SlowWorker
To see how blocks work, let’s revisit SlowWorker’s doWork: method. It currently looks like this:
- (IBAction)doWork:(id)sender
{
self.resultsTextView.text = @"";
NSDate *startTime = [NSDate date];
NSString *fetchedData = [self fetchSomethingFromServer];
NSString *processedData = [self processData:fetchedData];
NSString *firstResult = [self calculateFirstResult:processedData];
NSString *secondResult = [self calculateSecondResult:processedData];
NSString *resultsSummary = [NSString stringWithFormat:
@"First: [%@]\nSecond: [%@]", firstResult,
secondResult];
self.resultsTextView.text = resultsSummary;
NSDate *endTime = [NSDate date];
NSLog(@"Completed in %f seconds",
[endTime timeIntervalSinceDate:startTime]);
}
We can make this method run entirely in the background by wrapping all the code in a block and passing it to a GCD function called dispatch_async. This function takes two parameters: a GCD queue and a block to assign to the queue. Make these two changes to your copy ofdoWork:. Be sure to add the closing brace and parenthesis at the end of the method:
- (IBAction)doWork:(id)sender
{
NSDate *startTime = [NSDate date];
dispatch_queue_t queue =
dispatch_get_global_queue(DISPATCH_QUEUE_PRIORITY_DEFAULT, 0);
dispatch_async(queue, ^{
NSString *fetchedData = [self fetchSomethingFromServer];
NSString *processedData = [self processData:fetchedData];
NSString *firstResult = [self calculateFirstResult:processedData];
NSString *secondResult = [self calculateSecondResult:processedData];
NSString *resultsSummary = [NSString stringWithFormat:
@"First: [%@]\nSecond: [%@]", firstResult,
secondResult];
self.resultsTextView.text = resultsSummary;
NSDate *endTime = [NSDate date];
NSLog(@"Completed in %f seconds",
[endTime timeIntervalSinceDate:startTime]);
});
}
The first line grabs a preexisting global queue that’s always available, using the dispatch_get_global_queue() function. That function takes two arguments: the first lets you specify a priority, and the second is currently unused and should always be 0. If you specify a different priority in the first argument, such as DISPATCH_QUEUE_PRIORITY_HIGH or DISPATCH_QUEUE_PRIORITY_LOW, you will actually get a different global queue, which the system will prioritize differently. For now, we’ll stick with the default global queue.
The queue is then passed to the dispatch_async() function, along with the block of code that comes after. GCD takes that entire block and puts it on the queue, from where it will be scheduled to run on a background thread and executed one step at a time, just as when it was running in the main thread.
Note that we define a variable called startTime just before the block is created, and then use its value at the end of the block. Intuitively, this doesn’t seem to make sense because, by the time the block is executed, the doWork: method has exited, so the NSDate instance that thestartTime variable is pointing to should already be released! This is a crucial point of block usage: if a block accesses any variables from “the outside” during its execution, then some special setup happens when the block is created, allowing the block access to those variables. The values contained by such variables will either be duplicated (if they are plain C types such as int or float) or retained (if they are pointers to objects) so that the values they contain can be used inside the block. When dispatch_async is called in the second line of doWork:, and the block shown in the code is created, startTime is actually sent a retain message, the return value of which is assigned to what is essentially a new immutable variable with the same name (startTime) inside the block.
The startTime variable needs to be immutable inside the block, so that code inside the block can’t accidentally mess with a variable that’s defined outside the block. If that were allowed all the time, it would just be confusing for everyone. Sometimes, however, you actually do want to let a block write to a value defined on the outside, and that’s where the __block storage qualifier (which we mentioned a couple of pages ago) comes in handy. If __block is used to define a variable, then it is directly available to any and all blocks that are defined within the same scope. An interesting side effect of this is that __block-qualified variables are not duplicated or retained when used inside a block.
Don’t Forget That Main Thread
Getting back to the project at hand, there’s one problem here: UIKit thread-safety. Remember that messaging any GUI object from a background thread, including our resultsTextView, is a no-no. In fact, it you run the example now, you’ll get an exception after about ten seconds, when the block tries to update the text view. Fortunately, GCD provides a way to deal with this, too. Inside the block, we can call another dispatching function, passing work back to the main thread! We do this by once again calling dispatch_async(), this time passing in the queue returned by the dispatch_get_main_queue() function. This always gives us the special queue that lives on the main thread, ready to execute blocks that require the use of the main thread. Make one more change to your version of doWork:
- (IBAction)doWork:(id)sender
{
self.resultsTextView.text = @"";
NSDate *startTime = [NSDate date];
dispatch_queue_t queue =
dispatch_get_global_queue(DISPATCH_QUEUE_PRIORITY_DEFAULT, 0);
dispatch_async(queue, ^{
NSString *fetchedData = [self fetchSomethingFromServer];
NSString *processedData = [self processData:fetchedData];
NSString *firstResult = [self calculateFirstResult:processedData];
NSString *secondResult = [self calculateSecondResult:processedData];
NSString *resultsSummary = [NSString stringWithFormat:
@"First: [%@]\nSecond: [%@]", firstResult,
secondResult];
dispatch_async(dispatch_get_main_queue(), ^{
self.resultsTextView.text = resultsSummary;
});
NSDate *endTime = [NSDate date];
NSLog(@"Completed in %f seconds",
[endTime timeIntervalSinceDate:startTime]);
});
}
Giving Some Feedback
If you build and run your app at this point, you’ll see that it now seems to work a bit more smoothly, at least in some sense. The button no longer gets stuck in a highlighted position after you touch it, which perhaps leads you to tap again, and again, and so on. If you look in Xcode’s console log, you’ll see the result of each of those taps, but only the results of the last tap will be shown in the text view.
What we really want to do is enhance the GUI so that, after the user presses the button, the display is immediately updated in a way that indicates that an action is underway. We also want the button disabled while the work is in progress. We’ll do this by adding aUIActivityIndicatorView to our display. This class provides the sort of spinner seen in many applications and web sites. Start by declaring it in the class extension at the top of ViewController.m:
@interface ViewController ()
@property (weak, nonatomic) IBOutlet UIButton *startButton;
@property (weak, nonatomic) IBOutlet UITextView *resultsTextView;
@property (weak, nonatomic) IBOutlet UIActivityIndicatorView *spinner;
@end
Next, open Main.Storyboard, locate an Activity Indicator View in the library, and drag it into our view, next to the button (see Figure 15-3). You’ll need to add layout constraints to fix the activity indicator’s position relative to the button. One way to do this is to Control-drag from the button to the activity indicator and select Horizontal Spacing from the pop-up menu to fix the horizontal separation between them, then Control-drag again and select Center Y to make sure that their centers remain vertically aligned.
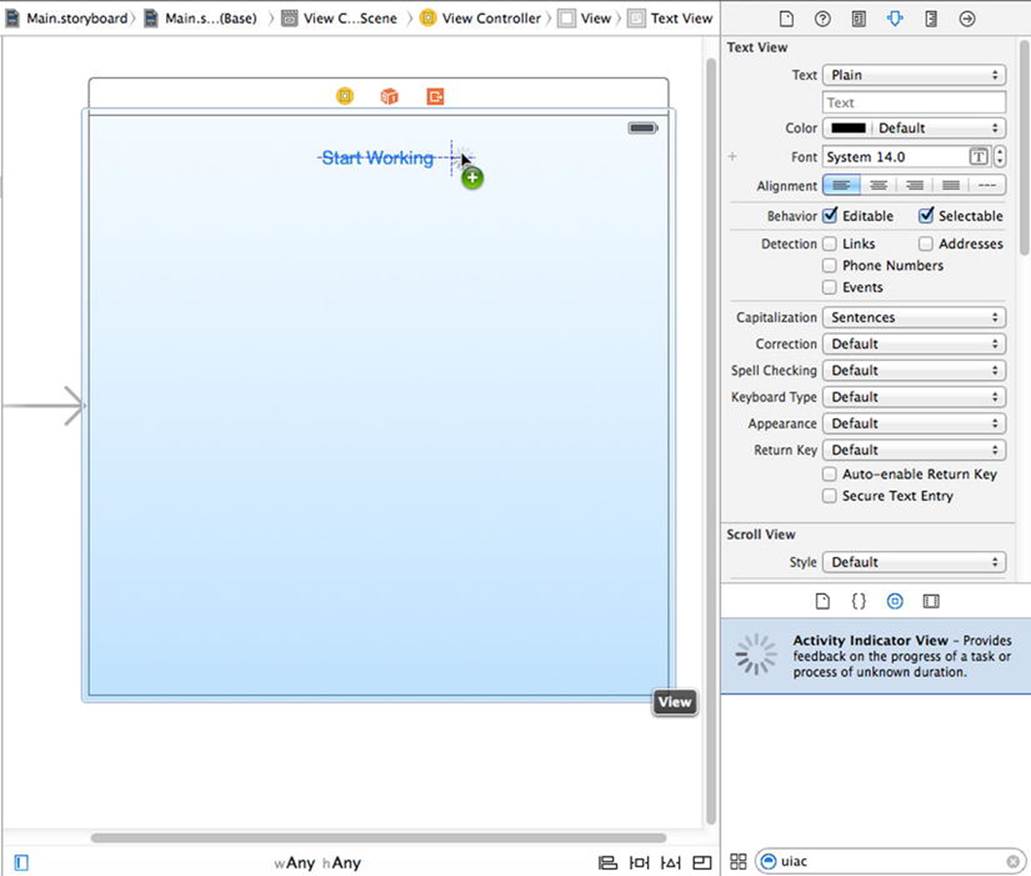
Figure 15-3. Dragging an activity indicator view into our main view in Interface Builder
With the activity indicator spinner selected, use the Attributes Inspector to check the Hides When Stopped check box so that our spinner will appear only when we tell it to start spinning (no one wants an unspinning spinner in their GUI).
Next, Control-drag from the View Controller icon to the spinner and connect the spinner outlet. Save your changes.
Now open ViewController.m. Here, we’ll first work on the doWork: method a bit, adding a few lines to manage the appearance of the button and the spinner when the user taps the button and when the work is done. We’ll first set the button’s enabled property to NO, which prevents it from registering any taps and also shows that the button is disabled by making its text gray and somewhat transparent. Next, we get the spinner moving by calling its setAnimated: method. At the end of the block, we re-enable the button and stop the spinner, which causes it to disappear again:
- (IBAction)doWork:(id)sender
{
self.resultsTextView.text = @"";
NSDate *startTime = [NSDate date];
self.startButton.enabled = NO;
[self.spinner startAnimating];
dispatch_queue_t queue =
dispatch_get_global_queue(DISPATCH_QUEUE_PRIORITY_DEFAULT, 0);
dispatch_async(queue, ^{
NSString *fetchedData = [self fetchSomethingFromServer];
NSString *processedData = [self processData:fetchedData];
NSString *firstResult = [self calculateFirstResult:processedData];
NSString *secondResult = [self calculateSecondResult:processedData];
NSString *resultsSummary = [NSString stringWithFormat:
@"First: [%@]\nSecond: [%@]", firstResult,
secondResult];
dispatch_async(dispatch_get_main_queue(), ^{
self.resultsTextView.text = resultsSummary;
self.startButton.enabled = YES;
[self.spinner stopAnimating];
});
NSDate *endTime = [NSDate date];
NSLog(@"Completed in %f seconds",
[endTime timeIntervalSinceDate:startTime]);
});
}
Build and run the app, and press the button. That’s more like it, eh? Even though the work being done takes a few seconds, the user isn’t just left hanging. The button is disabled and looks the part, as well. Also, the animated spinner lets the user know that the app hasn’t actually hung and can be expected to return to normal at some point.
Concurrent Blocks
So far, so good, but we’re not quite finished yet! The sharp-eyed among you will notice that, after going through these motions, we still haven’t really changed the basic sequential layout of our algorithm (if you can even call this simple list of steps an algorithm). All that we’re doing is moving a chunk of this method to a background thread and then finishing up in the main thread. The Xcode console output proves it: this work takes ten seconds to run, just as it did at the outset. The 900-pound gorilla in the room is that calculateFirstResult: andcalculateSecondResult: don’t need to be performed in sequence, and doing them concurrently could give us a substantial speedup.
Fortunately, GCD has a way to accomplish this by using what’s called a dispatch group. All blocks that are dispatched asynchronously within the context of a group, via the dispatch_group_async() function, are set loose to execute as fast as they can, including being distributed to multiple threads for concurrent execution, if possible. We can also use dispatch_group_notify() to specify an additional block that will be executed when all the blocks in the group have been run to completion.
Make the following changes to your copy of doWork:. Again, make sure you get that trailing bit of curly brace and parenthesis:
- (IBAction)doWork:(id)sender
{
self.resultsTextView.text = @"";
NSDate *startTime = [NSDate date];
self.startButton.enabled = NO;
self.startButton.alpha = 0.5f;
[self.spinner startAnimating];
dispatch_queue_t queue =
dispatch_get_global_queue(DISPATCH_QUEUE_PRIORITY_DEFAULT, 0);
dispatch_async(queue, ^{
NSString *fetchedData = [self fetchSomethingFromServer];
NSString *processedData = [self processData:fetchedData];
NSString *firstResult = [self calculateFirstResult:processedData];
NSString *secondResult = [self calculateSecondResult:processedData];
__block NSString *firstResult;
__block NSString *secondResult;
dispatch_group_t group = dispatch_group_create();
dispatch_group_async(group, queue, ^{
firstResult = [self calculateFirstResult:processedData];
});
dispatch_group_async(group, queue, ^{
secondResult = [self calculateSecondResult:processedData];
});
dispatch_group_notify(group, queue, ^{
NSString *resultsSummary = [NSString stringWithFormat:
@"First: [%@]\nSecond: [%@]",
firstResult,
secondResult];
dispatch_async(dispatch_get_main_queue(), ^{
self.resultsTextView.text = resultsSummary;
self.startButton.enabled = YES;
self.startButton.alpha = 1;
[self.spinner stopAnimating];
});
NSDate *endTime = [NSDate date];
NSLog(@"Completed in %f seconds",
[endTime timeIntervalSinceDate:startTime]);
});
});
}
One complication here is that each of the calculate methods returns a value that we want to grab, so we must first create the variables using the __block storage modifier. This ensures the values set inside the blocks are made available to the code that runs later.
With this in place, build and run the app again. You’ll see that your efforts have paid off. What was once a ten-second operation now takes just seven seconds, thanks to the fact that we’re running both of the calculations simultaneously.
Obviously, our contrived example gets the maximum effect because these two “calculations” don’t actually do anything but cause the thread they’re running on to sleep. In a real application, the speedup would depend on what sort of work is being done and which resources are available. The performance of CPU-intensive calculations is helped by this technique only if multiple CPU cores are available, and it will get better almost for free as more cores are added to future iOS devices. Other uses, such as fetching data from multiple network connections at once, would see a speed increase even with just one CPU.
As you can see, GCD is not a panacea. Using GCD won’t automatically speed up every application. But by carefully applying these techniques at those points in your app where speed is essential, or where you find that your application feels like it’s lagging in its responses to the user, you can easily provide a better user experience, even in situations where you can’t improve the real performance.
Background Processing
Another important technology for handling concurrency is background processing. This allows your apps to run in the background—in some circumstances, even after the user has pressed the home button.
This functionality should not be confused with the true multitasking that modern desktop operating systems now feature, where all the programs you launch remain resident in the system RAM until you explicitly quit them. iOS devices still have too little RAM to be able to pull that off very well. Instead, this background processing is meant to allow applications that require specific kinds of system functionality to continue to run in a constrained manner when they are in the background. For instance, if you have an app that plays an audio stream from an Internet radio station, iOS will let that app continue to run, even if the user switches to another app. Beyond that, it will even provide standard pause and volume controls in the iOS control center (the translucent control panel that appears when you swipe up from the bottom of the screen) while your app is playing audio.
Assume you’re creating an app that does one of the following things: plays audio even when the user is running another app, requests continuous location updates, responds to a special type of push request telling it to load new data from a server, or implements Voice over IP (VoIP) to let users send and receive phone calls on the Internet. In each of these cases, you can declare this situation in your app’s Info.plist file, and the system will treat your app in a special way. This usage, while interesting, is probably not something that most readers of this book will be tackling, so we’re not going to delve into it here.
Besides running apps in the background, iOS also includes the ability to put an app into a suspended state after the user presses the home button. This state of suspended execution is conceptually similar to putting your Mac into sleep mode. The entire working memory of the application is held in RAM; it just isn’t executed while suspended. As a result, switching back to such an application is lightning-fast. This isn’t limited to special applications. In fact, it is the default behavior of any app you build with Xcode (though this can be disabled by another setting in the Info.plistfile). To see this in action, open your device’s Mail application and drill down into a message. Next, press the home button, open the Notes application, and select a note. Now double-tap the home button and switch back to Mail. You’ll see that there’s no perceptible lag; it just slides into place as if it had been running all along.
For most applications, this sort of automatic suspending and resuming is all you’re likely to need. However, in some situations, your app may need to know when it’s about to be suspended and when it has just been awakened. The system provides ways of notifying an app about changes to its execution state via the UIApplication class, which has a number of delegate methods and notifications for just this purpose. We’ll show you how to use them later in this chapter.
When your application is about to be suspended, one thing it can do, regardless of whether it’s one of the special backgroundable application types, is request a bit of additional time to run in the background. The idea is to make sure your app has enough time to close any open files, network resources, and so on. We’ll give you an example of this in a bit.
Application Life Cycle
Before we get into the specifics of how to deal with changes to your app’s execution state, let’s talk a bit about the various states in its life cycle:
· Not Running: This is the state that all apps are in on a freshly rebooted device. An application that has been launched at any point after the device is turned on will return to this state only under specific conditions:
o If its Info.plist includes the UIApplicationExitsOnSuspend key (with its value set to YES)
o If it was previously Suspended and the system needs to clear out some memory
o If it crashes while running
o Active: This is the normal running state of an application when it’s displayed on the screen. It can receive user input and update the display.
o Background: In this state, an app is given some time to execute some code, but it can’t directly access the screen or get any user input. All apps enter this state briefly when the user presses the home button; most of them quickly move on to the Suspended state. Apps that want to do any sort of background processing stay in this state until they’re made Active again.
o Suspended: A Suspended app is frozen. This is what happens to normal apps after their brief stint in the Background state. All the memory the app was using while it was active is held just as it was. If the user brings the app back to the Active state, it will pick up right where it left off. On the other hand, if the system needs more memory for whichever app is currently Active, any Suspended apps may be terminated (and placed back into the Not Running state) and their memory freed for other use.
o Inactive: An app enters the Inactive state only as a temporary rest stop between two other states. The only way an app can stay Inactive for any length of time is if the user is dealing with a system prompt (such as those shown for an incoming call or SMS message) or if the user has locked the screen. This state is basically a sort of limbo.
State-Change Notifications
To manage changes between these states, UIApplication defines a number of methods that its delegate can implement. In addition to the delegate methods, UIApplication also defines a matching set of notification names (see Table 15-1). This allows other objects besides the app delegate to register for notifications when the application’s state changes.
Table 15-1. Delegate Methods for Tracking Your Application’s Execution State and Their Corresponding Notification Names
|
Delegate Method |
Notification Name |
|
application:didFinishLaunchingWithOptions: |
UIApplicationDidFinishLaunchingNotification |
|
applicationWillResignActive: |
UIApplicationWillResignActiveNotification |
|
applicationDidBecomeActive: |
UIApplicationDidBecomeActiveNotification |
|
applicationDidEnterBackground: |
UIApplicationDidEnterBackgroundNotification |
|
applicationWillEnterForeground: |
UIApplicationWillEnterForegroundNotification |
|
applicationWillTerminate: |
UIApplicationWillTerminateNotification |
Note that each of these methods is directly related to one of the running states: Active, Inactive, and Background. Each delegate method is called (and each notification posted) in only one of those states. The most important state transitions are between Active and other states. Some transitions, like from Background to Suspended, occur without any notice whatsoever. Let’s go through these methods and discuss how they’re meant to be used.
The first of these, application:didFinishLaunchingWithOptions:, is one you’ve already seen many times in this book. It’s the primary way of doing application-level coding directly after the app has launched. There is a similar method calledapplication:willFinishLaunchingWithOptions: that’s called first and which is intended for applications that use the view controller-based state saving feature). That method is not listed here because it’s not associated with a state change.
The next two methods, applicationWillResignActive: and applicationDidBecomeActive:, are both used in a number of circumstances. If the user presses the home button, applicationWillResignActive: will be called. If the user later brings the app back to the foreground, applicationDidBecomeActive: will be called. The same sequence of events occurs if the user receives a phone call. To top it all off, applicationDidBecomeActive: is also called when the application launches for the first time! In general, this pair of methods brackets the movement of an application from the Active state to the Inactive state. They are good places to enable and disable any animations, in-app audio, or other items that deal with the app’s presentation to the user. Because of the multiple situations whereapplicationDidBecomeActive: is used, you may want to put some of your app initialization code there instead of in application:didFinishLaunchingWithOptions:. Note that you should not assume in applicationWillResignActive: that the application is about to be sent to the background; it may just be a temporary change that ends up with a move back to the Active state.
After those methods come applicationDidEnterBackground: and applicationWillEnterForeground:, which have a slightly different usage area: dealing with an app that is definitely being sent to the background. applicationDidEnterBackground: is where your app should free all resources that can be re-created later, save all user data, close network connections, and so on. This is also the spot where you can request more time to run in the background if you need to, as we’ll demonstrate shortly. If you spend too much time doing things inapplicationDidEnterBackground:—more than about five seconds—the system will decide that your app is misbehaving and terminate it. You should implement applicationWillEnterForeground: to re-create whatever was torn down inapplicationDidEnterBackground:, such as reloading user data, reestablishing network connections, and so on. Note that when applicationDidEnterBackground: is called, you can safely assume that applicationWillResignActive: has also been recently called. Likewise, when applicationWillEnterForeground: is called, you can assume that applicationDidBecomeActive: will soon be called, as well.
Last in the list is applicationWillTerminate:, which you’ll probably use seldom, if ever. It is called only if your application is already in the background and the system decides to skip suspension for some reason and simply terminate the app.
Now that you have a basic theoretical understanding of the states an application transitions between, let’s put this knowledge to the test with a simple app that does nothing more than write a message to Xcode’s console log each time one of these methods is called. We’ll then manipulate the running app in a variety of ways, just as a user might, and see which transitions occur. To get the most out of this example, you’ll need an iOS device. If you don’t have one, you can use the simulator and skip over the parts that require a device.
Creating State Lab
In Xcode, create a new project based on the Single View Application template and name it State Lab. Initially at least, this app won’t display anything but the default gray screen it’s born with. Later, we’ll make it do something more interesting, but for now, all the output it’s going to generate will end up in the Xcode console instead. The AppDelegate.m file already contains all the methods we’re interested in. We just need to add some logging, as shown in bold. Note that we’ve also removed the comments from these methods, just for the sake of brevity:
#import "AppDelegate.h"
#import "ViewController.h"
@implementation AppDelegate
- (BOOL)application:(UIApplication *)application didFinishLaunchingWithOptions:(NSDictionary *)launchOptions
{
NSLog(@"%@", NSStringFromSelector(_cmd));
return YES;
}
- (void)applicationWillResignActive:(UIApplication *)application
{
NSLog(@"%@", NSStringFromSelector(_cmd));
}
- (void)applicationDidEnterBackground:(UIApplication *)application
{
NSLog(@"%@", NSStringFromSelector(_cmd));
}
- (void)applicationWillEnterForeground:(UIApplication *)application
{
NSLog(@"%@", NSStringFromSelector(_cmd));
}
- (void)applicationDidBecomeActive:(UIApplication *)application
{
NSLog(@"%@", NSStringFromSelector(_cmd));
}
- (void)applicationWillTerminate:(UIApplication *)application
{
NSLog(@"%@", NSStringFromSelector(_cmd));
}
@end
You may be wondering about that NSLog call we’re using in all these methods. Objective-C provides a handy built-in variable called _cmd that always contains the selector of the current method. A selector, in case you need a refresher, is simply Objective-C’s way of referring to a method. The NSStringFromSelector function returns an NSString representation of a given selector. Our usage here simply gives us a shortcut for outputting the current method name without needing to retype it or copy and paste it.
Exploring Execution States
Now build and run the app. The simulator will appear and launch our application. Switch back to Xcode and take a look at the console (View ![]() Debug Area
Debug Area ![]() Activate Console), where you should see something like this:
Activate Console), where you should see something like this:
2014-06-26 19:12:36.953 State Lab[12751:70b] application:didFinishLaunchingWith
Options:
2014-06-26 19:12:36.957 State Lab[12751:70b] applicationDidBecomeActive:
Here, you can see that the application has successfully launched and been moved into the Active state. Now go back to the simulator and press the home button (which you’ll have to do by selecting Hardware ![]() Home from the simulator’s menu or
Home from the simulator’s menu or ![]()
![]() H on the keyboard), and you should see the following in the console:
H on the keyboard), and you should see the following in the console:
2014-06-26 19:13:10.378 State Lab[12751:70b] applicationWillResignActive:
2014-06-26 19:13:10.386 State Lab[12751:70b] applicationDidEnterBackground:
These two lines show the app actually transitioning between two states: it first becomes Inactive, and then goes to Background. What you can’t see here is that the app also switches to a third state: Suspended. Remember that you do not get any notification that this has happened; it’s completely outside your control. Note that the app is still live in some sense, and Xcode is still connected to it, even though it’s not actually getting any CPU time. Verify this by tapping the app’s icon to relaunch it, which should produce this output:
2014-06-26 19:13:55.739 State Lab[12751:70b] applicationWillEnterForeground:
2014-06-26 19:13:55.739 State Lab[12751:70b] applicationDidBecomeActive:
There you are, back in business. The app was previously Suspended, is woken up to Inactive, and then ends up Active again. So, what happens when the app is really terminated? Tap the home button again, and you’ll see this:
2014-06-26 19:14:35.035 State Lab[12751:70b] applicationWillResignActive:
2014-06-26 19:14:35.036 State Lab[12751:70b] applicationDidEnterBackground:
Now double-tap the home button (i.e., press ![]()
![]() HH—you need to press the H key twice). The sideways-scrolling screen of apps should appear. Press and swipe upward on the State Lab screenshot until it flies offscreen, killing the application. What happens? You may be surprised to see that none of our NSLog calls print anything to the console. Instead, the app hangs in main.m on the call to the UIMainApplication function with the error message “Thread 1: signal SIGKILL”. Click the Stop button in the upper-left corner of Xcode, and now State Lab is truly and completely terminated.
HH—you need to press the H key twice). The sideways-scrolling screen of apps should appear. Press and swipe upward on the State Lab screenshot until it flies offscreen, killing the application. What happens? You may be surprised to see that none of our NSLog calls print anything to the console. Instead, the app hangs in main.m on the call to the UIMainApplication function with the error message “Thread 1: signal SIGKILL”. Click the Stop button in the upper-left corner of Xcode, and now State Lab is truly and completely terminated.
As it turns out, the applicationWillTerminate: method isn’t normally called when the system is moving an app from the Suspended to Not Running state. When an app is Suspended, whether the system decides to dump it to reclaim memory or you manually force-quit it, the app simply vanishes and doesn’t get a chance to do anything. The applicationWillTerminate: method is called only if the app being terminated is in the Background state. This can occur, for instance, if your app is actively running in the Background state, using system resources in one of the predefined ways (audio playback, GPS usage, and so on) and is force-quit either by the user or by the system. In the case we just explored with State Lab, the app was in the Suspended state, not Background, and was therefore terminated immediately without any notification.
Tip Do not rely on the applicationWillTerminate: method being called to save the state of your application—do this in applicationDidEnterBackground: instead.
There’s one more interesting interaction to examine here. It’s what happens when the system shows an alert dialog, temporarily taking over the input stream from the app and putting it into an Inactive state. This state can be readily triggered only when running on a real device instead of the simulator, using the built-in Messages app. Messages, like many other apps, can receive messages from the outside and display them in several ways.
To see how these are set up, run the Settings app on your device, choose Notifications from the list, and then select the Messages app from the list of apps. The hot “new” way to show messages, which debuted way back in iOS 5, is called Banners. This works by showing a small banner overlaid at the top of the screen, which doesn’t need to interrupt whatever app is currently running. What we want to show is the bad old Alerts method, which makes a modal panel appear in front of the current app, requiring a user action. Under the heading ALERT STYLE WHEN UNLOCKED, select Alerts, so that the Messages app turns back into the kind of pushy jerk that users of iOS 4 and earlier always had to deal with.
Now back to your computer. In Xcode, use the pop-up at the upper left to switch from the simulator to your device, and then hit the Run button to build and run the app on your device. Now all you need to do is send a message to your device from the outside. If your device is an iPhone, you can send it an SMS message from another phone. If it’s an iPod touch or an iPad, you’re limited to Apple’s own iMessage communication, which works on all iOS devices, as well as OS X in the Messages app. Figure out what works for your setup, and send your device a message via SMS or iMessage. When your device displays the system alert showing the incoming message, this will appear in the Xcode console:
2014-06-26 00:04:28.295 State Lab[16571:60b] applicationWillResignActive:
Note that our app didn’t get sent to the background. It’s in the Inactive state and can still be seen behind the system alert. If this app were a game or had any video, audio, or animations running, this is where we would probably want to pause them.
Press the Close button on the alert, and you’ll get this:
2014-06-26 00:05:23.830 State Lab[16571:60b] applicationDidBecomeActive:
Now let’s see what happens if you decide to reply to the message instead. Send another message to your device, generating this:
2013-11-18 00:05:55.487 State Lab[16571:60b] applicationWillResignActive:
This time, hit Reply, which switches you over to the Messages app, and you should see the following flurry of activity:
2014-06-26 00:06:10.513 State Lab[16571:60b] applicationDidBecomeActive:
2014-06-26 00:06:11.137 State Lab[16571:60b] applicationWillResignActive:
2014-06-26 00:06:11.140 State Lab[16571:60b] applicationDidEnterBackground:
Interesting! Our app quickly becomes Active, becomes Inactive again, and finally goes to Background (and then, silently, Suspended).
Using Execution State Changes
So, what should we make of all this? Based on what we’ve just demonstrated, it seems like there’s a clear strategy to follow when dealing with these state changes.
Active ![]() Inactive
Inactive
Use applicationWillResignActive:/UIApplicationWillResignActiveNotification to “pause” your app’s display. If your app is a game, you probably already have the ability to pause the gameplay in some way. For other kinds of apps, make sure no time-critical demands for user input are in the works because your app won’t be getting any user input for a while.
Inactive ![]() Background
Background
Use applicationDidEnterBackground:/UIApplicationDidEnterBackgroundNotification to release any resources that don’t need to be kept around when the app is backgrounded (such as cached images or other easily reloadable data) or that wouldn’t survive backgrounding anyway (such as active network connections). Getting rid of excess memory usage here will make your app’s eventual Suspended snapshot smaller, thereby decreasing the risk that your app will be purged from RAM entirely. You should also use this opportunity to save any application data that will help your users pick up where they left off the next time your app is relaunched. If your app comes back to the Active state, normally this won’t matter; however, in case it’s purged and must be relaunched, your users will appreciate starting off in the same place.
Background ![]() Inactive
Inactive
Use applicationWillEnterForeground:/UIApplicationWillEnterForeground to undo anything you did when switching from Inactive to Background. For example, here you can reestablish persistent network connections.
Inactive ![]() Active
Active
Use applicationDidBecomeActive:/UIApplicationDidBecomeActive to undo anything you did when switching from Active to Inactive. Note that, if your app is a game, this probably does not mean dropping out of pause straight to the game; you should let your users do that on their own. Also keep in mind that this method and notification are used when an app is freshly launched, so anything you do here must work in that context, as well.
There is one special consideration for the Inactive ![]() Background transition. Not only does it have the longest description in the previous list, but it’s also probably the most code- and time-intensive transition in applications because of the amount of bookkeeping you may want your app to do. When this transition is underway, the system won’t give you the benefit of an unlimited amount of time to save your changes here. It gives you about five seconds. If your app takes longer than that to return from the delegate method (and handle any notifications you’ve registered for), then your app will be summarily purged from memory and pushed into the Not Running state! If this seems unfair, don’t worry because there is a reprieve available. While handling that delegate method or notification, you can ask the system to perform some additional work for you in a background queue, which buys you some extra time. We’ll demonstrate that technique in the next section.
Background transition. Not only does it have the longest description in the previous list, but it’s also probably the most code- and time-intensive transition in applications because of the amount of bookkeeping you may want your app to do. When this transition is underway, the system won’t give you the benefit of an unlimited amount of time to save your changes here. It gives you about five seconds. If your app takes longer than that to return from the delegate method (and handle any notifications you’ve registered for), then your app will be summarily purged from memory and pushed into the Not Running state! If this seems unfair, don’t worry because there is a reprieve available. While handling that delegate method or notification, you can ask the system to perform some additional work for you in a background queue, which buys you some extra time. We’ll demonstrate that technique in the next section.
Handling the Inactive State
The simplest state change your app is likely to encounter is from Active to Inactive, and then back to Active. You may recall that this is what happens if your iPhone receives an SMS message while your app is running and displays it for the user. In this section, we’re going to make State Lab do something visually interesting so that you can see what happens if you ignore that state change. Next, we’ll show you how to fix it.
We’ll also add a UILabel to our display and make it move using Core Animation, which is a really nice way of animating objects in iOS.
Start by adding a UILabel as an instance variable and property in ViewController.m:
#import "ViewController.h"
@interface ViewController ()
@property (strong, nonatomic) UILabel *label;
@end
Now let’s set up the label when the view loads. Add the bold lines shown here to the viewDidLoad method:
- (void)viewDidLoad
{
[super viewDidLoad];
// Do any additional setup after loading the view, typically from a nib.
CGRect bounds = self.view.bounds;
CGRect labelFrame = CGRectMake(bounds.origin.x, CGRectGetMidY(bounds) - 50,
bounds.size.width, 100);
self.label = [[UILabel alloc] initWithFrame:labelFrame];
self.label.font = [UIFont fontWithName:@"Helvetica" size:70];
self.label.text = @"Bazinga!";
self.label.textAlignment = NSTextAlignmentCenter;
self.label.backgroundColor = [UIColor clearColor];
[self.view addSubview:self.label];
}
It’s time to set up some animation. We’ll define two methods: one to rotate the label to an upside-down position and one to rotate it back to normal:
- (void)rotateLabelDown
{
[UIView animateWithDuration:0.5
animations:^{
self.label.transform = CGAffineTransformMakeRotation(M_PI);
}
completion:^(BOOL finished){
[self rotateLabelUp];
}];
}
- (void)rotateLabelUp
{
[UIView animateWithDuration:0.5
animations:^{
self.label.transform = CGAffineTransformMakeRotation(0);
}
completion:^(BOOL finished){
[self rotateLabelDown];
}];
}
This deserves a bit of explanation. UIView defines a class method called animateWithDuration:animations:completion:, which sets up an animation. Any animatable attributes that we set within the animations block don’t have an immediate effect on the receiver. Instead, Core Animation will smoothly transition that attribute from its current value to the new value we specify. This is what’s called an implicit animation, and it is one of the main features of Core Animation. The final completion block lets us specify what will happen after the animation is complete. Note carefully the syntax of this block:
completion:^(BOOL finished){
[self rotateLabelDown];
}];
The code in bold is the signature of the block—it says that the block is called with a single boolean argument and returns nothing. The argument has a value of true if the animation completed normally, false if it was cancelled. In this example, we don’t make any use of this argument.
So, each of these methods sets the label’s transform property to a particular rotation angle, specified in radians, and uses the completion block to call the other method, so the text will continue to animate back and forth forever.
Finally, we need to set up a way to kick-start the animation. For now, we’ll do this by adding this line at the end of viewDidLoad:
[self rotateLabelDown];
Now, build and run the app. You should see the Bazinga! label rotate back and forth (see Figure 15-4).
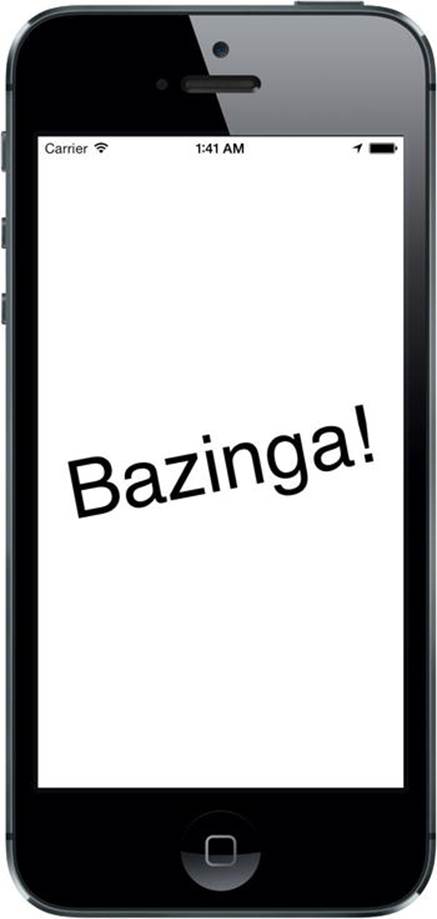
Figure 15-4. The State Lab application doing its label rotating magic
To test the Active ![]() Inactive transition, you really need to once again run this on an actual iPhone and send an SMS message to it from elsewhere. Unfortunately, there’s no way to simulate this behavior in any version of the iOS simulator that Apple has released so far. If you don’t yet have the ability to build and install on a device or don’t have an iPhone, you won’t be able to try this for yourself. In that case, please follow along as best you can!
Inactive transition, you really need to once again run this on an actual iPhone and send an SMS message to it from elsewhere. Unfortunately, there’s no way to simulate this behavior in any version of the iOS simulator that Apple has released so far. If you don’t yet have the ability to build and install on a device or don’t have an iPhone, you won’t be able to try this for yourself. In that case, please follow along as best you can!
Build and run the app on an iPhone, and see that the animation is running along. Now send an SMS message to the device. When the system alert comes up to show the message, you’ll see that the animation keeps on running! That may be slightly comical, but it’s probably irritating for a user. We will use application state transition notifications to stop our animation when this occurs.
Our controller class will need to have some internal state to keep track of whether it should be animating at any given time. For this purpose, let’s add an ivar to ViewController.m. Because this simple BOOL doesn’t need to be accessed by any outside classes, we skip the header and add it to the @implementation section:
@implementation ViewController {
BOOL animate;
}
As you’ve seen, changes in the application state are notified to the application delegate, but since our class isn’t the application delegate, we can’t just implement the delegate methods and expect them to work. Instead, we sign up to receive notifications from the application when its execution state changes. Do this by adding the following code to the end of the viewDidLoad method in ViewController.m:
NSNotificationCenter *center = [NSNotificationCenter defaultCenter];
[center addObserver:self
selector:@selector(applicationWillResignActive)
name:UIApplicationWillResignActiveNotification
object:nil];
[center addObserver:self
selector:@selector(applicationDidBecomeActive)
name:UIApplicationDidBecomeActiveNotification
object:nil];
This sets up these two notifications, so each will call a method in our class at the appropriate time. Define these methods anywhere you like inside the @implementation block:
- (void)applicationWillResignActive
{
NSLog(@"VC: %@", NSStringFromSelector(_cmd));
animate = NO;
}
- (void)applicationDidBecomeActive
{
NSLog(@"VC: %@", NSStringFromSelector(_cmd));
animate = YES;
[self rotateLabelDown];
}
This snippet includes the same method logging as before, just so you can see where the methods occur in the Xcode console. We added the preface "VC: " to distinguish this call from the NSLog() calls in the delegate (VC is for view controller). The first of these methods just turns off theanimate flag. The second turns the flag back on, and then actually starts up the animations again. For that first method to have any effect, we need to add some code to check the animate flag and keep on animating only if it’s enabled:
- (void)rotateLabelUp
{
[UIView animateWithDuration:0.5
animations:^{
self.label.transform = CGAffineTransformMakeRotation(0);
}
completion:^(BOOL finished){
if (animate) {
[self rotateLabelDown];
}
}];
}
We added this to the completion block of rotateLabelUp (and only there) so that our animation will stop only when the text is right-side up.
Finally, since we are now starting the animation when the application becomes active, and this happens right after it is launched, we no longer need the call rotateLabelDown in viewDidLoad, so delete it:
- (void)viewDidLoad {
[self rotateLabelDown];
NSNotificationCenter *center = [NSNotificationCenter defaultCenter];
}
Now build and run the app again, and you should see that it’s animating as before. Once again, send an SMS message to your iPhone. This time, when the system alert appears, you’ll see that the animation in the background stops as soon as the text is right-side up. Tap the Close button, and the animation starts back up.
Now you’ve seen what to do for the simple case of switching from Active to Inactive and back. The bigger task, and perhaps the more important one, is dealing with a switch to the background and then back to foreground.
Handling the Background State
As mentioned earlier, switching to the Background state is pretty important to ensure the best possible user experience. This is the spot where you’ll want to discard any resources that can easily be reacquired (or will be lost anyway when your app goes silent) and save information about your app’s current state, all without occupying the main thread for more than five seconds.
To demonstrate some of these behaviors, we’re going to extend State Lab in a few ways. First, we’re going to add an image to the display so that we can later show you how to get rid of the in-memory image. Then we’re going to show you how to save some information about the app’s state, so we can easily restore it later. Finally, we’ll show you how to make sure these activities aren’t taking up too much main thread time by putting all this work into a background queue.
Removing Resources When Entering the Background
Start by adding smiley.png from the 15 – Image folder in the book’s source archive to your project’s State Lab folder. Be sure to enable the check box that tells Xcode to copy the file to your project directory. Don’t add it to the Images.xcassets asset catalog because that would provide automatic caching, which would interfere with the specific resource management we’re going to implement.
Now let’s add properties for both the image and an image view to ViewController.m:
@interface ViewController ()
@property (strong, nonatomic) UILabel *label;
@property (strong, nonatomic) UIImage *smiley;
@property (strong, nonatomic) UIImageView *smileyView;
@end
Next, set up the image view and put it on the screen by modifying the viewDidLoad method, as shown here:
- (void)viewDidLoad
{
[super viewDidLoad];
// Do any additional setup after loading the view, typically from a nib.
CGRect bounds = self.view.bounds;
CGRect labelFrame = CGRectMake(bounds.origin.x, CGRectGetMidY(bounds) - 50,
bounds.size.width, 100);
self.label = [[UILabel alloc] initWithFrame:labelFrame];
self.label.font = [UIFont fontWithName:@"Helvetica" size:70];
self.label.text = @"Bazinga!";
self.label.textAlignment = NSTextAlignmentCenter;
self.label.backgroundColor = [UIColor clearColor];
// smiley.png is 84 x 84
CGRect smileyFrame = CGRectMake(CGRectGetMidX(bounds) - 42,
CGRectGetMidY(bounds)/2 - 42,
84, 84);
self.smileyView = [[UIImageView alloc] initWithFrame:smileyFrame];
self.smileyView.contentMode = UIViewContentModeCenter;
NSString *smileyPath = [[NSBundle mainBundle] pathForResource:@"smiley"
ofType:@"png"];
self.smiley = [UIImage imageWithContentsOfFile:smileyPath];
self.smileyView.image = self.smiley;
[self.view addSubview:self.smileyView];
[self.view addSubview:self.label];
NSNotificationCenter *center = [NSNotificationCenter defaultCenter];
[center addObserver:self
selector:@selector(applicationWillResignActive)
name:UIApplicationWillResignActiveNotification
object:nil];
[center addObserver:self
selector:@selector(applicationDidBecomeActive)
name:UIApplicationDidBecomeActiveNotification
object:nil];
}
Build and run the app, and you’ll see the incredibly happy-looking smiley face toward the top of your screen (see Figure 15-5).
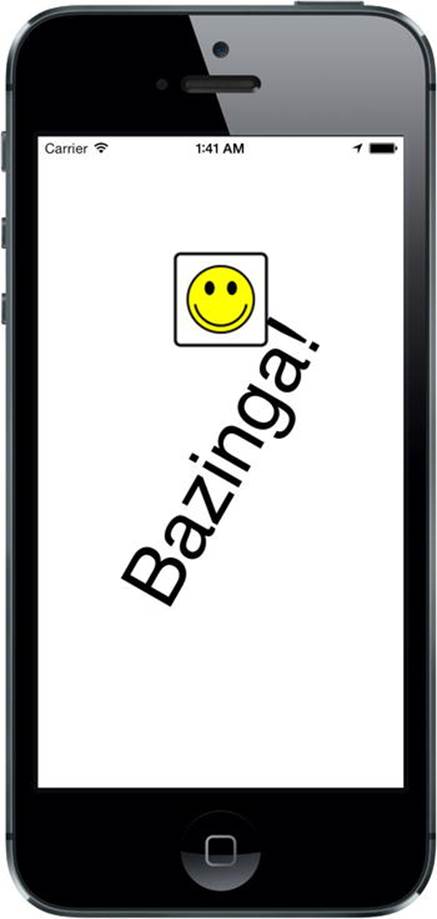
Figure 15-5. The State Lab application doing its label-rotating magic with the addition of a smiley icon
Next, press the home button to switch your app to the background, and then tap its icon to launch it again. You’ll see that when the app resumes, the label starts rotating again, as expected. All seems well, but in fact, we’re not yet optimizing system resources as well as we could.
Remember that the fewer resources we use while our app is Suspended, the lower the risk that iOS will terminate our app entirely. By clearing any easily re-created resources from memory when we can, we increase the chance that our app will stick around and therefore relaunch super-quickly.
Let’s see what we can do about that smiley face. We would really like to free up that image when going to the Background state and re-create it when coming back from the Background state. To do that, we’ll need to add two more notification registrations inside viewDidLoad:
[center addObserver:self
selector:@selector(applicationDidEnterBackground)
name:UIApplicationDidEnterBackgroundNotification
object:nil];
[center addObserver:self
selector:@selector(applicationWillEnterForeground)
name:UIApplicationWillEnterForegroundNotification
object:nil];
And we want to implement the two new methods:
- (void)applicationDidEnterBackground
{
NSLog(@"VC: %@", NSStringFromSelector(_cmd));
self.smiley = nil;
self.smileyView.image = nil;
}
- (void)applicationWillEnterForeground
{
NSLog(@"VC: %@", NSStringFromSelector(_cmd));
NSString *smileyPath = [[NSBundle mainBundle] pathForResource:@"smiley"
ofType:@"png"];
self.smiley = [UIImage imageWithContentsOfFile:smileyPath];
self.smileyView.image = self.smiley;
}
Build and run the app, and repeat the same steps of backgrounding your app and switching back to it. You should see that, from the user’s standpoint, the behavior appears to be about the same. If you want to verify for yourself that this is really happening, comment out the contents of theapplicationWillEnterForeground method, and then build and run the app again. You’ll see that the image really does disappear.
Saving State When Entering the Background
Now that you’ve seen an example of how to free up some resources when entering the Background state, it’s time to think about saving state. Remember that the idea is to save information relevant to what the user is doing, so that if your application is later dumped from memory, users can still pick up right where they left off the next time they return.
The kind of state we’re talking about here is really application-specific, not view-specific. Do not confuse this with saving and restoring the locations of views or which screen of your application the user was looking at when it was last active—for that, iOS provides the state saving and restoration mechanism, which you can read about in the iOS App Programming Guide on Apple’s web site (https://developer.apple.com/library/ios/documentation/iphone/conceptual/iphoneosprogrammingguide/StatePreservation/StatePreservation.html). Here, we’re thinking about things like user preferences in applications for which you do not want to implement a separate settings bundle. Using the same NSUserDefaults API that we introduced you to in Chapter 12, you can quickly and easily save preferences from within the application and read them back later. Of course, if your application is not visually complex or you don’t want to use the state saving and restoration mechanism, you can save information that will allow you to restore its visual state in the user preferences, too.
The State Lab example is too simple to have real user preferences, so let’s take a shortcut and add some application-specific state to its one and only view controller. Add a property called index in ViewController.m, along with a segmented control:
#import "ViewController.h"
@interface ViewController ()
@property (strong, nonatomic) UILabel *label;
@property (strong, nonatomic) UIImage *smiley;
@property (strong, nonatomic) UIImageView *smileyView;
@property (assign, nonatomic) NSInteger index;
@property (strong, nonatomic) UISegmentedControl *segmentedControl;
@end
We’re going to allow the user to set the value of this property using a segmented control and we’re going to save it in the user defaults. We’re then going to terminate and relaunch the application, to demonstrate that we can recover the value of the property.
Next, move to the middle of the viewDidLoad method, where you’ll create the segmented control, and add it to the view:
.
.
.
self.smileyView.image = self.smiley;
self.segmentedControl = [[UISegmentedControl alloc] initWithItems:
[NSArray arrayWithObjects: @"One", @"Two", @"Three", @"Four", nil]] ;
self.segmentedControl.frame = CGRectMake(bounds.origin.x + 20,
50, bounds.size.width - 40, 30);
[self.segmentedControl addTarget:self action:@selector(selectionChanged:) forControlEvents:UIControlEventValueChanged];
[self.view addSubview:self.segmentedControl];
[self.view addSubview:self.smileyView];
[self.view addSubview:self.label];
.
We also used the addTarget:action:forControlEvents: method to connect the segmented control to the selectionChanged: method, which we need to have called when the selected segment changes. Add the implementation of this method anywhere in the body of theViewController.m file:
- (void)selectionChanged:(UISegmentedControl *)sender {
self.index = sender.selectedSegmentIndex;
}
Now whenever the user changes the selected segment, the value of the index property will be updated.
Build and run the app. You should see the segmented control and be able to click its segments to select them one at a time. As you do so, the value of the index property will change, although you can’t actually see this happening. Background your app again by clicking the home button, bring up the taskbar (by double-clicking the home button) and kill your app, and then relaunch it. When the application restarts, the index property will have a value of zero again and there will be no selected segment. That’s what we need to fix next.
Saving the value of the index property is simple enough; we just need one line of code to the end of the applicationDidEnterBackground method in ViewController.m:
- (void)applicationDidEnterBackground
{
NSLog(@"VC: %@", NSStringFromSelector(_cmd));
self.smiley = nil;
self.smileyView.image = nil;
[[NSUserDefaults standardUserDefaults] setInteger:self.index forKey:@"index"];
}
But where should we restore the property value and use it to configure the segmented control? The inverse of this method, applicationWillEnterForeground, isn’t what we want. When that method is called, the app has already been running, and the setting is still intact. Instead, we need to access this when things are being set up after a new launch, which brings us back to the viewDidLoad method. Add the bold lines shown here to that method:
.
[self.view addSubview:self.label];
self.index = [[NSUserDefaults standardUserDefaults] integerForKey:@"index"];
self.segmentedControl.selectedSegmentIndex = self.index;
.
When the application is being launched for the first time, there will not be a value saved in the user defaults. In this case, the integerForKey: method returns the value zero, which happens to be the correct initial value for the index property. If you wanted to use a different initial value, you could do so by registering it as the default value for the index key, as described in “Registering Default Values” in Chapter 12.
Now build and run the app. You’ll notice a difference immediately—the first segment in the segmented control is preselected, because its selected segment index was set in the viewDidLoad method. Now touch a segment, and then do the full background-kill-restart dance. There it is—the index value has been restored and, as a result, the correct segment in the segmented control is now selected!
Obviously, what we’ve shown here is pretty minimal, but the concept can be extended to all kinds of application states. It’s up to you to decide how far you want to take it in order to maintain the illusion for the users that your app was always there, just waiting for them to come back!
Requesting More Backgrounding Time
Earlier, we mentioned the possibility of your app being dumped from memory if moving to the Background state takes too much time. For example, your app may be in the middle of doing a file transfer that it would really be a shame not to finish; however, trying to hijack theapplicationDidEnterBackground method to make it complete the work there, before the application is really backgrounded, isn’t really an option. Instead, you should use applicationDidEnterBackground as a platform for telling the system that you have some extra work you would like to do, and then start up a block to actually do it. Assuming that the system has enough available RAM to keep your app in memory while the user does something else, the system will oblige you and keep your app running for a while.
We’ll demonstrate this, not with an actual file transfer, but with a simple sleep call. Once again, we’ll be using our new acquaintances GCD and blocks to make the contents of our applicationDidEnterBackground method run in a separate queue.
In ViewController.m, modify the applicationDidEnterBackground method as follows:
- (void)applicationDidEnterBackground
{
NSLog(@"VC: %@", NSStringFromSelector(_cmd));
self.smiley = nil;
self.smileyView.image = nil;
[[NSUserDefaults standardUserDefaults] setInteger:self.index forKey:@"index"];
UIApplication *app = [UIApplication sharedApplication];
__block UIBackgroundTaskIdentifier taskId = [app beginBackgroundTaskWithExpirationHandler:^{
NSLog(@"Background task ran out of time and was terminated.");
[app endBackgroundTask:taskId];
}];
if (taskId == UIBackgroundTaskInvalid) {
NSLog(@"Failed to start background task!");
return;
}
dispatch_async(dispatch_get_global_queue(DISPATCH_QUEUE_PRIORITY_DEFAULT, 0),
^{
NSLog(@"Starting background task with %f seconds remaining",
app.backgroundTimeRemaining);
self.smiley = nil;
self.smileyView.image = nil;
// simulate a lengthy (25 seconds) procedure
[NSThread sleepForTimeInterval:25];
NSLog(@"Finishing background task with %f seconds remaining",
app.backgroundTimeRemaining);
[app endBackgroundTask:taskId];
});
}
Let’s look through this code piece by piece. First, we grab the shared UIApplication instance, since we’ll be using it several times in this method. And then comes this:
UIBackgroundTaskIdentifier taskId
= [app beginBackgroundTaskWithExpirationHandler:^{
NSLog(@"Background task ran out of time and was terminated.");
[app endBackgroundTask:taskId];
}];
With the call to beginBackgroundTaskWithExpirationHandler:, we’re basically telling the system that we need more time to accomplish something, and we promise to let it know when we’re finished. The block we give as a parameter may be called if the system decides that we’ve been going way too long anyway and decides to stop our background task. The call to beginBackgroundTaskWithExpirationHandler: returns an identifier that we save in the local variable taskId for later use. This variable has the __block qualifier so that its current value can be read from both of the blocks that are created in this code. Without this qualifier, the value of the variable would be captured by the expiration handler (the first code block) when that block is created. This is at the point that thebeginBackgroundTaskWithExpirationHandler: method is called, which is before its return value has been assigned to taskId! That would mean that if the expiration handler were ever invoked, it would pass an undefined value to the endBackgroundTask: method.
Note that the block we gave ended with a call to endBackgroundTask:, passing along taskId. That tells the system that we’re finished with the work for which we previously requested extra time. It’s important to balance each call tobeginBackgroundTaskWithExpirationHandler: with a matching call to endBackgroundTask: so that the system knows when we’ve completed the work.
Note Depending on your computing background, the use of the word task here may evoke associations with what we usually call a process, consisting of a running program that may contain multiple threads, and so on. In this case, try to put that out of your mind. The use of task in this context really just means “something that needs to get done.” Any task you create here is running within your still-executing app.
Next, we do this:
if (taskId == UIBackgroundTaskInvalid) {
NSLog(@"Failed to start background task!");
return;
}
If our earlier call to beginBackgroundTaskWithExpirationHandler: returned the special value UIBackgroundTaskInvalid, which means the system is refusing to grant us any additional time. In that case, you could try to do the quickest part of whatever needs doing anyway and hope that it completes quickly enough that your app won’t be terminated before it’s finished. This was more likely to be an issue when running on older devices, such as the iPhone 3G, that didn’t support multitasking. In this example, however, we’re just letting it slide.
Next comes the interesting part where the work itself is actually done:
dispatch_async(dispatch_get_global_queue(DISPATCH_QUEUE_PRIORITY_DEFAULT, 0),
^{
NSLog(@"Starting background task with %f seconds remaining",
app.backgroundTimeRemaining);
self.smiley = nil;
self.smileyView.image = nil;
// simulate a lengthy (25 seconds) procedure
[NSThread sleepForTimeInterval:25];
NSLog(@"Finishing background task with %f seconds remaining",
app.backgroundTimeRemaining);
[app endBackgroundTask:taskId];
});
All this does is take the same work our method was doing in the first place and place it in a background queue. Notice, though, that the code that uses NSUserDefaults to save state has not been moved into the block. That’s because it’s important to save that state whether or not iOS grants the application additional time to run when it moves into the background. At the end of the block, we call endBackgroundTask: to let the system know that we’re finished.
With that in place, build and run the app, and then background your app by pressing the home button. Watch the Xcode console, as well as the status bar at the bottom of the Xcode window. You’ll see that this time, your app stays running (you don’t get the “Debugging terminated” message in the status bar), and after 25 seconds, you will see the final log in your output. A complete run of the app up to this point should give you console output along these lines:
2014-06-27 01:30:08.194 State Lab[12158:70b] application:didFinishLaunchingWith
Options:
2014-06-27 01:30:08.209 State Lab[12158:70b] applicationDidBecomeActive:
2014-06-27 01:30:08.210 State Lab[12158:70b] VC: applicationDidBecomeActive
2014-06-27 01:30:17.010 State Lab[12158:70b] applicationWillResignActive:
2014-06-27 01:30:17.011 State Lab[12158:70b] VC: applicationWillResignActive
2014-06-27 01:30:17.018 State Lab[12158:70b] applicationDidEnterBackground:
2014-06-27 01:30:17.019 State Lab[12158:70b] VC: applicationDidEnterBackground
2014-06-27 01:30:17.021 State Lab[12158:3a03] Starting background task with
179.988868 seconds remaining
2014-06-27 01:30:42.027 State Lab[12158:3a03] Finishing background task with
154.986797 seconds remaining
As you can see, the system is much more generous with time when doing things in the background than it is in the main thread of your app. Following this procedure can really help you out if you have any ongoing tasks to deal with.
Note that we used only a single background task identifier; but in practice, you use as many as you need. For example, if you have multiple network transfers happening at Background time and you need to complete them, you can create a background task for each and allow them to continue running in a background queue. So, you can easily allow multiple operations to run in parallel during the available time. Also consider that the task identifier for each background task is a normal C-language value (not an object). Apart from being stored in a local __block variable, it can also be stored as an instance variable if that better suits your class design.
Grand Central Dispatch, Over and Out
This has been a pretty heavy chapter, with a lot of new concepts thrown your way. Not only have you learned about a complete new feature set that Apple added to the C language, but you’ve also discovered a new conceptual paradigm for dealing with concurrency without worrying about threads. We also demonstrated some techniques for making sure your apps play nicely in the multitasking world of iOS. Now that we’ve gotten some of this heavy stuff out of the way, let’s move on to the next chapter, which focuses on drawing. Pencils out, let’s draw!