C# Database Basics (2012)
Chapter 1. First Steps: Form with a Datagrid
It’s time to dive into C#. Whether you’re moving from Visual Basic or Microsoft Access, getting started means moving through a number of things that look familiar but work just a little differently.
Installing Software
If you haven’t done it already, you can go to the Microsoft website and download the Express version of Visual Studio 2010 for C#. The site is presently at http://www.microsoft.com/visualstudio/en-us. At the bottom of the page, you can go to Express Product Downloads, or you can download the 90-day trial of the full version. Links change all the time, so if it isn’t there when you look, a simple search from a search engine will direct you to where you can download it. Once you have it installed and opened it, you will see a screen similar to the one shown in Figure 1-1.
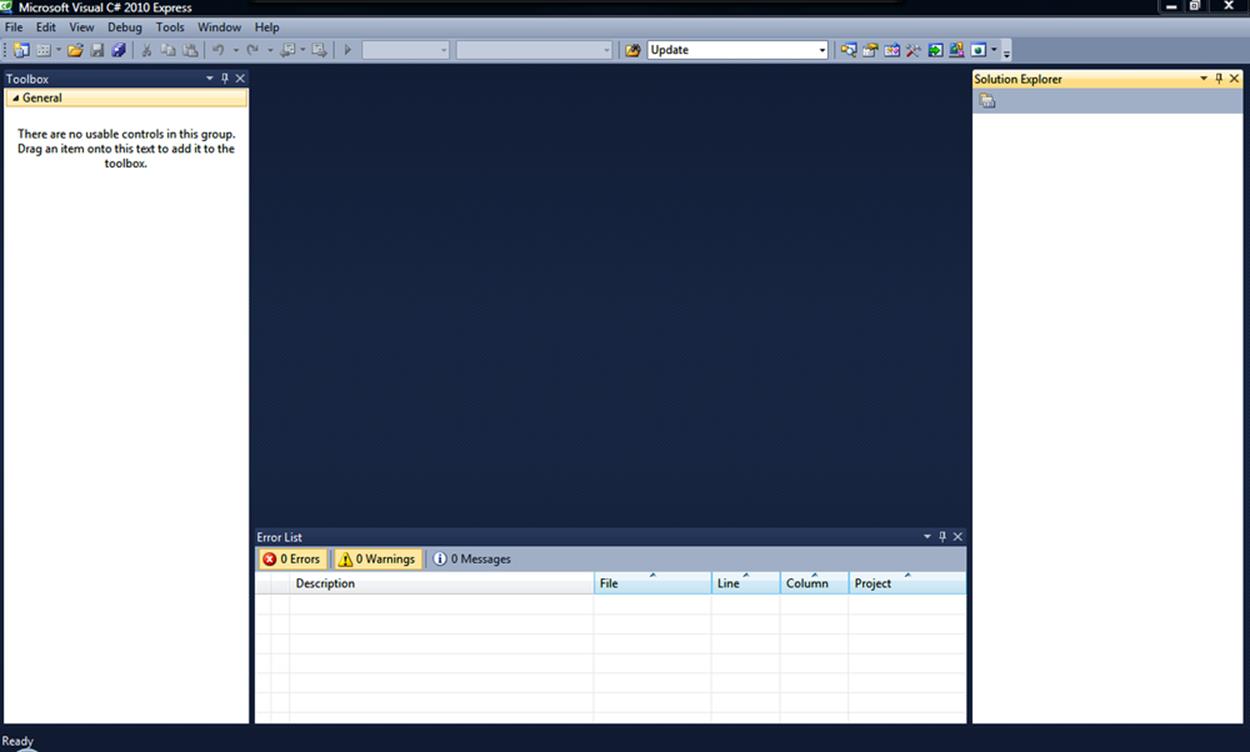
Figure 1-1. The main screen for the Microsoft Visual C# 2010 Express
NOTE
If you want the Express version of SQL Server, it is available on the Express Product Downloads page as well. If you don’t have Microsoft Access loaded on your computer, you will need this to work with the data examples. The examples we will use are virtually interchangeable between the two platforms. The main difference is the connection string you will use. While SQL Server has many additional features, it is beyond the scope of this book.
Now that you have the programs installed, you are ready to create a new project. To do this, from the main screen in Visual Studio, you can go to File→New Project, or simply press Ctrl+Shift+N to bring up the new project dialog box that you see in Figure 1-2.
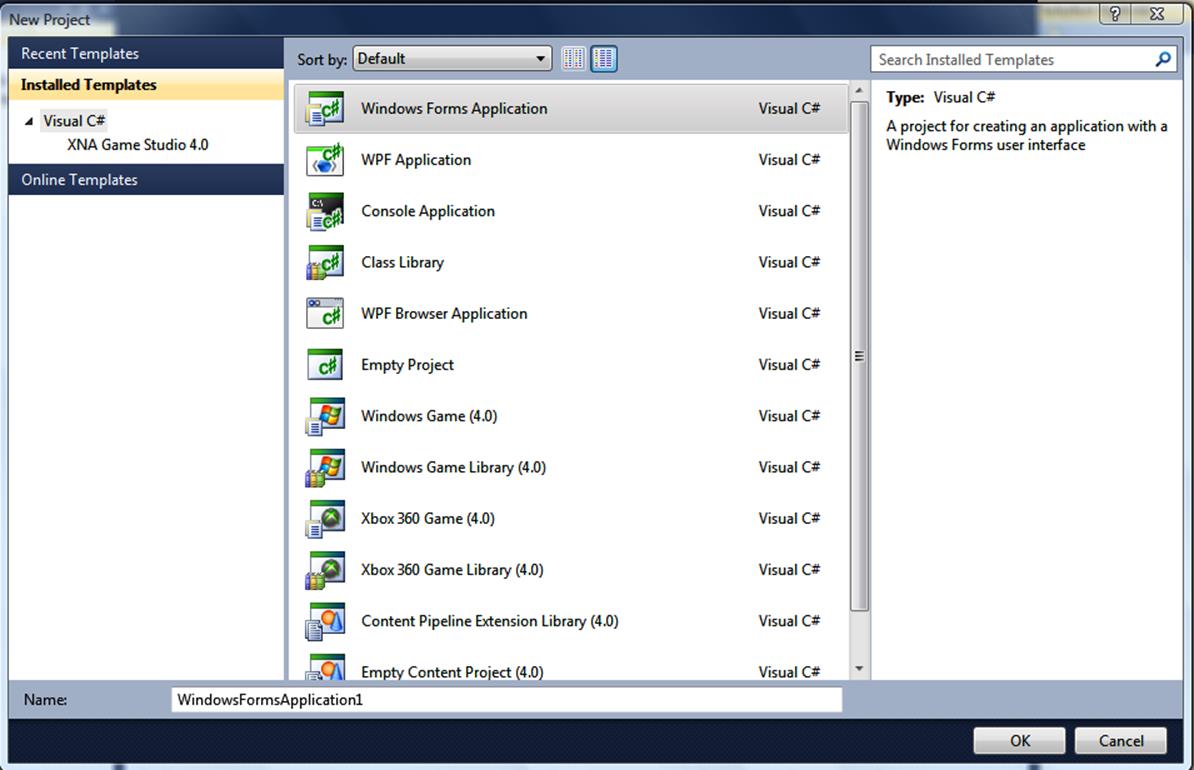
Figure 1-2. The C# New Project Dialog, where you will find the Windows Forms Application
If you click on the Windows Forms Application and enter FirstTestApplication into the name field in that dialog box, you will get a screen like you see in Figure 1-3. The Solution Explorer will be on the right (if you don’t see that, press Ctrl+W, then press the S key); it shows all of the objects that are in your solution. (Note that a solution can contain multiple projects.) Below that, you will see the Properties Window, where you will view and edit the object properties. To the left of the screen, you will see the Toolbox Window (you may see more or fewer tools, depending on what you have installed). You can use items in the Toolbox by dragging and dropping onto your form just like you would in Classic VB. At the bottom of the screen, you will notice the Error Window. This window will show you errors and warnings as you write code. This can be very helpful for you as you learn the language. You don’t need to wait until you compile to find errors.
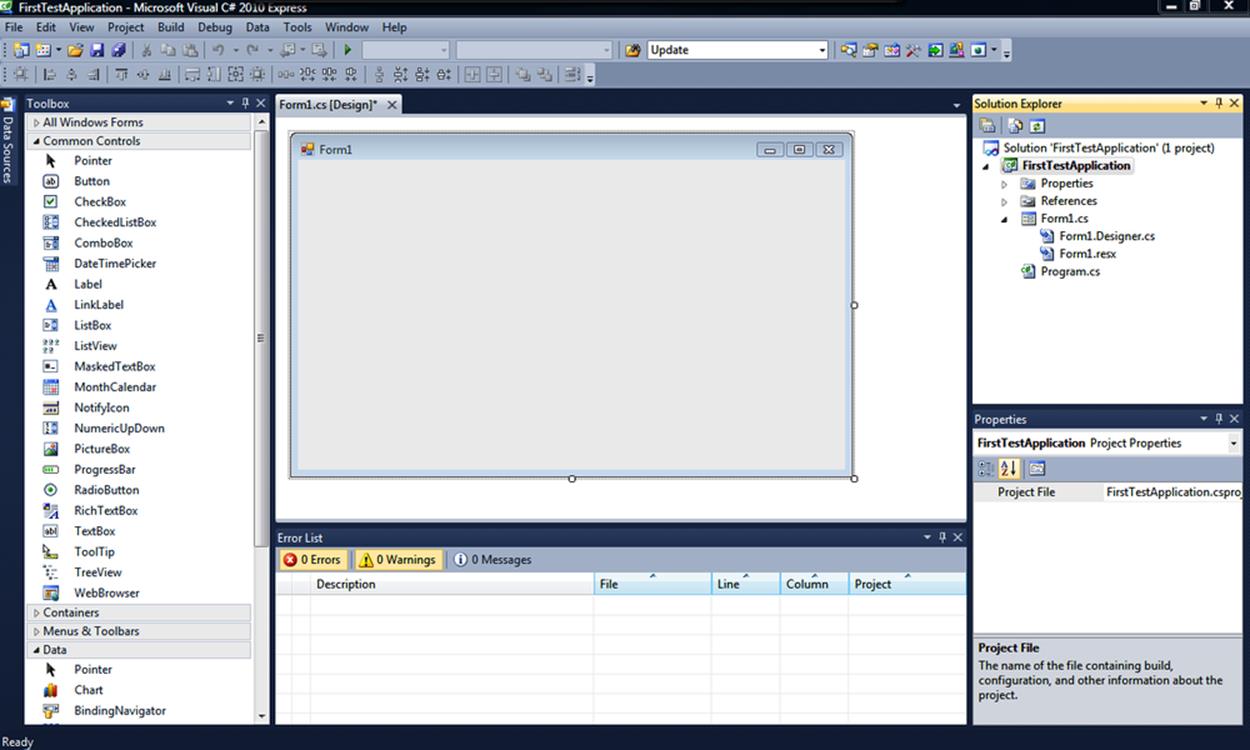
Figure 1-3. The screen for a blank new Windows Forms Application
Basic Syntax
Most of the work you’ll be doing here involves object manipulation, not complex object creation, so you don’t need to know the entire C# language to get started. There are some key differences between VB6 and C# that are helpful to be aware of up front. These will be briefly covered here and also in more detail as they come up in the code examples throughout the book.
C# Operators
These can take some time to get used to. The standard Boolean operations that you may have been used to in Classic VB are sometimes the same and sometimes slightly different in C#. In Table 1-1, you will see the VB6 Operator and the C# Operator. Having compile errors due to using the VB-style operators is easy to fix when you know about it.
Table 1-1. The differences are in the equality and inequality operators. Be careful to use the == when you are testing for equality and = when you are trying to set a value.
|
Operator Name |
VB6 Operator |
C# Operator |
|
Equality Operator |
= |
== |
|
Inequality Operator |
<> |
!= |
|
Greater Than |
> |
> |
|
Less Than |
< |
< |
|
Greater Than or Equal |
>= |
>= |
|
Less Than or Equal |
<= |
<= |
Outside of the Boolean operators, there are some other slight differences in operators that can save you some time. The first is the increment operator. In VB, you might have done something like:
X = X + 1
Whereas in C#, you can use:
X + = 1;
The addition, subtraction, multiplication, and division increment operators are +=, –=, *=, and /=. So, anywhere that you would use something like X = X (operator) Y, you can use these as shortcuts.
In addition, there are a few other operators that can help you with intense data operations that were not in Classic VB. For example, if you have a situation where you are trying to evaluate an OR expression and each side of the OR expression is data- and processor-intensive, you can use the || operator. Doing this will only evaluate the expressions until it gets a true; once an expression returns true, the statement returns true and the rest of the expressions are not evaluated. In non-processor-intensive operations, you won’t get much time savings from this. But, when you are looking at thousands of rows of data for potentially thousands of customers, you might be able to use this operator to save some time. These aren’t the only operator changes, however, these are the ones that are relevant to the examples in this book.
Selection Statements
The other changes that can take some getting used to are the selection statements. In Classic VB, we had If ... Then ... Else and Select ... Case. In C#, we have if ... else and switch ... case. Let’s assume that we have an integer variable called count that we are trying to evaluate and we have a string variable called reply that we want to populate with a message. See if you can spot the differences compared to VB for both statements:
If (count == 0) {
reply = "The count is 0";
}
else {
reply = "The count is not 0";
}
switch (count) {
case 0:
reply = "The count is 0";
break;
default:
reply="The count is not 0";
break;
}
Notice that in VB, we would have had to use the Then keyword, which is not used in C#. Also, where we would use Select ... Case in VB, we have to use switch ... case. In addition, in VB, we have a capital letter at the beginning of the keywords, whereas in C#, they are in all lowercase. Finally, take note of the braces and semicolons that you don’t use in VB. Again, these differences certainly stand out in terms of how they look, but once you write a few statements, you will easily pick up on them.
There are many other differences between the languages—I highlighted these examples because they are often used in data-intensive applications. You can get a full list of operators, keywords, and statements in the help that comes with Visual Studio. Also, the Intellisense in Visual Studio is fantastic and can greatly help you, and the error window also gives surprisingly good help, particularly when you are missing a curly brace, semicolon, or an includes statement.
If you are used to working in Microsoft Access, you can get spoiled by things that are done for you automatically. It is pretty straightforward to make a form in Access that will let you add, update, and delete records. In addition, changing the source data for a grid can really be accomplished with one line of code in VBA. But, building the same functionality from a C# application take some work. Even if you get all of the syntax correct, you have to be careful where you declare objects in C#, where you initialize them, etc. Once you realize where things need to be done, it becomes very easy, and you’ll move quickly up the learning curve.
For this example, we will be showing the screens from Visual Studio 2010 Express, but the code doesn’t change if you use a different version. In addition, we will be using the Northwind Database that comes with Access. Using the Northwind Database poses some challenges that you will run into when using databases where you don’t have control of the schema. These instances will be pointed out and you’ll learn how to handle them.
NOTE
If you don’t have Access or the Northwind Database, you can download the database from the Microsoft website.
First, open up Visual Studio and go to File→New Project. Pick Visual C# and select Windows Forms Application. On the bottom of that dialog box, type in EditingDatabaseTest and then click OK, as shown in Figure 1-4. Once you do that, you will see the screen shown in Figure 1-5.
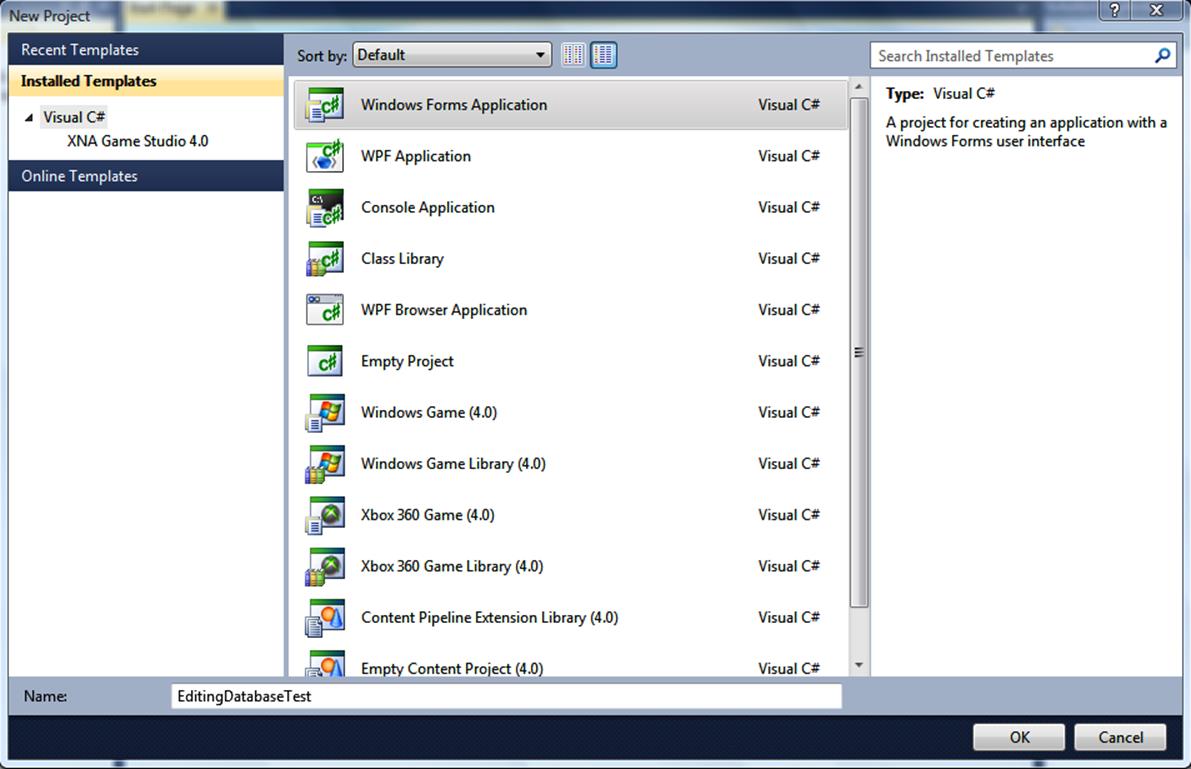
Figure 1-4. The New Project window

Figure 1-5. Editing your project
To start with, we’ll recreate more or less what Access does automatically when you build a form. You will fill a grid with data, add buttons to filter the data, and have a second grid that will let you choose different tables with which to populate the first grid. In addition, you will be adding code to allow you to add, update, and delete rows of data. While this seems pretty simple, you’ll see that there is some planning involved to make this work.
Take a look at the toolbox on the left side of your screen. (If the toolbox isn’t there, go to View→Toolbox to show it.) Take notice of the sections—you will be using controls from the Common Controls and Data sections for this sample. On the form, drag on a datagrid from the Data section, a text box from the Common Controls section, a combo box from the Common Controls section, two buttons from the Common Controls section, and a second datagrid from the Data section. When you add the datagrid, you will get the popup dialog shown in Figure 1-6. For the first datagrid, leave the boxes checked to add, update, and delete records. For the second datagrid, uncheck those boxes. On both, leave the datasource as None. You can create a project datasource and use it here, but we are going to start with programming the datasource because it will give you more flexibility. You can lay out these controls however you’d like; you can see how I did it in Figure 1-7. If you pressed F5 to start the project, it would open up and nothing would function yet.
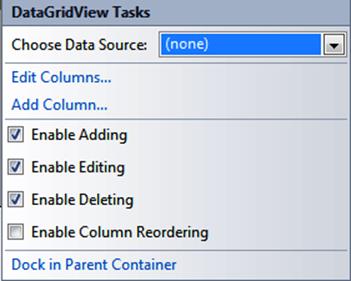
Figure 1-6. Choosing data sources for the datagrid
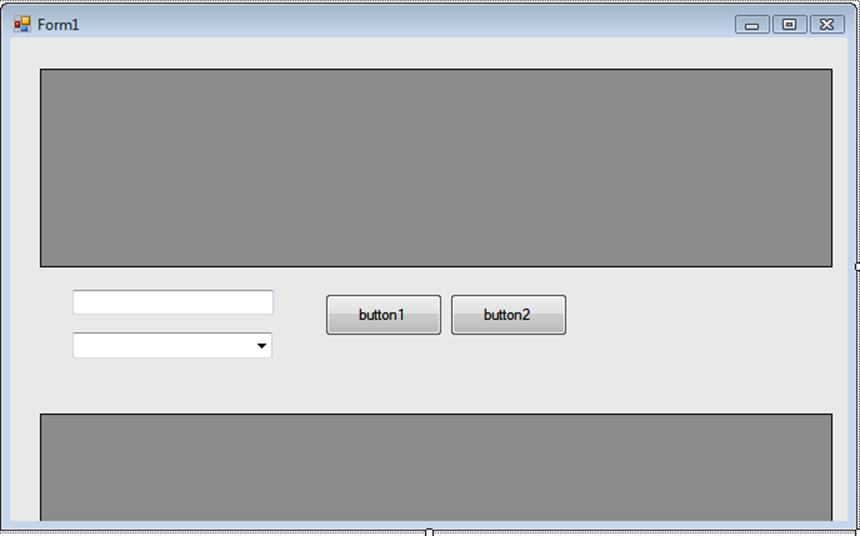
Figure 1-7. An initial form layout
Next, you will need to put in some code to get the controls functioning. You can get to the code for a Form by pressing F7, or you can right-click on the form’s name in the Solution Explorer on the righthand side of your screen and select View Code from the list. Once there, you will see the lines of code shown in Example 1-1 prefilled for you.
Example 1-1. Basic code to make the controls function
using System;
using System.Collections.Generic;
using System.ComponentModel;
using System.Data;
using System.Drawing;
using System.Linq;
using System.Text;
using System.Windows.Forms;
namespace EditingDatabaseTest
{
public partial class Form1 : Form
{
public Form1()
{
InitializeComponent();
}
}
}
The first thing you’ll notice in the code is the using keyword. These lines of code are very similar to adding a reference in VBA. When you add a using directive, it turns on the Intellisense for the objects, properties, and methods related to that namespace. Please note that you can and often do have to add references to a C# project; I’m only describing it this way to give you a familiar example.
There is an additional using directive that you will need to add for this example to work. Right under using System.Data;, add the following line of code:
using System.Data.OleDb;
This line of code tells C# to use the .NET Framework Provider for OLE DB. You will use objects, properties, and methods in this namespace to connect to the datasource. Also, you need some of the variables and objects that you are using to remain available continuously while the form is open. For this reason, you need to declare those at the class level and not in the individual procedures that you will be writing. Add the necessary lines to have your code read as shown in Example 1-2.
Example 1-2. Connecting to the datasource with OLE DB
using System;
using System.Collections.Generic;
using System.ComponentModel;
using System.Data;
using System.Data.OleDb;
using System.Drawing;
using System.Linq;
using System.Text;
using System.Windows.Forms;
namespace EditingDatabaseTest
{
public partial class Form1 : Form
{
public string connString;
public string query;
public OleDbDataAdapter dAdapter;
public DataTable dTable;
public OleDbCommandBuilder cBuilder;
public DataView myDataView;
public Form1()
{
InitializeComponent();
}
}
}
You need the objects and variables that are declared to remain available because these will be necessary for the updating, sorting, filtering, and other operations that you’ll program. If you didn’t declare them at the class level, those objects won’t be available outside of the procedure in which they were declared. After the InitializeComponent(); statement, add the following lines of code:
connString = "Provider=Microsoft.ACE.OLEDB.12.0;Data
Source=C:\\users\\michael\\documents\\Northwind 2007.accdb";
query = "SELECT * FROM Customers";
dAdapter = new OleDbDataAdapter(query, connString);
dTable = new DataTable();
cBuilder = new OleDbCommandBuilder(dAdapter);
cBuilder.QuotePrefix = "[";
cBuilder.QuoteSuffix = "]";
myDataView = dTable.DefaultView;
The connection string is very similar to what you would see in VBA. However, you should notice the \\ in the path name. If you use a single \, you will get an unrecognized escape sequence error. The query variable is a string that defines the Select statement that you are using to access the data. The OleDbDataAdapter is the class that holds the data commands and connection that you will use to fill the DataTable. The OleDbCommandBuilder class generates the commands that reconcile changes that happen in a DataTable and the connected database.
Since you are connecting to the Northwind Database, you need the QuotePrefix and QuoteSuffix properties defined with the square brackets. This is because the Northwind Database has spaces in the field names. If you try to update a cell in your datagrid that has spaces in field names without these properties defined, you will get an error. You can always trap that error, but it would make updating impossible in tables with spaces in field names. If you don’t add these properties and your datasource doesn’t have spaces in field names, you will still be able to run error-free. However, I recommend always adding these lines just in case. Next, add the following lines of code to finish up this first procedure:
dAdapter.Fill(dTable);
BindingSource bndSource = new BindingSource();
bndSource.DataSource = dTable;
this.dataGridView1.DataSource = bndSource;
for (int q = 0; q <= dataGridView1.ColumnCount - 1; q++)
{
this.comboBox1.Items.Add (this.dataGridView1.Columns[q].HeaderText.ToString());
}
OleDbConnection xyz = new OleDbConnection(connString);
xyz.Open();
DataTable tbl = xyz.GetSchema("Tables");
dataGridView2.DataSource = tbl;
DataView tbl_dv = tbl.DefaultView;
You are accomplishing several things with this code. First, you are filling the DataTable with the data in the data adapter. Then, you are creating a binding source for the form. (The BindingSource class is part of the System.Windows.Forms namespace.) Then, you are finally ready to set the datasource for the datagrid. Once you do this, the data you selected will populate the grid.
The next part of the code is a for loop, which is being used to populate the combo box with the field names. The code isn’t going to do anything with this data, but you could use that to set the sort field or do any other number of tasks. It is being included here simply to show you an example of how to iterate through the columns of a datagrid.
Finally, the bottom section of that code snippet is being used to populate the second datagrid with the schema of the OleDbConnection.
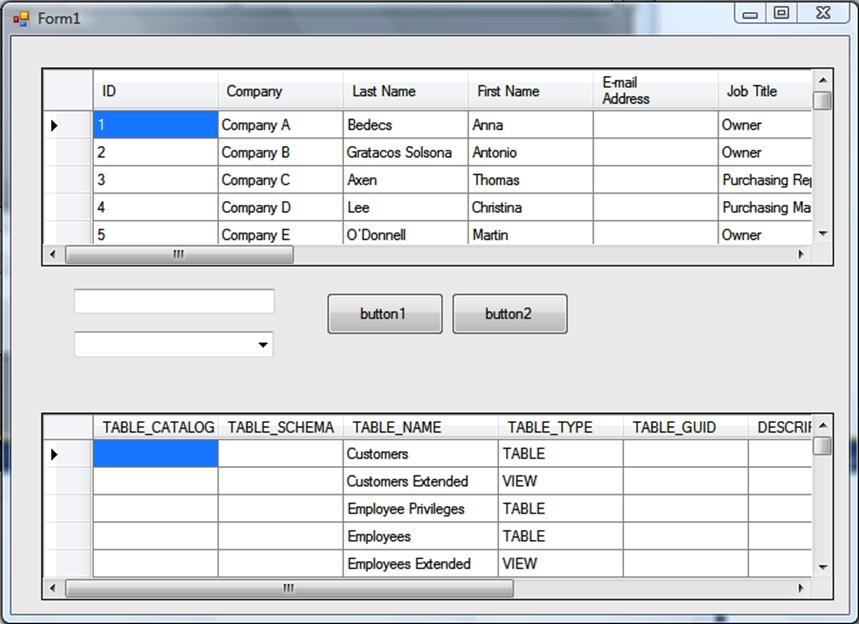
Figure 1-8. A populated datagrid
If you press F5 at this point, the form will open and you will see the screen in Figure 1-8. Because you told the first datagrid that it could add, update, and delete, you will be able to edit those fields. But, you didn’t add code yet to reconcile those changes in the database. So, you can edit the field and everything will show on the screen like it is changed; however, if you close the form and open it again, the changes will not be in the database. Also, you will notice that the bottom datagrid cannot be edited. This is because you unchecked the boxes. The important thing to note here is that those settings only impact the grid; they do not impact the database. If you search for help on datagrids in C# online, you will see many questions from people who made the change in the grid but didn’t add the code to apply the updates—they can’t understand why the data isn’t being changed in the database.
So, let’s add the code for updates. Add this code right below the curly brace ending the Form1() procedure:
private void Cell_Update(object sender, DataGridViewCellEventArgs e)
{
try
{
dAdapter.Update(dTable);
this.textBox1.Text = "Updated " + System.DateTime.Now.ToString();
}
catch (OleDbException f)
{
this.textBox1.Text = "Not Updated " + f.Source.ToString();
}
}
Once you do this, you need to set up the grid to call this procedure. Switch to the design view screen (Shift+F7), right-click on the first datagrid, and select Properties. On that box, click on the lightning bolt to get to the events and find the event called RowValidated. In that event, selectCell_Update from the drop-down box. It should be the only item available in the list at this time.
When you are creating an application, the last thing you want to do is have your users get dropped to a debug window or throw an unhandled exception. So, what I’ve done in this section of code is put the code that does the updating in a try ... catch statement. You could accomplish that update in one line of code: dAdapter.Update(dTable);. However, that code can throw an error for any number of reasons. For example, you could be updating a table that doesn’t have a primary key defined (that will always throw an error), or you might have skipped the step where you define the QuotePrefix and QuoteSuffix on the command builder and you have a table with spaces in field names. So, when that happens, you want the code to handle that exception gracefully. In this case, the code will try to execute that line and if it works, it will update the text box telling the user that it updated. If there is an OleDbException, it will update the text box, telling the user that it wasn’t updated. The grid will also show a red X on the left side of the row that didn’t update. Note that you are only trapping an OleDbException. You can trap all exceptions instead of defining one, but it is best to write specific sections of code to handle each type of error you may get.
The other item to note is the dAdapter variable. If you declare that variable in the Form1() procedure, it will run fine when the application first starts running, but it will give you an error when writing the update section of code because the dAdapter variable will be out of context.
Adding Filtering
The next thing you are going to program here is the filtering functionality. Go back to the design view on the form and change the button text for the buttons to be Set Filter and Clear Filter. Then come back to the code window and we’ll add the procedures for this functionality.
There are a number of ways that you can add filtering functionality. What you’ll do here is essentially the filter by selection functionality from Access, but we will default to using the entire field. You can do wildcards and such, but for now, we will focus on the basics. Enter the following code below the update procedure:
private void filter_click(object sender, EventArgs e)
{
string mystr;
if (myDataView.RowFilter == "")
{
mystr = "[" + dataGridView1.CurrentCell.OwningColumn.HeaderText.ToString() + "]";
mystr += " = '" + dataGridView1.CurrentCell.Value.ToString() + "'";
myDataView.RowFilter = mystr;
}
else
{
mystr = myDataView.RowFilter + " and ";
mystr += "[" + dataGridView1.CurrentCell.OwningColumn.HeaderText.ToString() + "]";
mystr += " = '" + dataGridView1.CurrentCell.Value.ToString() + "'";
myDataView.RowFilter = mystr;
}
}
A couple of things are important here. First, there is a line of code checking to see if the grid is already filtered. If the grid is filtered, clicking the filter button again adds to the filter. If the filter is empty, the code just sets the filter. Second, since we are not using the OleDbCommandBuilderclass here, the brackets will not be added to our column names automatically. So, you just need to add the square bracket to the front and back of the column name. Finally, you should take a look at all of the properties and methods that are available on the CurrentCell. In this case, you are referencing the OwningColumn of the cell and the HeaderText of that column; the HeaderText is the same as the field name in the table. Also, as in the other procedure, the object that we are referring to (myDataView in this case) is declared at the class level, so it is available to all procedures in the form.
Next, you will want to set this code to run when the Set Filter button is clicked. So, go back to the design view and right-click on the first button (you should have already set the Text property to Set Filter), then click on the lightning bolt to show the events. Find the click event and in the drop-down box, select filter_click.
Go back to the code view and add the following lines of code underneath the filter_click procedure:
private void clear_filter(object sender, EventArgs e)
{
myDataView.RowFilter = "";
}
Switch back to the design view and set the click event for the second button to clear_filter, just like you did for the first button. You may notice that only clear_filter and filter_click are available when you have another event already programmed for the row updating. This is because the Cell_Update procedure is specific to DataGridViewCellEventArgs, so it will only show up for datagrid events.
Once you have done this, press F5, and when the form opens, click in the first cell under Job Title, which should say owner. Then click on the button to Set Filter. You will see a form like the one shown in Figure 1-9.
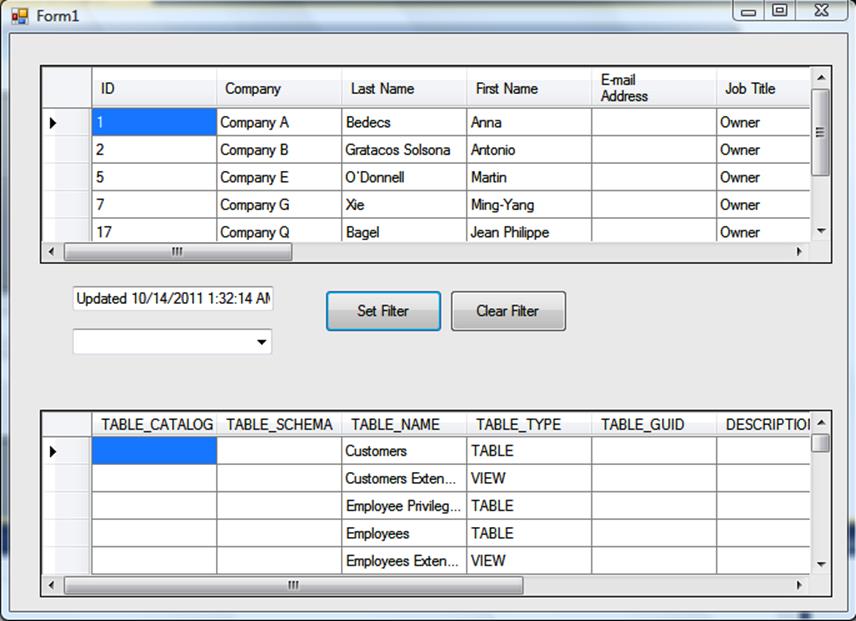
Figure 1-9. Setting a filter
If you click Clear Filter, it will remove the Filter. This functionality is fairly simple, but you can see how actually programming it is a bit complex. It wouldn’t make sense to go through all of this if all we wanted to do was edit a static table. If you wanted to do that, you could create a project datasource, which would set the code to allow updates, adds, deletes, etc. So, what I’m trying to show here is how you can select a different table and populate the first datagrid.
Your next task is to add another button to the form and call it Change Source. Add the following code below the last procedure you wrote:
private void change_data_source(object sender, EventArgs e)
{
string tbl_str = dataGridView2.CurrentRow.Cells[2].Value.ToString();
query = "SELECT * FROM [" + tbl_str + "]";
dAdapter = new OleDbDataAdapter(query, connString);
dTable = new DataTable();
cBuilder = new OleDbCommandBuilder(dAdapter);
cBuilder.QuotePrefix = "[";
cBuilder.QuoteSuffix = "]";
myDataView = dTable.DefaultView;
dAdapter.Fill(dTable);
BindingSource bSource = new BindingSource();
bSource.DataSource = dTable;
this.dataGridView1.DataSource = bSource;
for (int q = 0; q <= dataGridView1.ColumnCount - 1; q++)
{
this.comboBox1.Items.Add(this.dataGridView1.Columns[q].HeaderText.ToString());
}
}
This is essentially the same code as our opening code except that we are setting the table name equal to the third column of the schema grid. Please note that the columns of the grid are 0-based, so the third column has an int index of 2. Once you’ve done this, go back to the design view and set the click event to change_data_source. Your final form should look like the one shown in Figure 1-10.
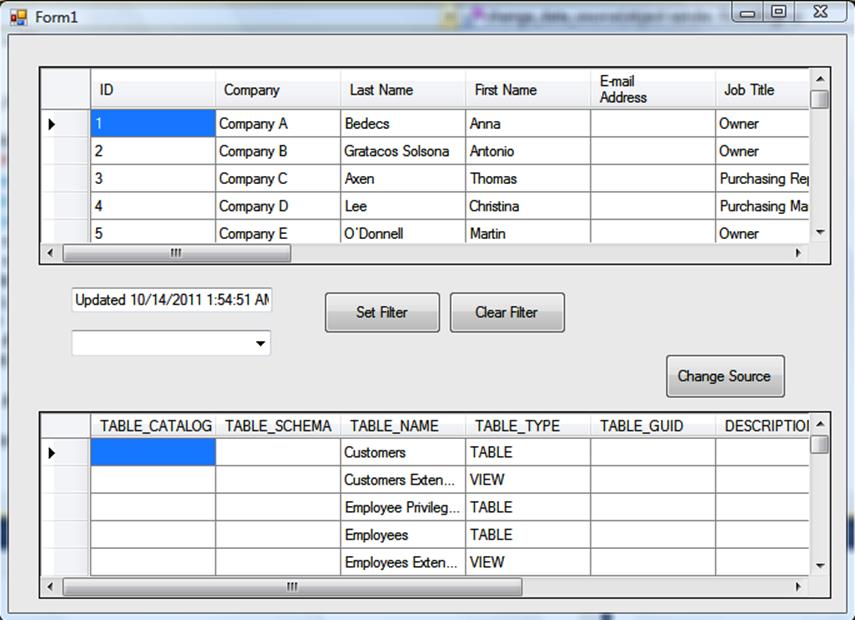
Figure 1-10. Form with an added Change Source button
Some Other Considerations
You should be aware of some errors that you will see with the datagrid, particularly with the Northwind Database. If you try to add records to some tables, you will see a red exclamation point to the left of the row, and if you hover over it, you will see “An INSERT INTO query cannot contain a multi-valued field.” This is because some of the tables in the Northwind Database take advantage of an Access-only feature of storing more than one value in a field (for example, multiple examples from a list). Since you won’t be able to insert records into the database if your table has a field like that, I would avoid it if you are planning on updating outside of Access.
Let’s take a look at a situation where you can update. In the second datagrid, click on the cell that says Invoices (you will need to scroll down), and then click the Change Source button. The data in the first datagrid will change to show the Invoices table. Then scroll down to the bottom and try to add a new row. Use 125 as the Order ID and use 7/1/2011 as the Invoice Date, then put zeroes in the columns with numbers. Then tab down to the next row or click off the row that you are trying to add.
When you do this, you will get a red exclamation point. When you hover over it, it will tell you that you need a related record in the table Orders. So, change the Order ID to 58 (which exists in the Orders table), and then click off the row. You will see that the update works. Then, click on Inventory Transactions (right above Invoices in the bottom grid) and click on Change Source. Then, go right back to Invoices and hit the Change Source button again. If you scroll to the bottom, you will see the row of data that you added and you’ll see that the database added the primary key automatically.
Now, you can try to delete that row. Click on the space right to the left of the first column on that row that you added. This will highlight the row. Now press the Delete key. This deletes the row from the database.
You can see from this example that while this is slightly more complicated than doing the same thing in Access, once you have the pattern down, it is relatively straightforward to add a datagrid and change the datasource, filter, etc.
Example 1-3 provides the full code listing for the example in this chapter.
Example 1-3. Putting all of the code together
using System;
using System.Collections.Generic;
using System.ComponentModel;
using System.Data;
using System.Data.OleDb;
using System.Drawing;
using System.Linq;
using System.Text;
using System.Windows.Forms;
namespace EditingDatabaseTest
{
public partial class Form1 : Form
{
public string connString;
public string query;
public OleDbDataAdapter dAdapter;
public DataTable dTable;
public OleDbCommandBuilder cBuilder;
public DataView myDataView;
public Form1()
{
InitializeComponent();
connString = "Provider=Microsoft.ACE.OLEDB.12.0;
Data Source=C:\\users\\michael\\documents\\Northwind 2007.accdb";
query = "SELECT * FROM Customers";
dAdapter = new OleDbDataAdapter(query, connString);
dTable = new DataTable();
cBuilder = new OleDbCommandBuilder(dAdapter);
cBuilder.QuotePrefix = "[";
cBuilder.QuoteSuffix = "]";
myDataView = dTable.DefaultView;
dAdapter.Fill(dTable);
BindingSource bndSource = new BindingSource();
bndSource.DataSource = dTable;
this.dataGridView1.DataSource = bndSource;
for (int q = 0; q <= dataGridView1.ColumnCount - 1; q++)
{
this.comboBox1.Items.Add(this.dataGridView1.Columns[q].HeaderText.ToString());
}
OleDbConnection xyz = new OleDbConnection(connString);
xyz.Open();
DataTable tbl = xyz.GetSchema("Tables");
dataGridView2.DataSource = tbl;
DataView tbl_dv = tbl.DefaultView;
}
private void Cell_Update(object sender, DataGridViewCellEventArgs e)
{
try
{
dAdapter.Update(dTable);
this.textBox1.Text = "Updated " + System.DateTime.Now.ToString();
}
catch (OleDbException f)
{
this.textBox1.Text = "Not Updated " + f.Source.ToString();
}
}
private void filter_click(object sender, EventArgs e)
{
string mystr;
if (myDataView.RowFilter == "")
{
mystr = "[" + dataGridView1.CurrentCell.OwningColumn.HeaderText.ToString() + "]";
mystr += " = '" + dataGridView1.CurrentCell.Value.ToString() + "'";
myDataView.RowFilter = mystr;
}
else
{
mystr = myDataView.RowFilter + " and ";
mystr += "[" + dataGridView1.CurrentCell.OwningColumn.HeaderText.ToString() + "]";
mystr += " = '" + dataGridView1.CurrentCell.Value.ToString() + "'";
myDataView.RowFilter = mystr;
}
}
private void clear_filter(object sender, EventArgs e)
{
myDataView.RowFilter = "";
}
private void change_data_source(object sender, EventArgs e)
{
string tbl_str = dataGridView2.CurrentRow.Cells[2].Value.ToString();
query = "SELECT * FROM [" + tbl_str + "]";
dAdapter = new OleDbDataAdapter(query, connString);
dTable = new DataTable();
cBuilder = new OleDbCommandBuilder(dAdapter);
cBuilder.QuotePrefix = "[";
cBuilder.QuoteSuffix = "]";
myDataView = dTable.DefaultView;
dAdapter.Fill(dTable);
BindingSource bSource = new BindingSource();
bSource.DataSource = dTable;
this.dataGridView1.DataSource = bSource;
for (int q = 0; q <= dataGridView1.ColumnCount - 1; q++)
{
this.comboBox1.Items.Add(this.dataGridView1.Columns[q].HeaderText.ToString());
}
}
}
}
Before we head to the next chapter and connect to SQL Server, let’s review some of the differences between data access inside of Microsoft Access and from C#. One of the biggest challenges is setting the events to fire at the right time and declaring the variables in the right place. In this example, it was done for you. But when you are writing from scratch, it is easy to get this part wrong. You’ll know when it happens when you try to access a variable that Visual Studio says is out of context. So, when that happens, you’ll know exactly where to look.
The events are a little trickier. As an example, some people will go through the events that are available in the datagrid, and they might choose an event like CellEndEdit to put the update code in. However, you will end up with errors when you try to add new rows because you will be missing required fields when the update fires right after the first column is updated. If you look around some of the technology forums, you’ll see some debate about where to fire the update event. My personal opinion is that doing it after the row validates is best, as it will only fire when you leave a row. You also have the option of having a Save button and only firing the updates when that button is pressed. The point is that you have options for when you call events and you can test them to see where it works the best in your particular application.
The final item of importance is to understand when you are dealing with an object or control that is in the Windows Forms namespace or the System.Data namespace, and when you are in the System.Data.OleDb namespace. There are times when you may want to try something, but you can’t find the object or method that you want. When you run into situations like that, all you need to do is hover over the class name where you declare the variable and it will tell you what namespace that class is in.
What’s Next?
The next chapter will connect SQL Server. If you don’t have SQL Server, you can download SQL Server Express. In addition, you will see some other examples in future chapters on databinding without a grid and even on returning data from a database on a webservice. This first coding chapter really lays the foundation for everything else that is covered. If you want to take advantage of what’s next, you will want to make sure you understand everything in this chapter before you move on.
All materials on the site are licensed Creative Commons Attribution-Sharealike 3.0 Unported CC BY-SA 3.0 & GNU Free Documentation License (GFDL)
If you are the copyright holder of any material contained on our site and intend to remove it, please contact our site administrator for approval.
© 2016-2026 All site design rights belong to S.Y.A.