Real World .NET, C#, and Silverlight: Indispensible Experiences from 15 MVPs (2012)
Chapter 1
ASP.NET and jQuery
by David Giard
Approximately ten years ago, Microsoft introduced ASP.NET — a framework for building web applications using the new .NET platform. ASP.NET was designed to assist developers to build, deploy, and maintain web pages and websites. ASP.NET integrates with Microsoft Internet Information Server (IIS) and provides developers with a rich set of tools to develop dynamic web applications.
When it was introduced, this framework focused on Web Forms. Web Forms abstracted away many of the low-level complexities of HTML and HTTP, giving developers an experience similar to one used to build Windows Forms. By using Web Forms, developers could quickly create an interactive web page, even if they knew little about the underlying technologies of the web. This development experience was similar to the popular Visual Basic language, so it appealed to developers familiar with that language.
Like its predecessor Active Server Pages (ASP), ASP.NET provides a developer with the ability to build web applications using a combination of code and markup.
Unlike the classic ASP, ASP.NET is built on top of the Common Language Runtime (CLR) and uses the power of .NET. Because of this, ASP.NET can take advantage of CLR benefits, such as automatic garbage collection, a rich set of libraries, and a robust security model.
The latest version of ASP.NET includes enhancements to the ASP.NET Web Forms Framework and an updated version of the new ASP.NET Model-View-Controller (MVC) framework. Visual Studio .NET 2010 is also the first version to ship with jQuery libraries, which enable developers to build rich client-side functionality into their websites.
This chapter focuses on what is new in ASP.NET 4. First, you learn about some of the new features and enhancements of ASP.NET 4 Web Forms. Next, you learn about the ASP.NET MVC framework. Finally, this chapter covers how to effectively use jQuery to enhance your application.
Along the way, a sample application provides guidance on how to implement these new features.
Understanding Web Forms
The Web Forms Framework was introduced with ASP.NET 1.0. Countless websites have been successfully built and deployed using this platform.
Essentially, the Web Forms Framework was designed to abstract away the complexities of Hypertext Markup Language (HTML) and Hypertext Transfer Protocol (HTTP) to make web development feel more like Visual Basic forms development. Following are characteristics of Web Forms application development:
· The developer is presented with a design surface that looks like a web page.
· Web controls are dragged onto this design surface.
· Properties are set on the page and on the controls.
· Code is written to manipulate the page, controls, and associated data.
Using Visual Studio, developers can quickly build a web application. A rich set of built-in controls and third-party controls adds to this abstraction and helps cut down on many development tasks.
However, this rapid application development (RAD) comes at a cost. Web Forms and associated controls automatically generate HTML and JavaScript. Sometimes the generated code does not exactly match your needs. To add to the difficulty, different web browsers often render the same HTML in different ways, and understand JavaScript differently — particularly as JavaScript interacts with the web page's Document Object Model (DOM). A common problem is that a page renders properly in one browser but improperly in another.
Using Web Forms, it is difficult to modify the output HTML or JavaScript. This is especially an issue when you target multiple browsers. If you have trouble tweaking HTML, you will have trouble supporting some browsers. For this reason, web developers should learn as much as they can about HTML, Cascading Style Sheets (CSS), and HTTP. Abstractions such as Web Forms are fine, but they do not excuse the responsibility to understand the technologies they abstract.
Microsoft introduced a number of enhancements to ASP.NET with version 4. Following are a few of the most important ones:
· Improved handling of View State provides users with greater flexibility over the controls that participate in View State.
· The web.config file has been greatly simplified.
· A new Web Project template provides greater functionality.
· web.config transformations make it easier to deploy to a new environment.
Let's take a look at these in a bit more detail.
View State
By default, the web and its underlying transport protocol (HTTP) are stateless. This means that, by default, each request remembers nothing about any previous request. ASP.NET introduced View State as a way to maintain state between pages in a web application.
View State works by automatically creating an extra, hidden input within an HTML form. To save the state of the submitted fields on a page, ASP.NET encodes View State data into a single string and sets the value of this hidden field to that string. This field is created on the server and sent down to the client with the rest of the web page.
This convenience comes at a price. The encoded data is submitted each time the form is submitted and it is returned to the browser with each response. If you have a lot of data stored in View State, that data can get quite large, slowing down communication between the client and the server.
Using a previous version of ASP.NET, a developer could turn View State on or off at the page level, or at the control level. Prior to ASP.NET 4, you basically had three options for enabling View State:
· Turn off View State for the entire page—If you do this, you do not realize any of the benefits of View State.
· Turn on View State for the entire page—If you do this, you may encode and add unneeded items to View State, bloating the payload sent between the server and the browser, slowing your application, and degrading the user experience.
· Turn on View State for the page, and then disable View State for controls that do not need it—This strategy works well if you want View State for almost every control on the page, but not for a few controls. It can be a real pain if you want View State enabled only for a couple controls.
ASP.NET 4 provides two relevant properties to control View State: ViewStateMode and EnableViewState. Only ViewStateMode is new in version 4, but the two properties work together.
EnableViewState has been around since the first version of ASP.NET. It can be set for an entire page, or for a single control, and it can be set to either True or False. EnableViewState does not turn on View State for any controls. Rather, it determines whether View State may be turned on for a control, and for any controls below it in the control containership hierarchy. A control's ViewStateMode turns on or off View State, but only if EnableViewState is True. ViewStateMode can be enabled or disabled explicitly, or by inheriting this property from its parent container.
Setting a Page or Control's View State attribute to False disables View State for that Page/Control and for any controls contained therein.
In previous versions of ASP.NET, the only way to selectively enable and disable View State on controls was to set EnableViewState=”True” on the page, and set EnableViewState=”False” on the controls for which you did not want to maintain the overhead of passing View State between the client and the server.
You can set ViewStateMode as an attribute of a page or control, or you can set it in code. Following are the allowable values:
· Enabled — Turns on View State for a control.
· Disabled — Turns off View State for a control.
· Inherit — Tells ASP.NET to set the ViewStateMode to that of the control's parent container. This is the default value for a user control.
ViewStateMode is only relevant if EnableViewState is set to True for a control or the control's parent. If EnableViewState is True, ViewStateMode turns View State on or off for a given control. By turning on View State, any data associated with a control is encoded on the server, saved with a hidden input field, and rendered to the client, so it will be submitted the next time the form is submitted.
My recommendation is to set EnableViewState to True on the page and to selectively turn on (set to Enabled) ViewStateMode for the controls that will benefit from it. This minimizes the payload sent between the client and server and prevents you from accidentally adding to this payload as you add new controls to the page. Following is an example of this:
<%@ Page …
EnableViewState="True" ViewStateMode="Disabled" %>
<asp:Label runat="server" Text="Enter UserName:" ID="EnterUserNameLabel" />
<br />
<asp:TextBox runat="server" ID="UserName" ViewStateMode="true" />
web.config Transformations
One of the challenges of application development is migrating configuration files from one environment to another. I typically develop my applications in a Development environment, using a Development database, Development web services, and the files on my own computer. Many of these settings (such as connection strings, file paths, and URLs) are set in the application's web.config file.
At some point, I deploy my application to a Test environment, so that testers can try it out. The Test environment can use different connection strings, URLs, and file paths, so I need to modify the web.config at the time I deploy the application to this environment. This problem presents itself again when I deploy to a Staging environment, a Production environment, and any other environment my organization or customer uses.
ASP.NET 4 provides an elegant way to handle modifying a web.config file as the application is deployed to different environments. Using Transformations, you can create a base web.config file and a separate file for each of your environments. Each environment file contains only those elements that vary from the base configuration.
Simplified web.config
In earlier versions of ASP.NET, the web.config file tended to become bloated and difficult to manage. Even a newly created empty web project contained a large web.config file.
With ASP.NET 4, much of the default configuration has been moved to the machine.config file, making the web.config much smaller. You can even create an ASP.NET application with no settings in the web.config file. Developers are encouraged to add only those settings specific to the application to which the web.config file applies.
A smaller web.config file makes configuration settings easier to find and to manage.
New ASP.NET Web Forms Templates
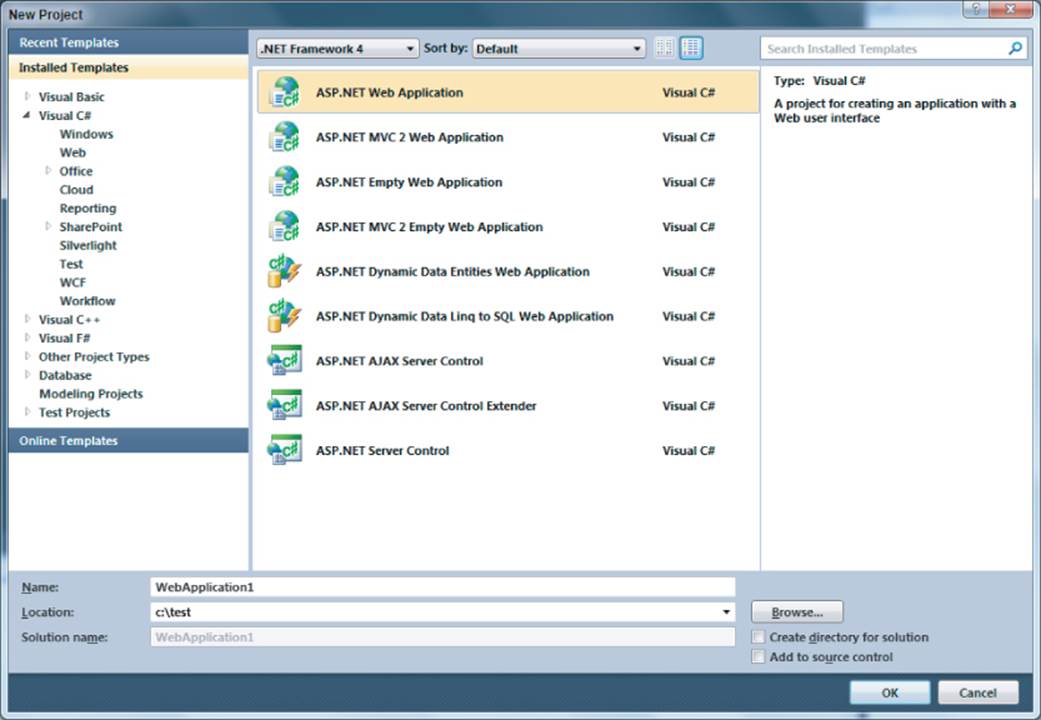
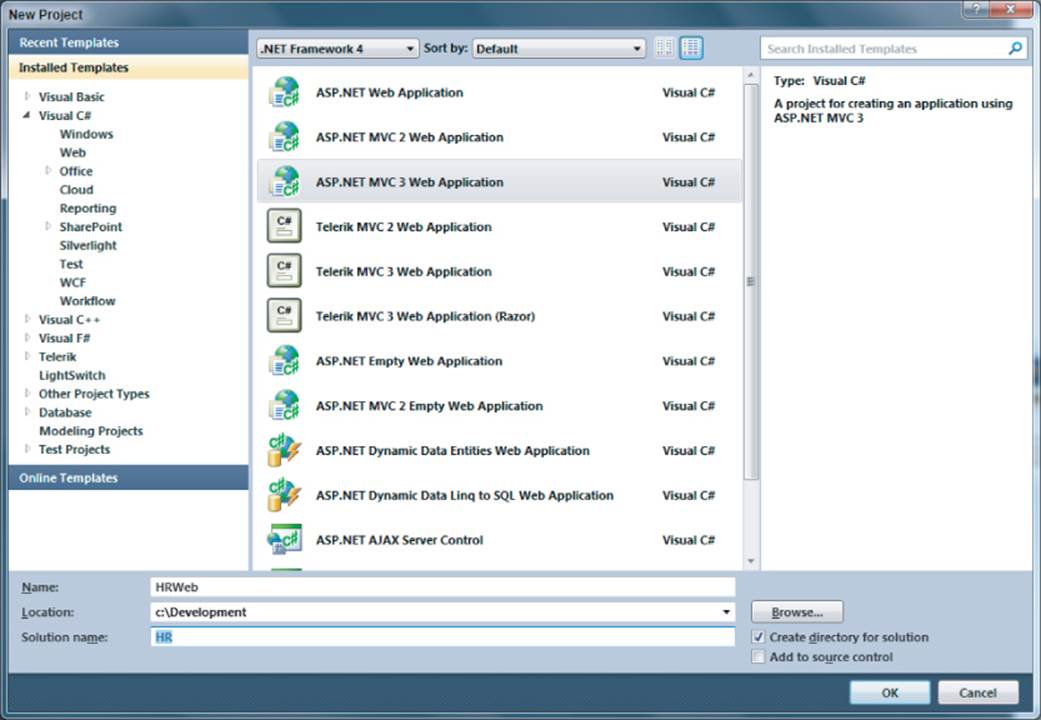
Visual Studio 2010 includes a new and improved web template that is designed to get web developers up and running faster. You can find the ASP.NET Web Application template in the New Project dialog under Installed Templates → Web, as shown in Figure 1.1. From the Visual Studio menu, select File → New Project to open this dialog.
Figure 1.1 Locating the ASP.NET Web Application template
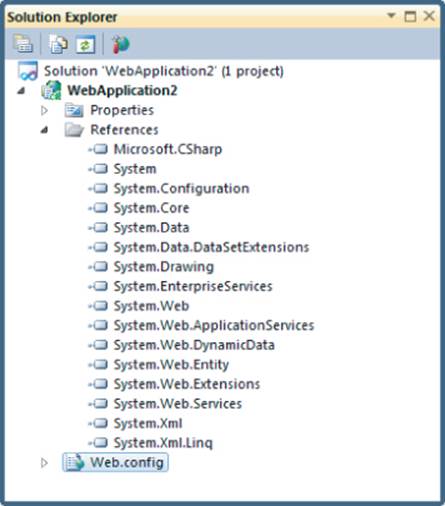
This template creates an application that includes Home and About pages, and pages for managing users and roles. The site uses a default stylesheet and master page, giving it a polished look; but developers can modify these files to meet their needs. The application is ready to run and use as soon as it is created. You can add forms and code to the initial site to suit the specific needs of your application. Figure 1.2 shows the structure of an ASP.NET Web Application project as viewed from Solution Explorer.
Figure 1.2 Structure of an ASP.NET Web Application project

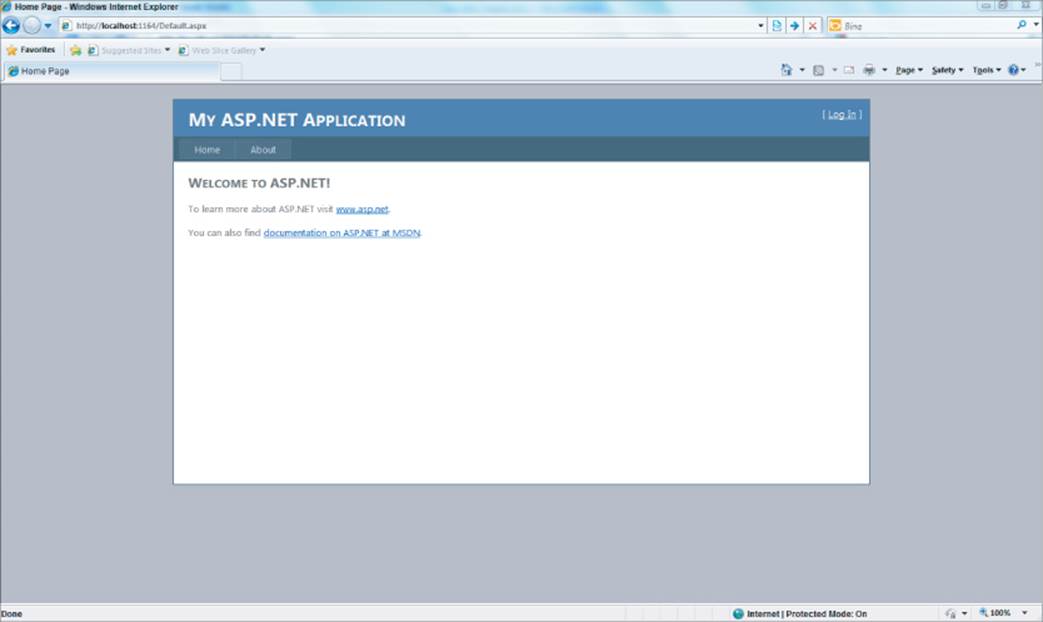
The ASP.NET Web Application template provides a good starting point for developers who are new to ASP.NET and want to see a sample implementation, as well as developers who want to quickly get a site up. Figure 1.3 shows the default page of this application.
Figure 1.3 Default application page
The ASP.NET Empty Web Application template takes the opposite approach. It contains no pages or code — only a nearly empty web.config file. This template contains only the references required by an ASP.NET website. It is designed to give experienced developers maximum flexibility when building their website. Figure 1.4 shows the structure of an ASP.NET Empty Web Application project as viewed in Solution Explorer.
Figure 1.4 Structure of an ASP.NET Empty Web Application project
Developers who want maximum control over their web applications will prefer the ASP.NET Empty Web Application template.
The features discussed thus far allow developers to improve on applications without changing the way they write those applications. However, Microsoft recently released ASP.NET MVC — a set of tools that provide a new way to build web applications.
ASP.NET MVC
Strictly speaking, ASP.NET MVC was not introduced with .NET 4. Version 1.0 of ASP.NET MVC (or MVC, as it is referred to here) was an out-of-band release that developers could download for free from Microsoft. Visual Studio 2010 shipped with version 2 of this framework. In 2011, Microsoft released MVC version 3 as another out-of-band release. Version 3 is examined here.
I have built many applications using the ASP.NET Web Forms Framework. I continue to enhance existing websites built with this framework. It has served me well over the years, and many other developers have built countless solid, scalable websites on this framework. However, for new websites built on the .NET platform, I recommend using the newer ASP.NET MVC framework.
The MVC framework has the following advantages:
· MVC encourages a greater separation of concerns among the parts of your application. For example, each new page has no code-behind file by default, which discourages users from mixing business logic with the user interface.
· MVC gives a developer greater control over the HTML and CSS that is output to the client.
· Because MVC encourages greater separation of concerns, it makes it easier to test parts of your application in isolation. In particular, the user interface — a notoriously difficult thing for which to create automated unit tests — is separated from the rest of the application.
In an ASP.NET Web Forms application, a URL typically points to a file on disk. Usually, that file is an ASPX page, and that ASPX page controls what happens next. Typically, the page life cycle executes, firing a series of page events (Load, PreInit Init, Prerender, Render) and runs code associated with each of these events.
In an MVC application, a URL points to a Controller method instead of to a file. A Controller method is a public method in a Controller class. A Controller class is a public, concrete class that implements the IController interface and has a name that ends with Controller. As its name implies, the controller handles all the logic of the request. This may involve accepting input data, applying business logic, retrieving data, deciding which view to render, and sending stateful data (the model) down to the client.
If this sounds complicated, tooling built into the framework can help you quickly create controller classes, controller methods, and views.
Versions of MVC
As of this writing, Microsoft has shipped three versions of the ASP.NET MVC framework. Version 1 shipped out-of-band (that is, between releases of Visual Studio) and was available as a download. Version 2 shipped with Visual Studio 2010. In 2011, Microsoft released version 3 of MVC.
This out-of-band version is available as a download from www.asp.net/mvc/mvc3. The install program (shown in Figure 1.5) has one button, labeled Install. Click this button to begin the installation. If you do not already have a version of Visual Studio installed, it will install Visual Studio Express.
Figure 1.5 ASP.NET MVC 3 Install dialog
The most noticeable difference between versions 2 and 3 of MVC is the view engine. MVC versions 1 and 2 used a view engine based on Web Forms. Server-side code in the Web Forms view engine is identified by placing it between the <% and %> symbols. (I don't know the names of these symbols, so I refer to them as “Bee-Stings.”) By default, MVC version 3 uses the new Razor view engine.
In the Razor view engine, server-side code is identified by preceding it with the @ symbol. MVC figures out from the context when to switch back to client-side code. To me, it seems counter-intuitive that I don't explicitly tell the view engine when server-side code is ending. But I have yet to find an example when Razor did not correctly switch back to client side.
The Pieces of MVC
To better understand the MVC, let's take a closer look at each of the pieces that make up the MVC.
Model
HTTP (and, by association, the World Wide Web) is inherently stateless. Every request from the client to the server is independent of every other request. In other words, when the web server receives a request from a client, the server has no memory of any requests that came before. At least, that's true by default.
But applications tend to be stateful. You want your applications to remember things about users and their data as the user navigates from page to page within your web application. In an MVC application, a model is a container for that stateful data.
A model often takes the form of instances of one or more entity classes. An entity class is a .NET class that contains properties to hold state information. For example, if you have a page displaying customer information, you may create a Customer class with public properties for FirstName, LastName,Address, and so on. This class may also have a public property to hold all orders placed by the customer, as in the following example.
public class CustomerDTO
{
public string FirstName { get; set; }
public string LastName { get; set; }
public string Address { get; set; }
public List<Order> Orders { get; set; }
}
An MVC application can instantiate this class to store stateful data about the current customer displayed, and to pass that data between the client and the server.
I prefer to place my model objects in a separate assembly so that they can be used independently of my web application. I refer to such a class as a Data Transfer Object (DTO) because its sole purpose is to maintain stateful data about an object, and transfer that data between pages, or between layers of my application.
The MVC framework provides annotations that allow you to enhance a model class and properties. For example, you can annotate a model property to specify validation rules and a descriptive label to display on a View page, as shown in the following example:
[Required(ErrorMessage = "Please enter a Last Name for this customer")]
[Display(Name = "Last Name")]
public string LastName { get; set; }
Often, I'll create a ViewModel class for use with a specific view in my application. A ViewModel contains the Model entities that the View requires. This will make more sense after I define a View and walk through a sample application. Following is an example of a ViewModel:
public class EditCustomerViewModel
{
public CustomerDTO Customer { get; set; }
public List<CustomerTypeDTO> CustomerTypes { get; set; }
}
View
A view is the markup sent to the client. In most MVC applications, this is HTML, but ASP.NET MVC enables you to create views that pass information as JavaScript Object Notation (JSON), Extensible Markup Language (XML), or almost any other data format. The exact format you choose depends on the client that consumes your application. If a user intends to browse to a view using a web browser, HTML probably makes sense; if a view contains subscription information consumed by a newsreader, The XML format ATOM probably makes sense; and if a web page uses JavaScript to make Ajax call to a server running ASP.NET MVC, JSON might be a preferred format to return.
Controller
A controller is a special kind of class in ASP.NET MVC.
The controller is the central nervous system of an MVC application. Everything starts with a controller because it is a controller's action (a method within the class) that the client calls to kick off each request.
In ASP.NET MVC, a controller must meet the following conditions:
· It must be a concrete class. (No abstract classes or interfaces qualify as controllers.)
· It must be a public class so that clients can access the controller's methods.
· It must implement the IController interface. The MVC framework provides a base class (BaseController) that implements this interface, so I usually inherit from that class.
· The name of the class must end with the word Controller.
The name of the class is important. MVC identifies a controller in part because its name ends with Controller. Identifying the functionality of a class by its name is an example of convention over configuration. By applying a naming pattern to all controller classes, you don't need to tell your application which classes are controllers: the application can figure this out by the class names.
Action Methods
Within a controller class, you can code one or more Action methods. Typically, an Action method creates a model (perhaps by querying a database and mapping the results to a stateful data class) and determines the view to render to the client. The Controller Action method then returns the view and the model to the client.
Typically, each Action method in a Controller class returns an ActionResult. The runtime then calls the ExecuteResult method on this ActionResult object, which can either create and send a response to the view engine, or perform some other action (such as redirecting to another Action method or raising an exception).
ActionResult is an abstract class, so Action methods actually return a specific subclass of ActionResult.
In a web application, it is common to return the ViewResult subclass, which is used to render HTML to a browser. But you can also choose to return the following:
· FileResult — This downloads a file to the client.
· HttpUnauthorizedResult — This returns a 404 error to the client.
· JsonResult — This generates a JSON object that is easily consumed by JavaScript Ajax requests.
· RedirectToRouteResult — This automatically sends the user to a new URL, which should invoke another Action method, based on the application's routing rules.
There are several other subclasses, and you can even subclass ActionResult in your own custom class to create your own custom behavior.
The MVC Controller class contains a number of helper methods to generate these ActionResult objects. For example, the View method returns a ViewResult object, and the RedirectToAction method returns a RedirectToRouteResult object.
Model Binding
The MVC framework is good at recognizing data and mapping it to appropriate objects. For example, data can be submitted to a Controller Action method in a number of ways, including form input values, query string values, and route data. When this data is submitted to an Action, theDefaultModelBinder kicks in and uses reflection in an attempt to map the values to the properties of a ViewModel. This allows your Action method to accept a ViewModel as a parameter, which tends to be much simpler to work with than collections of form or query string values. Working with strongly typed data in your Action methods makes it easier to enforce what data may be submitted, and to catch invalid data sooner.
Later in this chapter, you will see an example of such an Action method. For now, the following is a sample signature of a Controller Action method that accepts a ViewModel parameter:
public ActionResult Edit(DepartmentViewModel departmentVm)
URL Routing
To understand an ASP.NET MVC application, you need to understand routing.
Most web requests begin with a user typing a URL into a web browser's address bar. In traditional web applications, each URL maps to a physical file on disk containing HTML, scripts, and other markup and code. If the user types http://MySite.com/CustInfo/CustomerDetails.aspx into a browser, the web server looks in the CustInfo folder of the site http://MySite.com, finds a page named CustomerDetails.aspx, and processes that page.
URL routing allows a developer more flexibility in how to structure a site. It decouples the URL from the location of the physical pages on disk.
This flexibility can allow developers to create URLs that are easier to remember, and that are more easily indexed by search engines. For example, consider the following URL:
/OrderDetails.aspx?CustID=123&OrderYear=2010
This was a common way to offer data to a customer. In this URL, the OrderDetails.aspx file has code that reads the two query string parameters (everything after the question mark) and uses those parameter values to filter the information returned to the user. (In this case, only orders for customer 123 that were placed in 2010 are considered.) One problem with this approach is that it is not optimized for search engines.
Most search engines ignore query string parameters, so the following URLs would be considered the same:
/OrderDetails.aspx?CustID=123&OrderYear=2010
/OrderDetails.aspx?CustID=124&OrderYear=2009
Of course, you could simply create URLs, such as the following:
/OrderDetails123-2010.aspx
/OrderDetails124-2009.aspx
However, this requires you to maintain a lot of pages with redundant information, and isn't very flexible. A better solution would be to allow a user to type URLs such as the following:
/Order/Details/123/Year/2010
/Order/Details/122/Year/2009
These URLs are easier to read and to remember, and will be perceived as two different pages by search engines.
Many people think of ASP.NET routing as it applies to MVC. However, the routing functionality is part of the .NET Framework, and is available to all web applications.
In an ASP.NET MVC application, the URL points to an Action Controller method.
You can set up routing in the Application_Start method of the global.asax file. As the name implies, this method fires when an application first starts, so it's a good place to add startup code. I like to place routing code in its own method, and call it from Application_Start. Following is the code added by default to global.asax when you create a new ASP.NET MVC project:
public static void RegisterRoutes(RouteCollection routes)
{
routes.IgnoreRoute("{resource}.axd/{*pathInfo}");
routes.MapRoute(
"Default", // Route name
"{controller}/{action}/{id}", // URL with parameters
new { controller = "Home", action = "Index", id =
UrlParameter.Optional } // Parameter defaults
);
}
protected void Application_Start()
{
RegisterRoutes(RouteTable.Routes);
}
In this snippet, the routes.MapRoute method defines a Route for the application. The Route tells MVC how to interpret a URL.
In the previous example, the first parameter (“Default”) defines the name of the Route.
The second parameter (“{controller}/{action}/{id}”) defines the parts of a URL to look for. In this case, the expected URL is split into three parts:
· The first part defines the name of a controller.
· The second part defines the name of an Action method within that controller.
· The third part identifies the value of an id parameter passed to that Action method.
The third parameter of MapRoute defines defaults for each part of the URL, which allows you to omit any or all of these parts. If the controller is omitted, the Home Controller is assumed; if the Action is omitted, the Index action is assumed; and the id parameter is defined as optional, allowing an Actionmethod without parameters.
Accessing a Database
Most line-of-business (LOB) applications interact with data in a persistent data store such as Microsoft SQL Server.
The good news about MVC is that the framework does not care how an application stores data, or how it retrieves and updates the data in the database. The bad news is that the framework provides no help interacting with a database.
A developer can use any data-access technology. The developer may write stored procedures and access them via ADO.NET. Or the developer may use an Object Relational Mapper (ORM), such as nHibernate or Entity Framework, to interact with the database. MVC works with any method, as long as the model is populated with .NET entity objects. MVC does not work well with record sets, so there is likely to be some mapping involved.
MVC Tooling
Now that you are familiar with the fundamental building blocks of MVC, let's take a look at how to use the tooling in Visual Studio to quickly create a new MVC project, and add to that project.
Creating a New Project
Creating an ASP.NET MVC application is simple because Visual Studio 2010 ships with built-in templates. As described previously, from the Visual Studio 2010 menu, select File → New → Project. In the Installed Templates section of the New Project dialog, select Web.
On the right side of the New Project dialog (as you learned earlier in this chapter), you can find two relevant templates: ASP.NET MVC 3 Web Application and ASP.NET MVC 3 Empty Web Application. Each of these can create a project with references to assemblies used by the framework, folders expected by the framework, routing code in the Global.asax, and assembly and namespace entries in the web.config file. The ASP.NET MVC 3 Web Application (let's call it the “nonempty” template) also adds some sample controllers, views, stylesheets, and data. Figure 1.6 shows the New Project dialog. This is the same dialog you saw in the description of the new ASP.NET templates. However, you are now selecting an MVC template.
Figure 1.6 New Project dialog
If you select ASPNET MVC 3 Web Application, Visual Studio prompts you for some more information, as shown in Figure 1.7.
Figure 1.7 Project Template dialog

Here you can specify whether you want an “empty” project, or one with a couple of controllers, pages, models, and views added to assist with managing users and displaying basic content.
You also have the option to select a view engine. The default is the new Razor view engine, but you can revert to the older Web Forms view engine if you prefer. The Razor engine is cleaner and would be my recommendation.
Creating MVC project prompts you to create a test project associated with this web application. The default behavior is to create a test project, which encourages you to write unit tests as you write your application code. Some developers jokingly refer to the No, Do Not Create a Unit Test Project radio button as the I Suck button because clicking it is an acknowledgment that you don't care about unit testing.
You are encouraged to write unit tests because they can make your code more robust, maintainable, and easier to refactor. Also, remember that MVC tends to encourage more testable code because it tends to separate the logical parts of an application. Creating a test project allows you to take advantage of this testability.
If you are new to MVC, you should create a site based on the nonempty template. This creates a site with a couple of controllers and views, allowing you to see how these interact. You can run this site as soon as it is created. The site includes a Home page and some basic security. Start with this site and modify the code, data, HTML, and stylesheets to suit the particular needs of the application. Even if you later decide you want the flexibility and control of starting from scratch, it's good to see this code and use it as a guide for building your own controllers and views.
Referenced Assemblies
Figure 1.8 shows the assemblies referenced by an MVC project.
Figure 1.8 Assemblies referenced by an MVC project
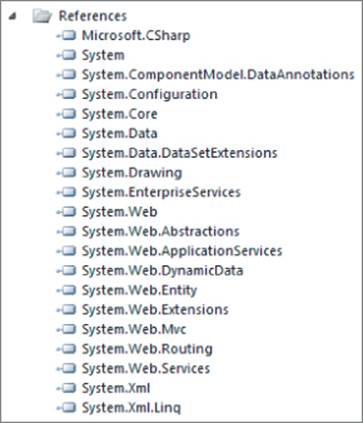
Following are the important assemblies used by MVC:
· System.Web.Mvc — This assembly contains the core framework and a number of helper methods.
· System.Web.Routing — This assembly controls URL routing. It is in its own assembly to make routing available to Web Forms applications as well.
· System.ComponentModel.DataAnnotations — This assembly contains attributes to decorate model properties. The framework detects these attributes and automatically adds functionality to parts of the application that consume the properties.
Site Structure
Many parts of an MVC application are familiar to Web Forms developers. Take a look at the “empty” MVC project in Figure 1.9.
Figure 1.9 “Empty” MVC project
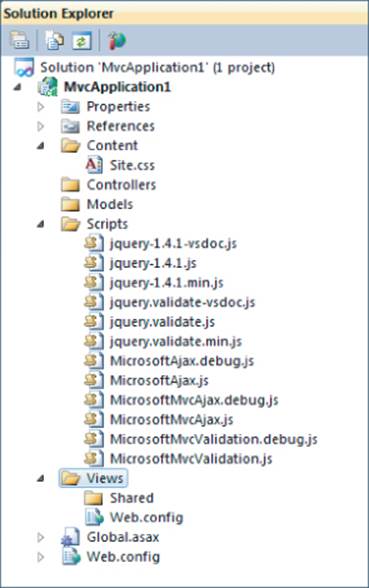
The project contains a web.config file and — other than references to namespaces and assemblies used by the MVC framework — it looks similar to the web.config file in a Web Forms application.
The project contains a global.asax file, where you can add code that fires when the application or session starts and stops, as well as other events in the app. MVC adds code in the Application_Start event handler to set up a default route, as described earlier.
Under the Content folder is a stylesheet file (Site.css) that controls fonts, colors, and other visual stylings for the site. Modifying files in this folder changes visual elements throughout the site, giving the site a consistent look and feel.
The Scripts folder contains mostly jQuery files. jQuery is an Open Source JavaScript library, useful for adding client-side functionality to a web application. You learn more about jQuery later in this chapter. There are a few other JavaScript files in the Scripts folder worth mentioning. MicrosoftAjax.jsand MicrosoftMvcAjax.js provide helper methods for calling server-side code from within your web client application. MicrosoftMvcValidation.js provides client-side validation of user input fields.
Some pieces of a new MVC application may be unfamiliar. Controllers, Models, and Views folders exist for developers to add their own custom controllers, models, and views.
The Models folder exists as a convenience, so a developer can keep all model classes together, making them easier to find. Because classes are compiled to Intermediate Language (IL), it doesn't matter where they are physically stored. I recommend placing entity objects in a separate project and storing ViewModel classes in the Models folder.
Controllers also get compiled to IL, so they need to be saved in the Controllers folder. However, MVC provides some tooling that enables you to right-click on this folder and easily create a Controller class, so that alone is worth keeping all your controllers there.
By default, each view must be saved to a subfolder of the Views folder. MVC uses a convention to find some things, and views are one of those things. When a controller Action method looks for a view, there is often no need to specify the name or location of the view. MVC looks for a view with the same name as the Action method, and either an ASPX or ASCX extension. It looks in the Views folder — first in the subfolder with the same name as the controller and then in the Shared subfolder.
For example, when you specify the Edit view in the CustomerController class, MVC will look in the following locations in this order:
1. Views/Customer/Edit.aspx
2. Views/Customer/Edit.ascx
3. Views/Shared/Edit.aspx
4. Views/Shared/Edit.ascx
Adding a Controller
It is a simple matter to add a new controller to an MVC project. Right-click the Controllers folder in Solution Explorer and select Add → Controller.
The Add Controller dialog displays, as shown in Figure 1.10.
Figure 1.10 Add Controller dialog
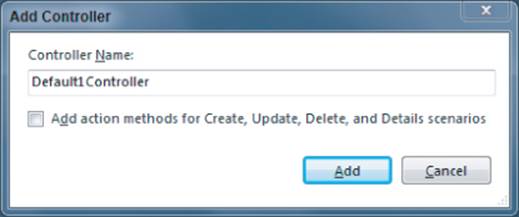
A controller name must end with the word Controller, so the dialog provides a default name (Default1Controller) and highlights the first part of this name, enabling you to change it to something more meaningful.
A drop-down menu also gives you the option to allow the framework to automatically generate a set of Action methods to create, read, update, and delete (known as CRUD) a model entity. You may allow the tooling to fill in these methods with code that assumes you are using the Entity Framework, or you may tell the tooling to only create method stubs that you can complete later.
In either case, you can modify these Action methods and add more Action methods to the Controller class, as necessary.
Adding a View
When you have a controller Action method, the MVC tooling makes it easy to add a default view for that method. Right-click anywhere inside the method, and select Add View from the context menu. The Add View dialog displays, as shown in Figure 1.11.
Figure 1.11 Add View dialog
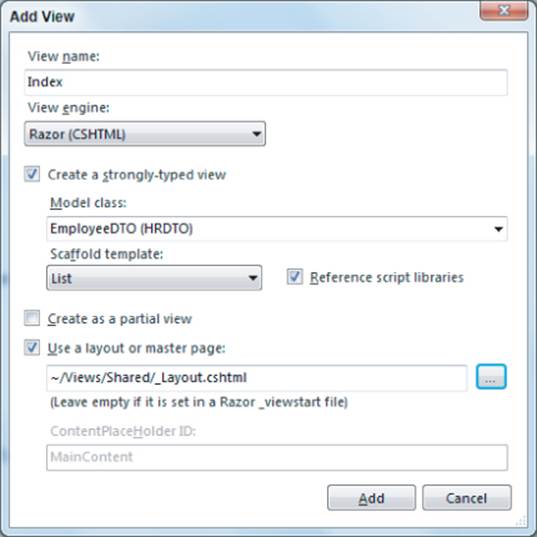
The View Name defaults to the name of the Action method. This is generally acceptable because, by default, an Action method looks for a view matching its name.
The View Engine defaults to Razor, which is a new view engine that shipped with MVC 3. The Razor view engine enables you to create a clean template for a web page. It contains a mixture of HTML and placeholders to be filled in by the model you pass to the view.
For CRUD methods, you need to check the Create a Strongly Typed View check box; then select the model class you want to update and the appropriate Scaffold Template. The Scaffold Template generates HTML appropriate for editing, creating, or listing the model.
Click the Add button to create this new view. The view is created in a folder named after the controller. If that folder does not exist, it is also created.
Sample Application
A sample application can illustrate how to use the features of MVC. For this example, you create a simple application called HR designed to track information about a company's employees.

You can download this application (file HR.zip) from this book's companion website at www.wrox.com to see all the code described in this section.
Sample Application Database
The sample application maintains a database containing two tables: Employees and Departments with primary keys EmployeeId and DepartmentId, respectively. The DepartmentId column of the Employees table points to a row in the Departments table, indicating the department to which the employee is assigned. A foreign key index enforces this relationship, preventing anyone from deleting a department to which any employees are assigned, and from assigning an employee to a department that does not exist. Figure 1.12 shows this relationship.
Figure 1.12 Relationship between database tables

Departments
Start by writing some code to maintain the Departments table.
The Departments table and the Department entity each contain only two fields — DepartmentId and DepartmentName — so the MVC framework can be demonstrated without writing a lot of business logic code.
Remember that a URL in MVC is a request for a Controller Action method. Therefore, it makes sense to start the web development by creating a Controller class.
The tooling in MVC makes this easy. You can quickly add a new controller by right-clicking the Controllers folder and selecting New → Controller. The Add Controller dialog displays, providing the option to add some method stubs to read and update data. Regardless of whether you choose to create these method stubs, a public concrete controller class is created, and this class inherits from the ControllerBase class, which implements IController. In the sample application, this class is named DepartmentController.cs.
Details
Take a look at the code in the DepartmentController class. Scroll down to the Details method. Details calls a custom method that retrieves from the database a single department by its ID. The retrieved data is an object of type DepartmentDTO and is saved in a variable named department. In this method, departmentis the model. Next, the Action calls the View helper method to generate a ViewResult (a subclass of ActionResult). By passing the model variable (department) to the helper method, MVC makes the model data available to the view. The view can reference this data as part of its ViewData before sending a response to the client.
public ActionResult Details(int id)
{
var empBus = new DepartmentBusiness();
DepartmentDTO department = empBus.GetDepartment(id);
return View(department);
}
To quickly jump to the view, right-click anywhere inside the method, and select “Go to View.” The Details.aspx page under the Views\Department folder opens. This page mostly contains HTML markup. But there are some directives and code that make it dynamic. The first thing to look at is the first line of the file, as shown here:
@model HRDTO.DepartmentDTO
This directive tells MVC what type of model is passed to the page. In this case, the page expects a model of type HRDTO.DepartmentDTO.
Because the page knows what class of model is passed to it, the Model variable is strongly typed and has all the properties of a Department object. Even IntelliSense works on the page. When you type Model and press ., the properties of a Department (for example, Id and Name) are listed.
Server-side code in the ASPX page is preceded by the special @ character. As you can see, it is possible to switch back and forth between server-side code and HTML. In the Details.aspx page, you have server-side code to render the properties of the model. For example, the following code is inDepartment.aspx:
@Model.DepartmentName
This outputs to the client browser the DepartmentName property of the DepartmentDTO object (the model) that was passed to this page.
By default, MVC will HTMLEncode any dynamic output before rendering it. This helps to prevent malicious scripting on your site. If the displayed data is retrieved from a database, someone may store malicious JavaScript in that database. When the JavaScript is rendered to a browser, the default behavior is to execute that script. Using HTMLEncode reduces this risk by encoding certain characters before rendering them. For example, < is replaced with < and > is replaced with >. Unless I have a reason not to, I always encode any output generated dynamically for the client.
MVC contains a number of helper methods to make it easier to render objects in a view. This page contains the following code:
@Html.ActionLink("Edit", "Edit", new { id=Model.DepartmentId })
This code generates a hyperlink with the text “Edit” and a link pointing to the Edit Action method in the current controller, and passing in an id parameter with a value of the current page's DeparmentID.
MVC provides other helper methods. The following methods each generate an HTML element, based on an attribute in a model passed to the view. It should be self-evident what HTML element each method renders.
· Html.TextBoxFor()
· Html.TextAreaFor()
· Html.DropDownListFor()
· Html.CheckboxFor()
· Html.RadioButtonFor()
· Html.ListBoxFor()
· Html.PasswordFor()
· Html.HiddenFor()
· Html.LabelFor()
Index
The Index Action method returns a List of all the Department objects, which is sent to the view engine to be merged with the view.
var empBus = new DepartmentBusiness();
List<DepartmentDTO> departments = empBus.GetAllDepartments();
return View(departments);
Look at the view and you can see it expects an IEnumerable<HRDTO.DepartmentDTO>.
@model IEnumerable<HRDTO.DepartmentDTO>
This matches the data sent from the action method, which sent down a List of DepartmentDTO objects with the view. Server-side C# code in this page iterates through this list of departments to output each department individually.
<table>
<tr>
<th></th>
<th>Department ID</th>
<th>Department Name</th>
</tr>
@foreach (var item in Model) {
<tr>
<td>
@Html.ActionLink
("Edit",
"Edit",
new { id=item.DepartmentId }) |
@Html.ActionLink
("Details",
"Details",
new { id = item.DepartmentId }) |
@Html.ActionLink
("Delete",
"Delete",
new { id = item.DepartmentId })
</td>
<td>
@item.DepartmentId
</td>
<td>
@item.DepartmentName
</td>
</tr>
}
The page code switches between server-side C# code and client-side HTML. The Razor view engine knows to begin interpreting code as server-side when it encounters the @ symbol. It figures when to stop based on the context. The server-side code runs first, causing the HTML to be output multiple times — once for each item in the list.
Edit
The Edit Action method looks like the details method. It returns a single Department. In this case, the DepartmentDTO is contained in a DepartmentViewModel object. I'll explain more about ViewModels later, but for now, the only thing you need to know is that the DepartmentViewModel object contains a Departmentproperty that is a DepartmentDTO object.
public ActionResult Edit(int id)
{
var empBus = new DepartmentBusiness();
DepartmentDTO department = empBus.GetDepartment(id);
var deptViewModel = new DepartmentViewModel()
{
Department = department
};
return View(deptViewModel);
}
In this case, you return something called a ViewModel. A ViewModel is data specific to a view. No other application uses the DepartmentViewModel other than this MVC application. You can find the DepartmentViewModel in the Models folder. It looks similar to the DepartmentDTO, but special attributes decorate the properties of the ViewModel.
public class DepartmentViewModel
{
[DisplayName("Department ID")]
public int DepartmentId { get; set; }
[Required(ErrorMessage="Please provide a name for this department")]
[DisplayName("Department Name")]
public string DepartmentName { get; set; }
}
These attributes are recognized by the MVC view engine. Look at the view associated with editing a Department (Views/Department/Edit.aspx).
@using (Html.BeginForm()) {
@Html.ValidationSummary(true)
<fieldset>
<legend>Department</legend>
@Html.HiddenFor(model => model.Department.DepartmentId)
<div class="editor-label">
@Html.LabelFor(model => model.Department.DepartmentId)
</div>
<div class="editor-field">
@Model.Department.DepartmentId
</div>
<div class="editor-label">
@Html.LabelFor(model => model.Department.DepartmentName)
</div>
<div class="editor-field">
@Html.EditorFor(model => model.Department.DepartmentName)
@Html.ValidationMessageFor
(model => model.Department.DepartmentName)
</div>
<p>
<input type="submit" value="Save" />
</p>
</fieldset>
}
The following line uses the MVC attributes:
@Html.LabelFor(model => model.Department.DepartmentId)
The LabelFor helper method outputs an HTML label for the DepartmentID property. In this case, the text of the label is determined by the DisplayName attribute decorating this property in the ViewModel. So, a label with the text “Department ID” renders. If the model's (or ViewModel's) class is not decorated with an attribute, the property name (DepartmentId) displays by default.
Another place where model attributes are used on this page is to validate input. In the ViewModel, the DepartmentName property is decorated with the Required attribute, as shown here:
[Required(ErrorMessage="Please provide a name for this department")]
The Required attribute comes from the System.ComponentModel.DataAnnotations assembly, so you must add a reference to this assembly in your project. This tells the view engine that the user must enter a nonempty DepartmentName. If a user tries to submit the form, the submission will be halted.
For the view to take full advantage of this validation, several helper methods output error messages when validation fails. The model property's Required attribute includes an error message argument (“Please Provide a Name for This Department”). Below the DepartmentName's textbox in the view, theValidationMessageFor helper method is called to output this message when a user tries to submit a form without a valid DepartmentName:
@Html.ValidationMessageFor(model => model.DepartmentName)
The view also includes a helper method to summarize all validation errors on the page.
@Html.ValidationSummary(true)
If multiple validation errors occur, all error messages will be listed here in the Validation Summary, so the user can see them all at once and deal with them at the same time.
Following are some Validation attributes that you can place on a Model property:
· [Required] — Input is required (see the earlier example).
· [StringLength] — String properties only. Validation fails if the length of a string is greater than specified.
· [RegularExpression] — Input must match the pattern defined in a given Regular Expression (regex).
· [Range] — Numeric properties only. Input must fall within a specified range.
· [DataType] — Input must be of a given data type.
The other thing to note about the Edit.aspx view is this line:
@using (Html.BeginForm()) {
The content between the beginning and ending braces ({ and }) will be wrapped in an HTML <form> tag, defining what will POST back to the same URL.
So, if the form posts to the same URL, it should call the same Action method, right? Well…that's almost true. As mentioned earlier, a URL is routed to a given Action method. But it is possible to have two Action methods with the same name. When MVC posts a form to a URL and two Actionmethods match the routing pattern, it first chooses a method decorated with the [HttpPost] attribute. The DepartmentController contains an Edit method decorated in just this way.
[HttpPost]
public ActionResult Edit(DepartmentViewModel departmentVm)
{
DepartmentDTO department = departmentVm.Department;
if (ModelState.IsValid)
{
try
{
var empBus = new DepartmentBusiness();
empBus.UpdateDepartment(department);
return RedirectToAction
("Details",
new { id = department.DepartmentId });
}
catch
{
return View(departmentVm);
}
}
else
{
return View(departmentVm);
}
}
Several options exist for the signature of this Action method. For example, if the method parameter is a System.Web.Mvc.FormCollection, it is populated with name-value pairs, matching each of the elements submitted with the form. This is the default MVC uses to auto-generate Action methods.
I prefer my HttpPost form methods to accept a ViewModel object of the same type that was originally passed to the Edit view. This works because MVC looks at the parameters and at the posted form data and then does its best to match them up. With a ViewModel parameter (in this case, aDepartmentViewModel), all data is strongly typed making the code more type-safe.
The HttpPost Edit method is called when the Edit form is posted. The first thing the method does is ensure that validation succeeded, based on the Data Annotation attributes added to the model. If so, the Edit method calls a helper method to save changes back to the database.
Employees
Maintaining Employees is more complex than maintaining Departments because the Department ID of each Employee must be validated against the Departments table.
Ideally, when editing or creating an Employee, users should select a Department from a drop-down list of valid departments, making it impossible to select an invalid Department. You can accomplish this by creating a ViewModel that contains information about a single Employee, as well as a list of all valid departments, bundling all this data together, and passing it all down to the view.
The EmployeeViewModel is just such a ViewModel. It contains both an Employee object and a List of departments.
public class EmployeeViewModel
{
public EmployeeDTO Employee { get; set; }
public List<DepartmentDTO> AllDepartments { get; set; }
}
The Edit action method of EmployeeController retrieves the current Employee and a List of all departments. The EmployeeViewModel is populated with these objects before it is sent to the view.
public ActionResult Edit(int id)
{
var empBus = new EmployeeBusiness();
EmployeeDTO employeeDto = empBus.GetEmployee(id);
var deptBus = new DepartmentBusiness();
List<DepartmentDTO> allDepartments = deptBus.GetAllDepartments();
EmployeeViewModel empVm = employeeDto.TransformToViewModel();
empVm.AllDepartments = Transformations.
TransformToViewModelsList(allDepartments);
return View(empVm);
}
The view (Employee/Edit.aspx) renders the Employee form similar to how the Department view was rendered. The difference is in how it constructs a drop-down list containing all departments and binds the selected item to the Employee's DepartmentID property.
@Html.DropDownListFor(
model => model.Employee.DepartmentId,
new SelectList(Model.AllDepartments, "DepartmentId", "DepartmentName"))
The DropDownListFor helper method renders an HTML drop-down and binds it to a property. The second parameter of this helper method is a SelectList — an MVC class that generates a drop-down list given the data, the ID column, and the text column. The data comes from Model.AllDepartmentsbecause the EmployeeViewModel contains an AllDepartments property that was populated in the controller action.
The HttpPost Edit method looks much like the HttpPost Edit method in DepartmentController.
[HttpPost]
public ActionResult Edit(EmployeeViewModel employeeVm)
{
if (ModelState.IsValid)
{
try
{
EmployeeDTO employee = employeeVm.Employee;
var empBus = new EmployeeBusiness();
empBus.UpdateEmployee(employee);
return RedirectToAction
("Details", new { id = employee.EmployeeId });
}
catch
{
return View(employeeVm);
}
}
else
{
return View(employeeVm);
}
}
You don't need to do anything special here because all data is automatically bound to the Employee ViewModel.
ASP.NET MVC Framework Summary
This section introduced the new ASP.NET MVC framework, explained the advantages of MVC, showed some of the useful features of this framework, and walked through a simple application.
jQuery
Because web forms have been around for a long time, developers can find countless user controls to enhance their web applications. Microsoft and numerous third-party vendors have produced libraries of rich controls to provide extra functionality to ASP.NET websites.
Many of these Web Forms controls rely on page events and code-behind. Therefore, they do not work with the new ASP.NET MVC paradigm.
Developers can still enhance their applications by adding rich client-side interactions using JavaScript. Many of the same component vendors who built Web Forms controls are working on and releasing controls designed for MVC. In many cases, they use JavaScript to provide client-side interactivity.
JavaScript is an excellent tool to interact with a web page because of the following reasons:
· It is a standard language that runs within all modern desktop browsers.
· It interacts with the Document Object Model (DOM) exposed by a web page, allowing web developers to manipulate the objects on a page.
· It has a rich event model for building interactive applications.
Unfortunately, JavaScript has several disadvantages that have limited its usefulness and popularity, including the following:
· The learning curve for JavaScript can be steep for some developers.
· Each browser has its own implementation of the DOM, forcing developers to write and test the same functionality multiple times to ensure the code runs correctly in a variety of browsers.
Several libraries have been built on top of JavaScript to address these disadvantages. These libraries abstract away the complexity of JavaScript, and (more important) automatically detect and handle the differences interacting with the variety of DOM implementations among the major browsers.
jQuery is an Open Source JavaScript library that has gained a lot of popularity in recent years, thanks to its rich set of functions and ease of use. With Visual Studio 2010, Microsoft made the decision to include jQuery with the product, which has boosted its popularity even more.
A new ASP.NET MVC project includes a Scripts folder that contains a dozen .js files. These files contain jQuery functions that the project's web pages can call. You can replace these files with new versions downloaded from http://jquery.com. Each filename contains a number (such as 1.4.1) just before the file extension. This is the version number of jQuery with which the script file is associated. This naming convention makes it easy to tell which version of jQuery a site is running.
To use jQuery in a view page, reference either files in the Scripts folder or files hosted on a Content Delivery Network (CDN), such as the one hosted by Microsoft at http://ajax.microsoft.com/ajax/jquery. The jQuery script files (for example, jquery-1.4.4.min.js) are stored in this folder. Link to each.js file you wish to use on your page.
Each location typically contains two versions of each file: one ending in .js and one ending in .min.js. The .min.js version is a minified version of the script, meaning that comments and excess white space have been removed, and variable and function names have been shortened. I always use the minified versions because they are smaller and, therefore, faster to download to the client.
Add the following line to the top of the page to make jQuery functionality available:
<script src="[FULL_SCRIPT_PATH]" type="text/javascript"></script>
In this snippet, [FULL_SCRIPT_PATH] is the path and filename of the script file used by the page.
For example, add the following line to use the main jquery file in the project's Scripts folder from within the sample site's master page (Shared\_Layout.cshtml):
<script
src="@Url.Content("∼/Scripts/jquery-1.4.4.min.js")"
type="text/javascript"></script>
The Url.Content method specifies an absolute path, so that the .js file will be found, regardless which view is rendered, and in which folder that view is found. I prefer to reference this script from my site's master pages.

The jQuery code described in this section is included in the sample applications file (HR.zip) available for download on this book's companion website at www.wrox.com.
JQuery code is simply JavaScript. Therefore, all jQuery code belongs within <script language=”javascript”></script> tags.
A common pattern for jQuery syntax is as follows:
$(Selector).Event(Action);
In this snippet, $ is simply the dollar sign character, which represents the jQuery object; Selector is a jQuery selector function (more on this later); Event is an event fired by the selected objects; and Action is the code to run when the event fires.
Each call to a jQuery function begins with the $ symbol. This symbol indicates that the JavaScript that follows is jQuery syntax. You can replace the $ with the keyword jQuery, but $ is far more terse.
A jQuery selector uses syntax similar to the selectors in CSS and always returns a collection of elements that match the selector criteria. The selector syntax can take several forms:
· Enclosing a tag name in quotation marks selects all elements of a given tag. For example, (“div”) selects all div elements on a page.
· Preceding a string with # selects an element by its ID. For example, (“#custIdLabel”) selects an element with the ID custIdLabel. It would select multiple elements with this ID if you were foolish enough to have multiple elements on your page with the same ID.
· Preceding a string with . selects all elements to which a given class has been applied. For example, (“.bodyText”) selects an element with the class bodyText.
· You can select elements within elements by separating selectors with a space. For example, (“headerDiv a”) selects anchor tags contained within an element named headerDiv.
Sometimes, the action might be to bind a function to an event, so that function's code runs when the event is fired. The most common way to do this is to bind an anonymous function to the ready event of the document. For example, the following jQuery code displays an alert message when the user selects the text within a Div with an ID of MyDiv:
$("#MyDiv").click(function () {
alert("You clicked me");
});
jQuery code often starts by binding code to the ready event of the document object. The document object represents a page's entire DOM, and the ready event fires when all the elements of the DOM are loaded into memory, making it an ideal time to manipulate elements, or wire up any other events.
Manipulating DOM Elements with jQuery
Take a look at the DemoClick.htm page in the sample project. Following are the relevant parts:
<script type="text/javascript" language="javascript">
$(document).ready(function () {
$("#Img1").click(function () {
var newHeight = $(this).height() + 20;
$(this).height(newHeight);
});
});
</script>
…
<img id="Img1" height="50" src="../Images/Grin.png" alt="Click to grow" />
The page contains an image tag with the ID “Img1”. The JavaScript binds an anonymous function to the document.ready event. The document.ready event fires when the browser has loaded into memory all the objects in the page's DOM. In jQuery, you may shorten $(document).ready(function() to the more terse syntax $(function(), which I will do in later examples.
This anonymous function binds another function to the click event of the Img1 image.
$("#Img1").click(function () {
Notice the selector: $(“#Img1”). The # symbol preceding “Img1” tells jQuery to search for any elements with an ID of “Img1”. A selector returns a set of elements matching the selection criteria. In this case, the selector finds one such element on the page, so it returns a set containing that one matching element. The code then binds an anonymous function to the click event of the matching element. The code of the anonymous function is as follows:
var newHeight = $(this).height() + 20;
$(this).height(newHeight);
In this code, the variable newHeight is declared and assigned. The code uses the keyword this to identify the element that fired the event. In this case, it is the image element that fired the click event, so $(this) refers to the image element. The code retrieves the height of the image element and increments it by 20 pixels before assigning this sum to the newHeight variable.
The result is a page that displays an image. Each time the user clicks the image, it grows 20 pixels larger.
Calling Server Code with jQuery
A powerful use of jQuery is its capability to call RESTful web services on the server. This gives a web application the capability to call server code without posting back an entire page.
ASP.NET MVC provides a simple way to expose RESTful services that can be called from jQuery. Recall that each Controller Action method returns an ActionResult object. The MVC framework provides the JsonResult class — a subclass of ActionResult that returns data in the JSON format. JSON is a lightweight, text-based data format designed for transmitting data across the web.
The EmployeeController class in the HR sample application contains a GetAllEmployees action method that returns a JsonResult object. Following is the code:
public JsonResult GetAllDepartments()
{
var empBus = new DepartmentBusiness();
List<DepartmentDTO> departments = empBus.GetAllDepartments();
return Json(departments, JsonRequestBehavior.AllowGet);
}
This code looks similar to the GetAllDepartments method in the DepartmentController class. The difference is that the last line uses the Json helper method to pass to the view engine a JsonResult object, instead of a ViewResult object. The result is that data is sent to the client as JSON — a data format that is small and self-describing, and, therefore, well-suited for passing data between client and server.
return Json(departments, JsonRequestBehavior.AllowGet);
The Json method here passes the list of departments down to the view engine. The second parameter of the method enables this service method to be called via HTTP GET. By default, only POST methods are enabled.
This method can be called directly from a jQuery script on a web page without refreshing that page. The EditJQ.aspx page contains the following script:
$ (function () {
var url = "/Employee/GetAllDepartments";
$.getJSON(
url,
null,
function (data) {
var options = "";
for (var i = 0; i < data.length; i++) {
options += "<option value=" + data[i].DepartmentId + ">"
+ data[i].DepartmentName + "</option>";
}
$("#DepartmentSelect").append(options);
});
});
When the document's ready event fires, the script calls the jQuery getJSON function, which calls the RESTful web service function GetAllDepartments. The last parameter of getJSON is a callback function that runs after the web service returns. The data parameter is the return value from the web service — in this case, a List of departments.
The selector $(“#DepartmentSelect”) selects an empty drop-down list on the page with the ID DepartmentSelect. The function loops through the list of departments and builds up an option tag for each department. It then appends the list of option tags to the empty drop-down list.
jQuery
This section introduced jQuery, described the basic syntax of jQuery, and discussed how use jQuery to call RESTful web services from client-side code.
This discussion has just scratched the surface of this powerful framework by showing a couple of simple examples. You can get more detailed information by exploring the online documentation at http://docs.jquery.com.
Summary
This chapter examined some of the new features introduced in ASP.NET 4.0. You learned about enhanced ways of handling View State in a web application, the new web.config transformations, and improvements to the web application templates (including a simpler web.config and more options when creating a new web application).
You also learned about the latest version of the ASP.NET MVC framework. You learned the basic concepts in an MVC application, and saw a sample application built with this framework.
You also learned about jQuery — a tool for enhancing your web applications. The chapter showed how to use jQuery to select and manipulate objects on a web page, and how to call server-side code from client-side script on your web page.
About the Author
David Giard has been developing solutions using Microsoft technologies since 1993. He is a Microsoft Most Valuable Professional (MVP), an International .NET Association (INETA) mentor, and the President of the Great Lakes Area .NET Users Group. He has presented at numerous conferences and user groups. Giard is a recovering certification addict, and holds an MCTS, MCSD, MCSE, and MCDBA, as well as a BS and an MBA. He is the host and producer of the mildly popular online TV show “Technology and Friends.” You can read his latest thoughts atwww.DavidGiard.com. Giard lives in Michigan with his two teenage sons.