Database Patterns (2015)
3. Redis
Redis is an open-source database server that has been gaining popularity recently. It’s an in-memory key-value store. It keeps all the data in-memory for fast access, but also keeps the data in-disk if you tell it to. It’s a basic key-value store where the keys and values are strings, but it also contains more interesting constructs like integers, lists, sets, sorted sets and dictionaries, and also contains some advanced features like pub-sub, blocking pop, key monitoring, and transactions.
Redis is the Swiss knife of in-memory databases: you can use it to implement many different use-cases, ranging from a data cache or a work queue to a statistics log.
4.1 Redis primitives
In Node, to access Redis you will need to instal a client library. The most used and battle-tested one is redis:
$ npm install redis --save
|
|
If you haven’t yet done it, to instal Redis itself you should follow the instructions on the official website at http://redis.io/download. |

redis.js:
var redis = require('redis');
module.exports = redis.createClient();
This local redis module uses the installed official redis NPM module to create a client object, which is what this module exports.
Optionally you can pass in some client options if you’re hosting Redis in a different port, or in another network host:
var redis = require('redis');
var port = process.env.REDIS_PORT || 6379;
var host = process.env.REDIS_HOST || '127.0.0.1';
module.exports = redis.createClient(port, host);
To use this module from any other file you just have to require it like this:
client_example.js:
var redis = require('./redis');
var assert = require('assert');
redis.set('key', 'value', function(err) {
if (err) {
throw err
}
redis.get('key', function(err, value) {
if (err) {
throw err
}
assert.equal(value, 'value');
console.log('it works!');
redis.quit();
});
});
Here in this last example we’re setting a key and then getting the value for that key, asserting that it is indeed what we inserted.
Now let’s look at some of Redis’ useful primitives, and how to use them in Node.
4.1.1 Strings
In Redis all keys are strings, and values are typically strings. (We’ll see some examples using numbers and objects later.) As we’ve seen, to set a key to a string you use put, providing the key and the value strings:
redis.put('key', 'value');
For every Redis command you can pass in a callback to be invoked when the command completes or errors:
redis.put('key', 'value', function(err) {
if (err) {
console.error('error putting key:', err)
}
else {
console.log('key saved with success');
}
});
You can also get the string value of any key using the get command:
redis.get('key', function(err, value) {
if (err) {
console.error('error getting key:', err);
}
else {
console.log('key has the value %s', value);
}
});
4.1.2 Key expiration
Besides the basic key-value operations, Redis has a load of useful functionalities. One of them is key expiration. You can define an expiration time after which the entry will be removed from Redis. Let’s see this in action:
expiration.js:
var redis = require('./redis');
redis.set('some key', 'some value');
redis.expire('some key', 2);
setInterval(function() {
redis.get('some key', function(err, value) {
if (err) {
throw err;
}
if (value) {
console.log('value:', value);
}
else {
console.log('value is gone');
process.exit();
}
});
}, 1e3);
Here we’re setting a key and then expiring it after two seconds have elapsed. We then poll Redis for the value on that key until Redis removes that record, at which time we terminate the current script.
|
|
You may have noticed that in the previous example we are sometimes calling Redis without providing a callback. Is this safe? This is how it works: when issuing several commands on the same client, the client is only executing one command at a time; the pending commands are waiting on a queue. This happens because the Redis protocol only allows one running command per connection. If an error occurs and you didn’t provide a callback, the error will be emitted on the client. When this happens, you lose all the context of the error. This is why you should always provide callbacks in the commands. |
You can test this by doing:
$ node expiration
value: some value
value is gone
If you need to set the expiration time when you set the key, you can use the SETEX command instead:
expiration_setex.js:
var redis = require('./redis');
redis.setex('some key', 2, 'some value');
setInterval(function() {
redis.get('some key', function(err, value) {
if (err) {
throw err;
}
if (value) {
console.log('value:', value);
}
else {
console.log('value is gone');
process.exit();
}
});
}, 1e3);
4.1.3 Transactions
In the previous example we saw a command that combines two commands into one (SET and EXPIRE). You can also choose to combine whatever commands you wish into one atomic transaction by using the MULTI command. For instance, if you want to atomically set two keys and set the expiration of another, you can compose it like this:
multi.js:
var redis = require('./redis');
redis.multi().
set('key A', 'some value A').
set('key B', 'some value B').
expire('some other key', 2).
exec(function(err) {
if (err) {
throw err;
}
console.log('terminated');
redis.quit();
});
Here we’re constructing a MULTI command using redis.multi() We’re then adding commands to this transaction using the Redis API, but on the created multi. We then execute the transaction by calling multi.exec(), providing it with a callback.
If you get an error, then none of the commands were effective. If you don’t get an error, this means that each command succeeded.
|
|
All these commands are documented on the official Redis website: http://redis.io/commands. With some few exceptions, the redis client follows the exact same argument order and type as documented. |

4.1.4 Command results in Multi
Besides executing multiple commands, you can also execute multiple queries, or mix commands and queries, getting the results at the end. Let’s see this in action:
multi_read.js:
var redis = require('./redis');
redis.multi().
set('key A', 'some value for A').
get('key A').
set('key A', 'some *OTHER* value for A').
get('key A').
exec(function(err, results) {
if (err) {
throw err;
}
console.log('terminated. results: %j', results);
redis.quit();
});
If you execute this, you get the following output:
$ node multi_read.js
terminated. results: ["OK","some value for A","OK","some *OTHER* value for A"]
Here you can see that the result passed to our callback is an array containing a position for the result of each operation in our transaction. The SET operations (positions 0 and 2) resulted in an OK string (this is how Redis indicates success); and the GET operations (positions 1 and 3) resulted in the key values at the time of execution.
4.1.5 Optimistic locking using WATCH
The MULTI command can be powerful, but you still can’t issue atomic compare-and-set operations. For instance, let’s say that you want to make an operation where you read an integer value from key A and then you add 1 to it and store it back:
redis.get('A', function(err, value) {
if (err) {
throw err;
}
var newValue = Number(value) + 1;
redis.set('A', newValue);
});
This approach has an obvious problem though: it doesn’t allow safe concurrent clients. If more than one client is performing this operation in parallel, more than one may read the same value, increment it, and then save the same result. This means that, instead of atomically incrementing the value, we would lose increments. This can be solved by using a combination of WATCH and MULTI:
var Redis = require('redis');
function increment(key, cb) {
var replied = false;
var newValue;
var redis = Redis.createClient();
redis.once('error', done);
redis.watch(key);
redis.get(key, function(err, value) {
if (err) {
return done(err);
}
newValue = Number(value) + 1;
redis.multi().
set(key, newValue).
exec(done);
});
function done(err, result) {
redis.quit();
if (! replied) {
if (!err && !result) {
err = new Error('Conflict detected');
}
replied = true;
cb(err, newValue);
}
}
}
increment('A', function(err, newValue) {
if (err) {
throw err;
}
console.log('successfully set new value to %j', newValue);
});
Here we’re defining a generic increment function that takes a key and a callback. After defining this function we use it to increment the key A. When this is done we terminate the Redis client connection.
The increment function starts by watching the key, and then starting a MULTI command. We then calculate the new value for A and append the SET command to the multi. We then execute this one-command multi, passing our done function as a callback. This function detects conflicts. TheMULTI command returns a null value (instead of the traditional OK) when a conflict is detected. A conflict happens when any of the watched keys (in our case, only one) is written by another connection. In this case, we detect the conflict and raise an appropriate error with a message stating that a conflict was detected.
There are several minute and perhaps non-obvious aspects to this script, though. First, we’re using one connection per transaction. This is because Redis keeps one watch list per connection, and a MULTI execution is only aborted if a write on a watched key is performed on a different client connection. Also, after the multi has been executed, the watch list is discarded. Basically, it’s not safe to share a connection if you’re relying on the behaviour of a watch list.
|
|
Issuing more that one WATCH command adds a key to the connection watch list. You can clear the watch list using the UNWATCH command. |
Also notice that, since we’re creating one Redis connection per increment, we’re being especially careful in closing that connection. This means that, in the case of an error, we always call the done function, which is responsible for closing the connection to Redis. We have to cover all error conditions – it’s very easy to leak short-lived connections.
|
|
One connection per transaction means that extra client-side and server-side resources are needed. Be careful with dimensioning your systems when using this feature, as it’s easy to burden the Node processes or the Redis server during peak traffic! |
We can test the conflict detection by concurrently issuing more than one increment at the end of the last file:
end of increment_watch.js:
for(var i = 0 ; i < 10 ; i ++) {
increment('A', function(err, newValue) {
if (err) {
throw err;
}
console.log('successfully set new value to %j', newValue);
});
}
Let’s run this script:
$ node increment_watch
successfully set new value to 14
/Users/pedroteixeira/projects/nodejs-patterns-book/code/08/redis/node_modules/re\
dis/index.js:602
throw err;
^
Error: Conflict detected
at done (/Users/pedroteixeira/projects/nodejs-patterns-book/code/08/redis/in\
crement_watch.js:27:15)
But now that we can properly detect conflicts, we can handle them and retry performing the transaction:
increment_watch_retry.js:
var Redis = require('redis');
function _increment(key, cb) {
var replied = false;
var newValue;
var redis = Redis.createClient();
redis.once('error', done);
redis.watch(key);
redis.get(key, function(err, value) {
if (err) {
return done(err);
}
newValue = Number(value) + 1;
redis.multi().
set(key, newValue).
exec(done);
});
function done(err, result) {
redis.quit();
if (! replied) {
if (!err && !result) {
err = new Error('Conflict detected');
}
replied = true;
cb(err, newValue);
}
}
}
function increment(key, cb) {
_increment(key, callback);
function callback(err, result) {
if (err && err.message == 'Conflict detected') {
_increment(key, callback);
}
else {
cb(err, result);
}
}
}
for(var i = 0 ; i < 10 ; i ++) {
increment('A', function(err, newValue) {
if (err) {
throw err;
}
console.log('successfully set new value to %j', newValue);
});
}
Here we renamed our increment function to _increment and created a new increment function that handles the special case where a conflict is detected. Since we are guaranteed that Redis will not commit if there is a conflict, we can safely try calling the _increment function again.
We can now test this new version and verify that all the transactions eventually succeeded, even though they were emitted concurrently:
$ node increment_watch_retry.js
successfully set new value to 15
successfully set new value to 16
successfully set new value to 17
successfully set new value to 18
successfully set new value to 19
successfully set new value to 20
successfully set new value to 21
successfully set new value to 22
successfully set new value to 23
successfully set new value to 24
Here we used a simple increment, but you can easily see that we can use optimistic locking to create any type of custom transactions as long as we’re using different Redis connections for each transaction, and that we’re watching the necessary keys.
4.1.6 Transactions using Lua scripts
Another way of performing arbitrarily complex operations in an atomic way in Redis is by using scripts written in Lua. Redis provides a way for us to inject and run Lua scripts inside it. When executing a Lua script in Redis, we are guaranteed that no other command or script is executing concurrently, which is exactly what we want.
Lua is a light scripting language that is somewhat similar to JavaScript (even though arrays start at index 1, not 0…).
|
|
If you don’t know Lua, there are several resources out there if you want to learn it — but it’s clearly out of the scope of this book. Nonetheless, we’re going to present here some examples that you may find useful to base your own scripts on. |
First we’re going to port our increment transaction into a Redis Lua script:
lua_scripts/increment.lua:
local key = KEYS[1]
local value = redis.call('get', key) or 0
local newValue = value + 1
redis.call('set', key, newValue)
return newValue
Here you can see that this simple script starts by getting the name of the key from the KEYS variable. This is a special implicit variable that Redis passes to the script, which comes from the client invocation. After that we get the value stored in that key by calling the Redis engine. The Redis operations are available to be called using redis.call; the first argument is the operation name, and the following arguments are the arguments to the operation itself.
After getting the current value, we increment it, store it, and then return it as the result of the operation.
Here is the Node part that implements the increment function, and that delegates to the Lua script:
increment_lua.js:
var fs = require('fs');
var path = require('path');
var redis = require('./redis');
var script = fs.readFileSync(
path.join(__dirname, 'lua_scripts', 'increment.lua'),
{encoding: 'utf8'});
function increment(key, cb) {
redis.eval(script, 1, key, cb);
}
for(var i = 0 ; i < 10 ; i ++) {
increment('some key', function(err, newValue) {
if (err) {
throw err;
}
console.log('successfully set new value to %j', newValue);
redis.quit();
});
}
The first thing we do is to load the Lua script into memory. We do this by using fs.readFileSync.
|
|
Somewhere you may have heard that it’s wrong to use the Node synchronous functions – you should always use the asynchronous version of the functions so that you don’t block the Node’s event loop. It’s OK to use synchronous functions during module prepartion time – they exist here because of that. As a rule of thumb, you only have to avoid calling synchronous functions from inside a callback or an event listener. |
Now that we have our Lua script in memory, we can implement the increment function, which loads the script into Redis and calls it by using the EVAL command. The first argument of redis.eval is the script code itself, and after that comes the number of keys we’re going to pass. In our case, we’ll only be passing one key argument. Finally, there’s a callback for us to know when the operation failed or succeeded, and in the last case, what the result was.
|
|
Besides keys, you can also pass arbitrary arguments, which the Lua script can access using the ARGS implicit array variable. |
We can now test our script:
$ node increment_lua.js
successfully set new value to 1
successfully set new value to 2
successfully set new value to 3
successfully set new value to 4
successfully set new value to 5
successfully set new value to 6
successfully set new value to 7
successfully set new value to 8
successfully set new value to 9
successfully set new value to 10
4.1.6.1 Caching Lua scripts
There’s one problem with our last implementation: we are always passing in the Lua script before invoking. This bears the overhead of transmitting the script into Redis, Redis loading, parsing and running the script. We can optimise this by using the Redis EVALSHA command, which allows us to invoke a script given its SHA1 digest. Let’s use it to avoid loading the same script all the time:
lua_scripts/index.js:
var fs = require('fs');
var path = require('path');
var crypto = require('crypto');
var NO_SCRIPT_REGEXP = /NOSCRIPT/;
var scriptNames = ['increment'];
var scripts = {};
scriptNames.forEach(function(scriptName) {
var body = fs.readFileSync(
path.join(__dirname, scriptName + '.lua'),
{encoding: 'utf8'})
scripts[scriptName] = {
body: body,
digest: crypto.createHash('sha1').update(body).digest('hex')
};
});
exports.execute = execute;
function execute(redis, scriptName, keyCount) {
var args = Array.prototype.slice.call(arguments);
var cb = args[args.length - 1];
var redis = args.shift();
var scriptName = args.shift();
var script = scripts[scriptName];
if (!script) {
cb(new Error('script is not defined: ' + scriptName));
}
else {
var digest = script.digest;
args.unshift(digest);
args[args.length - 1] = callback;
redis.evalsha.apply(redis, args);
}
function callback(err) {
if (err && err.message.match(NO_SCRIPT_REGEXP)) {
args[0] = script.body;
redis.eval.apply(redis, args);
}
else {
cb.apply(null, arguments);
}
};
}
This code is a generic module that manages the execution of scripts for you. The variable named scriptNames is an array that contains all the names of the available scripts. In our simple case we only have one script named increment, but we could have more. When this module loads, it loads the script bodies and calculates the SHA1 digest of each one.
Also, this module exports an execute function that takes a Redis connection, a script name and a set of arbitrary script execution arguments, finalised with a callback. This function starts by trying to execute the script using redis.evalsha, passing in the script SHA1 digest. If Redis cannot find the script, the execution yields a specific error message that contains the “NOSCRIPT” string. When we get such an error, Redis is telling us that it doesn’t yet contain the script: we then fall back to using redis.eval, passing in the script body instead of the script digest.
Now we can simply use this module from a client script like this:
increment_lua_sha.js:
var redis = require('./redis');
var luaScripts = require('./lua_scripts');
function increment(key, cb) {
luaScripts.execute(redis, 'increment', 1, key, cb);
}
for(var i = 0 ; i < 10 ; i ++) {
increment('some key', function(err, newValue) {
if (err) {
throw err;
}
console.log('successfully set new value to %j', newValue);
redis.quit();
});
}
When executing this script, again you should see the same output as before – but now knowing in your heart that it’s doing its best to reuse the cached script.
$ node increment_lua_sha.js
successfully set new value to 31
successfully set new value to 32
successfully set new value to 33
successfully set new value to 34
successfully set new value to 35
successfully set new value to 36
successfully set new value to 37
successfully set new value to 38
successfully set new value to 39
successfully set new value to 40
4.1.6.2 Performance
Since we know that all Redis queries and commands are performed in memory, and also that Lua scripts are executed quickly, if we’re somewhat careful with the number and types of operations we perform we can also guarantee that each transaction is performed quickly enough for us to be able to accomodate a given workload.
Each Redis command has a time complexity that’s given to us in O() notation. For instance, if a given operation is O(1), we know that it will always take the same fixed amont of time.
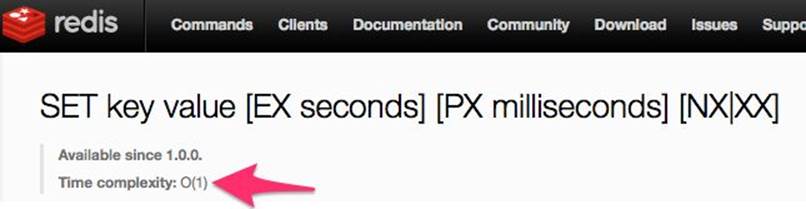
Redis SET command complexity
For instance, the Redis LINDEX command, which gets the Nth element of a list, has a complexity of O(N), where N is the number of elements the list has. If you’re using this command, you must somehow ensure that the number of elements in this list in not unbounded.
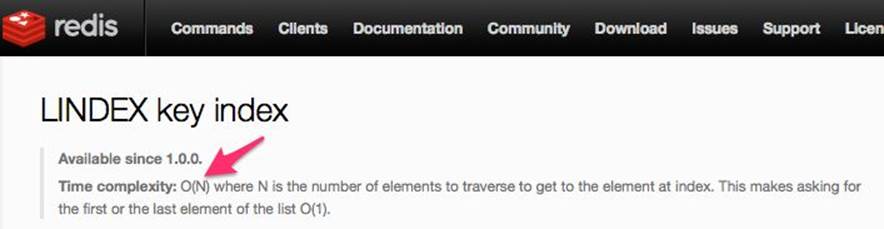
Redis LINDEX command complexity
4.1.7 Integers
Earlier we saw how to perform atomic operations in Redis, and we showed the example of incrementing an integer value of a record. This example was only presented for the sake of showing a simple example, since it happens that Redis already has increment and decrement commands.
incr.js:
var redis = require('./redis');
for(var i = 0 ; i < 10 ; i ++) {
redis.incr('some key', done);
}
function done(err, result) {
if (err) {
throw err;
}
console.log('new value:', result);
redis.quit();
}
If you execute this file you will get the same type of result as in the previous custom version:
$ node incr
new value: 1
new value: 2
new value: 3
new value: 4
new value: 5
new value: 6
new value: 7
new value: 8
new value: 9
new value: 10
Besides incrementing by one, Redis also allows incrementing by a specific integer value using the INCRBY command:
incrby.js:
var redis = require('./redis');
for(var i = 0 ; i < 10 ; i ++) {
redis.incrby('some other key', 2, done);
}
function done(err, result) {
if (err) {
throw err;
}
console.log('new value:', result);
redis.quit();
}
In this case we’re incrementing the record by the value of 2 ten times:
$ node incrby.js
new value: 2
new value: 4
new value: 6
new value: 8
new value: 10
new value: 12
new value: 14
new value: 16
new value: 18
new value: 20
Besides incrementing, we can also decrement:
decr.js:
var redis = require('./redis');
for(var i = 0 ; i < 10 ; i ++) {
redis.decr('some key', done);
}
function done(err, result) {
if (err) {
throw err;
}
console.log('new value:', result);
redis.quit();
}
This yields the following expected results:
$ node decr
new value: 9
new value: 8
new value: 7
new value: 6
new value: 5
new value: 4
new value: 3
new value: 2
new value: 1
new value: 0
Redis also has a DECRBY command that allows us to decrement by a specific amount:
decrby.js:
var redis = require('./redis');
for(var i = 0 ; i < 10 ; i ++) {
redis.decrby('some other key', 2, done);
}
function done(err, result) {
if (err) {
throw err;
}
console.log('new value:', result);
redis.quit();
}
And running this last script yields the following results:
$ node decrby
new value: 18
new value: 16
new value: 14
new value: 12
new value: 10
new value: 8
new value: 6
new value: 4
new value: 2
new value: 0
4.1.8 Using counters
These primitives give great ways to implement basic counters for storing and reading statistics. For instance, you can store per-user statistics on the number of API requests. If you want to throttle API usage per user, you can use Redis to store an API request counter per user, which gets automatically reset at a fixed time interval.
For instance, this is how you could implement a function to increment the API usage counter for a specific user:
api_throttling/incr_api_usage_counter.js:
var redis = require('../redis');
var expirationSecs = 60;
module.exports = incrAPIUsageCounter;
function incrAPIUsageCounter(user, cb) {
var key = 'api-usage-counter:' + user;
redis.multi().
incr(key).
ttl(key).
exec(callback);
function callback(err, results) {
if (err) {
cb(err);
}
else {
var newValue = results[0];
var ttl = results[1];
if (ttl == -1) {
redis.expire(key, expirationSecs, expired);
}
else {
cb(null, newValue);
}
}
function expired(err) {
if (err) {
cb(err);
}
else {
cb(null, newValue);
}
}
}
}
Here we’re using a Redis multi call to make two operations: one to increment the record, and another to get the TTL (time-to-live) of the record. If the record TTL has not been set yet, we set it by using redis.expire(). If the TTL is already set, we just terminate the operation.
|
|
The TTL command yields a -1 value for records that exist and that don’t yet have a TTL. If the record does not exist, it returns -2. We only need to check for the -1 value because we’re querying the TTL in a multi right after the record is updated, guaranteeing that the record exists. |
You just have to call this function before any client-authenticated request, and it will increment the user API usage counter.
Now we have to create a function that queries this counter to determine whether or not the user can use the API:
api_throttling/can_user_use_api.js:
var redis = require('../redis');
var maxAPICallsPerUser = 100;
module.exports = canUserUseAPI;
function canUserUseAPI(user, cb) {
var key = 'api-usage-counter:' + user;
redis.get(key, function(err, value) {
if (err) {
cb(err);
}
else {
var n = Number(value);
var allowed = n <= maxAPICallsPerUser;
cb(null, allowed);
}
});
}
This module gets the value for the user API request counter. If it exceeds a given maximum, we say it’s now allowed. Now the application just has to call this function before any authenticated client API request handling, something like this:
throttling_example.js:
var canUserUseAPI = require('./api_throttling/can_user_use_api');
app.use(function(req, res, next) {
canUserUseAPI(req.user, function(err, can) {
if (err) {
next(err);
}
else if (can) {
next();
}
else {
res.status(429).send({error: 'Too many requests'});
}
});
});
In the implementation we are failing if there is an error, but you can instead choose to ignore the errors from Redis and proceed anyway, improving the availability of your service in case Redis is down:
throttling_example_resilient.js:
var canUserUseAPI = require('./api_throttling/can_user_use_api');
app.use(function(req, res, next) {
canUserUseAPI(req.user, function(err, can) {
if (err || can) {
next();
}
else {
res.status(429).send({error: 'Too many requests'});
}
});
});
By using Redis as a store for the API usage counters, we’re able to implement a centralised and quick way to check whether the user has exceed the API usage quota. By using Redis’ built-in TTLs, we don’t need an aditional job to expire records: Redis does that for us.
4.1.9 Dictionaries
Besides simple string values, Redis also allows you to store string dictionaries where the keys and values are strings. The set of Redis commands start with H and include HMSET, HMGET and HGETALL, among others. These commands can map well from and into JavaScript shallow objects.
For instance, you can store a user profile with a single set command like this:
user_profile.js:
var redis = require('./redis');
exports.set = setUserProfile;
exports.get = getUserProfile;
function setUserProfile(userId, profile, cb) {
redis.hmset('profile:' + userId, profile, cb);
}
function getUserProfile(userId, cb) {
redis.hgetall('profile:' + userId, cb);
}
You can use this module we have devised from your app:
var UserProfile = require('./user_profile');
var user = 'johndoe';
var profile = {
name: 'John Doe',
address: '31 Paper Street, Gotham City',
zipcode: '987654',
email: 'john.doe@example.com'
};
UserProfile.set(user, profile, function(err) {
if (err) {
throw err;
}
console.log('saved user profile');
UserProfile.get(user, function(err, profile) {
if (err) {
throw err;
}
console.log('loaded user profile:', profile);
});
});
Of course, instead of using Redis dictionaries you could simply JSON-encode and JSON-decode the user profile object. Using a Redis dictionary here can be useful if you want to get or set individual attributes without having to get and set the entire object.
For instance, to get the user email in this example, you can simply:
redis.hget('profile:' + userId, 'email', function(err, email) {
if (err) {
handleError(err);
}
else {
console.log('User email:', email);
}
});
|
|
Given the persistence and availability properties, I don’t think that Redis is appropriate for the main storage engine for any application. Instead, Redis can be quite useful as a secondary faster storage, and for use as a caching layer. |

4.1.10 Redis dictionary counters
Another use for Redis dictionaries is to help with naming the keys by storing several counters under the same key. For instance, if you want to keep track of API access, you can atomically increment several user counters like this:
counters.js:
var redis = require('./redis');
exports.APIAccess = countAPIAccess;
function countAPIAccess(user, cb) {
var now = new Date();
var year = now.getUTCFullYear();
var month = format(now.getUTCMonth()+1)
var day = [year, month, now.getUTCDate()].join('-');
var key = 'counters:' + user;
redis.multi().
hincrby(key, year, 1).
hincrby(key, month, 1).
hincrby(key, year + '-', month, 1).
hincrby(key, day, 1).
hincrby(key, 'total', 1).
exec(cb);
}
function format(n) {
return ("0" + n).slice(-2);
}
Here we’re exporting a function named APIAccess that clients call when they want to count an API access by a particular user. This function creates a MULTI transaction that bears several HINCRBY commands. For each of these commands, the base key is always the same – and is composed specifically for the given user ID. Each attribute key is then composed based on the current date. For instance, if the current date is 2014-01-15, this will increment the counters named 2014, 01, 2014-01, 2014-01-15 and total, all under the user-specific counter record. This way you will have counter buckets for each day, month, and year, as well as a grand total.
|
|
You will have to take some care maintaining the keys inside each Hash. After some time has passed, the number of keys for each active user will increase, occupying Redis memory and increasing operation latency. |
4.1.11 Lists
Redis has another interesting type: lists. A list in Redis is internally implemented as a linked list, which means that it’s cheap to insert and remove elements from it.
This, for instance, makes lists useful for implementing work queues. You insert work at one end of the list, and the workers pop out work from the other end of the list. Let’s see how we could implement a work queue using Redis:
queue.js:
var redis = require('./redis');
exports.push = push;
exports.pop = pop;
function push(work, cb) {
redis.lpush('workqueue', JSON.stringify(work), cb);
}
function pop(cb) {
redis.rpop('workqueue', function(err, work) {
if (err) {
cb(err);
}
else {
if (work) {
work = JSON.parse(work);
}
cb(null, work);
}
});
}
This queue module exports two functions: push and pop. The first one serves to push work items to the workers. The second one is for the workers to pop work from the queue.
Here is some code that exercises this module:
queue_test.js:
var queue = require('./queue');
var missing = 10;
for(var i = 0 ; i < 10 ; i ++) {
queue.push({some: 'work', id: i}, pushed);
}
function pushed(err) {
if (err) {
throw err;
}
if (-- missing == 0) {
console.log('all work is pushed');
poll();
}
}
function poll() {
queue.pop(popped);
}
function popped(err, work) {
if (err) {
throw err;
}
console.log('work:', work);
if (! work) {
setTimeout(poll, 1e3);
}
else {
poll();
}
}
This script above inserts 10 work items into the queue. Once they’re all inserted, it goes out to pop them. If there is no more work, it waits for one second before trying to pop another item. Otherwise, it tries to pop another one immediately afterwards. You can execute this file:
$ node queue_test.js
all work is pushed
work: { some: 'work', id: 0 }
work: { some: 'work', id: 1 }
work: { some: 'work', id: 2 }
work: { some: 'work', id: 3 }
work: { some: 'work', id: 4 }
work: { some: 'work', id: 5 }
work: { some: 'work', id: 6 }
work: { some: 'work', id: 7 }
work: { some: 'work', id: 8 }
work: { some: 'work', id: 9 }
work: null
work: null
work: null
4.1.11.1 Avoid polling
In this last solution, the workers have to poll Redis for work, which is ugly, introduces a bit of overhead, and is also error-prone. Instead, a Redis client connection can use one of the list-blocking pop commands to block on a list while there are no elements. With this new knowledge, this is how we would then re-implement the queue module:
queue_block.js:
var Redis = require('redis');
var redis = require('./redis');
var popTimeout = 10;
exports.push = push;
exports.Worker = worker;
function push(work, cb) {
redis.lpush('workqueue', JSON.stringify(work), cb);
}
function worker(fn) {
var conn = Redis.createClient();
next();
function next() {
conn.brpop('workqueue', popTimeout, popped);
function popped(err, results) {
if (err) {
cb(err);
}
else {
var work = results[1];
if (work) {
fn(null, JSON.parse(work));
}
}
next();
}
}
function close() {
conn.quit();
}
return {
close: close
};
}
Here, instead of exposing a pop function, we expose a constructor for a worker. This constructor receives one function that will be called when a work item gets popped, or when an error occurs when doing it.
You can see here that we create one Redis connection per worker. This is because the blocking pop blocks the connection, only replying when the given timeout expires, or when an item gets popped.
4.1.11.2 Not losing work
One problem that may arise from any of the previous work-queue implementations is that work may be lost if the worker process goes down. If a worker dies while processing some work, that piece of work was already popped from Redis, and we have already lost it. In some applications this may not be a problem if it happens rarely; but in some others this may not be tolerable.
|
|
It usually comes down to whether the work has to be performed at most once or at least once. If you have to perform the work at least once, the operations resulting from this work should be idempotent: that is, if the same operation happens more than once, it will yield the same result. An example of this is an operation of propagating a user password change to a foreign system. It should not matter whether the change is propagated more than once, as it will yield the same result, which is setting the password in a foreign system. |

|
|
There is usually a way of making operations execute exactly once, and it usually involves creating a unique operation identifier and making sure the same operation is not applied twice. |
Let’s see how we could create such a system using Redis queues. First, you will need to instal this cuid for generating unique IDs:
$ npm install cuid --save
We’re now ready to create a version of the queue that’s safer:
queue_block_safe.js:
var cuid = require('cuid');
var Redis = require('redis');
var redis = require('./redis');
var EventEmitter = require('events').EventEmitter;
var popTimeout = 10;
exports.push = push;
exports.Worker = Worker;
function push(work, cb) {
var id = cuid();
var item = {
work: work,
created: Date.now(),
id: id
};
redis.lpush('workqueue:in', JSON.stringify(item), function(err) {
if (err) {
cb(err);
}
else {
cb(null, id);
}
});
}
function Worker(fn) {
var conn = Redis.createClient();
setImmediate(next);
var worker = new EventEmitter();
worker.close = close;
return worker;
function next() {
conn.brpoplpush('workqueue:in', 'workqueue:processing', popTimeout, popped);
function popped(err, item) {
if (err) {
worker.emit('error', err);
}
else {
if (item) {
var parsed = JSON.parse(item);
fn.call(null, parsed.work, parsed.id, workFinished);
}
}
function workFinished() {
conn.lrem('workqueue:processing', 1, item, poppedFromProcessing);
}
function poppedFromProcessing(err) {
if(err) {
worker.emit('error', err);
}
next();
}
}
}
function close() {
conn.quit();
}
}
Here, our next function uses the BRPOPLPUSH command, which atomically pops from a list and pushes into another list. This makes sure that we always have the work in Redis while it’s being processed. When the worker finishes processing the item, it calls a callback function (workFinished), which removes the item from the work:processing queue.
Now, to recover from dead workers, a process can be responsible for peeking into the work:processing list and requeueing the work items that have exceeded a certain execution time.
|
|
One thing to bear in mind is that, in the event of a load problem where the workers don’t have enough capacity to consume the work in a timely fashion, the work items may eventually timeout and get requeued, only making the load problem worse. To avoid this you should a) set a long enough timeout, and b) log every requeue event and monitor its frequency so that you get alerted when it gets too high. |

4.1.12 Sets
Redis has other types of data that allow multiple values: Redis sets allow you to store multiple unsorted values. They also allow you to quickly test membership or to calculate the intersection of two sets.
Sets are often used to group records. For instance, say that your application has several user groups: one for registered users, one for paying users, one for moderators and another for administrators. We can then create a module to manage the belonging to these groups:
user_sets.js:
var redis = require('./redis');
exports.add = add;
function add(group, member, cb) {
redis.sadd(key(group), member, cb);
}
exports.remove = remove;
function remove(group, member, cb) {
redis.srem(key(group), member, cb);
}
exports.belongs = belongs;
function belongs(group, member, cb) {
redis.sismember(key(group), member, function(err, belongs) {
cb(err, belongs == 1);
});
}
function key(group) {
return 'group:' + group;
}
Here we’re using some of the s-prefixed functions of Redis to manage sets. exports.add adds a member to a group and exports.remove uses srem to remove a member from a group. We can also test whether a certain user belongs to a given group. We can use this to verify whether a give user has permissions to execute certain sensible operations:
user_sets_example.js
var userSets = require('./user_sets');
userSets.add('admins', 'user1', function(err) {
if (err) {
throw err;
}
console.log('added user1 to group');
['user1', 'user2'].forEach(function(user) {
userSets.belongs('admins', user, function(err, belongs) {
if (err) {
throw err;
}
console.log('%s belongs to group: %j', user, belongs);
});
});
});
|
|
The SISMEMBER Redis query has a fixed-time cost, making it very efficient for testing whether a certain member belongs to a given set. In our case this makes it efficient to, for instance, test whether a user belongs to a given user group before executing a privileged operation. |
|
|
Adding a member to a set is an idempotent operation: by definition, a set will not hold repeated items. |
We can now run this example:
$ node user_sets_example.js
added user1 to group
user1 belongs to group: true
user2 belongs to group: false
4.1.12.1 Intersecting sets
Redis sets allow you to calculate the intersection: given two or more sets, Redis can tell you which members are common to all of them. We can, for instance, calculate which users are both moderators and paying users:
var redis = require('./redis');
function key(group) {
return 'group:' + group;
}
redis.sinter(key('mods'), key('paying'), function(err, users) {
if (err) {
throw err;
}
console.log('paying mods: %j', users);
});
4.1.13 Sorted Sets
Redis keeps elements in a set in no particular order: the order in which you add them is not necessarily the order that Redis retrieves them in, making them very useful for little else other that membership-related operations.
If you need sorted sets, Redis has your back: there are a group of Z-prefixed operations coming to your rescue.
Each element of a set has a score, which is a natural integer. All elements are stored, sorted, and indexed by this value, which means that you can retrieve all elements within a range of scores, all sorted by score.
Let’s say that you are running an online collaborative real-time game and that you want to keep a ranking of scores for each given game. Each player has a score that can increase or decrease, and you want to present an up-to-date ranking with that score. Let’s create a module to manage that:
game_scores.js:
var redis = require('./redis');
exports.score = score;
function score(game, player, diff, cb) {
redis.zincrby(key(game), diff, player, cb);
}
exports.rank = rank;
function rank(game, cb) {
redis.zrevrange(key(game), 0, -1, "WITHSCORES", function(err, ret) {
if (err) {
cb(err);
}
else {
var rank = [];
for (var i = 0 ; i < ret.length ; i += 2) {
rank.push({player: ret[i], score: ret[i+1]});
}
cb(null, rank);
}
});
}
function key(game) {
return 'game:' + game;
}
This module exports two functions. The first, named score, accepts the name of a game, the name of a player, and a number; and just adds that number to the score of a player in that game.
|
|
If the player in that room does not exist, it gets created by Redis with a score of 0. |
The second function is named rank and gives you a rank of a given game. Here we’re using the ZREVRANGE Redis query that returns a range of elements in that set, sorted in reverse order of score. If we wanted this to return the user with the lowest score first, we would be using ZRANGE instead. We’re requesting every element of the set by specifying 0 as the minimum range and -1 as the maximum range. Giving -1 as the maximum value makes the range have no upper bound, effectively returning all elements of that set.
We’re also passing in the WITHSCORES option, which makes Redis interleave the scores in the response (one array element for the entry, one array element for the score, etc.). Here we’re parsing the response and constructing a more appropriate rank array where each element has a playerproperty and a score property.
We can now simulate a game using this module:
game_scores_example.js:
var gameScores = require('./game_scores');
var room = 'room1';
setInterval(function() {
var player = 'player' + Math.floor(Math.random() * 10);
gameScores.score(room, player, Math.floor(Math.random() * 10), function(err) {
if (err) {
throw err;
}
});
}, 1e2);
setInterval(function() {
gameScores.rank(room, function(err, ranks) {
if (err) {
throw err;
}
console.log('%s ranking:\n', room, ranks);
});
}, 1e3);
Here we’re randomly incrementing the score of a random player every 100 milliseconds. We’re also printing the current rank of the game every second:
$ node game_scores_example.js
room1 ranking:
[ { player: 'player5', score: '14' },
{ player: 'player7', score: '11' },
{ player: 'player1', score: '10' },
{ player: 'player4', score: '5' } ]
room1 ranking:
[ { player: 'player4', score: '20' },
{ player: 'player1', score: '20' },
{ player: 'player5', score: '14' },
{ player: 'player3', score: '14' },
{ player: 'player7', score: '11' },
{ player: 'player8', score: '10' },
{ player: 'player6', score: '4' } ]
room1 ranking:
[ { player: 'player4', score: '32' },
{ player: 'player3', score: '30' },
{ player: 'player1', score: '20' },
{ player: 'player7', score: '17' },
{ player: 'player8', score: '14' },
{ player: 'player5', score: '14' },
{ player: 'player0', score: '7' },
{ player: 'player6', score: '4' } ]
4.1.14 Pub-sub
Besides all this key-values, lists, queues, and sets types and operations, you can also use Redis for managing inter-process communication. Redis provides a publish-subscribe model over named channels that allows message producers and message consumers to communicate using Redis as a message broker.
To publish a message to a channel, you use the PUBLISH command, passing in the channel name and the message string:
var redis = require('./redis');
redis.publish('some channel', 'some message', function(err) {
if (err) {
console.error('error publishing:', err);
}
});
Besides bare strings you can also publish complex objects by JSON-encoding them:
var redis = require('./redis');
var message = {
some: 'attribute',
and: 'more'
};
redis.publish('some channel', JSON.stringify(message), function(err) {
if (err) {
console.error('error publishing:', err);
}
});
To receive messages you have to dedicate one Redis connection to it, turning on the subscriber mode by issuing the SUBSCRIBE or the PSUBSCRIBE command. From that point on the connection only allows commands that change the subscription set. Let’s see this in action:
var redis = require('redis').createClient();
redis.on('message', function(channel, message) {
console.log('new message from channeg %s: %j', channel, message);
});
redis.subscribe('some channel');
redis.subscribe('some other channel');
Here we are subscribing to two channels named “some channel” and “some other channel”. Each time a message gets published in Redis to any of these channels, Redis distributes the message to all the active connections that have a subscription to this channel.
As you can see from the previous example, you can dynamically add subscriptions to the connection. You can also dynamically remove subscriptions from a connection by calling redis.unsubscribe():
redis.unsubscribe('some channel');
If you’re expecting to receive complex JSON-encoded objects instead of strings, you can parse the string like this:
redis.on('message', function(channel, message) {
message = JSON.parse(message);
console.log('new message from channeg %s: %j', channel, message);
});
4.1.15 Distributed Emitter
Node has a similar pattern to the Redis Pub-sub: the Event Emitter. The event emitter allows you to detach the event producer from the event consumer, but it’s all working inside the same Node process. We can change it to make it work between processes:
distributed_emitter.js:
var Redis = require('redis');
var EventEmitter = require('events').EventEmitter;
module.exports = DistributedEmitter;
function DistributedEmitter() {
// Redis stuff
var redis = {
pub: Redis.createClient(),
sub: Redis.createClient()
};
redis.pub.unref();
redis.sub.unref();
redis.pub.on('error', onRedisError);
redis.sub.on('error', onRedisError);
redis.sub.on('message', function(channel, message) {
old.emit.call(emitter, channel, JSON.parse(message));
});
// Emitter stuff
var emitter = new EventEmitter();
var old = {
emit: emitter.emit,
addListener: emitter.addListener,
removeListener: emitter.removeListener
};
emitter.emit = function emit(channel, message) {
redis.pub.publish(channel, JSON.stringify(message));
};
emitter.addListener = emitter.on = function addListener(channel, fn) {
if (!emitter.listeners(channel).length) {
subscribe(channel);
}
old.addListener.apply(emitter, arguments);
};
emitter.removeListener = function removeListener(channel, fn) {
old.removeListener.apply(emitter, arguments);
if (!emitter.listeners(channel).length) {
unsubscribe(channel);
}
};
emitter.close = function close() {
redis.pub.quit();
redis.sub.quit();
};
return emitter;
function subscribe(channel) {
redis.sub.subscribe(channel);
}
function unsubscribe(channel) {
redis.sub.unsubscribe(channel);
}
function onRedisError(err) {
emitter.emit('error', err);
}
}
Here we have created a module that exports just one function: a constructor for our distributed emitter, that returns a modified event emitter.
When creating a distributed emitter, we start by setting up two Redis connections. One connection serves as a publisher connection and the other serves as a dedicated subscriber connection. This has to be like this because of the Redis protocol: when a Redis connection enters a subscriber mode, it cannot emit commands other than ones that alter the subscriptions.
Then we call unref() on each of these connections. This makes sure the Node process does not quit just because we have one of these client connections open.
Then we proceed to listening for error events on each of the Redis connections, which we just propagate to the returned event emitter. This allows clients to listen for and handle Redis-specific errors.
We also listen for message events, which the Redis client emits when events come in from the Redis Pub-sub system through the client connection. When this happens, we just propagate the event into the local event emitter, allowing the event emitter subscribers to get it.
Next, we modify the returned event emitter, replacing the emit, addListener, on and removeListener methods. When emitting an event, instead of emitting locally, we just publish the event to Redis, using the event name as the channel name.
We also wrap the addListener and on methods, which are used for listening to event types. When any of these are called, if it’s the first subscription for this given event type, we subscribe to the respective channel on Redis. We then revert to the default behaviour, which is to add a listener function to Redis.
Similarly, we wrap the removeListener method to catch the case when there are no more listeners for a specific event type, in which case we cancel the respective channel subscription on our Redis client connection.
We keep around the event emitter old methods in the old variable so that we can call them from inside the wrapper methods.
Finally, we implement a specific close method that closes the Redis connection.
Let’s now create a client module that instantiates two distributed emitters, using Redis to communicate between them, as would happen if they were in two separate processes:
distributed_emitter_example.js:
var DistributedEmitter = require('./distributed_emitter');
var emitter1 = DistributedEmitter();
var emitter2 = DistributedEmitter();
var channels = ['channel 1', 'channel 2'];
channels.forEach(function(channel) {
emitter1.on(channel, function(msg) {
console.log('%s message:', channel, msg);
});
});
channels.forEach(function(channel) {
setInterval(function() {
emitter2.emit(channel, {time: Date.now()});
}, 1e3);
});
This example client module creates these two distributed emitters. The first one subscribes to two event types, printing out these events as they come in. The second one emits these two event types every second. The payload of the event is just a timestamp. Let’s run this:
node distributed_emitter_example.js
channel 1 message: { time: 1421746397411 }
channel 2 message: { time: 1421746397411 }
channel 1 message: { time: 1421746398418 }
channel 2 message: { time: 1421746398420 }
channel 1 message: { time: 1421746399426 }
channel 2 message: { time: 1421746399427 }
channel 1 message: { time: 1421746400431 }
channel 2 message: { time: 1421746400432 }
...
4.1.15.1 Beware of race conditions
This distributed event emitter behaves differently from a normal event emitter in one fundamental way: it propagates events by doing I/O. In Node, I/O is an asynchronous operation, while all the event emitter typical operations are just local and synchronous. This has an impact on the timing for local processes. For instance, consider the following code using a normal event emitter:
local_event_emitter.js:
var EventEmitter = require('events').EventEmitter;
var emitter = new EventEmitter();
emitter.on('some event', function() {
console.log('some event happened');
});
emitter.emit('some event');
Running this would yield, as expected:
$ node local_event_emitter.js
some event happened
Good, all looks normal. Now let’s try replacing the event emitter by one of our distributed emitters:
distributed_event_emitter_race.js:
var DistributedEmitter = require('./distributed_emitter');
var emitter = DistributedEmitter();
emitter.on('some event', function() {
console.log('some event happened');
});
emitter.emit('some event', 'some payload');
Let’s try to run this version then:
$ node distributed_event_emitter_race.js
The process just exits without outputting anything. This means that, when we call the on method, the distributed emitter will subscribe to the channel for the first time. But that envolves some I/O, so this is not done immediately: the command has to go to the network layer, has to be received, parsed and executed by Redis, and then a response comes back to Node. Before all this I/O even happened, though, we emit an event (the last line of the previous file). This event also involves I/O, which is also asynchronous. What happens is that both commands are racing to get to Redis using two different client connections. If the PUBLISH command reaches Redis before the SUBSCRIBE command, our client will never see that event.
To see exactly the sequence of events in Redis, we can use a little trick using the Redis command-line client bundled with Redis. With it you can monitor the Redis server to inspect which commands are being issued:
$ redis-cli monitor
OK
Now you can execute the previous node script and observe which commands happen on Redis:
1421747925.034001 [0 127.0.0.1:52745] "info"
1421747925.034762 [0 127.0.0.1:52746] "info"
1421747925.037992 [0 127.0.0.1:52745] "publish" "some event" "\"some payload\""
1421747925.039248 [0 127.0.0.1:52746] "subscribe" "some event"
There you go: the subscribe command arrived after the publish command, losing the race.
|
|
This serves to illustrate that a Pub-sub mechanism is not a persistent queue: listeners will only get new events after the subscription request is processed by the server, and not before. Remembering this will probably save you a lot of future headaches. |