RESTful Web Services with Dropwizard (2014)
Chapter 8. The Web Service Client
We have our service ready and functional, but we need an interface to actually use it. Of course, by using a web browser, we are able to perform HTTP GET requests, but not more complex requests such as POST. We need to create an HTTP Client for that.
Also, in many cases, you may need to have your web services call other web services and then perform additional processing before returning information to the caller.
Building a client for our application
Dropwizard includes both Jersey and Apache HTTP clients. We will use the Jersey client to create a client for our web service.
Getting ready
Add the dropwizard-client module to the dependencies section of your pom.xml in order to add web service client support to our project:
<dependency><groupId>io.dropwizard</groupId><artifactId>dropwizard-client</artifactId><version>0.7.0-SNAPSHOT</version></dependency>
How to do it…
We will create a new resource class that will listen for and accept HTTP GET requests from our web browser and then call the appropriate method of the Contact resource and render the response in a human-friendly format. Let's have a look at the steps required in order to achieve this:
1. Create the ClientResource class in the com.dwbook.phonebook.resources package. Similar to the ContactResource class, we should first import the required javax.ws.rs annotations, the representation classes we are going to use, as well as the required Jersey client classes as shown in the following code snippet:
2. package com.dwbook.phonebook.resources;
3.
4. import javax.ws.rs.*;
5. import javax.ws.rs.core.*;
6. import com.dwbook.phonebook.representations.Contact;
7. import com.sun.jersey.api.client.*;
8.
public class ClientResource { }
9. Set the context path of the client resource class to /client/ to logically separate the URIs of client and service by adding the appropriate annotation to the newly created class:
10. @Path("/client/")
public class ClientResource { }
11. Since our client is going to be used by humans, we need a human-friendly response type such as text/plain, so we will use MediaType.TEXT_PLAIN. Define it by adding the @Produces annotation to our class.
12. @Produces(MediaType.TEXT_PLAIN)
13. @Path("/client/")
public class ClientResource { }
14. In order to perform calls to other web services (in this case, our service, the ContactResource class), we need to have a Client instance as a member of our resource class. This will be provided during initialization, so we need to have an appropriate constructor.
15.private Client client;
16. public ClientResource(Client client) {
17. this.client = client;
}
18. Instantiate the client in our application's entry class, and also add the new resource to the environment by adding a couple of lines of code to the App#run() method. Of course, we first need to import com.sun.jersey.api.client.Client,io.dropwizard.client.JerseyClientBuilder, and the com.dwbook.phonebook.resources.ClientResource class we've just created.
19. // build the client and add the resource to the environment
20. final Client client = new JerseyClientBuilder(e).build("REST Client");
e.jersey().register(new ClientResource(client));
How it works…
We now have the client resource ready. This resource has a Jersey Client object as a member, which we can use to perform HTTP requests on specific URLs by building WebResource objects (using the Client#resource() method) and interacting with them.
There's more…
Most of the time, and generally in large-scale applications, the client is decoupled from the backend services, forming a separate application. Backend services usually perform more intensive and complex tasks, and it is generally a good practice to treat and scale them independently from the client.
Interacting with our services
We will proceed by adding the necessary methods to the ClientResource class, bound to the GET requests so they can be easily triggered with a browser. We need to add methods for creating, updating, deleting, and retrieving contacts, which we will trigger by performing appropriate HTTP requests.
How to do it…
1. Add the #showContact() method to the ClientResource class, binding the query String parameter id as the input using the @QueryParam annotation.
2. @GET
3. @Path("showContact")
4. public String showContact(@QueryParam("id") int id) {
5. WebResource contactResource = client.resource("http://localhost:8080/contact/"+id);
6. Contact c = contactResource.get(Contact.class);
7. String output = "ID: "+ id
8. +"\nFirst name: " + c.getFirstName()
9. + "\nLast name: " + c.getLastName()
10. + "\nPhone: " + c.getPhone();
11. return output;
}
12. Create the #newContact() method. This method is going to accept the properties of a Contact object as parameters and will create a new contact by performing the appropriate HTTP request to the ContactResource service.
13. @GET
14. @Path("newContact")
15. public Response newContact(@QueryParam("firstName") String firstName, @QueryParam("lastName") String lastName, @QueryParam("phone") String phone) {
16. WebResource contactResource = client.resource("http://localhost:8080/contact");
17. ClientResponse response = contactResource.type(MediaType.APPLICATION_JSON).post(ClientResponse.class, new Contact(0, firstName, lastName, phone));
18. if (response.getStatus() == 201) {
19. // Created
20. return Response.status(302).entity("The contact was created successfully! The new contact can be found at " + response.getHeaders().getFirst("Location")).build();
21. }
22. else {
23. // Other Status code, indicates an error
24. return Response.status(422).entity(response.getEntity(String.class)).build();
25. }
}
26. The #updateContact() method for updating contacts will be quite similar to the previous one.
27.@GET
28. @Path("updateContact")
29. public Response updateContact(@QueryParam("id") int id, @QueryParam("firstName") String firstName, @QueryParam("lastName") String lastName, @QueryParam("phone") String phone) {
30. WebResource contactResource = client.resource("http://localhost:8080/contact/" + id);
31. ClientResponse response = contactResource.type(MediaType.APPLICATION_JSON).put(ClientResponse.class, new Contact(id, firstName, lastName, phone));
32. if (response.getStatus() == 200) {
33. // Created
34. return Response.status(302).entity("The contact was updated successfully!").build();
35. }
36. else {
37. // Other Status code, indicates an error
38. return Response.status(422).entity(response.getEntity(String.class)).build();
39. }
}
40. In a similar way, let's add the method for deleting contacts, #deleteContact().
41.@GET
42. @Path("deleteContact")
43. public Response deleteContact(@QueryParam("id") int id) {
44. WebResource contactResource = client.resource("http://localhost:8080/contact/"+id);
45. contactResource.delete();
46. return Response.noContent().entity("Contact was deleted!").build();
}
47. Now you may build and run the application in order to see what we've done up to this point.
How it works…
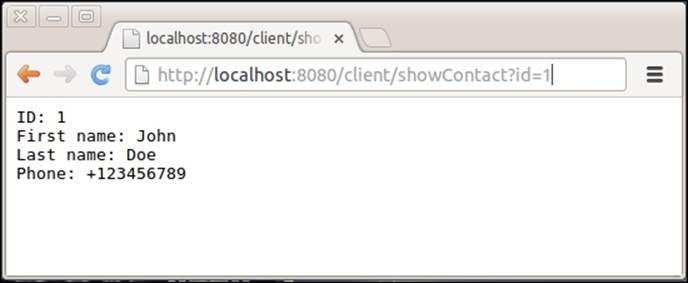
Point your browser at http://localhost:8080/client/showContact?id=1. The client will perform an HTTP GET request to http://localhost:8080/contact/1, parse the JSON representation of the contact, and produce a plain text summary of it.
In order to perform an HTTP request, we must first create a WebResource instance (since RESTful Web Services are all about resources and HTTP verbs) using the #resource(String) method of our client. Think of WebResource as a proxy for a specific web service endpoint.
The #get() method of the WebResource class takes the class that we will use to parse and map the response as a parameter, which will also be its return type.
For the HTTP POST request though, we use the generic HTTP response class, ClientResponse, which we can use to extract the status code of the response using the #getStatus() method. Also, we can extract its headers using the #getHeaders() method.
Note that for POST and PUT requests, we are also setting up the media type of the request data (WebResource#type()).
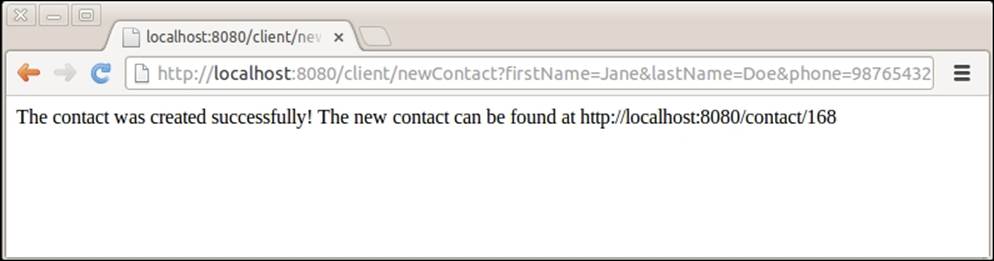
If you point your web browser at http://localhost:8080/client/newContact?firstName=Jane&lastName=Doe&phone=98765432, our client will post that data to ClientResource, which will create a new contact and return its location back to the client. The client will then show us the new contact's URL as seen in the following screenshot:
Similarly, we can update a contact using the client by requesting the appropriate URL. The URL http://localhost:8080/client/updateContact?id=1&firstName=Alex&lastName=Updated&phone=3210465 will trigger a PUT request to the contact service, which will eventually update the contact with id equal to 1.
As you may already be guessing, the URL http://localhost:8080/client/deleteContact?id=1 will send the relevant HTTP DELETE request to contact service, deleting the contact identified by the given id.
There's more…
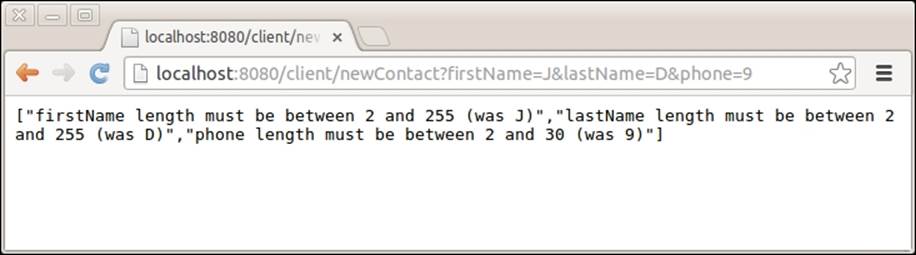
Note that in the case of validation errors during the creation of a new contact, these errors are communicated to the client. Our client checks the status code of the POST request, and if it is not equal to 201 (which indicates that the entity has been created), then it parses the response as a string and presents it to the user.
For example, navigate to http://localhost:8080/client/newContact?firstName=J&lastName=D&phone=9. Since we have set constraints indicating that the length of firstName, lastName, and phone shall be greater than 2, we will get validation errors as you can see in the following screenshot:
All materials on the site are licensed Creative Commons Attribution-Sharealike 3.0 Unported CC BY-SA 3.0 & GNU Free Documentation License (GFDL)
If you are the copyright holder of any material contained on our site and intend to remove it, please contact our site administrator for approval.
© 2016-2026 All site design rights belong to S.Y.A.