Google Apps Script for Beginners
Chapter 2. Create and Manipulate Forms
In January 2013, Google launched a new version of Google forms that was more customizable, richer in many new features, shareable between any number of editors, and—even more important to us—could be created and modified using Google Apps Script.
This feature made it possible to imagine a lot of potential applications. Some of these applications could be used for the following:
· To change questions every day, automatically
· To modify the form for future respondents based on responses from the past
· To remove or add questions depending on any external parameter (such as the day of the week or the time of day)
What tools do we have?
The forms service has quite a lot of methods presented in the Google documentation, but some of the aspects of form creation and modification are still a bit complex to apprehend (https://developers.google.com/apps-script/reference/forms/).
To create a form, we only need a script in a project. This project can either be bound to a document or can be a standalone file in your drive.
Since the script actually creates a new form and a new spreadsheet to get responses from, we have no special interest in using a spreadsheet-bounded script or a form-bounded one. The following code creates a simple form; its contents are directly inspired by the example that Google provides in its documentation. We will see what we can do with it using only script. It will be an opportunity to see how we can change the form content and presentation (read the comments if you're not sure how it works).
// Global variable = constants
var ssId = ScriptProperties.getProperty('ssId');
if(ssId == null){
// test if the destination spreadsheet already exists, if not just create it
var ss = SpreadsheetApp.create('Form response spreadsheet');
ssId = ss.getId();
ScriptProperties.setProperty('ssId',ssId);
}
function createForm(){
var formID = ScriptProperties.getProperty('formId');
if(formID != null){
// if the form was already created then do nothing
throw('Form already exists') ; return ;
}
// here we create the form with questions and set the destination spreadsheet
var form = FormApp.create('New custom Form for test');
form.addTextItem().setTitle('What is your last name ?').setHelpText('Please don\'t be shy...');
form.setDestination(FormApp.DestinationType.SPREADSHEET, ssId);
var item = form.addCheckboxItem();
item.setTitle('What are you ?');
item.setChoices([
item.createChoice('A man'),
item.createChoice('A boy'),
item.createChoice('A woman'),
item.createChoice('A girl')
]);
form.addMultipleChoiceItem().setHelpText('If this question bothers you then just skip it')
.setTitle('Do you prefer cars or dolls?')
.setChoiceValues(['Cars','Dolls'])
.showOtherOption(true)
form.addDateItem()
.setTitle('When were you born?');
form.addGridItem()
.setTitle('Rate your interests')
.setRows(['Cars', 'Dolls', 'Food'])
.setColumns(['annoying', 'no opinion', 'exciting']);
ScriptProperties.setProperty('formId',form.getId());
ss.getSheets()[0].getRange(1,1,4,2).setValues([['form Url',form.getPublishedUrl()],
['form Edit Url',form.getEditUrl()],['formID',formID],['Spreadsheet Url',ss.getUrl()]]);
ss.getSheets()[0].setColumnWidth(1,200).setColumnWidth(2,800);
Logger.log('\n\nForm Url = '+form.getEditUrl()+'\n\nGoto this url and paste the code in the FORM script editor\n'+
'(only code from the 2cond script file : "Form Code to copy")\n\nThen you won\'t need this script anymore\n\Thank you :-)');
}
When you run the preceding code from the script editor, and after granting the necessary authorizations, nothing seems to happen because all it does is create a new form and spreadsheet that will appear in your drive. Please take the time to read the logger's content after you run the code as it will give you a word of explanation. A sample of this content is shown in the following screenshot:
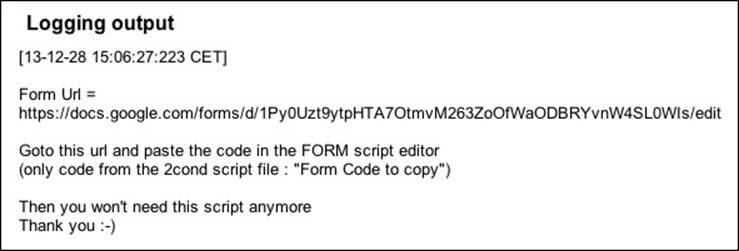
You can then have a look at the instructions to copy and paste some code in the newly created form script editor.
Before we get to that part though, let's have a look at how the preceding script works.
var ssId = ScriptProperties.getProperty('ssId');
if(ssId == null){ // test if the destination spreadsheet already exists
// if not just create it
var ss = SpreadsheetApp.create('Form response spreadsheet');
ssId = ss.getId();
ScriptProperties.setProperty('ssId',ssId);
ScriptProperties is a special class that offers an easy way to store any information within the script file itself. Data stored in this form is visible to anyone who has access to the script.
Data is stored as string key / string value pairs and must have a limited size (9 KB / value = 9000 digits and 500 KB / total properties in a script). When a pair of data has not been defined yet, the method getProperty('key') returns null (meaning not defined).
We use this method to determine if the spreadsheet has already been created. We also use the exact same procedure later to know if the form has been created. This gives us a convenient method to store the form and spreadsheet IDs.
If ever we would like to create a new form/spreadsheet again, a simple function that clears the ScriptProperties class would reset the process and restart as new. Here is how it goes:
function resetAllKeys(){
var keys = ScriptProperties.getKeys();// get every keys in this script
for(var n in keys){ScriptProperties.deleteProperty(keys[n])};// and delete them one by one
}
We will see later in this book that scriptProperties and the per user equivalent UserProperties are real lifesavers in many situations where we have to store some values permanently. Small pieces of code such as the preceding one demonstrate how simple it is to get it working.
The main part of the code simply creates a few questions of different types. Honestly, we could easily use the "normal" form creation interface; it would surely be easier since we would be able to see what we do. The pleasure of WYSIWYG interfaces!
But this book is all about the creation of forms with Apps Script, so let's do this the hard way!
The last portion of the code adds a few important snippets of information to our newly created spreadsheet, which we'd like to have at hand for future use, and shows a message in the logger in case we forget how this script is supposed to be used in a couple of months.
Now that the form exists, we can check if everything looks like we want it to look. If not, we can always adjust it using the edit form URL. There is no need to return to our code and restart from scratch.
The next part will be more fun as we shall try to analyze the form's content and modify it a bit depending on the responses we get.
The idea is to show for each question what the last person's answer was who filled the form and who they were. In the process, we shall try out some user interface elements that will be detailed in Chapter 7, Using User Interfaces in Spreadsheets and Documents.
When we ran the form creation code previously, it created a spreadsheet and a form as well. The following code should be pasted in the form's script editor because its purpose is to extend the form editor user interface (for this, we need to navigate to Tools |Script editor).
I've added a lot of comments in the code to explain how it works and split it across separate functions.
The onOpen function simply creates the first sidebar that will suggest that we call the menu function. It creates the menu as well, as follows:
function onOpen() {
var ui = FormApp.getUi();
ui.createMenu('Form Custom Tools')
.addItem("Show answers in questions", 'showAnswers')
.addToUi();
// this is how we add a menu in this type of doc, it is slightly different from what we used in spreadsheets
showTempSideBar();
}
The following function creates a simple message that asks our user to use the menu:
function showTempSideBar() {
// this shows a temporary sidebar in the main user interface
// it will be explained in detail in chapter 7
var ui = FormApp.getUi();
app = UiApp.createApplication().setTitle("Custom Tools User Interface").setWidth(300)
.setTitle("Information sidebar used as a logger").setWidth(300);
var message = app.createHTML("If you open this page for the first time<br>"+
"please authorize using any item from<br>the menu : <b>'Form Custom Tools'</b><br>"+
"<p>This sidebar will show you some<br>informations when you run <br>a function from the menu...")
.setStyleAttribute('padding','20px').setId('message');
ui.showSidebar(app.add(message));
}
The showAnswers() function is the main function called from the menu. In turn, it calls all the other functions to create the main sidebar and update its values. It also sends an e-mail with a summary of answers (we'll see how to send mails in more detail in the next chapter). Refer to the following code:
function showAnswers(){
var app = UiApp.createApplication().setTitle("Custom Tools User Interface").setWidth(300);
app.add(app.createHTML('These are the last values<br>entered in the form').setStyleAttributes({'padding':'20px','background':'brown','color':'beige'}));
// set some style on this Ui to get a nice look then align items in a grid
var panel = app.createVerticalPanel().setId('panel').setStyleAttributes({'fontSize':'12pt','background':'beige','color':'#333333','padding':'10px'}).setHeight('100%').setWidth('100%');
var grid = app.createGrid(12,2).setText(0,1,'Questions overview').setText(6,1,'Responses');
// don't forget to add the panel to the Ui and the grid to the panel
app.add(panel.add(grid));
var form = FormApp.getActiveForm();//access this form
var sh = SpreadsheetApp.openById(form.getDestinationId()).getSheetByName('Form Responses');
//read the whole spreadsheet and get values in an array
var data = sh.getDataRange().getValues();
var lc = sh.getLastColumn();
// we have seen how to clean up a sheet, let's remove unnecessary columns and set appropriate width
sh.insertColumnAfter(lc).deleteColumns(lc+1,sh.getMaxColumns()-lc);
sh.setColumnWidth(1,160);
// last row of data (=last item in the array)is last answer
var lastResponse = data.pop();
var lastUser = lastResponse[1];
// second field is the lastName item (arrays count from 0), shift the array row to get rid of timeStamp in column1
lastResponse.shift();
var questions = form.getItems();
// get all questions and iterate these questions array using the Logger to check content
var textToSend = 'Summary of last form response\n';
for(var n in questions){
Logger.log(questions[n].getTitle()+' = '+questions[n].getIndex());
// for the 3 first question there is only 1 answer
var response = lastResponse[n];
// if response is a date, transform it to a user-friendly formatted string
if(typeof(response)=='object'){response = Utilities.formatDate(response,Session.getTimeZone(),'yyyy/MM/dd')};
// the 4th question has 3 choices, show all of them joined together with '&'
if(n>3){response = lastResponse.splice(4,3).join(' & ')};
// and update the question help value
questions[n].setHelpText(lastUser+' has answered "'+response+'", what would you answer ?');
updateUi(app,grid,n,questions,response);
textToSend += '\n'+questions[n].getTitle()+'\t'+response
}
MailApp.sendEmail(Session.getActiveUser().getEmail(),'Summary of last form response',textToSend);
var ui = FormApp.getUi();
ui.showSidebar(app);
}
The following function uses five parameters (the names are mentioned in parenthesis); some are related to the user interface and others are values. Note the simplicity of this mechanism: any parameter we need can simply be added to any function.
function updateUi(app,grid,n,questions,response){
app = showData(grid,n,0,n+' : ' );// display question number
app = showData(grid,n,1,questions[n].getTitle());// display question title
app = showData(grid,Number(n)+6,0,n+' : ');// display response number
app = showData(grid,Number(n)+6,1,response);//display response value
}
What follows is probably the shortest function in this book. I have used it mainly for demonstration purposes; it could easily be integrated into another function.
function showData(grid,row,col,text){
grid.setText(Number(row)+1,col,text);
}
Once everything is copied in place and saved, you can refresh your browser window to let the onOpen function get executed; you should see a new sidebar on the right of your screen along with some explanation.
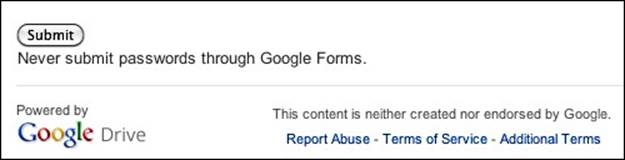
Before running any function, you should fill a form so you have at least one row of data to play with. But if you don't, it's not really an issue. The link to the form is available in the menu as shown in the following screenshot:

Now follow the instructions, run a function from the custom menu, and look at the result. We wanted the form to show the last answer, and so it does!
It certainly isn't the most useful script in history, but it shows how we can interact with forms using script. It also gave us the opportunity to get a quick peek at the HTML and UiApp services that will allow us to go further in our customization.
Forms' limitations
There are a few things we cannot achieve with FormApp. For example, there is no way to catch user response and modify a form according to their answers. The only form-related event that we can catch is the form submission itself; that is, we can catch the occurrence of an event when the form is submitted and all the data is already recorded. It's a major limitation of this service, but we'll see that it's possible to do so using other approaches.
Handling answers
The function we wrote in the script earlier will not be very useful if we have to run it manually (we won't be there to monitor every time someone fills a form). So, we should capture the event when someone sends a form so that we are informed by an e-mail message.
We already see the events available in the spreadsheet, so we know how it works. Just go to the Resources menu in the script editor to set up a new trigger On form submit as shown in the following screenshot:
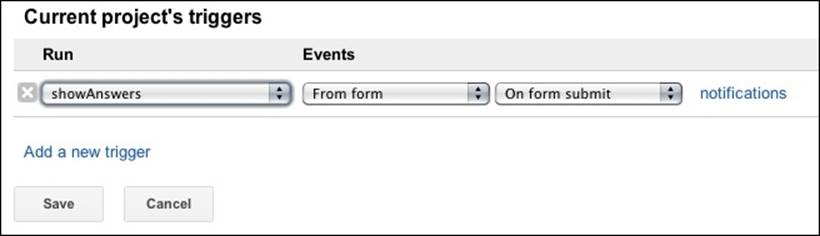
Now the script will send us a message every time a form is filled. Note that the sidebar UI won't be updated since it can only work in cases where a user actually uses the form editor UI.
Forms' alternatives
If you need to customize your forms further than what Google's forms service offers or if you don't like to see Google's messages and logo on all the forms you send (these are indeed quite obvious), Google Apps Script has two UI-oriented services you can use. Both are capable of developing very complex UIs, the second being even more powerful as it includes the possibility to use external JavaScript libraries, such as jQuery.
A quick peek at the UiApp and HTML services
We saw in the previous form example that we can create small user interfaces to enhance the standard form UI. This is also available in documents and spreadsheets, although it is slightly different. I decided to use both of them in this small example to encourage you to experiment and customize more because, even if it takes some time to develop these tools, it is so rewarding from a personal point of view that it's well worth the pain.
UiApp was the first service available in Google Apps Script a few years ago and is still presented as experimental in the documentation, although no announcement has been made (for now) that they will deprecate it in the near future. Google encourages users to switch to an HTML service as this one will continue to be upgraded.
In the meantime, we will continue to show both of them as they both have strengths and weaknesses.
Summary
A forms service can actually be very useful to teachers or other people who need to create lots of forms or questionnaires, often using the same structure.
The ability forms have to respond to triggers provides the possibility to automatically send back an evaluation with reference to good and bad answers.
The academic community is probably the group most interested in this Google app.
It gives us the opportunity to use function parameters to split our code into smaller and simpler parts.
Our last example introduced the key word of the next chapter: e-mail.
All materials on the site are licensed Creative Commons Attribution-Sharealike 3.0 Unported CC BY-SA 3.0 & GNU Free Documentation License (GFDL)
If you are the copyright holder of any material contained on our site and intend to remove it, please contact our site administrator for approval.
© 2016-2026 All site design rights belong to S.Y.A.