Getting Started with Bluetooth Low Energy (2014)
Chapter 6. Debugging Tools
This chapter introduces useful several debugging and development tools for working with Bluetooth Low Energy. It includes hardware tools, such as wireless protocol analyzers or sniffers (which sniff traffic over the air, displaying the captured data in a UI to analyze later), and tools to interact directly with BLE peripherals during the debug process.
To keep things accessible to small startups or engineers and developers who are just getting started with BLE, this chapter focuses on inexpensive tools, rather than high-end products that can run thousands or tens of thousands of dollars.
PCA10000 USB Dongle and the Master Control Panel
The PCA10000 is a USB dongle included in Nordic Semiconductor’s nRF51822-EK (Working with the nRF51822-EK), a low-cost evaluation kit for the nRF51822 system-on-chip (SoC). While this kit is designed for embedded hardware engineers who are designing their own BLE peripherals, it might be worth purchasing the kit even if you are only developing mobile applications, because it includes a number of extremely useful debug tools for a relatively modest price tag.
One of these tools is the Master Control Panel (MCP), a Windows-based utility that turns the PCA10000 USB dongle into something that can simulate a BLE central device. It features an easy-to-use interface that allows you to see any data available on BLE peripherals in range or send data back to any peripheral you are connected to. This is particularly useful on Windows 7, which doesn’t include native support for Bluetooth Low Energy (BLE support was introduced in Windows 8, but that operating system doesn’t include a comparable application for testing and debugging).
NOTE
Nordic also provides a Master Control Panel application for Android that includes some of the same functionality without any additional hardware requirements, though the standalone tool using the PCA10000 supports a much larger command set at the time of this writing.
If you are writing an application for an existing peripheral, you can also use the MCP to quickly reverse-engineer BLE accessories, displaying their individual data structures and config settings, and then access them in your mobile application using the discovered service and characteristic UUIDs.
The MCP talks to the PCA10000 using a special firmware image included with the tool’s installer. Using Nordic’s nRFGo Studio (also available on Nordic’s website after registering your nRF51822-EK, per the note in Examples and Toolchains), you can update the USB dongle to use this firmware image.
Once the PCA10000 has been updated with the appropriate firmware, you can open the MCP and interact with your peripheral via an easy-to-navigate UI, which allows you to perform almost any functionality of a normal central device. This includes bonding, opening or closing a connection, reading and writing to GATT characteristics, etc.
Figure 6-1 shows the results of a single peripheral advertising itself.
Once you connect to the periperhal and send a service discovery request, you can see the list of services and characteristics available on the device (as shown in Figure 6-2), at which point you can read or write to them the same way you could with any regular BLE central device.
You can update values by selecting an appropriate characteristic, modifying the value in the Value textbox, and then clicking “Send update.” You can also retrieve the latest value of any characteristic by selecting it and clicking the Read button, which can be useful with characteristics for which notification or indication have not yet been enabled.
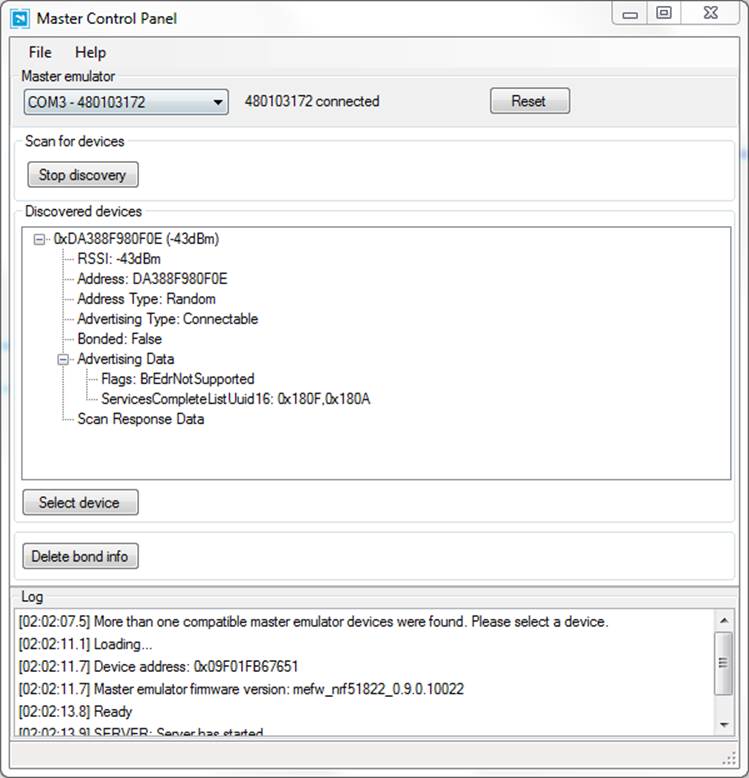
Figure 6-1. Master Control Panel displaying advertising data
The MCP is an extremely valuable tool early in the hardware development process, when you might not have a mobile application for your BLE peripheral to talk to yet. The Master Control Panel can simulate almost any action that your application will perform, including validating communication for both incoming and outgoing data.
The MCP also includes a set of C# libraries that can be used to automate any of the functionality it provides, allowing application developers to create desktop or command-line applications that have access to a simple but complete set of central APIs. This can be extremely useful for automated regression testing or production tests.
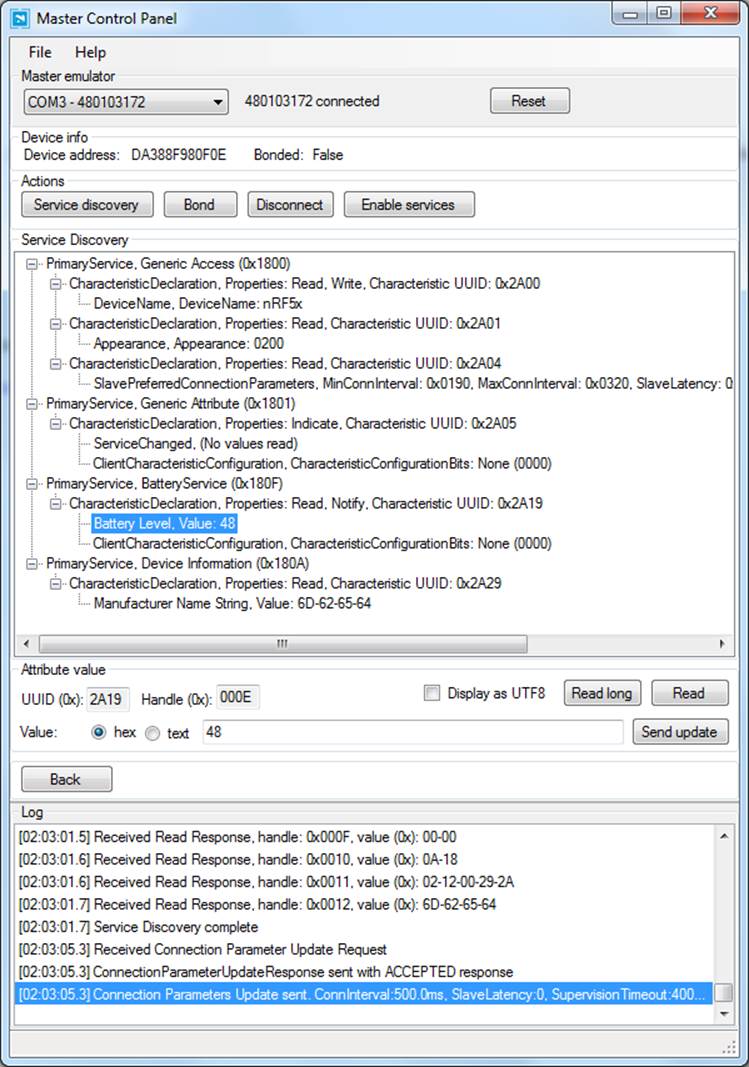
Figure 6-2. Master Control Panel showing service and characteristic data
PCA10000 USB Dongle and Wireshark
The Master Control Panel (PCA10000 USB Dongle and the Master Control Panel) is likely the easiest way to interact with BLE peripherals, but some use cases require lower-level access to the BLE data. For those cases, Nordic also provides a custom firmware image and tools for the PCA10000 or PCA10001 (both of which are included in their nRF51822-EK development kit) that can sniff traffic from a single peripheral device and push it into Wireshark.
Wireshark is a mature and powerful open source data-capture and analysis tool that allows you to easily visualize data down to the packet and byte level. Nordic’s Wireshark plugin (shown in Figure 6-3), which is available after registering your nRF51822-EK kit at Nordic’s support site, takes data captured via the nRF51822-EK boards and adds useful descriptions to help make sense of that raw data.
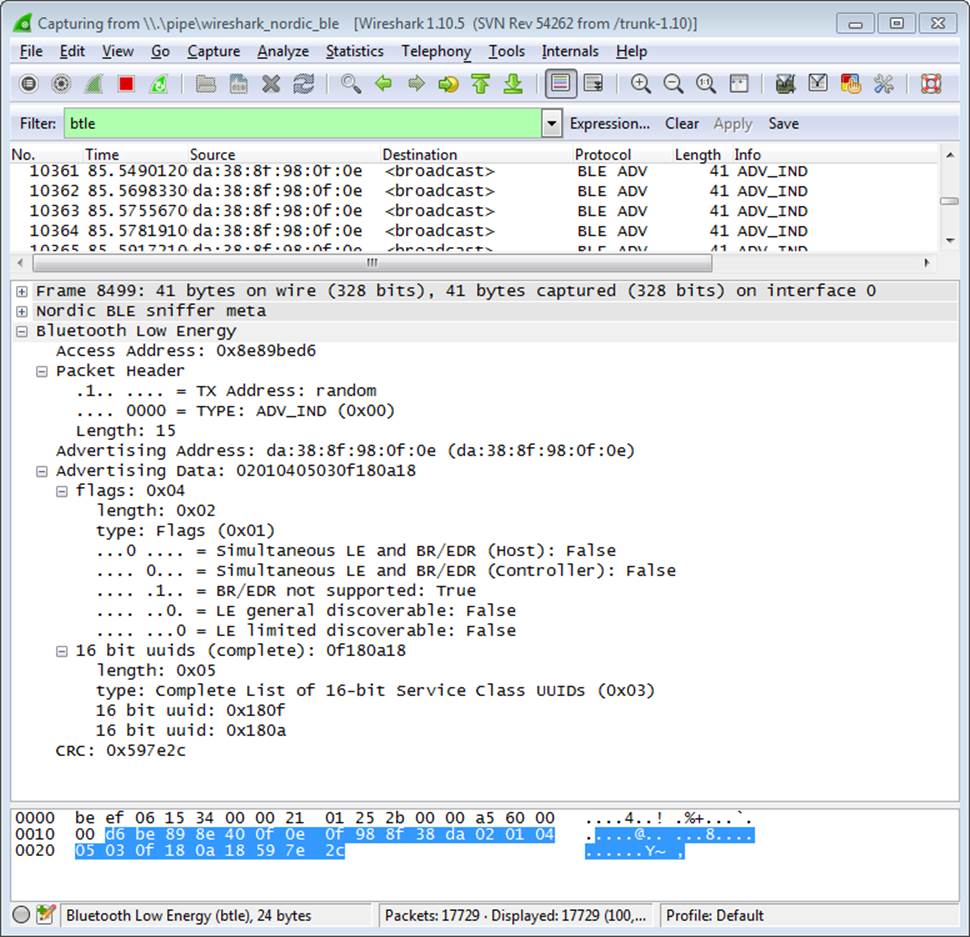
Figure 6-3. Nordic Semiconductor’s PCA10000 breakout with the Wireshark plugin
If you are interested only in designing applications that talk to existing BLE peripherals, you will rarely need to go down to this level. But it can be extremely useful for hardware designers or firmware engineers working on their own peripheral designs and code or trying to debug a particular latency or throughput issue.
CC2540 USB Dongle and SmartRF Sniffer
As part of the development ecosystem around their CC254x family of ICs, Texas Instruments designed the CC2540EMK-USB (Figure 6-4), a low-cost CC2540-based USB dongle that can be used with their free SmartRF software (Figure 6-5) to convert the board into a BLE sniffer. This combination allows you to see all BLE data going out over the air around you at the lowest possible level.
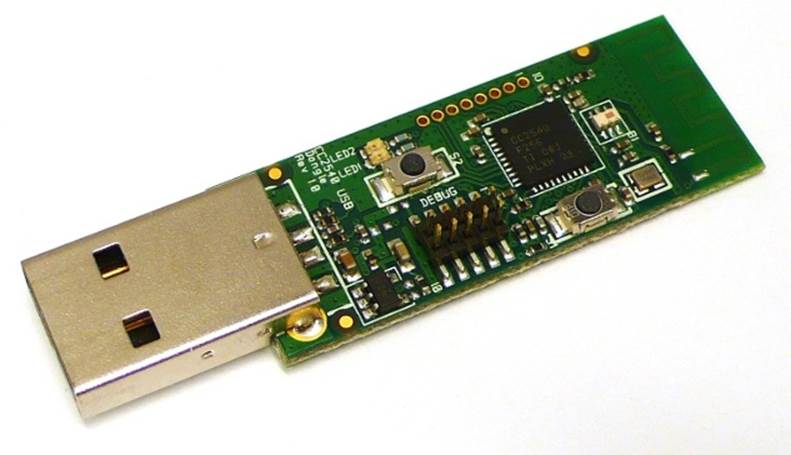
Figure 6-4. CC2540EMK-USB
This performs a function similar to the PCA10000/Wireshark combination (PCA10000 USB Dongle and Wireshark), but it provides a different UI that might be easier to work with in certain situations. The kits might be easier to source in certain regions.
SmartRF-to-Wireshark Converter
If you prefer Wireshark (PCA10000 USB Dongle and Wireshark) as a data analysis tool and have access to the CC2540 USB dongle (CC2540 USB Dongle and SmartRF Sniffer), you will be happy to find out about smartRFtoPcap, a freely available tool that converts saved SmartRF data into a file format that WireShark can understand.
You won’t be able to stream live data into Wireshark the way you can with the PCA10000 and Nordic’s Wireshark plugin, but having the option to convert previously captured files might still be useful, since Wireshark includes numerous utilities to filter and search inside your logged data.
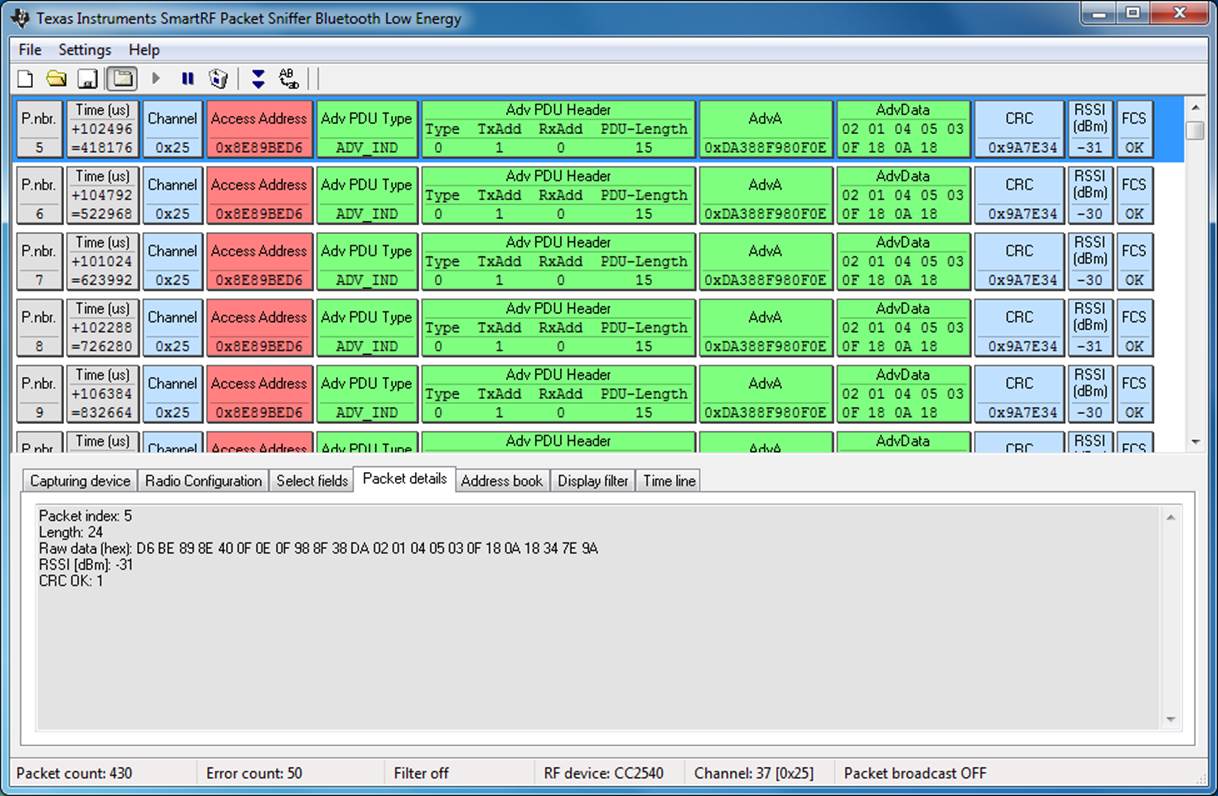
Figure 6-5. Texas Instruments’ SmartRF Sniffer application
Bluez hcitool and gatttool
If you are using a Linux workstation, you can take advantage of two useful utilities in the Bluez Bluetooth Stack, hcitool and gatttool, which allow you to interact with BLE devices from the command line.
NOTE
If you don’t have access to a dedicated Linux workstation, Bluez also runs fine on inexpensive Linux devices, such as the Raspberry Pi or BeagleBone Black, which turns them into extremely useful and portable BLE debug tools
hcitool allows you to scan for BLE peripherals in range, connect to them, or optionally simulate a BLE device using any supported BLE 4.0 USB dongle. To scan for BLE devices in range, you can issue the following command (assuming our USB dongle is enumerated as hci0):
sudo hcitool -i hci0 lescan
Once you have the device’s address (retrieved via the previous scan command), you can connect to the peripheral using the following command (which assumes a peripheral address of 6C:60:B3:6E:7C:B1):
sudo hcitool lecc 6C:60:B3:6E:7C:B1
gatttool allows you to interact with GATT services, such as reading or writing to characteristics on your device.
Being able to do this from the command line means that you can easily script certain repetitive actions or test cases and run the same tests across multiple hardware devices consistently and reliably.