Raspberry Pi: A Quick-Start Guide, 2nd Edition (2014)
Chapter 6. Networking with the Pi
Like any computer, the Pi gets even more exciting the moment you connect it to a network. Suddenly, you can use the Pi for everyday tasks, such as surfing the Web or tweeting messages. You also can make the Pi accessible via Secure Shell, so you can securely and conveniently work on it from another computer. You can even share the Pi’s graphical desktop with your PC over a network, and vice versa.
In addition, you can use the Pi as a cheap but powerful web server that not only serves static content, but also is able to run web applications written in languages such as PHP, for example.
Perform Everyday Tasks on the Web
You’re probably used to performing many tasks using only your web browser: checking email, reading RSS feeds, watching videos, sending tweets, and so on. This is all possible because most browsers today support HTML5, JavaScript, Flash, and Java. Without these technologies, the Web would still look very much like it did in 1995.
All these nice things work only with modern browsers, such as Google Chrome or Mozilla Firefox. Although you can already install Chromium on Raspbian,[59] it will be a while until it will run sufficiently fast on the Pi. Also, it doesn’t support all features, such as video, at the moment. The biggest limitation is due to the Pi’s small memory, because modern browsers use a lot of it. The browser that ships with the Debian distribution for the Pi is Midori.[60] It’s a pretty good web browser that doesn’t use a lot of memory. Unfortunately, it’s still in its infancy, and it has some limitations. For one thing, technologies such as Flash and Java aren’t currently available on the Pi. So, if you come across a website that uses Flash or a Java applet, it won’t work in any browser running on the Pi.
But I Want My Regular Browser
The basis of the Google Chrome browser is the Chromium project.[61] There is no Google Chrome for the Raspberry Pi, but at least you can run the Chromium browser. As of this writing, the Chromium port is rather slow, but if you still want to install Chromium on the Pi, run the following command:
|
|
pi@raspberrypi ~ $ sudo apt-get install chromium |
Then you can start Chromium from a terminal on the LXDE desktop using the following command:
|
|
pi@raspberrypi ~ $ chromium |
You’ll also find a shortcut to the Chromium browser in the application menu. To make it run as fast as possible, devote a maximum of 32MB of RAM to the GPU (see Adjust the Pi’s Memory Layout). Also, you should consider overclocking your Pi (see Accelerate/Overclock the Pi).
Similarly, you can install Iceweasel, a Firefox port for Debian.[62]
|
|
pi@raspberrypi ~ $ sudo apt-get install iceweasel |
Afterwards, you’ll find a shortcut to the Iceweasel browser in the Internet section of the application menu. As with Chromium, you’ll get better performance by overclocking your Pi.
Although Midori understands HTML5, CSS3, and JavaScript, it’s not capable of properly interpreting all modern websites. For example, not all features of Google Mail run out of the box, because Midori doesn’t understand some of the site’s JavaScript. Also, Midori needs some time to render Google Mail’s default view. You can improve this situation by disabling JavaScript using Midori’s Preferences > Behaviour menu and by choosing Google Mail’s basic HTML view.
Disabling JavaScript can improve the usability of other websites, too. When you disable JavaScript in your browser, many websites will return a plain HTML version of their service. This HTML version usually doesn’t have all the bells and whistles of the original site, but at least you can use it.
For Twitter, it’s similar. Midori can render it, but it’s rather slow. A good solution is to use Twitter’s mobile website.[63] It won’t have all the features of the original site, but it will still provide a very good Twitter experience, and it works on Midori.
Another trick that sometimes helps is to change Midori’s user agent. All web browsers send with every request a unique identifier that tells the web server exactly what kind of browser has sent the request. This identifier is called the user agent, and some websites change their response depending on its value. For example, some websites generate an error message if they don’t know the user agent. In Midori, you can change the user agent in the Preferences > Network menu. Here you can tell Midori that it should pretend to be a Mozilla Firefox browser, Safari, or an iPhone.
Some sites won’t work at the moment, no matter what you try. YouTube,[64] for example, depends on video support in the browser, be it HTML5 video or Flash. Midori doesn’t support either of these on Raspbian at the moment, so you can’t render YouTube properly. You’re out of luck, too, if a website depends on some JavaScript code that doesn’t work on Midori or if it needs a Java applet. Fortunately, Java applets aren’t very popular today, but some online banking sites still use them.
In addition to all this, Midori sometimes uses a lot of resources, especially the CPU. Midori often needs nearly the whole CPU to render a website—sometimes you have to wait for a few minutes for just one page to render.
A Glimpse into the Future
The Raspberry Pi team has always known that the lack of a really good web browser is one of the platform’s biggest problems. Instead of waiting for someone else to come up with a decent solution, they’ve tried to improve the situation—chances are good now that the Pi will eventually get a really good web browser.[65]
This browser is named “Web” (admittedly not the most creative name for a web browser), and it has been around for quite a long time.[66] At the moment, early beta ports for the Pi are available, and they look quite promising.
If you keep in mind that you can disable JavaScript and that most popular websites have a mobile version, Midori is sufficient for most situations. Also, the Pi’s popularity might result in major improvements in the near future.
Use Secure Shell with the Pi
It’s likely that you’ll connect your Pi to a network so you can access the Pi from other computers, and vice versa. One of the best ways to communicate securely between two computers is via Secure Shell (SSH), a network protocol for secure data communication. Debian comes with everything you need to use SSH; you simply have to configure a few things.
Access the Pi Using a Password
If you only want to access other computers from the Pi, you don’t have to configure anything. For example, you can connect as the admin user to the host maik-schmidt.de by starting SSH on the Pi with the other computer’s name and password.
|
|
pi@raspberrypi ~ $ ssh admin@maik-schmidt.de |
|
|
admin@maik-schmidt.de's password: |
|
|
Last login: Wed Jan 2 09:41:34 2013 from 94.221.82.250 |
|
|
admin@maik-schmidt.de:~$ exit |
|
|
logout |
|
|
Connection to maik-schmidt.de closed. |
However, if you want to access the Pi using SSH, you first have to enable the SSH server on the Pi using Raspi-config.
|
|
pi@raspberrypi ~ $ sudo raspi-config |
Choose the SSH menu item in the Advanced Options menu and enable the SSH server. Then click the Finish button to leave Raspi-config. After you reboot, the Pi’s boot log will contain a new message.
|
|
Starting OpenBSD Secure Shell server: sshd |
|
|
My IP address is 192.168.2.109 |
This means you can access the Pi via SSH now, and that the Pi’s IP address is 192.168.2.109. In your case, the IP address will likely be different. If you need to determine your Pi’s IP address later, you can run this:
|
|
pi@raspberrypi ~ $ ip addr | grep 'inet .* eth0' |
|
|
inet 192.168.2.109/24 brd 192.168.2.255 scope global eth0 |
The first IP address that appears in the output is your Pi’s address. Using this address, you can access the Pi from all the other computers on your network.
From a Mac or a Linux system, you can start SSH from the command line, passing it the Pi user’s IP address and password.
|
|
maik> ssh pi@192.168.2.109 |
|
|
pi@192.168.2.109's password: |
|
|
Linux raspberrypi 3.10.25+ #622 PREEMPT Fri Jan 3 18:41:00 GMT 2014 armv6l |
|
|
|
|
|
The programs included with the Debian GNU/Linux system are free software; |
|
|
the exact distribution terms for each program are described in the |
|
|
individual files in /usr/share/doc/*/copyright. |
|
|
|
|
|
Debian GNU/Linux comes with ABSOLUTELY NO WARRANTY, to the extent |
|
|
permitted by applicable law. |
|
|
Last login: Tue Feb 4 20:55:56 2014 |
|
|
pi@raspberrypi ~ $ exit |
|
|
logout |
|
|
Connection to 192.168.2.109 closed. |
To access the Pi from a Windows box, you need an SSH client, and one of the best is PuTTY.[67] It’s a very small program that you don’t even have to install. Download the executable, start it, and you’ll see the configuration screen shown in Figure 23, PuTTY configuration screen.
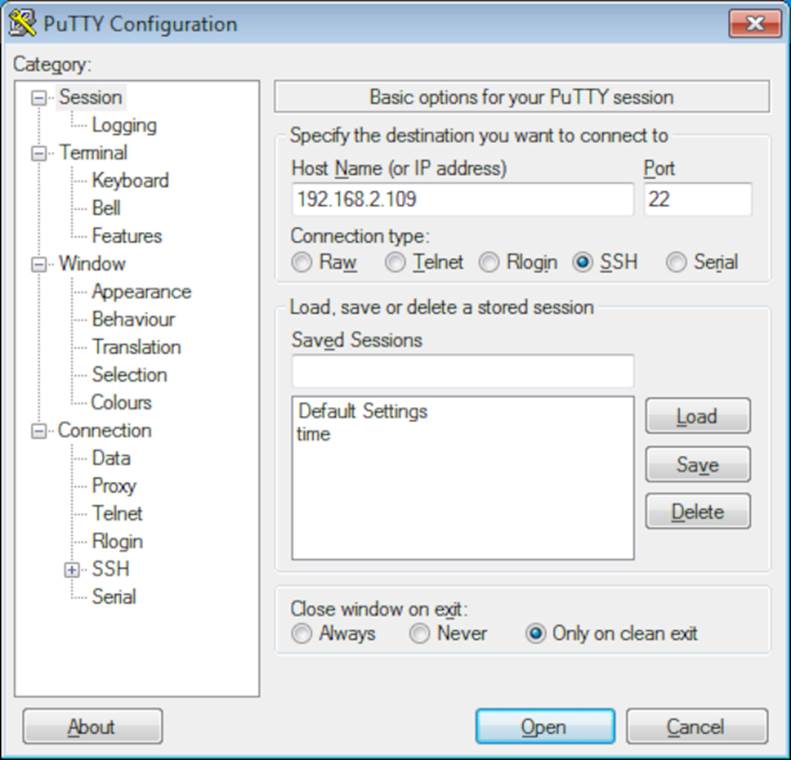
Figure 23. PuTTY configuration screen
PuTTY allows you to configure many things, and it lets you store your configuration for each type of session you need. To log into the Pi, you simply enter its IP address and click the Open button. Then you’ll see the Pi’s regular login prompt, as in Figure 24, Accessing the Pi from Windows is easy.
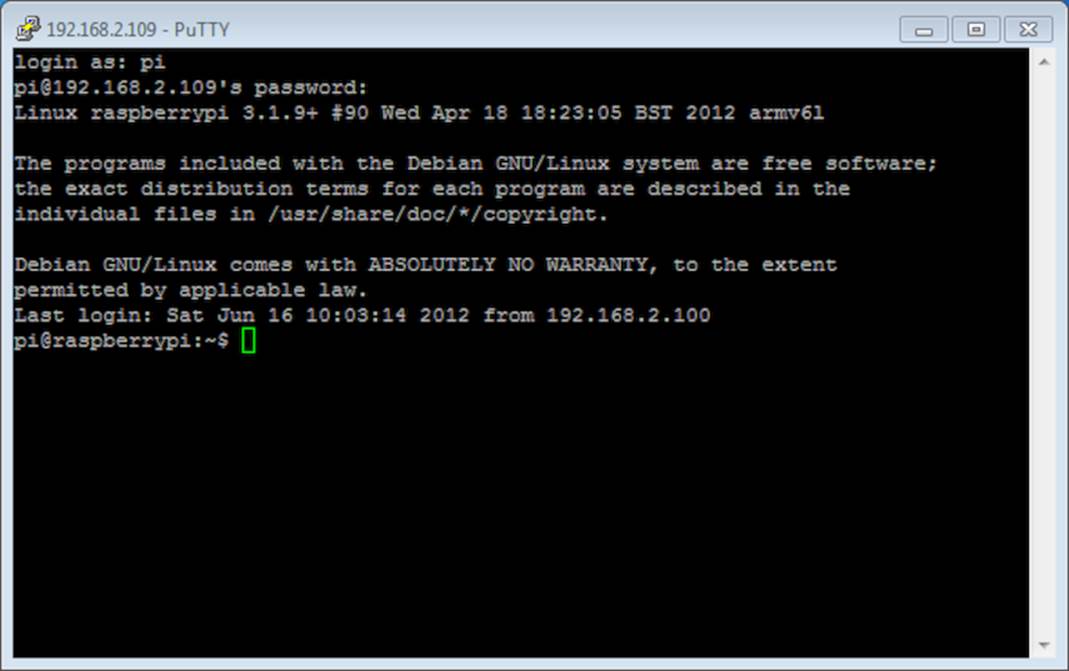
Figure 24. Accessing the Pi from Windows is easy.
Access the Pi with a Public-Private Key Pair
If you often have to access your Pi via SSH, it might get tedious to always enter the password when you log in. A more convenient method is to use the public-private key mechanism. To do that, you have to generate a key on your PC. The key has two parts, one private and one public, and you copy the public part to the Pi. The next time you log in to the Pi from your PC, SSH will verify your identity by checking whether the public and private parts of the key match. If you want to access the Pi from several computers, you have to run the steps in this section for each of them.
Before you generate a new key pair, you should check to see whether you have one already. On Linux or Mac OS X, open a terminal and run the following command:
|
|
maik> ls ~/.ssh/id_rsa.pub |
|
|
/Users/maik/.ssh/id_rsa.pub |
The file id_rsa.pub contains the public key, and the command shown earlier tries to list it. If the output looks like the previous output, you already have a key, and you can skip the key generation and copy the public key to the Pi, as described next. If you get a “No such file or directory” message instead, you have to generate a key, as in the following:
|
|
maik> ssh-keygen -t rsa -C "your_email@youremail.com" |
|
|
Generating public-private rsa key pair. |
|
|
Enter file in which to save the key (/Users/maik/.ssh/id_rsa): |
|
|
Enter passphrase (empty for no passphrase): |
|
|
Enter same passphrase again: |
|
|
Your identification has been saved in |
|
|
/Users/mschmidt/.ssh/id_rsa. |
|
|
Your public key has been saved in |
|
|
/Users/mschmidt/.ssh/id_rsa.pub. |
|
|
The key fingerprint is: |
|
|
f0:09:09:49:42:46:42:6f:42:3b:42:44:42:09:6a:e8 |
|
|
your_email@youremail.com |
|
|
The key's randomart image is: |
|
|
+--[ RSA 2048]----+ |
|
|
| . .o.. | |
|
|
|+ ..o + . | |
|
|
|o.o + B o | |
|
|
|.+ o o B . | |
|
|
| E = S . | |
|
|
| . . o | |
|
|
| . | |
|
|
| | |
|
|
| | |
|
|
+-----------------+ |
This generated a key pair in your home directory. You can find the public key in a file named id_rsa.pub. You now have to transfer this file to the Pi, where SSH keeps a list of all authorized keys in a file named .ssh/authorized_keys in the Pi user’s home directory. The following commands append the id_rsa.pub file to the Pi’s list of authorized keys:
|
|
maik> scp ~/.ssh/id_rsa.pub pi@192.168.2.109:/tmp |
|
|
maik> ssh pi@192.168.2.109 "mkdir ~/.ssh" |
|
|
maik> ssh pi@192.168.2.109 "cat /tmp/id_rsa.pub >> ~/.ssh/authorized_keys" |
The first command copies id_rsa.pub to the Pi’s /tmp directory, and the second command creates a hidden directory named .ssh that contains configuration data for SSH. The last command appends the file’s content to the ~/.ssh/authorized_keys file. If you don’t plan to keep several keys in the authorized_keys file, you can copy id_rsa.pub directly, of course.
|
|
maik> scp ~/.ssh/id_rsa.pub pi@192.168.2.109:/home/pi/.ssh/authorized_keys |
On a Windows box, you can use some additional tools from the PuTTY download page to generate the keys and to copy them to the Pi. In the following figure you can see the PuTTYgen application that generates keys.
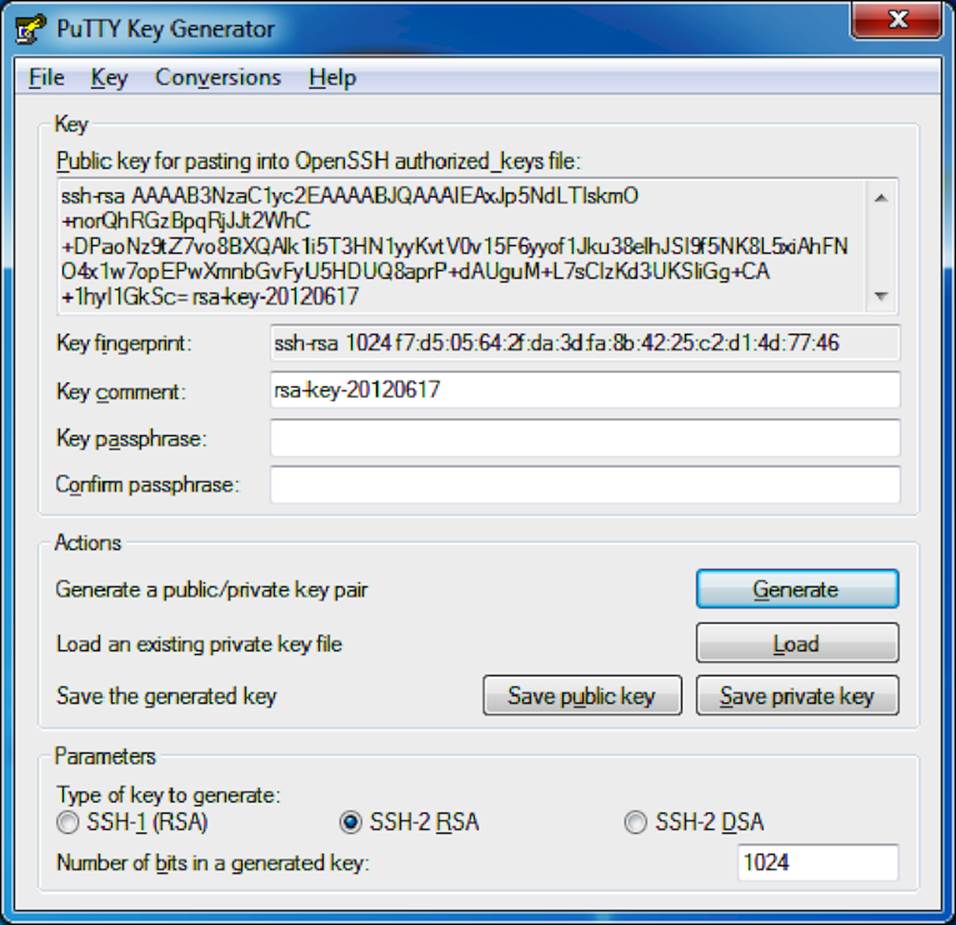
Figure 25. PuTTYgen generates keys on Windows.
To copy the generated public key file, use PSCP. It works exactly like scp, so from a DOS prompt, run the following command:
|
|
C:\> pscp id_rsa.pub pi@192.168.2.109:/home/pi/.ssh/authorized_keys |
Your Pi is a full-fledged member of your network now.
Share Desktops with the Pi
Logging into the Pi using SSH is convenient and opens a new world of possibilities. For example, you can access the Pi’s file system, start and stop processes, and monitor what’s happening on the Pi at the moment. The biggest disadvantage of the SSH solution so far is that it only works in a text terminal.
You can easily overcome this limitation and control the Pi’s desktop, keyboard, and mouse using another computer. One solution is Virtual Network Computing (VNC),[68] a technology that transmits the whole screen and all mouse and keyboard events from one computer to another.
To enable VNC, you need a VNC client and server. The server runs on the machine you’d like to control, and the client runs on the controlling machine. So, if you want to control the Pi using your PC, you have to install a VNC server on your Pi. You can choose from several, but one of the best is TightVNC.[69] It’s available for free for all major platforms, and you can install it via apt-get.
|
|
pi@raspberrypi ~ $ sudo apt-get install tightvncserver |
|
|
pi@raspberrypi ~ $ tightvncserver |
|
|
|
|
|
You will require a password to access your desktops. |
|
|
|
|
|
Password: |
|
|
Verify: |
|
|
Would you like to enter a view-only password (y/n)? n |
|
|
|
|
|
New 'X' desktop is raspberrypi:1 |
|
|
|
|
|
Creating default startup script /home/pi/.vnc/xstartup |
|
|
Starting applications specified in /home/pi/.vnc/xstartup |
|
|
Log file is /home/pi/.vnc/raspberrypi:1.log |
When you run tightvncserver for the first time, it asks you to set a password. You have to enter this password in the VNC client later to prevent unauthorized people from accessing your Pi. In addition, TightVNC allows you to optionally define a view-only password. This password gives clients read-only access so they can see the screen, but they cannot control the keyboard and mouse. This is useful for presentations, for example.
After you’ve defined the passwords, TightVNC creates a new virtual screen that you can access from your PC or Mac. The great thing about VNC is that it allows you to create as many virtual screens as you need. These screens don’t necessarily have to correspond to physical screens. They are purely virtual, so many users can access your Pi, for example, and each will get an independent desktop environment.
To address a virtual screen, you need two things: the Pi’s IP address and the screen’s port address. VNC’s base port is 5900, so to access screen number 1, you have to use port 5901. To access the screen you’ve created with the previous commands, you have to use the network address 192.168.2.109:5901. Keep in mind that your IP address will probably be different.
Now that you know the address of the Pi’s VNC server, you can access it from a PC or a Mac using a VNC client. On a Mac it’s very easy, because the Mac comes with a VNC client already. You can actually connect to a VNC server using the Safari web browser. Simply enter the web address vnc://192.168.2.109:5901, and Safari will spawn the Screen Sharing application. Enter the password you defined earlier, and you’re finished. See the result in the following figure.
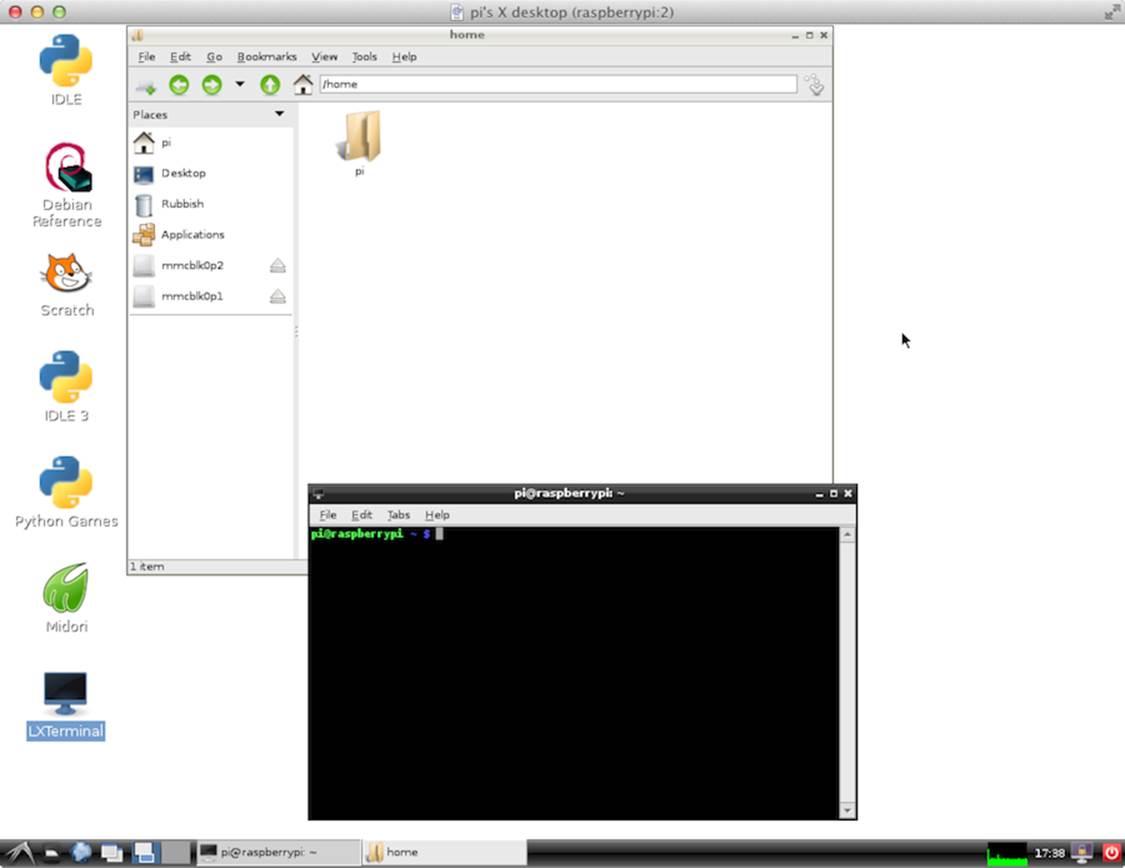
Figure 26. Controlling the Pi from a Mac
On Windows and Linux, the procedure is very similar, but you have to install a VNC client first. This is easy, because TightVNC runs on Windows and Linux, and it contains a client, too.
Controlling your PC’s or Mac’s desktop from the Pi is easy, too. First you have to install a VNC server on your PC. Again, TightVNC is a great choice for Windows and Linux. On a Mac it’s even easier, because Mac OS X has an integrated VNC server that you simply have to enable. In the System Preferences, select Sharing and then enable Screen Sharing. Click the Computer Settings button to set a password. (You can see the preferences panel in the following figure.)
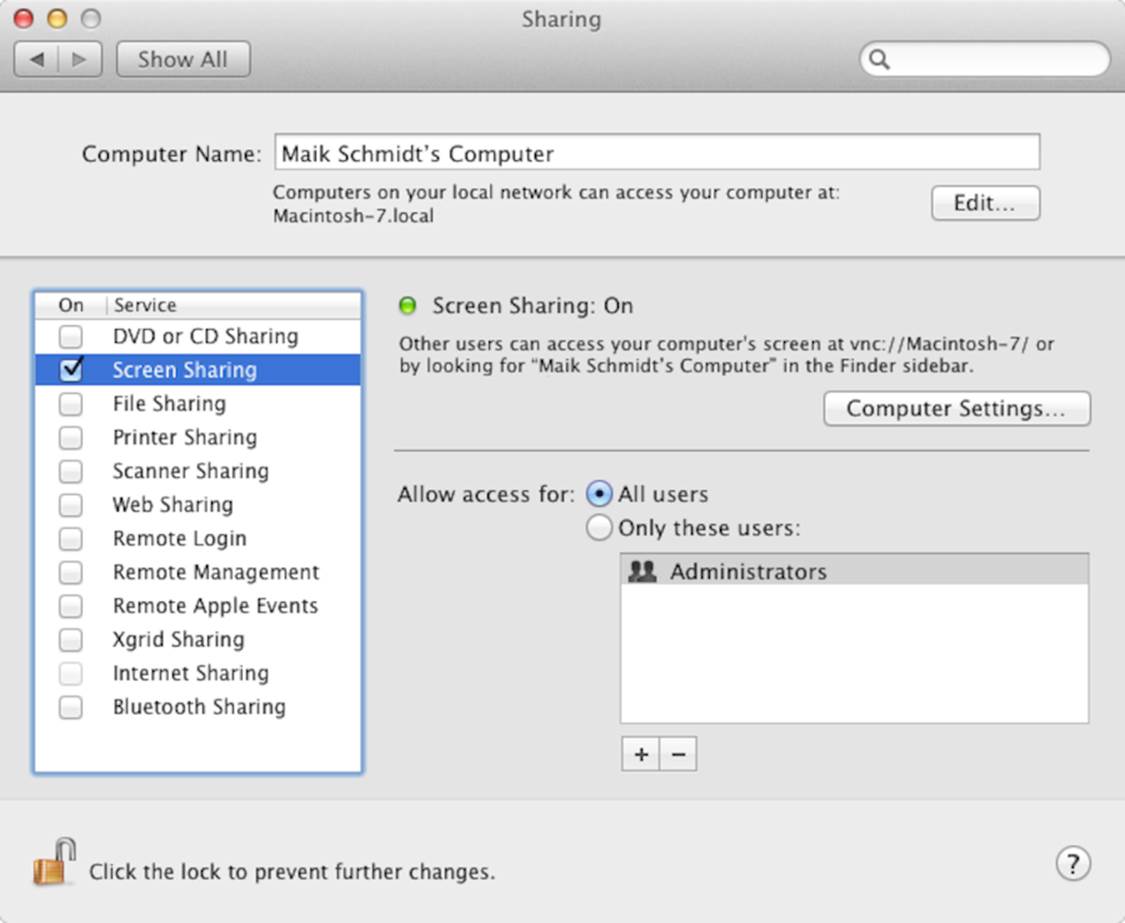
Figure 27. Sharing the Mac’s screen is easy.
Now you need a VNC client on the Pi, and xtightvncviewer is a good one. Install it using apt-get.
|
|
pi@raspberrypi ~ $ sudo apt-get install xtightvncviewer |
Then open a terminal on the Pi’s desktop and start the client, passing it your PC’s IP address and VNC port.
|
|
pi@raspberrypi ~ $ xtightvncviewer 192.168.2.100:5900 |
In Figure 28, Controlling a Mac from the Pi, you can see a Mac’s desktop inside a window on the Pi’s desktop. If it doesn’t work, make sure you use the correct IP address and port number. Usually it’s 5900, but it might vary in different VNC servers.
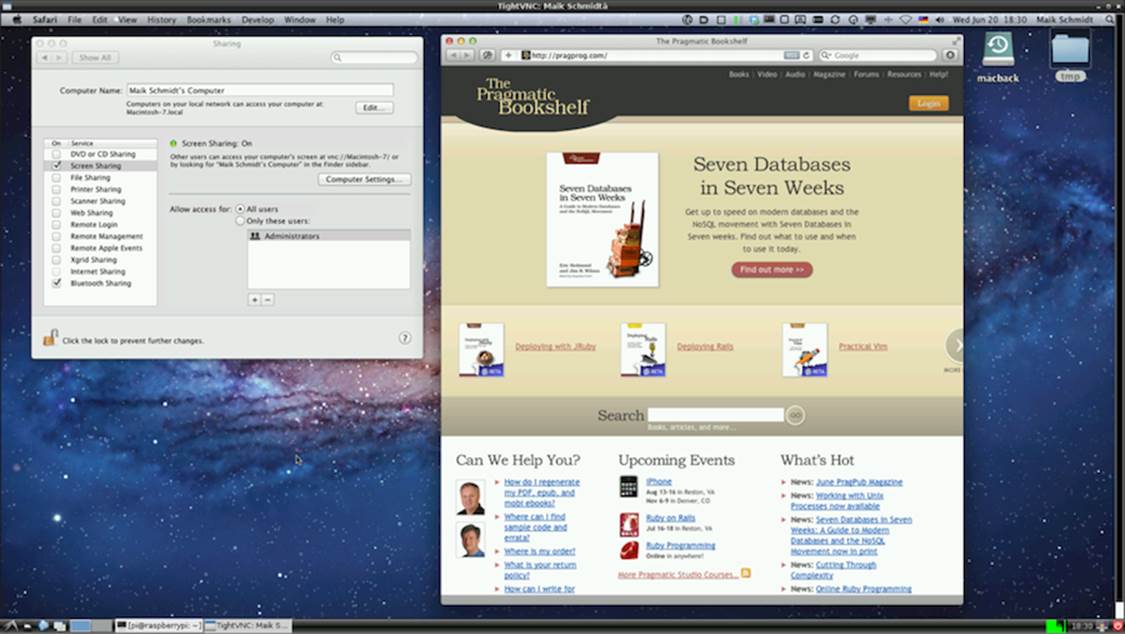
Figure 28. Controlling a Mac from the Pi
Turn the Pi into a Web Server
Although the Pi looks like a toy compared to modern web server hardware, it’s still powerful enough to serve interesting information in your local network. Not only can it serve static websites, but it can also generate dynamic content using databases and web applications. In addition, it can even provide access to its GPIO ports via web technologies.
The first thing you need to turn the Pi into a web server is an HTTP server, a network service that understands the Hypertext Transfer Protocol (HTTP). You can choose from several great products, such as the Apache HTTP server[70] or Nginx,[71] but Lighttpd[72] is a good choice for the Pi because of its very low memory footprint.
Installing/running Lighttpd is a piece of cake.
|
|
pi@raspberrypi ~ $ sudo apt-get install lighttpd |
After the installation has completed, Lighttpd is up and running, and you can point your PC’s web browser to your Pi’s IP address. For example, in the following figure you can see the server’s welcome page.
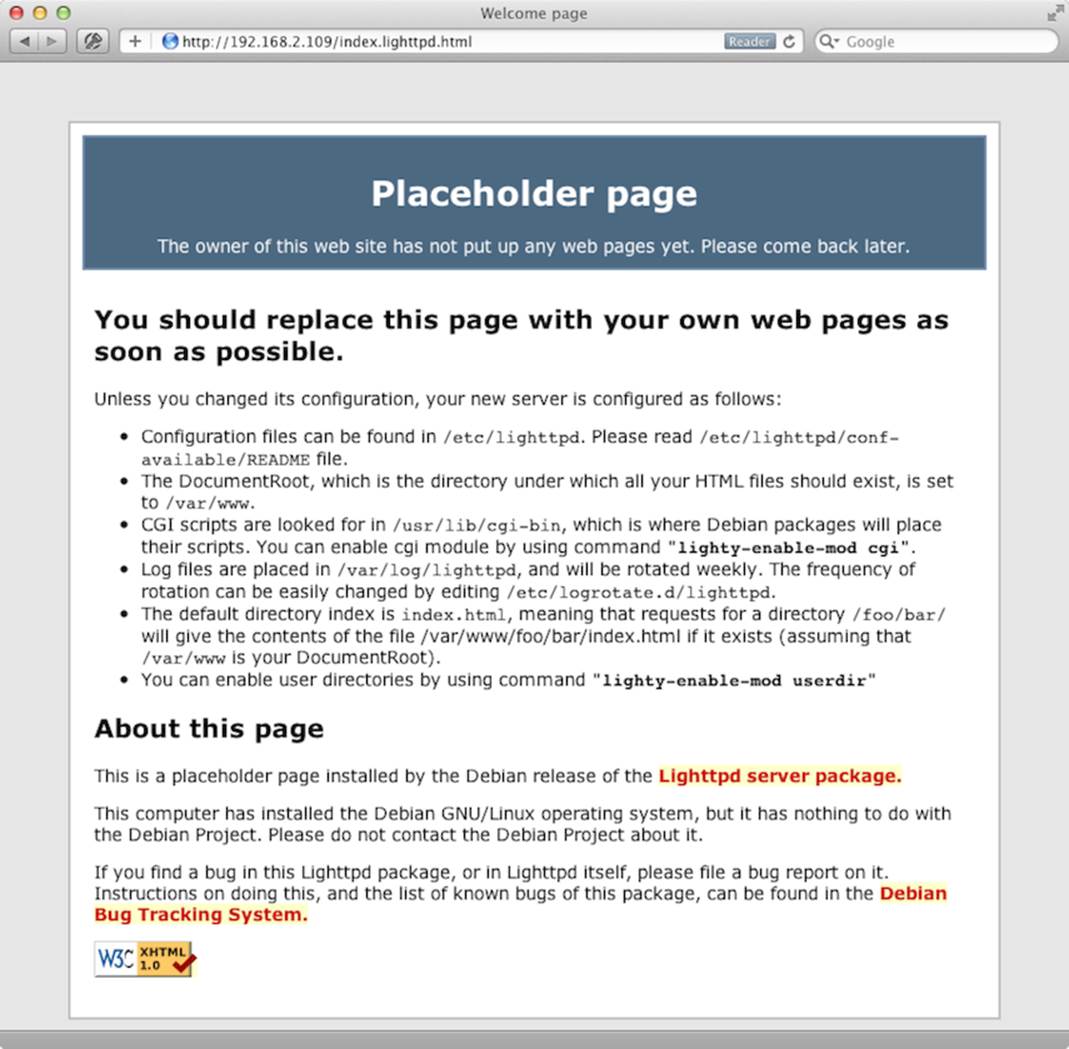
Figure 29. Lighttpd’s welcome page
To create your own web pages, you have to add them to Lighttpd’s document root, a directory containing all files it should serve for a website. Lighttpd’s document root by default is the /var/www directory. You should make sure that only members of the operating system group www-data have permission to write to it. The following commands add a Pi user to the www-data group and set the permission flags of the /var/www directory accordingly:
|
|
pi@raspberrypi ~ $ sudo adduser pi www-data |
|
|
pi@raspberrypi ~ $ sudo chown -R www-data:www-data /var/www |
|
|
pi@raspberrypi ~ $ sudo chmod -R 775 /var/www |
After the next login, you can create new web pages. You can do it with any text editor, such as nano. The following command creates a new file named index.html that will be the start page of your first website:
|
|
pi@raspberrypi ~ $ nano /var/www/index.html |
Enter the following text:
|
Networking/index.html |
|
|
|
<!DOCTYPE html> |
|
|
<html> |
|
|
<head> |
|
|
<title>Hello, world!</title> |
|
|
</head> |
|
|
<body> |
|
|
<h1>Hello, world!</h1> |
|
|
</body> |
|
|
</html> |
When you’re finished, press Ctrl+X to leave nano. Press Y to confirm that you want to save the file, and then press Enter to confirm the filename. After that, point your browser to the new web page, and you’ll see a result like this:
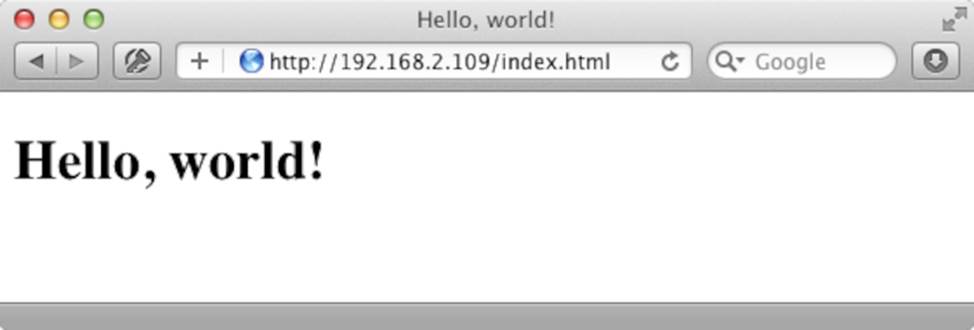
Figure 30. Results of pointing to the new web page
By the way, if you prefer, you can edit the index.html file on your PC and copy it to the Pi afterward. (Remember to replace the IP address with your Pi’s IP address.)
|
|
maik> scp index.html pi@192.168.2.109:/var/www |
Using only a few commands, you’ve turned the Pi into a full-blown web server that can serve static content, such as HTML pages. This is useful, but sometimes you need more dynamic content. For example, you might want to embed data from a database into your pages, or you might even embed environmental data you collect with sensors attached to the Pi.
To create dynamic content, you need a programming language. You can choose from many alternatives. For the Pi, PHP[73] is a good choice because it doesn’t use a lot of resources and it’s easy to install.
|
|
pi@raspberrypi ~ $ sudo apt-get update |
|
|
pi@raspberrypi ~ $ sudo apt-get install php5-cgi |
|
|
pi@raspberrypi ~ $ sudo lighty-enable-mod fastcgi-php |
|
|
pi@raspberrypi ~ $ sudo /etc/init.d/lighttpd force-reload |
These commands install a PHP interpreter and enable the FastCGI module in the Lighttpd server. FastCGI[74] speeds up dynamic websites tremendously, so it’s a good idea to enable it.
To test whether everything works as expected, create a file named /var/www/index.php with the following content:
|
Networking/index.php |
|
|
|
<?php |
|
|
phpinfo(); |
|
|
?> |
Point your web browser to the newly created file, and you should see something similar to Figure 31, Serving dynamic web pages from the Pi.
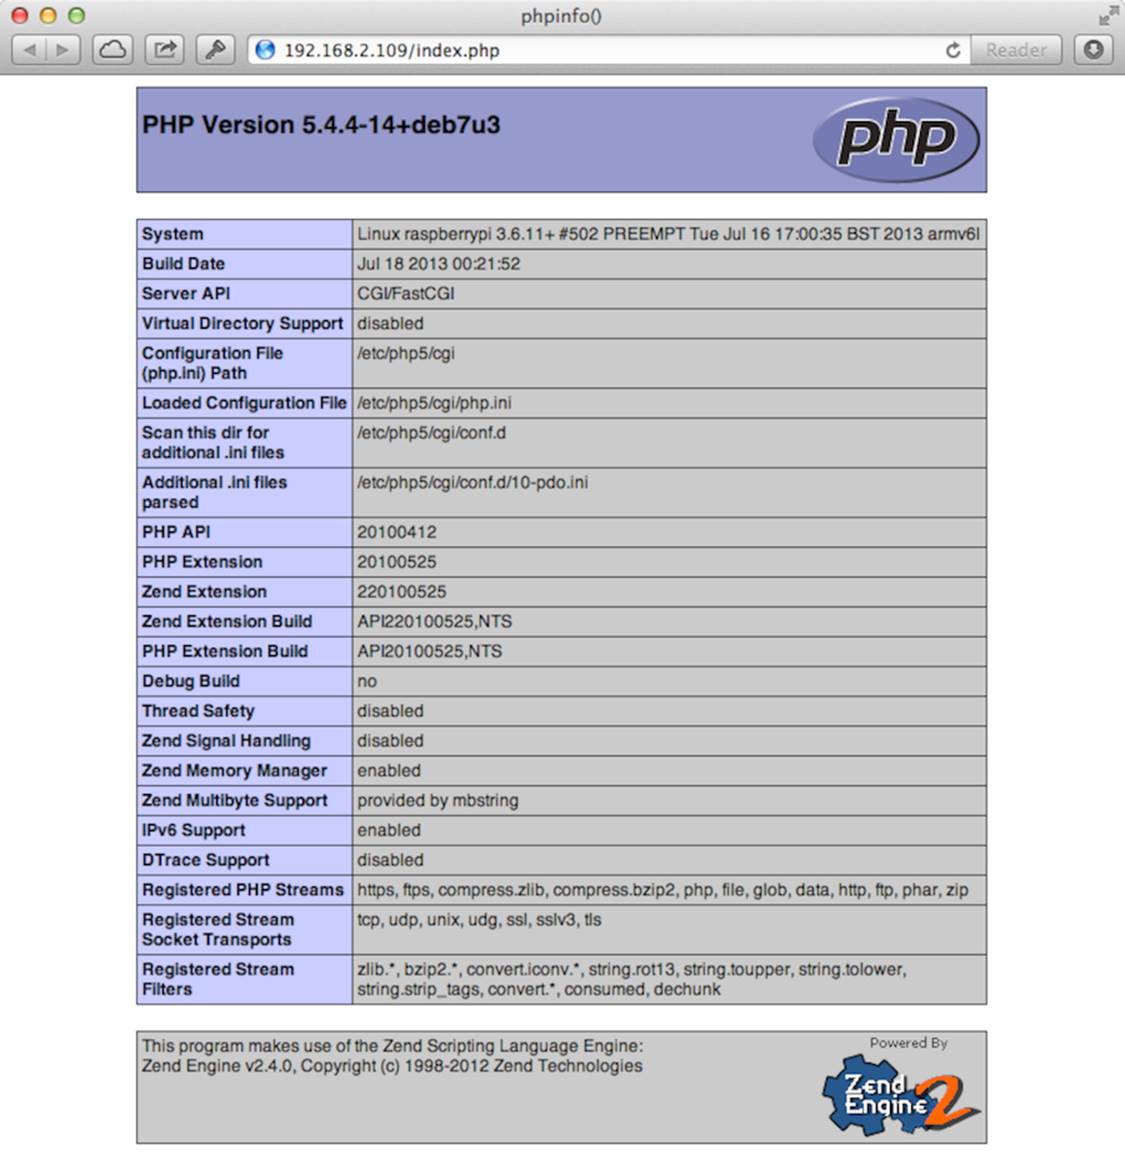
Figure 31. Serving dynamic web pages from the Pi
This is PHP’s info page, which contains a lot of information about the system on which PHP is currently running. PHP generates it dynamically. You can see that everything works fine, and now you can start to build your own web applications on the Pi. In Chapter 9, Tinker with the GPIO Pins, you’ll build a web application that controls some external hardware attached to the Pi.
Add Wi-Fi to the Pi
Wireless networks are everywhere these days. Coffee shops, airports, and hotels generally offer Wi-Fi to their customers. You probably run a wireless network at home, too, so you can conveniently access your most important services from your smartphone while you’re having a barbecue with the family. On Windows or Mac OS X, you usually don’t have to think much about joining wireless networks because the process is nearly invisible.
On the Pi it’s different, because the Pi’s hardware doesn’t support Wi-Fi by default. You need a Wi-Fi stick for the USB port, and depending on the stick’s type, Raspbian might configure it automatically. In some cases you have to configure it manually; in this section, you’ll learn both ways.
Configure Wi-Fi Using WiFi Config
The easiest way to configure Wi-Fi on Raspbian is to use a graphical tool named WiFi Config. Plug the Wi-Fi stick into a USB port and start the LXDE desktop:
|
|
pi@raspberrypi ~ $ startx |
On the desktop you’ll find an icon for WiFi Config. Double-click it, and you’ll see the application shown in Figure 32, WiFi Config lets you scan for wireless networks.
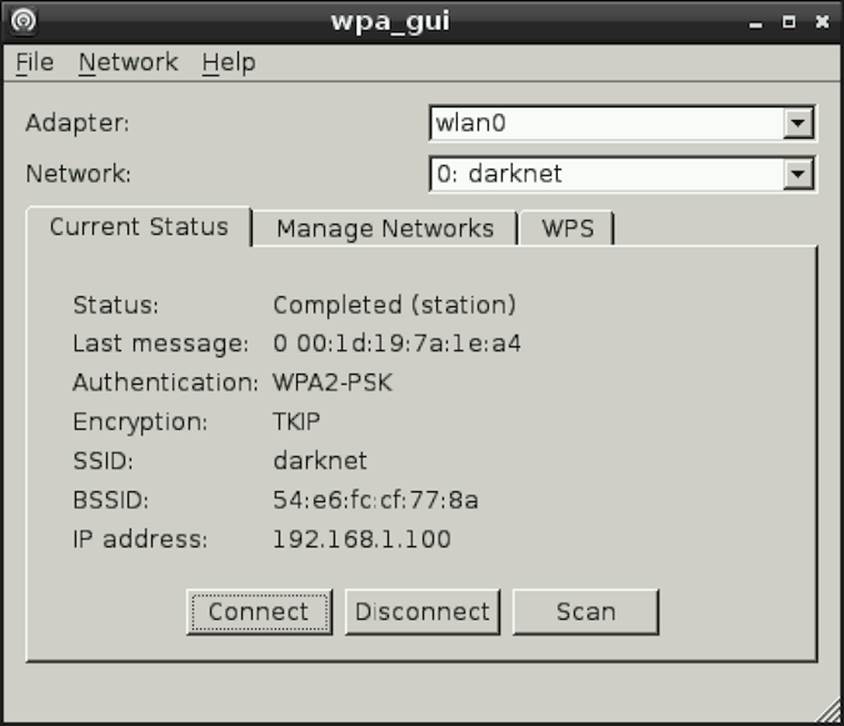
Figure 32. WiFi Config lets you scan for wireless networks.
Choose wlan0 from the Adapter drop-down menu and then click the Scan button to search for wireless networks. If you find the network you’ve been looking for, double-click its name, and the configuration dialog in Figure 33, You can change many parameters in WiFi Config will appear.
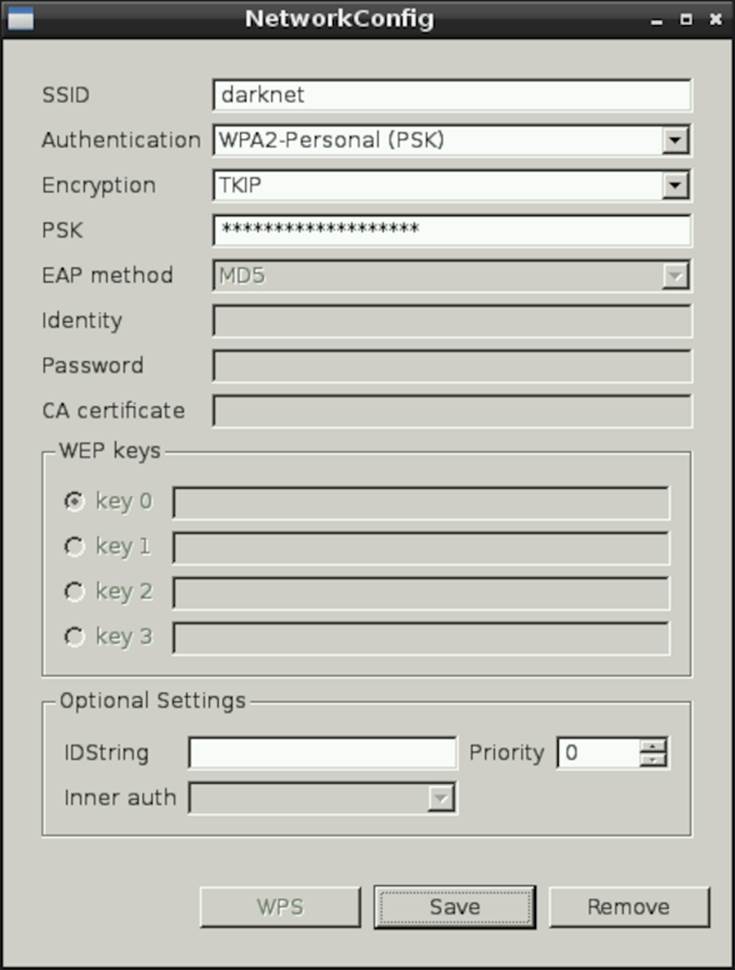
Figure 33. You can change many parameters in WiFi Config.
Usually, you don’t have to change anything here. You only have to enter your Wi-Fi password in the PSK text field. Press the Save button to return to the main menu and then press the Connect button to connect the Pi to the wireless network. If everything works as expected, save the current configuration using the File > Save Configuration menu.
As long as Raspbian and WiFi Config recognize your Wi-Fi stick, WiFi Config is the most convenient way to join wireless networks with the Pi. Unfortunately, WiFi Config doesn’t work with all Wi-Fi sticks, and sometimes you might need to avoid the desktop system because you’re running a server. In these cases you have to configure Wi-Fi manually.
Configure Wi-Fi Manually
Configuring Wi-Fi on the command line isn’t very convenient, but it isn’t rocket science, either. Plug your Wi-Fi stick into one of the Pi’s USB ports and run the lsusb command to see whether the Pi recognizes it properly:
|
|
pi@raspberrypi ~ $ lsusb |
|
|
Bus 001 Device 001: ID 1d6b:0002 Linux Foundation 2.0 root hub |
|
|
Bus 001 Device 002: ID 0424:9512 Standard Microsystems Corp. |
|
|
Bus 001 Device 003: ID 0424:ec00 Standard Microsystems Corp. |
|
|
Bus 001 Device 004: ID 050d:0237 Belkin Components F5U237 USB 2.0 7-Port Hub |
|
|
Bus 001 Device 005: ID 04e8:2018 Samsung Electronics Co., Ltd WIS09ABGN |
|
|
LinkStick Wireless LAN Adapter |
|
|
Bus 001 Device 006: ID 046d:c312 Logitech, Inc. DeLuxe 250 Keyboard |
|
|
Bus 001 Device 007: ID 046d:c05a Logitech, Inc. Optical Mouse M90 |
In this case, device 005 is a Wi-Fi stick manufactured by Samsung. You can take a closer look at the Pi’s boot message with the dmesg command and see whether the WLAN stick has been initialized properly:
|
|
pi@raspberrypi ~ $ dmesg | less |
|
|
... |
|
|
usb 1-1.3.6: new high speed USB device number 5 using dwc_otg |
|
|
usb 1-1.3.6: New USB device found, idVendor=04e8, idProduct=2018 |
|
|
usb 1-1.3.6: New USB device strings: Mfr=1, Product=2, SerialNumber=3 |
|
|
usb 1-1.3.6: Product: 802.11 n WLAN |
|
|
usb 1-1.3.6: Manufacturer: Ralink |
|
|
usb 1-1.3.6: SerialNumber: 1.0 |
|
|
... |
Press the spacebar to go down one page and press B to go up one page. Press Q to go back to the shell prompt. As you can see in the current case, the Samsung stick uses the Wi-Fi chipset from a company named Ralink. This chipset is pretty popular, so Debian recognized it out of the box. If the output of dmesg contains any errors right after the initialization of your Wi-Fi stick, check the Pi’s wiki.[75] Often you have to download the firmware for your Wi-Fi stick manually and reconfigure the Linux kernel.
If no errors occurred, Debian Linux has recognized your Wi-Fi stick successfully. You can use the following command to get the current status of your Pi’s wireless network interfaces:
|
|
pi@raspberrypi ~ $ iwconfig |
|
|
lo no wireless extensions. |
|
|
|
|
|
eth0 no wireless extensions. |
|
|
|
|
|
wlan0 IEEE 802.11abgn ESSID:off/any |
|
|
Mode:Managed Access Point: Not-Associated Tx-Power=20 dBm |
|
|
Retry long limit:7 RTS thr:off Fragment thr:off |
|
|
Power Management:on |
At the moment, the Pi isn’t connected to a wireless network, but the wlan0 interface is up and running. The following command searches for wireless networks:
|
|
pi@raspberrypi ~ $ sudo iwlist scan | grep ESSID |
|
|
ESSID:"darknet" |
|
|
ESSID:"valhalla" |
In this case, two wireless networks named darknet and valhalla are within reach. To connect to one of them, you have to edit the configuration file /etc/network/interfaces using a text editor, such as nano. The configuration file should look like this after editing:
|
|
auto lo |
|
|
iface lo inet loopback |
|
|
iface eth0 inet dhcp |
|
|
|
|
|
allow-hotplug wlan0 |
|
|
iface wlan0 inet manual |
|
|
wpa-roam /etc/wpa_supplicant/wpa_supplicant.conf |
|
|
iface default inet dhcp |
These lines will activate the wlan0 network interface automatically the next time you boot the Pi without an Ethernet connection. Also, they’ll make the Pi obtain an IP address using DHCP (Dynamic Host Configuration Protocol).
You still have to configure your Wi-Fi credentials. Open /etc/wpa_supplicant/wpa_supplicant.conf with your text editor of choice and enter the following lines:
|
|
ctrl_interface=DIR=/var/run/wpa_supplicant GROUP=netdev |
|
|
update_config=1 |
|
|
|
|
|
network={ |
|
|
ssid="darknet" |
|
|
psk="dontTellAny0ne" |
|
|
proto=RSN |
|
|
key_mgmt=WPA-PSK |
|
|
pairwise=TKIP |
|
|
auth_alg=OPEN |
|
|
} |
Of course, you have to adjust the parameters ssid and psk accordingly.
If you’re impatient, you don’t have to reboot the Pi. Run the following command to make the Pi join your wireless network:
|
|
pi@raspberrypi ~ $ sudo ifup wlan0 |
|
|
Internet Systems Consortium DHCP Client 4.2.2 |
|
|
Copyright 2004-2011 Internet Systems Consortium. |
|
|
All rights reserved. |
|
|
For info, please visit https://www.isc.org/software/dhcp/ |
|
|
|
|
|
Listening on LPF/wlan0/00:12:fb:28:a9:51 |
|
|
Sending on LPF/wlan0/00:12:fb:28:a9:51 |
|
|
Sending on Socket/fallback |
|
|
DHCPDISCOVER on wlan0 to 255.255.255.255 port 67 interval 8 |
|
|
DHCPDISCOVER on wlan0 to 255.255.255.255 port 67 interval 14 |
|
|
DHCPDISCOVER on wlan0 to 255.255.255.255 port 67 interval 14 |
|
|
DHCPREQUEST on wlan0 to 255.255.255.255 port 67 |
|
|
DHCPOFFER from 192.168.1.1 |
|
|
DHCPACK from 192.168.1.1 |
|
|
bound to 192.168.1.101 -- renewal in 2983 seconds. |
The Pi has the IP address 192.168.1.101 now and is connected to your network wirelessly. (Your IP address probably will differ.) Use the ping command to check whether you can access a website such as Google, for example:
|
|
pi@raspberrypi ~ $ ping -c 3 google.com |
|
|
PING google.com (173.194.69.100) 56(84) bytes of data. |
|
|
64 bytes from google.com (173.194.69.100): icmp_req=1 ttl=45 time=26.7 ms |
|
|
64 bytes from google.com (173.194.69.100): icmp_req=2 ttl=45 time=32.3 ms |
|
|
64 bytes from google.com (173.194.69.100): icmp_req=3 ttl=45 time=34.8 ms |
|
|
|
|
|
--- google.com ping statistics --- |
|
|
3 packets transmitted, 3 received, 0% packet loss, time 2002ms |
|
|
rtt min/avg/max/mdev = 26.752/31.338/34.863/3.395 ms |
As you can see, the Pi is connected to the Internet via Wi-Fi now. Run the following command to get some statistics about the signal strength and so on:
|
|
pi@raspberrypi ~ $ iwconfig |
|
|
lo no wireless extensions. |
|
|
|
|
|
eth0 no wireless extensions. |
|
|
|
|
|
wlan0 IEEE 802.11abgn ESSID:"darknet" |
|
|
Mode:Managed Frequency:2.442 GHz Access Point: 54:E6:FC:CF:77:8A |
|
|
Bit Rate=135 Mb/s Tx-Power=20 dBm |
|
|
Retry long limit:7 RTS thr:off Fragment thr:off |
|
|
Power Management:on |
|
|
Link Quality=40/70 Signal level=-70 dBm |
|
|
Rx invalid nwid:0 Rx invalid crypt:0 Rx invalid frag:0 |
|
|
Tx excessive retries:1 Invalid misc:6 Missed beacon:0 |
Keep in mind that a computer like the Pi can have more than one IP address. If you connect it via Ethernet and Wi-Fi, for example, your boot message will display something like the following:
|
|
My IP address is 192.168.2.109 192.168.1.101 |
That means that you’ve connected your Pi using two network interfaces, and for each interface it has a different IP address.
Configure Static IP Addresses
Until now you’ve configured all network devices using DHCP. That is, your router assigns an IP address to your Pi automatically. This IP address is unique, but it might change. In some cases it’s more convenient to assign a static IP address—that is, an IP address that always stays the same. Of course, you have to make sure you don’t use an IP address that is being used by another device in your network.
Configuring static IP addresses isn’t much different from configuring dynamic IP addresses. You have to edit /etc/network/interfaces first. The following file assigns a dynamic IP address to the Ethernet device. Also, it assigns the static IP address 192.168.1.105 to the Wi-Fi device:
|
|
auto lo |
|
|
iface lo inet loopback |
|
|
iface eth0 inet dhcp |
|
|
|
|
|
allow-hotplug wlan0 |
|
|
iface wlan0 inet manual |
|
|
wpa-roam /etc/wpa_supplicant/wpa_supplicant.conf |
|
|
|
|
|
iface home inet static |
|
|
address 192.168.1.105 |
|
|
netmask 255.255.255.0 |
|
|
network 192.168.1.0 |
|
|
gateway 192.168.1.1 |
Make sure you’re using the correct addresses for netmask, network, and gateway. Also, make sure the address 192.168.1.105 isn’t used by any other device on your wireless network.
In this case, the static interface’s name is “home.” You have to connect it to the Wi-Fi credentials by changing /etc/wpa_supplicant/wpa_supplicant.conf slightly:
|
|
ctrl_interface=DIR=/var/run/wpa_supplicant GROUP=netdev |
|
|
update_config=1 |
|
|
|
|
|
network={ |
|
|
ssid="darknet" |
|
|
psk="t0p$ecret" |
|
|
proto=RSN |
|
|
key_mgmt=WPA-PSK |
|
|
pairwise=TKIP |
|
|
auth_alg=OPEN |
|
|
id_str="home" |
|
|
} |
The only thing you have to add is id_str="home". After you reboot the Pi, it will listen on a dynamic Ethernet address and a static wireless address.
Next Steps
In this chapter, you learned how to integrate the Pi into your network. You can now conveniently access the Pi via SSH, and you can even use it as a web server. In the next chapter, you’ll do something completely different: you’ll turn the Pi into a multimedia center.
Footnotes
|
[59] |
http://hexxeh.net/?p=328117859 |
|
[60] |
http://twotoasts.de/index.php/midori/ |
|
[61] |
http://www.chromium.org/ |
|
[62] |
http://en.wikipedia.org/wiki/Mozilla_Corporation_software_rebranded_by_the_Debian_project#IceWeasel |
|
[63] |
http://mobile.twitter.com |
|
[64] |
http://youtube.com |
|
[65] |
http://www.raspberrypi.org/archives/5535 |
|
[66] |
http://en.wikipedia.org/wiki/Web_%28web_browser%29 |
|
[67] |
http://www.chiark.greenend.org.uk/~sgtatham/putty/download.html |
|
[68] |
http://en.wikipedia.org/wiki/Vnc |
|
[69] |
http://www.tightvnc.com/ |
|
[70] |
http://httpd.apache.org/ |
|
[71] |
http://nginx.org/ |
|
[72] |
http://www.lighttpd.net/ |
|
[73] |
http://www.php.net/ |
|
[74] |
http://www.fastcgi.com/ |
|
[75] |
http://elinux.org/RPi_VerifiedPeripherals#USB_WiFi_Adapters |
All materials on the site are licensed Creative Commons Attribution-Sharealike 3.0 Unported CC BY-SA 3.0 & GNU Free Documentation License (GFDL)
If you are the copyright holder of any material contained on our site and intend to remove it, please contact our site administrator for approval.
© 2016-2026 All site design rights belong to S.Y.A.