Instant Zurb Foundation 4: Get up and running in an instant with Zurb Foundation 4 Framework (2013)
3. Configuration of the Work Environment
Our work environment must have the appropriate tools that allow us to be agile and check errors without wasting time on repetitive tasks.
We need a modern web browser, which supports new standards and includes a console and development tools. Today, one of those that provides the best results, in terms of development, is the Google browser, Chrome.
We also need a text editor. There are developers who prefer an IDE like Eclipse, WebStorm, NetBeans, etc... I personally find myself to be most comfortable with minimalist editors like Sublime Text or the recent Atom.io.
Although we are front ends and the terminal seems more related to the back end or server management, we need to use it too. We need one that is simple to use and efficient. If you have a MacOS X system, I recommend iTerm2.
Note The next steps are for installing the programs on a MacOS X system. For other operating systems consult the documentation available on their respective websites.
3.1 Installing Google Chrome
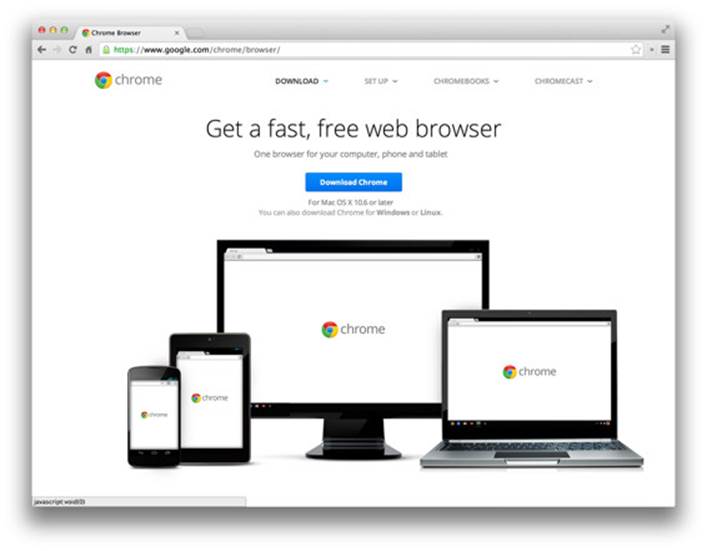
Go to http://google.com/chrome. Download the file .dmg and open it once it has downloaded. Drag the Google Chrome application to the applications folder.
To access the development tools. Go to Chrome’s View menu, Development / Developer tools. There you will find the JavaScript console, access to scripts, network tools, etc...
In the Chrome Store there is an extension for Angular, called Batarang. You can download it from here. This extension allows you to display the scopes and other special features that are useful when debugging.
3.2 Installing and Configuring Sublime Text or Atom
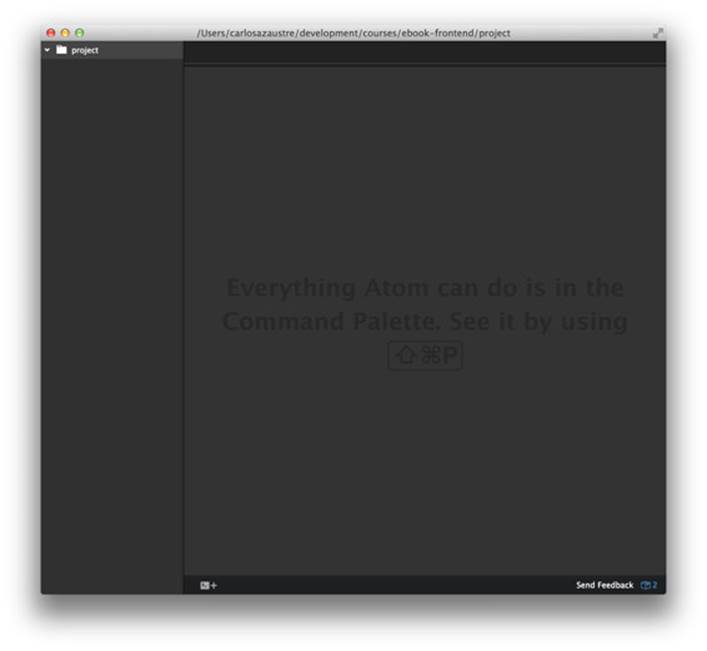
You can download SublimeText from its website. Using it is free, but purchasing your license (to avoid the pop-ups that appear occasionally) costs about $70. Another very similar editor is Atom created by the developers at GitHub which is what I currently use. If you want to try morehipster options there’s the beta of Chrome Dev Editor.
Atom has many plugins, developed by the Atom team and the community. You can install them from the menu Atom > Preferences. 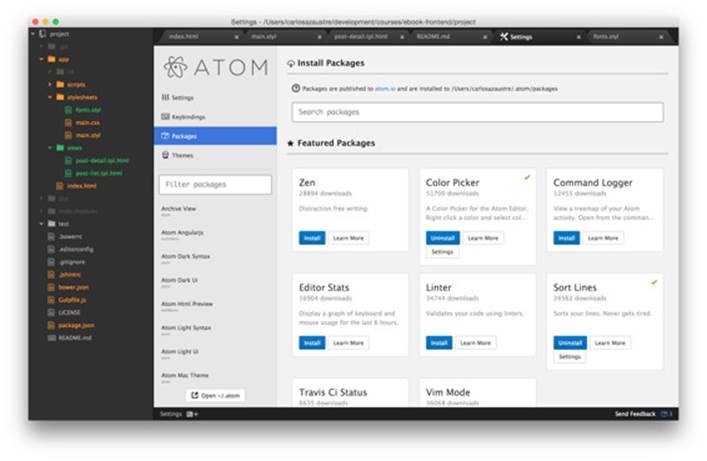 .
.
Among the most curious and not very well-known is the terminal plugin, to have a command terminal in a tab of the editor. 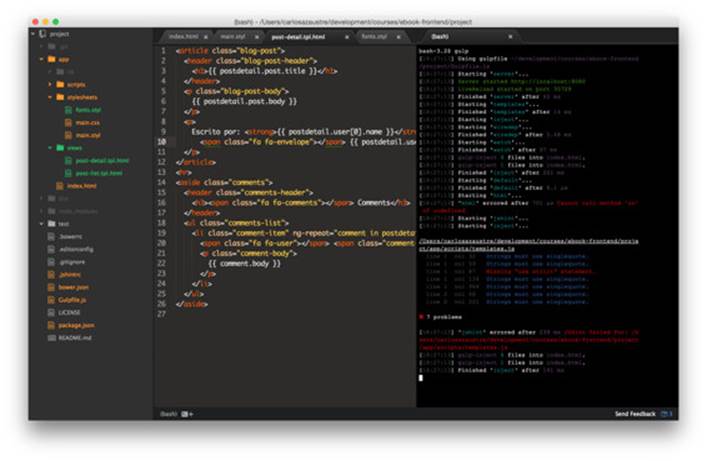
Or a Markdown file viewer to see what you’re writing displayed in real-time. 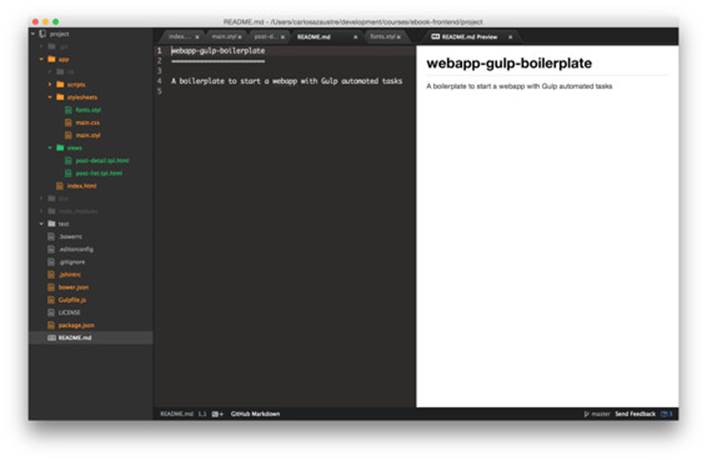
3.3 Installing and Configuring iTerm2
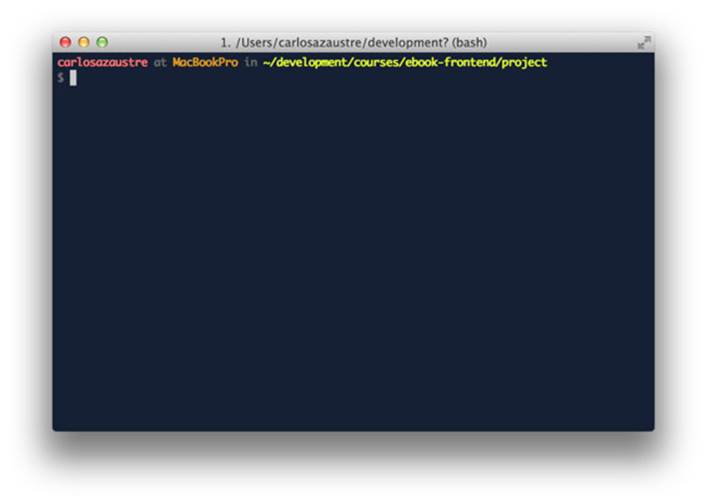 Download iTerm2 for Mac. Once it is installed, start the application. To get a prompt like the one in the image, in which you can see your username, your computer, the current directory, and even the repository branch you’re in, you can download the following scripts that will configure the terminal like I have mine, by writing the following:
$ cd ~
$ curl -O https://raw.githubusercontent.com/carlosazaustre/mac-dev-setup/master/.bash_profile
$ curl -O https://raw.githubusercontent.com/carlosazaustre/mac-dev-setup/master/.bash_prompt
$ curl -O https://raw.githubusercontent.com/carlosazaustre/mac-dev-setup/master/.aliases
$ curl -O https://raw.githubusercontent.com/carlosazaustre/mac-dev-setup/master/.gitconfig
Restart iTerm and it will already be configured for you.
3.4 Installing Git
Git is very important for a developer; it is a way to save versions and changes that we make in our developments, to collaborate on other free software projects with the community and gradually create a CV.
You can install Git on your system using homebrew on Mac. To install this package manager on Mac, you need to run the following scripts in your terminal:
# Installing homebrew for Mac. The missing package manager for OS X
$ ruby -e "$(curl -fsSL https://raw.github.com/Homebrew/homebrew/go/install)"
$ brew update
$ export PATH="/usr/local/bin:$PATH"
Then we can install Git with:
$ brew install git
When you’re done, you can check the version with:
$ git --version
git version 1.8.4
We proceed to configure Git with our username:
$ git config --global user.name "Carlos Azaustre"
$ git config --global user.email "cazaustre@gmail.com"
Every time we push to a remote repository, it will ask for the name and password of our account that we will now create.
3.4.1 Registration on GitHub
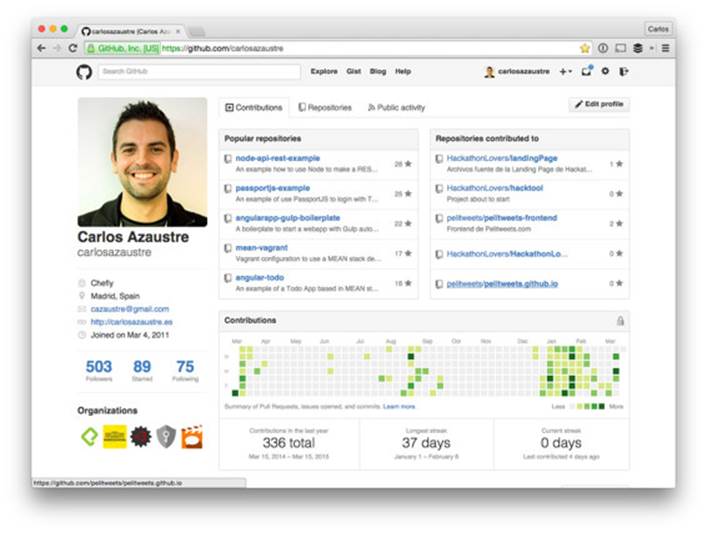 In addition to being a version control system (or repository) on the cloud, GitHub is also a social network for developers, where communities are formed around Open Source projects. If you are a developer and you don’t have a GitHub account, I’m sorry to say that you don’t exist. Create your GitHub account today and start to publish your open projects. Their website isgithub.com
3.4.2 Registration on GitLab
If, however, you want to use the cloud for your private repositories, you have the option of GitLab, which gives you unlimited repositories and also, due to being Open Source, the option of installing it on your own server and therefore having more control over it. 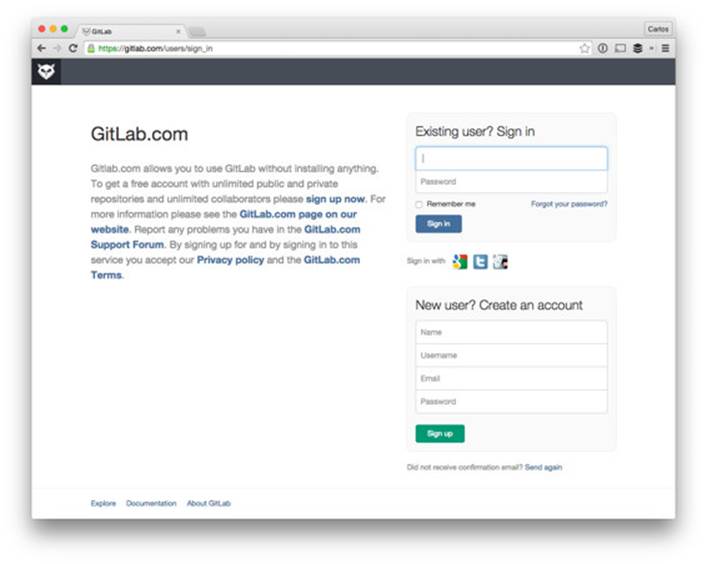
3.5 File and Directory Structure
To begin developing our front end project, we are going to structure the files in the following manner:
project/
├── app/
├── dist/
├── package.json
├── bower.json
├── README.md
├── .gitignore
├── .editorconfig
└── .jshintrc
Later we will be adding more files and subdirectories, but to start this will be our structure.
· project is the root folder of our web project and we have 2 subdirectories below it.
· app contains all of the complete source code of our web application, without minification or optimization, only the development code. And in dist we have the entire project minified and optimized in order to be deployed in production.
· package.json contains our project information as well as the name and versions of the dependencies that we will use for development.
· bower.json is similar to package.json for managing the dependencies that we will use in the front end, such as Angular libraries, CSS frameworks, etc...
· README.md is the file that we use to provide information about the application that we are developing and as project documentation.
· .gitignore tells Git which files we don’t want to be uploaded to the repository (for example, passwords, configuration files, etc.).
· .editorconfig allows us to configure our text editor so that all of the developers on the same project, who use it, have the same spacing, tabbing, etc. in the code.
· .jshintrc is a JSON file that allows us to check errors in the code as well as in the syntax, use of variables, or style in our JavaScript code as we save the files. Combined with a task manager, like Gulp, which we will use later, it allows the agile development of our projects.
.editorconfig
This is the content that we will use, which you can adapt to your preferences:
root = true
[*]
indent_style = space
indent_size = 2
end_of_line = lf
charset = utf-8
trim_trailing_whitespace = true
insert_final_newline = true
[*.md]
trim_trailing_whitespace = false
indent_style = tab
In this file we are indicating that we want the indent to be created with spaces instead of tabs. The size of the tab is 2 spaces. The end of the line should be marked as LF. The character encoding to use is UTF-8. And for .md files such as README.md the indentation is with tabs.
You can consult the rest of the properties to configure in the documentation on their website: http://editorconfig.org/ and also download the plugin for your favorite text editor.
.jshintrc
This is the content of our JSHint file. You can see properties to add on the web page with their documentation: http://www.jshint.com/docs/options/:
{
"node": true,
"browser": true,
"esnext": true,
"bitwise": true,
"camelcase": true,
"curly": true,
"eqeqeq": true,
"immed": true,
"indent": 4,
"latedef": true,
"newcap": true,
"noarg": true,
"quotmark": "single",
"undef": true,
"unused": true,
"strict": true,
"trailing": true,
"smarttabs": true,
"jquery": true,
"globals": {
"angular": false
}
}
package.json
This is a JSON file which is where we include all of the information concerning our project. You can add numerous fields. You can see which fields to add in the documentation on the following web page: https://www.npmjs.org/doc/files/package.json.html. For this book’s example, this is the content that we have:
{
"name": "angularapp-gulp-boilerplate",
"version": "0.0.1",
"description": "Ejemplo de desarrollo de aplicación web con AngularJS",
"bugs": {
"url": "https://github.com/carlosazaustre/angularapp-gulp-boilerplate/issues",
"email": "cazaustre@gmail.com"
},
"license": "MIT",
"author": "Carlos Azaustre <cazaustre@gmail.com> - http://carlosazaustre.es",
"repository": {
"type": "git",
"url": "https://github.com/carlosazaustre/angularapp-gulp-boilerplate"
},
"dependencies": {},
"devDependencies": {}
}
We will fill in the devDependencies object each time we install a new package via npm from the terminal.
bower.json
As we said earlier, it is similar to package.json but for the dependencies and libraries we will use for the “front end”. The content of this file will be the following:
{
"name": "angularapp-gulp-boilerplate",
"version": "0.0.1",
"description": "Example of a web application with JavaScript",
"dependencies": {}
}
We will fill in the dependencies object each time we install a new dependency via bower from the terminal.
3.6 Automating our Workflow
First of all, we must install Node.js. Although this is a front end project and we are not going to develop the back end (we will use a fake back end), we need Node.js in order to install Bower, Gulp and run the tasks that we specify in Gulpfile.js.
To install Node you can go to their website [http://nodejs.org/downloads] or if you have a Mac, you can do it from the terminal with homebrew like we did with git:
# Install NodeJS from Homebrew
$ brew install node
$ node -v
v0.10.26
$ npm -v
1.4.3
With Node.js installed, we proceed to install the following dependencies, globally (using the flag -g) that we will use throughout our project. After being globally installed, we can run the commands from any directory and in any other project:
$ npm install -g gulp
$ npm install -g bower
Gulp is a task launcher that runs under Node.js, allowing us to automate tasks that we do frequently. Until now the best known manager was Grunt but the simplicity and speed that Gulp offers has made its use spread to many projects. Gulp has a large community and plugins for anything that comes to mind. We proceed then to install the dependencies and plugins that we are going to use locally in our project. In this case we must be in the root directory of our application and write the following:
$ npm install --save-dev gulp
$ npm install --save-dev gulp-connect
$ npm install --save-dev connect-history-api-fallback
$ npm install --save-dev gulp-jshint
$ npm install --save-dev gulp-useref
$ npm install --save-dev gulp-if
$ npm install --save-dev gulp-uglify
$ npm install --save-dev gulp-minify-css
$ npm install --save-dev gulp-stylus
$ npm install --save-dev nib
These dependencies will automate the JavaScript code correction, the minification of the CSS, the creation of a web development server in order to see the changes that we make in the code in real-time in the browser, etc... We will see each package in detail while we move forward.
If we look closely, our package.json has changed, and the devDependencies object now looks like this:
"devDependencies": {
"gulp": "^3.8.6",
"gulp-connect": "^2.0.6",
"connect-history-api-fallback": "0.0.4",
"gulp-jshint": "^1.8.0",
"gulp-useref": "^0.6.0",
"gulp-if": "^1.2.4",
"gulp-uglify": "^0.3.1",
"gulp-minify-css": "^0.3.7",
"gulp-stylus": "^1.3.0",
"nib": "^1.0.3"
}
Dependencies along with their version number have been added to the file automatically, thanks to the flag --save and with -dev in the object in question.
We are going to create a Gulpfile.js file in the root directory of our project, where we are going to specify some tasks to begin to streamline our life:
Gulpfile.js
var gulp = require('gulp'),
connect = require('gulp-connect'),
historyApiFallback = require('connect-history-api-fallback');
// Development web server
gulp.task('server', function() {
connect.server({
root: './app',
hostname: '0.0.0.0',
port: 8080,
livereload: true,
middleware: function(connect, opt) {
return [ historyApiFallback ];
}
});
});
This task takes the content from the directory app and shows it as if it were a web server, at the address http://localhost:8080, http://127.0.0.1:8080 or http://0.0.0.0:8080. Entering the hostname 0.0.0.0 gets us the livereload, which is what allows us to see the changes we make in real-time, visible from any device connected to the same network.
Imagine that in our local network, our computer has the private IP 192.168.1.20. If we access the address http://192.168.1.20:8080 from a mobile phone, tablet or other computer connected to the same network as our development computer, we will see our web application and the changes we make will be shown automatically. Black magic.
To do this we must continue configuring the file Gulpfile.js, we are going to add that the changes we make in a Stylus .styl file, are shown as CSS in the browser. Stylus is a CSS preprocessor, which allows you to write the design in a language and then change it to CSS. In chapter 4 we will look at this topic in more detail. For now, to see a quick example, we add the following tasks:
var stylus = require('gulp-stylus'),
nib = require('nib');
// Preprocess Stylus files to CSS and reload the changes
gulp.task('css', function() {
gulp.src('./app/stylesheets/main.styl')
.pipe(stylus({ use: nib() }))
.pipe(gulp.dest('./app/stylesheets'))
.pipe(connect.reload());
});
// Reload the browser on HTML changes
gulp.task('html', function() {
gulp.src('./app/**/*.html')
.pipe(connect.reload());
});
// Watch code changes and to run related tasks
gulp.task('watch', function() {
gulp.watch(['./app/**/*.html'], ['html']);
gulp.watch(['./app/stylesheets/**/*.styl'], ['css']);
});
gulp.task('default', ['server', 'watch']);
The task css takes the file app/sytlesheets/main.styl and preprocesses its contents to CSS in the file app/stylesheets/main.css, using the library nib that automatically adds the CSS properties for Firefox, Internet Explorer and Webkit. So we saved having to write the specific prefixes for each browser.
The task html simply restarts the browser using connect.reload() each time a change is made in an HTML file.
The task watch watches the changes that take place in HTML and Stylus files and launches the html and css tasks respectively.
Finally, we define a default task default that launches the server and watch tasks. To run the task that includes all of the tasks, in the terminal we write:
$ gulp
All of the tasks will be launched and we will be able to make changes in our code that will be shown in the browser without needing to reload manually.
Here’s a quick example to put all this in place and see how Gulp and its automated tasks works. We create the test file index.html in the app folder with the following content:
<!doctype html>
<html lang="en">
<head>
<meta charset="UTF-8">
<link rel="stylesheet" href="/stylesheets/main.css">
<title>Example</title>
</head>
<body>
Hello World!
</body>
</html>
As you can see, we link to the style file main.css in the folder app/stylesheets. This file will be generated by Gulp using the .styl files in which we encode our design.
Therefore we create the file main.styl in app/stylesheets with the following content:
body
background-color white;
color black;
We save and run Gulp. If we go to http://localhost:8080 in a browser window we can see the following:
Without stopping Gulp’s process or closing the browser, we return to our main.styl file and change the following:
body
background-color blue;
color white;
We save and our browser will automatically change to this: 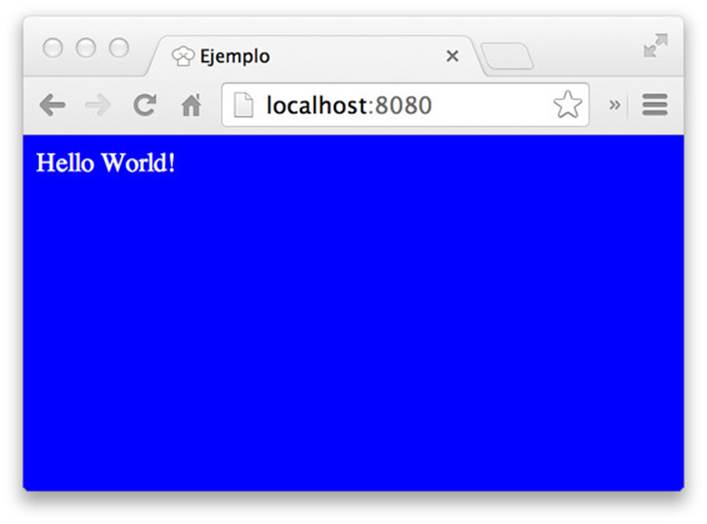
In this way we have configured Gulp to reload the browser automatically according to the changes we make in the HTML and the CSS, leaving us with a much more agile workflow that allows us to save a lot of development time.
Finally we will add one last task (for now), whose function is to review the JavaScript code that we write, in search of errors, style consistency, etc. This is achieved using the plugin gulp-jshint with the .jshintrc file that we had written earlier. However beforehand, we will add this new dependency, which will allow us a better reading of the errors from the terminal:
$ npm install --save-dev jshint-stylish
Then we add the following task to our Gulpfile.js file:
var jshint = require('gulp-jshint'),
stylish = require('jshint-stylish');
// Search errors on JS code and to show in screen
gulp.task('jshint', function() {
return gulp.src('./app/scripts/**/*.js')
.pipe(jshint('.jshintrc'))
.pipe(jshint.reporter('jshint-stylish'))
.pipe(jshint.reporter('fail'));
});
We also add a new subtask to the watch task to watch the changes we make in the JavaScript code and so launch the task we just created:
gulp.task('watch', function() {
gulp.watch(['./app/**/*.html'], ['html']);
gulp.watch(['./app/stylesheets/**/*.styl'], ['css']);
gulp.watch(['./app/scripts/**/*.js'], ['jshint']);
});
Our complete Gulpfile.js file, for the moment, will stay like this:
// File: Gulpfile.js
'use strict';
var gulp = require('gulp'),
connect = require('gulp-connect'),
stylus = require('gulp-stylus'),
nib = require('nib'),
jshint = require('gulp-jshint'),
stylish = require('jshint-stylish'),
historyApiFallback = require('connect-history-api-fallback');
gulp.task('server', function() {
connect.server({
root: './app',
hostname: '0.0.0.0',
port: 8080,
livereload: true,
middleware: function(connect, opt) {
return [ historyApiFallback ];
}
});
});
gulp.task('jshint', function() {
return gulp.src('./app/scripts/**/*.js')
.pipe(jshint('.jshintrc'))
.pipe(jshint.reporter('jshint-stylish'))
.pipe(jshint.reporter('fail'));
});
gulp.task('css', function() {
gulp.src('./app/stylesheets/main.styl')
.pipe(stylus({ use: nib() }))
.pipe(gulp.dest('./app/stylesheets'))
.pipe(connect.reload());
});
gulp.task('html', function() {
gulp.src('./app/**/*.html')
.pipe(connect.reload());
});
gulp.task('watch', function() {
gulp.watch(['./app/**/*.html'], ['html']);
gulp.watch(['./app/stylesheets/**/*.styl'], ['css']);
gulp.watch(['./app/scripts/**/*.js', './Gulpfile.js'], ['jshint']);
});
gulp.task('default', ['server', 'watch']);
To test how JSHint works, we are going to write a small example file in JavaScript with errors, so that it launches the task. We add the file main.js to the directory app/scripts.
(function() {
console.log('Hello World!');
})();
If we run Gulp, we will see the following in the terminal:
$ gulp
[12:32:29] Using gulpfile ~/development/courses/ebook-frontend/project/Gulpfile.js
[12:32:29] Starting 'server'...
[12:32:29] Server started http://localhost:8080
[12:32:29] LiveReload started on port 35729
[12:32:29] Finished 'server' after 25 ms
[12:32:29] Starting 'watch'...
[12:32:29] Finished 'watch' after 13 ms
[12:32:29] Starting 'default'...
[12:32:29] Finished 'default' after 5.52 μs
[12:32:38] Starting 'jshint'...
/Users/carlosazaustre/development/courses/ebook-frontend/project/app/scripts/main.js
line 2 col 3 Missing "use strict" statement.
✖ 1 problem
[12:32:38] 'jshint' errored after 69 ms JSHint failed for: /Users/carlosazaustre/development/courses/ebook-frontend/project/app/scripts/main.js
We encountered an error, which is that we need to add the line use strict; to the beginning of the file. That is because we have instructed our .jshintrc file to verify that the element /js exists in all of our files or the parser will show an error message. This way, in our team, all of the developers will follow the same style rules.
We add this line to the file main.js:
// File: app/scripts/main.js
'use strict';
(function() {
console.log('Hello World!');
})();
Immediately after saving the file, we see in the terminal that the task has been run automatically and no longer displays errors:
[12:37:08] Starting 'jshint'...
[12:37:08] Finished 'jshint' after 26 ms
Done, we have automated our workflow each time we make a change. In the next chapter we will look at how to structure JavaScript files and the use of Bower to start to add functionality to our application.
All materials on the site are licensed Creative Commons Attribution-Sharealike 3.0 Unported CC BY-SA 3.0 & GNU Free Documentation License (GFDL)
If you are the copyright holder of any material contained on our site and intend to remove it, please contact our site administrator for approval.
© 2016-2026 All site design rights belong to S.Y.A.