Continuous Enterprise Development in Java (2014)
Chapter 11. Assembly and Deployment
The road to success is always under construction.
— Lily Tomlin
To this point, we’ve focused primarily on the testable development of our modules and have taken some selective slices out for examination and testing. The time has come for us to address full integration by bringing everything together into a single deployable unit.
Additionally, we’ll look at some alternative (and arguably more enterprise-ready) runtimes for our application. Ideally, we’d like to be in a position where our test environment is aligned as closely as possible to what will be run in production, and we’ll further aim to automate the process of deployment. By removing human interaction as much as possible, our potential for mistakes decreases and we learn to rely instead on our test suite as a guardian of code quality.
This chapter will ultimately link a git push to validate new commits in a continuous integration server before deploying the new version of our application into the publicly accessible Web. Whether you go straight to production or first to a staging environment, these steps should outline a smooth transition from development to real application use.
Obtaining JBoss EAP
JBoss Enterprise Application Platform (EAP) is Red Hat’s supportable application server distribution born from the community open source WildFly project (formerly known as the JBoss Application Server). A full discussion of the relationship and differences between community and supportable middleware is detailed by Red Hat, and some of the most important points are as follows:
§ The community projects are built to innovate quickly and push new features at a rapid rate.
§ Supportable products are intended to have a multiyear life span, and receive updates and bug fixes over this time period.
§ A support contract and SLA can be purchased for supportable products.
In March of 2013, the JBoss Senior Director of Engineering announced that EAP binaries and their dependencies will be made freely available (at no monetary cost) via a 0-dollar subscription through Red Hat. Because this runtime comes with no obligation and allows us a migration path to support if our little GeekSeek business were to need it, we’ll opt for EAP as our target runtime.
EAP has some additional differences with WildFly, which become very apparent during our development experience. Though EAP is available for free, there is a Terms and Conditions prerequisite to its use, and therefore it is not currently available in the JBoss Nexus or Maven Central repositories. We’ll have to perform some extra steps to set up our environments for EAP before we can enable this option in our builds.
First, let’s obtain the EAP distribution and private JBoss EAP Maven repository from the JBoss Downloads page, as shown in Figure 11-1.
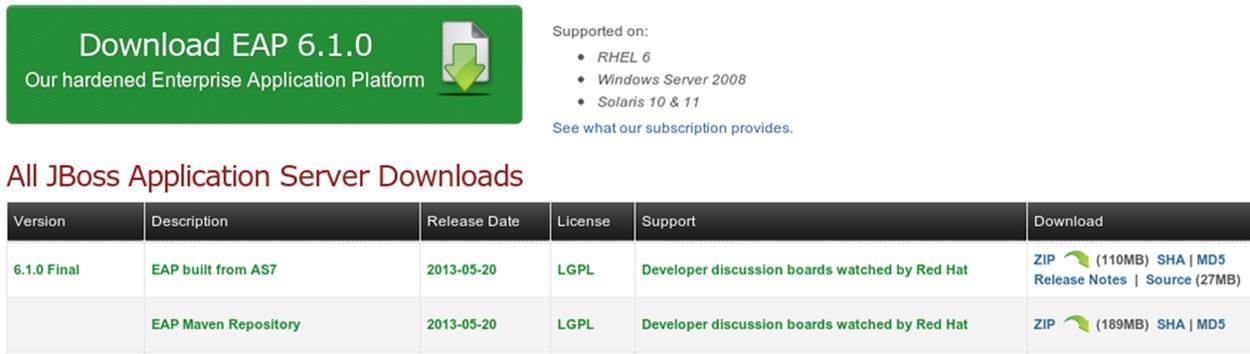
Figure 11-1. Download JBoss EAP
Once we agree to the Terms and Conditions, the links to download will begin the process. Both the EAP distribution and the EAP Maven Repository are bundled as ZIP files.
Let’s install EAP by unzipping it into a location on the filesystem. Anywhere will do; for instance, in *nix-like systems we can handle this from the command line:
~ $> mkdir -p /home/alr/opt/jboss/eap; cd /home/alr/opt/jboss/eap
eap $> mv /home/alr/Downloads/jboss-eap-6.1.0.zip .
eap $> unzip jboss-eap-6.1.0.zip
Using this, we’d now have EAP installed at /home/alr/opt/jboss/eap/jboss-eap-6.1/.
Now let’s place our EAP Maven repository somewhere useful. It might be enticing to mix in these artifacts with our default Maven repository (typically located at USER_HOME/.m2/repository), but let’s keep things separated and create a new extension repo for our product bits. This way we’ll have the option of enabling this repository explicitly in our builds and won’t ever have to worry about placing these artifacts alongside ones found in Maven Central. We’ll choose USER_HOME/.m2/jboss-eap-6.1.0.GA-maven-repository (the default folder name contained inside the ZIP, under our user’s Maven directory):
Downloads $> unzip jboss-eap-6.1.0-maven-repository.zip
Downloads $> mv jboss-eap-6.1.0-maven-repository ~/.m2/
Downloads $> rm jboss-eap-6.1.0-maven-repository.zip
Running Against JBoss EAP
With our EAP installation in place, we’re now in a position to exercise our application against this server instead of WildFly, which we’ve used up to this point as a convenient default.
Using the EAP Remote Container
First we’ll run EAP as a standalone process. Opening a terminal or console window, let’s cd into the directory in which we unzipped the distribution. From there we can export an environment variable to set JBOSS_HOME to the present working directory (using the export command on *nix systems or simply set on Windows machines):
$> cd /home/alr/opt/jboss/eap/jboss-eap-6.1/
jboss-eap-6.1 $> export JBOSS_HOME=`pwd`
Now we’ll launch the EAP server in standalone (nondomain) mode by using the provided scripts in the bin directory:
jboss-eap-6.1 $> cd bin
bin $> ./standalone.sh
=================================
JBoss Bootstrap Environment
JBOSS_HOME: /home/alr/opt/jboss/eap/jboss-eap-6.1
JAVA: /home/alr/opt/oracle/java/jdk7/bin/java
JAVA_OPTS: -server -XX:+UseCompressedOops -Xms1303m
-Xmx1303m -XX:MaxPermSize=256m -Djava.net.preferIPv4Stack=true
-Djboss.modules.system.pkgs=org.jboss.byteman
-Djava.awt.headless=true
=================================
...output trimmed
02:57:43,593 INFO [org.jboss.as] (Controller Boot Thread) JBAS015874:
JBoss EAP 6.1.0.GA
(AS 7.2.0.Final-redhat-8) started in 2404ms -
Started 123 of 177 services (53 services
are passive or on-demand)
And with that, we have our server process running and ready to receive deployments or service requests. As noted in the preceding output, the startup sequence is complete on our machines in about 2.4 seconds. You can ensure that everything is working correctly or find links to the web-based management interface by pointing your browser to http://localhost:8080, as shown in Figure 11-2.
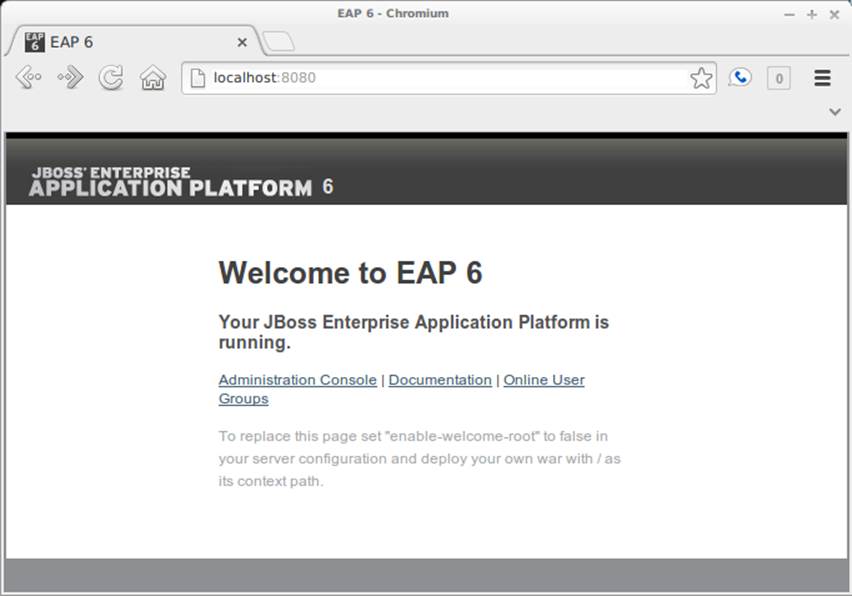
Figure 11-2. EAP home page
Let’s leave this as is for the time being, and open a new console window (or tab) in the GeekSeek application’s source root.
Our experience with Arquillian up to this point has been using a managed container configuration; this has ceded the responsibility of server startup and shutdown to Arquillian during the Before Suite and After Suite test lifecycle events. Now that we’ve already got a server booted, we can let Arquillian bypass these steps to use a previously bootstrapped process, which gives us some benefits:
§ We save the time needed to start and/or stop a server alongside each test suite.
§ A server does not have to be running locally; the server process may be housed on a separate physical machine accessible on the network.
We’ve provided a Maven profile, arq-jbosseap-remote, to run our Arquillian tests against a running EAP process on the local machine. From the GeekSeek source code root, simply pass this profile as an argument using the -P switch to the mvn command, and instead of using the default WildFly managed container (which will automatically start and stop), we’ll instead use the running server that we started earlier:
code $> mvn clean install -Parq-jbosseap-remote
The build will run as we’ve seen before, only this time we’ll be able to see some activity in the server console resulting from the deployments made and tests run. For instance:
03:35:30,984 INFO [org.jboss.as.server]
(management-handler-thread - 1) JBAS018559:
Deployed "015c84ea-1a41-4e37-957a-f2433f201a23.war"
(runtime-name : "015c84ea-1a41-4e37-957a-f2433f201a23.war")
This may be a preferable technique to employ while developing; at the start of the day you can launch the server and keep it running as an external process, and run your tests without the overhead of waiting for server start and stop, as well as the unzipping process (and resulting file I/O) to create local WildFly installation directories under target for testing. On our machines, this cuts the total build time from around 3:30 to 2:11, as we exercise quite a few test suites and hence remove a good number of start/stop lifecycle events by using the remote container.
Because we’re done with the EAP instance we started earlier, let’s end the process:
bin $> ^C
03:45:58,876 INFO [org.jboss.as]
(MSC service thread 1-5) JBAS015950:
JBoss EAP 6.1.0.GA (AS 7.2.0.Final-redhat-8)
stopped in 127ms
Using the EAP Managed Container
Of course, the GeekSeek examples also make EAP available for use in managed mode, as we’ve used before. Because EAP is not currently available as a distribution in a Maven repository, it’ll take a few extra steps for us to enable this layout.
Remember that we downloaded the EAP Maven repository earlier. This is an extension repo; it’s meant to serve as an addition to a standard repo like that offered by JBoss Nexus or Maven Central. As such, it contains EAP-specific artifacts and dependencies only.
Let’s begin by unpacking this into a new repository alongside the default ~/.m2/repository repo:
~ $> cd ~/.m2/
.m2 $> mv /home/alr/Downloads/jboss-eap-6.1.0-maven-repository.zip .
.m2 $> unzip jboss-eap-6.1.0-maven-repository.zip
.m2 $> rm jboss-eap-6.1.0-maven-repository.zip
This will leave us with the new EAP extension repository jboss-eap-6.1.0.GA-maven-repository under our .m2/ directory.
Now we must let Maven know about our new repository, so we can define it in the default user-level ~/.m2/settings.xml. Note that we’re actually free to use any settings file we choose, though if we opt outside of the default settings file we’ll have to manually specify our settings configuration to the mvn command using the -s /path/to/settings/file switch.
We’ll add our repository definition inside a profile, so that we can enable this at will without affecting other projects. In this case we create the jboss-eap-6.1.0 profile:
<?xml version="1.0" encoding="UTF-8"?>
<settings xmlns="http://maven.apache.org/SETTINGS/1.0.0"
xmlns:xsi="http://www.w3.org/2001/XMLSchema-instance"
xsi:schemaLocation="http://maven.apache.org/SETTINGS/1.0.0
http://maven.apache.org/xsd/settings-1.0.0.xsd">
...
<profiles>
<profile>
<id>jboss-eap-6.1.0</id>
<repositories>
<repository>
<id>jboss-eap-6.1.0-maven-repository</id>
<name>JBoss EAP 6.1.0 Repository</name>
<url>file://${user.home}/.m2/jboss-eap-6.1.0.GA-maven-repository</url>
<layout>default</layout>
<releases>
<enabled>true</enabled>
<updatePolicy>never</updatePolicy>
</releases>
<snapshots>
<enabled>false</enabled>
<updatePolicy>never</updatePolicy>
</snapshots>
</repository>
</repositories>
</profile>
...
</profiles>
...
</settings>
Now, we’ll need to again find our EAP ZIP. Then, using the profile we’ve created, we’ll deploy our EAP distribution ZIP as a proper Maven artifact into the repository using the Maven deploy plug-in. We must remember to pass in our profile using the -P switch:
mvn deploy:deploy-file -DgroupId=org.jboss.as \
-DartifactId=jboss-as-dist \
-Dversion=eap-6.1.0 \
-Dpackaging=zip \
-Dfile=/home/alr/Downloads/jboss-eap-6.1.0.zip \
-DrepositoryId=jboss-eap-6.1.0-maven-repository \
-Durl=file:///home/alr/.m2/jboss-eap-6.1.0.GA-maven-repository \
-Pjboss-eap-6.1.0
If we’ve set everything up correctly, we’ll see output:
[INFO] Scanning for projects...
...
[INFO]
[INFO] --- maven-deploy-plugin:2.7:deploy-file (default-cli) @ standalone-pom ---
Uploading: file:///home/alr/.m2/jboss-eap-6.1.0.GA-maven-repository/
org/jboss/as/jboss-as-dist/eap-6.1.0/jboss-as-dist-eap-6.1.0.zip
Uploaded: file:///home/alr/.m2/jboss-eap-6.1.0.GA-maven-repository/
org/jboss/as/jboss-as-dist/eap-6.1.0/jboss-as-dist-eap-6.1.0.zip
(112789 KB at 50828.7 KB/sec)
Uploading: file:///home/alr/.m2/jboss-eap-6.1.0.GA-maven-repository/
org/jboss/as/jboss-as-dist/eap-6.1.0/jboss-as-dist-eap-6.1.0.pom
Uploaded: file:///home/alr/.m2/jboss-eap-6.1.0.GA-maven-repository/
org/jboss/as/jboss-as-dist/eap-6.1.0/jboss-as-dist-eap-6.1.0.pom
(431 B at 420.9 KB/sec)
Downloading: file:///home/alr/.m2/jboss-eap-6.1.0.GA-maven-repository/
org/jboss/as/jboss-as-dist/maven-metadata.xml
Uploading: file:///home/alr/.m2/jboss-eap-6.1.0.GA-maven-repository/
org/jboss/as/jboss-as-dist/maven-metadata.xml
Uploaded: file:///home/alr/.m2/jboss-eap-6.1.0.GA-maven-repository/
org/jboss/as/jboss-as-dist/maven-metadata.xml (313 B at 305.7 KB/sec)
...
[INFO] BUILD SUCCESS
[INFO] Total time: 2.911s
[INFO] Finished at: Mon Jun 03 05:30:53 MST 2013
[INFO] Final Memory: 5M/102M
And in the ~/.m2/jboss-eap-6.1.0.GA-maven-repository/org/jboss/as/jboss-as-dist directory, we should see our EAP distribution ZIP along with some Maven-generated metadata files:
$> ls -R
.:
eap-6.1.0 maven-metadata.xml.md5
maven-metadata.xml maven-metadata.xml.sha1
./eap-6.1.0:
jboss-as-dist-eap-6.1.0.pom
jboss-as-dist-eap-6.1.0.pom.md5
jboss-as-dist-eap-6.1.0.pom.sha1
jboss-as-dist-eap-6.1.0.zip
jboss-as-dist-eap-6.1.0.zip.md5
jboss-as-dist-eap-6.1.0.zip.sha1
Now, assuming we enable the jboss-eap-6.1.0 profile in our builds, we’ll be able to use EAP just as we did for WildFly, because we’ve assigned it to a proper Maven artifact in the coordinate space org:jboss.as:jboss-as-dist:eap-6.1.0.
To run our GeekSeek build with tests against EAP in managed mode, we apply the jboss-eap-6.1.0 profile to enable our custom repository, and the arq-jbosseap-managed profile to configure Arquillian with the proper adaptors:
code $> mvn clean install -Parq-jbosseap-managed,jboss-eap-6.1.0
In this fashion, we can now automate our testing with EAP just as with WildFly.
Continuous Integration and the Authoritative Build Server
The practice of continuous integration involves the frequent pushing of code to a shared mainline, then executing a robust test suite against it. Ideally, each commit will be tested in this fashion, and though we should strive to run as many tests as are appropriate locally before pushing code to the source repository for all to see, the most reliable agent to verify correctness is our authoritative build server.
Our goal here is to set up a continuous integration environment that will serve two primary purposes:
§ Run the test suite in a controlled environment when a git push is made to the authoritative source repository
§ Trigger the deployment of the latest version of our application upon build success
In this way we chain events together in order to automate the human action of a code commit all the way through deployment to a publicly accessible application server.
Although we have our choice of build servers and cloud services backing them, we’ve chosen for our examples the Jenkins CI Server (the project forked off Hudson) run by the CloudBees service. Of course, we could install a CI server and maintain it ourselves, but the excellent folks at CloudBees have proven more than capable at keeping our infrastructure running, patched, and updated. Additionally, they offer a few extension services (which we’ll soon see) that fit well with our desired use cases.
It’s worth noting that the CloudBees team has kindly provided the Arquillian and ShrinkWrap communities with gratis service and support over the past several years, so we’d like to thank them for their contributions in keeping the open source ecosystem running smoothly.
Configuring the GeekSeek Build on CloudBees
Because our eventual deployment target will be EAP, we’re going to configure CloudBees as our authoritative build server to execute Arquillian tests against the EAP runtime. Just as we ran a few extra steps on our local environment to equip the backing Maven repositories with an EAP distribution, we’ll have to make the same artifacts available to our CloudBees Jenkins instance. Luckily, we’ve already done most of that work locally, so this will mainly be an issue of copying over the EAP Maven repository we already have.
First we’ll log in to our CloudBees account and click Select to enter the Jenkins Dashboard from within CloudBees Central, as shown in Figure 11-3.
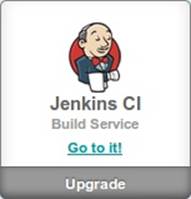
Figure 11-3. CloudBees Jenkins
We’ll create a new job, assigning it our project name of GeekSeek and selecting a Maven2/Maven3 Build configuration template, as shown in Figure 11-4.

Figure 11-4. CloudBees new job
The next step is to configure the build parameters, as shown in Figure 11-5. First let’s set the SCM section to point to our authoritative Git repository; this is where the build will pull code.

Figure 11-5. CloudBees SCM
Now we’ll tell Maven how to run the build; remember, we want to enable the arq-jbosseap-managed profile, so we’ll note that in the “Goals and options” section (see Figure 11-6). Also, we’ll enable our alternative settings file, which will expose our private repository to our build.
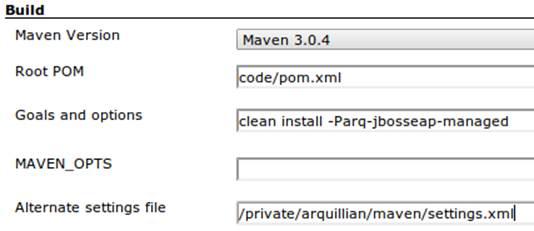
Figure 11-6. CloudBees build config
Populating CloudBees Jenkins with the EAP Repository
CloudBees offers a series of Maven repositories associated with each Jenkins domain. These are documented here, and of particular note is the private repository that is made available to us. We’ll be able to write to it and place in artifacts demanded by our builds, yet the visibility permissions associated with the private repo will block the rest of the world from seeing or accessing these resources.
To copy our EAP Maven Repository into the CloudBees Jenkins private repo, we’ll make use of the WebDAV protocol, an extension of HTTP that permits writing to WWW resources. There are a variety of system-dependent tools to mount DAV volumes, and CloudBees addresses some known working techniques in its documentation. For illustrative purposes, we’ll apply *nix-specific software in this guide, loosely based off the CloudBees Linux Documentation.
First we need to install the davfs2 project, a set of libraries enabling the mounting of a WebDAV resource as a standard logical volume. In most Linux-based systems with a package manager, installation can be done using apt-get or yum:
$> sudo apt-get install davfs2
or:
$> sudo yum install davfs2
Next we’ll ensure that our /etc/conf/davfs2/davfs2.conf configuration file is set up appropriately; be sure to edit yours to match the following:
$> cat /etc/davfs2/davfs2.conf
use_locks 0
ask_auth 1
if_match_bug 1
The last line is unique to Ubuntu-based x64 systems.
Now we can create a directory that will act as our mounting point; we’ve chosen /mnt/cloudbees/arquillian/private:
$> mkdir -p /mnt/cloudbees/arquillian/private
The fstab utility on *nix systems acts to automatically handle mounting to registered endpoints. It’s configured in /etc/fstab, so using your favorite text editor, add the following line (replacing your own parameters) to the configuration:
# Arquillian WebDAV on CloudBees
https://repository-{domainId}.forge.cloudbees.com/private/ {/mnt/location/path}
davfs rw,user,noauto,conf=/etc/davfs2/davfs2.conf,uid=$UID 0 0
The private repository requires authentication, so we must add authentication information to /etc/davfs2/secrets:
{/mnt/location/path} {cloudbees username} {password}
Note the CloudBees username here is available on the details page under “Authenticated access” (as shown in Figure 11-7), located at https://forge.cloudbees.com/a/domainId/repositories/private.
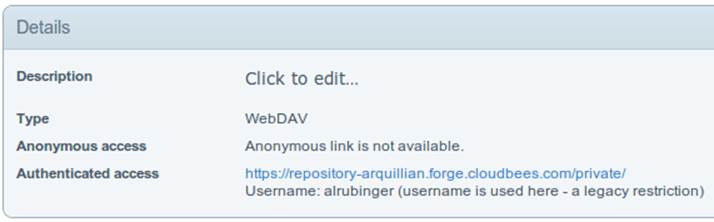
Figure 11-7. CloudBees Authenticated access
Now we should be ready to mount our volume (subsequent reboots to the system should do this automatically due to our fstab configuration):
$> sudo mount /mnt/cloudbees/arquillian/private/
With our volume mounted, any file activities we make under /mnt/cloudbees/arquillian/private/ will be reflected in our remote private CloudBees Maven Repository. Let’s copy the contents of the JBoss EAP Maven Repository into private:
sudo cp -Rv ~/.m2/jboss-eap-6.1.0.GA-maven-repository/* \
/mnt/cloudbees/arquillian/private/
This may take some time as we copy all artifacts and the directory structure over the network.
We must also enable this private repository in our build configuration. In the private repo (which we have mounted) is a file called maven/settings.xml. We’ll edit it to add the following sections.
Under <servers>:
<server>
<id>cloudbees-private-maven-repository</id>
<username>{authorized_username}</username>
<password>{authorized_password}</password>
<filePermissions>664</filePermissions>
<directoryPermissions>775</directoryPermissions>
</server>
And under <profiles>:
<profile>
<id>cloudbees.private.maven.repository</id>
<activation>
<property>
<name>!cloudbees.private.maven.repository.off</name>
</property>
</activation>
<repositories>
<repository>
<id>cloudbees-private-maven-repository</id>
<url>https://repository-arquillian.forge.cloudbees.com/private</url>
<releases>
<enabled>true</enabled>
</releases>
<snapshots>
<enabled>false</enabled>
</snapshots>
</repository>
</repositories>
</profile>
Keep in mind that some mounting systems (including davfs2) may cache content locally, and avoid flushing bytes to the remote CloudBees DAV repository immediately for performance reasons. To force a flush, we can unmount, then remount the volume:
$> sudo umount /mnt/cloudbees/arquillian/private
$> sudo mount -a
Note that it’s not atypical for large hold times while the cache synchronizes over the network:
/sbin/umount.davfs: waiting while mount.davfs (pid 11125) synchronizes the cache
....
Now we can manually trigger a build of our project, and if all’s set up correctly, we’ll see our test result come out clear.
Automatic Building on Git Push Events
Let’s take things one step further in terms of automation. We don’t have to click the Build Now button on our CI server every time we’d like to run a build. With some extra configuration we can set up a trigger for new git push events on the authoritative source repository to start a new CI build.
CloudBees documents this process, and we’ll follow along these guidelines.
First we must log in to the CloudBees Jenkins home and select the GitHub plug-in for installation at the Manage Jenkins → Manage Plugins screen. Jenkins will download and install the plug-in, then reboot the instance. Then we can go to Manage Jenkins → Configure System and select “Manually manage hook URLs” under the “GitHub Web Hook” setting. Save and exit the screen.
With our Jenkins instance configured, now we should enable GitHub triggers in our build job configuration. Check the box “Build when a change is pushed to GitHub” under “Build Triggers” on the build configuration page, then save.
That will handle the CloudBees Jenkins side of the integration.
In GitHub, we can now visit our repository’s home, and select Settings → Service Hooks → WebHook URLs (see Figure 11-8). Add a URL with the format https://domainId.ci.cloudbees.com/github-webhook. This will instruct GitHub to send an HTTP POST request to CloudBees containing information about the new push, and CloudBees will take it from there.
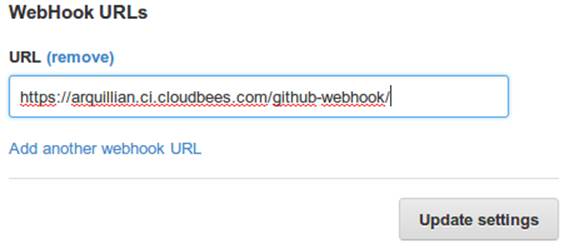
Figure 11-8. GitHub WebHook URLs
From here on out, new commits pushed to the GitHub repository will trigger a build on the CloudBees Jenkins instance. In this way we can nicely create a pipeline of build-related actions, triggered easily by our committing new work upstream.
Note that this is simply one mechanism of chaining together actions from a git push, and it relies on the GitHub and CloudBees services specifically. Of course, there are many other custom and third-party services available, and the choice will ultimately be yours based on your needs. This configuration is offered merely to prove the concept and provide a base implementation (and it also drives the software examples for this book).
Pushing to Staging and Production
With a working build to validate our tests and assemble the final deployable unit(s), we’re now free to push our application out to a publicly accessible runtime. In most cases, we’d like to first target a staging server that can be accessed only by members of our team before going public, but the choice for that extra stage is left to the reader’s discretion. For the purposes of our GeekSeek application, we’ll allow commits that pass the test suite to go straight to the public WWW on OpenShift.
Setting Up the OpenShift Application
First, let’s create our new application by logging in to OpenShift and selecting Add Application, as shown in Figure 11-9.
![]()
Figure 11-9. Add Application
Because EAP will be our target runtime, we’ll select the “JBoss Enterprise Application Platform 6.0” cartridge, a prebuilt environment for applications targeting EAP (see Figure 11-10).
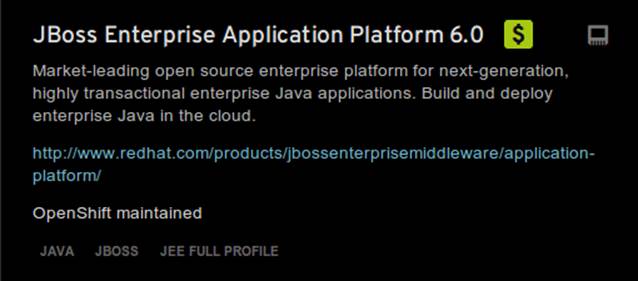
Figure 11-10. JBoss EAP cartridge
Next we’ll assign our application with a name unique to our account’s domain, as shown in Figure 11-11.

Figure 11-11. New app name
And when we’ve reviewed the configuration, clicking Create Application, as shown in Figure 11-12, will instruct OpenShift to provision a new namespace and backing infrastructure for our application.

Figure 11-12. Create Application
When the process is completed, a default landing page will be accessible to us (and anyone in the world) from the browser, as shown in Figure 11-13.
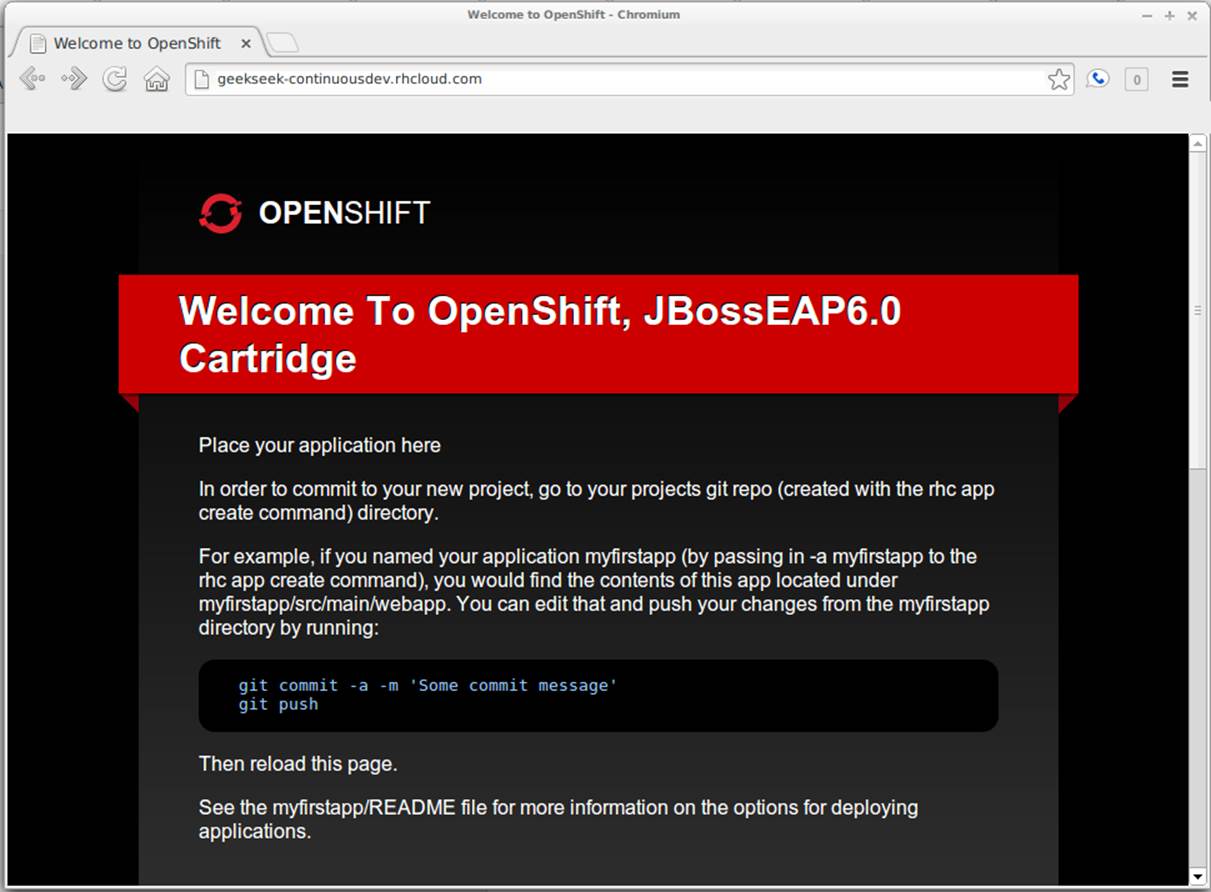
Figure 11-13. Welcome to OpenShift
The default DNS record will be in the format http://appName-domainId.rhcloud.com. It’s likely that this isn’t really the name we desire for public consumption, so let’s add our own custom DNS name.
This is a two-step process:
1. Create a DNS entry with your domain registrar or DNS Management interface to point to http://appName-domainId.rhcloud.com. In our case, we’ll opt for a subdomain, which amounts to a CNAME record. Consult your domain authority for the specifics of this step, but generally you might be presented with a screen that looks similar to Figure 11-14.
![]()
Figure 11-14. Add CNAME
2. Add an “alias” in your OpenShift application’s configuration. You can do this via the web interface shown in Figure 11-15.
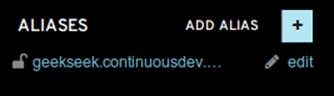
Figure 11-15. Add alias
Alternatively, you can acquire the OpenShift client-side command-line tools. These rely on a Ruby installation of 1.8.7 or greater on your system, and are obtained by installing a Ruby gem:
$> sudo gem install rhc
Once the gem is installed, you can add the domain record to OpenShift using the command rhc alias add appName alias -l username. For instance:
$> $ rhc alias add geekseek geekseek.continuousdev.org -l admin@continuousdev.org
Password: *****************
Alias 'geekseek.continuousdev.org' has been added.
Assuming the CNAME is properly set up with your domain registrar, the record has percolated through the network’s DNS tree (which may or may not take some time), and the alias is set up correctly, your application should now be available directly at the provided alias. In our case, this ishttp://geekseek.continuousdev.org/.
Removing the Default OpenShift Application
Now let’s clear the way for our real application. First we’ll clone the OpenShift application repository into our local workspace. The Git URL for your application is displayed on the application’s status screen on your OpenShift account. The git clone command will look a little like this:
$> git clone ssh://(somehash))@geekseek-continuousdev.
rhcloud.com/~/git/geekseek.git/
Cloning into 'geekseek'...
The authenticity of host 'geekseek-continuousdev.rhcloud.com (72.44.62.62)'
can't be established.
RSA key fingerprint is cf:ee:77:cb:0e:fc:02:d7:72:7e:ae:80:c0:90:88:a7.
Are you sure you want to continue connecting (yes/no)? yes
Warning: Permanently added 'geekseek-continuousdev.rhcloud.com,72.44.62.62'
(RSA) to the list of known hosts.
remote: Counting objects: 39, done.
remote: Compressing objects: 100% (31/31), done.
remote: Total 39 (delta 1), reused 0 (delta 0)
Receiving objects: 100% (39/39), 19.98 KiB, done.
Resolving deltas: 100% (1/1), done.
Now we have a full copy of the OpenShift application’s repository on our local disk. Because we don’t need the default landing page shown in Figure 11-13, we can safely remove it. We can do this easily by cd-ing into our repository directory, removing the files in question with git rm, committing the changes, and then pushing the commit to the remote OpenShift repository:
$> cd geekseek
geekseek $> git rm -rf pom.xml src/
rm 'pom.xml'
rm 'src/main/java/.gitkeep'
rm 'src/main/resources/.gitkeep'
rm 'src/main/webapp/WEB-INF/web.xml'
rm 'src/main/webapp/images/jbosscorp_logo.png'
rm 'src/main/webapp/index.html'
rm 'src/main/webapp/snoop.jsp'
geekseek $> git commit -m 'Remove OpenShift default application structure'
geekseek $> git push origin master
When the git push command concludes and the remote build is complete, reloading our application in the web browser should now yield us a blank page, because we’ve deleted the only content in the OpenShift repo. We’ll replace that with fresh content from our CI builds.
Pushing from the CI Build Job to OpenShift
The final piece of the automated deployment puzzle lies in deploying artifacts built from our CI server into our runtime environment. In our case, this amounts to configuring the CloudBees Jenkins instance to perform some Git operations against our OpenShift repository.
We’ll need to allow access for CloudBees Jenkins to interact with the OpenShift repository. On the Configure screen for our CI job is a section named CloudBees DEV@Cloud Authorization, which contains our public key (see Figure 11-16). Copy this to your OS’s clipboard.
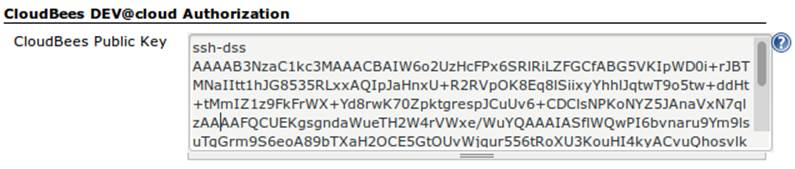
Figure 11-16. CloudBees SSH public key
Then log in to your OpenShift Management Console and select Settings; there will be a dialog to manage the public keys allowed access to our repository (see Figure 11-17). Add the CloudBees Jenkins key by pasting it here.
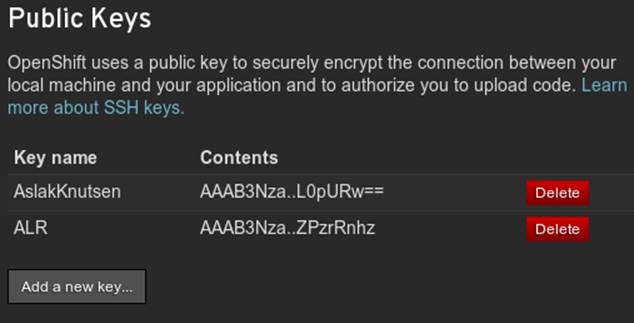
Figure 11-17. OpenShift public keys
Switching back to our Jenkins job configuration screen, toward the bottom is a section where we can add “post-build” steps (see Figure 11-18). Let’s create a shell-based action that will be set to execute only upon successful build.
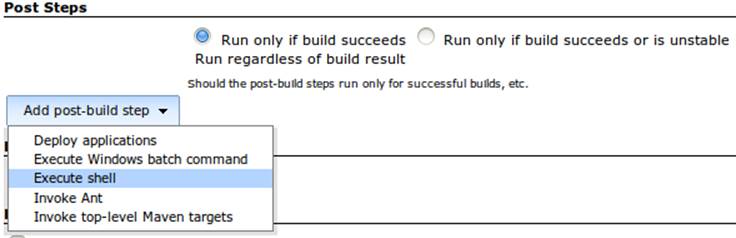
Figure 11-18. CloudBees post-build steps
The following script will handle the task for us:
if [ -d geekseek ]; then
cd geekseek
if [ -f deployments/ROOT.war ]; then
rm -rf deployments/ROOT.war
fi
git pull origin master
else
git clone ssh://51abd6c84382ec5c160002e2@geekseek-continuousdev.rhcloud.com/
~/git/geekseek.git/
cd geekseek
fi
cp $WORKSPACE/code/application/application/target/*.war deployments/ROOT.war
touch deployments/ROOT.WAR.dodeploy
git add -Av
COMMIT_MESSAGE='Updated application from '
COMMIT_MESSAGE=$COMMIT_MESSAGE$BUILD_URL
git commit -m "$COMMIT_MESSAGE"
git push origin master
Let’s see what’s going on here. First we have some bash logic to either clone the remote OpenShift repository if this node hasn’t already, or update the existing copy. Then we copy the final deployable web application. We’ll WAR into the deployments directory of the repository, renaming it toROOT.war so that this acts as our application servicing requests from the web root. Also, we’ll add or update an empty ROOT.war.dodeploy file to let OpenShift know that we want this application deployed when it’s discovered (full documentation on this feature is available on the OpenShift site). Finally, we add our changes to be staged for commit, perform the commit, and then push the changes to our remote OpenShift repository.
As we’ve seen before, OpenShift will dutifully exercise the remote operations to redeploy our application and make it available for our use.
Using the OpenShift client command-line tools, we can tail the server logs for the application to monitor status:
$> rhc tail {openshift_appname} -l {openshift_username}
If we look closely, we’ll see that the application has deployed, and is ready for use!
2013/06/04 05:38:52,413 INFO [org.jboss.as.server]
(ServerService Thread Pool -- 36) JBAS018559:
Deployed "ROOT.war" (runtime-name : "ROOT.war")