Getting Good with JavaScript (2011)
Getting Started
Thanks for buying "Getting Good with JavaScript." I'm pretty sure you've made the right decision (if I'm allowed to say that). This introductory chapter will get you acquainted the subject under the microscope. Let's roll!
Aren't There Already Enough JavaScript Books?
There's a pretty good chance that you rolled your eyes when you first saw this book. If you've followed the online development community for any time at all, you'll know that JavaScript is a pretty hot topic. Everybody is writing about it. So why yet another book on JavaScript?
Well, yet another JavaScript book because I hope this book fills a niche. From the beginning, I wanted this book to be one that would take someone who knows little or nothing about JavaScript and get them up to speed in very little time … while only teaching current methods and best practices. This means that there's much more to JavaScript than you'll find in this book. There are many things you really don't need to know when you get started; I won't be spending time on them. I've seen other beginner books that cover things I've left out, and that's okay, because they're aiming for comprehensiveness. But not in this book: here, you'll only learn what you'll actually use as you dip your toes into JavaScript. That other stuff can wait.
Since I've tried to keep this book short enough to read in a weekend (well, maybe a long weekend), many of the things we'll look at aren't exhaustively covered. This doesn't mean I'll skim over things. It just means that there are more advanced techniques that aren't important for you to learn at this time. Don't worry: you'll get a solid grounding in what you need to know to get you off the ground. Then, check out some of the resources in the Appendices for further study.
What Will I Learn?
Before we get started, let's talk about what this book covers. In this chapter, you'll get acquainted with what JavaScript is and where it came from. We'll also talk about how to set up an environment for coding JavaScript.
After that, we'll cover the basics in Chapters 2 and 3. You'll learn all about the core syntax: what to actually type. Chapter 4 will cover many best practices and important concepts for writing JavaScript. Then, in Chapter 5, I'll introduce you to the basics of writing JavaScript that interacts with web pages.
Where Did JavaScript Come From?
JavaScript was developed by a gentleman named Brendan Eich, who was working for Netscape (a now non-existent web browser maker) at the time—he built the whole language in less than two weeks. Originally, it was called Mocha, then LiveScript, and finally JavaScript. The first browser to support JavaScript was Netscape Navigator 2.0, way back in late 1995.
For a long time, JavaScript wasn't considered to be much of a language. The "big idea" on the web was supposed to be Java Applets. However, they failed, and eventually, JavaScript's "Good Parts" became well-known and soon even loved by many people.
Now, JavaScript is the most used programming language in the world. It's used not only in web browsers, but also desktop apps, mobile phone apps, and now even on the server. You definitely won't be wasting your time learning JavaScript.
|
ROCKSTAR TIP It's important to note that JavaScript IS NOT Java. There are really only two things that JavaScript and Java have in common. First and most obvious is the word "Java" (which was used to make JavaScript attractive to Java developers; I know, really). The only other things is a bit of similar syntax: both languages use C-style curly braces. That's really all. |
How Do I Get Started?
Now that you're pumped to learn JavaScript, how do we get started? Well, you'll learn how to actually code JavaScript in the following chapters. But where is that code going to go?
Although it's hard to find a place where JavaScript won't run, the overwhelming majority of JavaScript—especially the JavaScript you'll be writing for now—will be in web pages, to run in the browser. There are two ways to get JavaScript into your HTML page.
First, you can embed your JavaScript code right inside script tags.
<script>
alert("I'm learning JavaScript");
</script>
You don't have to understand the code in the tags for now; just know that it works. When your browser encounters a script tag, it will interpret the code that you've written and execute it (if appropriate).
The second way to get JavaScript onto your page is to link to a .js file:
<script src="somefile.js"></script>
Yes: unfortunately that closing script tag is required, even though you don't put anything inside it. As you might guess, the src attribute is short for "source." This will download the JavaScript file and process it, just like the inline code.
Two more notes about including scripts:
· For the most part, you'll want to include your script tags right before your closing body tag. Actually, you can put them anywhere you want, but it's best for performance reasons to put it at the end of the body … or write your code to wait until the page has completed loading before it begins executing. We'll see how to do this later on (and no, you can't jump ahead to "Another Short Rabbit-Trail on Script Loading").
· You might see code in which the script tags have this attribute: type="text/javascript". This used to be required, but isn't in HTML5 (or course, you should then be using an HTML5 doctype).
Firebug
As you learn about JavaScript, you'll find the Firefox plugin Firebug invaluable. Go to that link and install it, right after you install the latest version of Firefox.
After installing Firebug, you'll have a little bug icon in the lower right corner of the status bar of your Firefox window; if it's coloured, that means it's enabled for the website you're on; otherwise it will be black and white.
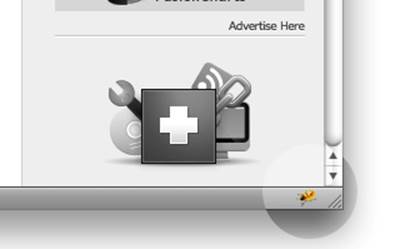
Fig. 1-1. Firebug activated indicator
At least, that's where it's been for a long time. If you're on Firefox 4, however, it's now on the toolbar:
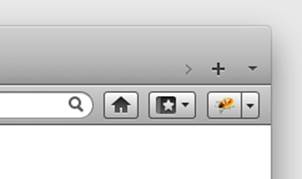
Fig. 1-2. Firebug activated indicator in Firefox 4
To enable Firebug on a website, just click that icon. When you click on this, the Firebug panel will pop up. It'll look something like this:
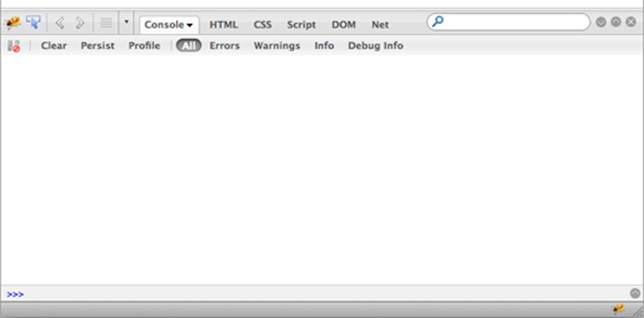
Fig. 1-3. The Firebug panel
We could write a whole tutorial on Firebug, but the panel you'll find useful in this book is the console panel. You can find it by clicking the console tab (Firebug should open to it by default; it's pictured above).
At the bottom of the panel, you'll see a prompt (»>) where you can type some JavaScript. This is like the command line, where you type in some code, hit return (or enter), and you'll get the result. If you need to type in more than one line of code at a time, press the upward-facing arrow at the end of the line; you'll be able to type in more than one line, and then click the Run button at the bottom of the expanded panel to execute it.
Conventions Used in This Book
One more administrative note before we continue: many of the code examples in the book will look like this:
Example 1.1
alert("Hello, reader"); // Hello, reader
See how there's a header on this code snippet: "Example 1.1"? All code snippets with headers have an accompanying file—called something like 'example_1_1.html'—that you can find in the 'code' folder which you've already downloaded with the book. I want you to run these, but even better, I want you to open them up and change the code, mess around, and learn why some things work and others don't.
If a snippet doesn't have a title, it's just a quick example that needs to be shown in code, but won't give you any result if you execute it by itself.
You won't fully understand this now, but I need to explain it, and you'll understand it soon: in the snippet above, I've used the alert function to show the result of the code; this function will pop up an alert box, with the text we give it. Notice the two backslashes at the end of the line: those denote a comment in the code (more on this soon); in our case, I've put the result you should see in the alert box in the comment, so you can compare results.
Sometimes, I'll use console.log instead of alert; instead of popping up an alert box, this will write the information to the Firebug console. This the more popular way of getting output when writing JavaScript. We'll use both, so that you're comfortable with both.
Example 1.2
console.log("Hi there"); // Hi there
console.log(1 + 4); // 5
Open the 'example 1.2' file in Firefox, and open Firebug (actually you'll have to refresh the page after you open Firebug, because nothing will log if Firebug isn't enabled for that page). You should see two lines in the console, one saying "Hi there", and the other saying "5."
Summary
I hope you're getting excited, because I know I am! We're about to undertake a journey that will change your life forever (well, at least it could). Let's swing into Chapter 2 to begin talking about the basics of JavaScript.