JavaScript and Node FUNdamentals: A Collection of Essential Basics (2014)
3. Backbone.js FUNdamentals: The Cornerstone of JavaScript MV* Frameworks
If you are reading this chapter, you’re probably familiar with the benefits of using an MV* (asterisk means a controller, another view or something else) over plain jQuery that grows into unmanageable spaghetti code with time and added complexity.
Backbone.js is the cornerstone of all JavaScript frameworks because it’s one of the most mature (i.e., dependable) and popular solutions in the ever-growing multitudes of browser JavaScript MV* (model-view-controllers and model-view-something) frameworks. If we draw a quick comparison between Backbone.js and other frameworks (not a fair one but still might be useful for some readers), it will be somewhere in the middle in complexity and features between Spine&KnockoutJS (the lighter side) and Ember.js&Angular.js (heavier side). Which one to choose depends on whether developers will have to customize a lot (go with lightweights) or use right-out-of-the-box (go with heavyweights).
A bit of trivia: Backbone.js was created by the same person (Jeremy Ashmenas) that brought CoffeeScript and Underscore.js to the world!
Therefore, we’ll demonstrate how to build a Backbone.js simple application from scratch. This is not your typical to-do list, examples of which you can find plenty at TodoMVC, but a simplified application that is easier to understand but that still uses all components: views, collections, subviews, models, and event binding. The example is the apple database application.
In this chapter we’ll cover following:
· Typical Backbone.js App Structure
· Setting up Backbone.js App from Scratch
· Dependencies for the Backbone.js Project
· Working with Backbone.js Collections
· Event Binding with Backbone.js and jQuery
· Backbone.js View and Subviews with Backbone.js Underscore.js
· Super Simple Backbone Starter Kit
· Conclusion
3.1 Typical Backbone.js App Structure
There are just four classes in Backbone.js:
· Router: mapping of URL to methods
· View: methods related to browser&user events, HTML output (rendering)
· Collection: a list of models with extra helpers such as fetch()
· Model: an individual data item with extra helpers
A typical Backbone.js app will have the main Router class. From that class all the routes (URL paths) will be defined. The router can create and call methods of other classes such as Views, Collections, and Models. For example, for path /books we’ll render books view.
The recommended usage is that Views usually have one Collection or one Model. A Collection is just a list of Models. However, this is not written in stone. Backbone.js is very flexible and should be used according to the specific needs. For example, an application can have a Model that has Views and each View that has collections.
In our concise example, we’ll have one main Router that has Views. These Views will have models and collections.
3.2 Setting up Backbone.js App from Scratch
Firstly, we’re going to build a typical starter “Hello World” application using Backbone.js and the model-view-controller (MVC) architecture. I know it might sound like overkill in the beginning, but as we go along we’ll add more and more complexity, including Models, Subviews and Collections. The structure of the project is keep it simple stupid:
· index.html: the main file and all the application’s JavaScript code
· jquery.js: jQuery library
· underscore.js: Underscore.js library
· backbone.js: Backbone.js library
A full source code for the “Hello World” app is available at GitHub under github.com/azat-co/rpjs/backbone/hello-world.
jQuery, Underscore are required dependencies for Backbone.js.
3.3 Dependencies for the Backbone.js Project
To build our apple database, we’ll need to download the following libraries:
· jQuery 1.9 development source file
· Underscore.js development source file
· Backbone.js development source file
Alternatively, you can hot-like these libraries from some CDNs (e.g., Google Hosted Libraries), but then we’ll need an internet connection every time you run your app.
Include these frameworks in the newly created index.html file like this:
1 <!DOCTYPE>
2 <html>
3 <head>
4 <script src="jquery.js"></script>
5 <script src="underscore.js"></script>
6 <script src="backbone.js"></script>
7
8 <script>
9 //TODO write some awesome JS code!
10 </script>
11
12 </head>
13 <body>
14 </body>
15 </html>
|
|
Note We can also put <script> tags right after the </body> tag in the end of the file. This will change the order in which scripts and the rest of HTML are loaded and impact performance in large files. |

Some developers shy away from using Backbone Router (it’s an optional class/component), but we always find that Router brings more benefits and clarity. In a way, it serves as a starting point of your application and helps to understand the foundation and how all the pieces fit together such as views, models, etc. So, let’s define a simple Backbone.js Router inside of a <script> tag:
1 ...
2 var router = Backbone.Router.extend({
3 });
4 ...
|
|
Note For now, to Keep It Simple Stupid (KISS), we’ll be putting all of our JavaScript code right into the index.html file. This is not a good idea for a real development or production code. We’ll refactor it later. |
Then set up a special routes property inside of an extend call:
1 var router = Backbone.Router.extend({
2 routes: {
3 }
4 });
The Backbone.js routes property needs to be in the following format: 'path/:param': 'action' which will result in the filename#path/param URL triggering a function named action (defined in the Router object). For now, we’ll add a single home route:
1 var router = Backbone.Router.extend({
2 routes: {
3 '': 'home'
4 }
5 });
This is good, but now we need to add a home function (the right part of the route: action key-value pair):
1 var router = Backbone.Router.extend({
2 routes: {
3 '': 'home'
4 },
5 home: function(){
6 //TODO render html
7 }
8 });
We’ll come back to the home function later to add more logic for creating and rendering of a View. Right now, we should define our homeView:
1 var homeView = Backbone.View.extend({
2 });
Does it look familiar to you? Right, Backbone.js uses similar syntax for all of its components, such as Backbone.View, Backbone.Router, Backbone.Model and Backbone.Collection. The class is followed by the extend function and a JSON object as a parameter to it. This object often contains some initialization options or attributes of the class.
There are multiple ways to proceed from now on, but the best practice is to use the el and template properties, which are magical, i.e., special in Backbone.js, because they allow us to do two things:
1. el: attach the Backbone View object to a Document Object Model (DOM) element
2. template: store the Underscore (in this case we use Underscore but it can be changed to another library) template
Here’s the code for the home view:
1 var homeView = Backbone.View.extend({
2 el: 'body',
3 template: _.template('Hello World')
4 });
The property el is just a string that holds the jQuery selector (you can use class name with ‘.’ and id name with ‘#’). The template property has been assigned an Underscore.js function template with just a plain text ‘Hello World’.
To render our homeView we use this.$el which is a compiled jQuery object referencing element in an el property, and the jQuery .html() function to replace HTML with this.template() value. Here is what the full code for our home Backbone.js View looks like:
1 var homeView = Backbone.View.extend({
2 el: 'body',
3 template: _.template('Hello World'),
4 render: function(){
5 this.$el.html(this.template({}));
6 }
7 });
Now, if we go back to the router we can add these two lines to the home function:
1 var router = Backbone.Router.extend({
2 routes: {
3 '': 'home'
4 },
5 initialize: function(){
6 // some awesome code that will be executed during object's creation
7 },
8 home: function(){
9 this.homeView = new homeView;
10 this.homeView.render();
11 }
12 });
The first line will create the homeView object and assign it to the homeView property of the router. The second line will call the render() method in the homeView object, triggering the “Hello World” output.
Finally, to start a Backbone app, we call new Router inside of a document-ready wrapper to make sure that the file’s DOM is fully loaded. The app variable is made global in this sense, this helps to access some Router properties (it’s a good idea to use a prefix specific to your application):
1 var app;
2 $(document).ready(function(){
3 app = new router;
4 Backbone.history.start();
5 })
Confused so far? Don’t be because here is the full code of the index.html file:
1 <!DOCTYPE>
2 <html>
3 <head>
4 <script src="jquery.js"></script>
5 <script src="underscore.js"></script>
6 <script src="backbone.js"></script>
7
8 <script>
9
10 var app;
11
12 var router = Backbone.Router.extend({
13 routes: {
14 '': 'home'
15 },
16 initialize: function(){
17 //some code to execute
18 //when the object is instantiated
19 },
20 home: function(){
21 this.homeView = new homeView;
22 this.homeView.render();
23 }
24 });
25
26 var homeView = Backbone.View.extend({
27 el: 'body',
28 template: _.template('Hello World'),
29 render: function(){
30 this.$el.html(this.template({}));
31 }
32 });
33
34 $(document).ready(function(){
35 app = new router;
36 Backbone.history.start();
37 })
38
39 </script>
40 </head>
41 <body>
42 <div></div>
43 </body>
44 </html>
Open index.html in the browser to see if it works, i.e., the “Hello World” message should be on the page.
3.4 Working with Backbone.js Collections
Backbone Collections are useful classes that developers can use for storing any sets of data that belong to the same type. In other words, Collections are sets or lists of models, and they (collections) can have their own custom methods and logic as well as some built-in Backbone methods.
The full source code of Backbone Collections example is under the GitHub’s rpjs/backbone/collections.
This example is about Backbone Collections, and it’s built on top of the previous “Hello World” example from the Setting up Backbone.js App from Scratch which is available for download at rpjs/backbone/hello-world.
We should add some data to play around with and to hydrate our views. To do this, add this right after the script tag and before the other code:
1 var appleData = [
2 {
3 name: "fuji",
4 url: "img/fuji.jpg"
5 },
6 {
7 name: "gala",
8 url: "img/gala.jpg"
9 }
10 ];
Grab the images (see picture below) from GitHub: https://github.com/azat-co/rpjs/tree/master/backbone/collections/img, or add your own.
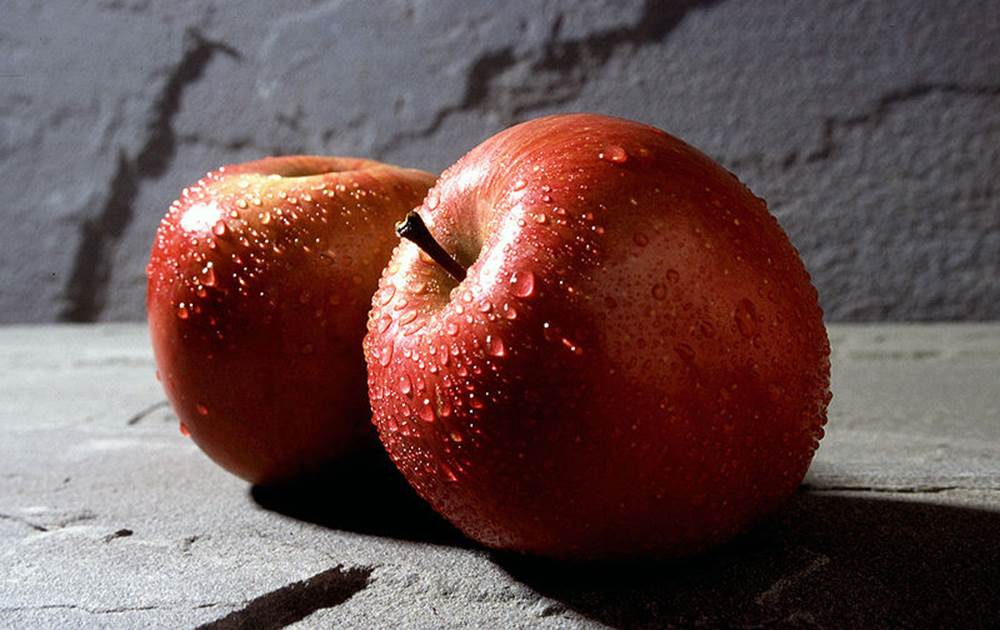
Fuji apple illustration
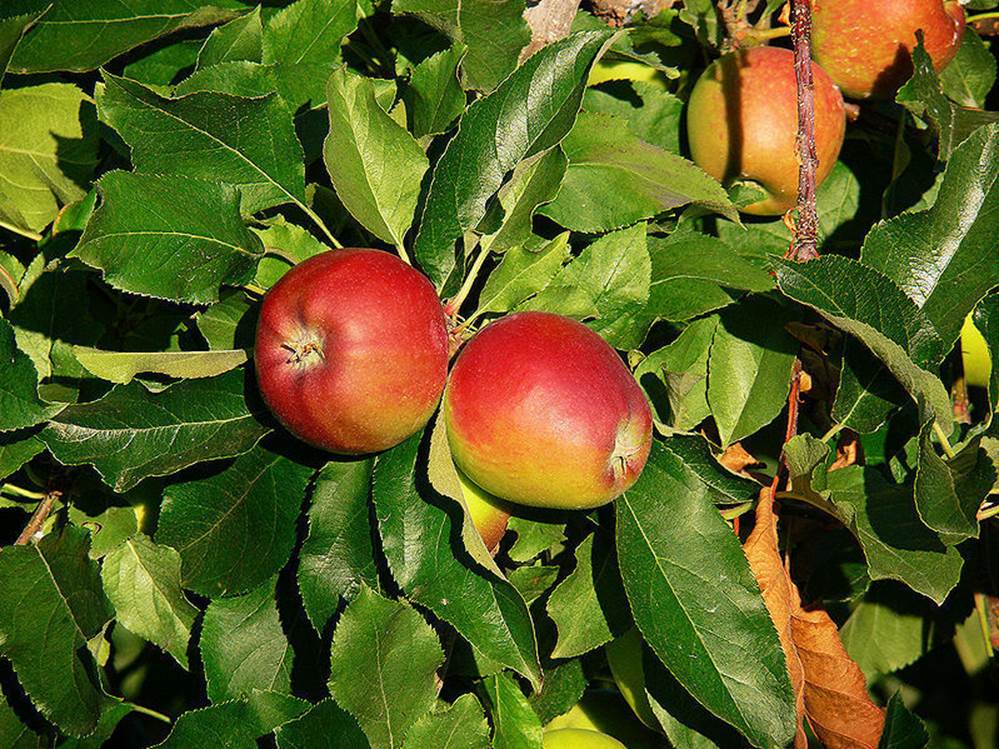
Gala apple illustration
This is our apple database. :-) Or to be more accurate, our REST API endpoint-substitute, which provides us with names and image URLs of the apples (data models). If you want some real-world servers, you can use:
· Parse.com: back-end-as-a-service provider
· Node.js and MongoDB REST API: a free-JSON API built with Node.js, Express.js and MongoDB
|
|
Note This mock dataset can be easily substituted by assigning REST API endpoints of your back-end to url properties in Backbone.js Collections and/or Models, and calling the fetch() method on them. |

Now to make the User Experience (UX) a little bit better, we can add a new route to the routes object in the Backbone Route:
1 ...
2 routes: {
3 '': 'home',
4 'apples/:appleName': 'loadApple'
5 },
6 ...
This will allow users to go to index.html#apples/SOMENAME and expect to see some information about an apple. This information will be fetched and rendered by the loadApple function in the Backbone Router definition:
1 loadApple: function(appleName){
2 this.appleView.render(appleName);
3 }
Have you noticed an appleName variable? It’s exactly the same name as the one that we’ve used in route. This is how we can access query string parameters (e.g., ?param=value&q=search) in Backbone.js.
Now we’ll need to refactor some more code to create a Backbone Collection, populate it with data in our appleData variable, and to pass the collection to homeView and appleView. Conveniently enough, we do it all in the Router constructor method initialize:
1 initialize: function(){
2 var apples = new Apples();
3 apples.reset(appleData);
4 this.homeView = new homeView({collection: apples});
5 this.appleView = new appleView({collection: apples});
6 },
At this point, we’re pretty much done with the Router class, and it should look like this:
1 var router = Backbone.Router.extend({
2 routes: {
3 '': 'home',
4 'apples/:appleName': 'loadApple'
5 },
6 initialize: function(){
7 var apples = new Apples();
8 apples.reset(appleData);
9 this.homeView = new homeView({collection: apples});
10 this.appleView = new appleView({collection: apples});
11 },
12 home: function(){
13 this.homeView.render();
14 },
15 loadApple: function(appleName){
16 this.appleView.render(appleName);
17 }
18 });
Let’s modify our homeView a bit to see the whole database:
1 var homeView = Backbone.View.extend({
2 el: 'body',
3 template: _.template('Apple data: <%= data %>'),
4 render: function(){
5 this.$el.html(this.template({
6 data: JSON.stringify(this.collection.models)
7 }));
8 }
9 });
For now, we just output the string representation of the JSON object in the browser. This is not user-friendly at all, but later we’ll improve it by using a list and subviews.
So far, our apple Backbone Collection is very clean and simple:
1 var Apples = Backbone.Collection.extend({
2 });
|
|
Note Backbone automatically creates models inside of a collection when we use the fetch() or reset() functions. |
Apple view is not any more complex; it has only two properties: template and render. In a template, we want to display figure, img and figcaption tags with specific values. The Underscore.js template engine is handy at this task:
1 var appleView = Backbone.View.extend({
2 template: _.template(
3 '<figure>\
4 <img src="<%= attributes.url %>"/>\
5 <figcaption><%= attributes.name %></figcaption>\
6 </figure>'),
7 ...
8 });
To make a JavaScript string, which has HTML tags in it, more readable we can use the backslash line breaker escape (\) symbol, or close strings and concatenate them with a plus sign (+). This is an example of appleView above, which is refactored using the latter approach:
1 var appleView = Backbone.View.extend({
2 template: _.template(
3 '<figure>'+
4 +'<img src="<%= attributes.url %>"/>'+
5 +'<figcaption><%= attributes.name %></figcaption>'+
6 +'</figure>'),
7 ...
Please note the ‘<%=’ and ‘%>’ symbols; they are the instructions for Undescore.js to print values in properties url and name of the attributes object.
Finally, we’re adding the render function to the appleView class.
1 render: function(appleName){
2 var appleModel = this.collection.where({name:appleName})[0];
3 var appleHtml = this.template(appleModel);
4 $('body').html(appleHtml);
5 }
We find a model within the collection via where() method and use [] to pick the first element. Right now, the render function is responsible for both loading the data and rendering it. Later we’ll refactor the function to separate these two functionalities into different methods.
The whole app, which is in the rpjs/backbone/collections/index.html folder, looks like this:
1 <!DOCTYPE>
2 <html>
3 <head>
4 <script src="jquery.js"></script>
5 <script src="underscore.js"></script>
6 <script src="backbone.js"></script>
7
8 <script>
9 var appleData = [
10 {
11 name: "fuji",
12 url: "img/fuji.jpg"
13 },
14 {
15 name: "gala",
16 url: "img/gala.jpg"
17 }
18 ];
19 var app;
20 var router = Backbone.Router.extend({
21 routes: {
22 "": "home",
23 "apples/:appleName": "loadApple"
24 },
25 initialize: function(){
26 var apples = new Apples();
27 apples.reset(appleData);
28 this.homeView = new homeView({collection: apples});
29 this.appleView = new appleView({collection: apples});
30 },
31 home: function(){
32 this.homeView.render();
33 },
34 loadApple: function(appleName){
35 this.appleView.render(appleName);
36 }
37 });
38
39 var homeView = Backbone.View.extend({
40 el: 'body',
41 template: _.template('Apple data: <%= data %>'),
42 render: function(){
43 this.$el.html(this.template({
44 data: JSON.stringify(this.collection.models)
45 }));
46 }
47 //TODO subviews
48 });
49
50 var Apples = Backbone.Collection.extend({
51
52 });
53 var appleView = Backbone.View.extend({
54 template: _.template('<figure>\
55 <img src="<%= attributes.url %>"/>\
56 <figcaption><%= attributes.name %></figcaption>\
57 </figure>'),
58 //TODO re-write with load apple and event binding
59 render: function(appleName){
60 var appleModel = this.collection.where({
61 name:appleName
62 })[0];
63 var appleHtml = this.template(appleModel);
64 $('body').html(appleHtml);
65 }
66 });
67 $(document).ready(function(){
68 app = new router;
69 Backbone.history.start();
70 })
71
72 </script>
73 </head>
74 <body>
75 <div></div>
76 </body>
77 </html>
Open collections/index.html file in your browser. You should see the data from our “database”, i.e., Apple data: [{"name":"fuji","url":"img/fuji.jpg"},{"name":"gala","url":"img/gala.jpg"}].
Now, let’ go to collections/index.html#apples/fuji or collections/index.html#apples/gala in your browser. We expect to see an image with a caption. It’s a detailed view of an item, which in this case is an apple. Nice work!
3.5 Event Binding with Backbone.js and jQuery
In real life, getting data does not happen instantaneously, so let’s refactor our code to simulate it. For a better UI/UX, we’ll also have to show a loading icon (a.k.a., spinner or ajax-loader, see the picture below) to users to notify them that the information is being loaded.

Spinner GIF
It’s a good thing that we have event binding in Backbone. The event binding is not an exclusive to Backbone feature, because it is part of jQuery. But without Backbone organization and code structure, things tend to end up messier (with plain jQuery). For example, we’ll have to pass a function that renders HTML as a callback to the data loading function, to make sure that the rendering function is not executed before we have the actual data to display.
Therefore, when a user goes to detailed view (apples/:id) we only call the function that loads the data. Then, with the proper event listeners, our view will automagically (this is not a typo) update itself; when there is a new data (or on a data change, Backbone.js supports multiple and even custom events).
Let’s change the code in the router:
1 ...
2 loadApple: function(appleName){
3 this.appleView.loadApple(appleName);
4 }
5 ...
Everything else remains the same until we get to the appleView class. We’ll need to add a constructor or an initialize method, which is a special word/property in the Backbone.js framework. It’s called each time we create an instance of an object, i.e., var someObj = new SomeObject(). We can also pass extra parameters to the initialize function, as we did with our views (we passed an object with the key collection and the value of apples Backbone Collection). Read more on Backbone.js constructors at backbonejs.org/#View-constructor.
1 ...
2 var appleView = Backbone.View.extend({
3 initialize: function(){
4 //TODO: create and setup model (aka an apple)
5 },
6 ...
Great, we have our initialize function. Now we need to create a model which will represent a single apple and set up proper event listeners on the model. We’ll use two types of events, change and a custom event called spinner. To do that, we are going to use the on() function, which takes these properties: on(event, actions, context) — read more about it at backbonejs.org/#Events-on:
1 ...
2 var appleView = Backbone.View.extend({
3 this.model = new (Backbone.Model.extend({}));
4 this.model.bind('change', this.render, this);
5 this.bind('spinner',this.showSpinner, this);
6 },
7 ...
The code above basically boils down to two simple things:
1. Call render() function of appleView object when the model has changed
2. Call showSpinner() method of appleView object when event spinner has been fired.
So far, so good, right? But what about the spinner, a GIF icon? Let’s create a new property in appleView:
1 ...
2 templateSpinner: '<img src="img/spinner.gif" width="30"/>',
3 ...
Remember the loadApple call in the router? This is how we can implement the function in appleView:
1 ...
2 loadApple:function(appleName){
3 this.trigger('spinner');
4 //show spinner GIF image
5 var view = this;
6 //we'll need to access that inside of a closure
7 setTimeout(function(){
8 //simulates real time lag when
9 //fetching data from the remote server
10 view.model.set(view.collection.where({
11 name:appleName
12 })[0].attributes);
13 },1000);
14 },
15 ...
The first line will trigger the spinner event (the function for which we still have to write).
The second line is just for scoping issues (so we can use appleView inside of the closure).
The setTimeout function is simulating a time lag of a real remote server response. Inside of it, we assign attributes of a selected model to our view’s model by using a model.set() function and a model.attributes property (which returns the properties of a model).
Now we can remove an extra code from the render method and implement the showSpinner function:
1 render: function(appleName){
2 var appleHtml = this.template(this.model);
3 $('body').html(appleHtml);
4 },
5 showSpinner: function(){
6 $('body').html(this.templateSpinner);
7 }
8 ...
That’s all! Open index.html#apples/gala or index.html#apples/fuji in your browser and enjoy the loading animation while waiting for an apple image to load.
The full code of the index.html file:
1 <!DOCTYPE>
2 <html>
3 <head>
4 <script src="jquery.js"></script>
5 <script src="underscore.js"></script>
6 <script src="backbone.js"></script>
7
8 <script>
9 var appleData = [
10 {
11 name: "fuji",
12 url: "img/fuji.jpg"
13 },
14 {
15 name: "gala",
16 url: "img/gala.jpg"
17 }
18 ];
19 var app;
20 var router = Backbone.Router.extend({
21 routes: {
22 "": "home",
23 "apples/:appleName": "loadApple"
24 },
25 initialize: function(){
26 var apples = new Apples();
27 apples.reset(appleData);
28 this.homeView = new homeView({collection: apples});
29 this.appleView = new appleView({collection: apples});
30 },
31 home: function(){
32 this.homeView.render();
33 },
34 loadApple: function(appleName){
35 this.appleView.loadApple(appleName);
36
37 }
38 });
39
40 var homeView = Backbone.View.extend({
41 el: 'body',
42 template: _.template('Apple data: <%= data %>'),
43 render: function(){
44 this.$el.html(this.template({
45 data: JSON.stringify(this.collection.models)
46 }));
47 }
48 //TODO subviews
49 });
50
51 var Apples = Backbone.Collection.extend({
52
53 });
54 var appleView = Backbone.View.extend({
55 initialize: function(){
56 this.model = new (Backbone.Model.extend({}));
57 this.model.on('change', this.render, this);
58 this.on('spinner',this.showSpinner, this);
59 },
60 template: _.template('<figure>\
61 <img src="<%= attributes.url %>"/>\
62 <figcaption><%= attributes.name %></figcaption>\
63 </figure>'),
64 templateSpinner: '<img src="img/spinner.gif" width="30"/>',
65
66 loadApple:function(appleName){
67 this.trigger('spinner');
68 var view = this; //we'll need to access
69 //that inside of a closure
70 setTimeout(function(){ //simulates real time
71 //lag when fetching data from the remote server
72 view.model.set(view.collection.where({
73 name:appleName
74 })[0].attributes);
75 },1000);
76
77 },
78
79 render: function(appleName){
80 var appleHtml = this.template(this.model);
81 $('body').html(appleHtml);
82 },
83 showSpinner: function(){
84 $('body').html(this.templateSpinner);
85 }
86
87 });
88 $(document).ready(function(){
89 app = new router;
90 Backbone.history.start();
91 })
92
93 </script>
94 </head>
95 <body>
96 <a href="#apples/fuji">fuji</a>
97 <div></div>
98 </body>
99 </html>
3.6 Backbone.js Views and Subviews with Underscore.js
This example is available at rpjs/backbone/subview.
Subviews are Backbone Views that are created and used inside of another Backbone View. A subviews concept is a great way to abstract (separate) UI events (e.g., clicks) and templates for similarly structured elements (e.g., apples).
A use case of a Subview might include a row in a table, a list item in a list, a paragraph, a new line, etc.
We’ll refactor our home page to show a nice list of apples. Each list item will have an apple name and a “buy” link with an onClick event. Let’s start by creating a subview for a single apple with our standard Backbone extend() function:
1 ...
2 var appleItemView = Backbone.View.extend({
3 tagName: 'li',
4 template: _.template(''
5 +'<a href="#apples/<%=name%>" target="_blank">'
6 +'<%=name%>'
7 +'</a> <a class="add-to-cart" href="#">buy</a>'),
8 events: {
9 'click .add-to-cart': 'addToCart'
10 },
11 render: function() {
12 this.$el.html(this.template(this.model.attributes));
13 },
14 addToCart: function(){
15 this.model.collection.trigger('addToCart', this.model);
16 }
17 });
18 ...
Now we can populate the object with tagName, template, events, render and addToCart properties/methods.
1 ...
2 tagName: 'li',
3 ...
tagName automatically allows Backbone.js to create an HTML element with the specified tag name, in this case <li> — list item. This will be a representation of a single apple, a row in our list.
1 ...
2 template: _.template(''
3 +'<a href="#apples/<%=name%>" target="_blank">'
4 +'<%=name%>'
5 +'</a> <a class="add-to-cart" href="#">buy</a>'),
6 ...
The template is just a string with Undescore.js instructions. They are wrapped in <% and %> symbols. <%= simply means print a value. The same code can be written with backslash escapes:
1 ...
2 template: _.template('\
3 <a href="#apples/<%=name%>" target="_blank">\
4 <%=name%>\
5 </a> <a class="add-to-cart" href="#">buy</a>\
6 '),
7 ...
Each <li> will have two anchor elements (<a>), links to a detailed apple view (#apples/:appleName) and a buy button. Now we’re going to attach an event listener to the buy button:
1 ...
2 events: {
3 'click .add-to-cart': 'addToCart'
4 },
5 ...
The syntax follows this rule:
1 event + jQuery element selector: function name
Both the key and the value (right and left parts separated by the colon) are strings. For example:
1 'click .add-to-cart': 'addToCart'
or
1 'click #load-more': 'loadMoreData'
To render each item in the list, we’ll use the jQuery html() function on the this.$el jQuery object, which is the <li> HTML element based on our tagName attribute:
1 ...
2 render: function() {
3 this.$el.html(this.template(this.model.attributes));
4 },
5 ...
The addToCart method will use the trigger() function to notify the collection that this particular model (apple) is up for the purchase by the user:
1 ...
2 addToCart: function(){
3 this.model.collection.trigger('addToCart', this.model);
4 }
5 ...
Here is the full code of the appleItemView Backbone View class:
1 ...
2 var appleItemView = Backbone.View.extend({
3 tagName: 'li',
4 template: _.template(''
5 +'<a href="#apples/<%=name%>" target="_blank">'
6 +'<%=name%>'
7 +'</a> <a class="add-to-cart" href="#">buy</a>'),
8 events: {
9 'click .add-to-cart': 'addToCart'
10 },
11 render: function() {
12 this.$el.html(this.template(this.model.attributes));
13 },
14 addToCart: function(){
15 this.model.collection.trigger('addToCart', this.model);
16 }
17 });
18 ...
Easy peasy! But what about the master view, which is supposed to render all of our items (apples) and provide a wrapper <ul> container for <li> HTML elements? We need to modify and enhance our homeView.
To begin with, we can add extra properties of string type understandable by jQuery as selectors to homeView:
1 ...
2 el: 'body',
3 listEl: '.apples-list',
4 cartEl: '.cart-box',
5 ...
We can use properties from above in the template, or just hard-code them (we’ll refactor our code later) in homeView:
1 ...
2 template: _.template('Apple data: \
3 <ul class="apples-list">\
4 </ul>\
5 <div class="cart-box"></div>'),
6 ...
The initialize function will be called when homeView is created (new homeView()) — in it we render our template (with our favorite by now html() function), and attach an event listener to the collection (which is a set of apple models):
1 ...
2 initialize: function() {
3 this.$el.html(this.template);
4 this.collection.on('addToCart', this.showCart, this);
5 },
6 ...
The syntax for the binding event is covered in the previous section. In essence, it is calling the showCart() function of homeView. In this function, we append appleName to the cart (along with a line break, a <br/> element):
1 ...
2 showCart: function(appleModel) {
3 $(this.cartEl).append(appleModel.attributes.name+'<br/>');
4 },
5 ...
Finally, here is our long-awaited render() method, in which we iterate through each model in the collection (each apple), create an appleItemView for each apple, create an <li> element for each apple, and append that element to view.listEl — <ul> element with a class apples-list in the DOM:
1 ...
2 render: function(){
3 view = this;
4 //so we can use view inside of closure
5 this.collection.each(function(apple){
6 var appleSubView = new appleItemView({model:apple});
7 // creates subview with model apple
8 appleSubView.render();
9 // compiles template and single apple data
10 $(view.listEl).append(appleSubView.$el);
11 //append jQuery object from single
12 //apple to apples-list DOM element
13 });
14 }
15 ...
Let’s make sure we didn’t miss anything in the homeView Backbone View:
1 ...
2 var homeView = Backbone.View.extend({
3 el: 'body',
4 listEl: '.apples-list',
5 cartEl: '.cart-box',
6 template: _.template('Apple data: \
7 <ul class="apples-list">\
8 </ul>\
9 <div class="cart-box"></div>'),
10 initialize: function() {
11 this.$el.html(this.template);
12 this.collection.on('addToCart', this.showCart, this);
13 },
14 showCart: function(appleModel) {
15 $(this.cartEl).append(appleModel.attributes.name+'<br/>');
16 },
17 render: function(){
18 view = this; //so we can use view inside of closure
19 this.collection.each(function(apple){
20 var appleSubView = new appleItemView({model:apple});
21 // create subview with model apple
22 appleSubView.render();
23 // compiles tempalte and single apple data
24 $(view.listEl).append(appleSubView.$el);
25 //append jQuery object from single apple
26 //to apples-list DOM element
27 });
28 }
29 });
30 ...
You should be able to click on the buy, and the cart will populate with the apples of your choice. Looking at an individual apple does not require typing its name in the URL address bar of the browser anymore. We can click on the name, and it opens a new window with a detailed view.
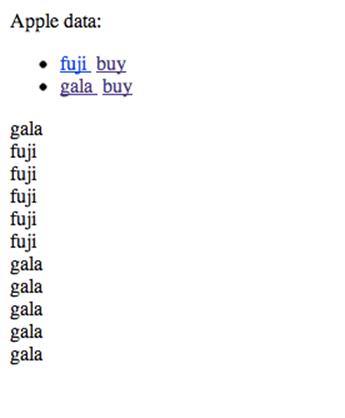
The list of apples rendered by subviews.
By using subviews, we reused the template for all of the items (apples) and attached a specific event to each of them. Those events are smart enough to pass the information about the model to other objects: views and collections.
Just in case, here is the full code for the subviews example, which is also available at rpjs/backbone/subview/index.html:
1 <!DOCTYPE>
2 <html>
3 <head>
4 <script src="jquery.js"></script>
5 <script src="underscore.js"></script>
6 <script src="backbone.js"></script>
7
8 <script>
9 var appleData = [
10 {
11 name: "fuji",
12 url: "img/fuji.jpg"
13 },
14 {
15 name: "gala",
16 url: "img/gala.jpg"
17 }
18 ];
19 var app;
20 var router = Backbone.Router.extend({
21 routes: {
22 "": "home",
23 "apples/:appleName": "loadApple"
24 },
25 initialize: function(){
26 var apples = new Apples();
27 apples.reset(appleData);
28 this.homeView = new homeView({collection: apples});
29 this.appleView = new appleView({collection: apples});
30 },
31 home: function(){
32 this.homeView.render();
33 },
34 loadApple: function(appleName){
35 this.appleView.loadApple(appleName);
36
37 }
38 });
39 var appleItemView = Backbone.View.extend({
40 tagName: 'li',
41 // template: _.template(''
42 // +'<a href="#apples/<%=name%>" target="_blank">'
43 // +'<%=name%>'
44 // +'</a> <a class="add-to-cart" href="#">buy</a>'),
45 template: _.template('\
46 <a href="#apples/<%=name%>" target="_blank">\
47 <%=name%>\
48 </a> <a class="add-to-cart" href="#">buy</a>\
49 '),
50
51 events: {
52 'click .add-to-cart': 'addToCart'
53 },
54 render: function() {
55 this.$el.html(this.template(this.model.attributes));
56 },
57 addToCart: function(){
58 this.model.collection.trigger('addToCart', this.model);
59 }
60 });
61
62 var homeView = Backbone.View.extend({
63 el: 'body',
64 listEl: '.apples-list',
65 cartEl: '.cart-box',
66 template: _.template('Apple data: \
67 <ul class="apples-list">\
68 </ul>\
69 <div class="cart-box"></div>'),
70 initialize: function() {
71 this.$el.html(this.template);
72 this.collection.on('addToCart', this.showCart, this);
73 },
74 showCart: function(appleModel) {
75 $(this.cartEl).append(appleModel.attributes.name+'<br/>');
76 },
77 render: function(){
78 view = this; //so we can use view inside of closure
79 this.collection.each(function(apple){
80 var appleSubView = new appleItemView({model:apple});
81 // create subview with model apple
82 appleSubView.render();
83 // compiles tempalte and single apple data
84 $(view.listEl).append(appleSubView.$el);
85 //append jQuery object from
86 //single apple to apples-list DOM element
87 });
88 }
89 });
90
91 var Apples = Backbone.Collection.extend({
92 });
93
94 var appleView = Backbone.View.extend({
95 initialize: function(){
96 this.model = new (Backbone.Model.extend({}));
97 this.model.on('change', this.render, this);
98 this.on('spinner',this.showSpinner, this);
99 },
100 template: _.template('<figure>\
101 <img src="<%= attributes.url %>"/>\
102 <figcaption><%= attributes.name %></figcaption>\
103 </figure>'),
104 templateSpinner: '<img src="img/spinner.gif" width="30"/>',
105 loadApple:function(appleName){
106 this.trigger('spinner');
107 var view = this;
108 //we'll need to access that inside of a closure
109 setTimeout(function(){
110 //simulates real time lag when fetching data
111 // from the remote server
112 view.model.set(view.collection.where({
113 name:appleName
114 })[0].attributes);
115 },1000);
116 },
117 render: function(appleName){
118 var appleHtml = this.template(this.model);
119 $('body').html(appleHtml);
120 },
121 showSpinner: function(){
122 $('body').html(this.templateSpinner);
123 }
124 });
125
126 $(document).ready(function(){
127 app = new router;
128 Backbone.history.start();
129 })
130
131 </script>
132 </head>
133 <body>
134 <div></div>
135 </body>
136 </html>
The link to an individual item, e.g., collections/index.html#apples/fuji, also should work independently, by typing it in the browser address bar.
3.7 Super Simple Backbone Starter Kit
To jump-start your Backbone.js development, consider using Super Simple Backbone Starter Kit by Azator, or similar projects like:
· Backbone Boilerplate
· Sample App with Backbone.js and Twitter Bootstrap
· More Backbone.js tutorials
3.8 Conclusion
The already-mentioned in this chapter, and reputable Addy’s TodoMVC resource contains a lot of browser JavaScript MV* frameworks with tutorials and examples. I often get asked “What do you think of X or Y?” The main point is not to get into analysis paralysis when choosing a front-end framework. Learn the foundation with Backbone.js, just because it’s not so bloated and complicated, yet so widely-used and powerful in the right hands. Then pick a few newer and shinier libraries (e.g., React.js, Angular.js) and see how they fit the particular goals of project at hand.
All materials on the site are licensed Creative Commons Attribution-Sharealike 3.0 Unported CC BY-SA 3.0 & GNU Free Documentation License (GFDL)
If you are the copyright holder of any material contained on our site and intend to remove it, please contact our site administrator for approval.
© 2016-2026 All site design rights belong to S.Y.A.