Excel Bootcamp: Learn the Basics of Microsoft Excel (2016)
Chapter 1. Excel - The Basics
Excel is an excellent spreadsheet program that allows you to create tables containing graphs and computations. When using this program, your computations can range from simple additions to complicated functions and math models.
In this chapter, you’ll learn about the basics of Excel. This material will teach you the ideas and principles related to this powerful spreadsheet application.
Excel– A Windows Program
Microsoft, one of the leading software manufacturers today, created Excel as a part of its“Office Suite.” Basically, MS Excel (i.e. Microsoft Excel) is a program that uses the well-known Windows graphical interface. Once activated, Excel will sit on a separate“window” – the large square that encloses the program components.
Windows operating systems (e.g. XP, Vista, 7, etc.) have built-in features that allow you to customize the look of an Excel window. These features are:
· Border– This is the box that encloses the Excel window when it’s not maximized. If you’ll place your mouse over a border, it will become a two-headed arrow– this arrow allows you to resize the Excel window.
· Title Bar– This is the colored section at the top of any Excel window. This feature shows the name of the program you are using. If the Excel window is maximized, the title bar will also display the name of your current workbook.
You may use the title bar to relocate an Excel window. Just make sure that the window is not maximized. Click on the title bar and drag it to your preferred location.
· Maximize Button– When accessing a workbook, Excel will show you two windows: (1) a program window and (2) a workbook window. You may maximize these windows to take full advantage of the on-screen space available to you. If you want the Excel program to cover the entire screen, click on the maximize button found at the top-right corner of your screen. To make sure that the workbook fills the Excel window, click on the maximize button located inside the Excel program.
· Minimize Button– This button allows you to use other computer programs without exiting MS Excel. Click on the minimize button to turn Excel into a small icon on your Desktop’s taskbar. After doing this, you will be able to launch/access other files or programs you need. Once you are ready to work on Excel again, just click on the Excel icon on the taskbar.
Workbook windows also have this button. You can use that to manage multiple workbooks easily.
· Restore Button– You can only use this button if the window is maximized. After clicking on a restore button (either in a program or workbook window), the window will be reduced in size. That means you will be able to adjust the window’s size and location.
· Close Button– Use this button to close a window.
Menus and Ribbons
The latest versions of MS Excel don’t have menus. Instead of clickable menus, Excel uses Ribbons to display available options to its users. This eBook is based on Excel 2010, so you will be using ribbons while reading this manual.
What is a Ribbon?
A ribbon is a tab that displays various commands available to the user.
The Different Types of Ribbons
The following list shows three ribbons that you’ll encounter while using Excel:
· HOME– This ribbon contains the basic formatting commands.

· INSERT– This ribbon allows you to insert different objects into your spreadsheets.

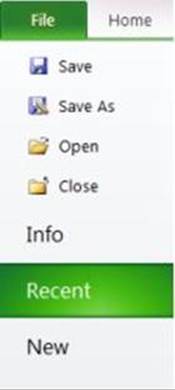
· FILE– This serves as the primary ribbon of MS Excel. Use this ribbon to create new workbooks, save changes, or open existing files.
Using a Ribbon
Ribbons use clickable icons to display options and commands. By placing the mouse on an icon, you’ll see helpful information about that particular command or option. Obviously, clicking on the icon applies its effect on the program or active workbook.
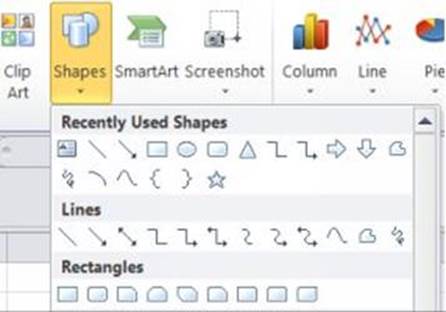
Some icons have dropdown arrows– clicking on these arrows will display additional options related to the icon. A good example for this is the Shapes icon: this icon allows you to insert various shapes into your workbooks. Here’s a screenshot:
Dialog Boxes
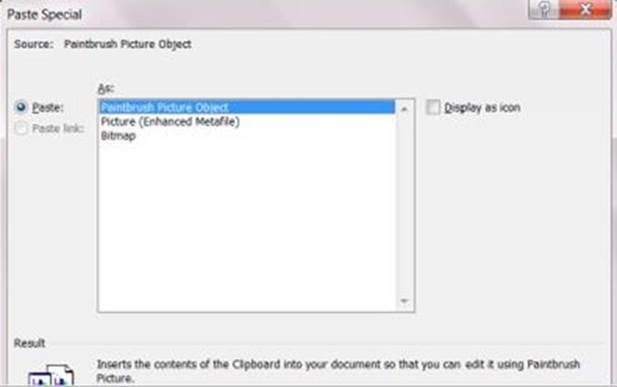
Inside each ribbon, the icons are divided into“Groups.” These groups have names, which means you can easily find what you need just by reading some words on the screen. Some groups have an arrow– this arrow is known as the“Dialog Box Launcher.” Clicking on this arrow displays a dialog box. Here’s an example:
All materials on the site are licensed Creative Commons Attribution-Sharealike 3.0 Unported CC BY-SA 3.0 & GNU Free Documentation License (GFDL)
If you are the copyright holder of any material contained on our site and intend to remove it, please contact our site administrator for approval.
© 2016-2026 All site design rights belong to S.Y.A.