WebGL Textures & Vertices: Beginner's Guide (2015)
WebGL API Method texParameteri(target, wrap mode, REPEAT)
The WebGL API method texParameteri(target, wrap mode, repeat type) assigns criteria for the currently active texture. In other words texParameteri(target, wrap mode, repeat type) tells WebGL how to display a texture. Method texParameteri(target, wrap mode, repeat type) includes a number of settings. This section focuses on repeating a texture. See other entries in the table of contents which begin with WebGL API Method texParameteri, for examples of different wrapping modes.
The first parameter to texParameteri(target, wrap mode, repeat type) equals the WebGL constant TEXTURE_2D, because we're mapping two dimensional textures. Pass TEXTURE_WRAP_S as the second parameter, to repeat textures along the horizontal axis. Pass REPEAT as the third parameter to repeat tiles. The following listing demonstrates repeating tiles along the horizontal axis.
gl.texParameteri
(
gl.TEXTURE_2D,
gl.TEXTURE_WRAP_S,
gl.REPEAT
);
Listing 16: WebGL API texParameteri(...) Repeat Horizontal Axis
Pass TEXTURE_WRAP_T as the second parameter, to repeat textures along the vertical axis. Pass REPEAT as the third parameter to repeat tiles. The following listing demonstrates repeating tiles along the vertical axis.
gl.texParameteri
(
gl.TEXTURE_2D,
gl.TEXTURE_WRAP_S,
gl.REPEAT
);
Listing 17: WebGL API texParameteri(...) Repeat Vertical Axis
See the entire repeating texture init(controller) method.
Display Repeating Graphic Summary
We demonstrated how to repeat graphics with the WebGL API method texParameteri(target, wrap mode, repeat type). This method provides a simple and fast technique to tile textures across a surface. This section demonstrated how to easily assign tiles across the vertical and horizontal axis of a mesh. With a properly constructed array of texels and the WebGL API method texParameteri(target, wrap mode, repeat type), there's no need to add more vertices.
We explained how to construct an array with texels which tile vertically and horizontally. We included two arrays. One array tiles four times across both dimensions. The other array tiles twice across the horizontal axis and eight times across the vertical axis. We demonstrated how to assign WebGL repeat settings with texParameteri(target, wrap mode, repeat type). See the GLSquareRepeat constructor.
Procedural Textures Bonus Project
Procedural Textures
Procedural textures are prepared entirely with source code, rather than image files. Procedural textures don't require separate image files to download. This section explains how to create five different procedural textures. We'll demonstrate JavaScript which generates color values to display as a texture. We also cover WebGL initialization modifications required for procedural textures.
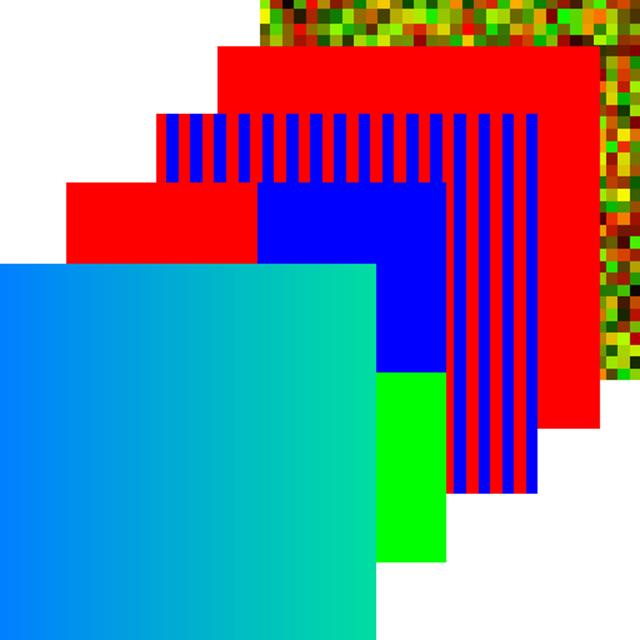
The procedural textures in this section include a blue to green linear gradient, red and blue striped texture, texture with different colored tiles, random green and red texture, and a solid red square. In the process we introduce the WebGL array type Uint8Array, and an overloaded version of the WebGL method texImage2D().
Procedural textures include a few advantages. First procedural textures are lightweight. They usually require less memory.
Second initialization is synchronous. As opposed to image files which must download. Image file onload event listeners are asynchronous. We have to wait before the file loads to complete processing the texture. With synchronousprocesses, source code can move from one initialization method to the next. Therefore procedural textures allow more immediate texture processing.
Third JavaScript may resize graphics based on screen resolution, with no loss in image quality. Resized image files often result in blurry or distorted images. We don't cover resizing in this book, however you can modify JavaScript procedural texture methods to prepare textures for varying dimensions.
Fourth procedural texture generation includes the ability to create algorithms of imaginative, complex, and sometimes surreal beauty.
Perhaps the only disadvantage to procedural textures involves processing time. With complicated textures many lines of code execute before the texture completes preparation. The simple textures demonstrated in this section require minimal processing time.
Prepare Four Procedural Textures
The JavaScript file GLTexProcedure.js defines the GLTexProcedure class. The constructor initializes an array of vertices with textures, and an array of indices identical to arrays created for the Lighthouse Texture Mapproject. Create arrays which define a square plane with mapping coordinates from edge to edge. The only difference between the the GLSquare constructor and the GLTexProcedure constructor is that we don't need an image file. The following listing demonstrates filling the first GLEntity img property with data returned from the method generateGradientBG() declared within GLTexProcedure.js. Method generateGradientBG() creates color data to display a blue green gradient, covered in the next few sections. See method generateGradientBG().
var n = new GLEntity(null,0);
n.img = this.generateGradientBG();
Listing 18: Assign Procedural Data
Select a Procedural Texture from the Menu
The GLTexProcedure constructor calls setListener(controller) to assign a change event for the Web page's select menu element. setListener(controller) retrieves a reference to the Web page's select menu element. Then setListener(controller) assigns the GLTexProcedure method named optionSelect(ev) as the menu's change event handler. Last setListener(controller) creates a property named controller and assigns a reference to the GLControl controller. The following line demonstrates assigning the controller to the menu's property.
menu.controller = controller; .
The Web page's drop down menu allows the user to select procedural textures for display. For each selection, the menu's change event listener named optionSelect(ev), retrieves a reference to the controller GLControl, a reference to GLTexProcedure, and the first GLEntity from the controller's list. The following listing demonstrates saving references to the controller, entity, and the GLTexProcedure reference named glDemo. The controller saves a reference to the property glDemo. The instance variable glDemo references an instance to the current project's class.
var controller = ev.currentTarget.controller;
// Reference to
// GLTexProcedure:
var glDemo = controller.glDemo;
var entity = controller.aEntities[0];
Listing 19: Menu for Procedural Textures
Method optionSelect(ev) calls one of GLTexProcedure's five texture generation methods. Each texture generation method returns an array of color data. The methods include generateGradientBG() which creates a blue green gradient, generateTilesRGB() which creates a texture with four colored tiles, generateStripesRB() which creates red and blue stripes, and generateSquareR() which creates a solid red square.
The following line demonstrates assigning a solid red square texture to the GLEntity.img property.
entity.img = glDemo.generateSquareR();
Begin the texture initialization sequence with a call to controller.setImage(controller). See the optionSelect(ev), and the setListener(controller) methods.
Show Array Data
Each texture generation method within GLTexProcedure displays the first 32 entries of pixel data, to the Web pages. The method printArray(s, a) simply outputs ordered numbers to a Web page text element. Displaying each entry helps when debugging texture values.
The first parameter to printArray(s, a) is a String to show to the user on the Web page. The second parameter is a reference to a filled Uint8Array. See the entire printArray(s, a) method.
The next few sections explain how to prepare arrays of color data for procedural textures. Then we explain how to initialize procedural textures.