Wrox Press Java Programming 24-Hour Trainer 2nd (2015)
Lesson 14. Working with I/O Streams
Most programs work with some kind of data, which could be stored in a local database, on a remote computer, or in a file located on your disk. Java has a concept of working with streams of data. You can say that a Java program reads sequences of bytes from an input stream (or writes into an output stream) byte after byte, character after character, primitive after primitive. Accordingly, Java defines various types of classes supporting streams; for example, InputStream or OutputStream. There are classes specifically meant for reading character streams such as Reader andWriter. DataInputStream and DataOutputStream can read and write Java primitives, and to work with files you may consider such classes as FileInputStream and FileReader.
Classes that work with streams are located in two packages: java.io and java.nio. Classes from the former implement blocking input/output (I/O): When bytes are being read/written by a process, they become unavailable for other threads of execution. The latter package offers non-blocking I/O with improved performance. Most of this chapter covers the fundamentals of I/O, but at the end I’ll show you how to work with files using classes from the package java.nio.
Before deciding which Java class to use for I/O in each particular case, you need to understand what kind of data is coming from (or going to) the stream in question. No matter what you select, your code needs to perform three operations:
1. Open a stream that points at a specific data source: a file, a socket, a URL, and so on.
2. Read or write data from/to this stream.
3. Close the stream.
If a Java program uses third-party programs, such as database management systems (DBMS), you won’t need to program streams directly—the database drivers or object-relational mapping framework is all you need. But in this lesson you see examples of performing I/O operations with different streams.
Byte Streams
A program can read or write any file one byte at a time with the help of one of the subclasses of InputStream or OutputStream, respectively. The following example in Listing 14-1 shows how to use the class FileInputStream to read a file named abc.dat. This code snippet reads and prints each byte’s value:
Listing 14-1: Using FileInputStream
try (FileInputStream myFile = new FileInputStream("abc.dat")){
boolean eof = false;
while (!eof) {
int byteValue = myFile.read();
System.out.print(byteValue + " ");
if (byteValue == -1)
eof = true;
}
} catch (IOException ioe) {
System.out.println("Could not read file: " +
ioe.toString());
}
}
Because the code in Listing 14-1 doesn’t specify the directory where abc.dat is located, the program tries to find this file in the current directory, which is the root directory of the Eclipse project (if you use Eclipse). At any given time you can easily find out the current directory programmatically by calling the method System.getProperty("user.dir").
The output of this program will be a sequence of numbers, which represents the codes of the characters located in the file. For example, if abc.dat contains the text “This is a test file,” the output on the system console will look like this:
84 104 105 115 32 105 115 32 97 32 116 101 115 116 32 102 105 108 101 -1
When you are reading with FileInputStream, the end of the file is represented by a negative one, and this is how you know when to stop. The code in Listing 14-1 checks for -1 and sets the boolean variable eof to false to finish the loop.
Note that the above example automatically closes streams by using try-with-resources, as explained in Lesson 10. This code will work starting from Java 7.
The code fragment in Listing 14-2 writes into a file called xyz.dat using the class FileOutputStream.
Listing 14-2: Using FileOutputStream
// byte values are represented by integers from 0 to 255
int somedata[]= {56,230,123,43,11,37};
try (FileOutputStream myFile= new FileOutputStream("xyz.dat");){
for (int i = 0; i <somedata.length; i++){
file.write(somedata[i]);
}
} catch (IOException ioe) {
System.out.println("Could not write to a file: " +
ioe.toString());
}
Buffered Streams
The code in the previous section was reading and writing one byte at a time. In general, disk access is much slower than the processing performed in memory; that’s why it’s not a good idea to access the disk a thousand times to read a file of 1,000 bytes. To minimize the number of times the disk is accessed, Java provides buffers, which serve as reservoirs of data.
The class BufferedInputStream works as a middleman between FileInputStream and the file itself. It reads a big chunk of bytes from a file into memory in one shot, and the FileInputStream object then reads single bytes from there, which is memory-to-memory operations.BufferedOutputStream works similarly with the class FileOutputStream. The main idea here is to minimize disk access.
Buffered streams are not changing the type of the original streams—they just make reading more efficient. Think of it this way: A program performs stream chaining (or stream piping) to connect streams, just as pipes are connected in plumbing. Listing 14-3 shows an example in which a file is read so the data from FileInputStream fills BufferedInputStream before processing.
Listing 14-3: Chaining FileInputStream with BufferedInputStream
try (FileInputStream myFile = new FileInputStream("abc.dat");
BufferedInputStream buff = new BufferedInputStream(myFile);){
boolean eof = false;
while (!eof) {
int byteValue = buff.read();
System.out.print(byteValue + " ");
if (byteValue == -1)
eof = true;
}
} catch (IOException ioe) {
ioe.printStackTrace();
}
}
While reading a stream with the help of BufferedInputStream, watch for the end-of-file character to know that all the bytes have been read from the buffer. The class BufferedOutputStream is for writing, and you’d need to call its method write().
The default buffer size is 8Kb, but you can control it using a two-argument constructor of the BufferedInputStream or BufferedOutputStream. For example, to set the buffer size to 5,000 bytes, instantiate the buffered stream as follows:
BufferedInputStream buff = new BufferedInputStream(myFile, 5000);
Character Streams
The text in Java is represented as a set of char values (two-byte characters), which are based on the Unicode Standard. The Java classes FileReader and FileWriter were specifically created to work with text files, but they work only with default character encoding and don’t handle localization properly.
The recommended way is to pipe the class InputStreamReader with specified encoding and the FileInputStream. The class InputStreamReader reads bytes and decodes them into characters using a specified CharSet. Each JVM has a default charset, which can be specified during the JVM start-up and depends on the locale. Some of the standard charsets are US-ASCII, UTF-8, and UTF-16.
Listing 14-4 reads bytes from a text file and converts them from UTF-8 encoding into Unicode to return results as a String. For efficiency, the reading is piped with the BufferReader, which reads text from the stream buffering characters. Note that this code uses mutable StringBuffer that usually works faster than String when it comes to performing text manipulations. Using a mutable StringBuffer was a recommended way to concatenate strings. That’s why I decided to illustrate its use.
If you’ll be concatenating regular String values, Java compiler will optimize this code anyway and will replace String concatenation with yet another helper class StringBuilder. You can also manually use StringBuilder instead of StringBuffer, as shown in Lesson 16.
Listing 14-4: Reading text files
StringBuffer buffer = new StringBuffer();
try (
FileInputStream myFile = new FileInputStream("abc.txt");
InputStreamReader inputStreamReader =
new InputStreamReader(myFile, "UTF8"
);
Reader reader = new BufferedReader(inputStreamReader);){
int ch; // the code of one character
while ((ch = reader.read()) > -1) {
buffer.append((char)ch);
}
buffer.toString();
} catch (IOException e) {
e.printStackTrace();
}
For writing characters to a file, pipe FileOutputStream and OutputStreamWriter. For efficiency, use BufferedWriter; for example:
try (FileOutputStream myFile = new FileOutputStream("abc.txt");
Writer out = new BufferedWriter(
new OutputStreamWriter(myFile, "UTF8"));) {
String myAddress = "123 Broadway, New York, NY 10011";
out.write(myAddress);
} catch(IOException e){
e.printStackTrace();
}
Bringing Together GUI and I/O Streams
Listing 14-5 shows yet another version of the tax calculation program. This time I’ve added a text file, states.txt, that includes states that will be used to populate a drop-down box, chStates. My file is located in the root directory of the Eclipse project Lesson14, and it looks like this:
New Jersey
Florida
California
The program in Listing 14-5 requires a class, Tax, that you can borrow from Lesson 4 class_methods_and_constructors. Make sure that it has the method calcTax().
Listing 14-5: Bringing together Swing and streams
public class TaxGuiFile extends JFrame {
JLabel lblGrIncome;
JTextField txtGrossIncome = new JTextField(15);
JLabel lblDependents=new JLabel("Number of Dependents:");
JTextField txtDependents = new JTextField(2);
JLabel lblState = new JLabel("State: ");
//Define a data model for the ComboBox chState
Vector<String> states = new Vector<>(50);
//Create a combobox to get data from the model
JComboBox chState = new JComboBox(states);
JLabel lblTax = new JLabel("State Tax: ");
JTextField txtStateTax = new JTextField(10);
JButton bGo = new JButton("Go");
JButton bReset = new JButton("Reset");
TaxGuiFile() {
lblGrIncome = new JLabel("Gross Income: ");
GridLayout gr = new GridLayout(5,2,1,1);
setLayout(gr);
add(lblGrIncome);
add(txtGrossIncome);
add(lblDependents);
add(txtDependents);
add(lblState);
add(chState);
add(lblTax);
add(txtStateTax);
add(bGo);
add(bReset);
// Populate states from a file
populateStates();
chState.setSelectedIndex(0);
txtStateTax.setEditable(false);
// The Button Go processing using lambda expression
bGo.addActionListener(evt -> {
try{
int grossInc=Integer.parseInt(txtGrossIncome.getText());
int dependents=Integer.parseInt(txtDependents.getText());
String state = (String)chState.getSelectedItem();
Tax tax=new Tax(grossInc, state,dependents);
String sTax =Double.toString(tax.calcTax());
txtStateTax.setText(sTax);
}catch(NumberFormatException e){
txtStateTax.setText("Non-Numeric Data");
}catch (Exception e){
txtStateTax.setText(e.getMessage());
}
});
// The Button Reset processing using lambda expression
bReset.addActionListener(evt ->{
txtGrossIncome.setText("");
txtDependents.setText("");
chState.setSelectedIndex(0);
txtStateTax.setText("");
});
// Define, instantiate and register a WindowAdapter
// to process windowClosing Event of this frame
this.addWindowListener(new WindowAdapter() {
public void windowClosing(WindowEvent e) {
System.exit(0);
}});
}
// The code below will read the file states.txt and
// populate the drop-down chStates
private void populateStates(){
states.add("Select State");
try (FileInputStream myFile =
new FileInputStream("states.txt");
InputStreamReader inputStreamReader=
new InputStreamReader(myFile, "UTF8");
BufferedReader reader =
new BufferedReader(inputStreamReader);){
String stateName;
while ( (stateName = reader.readLine()) != null ){
states.add(stateName);
}
}catch (IOException ioe){
txtStateTax.setText("Can't read states.txt: " +
ioe.getMessage());
}
}
public static void main(String args[]){
TaxGuiFile taxFrame = new TaxGuiFile();
taxFrame.setSize(400,150);
taxFrame.setVisible(true);
}
}
The code in Listing 14-5 reads the content of the file states.txt and populates a collection—a Vector with states. The Vector collection (it’s like ArrayList but synchronized) plays the role of a data model for the combo box states. I used a constructor of JComboBox that takes a data model as an argument. This Swing component knows how to display the content of its data model.
This is an example of the implementation of the MVC (model-view-controller) design pattern, which promotes the separation of data and user interface (UI). JComboBox plays the role of a view, the Vector is a model, and the user works as a controller when she selects a particular state and the view has to be updated.
Note that the TaxGuiFile class doesn’t implement the ActionListener interface. The click event handling for the Go and Reset buttons is implemented using lambda expressions.
The output of the program from Listing 14-5 is shown in Figure 14-1.
Splitting GUI and Processing
In a larger application it would make sense to separate the class TaxGuiFile into two: one would be only creating GUI components, and the other would read the data from files or other data sources. I illustrated this in Lesson 9 for the calculator program that had two classes: Calculator and CalculatorEngine.
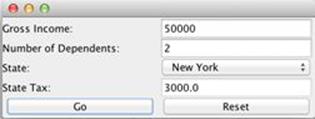
Figure 14-1: Running the TaxGuiFile program
Data Streams
If you are expecting to work with a stream of known data primitives (for example, two integers, three floats, and a double) use either DataInputStream for reading or DataOutputStream for writing. A method, readInt(), of DataInputStream reads the whole integer number (four bytes) at once, and readLong() gets you a long number (eight bytes).
The class DataInputStream is yet another “pipe” that can be connected to another stream. Listing 14-6 has an example of how you can “build a pipe” from the following pieces:
FileInputStream → BufferedInputStream → DataInputStream
Listing 14-6: Using DataInputStream
try (FileInputStream myFile = new FileInputStream("myData.dat");
BufferedInputStream buff = new BufferedInputStream(myFile);
DataInputStream data = new DataInputStream(buff);) {
int num1 = data.readInt();
int num2 = data.readInt();
float num2 = data.readFloat();
float num3 = data.readFloat();
float num4 = data.readFloat();
double num5 = data.readDouble();
} catch (IOException ioe) {
ioe.printStackTrace();
}
In this example, FileInputStream opens the file myData.dat for reading, BufferedInputStream makes the read more efficient, and DataInputStream extracts from the buffer two integers, three floats, and a double. The assumption here is that the file myData.dat contains exactly these data types, and they’re in the specified order. Such a file could have been created with the help of DataOutputStream, which allows you to write primitive Java data types to a stream in a portable way. It has a variety of methods to choose from: writeInt(), writeByte(), writeFloat(), and so on.
Utility Classes for Working with Files
Often you need to do some operations with files that do not always include reading or writing into files. For example, you may need to check for the existence of a file or rename it programmatically. Java includes utility classes File, Files, and Path that can become handy.
The Class File
The class java.io.File enables you to rename or delete a file, perform an existence check, create a directory, check the file size, and more. If you need this functionality, start by creating an instance of this class:
File myFile = new File("abc.txt");
This line does not create a file; it just creates in memory an instance of the class File that’s ready to perform its action on the file named abc.txt. If you want to create a physical file, use the method createNewFile() defined in the class File. Here’s the list of some methods of the class File:
· createNewFile(): Creates a new, empty file named according to the file name used during the file instantiation. Creates a new file only if a file with this name does not exist.
· delete(): Deletes a file or directory.
· renameTo(): Renames a file.
· length(): Returns the length of the file in bytes.
· exists(): Tests whether the file with the specified name exists.
· list(): Returns an array of strings containing a file and directory.
· lastModified(): Returns the time that the file was last modified.
· mkDir(): Creates a directory.
The next code fragment checks for the existence of the file customers.txt.bak, deletes it if it is found, and then renames the file customers.txt to customers.txt.bak:
File file = new File("customers.txt");
File backup = new File("customers.txt.bak");
if (backup.exists()){
backup.delete();
}
file.renameTo(backup);
NIO.2: Using Files, Path, and Paths
Java 7 introduced a number of new classes and interfaces for more efficient work with files and directories often referred as NIO.2.
The interface Path is a programmatic representation of the full path to the file, a directory, or a URI. While the full path to the file is represented differently in Windows and Unix OS, each of the file systems is a hierarchical tree of directories, subdirectories, and files that start from some root node (e.g., c:\ in Windows or / in Unix).
The path can be absolute that starts from the root directory on the drive like /Users/yfain11/practicalJava/workspace/Lesson14/states.bak and relative that starts with the directory where the application was launched from; e.g., Lesson14/states.bak. A file can also be represented by a so-calledsymbolic link, that looks like a file but is actually a reference to a different file in a different branch of the files hierarchy. If you want to write a program that can be launched from any directory and work with a certain file, consider using absolute path. If your application is deployed in a way that a file will always be located in the same place relative to the location of the main application, use relative path.
The interface Path allows you to programmatically represent a full path according to the underlying OS being used. First your program should create a Path object, and then work with files or directories located there.
The class java.nio.file.Files is similar to java.io.File in that it contains static methods that operate on files and directories. Most of these methods delegate the processing to the underlying operating system (OS) file system. In addition to functionality of the class File, the class Files can walk directory trees, check a file’s attributes (e.g., read/write access), understand if a file is a symbolic link, and work with streams. Using the class Files you can copy, move, and delete files, too.
You can get a file path by using the method Paths.get(). The following class TestFilesPaths checks if the file states.txt exists, then checks its size, outputs its absolute path, and creates a backup copy of this file named states.bak.
public class TestFilesPaths {
public static void main(String[] args) {
// Get the path to the file states.txt located in dir
// this program was launched from
Path sourceFilePath = Paths.get("states.txt");
// Will copy the source file to this destination
Path destFilePath = Paths.get("states.bak");
if (Files.exists(sourceFilePath)){
System.out.println("The file " + sourceFilePath + " exists");
System.out.println("The absolute path is " +
sourceFilePath.toAbsolutePath());
try{
// Check the file size (in bytes)
System.out.println("It's size is " +
Files.size(sourceFilePath));
// Copy the file from states.txt to states.bak
Files.copy(sourceFilePath, destFilePath,
StandardCopyOption.REPLACE_EXISTING);
System.out.println(
"Copy completed. The backup file is at " +
destFilePath.toAbsolutePath());
} catch(IOException ioe){
ioe.printStackTrace();
}
}
}
}
The output of the program TestFilesPaths looks as follows:
The file states.txt exists
The absolute path is
/Users/yfain11/practicalJava/workspace/Lesson14/states.txt
It's size is 41
Copy completed. The backup file is at
/Users/yfain11/practicalJava/workspace/Lesson14/states.bak
Copy Options
In the class TestFilesPaths I was using the option StandardCopyOption.REPLACE_EXISTING to replace the destination file if it exists. Now let’s make a little experiment. The class Files has an overloaded version of the method copy that takes only two parameters: the source and the destination. If you’ll remove the parameter StandardCopyOption.REPLACE_EXISTING, the program will work fine as long as the output file doesn’t exist in the specified destination. So if you’ll run TestFilesPaths more than once, the method copy() will generate an exception, which on my computer looks as follows:
java.nio.file.FileAlreadyExistsException: states.bak
at sun.nio.fs.UnixCopyFile.copy(UnixCopyFile.java:551)
at sun.nio.fs.UnixFileSystemProvider.copy(UnixFileSystemProvider.java:253)
at java.nio.file.Files.copy(Files.java:1274)
at TestFilesPaths.main(TestFilesPaths.java:29)
I’m using a computer with MAC OS, which is Unix based. Read the exception message: The Java runtime properly figured out the type of my OS and, under the hood, engaged Unix-specific classes that implement file copying. If you’ll do the same experiment in Window, the exception stack trace will look different.
As a matter of fact, you can specify more than one copy option while invoking copy() or move(). The option COPY_ATTRIBUTES will set the same security attributes on the destination files. The option ATOMIC_MOVE will ensure that the copy or move operation will roll back in case of failure.
The class Files can also open input and output streams and read/write into them. You can find the complete list of all methods of the class Files in the Java documentation at http://goo.gl/LBhZYF.
What NIO Is About
In this lesson you’ve learned how to work with I/O streams using small files. The real-world applications, sometimes, need to process files that are hundreds of megabytes in size. While the file is being read, the main program may need to perform other application-specific functions. I’ll give you an example from the GUI-related programming. Imagine that the TaxGuiFile program has to read not a small but a large file, which takes 20 seconds. The GUI will become non-responsive for 20 seconds if you’ll be using blocking I/O in a wrong way. In Lesson 17 you’ll be learning about concurrent processing and multi-threading. You should run a long-running code in a separate thread of execution, so the main thread that’s responsible for the communication with GUI will remain operational. In particular, I’ll explain what SwingWorker thread is for in Lesson 17 and how to avoid “frozen screens” in JavaFX applications in Lesson 19.
Blocking I/O may become a bottleneck in your application, if you need to come up with a scalable solution that reads/writes large amounts of data. Yes, you can use blocking I/O in a separate thread of execution. But a better alternative is to use non-blocking I/O that was first introduced in Java 1.4, and improved in Java 7. The non-blocking mode of Java NIO allows to create channels so a thread can read (or write) only the data that’s currently available. The thread doesn’t wait till all the data is available and can continue processing some other tasks. Working with NIO channels is not covered in this book. Please refer to Oracle documentation.
I’ll show you just a couple of examples of using the class java.nio.Files for working with text files. This helper class consists of multiple static methods that can help you with various file operations. For the complete list of available operations refer to the javadoc on Files.
Reading a file with the class Files is even easier than with the classes from the java.io package . For example, to read the file states.txt that I used in the TestGuiFile class can be done as follows:
public class TestBufferedReaderNio {
public static void main(String[] args){
Path statesFile = Paths.get("states.txt");
try (BufferedReader reader =
Files.newBufferedReader(statesFile,
StandardCharsets.UTF_8)){
String stateName;
while ( (stateName = reader.readLine()) != null ){
System.out.println("Got the state " + stateName);
}
} catch (IOException ioe){
System.out.println("Error while reading states.txt: " +
ioe.getMessage());
}
}
}
The class TestBufferedReaderNio uses the method newBufferedReader() that spares you from manually creating an input stream.
If you want to read all lines from a file into a Java collection it can be easily done with the method readAllLines() from the class Files.
public class TestReadAllNio {
public static void main(String[] args){
Path statesFile = Paths.get("states.txt");
try {
// Populate the collection
List<String> states = Files.readAllLines(statesFile,
StandardCharsets.UTF_8);
// Print state names
states.forEach(System.out::println);
} catch (IOException ioe){
System.out.println("Error while reading states.txt: "
+ ioe.getMessage());
}
}
}
Writing into a text file is simple, too:
Path myOutputFile = Paths.get("someOutputFile.txt");
try (BufferedWriter writer = Files.newBufferedWrite(myOutputFile,
StandardCharsets.UTF_8, StandardOpenOption.CREATE)) {
writer.write("Whatever you want to write");
}
The enumeration StandardOpenOption allows you to specify how you want to open the file; e.g., append to an existing file, create a new file if none exists, et al. See the javadoc for details.
Another interesting feature of NIO is the ability to perform input/output operations asynchronously, which may substantially increase the scalability of your application. If you’ll need to work with large amounts of data, research asynchronous classes and interfaces located in the packagejava.nio.channels. For more detailed coverage of NIO get the book titled “The Well-Grounded Java Developer” published by Manning in 2012.
Try It
Write a program that will read a .zip archive file and print on the system console the list of files included in the zip archive. Do a little research about the class java.util.zip.ZipInputStream and use it together with FileInputStream. Read about the class ZipEntry, too.
Lesson Requirements
You should have Java installed.
NOTE You can download the code and resources for this “Try It” from the book’s web page at www.wrox.com/go/javaprog24hr2e. You can find them in the Lesson14.zip folder in the download.
Step-by-Step
1. Create a new Eclipse project called Lesson14.
2. Copy any .zip file into its root directory.
3. Open FileInputStream and connect it with ZipInputStream.
4. Write a loop that uses the method getNextEntry() from ZipInputStream. This method reads the ZipEntry, if any, and positions the stream at the beginning of the entry data.
5. Call the function getName() on each ZipEntry instance found.
6. Print the entry name on the system console.
7. Close the entry inside the loop.
8. Run the program and observe that it properly prints the filenames from the selected .zip file.
9. If you want to learn how to create .zip files from Java, read about the class ZipOutputStream.
TIP Please select the videos for Lesson 14 online at www.wrox.com/go/javaprog24hr2e. You will also be able to download the code and resources for this lesson from the website.
All materials on the site are licensed Creative Commons Attribution-Sharealike 3.0 Unported CC BY-SA 3.0 & GNU Free Documentation License (GFDL)
If you are the copyright holder of any material contained on our site and intend to remove it, please contact our site administrator for approval.
© 2016-2026 All site design rights belong to S.Y.A.