Linux All-in-One For Dummies, 5th Edition (2014)
Book II. Linux Desktops
Chapter 5. Introducing Linux Applications
In This Chapter
![]() Taking stock of typical Linux applications
Taking stock of typical Linux applications
![]() Trying out the office applications
Trying out the office applications
![]() Playing with multimedia
Playing with multimedia
![]() Working with images
Working with images
Each Linux distribution comes with plenty of applications for all your diverse computing needs, as you can see by simply looking at the menus in the GUI desktops. Often, more than one application of the same type exists. Most distributions come with the LibreOffice office application suite that provides a word processor, spreadsheet, presentation software, and more. You’ll find many choices for CD players and multimedia players, plus games, utility programs, and other useful tools, such as a scanner and digital camera applications. Some commercial distributions come with commercial office suites as well.
 When it comes to playing multimedia (audio and video in various formats, such as MP3, MP4, and QuickTime), freely available Linux distributions rarely come with the appropriate decoders because of licensing restrictions; the multimedia application runs but cannot play the MP3 file or the DVD movie because it lacks a decoder. Commercial distributions usually come with some of these decoders.
This chapter offers an overview of some Linux applications. After you read about these applications, you can explore them further and have them at your disposal when needed. This chapter also provides an introduction to the GUI file managers, which allow you to browse and manipulate individual files.
Taking Stock of Linux Applications
A list of all the Linux applications available could take up much of the bulk of this book. A major application almost always has a website where you can get more information about it. Each Linux distribution comes with many applications and utilities; this chapter is but a brief sampling of what is available.
Typically, as you install a Linux distribution, you must select specific groups of applications to install. The exact list of applications on your Linux system depends on the choices you make during the installation.
It’s easy to install missing applications in Debian (and Debian-based distributions, such as Ubuntu) as long as you have a broadband (cable or DSL) connection to the Internet. For example, to see whether the K3b CD/DVD burner exists for Debian, type apt-cache search k3b. You get output similar to the following:
k3b - A sophisticated KDE cd burning application
k3b-i18n - Internationalized (i18n) files for k3b
k3blibs - The KDE cd burning application library - runtime files
k3blibs-dev - The KDE cd burning application library - development files
Next, type apt-get install k3b and a few moments later you’ll have K3b installed on your Debian system. This ease of installing (or upgrading) software is why Debian users swear by apt-get (even though it’s a command-line tool).
Introducing Office Applications and Tools
Word processor, spreadsheet, presentation software, calendar, calculator —these are some office staples. Most Linux distributions come with the LibreOffice suite of office applications and tools. You can try all of them one by one and see which one takes your fancy. Each application is fairly intuitive to use. Although some nuances of the user interface may be new to you, you’ll become comfortable with the interface after using it a few times. This section briefly introduces the following applications, as well as some other commercially available office applications for Linux:
· LibreOffice Suite: A Microsoft Office–like office suite with the Writer word processor, the Calc spreadsheet program, the Impress presentation program, the Draw drawing and illustration application, and Math, a mathematical formula editor
· Kontact: A personal information management application in KDE
· Calculators: A GNOME calculator and KDE calculator
· Aspell: A spelling checker
LibreOffice.org office suite
LibreOffice.org is not only a website, but also an office suite similar to major office suites such as Microsoft Office. Its main components are the Writer word processor, the Calc spreadsheet, and the Impress presentation program.
You can easily start LibreOffice.org — either the overall suite or an individual application — from most GUI desktops by clicking a panel icon or by making a choice from the main menu. For example, in Ubuntu, you can click a desktop icon to open the initial window of the LibreOffice.org suite. You can create new documents or open existing documents (which can be Microsoft Office files as well) from the main window.
Writer
Choosing File⇒New⇒Text Document from any LibreOffice.org window starts LibreOffice.org Writer with a blank document in its main window. Using Writer is simple — if you’re familiar with Microsoft Word, you should have no trouble finding your way around Writer. You can type text into the blank document, format text, and save text.
You can also open documents that you’ve prepared with Microsoft Word on a Windows machine. Figure 5-1 shows a Microsoft Word document opened in LibreOffice Writer.
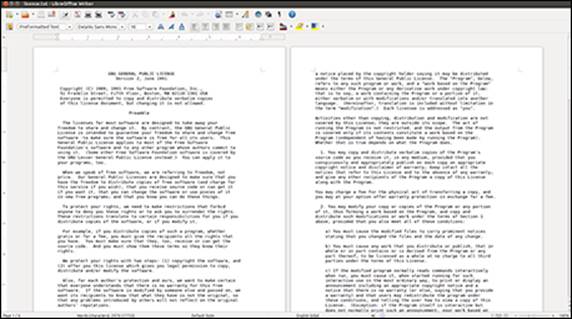
Figure 5-1: You can prepare documents in LibreOffice Writer.
When you save a document, Writer saves it in LibreDocument text format by default, in a file with the .odt extension.
 If you need to share Writer documents with Microsoft Word, you can save the documents in several formats, including Microsoft Word and Rich Text (.rtf) formats.
Writer is simple and intuitive to use. If you need help, online help is available by choosing Help from the Writer menu (or pressing F1 in newer versions). This brings up the Help window with help information on Writer. You can then click the links to view specific help information.
Calc
Calc is the spreadsheet program in the LibreOffice application suite. To start Calc, choose Spreadsheet from the Office category in the main menu or choose File⇒New⇒Spreadsheet from any LibreOffice window. Calc displays its main window, which looks similar to that of Windows-based spreadsheets such as Microsoft Excel. (Calc can read and write Microsoft Excel-format spreadsheet files.)
Use Calc in the same way you use Microsoft Excel. You can type entries in cells, use formulas, and format the cells. (For example, you can specify the type of value and the number of digits after the decimal point.) Figure 5-2 shows a typical spreadsheet in Calc.
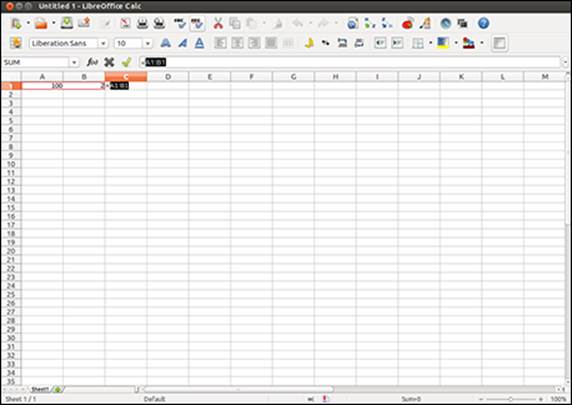
Figure 5-2: Prepare your spreadsheets with LibreOffice Calc.
When preparing the spreadsheet, use formulas in the same format that you would in Microsoft Excel. For example, use the formula SUM(D2:D6) to add the entries from cell D2 to D6. To set cell D2 as the product of the entries A2 and C2, type =A2*C2 in cell D2. To find out more about the functions available in LibreOffice.org Calc, choose Help⇒LibreOffice.org Help from the menu (or press F1 in newer versions). This opens the LibreOffice.org Help window, from which you can browse the functions by category and click a function to read more about it.
To save the spreadsheet, choose File⇒Save As. A dialog box appears, from which you can specify the file format, the directory location, and the name of the file. When you save a document, Calc saves it in LibreDocument spreadsheet format in a file with the .ods extension by default.
LibreOffice.org Calc can save the file in several other formats, including Microsoft Excel, as well as text file with comma-separated values (CSV).
If you want to exchange files with Microsoft Excel, save the spreadsheet in Microsoft Excel format (choose an appropriate version for Excel). Then you can transfer that file to a Windows system and open it in Microsoft Excel.
Impress
Impress is similar to Microsoft PowerPoint; it allows you to create unique and creative slide presentations for a variety of purposes. To run Impress, choose Presentation from the Office category in the main menu or choose File⇒New⇒Presentation from any LibreOffice window.
When you first open Impress, the program prompts you for the presentation style and template. To begin working, select Empty presentation and click Create. To open an existing document, select the appropriate option from the Presentation Wizard and click Open. Then select the presentation file you want to open. You can open Microsoft PowerPoint files in Impress. Figure 5-3 shows a typical slide presentation in Impress.
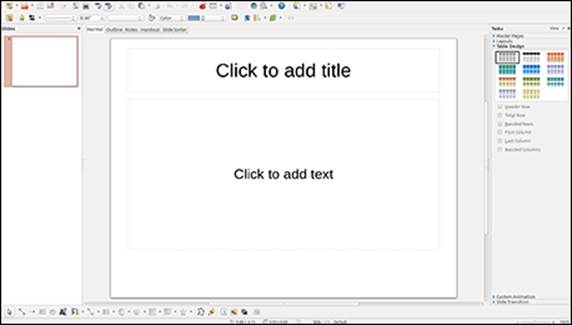
Figure 5-3: You can prepare presentations in LibreOffice Impress.
The Impress window shows the first slide together with an outline view of the slides along the left side. The exact appearance depends on the document type and template you select. You can begin adding text and other graphic objects such as images, text, and lines to the slide.
To insert a new slide, choose Insert⇒Slide from the menu. A blank slide appears. You can then add text and graphics to that new slide.
To save a presentation, choose File⇒Save. For new documents, you have to provide a filename and select the directory to which you want to save the file.
If you want to share the slides with someone who uses Microsoft PowerPoint, save the presentation in Microsoft PowerPoint format.
Calendars
KDE comes with Kontact — an application that integrates existing KDE applications such as KMail mail reader and the KOrganizer calendar program into a single graphical personal information manager. You can start Kontact from panel icons or the main menu. (The location of the menu entry depends on the Linux distribution.)
When Kontact starts, it usually displays a summary window with information about new e-mail messages, upcoming scheduled events, and more. You can explore each application individually by clicking the icons in the left pane of the Kontact window.
To add an event or appointment for a specific date and time, select the date from the calendar, double-click the time, and type a brief description of the appointment in the New Event dialog box that appears. Click OK when you’re finished.
Calculators
You have a choice of the GNOME calculator or the KDE calculator. Both are scientific calculators; you can do typical scientific calculations (such as square root and inverse) as well as trigonometric functions (such as sine, cosine, and tangent).
To use the calculator, look for it in the Utilities or Accessories category of the main menu. Figure 5-4 shows the KDE calculator in SUSE.
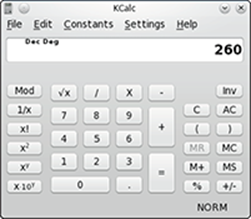
Figure 5-4: Do your calculations in the KDE calculator.
You can display additional buttons by selecting options from the Settings menu. For example, choose Settings⇒Statistic Buttons to show buttons that enable you to perform statistical calculations with the calculator.
Checking out Multimedia Applications
Most Linux distributions include quite a few multimedia applications — mostly multimedia audio players and CD players, but also applications for using digital cameras and burning CD-ROMs and DVDs. To play some other multimedia files (such as MPEG video), you may have to download and install additional software on your Linux system. Here’s a quick sketch of a few typical multimedia tasks and the applications you can use to perform these tasks:
· Using digital cameras: Use a digital camera tool to download photos from your digital camera in Linux (or simply access the camera as a USB mass storage device).
· Playing audio CDs: Use one of many audio CD players that come with Linux.
· Playing sound files: Use Rhythmbox or XMMS multimedia audio players. (You have to download some additional software to play MP3 files with Rhythmbox or XMMS.) You can also download other players from the Internet.
· Burning a CD or DVD: Use a DVD or CD burner, such as K3b, to burn audio and data CDs/DVDs.
Using a digital camera
Most Linux distributions come with a digital camera application that you can use to download pictures from digital cameras. For example, SUSE and Xandros come with digiKam, which works with many makes and models of digital cameras. Depending on the model, the cameras can connect to the serial port or the Universal Serial Bus (USB) port.
To use digiKam with your digital camera, follow these steps:
1. Connect your digital camera to the serial port or USB port (whichever interface the camera supports) and turn on the camera.
2. Start digiKam.
Look for digiKam in the main menu under the Graphics or Images submenu. The first time you open digiKam, you will be asked to specify a default location in which to store images, and to choose a number of other configuration preferences.
3. From the digiKam menu, choose Settings⇒Configure digiKam.
A configuration dialog box appears.
4. Click the Cameras tab in the dialog box, and then click Auto Detect.
If your camera is supported and the camera is configured to be in PTP (Picture Transfer Protocol) mode, the camera is detected. If not, you can get the photos from your camera by using an alternate method (described after these steps).
5. Choose your camera model from the Camera menu.
A new window appears and, after a short while, displays the photos in the camera.
6. Click the thumbnails to select the images you want to download; then choose Camera⇒Download to download the images.
digiKam downloads the images. You can save these files in a folder and edit the photos in The GIMP or your favorite photo editor.
 Don’t despair if digiKam doesn’t recognize your digital camera. You can still access the digital camera’s storage medium (compact flash card, for example) as a USB mass storage device, provided your camera supports USB mass storage. To access the images on your USB digital camera, use the following steps.
1. Read the camera manual and use the menu options of the camera to set the USB mode to Mass Storage.
If the camera doesn’t support USB mass storage, you can’t use this procedure to access the photos. If the camera supports the Picture Transfer Protocol mode, you can use digiKam to download the pictures.
2. Connect your digital camera to the USB port by using the cable that came with the camera. Then turn on the camera.
Linux detects the camera and opens the contents of the camera in a file manager window.
3. Click to select photos and copy them to your hard drive by dragging and dropping them into a selected folder.
4. Close the file manager window, disconnect the USB cable from the PC, and turn off the camera.
Whether you’re using a digital camera tool such as digiKam or accessing your camera as you would any other storage device, Linux makes it easy to get your pictures onto your computer.
Playing audio CDs
All Linux distributions come with either the GNOME or KDE CD-player applications. To play an audio CD, you need a sound card, and that sound card must be configured to work in Linux.
In some distributions, when you insert an audio CD into the drive, a dialog box appears and asks whether you want to play the CD with the CD player. If this dialog box doesn’t appear, locate an audio CD player by choosing Applications⇒Sound and Video from the main menu.
The KDE CD player displays the title of the CD and the name of the current track. The CD player gets the song titles from http://freedb.org — a free, open source CD database on the Internet (freedb.freedb.org at port 888). You need an active Internet connection for the CD player to download song information from the CD database. After the CD player downloads information about a particular CD, it caches that information in a local database for future use. The CD player user interface is intuitive, and you can figure it out easily. One nice feature is that you can select a track by title.
Playing sound files
You can use Rhythmbox or XMMS to open and play sound files (for example, MP3 files). Users with large MP3 music libraries usually like Rhythmbox because it can help organize their music files. You can start Rhythmbox by choosing the music player application from the main menu in several distributions, including Debian and Fedora. When you first start Rhythmbox, it displays an assistant that prompts you for the location of your music files so that Rhythmbox can manage your music library.
After you identify the locations of music files, Rhythmbox starts and displays the library in an organized manner. You can then select music and play it.
XMMS is another music player that can play many types of sound files, including Ogg Vorbis, FLAC (Free Lossless Audio Codec, an audio file format similar to MP3), and Windows WAV.
You can start XMMS by choosing the audio player application from the main menu (look under Multimedia or Sound & Video). After XMMS starts, you can open a sound file (such as an MP3 file) by choosing Window Menu⇒Play File or by pressing L. Then select one or more music files from the Load File dialog box. Click the Play button, and XMMS starts playing the sound file.
Burning a CD or DVD
Nowadays, most GUI file managers have the capability to burn CDs. For example, Nautilus File Manager and Xandros File Manager have built-in features for burning CDs and DVDs. Linux distributions also come with standalone GUI programs that enable you to easily burn CDs and DVDs. For example, K3b is a popular CD/DVD-burning application for KDE that’s available in Knoppix and SUSE.
Most CD-burning applications are simple to use. You basically gather the files that you want to burn to the CD or DVD and then start the burning process. Of course, for this to work, your PC must have a CD or DVD burner installed.
The upper part of the K3b window is for browsing the file system to select what you want to burn onto a CD or DVD. The upper-left corner shows the CD-writer device installed.
To burn a CD, you start with one of the projects shown in the lower part of the K3b window — New Audio CD Project, for example, or New Data DVD Project. Then you have to add files and, finally, burn the project to the CD or DVD by choosing Project⇒Burn or pressing Ctrl+B. For an audio CD, you can drag and drop MP3 files as well as audio tracks.
 K3b needs the external command-line programs cdrecord and cdrdao to burn CDs. K3b also needs the growisofs program to burn DVDs.
 If you get an error message about missing cdrdao in Debian, make sure that your Debian system is connected to the Internet, and then type apt-get install cdrdao to install it.
Using Graphics and Imaging Apps
You can use graphics and imaging applications to work with images and graphics (line drawings and shapes). Two of the most popular of these applications are
· The GIMP (GNU Image Manipulation Program): A program for viewing and performing image-manipulation tasks, such as photo retouching, image composition, and image creation.
· Gnome Ghostview (GGv): A graphical application capable of displaying PostScript files.
The GIMP
The GIMP is an image-manipulation program written by Peter Mattis and Spencer Kimball and released under the GNU General Public License (GPL). Most Linux distributions come with this program, although you may have to specifically select a package to install it. The GIMP is comparable to other image-manipulation programs, such as Adobe Photoshop and Corel PHOTO-PAINT.
To try out The GIMP, look for it under the Graphics category in the main menu. When you start The GIMP, it displays a window with copyright and license information. Click the Continue button to proceed with the installation. The next screen shows the directories to be created when you proceed with a personal installation of The GIMP.
If you can’t find The GIMP under the Graphics category, choose Add/Remove Software from the System Settings menu and install it from there.
The GIMP installation involves creating a directory in your home directory and placing a number of files there. This directory essentially holds information about any changes to user preferences you may make to The GIMP. Go ahead and click the Continue button at the bottom of the window. The GIMP creates the necessary directories, copies the necessary files to those directories, and guides you through a series of dialog boxes to complete the installation.
When the installation is finished, click the Continue button. The GIMP then loads any plug-ins — external modules that enhance its functionality. It displays a startup window that shows a message about each plug-in as it loads. After finishing the startup, The GIMP displays a tip of the day in a window. You can browse the tips and click the Close button to close the Tip window. At the same time, The GIMP displays a number of other windows, including a main navigation window titled The GIMP, a Toolbox window (usually on the left side), a Brush Selection window, and a Layers, Channels, Paths window. The center navigation window gives you access to new images to work with, image-editing functions, and a number of effect filters that you can apply to the image. The Toolbox window lets you quickly select a number of important image-manipulation tools.
To open an image file in The GIMP, choose File⇒Open. The Load Image dialog box appears. You can change directories and select the image file that you want to open. The GIMP can read all common image file formats, such as GIF, JPEG, TIFF, PCX, BMP, PNG, and PostScript. After you select the file and click OK, The GIMP loads the image into a new window.
The Toolbox window has many buttons that represent the tools you use to edit the image and apply special effects. You can get pop-up help on each tool button by placing the mouse pointer over the button. You can select a tool by clicking the tool’s button, and you can apply that tool’s effects to the image to see what it does.
When you right-click the image window, The GIMP displays a pop-up menu that has most of the options from The GIMP’s top toolbar.
You can do much more than just load and view images with The GIMP, but a complete discussion of all its features is beyond the scope of this book. If you want to try the other features of The GIMP, consult The GIMP User Manual (GUM), available online athttp://www.gimp.org/docs/. You can also choose Help⇒GIMP Online⇒User Manual Website to access the online documentation for The GIMP. (You need an Internet connection for this command to work.)
Visit The GIMP home page at www.gimp.org to find the latest news about The GIMP as well as links to other resources.
GNOME Ghostview
GNOME Ghostview is a graphical application ideal for viewing and printing PostScript or PDF documents. For a long document, you can view and print selected pages. You can also view the document at various levels of magnification by zooming in or out.
To run GNOME Ghostview in Fedora, choose Graphics⇒PostScript Viewer from GUI desktop. The GNOME Ghostview application window appears. In addition to the menu bar and toolbar along the top edge, a vertical divide splits the main display area of the window into two parts.
To load and view a PostScript document in GNOME Ghostview, choose File⇒Open, or click the Open icon on the toolbar. GNOME Ghostview displays a File-Selection dialog box. Use this dialog box to navigate the file system and select a PostScript file. For example, select the filetiger.ps in the /usr/share/ghostscript-8.64/examples directory. (Use your system’s version number of Ghostscript in place of 8.64).
To open the selected file, click the Open File button in the File-Selection dialog box. GNOME Ghostview opens the selected file, processes its contents, and displays the output in its window.
GNOME Ghostview is useful for viewing various kinds of documents that come in PostScript format. (These files typically have the .ps extension.) You can also open PDF files — which typically have .pdf extensions — in GNOME Ghostview.