Ubuntu 15.04 Server with systemd: Administration and Reference (2015)
Part I. Getting Started
Chapter 3. Usage Basics: Login, Interfaces, and Help
Using Linux has become an almost intuitive process, with easy-to-use interfaces, including graphical logins and desktops like GNOME and KDE. Even the standard Linux command line interface has become more user-friendly, with editable commands, history lists, and cursor-based tools. To start using Linux, you have to know how to access your Linux system and, once you are on the system, how to execute commands and run applications.
Linux is noted for providing easy access to extensive help documentation. It is easy to obtain information quickly about any Linux command and utility while logged in to the system. You can access an online manual that describes each command or obtain help that provides more detailed explanations of different Linux features. A complete set of manuals provided by the Linux Documentation Project is included on your system and is available to browse through or print. Both the GNOME and KDE desktops provide help systems with easy access to desktop, system, and application help files.
It is possible to first install the Ubuntu server, and then later install the Ubuntu desktop. This would provide you with all the configuration files for the Ubuntu server, as well as the desktop configuration tools available for those servers.
Ubuntu Server startup
If you installed from the server disk, no desktop is installed. When you start up, a command line interface is presented. The startup procedure uses tty1, the terminal one device, presenting a command line interface. Like the desktop, the Ubuntu server edition uses Plymouth for start up. On tty1, Plymouth will not display any start up messages. Start up messages are displayed on terminal 7, tty7, which you can access by pressing Alt-F7. The messages are logged in the /etc/log/boot file.
Ubuntu now uses the systemd login manager, logind, to manage logins and sessions, replacing consolekit which is no longer supported. You can configure login manager options with the /etc/systemd/logind.conf file. You can set options such as the number of terminals (default is 6), the idle action, and hardware key operations, such as the power key. Check the logind.conf man page for details.
The startup procedure provides no interactive support by default. This is an issue if you have file system mount problems, where fsck is run to check or fix file systems. To enable interactive support, edit the GRUB boot entry as described in the next section, and add the splash option, then boot. The Plymouth start up splash screen is shown, and you are notified and prompted for any filesystem mount problems. To make the Plymouth splash screen the default, add the splash option to the /etc/default/grub file.
The login prompt then prompts you to enter your user name. This is the user name you set up during installation (see Figure 3-1 ).
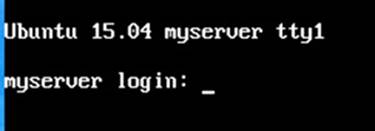
Figure 3-1: Server login prompt
After you enter your user name, you will be prompted to enter the password. Once logged in, you can then run commands. Basic server status information will be displayed such as the system load and the number of users logged in (see Figure 3-2 ).
To shut down the system enter the halt command with the sudo command. You will be prompted to enter your password.
sudo halt
From the login prompt, you can reboot your system with the Ctrl-Alt-Del keys.
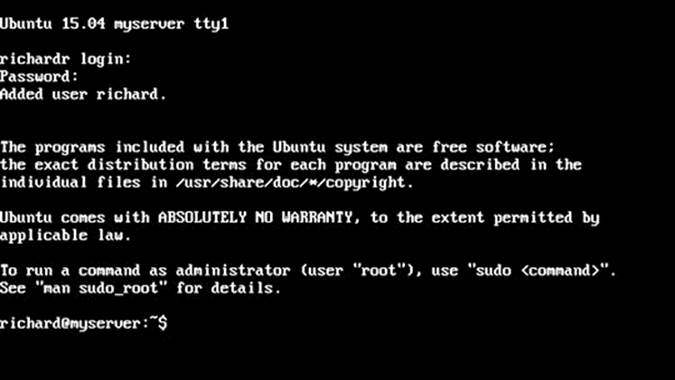
Figure 3-2: Server login
Grub selection and editing
If you have installed more than one operating system or wish to use the recovery kernel, you can select it using the GRUB menu.
If no other operating system is detected, by default, access to the GRUB menu is disabled. Disabling of the GRUB menu will also deny access to the recovery option. To enable the GRUB menu, you first have to edit the GRUB configuration file and comment out or modify the GRUB_HIDDEN_TIMEOUT option. By default this option set to 0, effectively disabling GRUB menu access.
GRUB_HIDDEN_TIMEOUT=0
If you want the GRUB menu displayed each time you start up, just comment out this line using a preceding # character.
#GRUB_HIDDEN_TIMEOUT=0
For the standard server installation and for systems with other operating systems installed, this entry will be commented out already (see Figure 3-3 ). Each time you start up, the GRUB menu will be displayed for a few seconds, allowing you to make selections.
If you only want the menu displayed when you choose to access it, change the numeric value to the number of seconds to wait. Pressing the ESC key in that time period will display the GRUB menu. On systems with other operating systems already installed, this option will be commented out. To enable the option, first remove the preceding # comment character. The following example waits for 10 seconds.
GRUB_HIDDEN_TIMEOUT=10
The GRUB configuration file is /etc/default/grub. You can edit it from the Server command line interface with a text editor like vi, emacs, or nano. The nano editor provides a simple cursor-based interface for easy editing. Use Ctrl-o to write changes and Ctrl-x to exit.
sudo nano /etc/default/grub
Once you have made your changes, you must run the update-grub command to implement the configuration changes.
sudo update-grub
In Figure 3-3 , the GRUB_HIDDEN_TIMEOUT option has been commented out.
v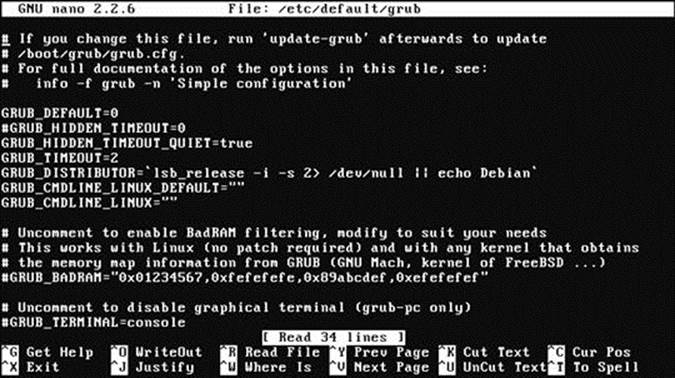
Figure 3-3: Editing the /etc/default/grub file with the nano editor
When enabled, the GRUB menu is displayed for several seconds at startup, before loading the default operating system automatically. Press an arrow key to have GRUB wait until you have made a selection. Your GRUB menu is displayed as shown in Figure 3-4 .
The GRUB menu lists Ubuntu and other operating systems installed on your hard drive such as Windows. Use the arrow keys to move to the entry you want and press ENTER. Press the e key to edit a GRUB entry (see Figure 3-5 ).

Figure 3-4: Ubuntu GRUB menu

Figure 3-5: Editing a GRUB menu item
To change a particular line, use the arrow keys to move to the line. You can use the arrow keys to move along the line. The Backspace key will delete characters, and simply typing will insert characters. All changes are temporary. Permanent changes can only be made by directly editing the GURB configuration files: the /etc/default/grub file and those in the /etc/grub.d directory, and then running the sudo update-grub command.
The Command Line Interface
The Ubuntu server CD, for efficiency reasons, will not install a desktop interface. Instead, you use the traditional UNIX command line interface, accessing your system from a login prompt and typing commands from your keyboard on a command line.
Accessing Ubuntu from the Command Line Interface
For the command line interface, you are initially given a login prompt. The login prompt is preceded by the hostname you gave your system. In this example, the hostname is turtle-server. When you finish using Linux, you first log out. Linux then displays exactly the same login prompt, waiting for you or another user to log in again. This is the equivalent of the login window provided by the LightDM. You can then log in to another account.
Once you log in to an account, you can enter and execute commands. Logging in to your Linux account involves two steps: entering your username and then entering your password. Type the username for your user account. If you make a mistake, you can erase characters with the BACKSPACE key. In the next example, the user enters the username richard and is then prompted to enter the password:
Ubuntu 15.04 my-server tty1
my-server login: richard
Password:
When you type in your password, it does not appear on the screen. This is to protect your password from being seen by others. If you enter either the username or the password incorrectly, the system will respond with the error message “Login incorrect” and will ask for your username again, starting the login process over. You can then reenter your username and password.
Once you enter your username and password correctly, you are logged in to the system. Your command line prompt is displayed, waiting for you to enter a command. Notice the command line prompt is a dollar sign ($). In Ubuntu, your prompt is preceded by the user and the hostname. Both are bounded by a set of brackets.
[richard@turtle-server]$
To end your session, issue the logout or exit command. This returns you to the login prompt, and Linux waits for another user to log in.
[richard@turtle-server]$ logout
To, instead, shut down your system from the command line, you enter the halt command. This command will log you out and shut down the system. It requires administrative access.
$ sudo halt
Using the Command Line Interface
When using the command line interface, you are given a simple prompt at which you type in a command. Even when you are using a desktop like GNOME, you sometimes need to execute commands on a command line. You can do so in a terminal window, which is accessed from the desktop’s dash’s Accessories category as Terminal.
Linux commands make extensive use of options and arguments. Be careful to place your arguments and options in their correct order on the command line. The format for a Linux command is the command name followed by options, and then by arguments, as shown here:
$ command-name options arguments
An option is a one-letter code preceded by one or two hyphens, which modifies the type of action the command takes. Options and arguments may or may not be optional, depending on the command. For example, the ls command can take an option, -s. The ls command displays a listing of files in your directory, and the -s option adds the size of each file in blocks. You enter the command and its option on the command line as follows:
$ ls -s
If you are uncertain what format and options a command uses, you can check the command syntax quickly by displaying its man page. Most commands have a man page. Just enter the man command with the command name as an argument.
An argument is data the command may need to execute its task. In many cases, this is a filename. An argument is entered as a word on the command line that appears after any options. For example, to display the contents of a file, you can use the more command with the file’s name as its argument. The less or more command used with the filename mydata would be entered on the command line as follows:
$ less mydata
The command line is actually a buffer of text you can edit. Before you press ENTER to execute the command, you can edit the command on the command line. The editing capabilities provide a way to correct mistakes you may make when typing a command and its options. The BACKSPACE key lets you erase the character you just typed (the one to the left of the cursor) and the DEL key lets you erase one character to the right of the cursor. With this character-erasing capability, you can BACKSPACE over the entire line if you want, erasing what you entered. CTRL-U erases the whole command line and lets you to start over again at the prompt.
You can use the UP ARROW key to redisplay your last-executed command. You can then re-execute that command, or you can edit it and execute the modified command. This is helpful when you have to repeat certain operations, such as editing the same file. This is also helpful when you have already executed a command you entered incorrectly.
Accessing USB drives from the Command line Interface on a Server.
When you attach a USB drive it is detected automatically, but not mounted. A message will be displayed indicating the device name for the drive. If you have one hard drive, which would be labeled device sda, then the USB device would be sdb. USB drives are normally formatted asvfat file systems. Your file system would be located on the first file system on the USB drive, which would be sdb1 in this example.
To access the USB drive you have to create a directory on which to mount it. Then use the mount command to mount the file system. You only create the directory once. Use the mkdir command to create the directory.
mkdir myusb
To mount a USB drive to that directory, enter a mount command with the vfat type, mounting the /dev/sdb1 device to the myusb directory. You have to have administrative access, so you need to use the sudo command.
sudo mount -t vfat /dev/sdb1 myusb
You can then access the USB drive by accessing the myusb directory.
$ cd myusb
$ ls
Write operations would still have to be run with administrative access.
sudo cp mydata myusb
To write whole directories and their subdirectories, you need to add the -R option to cp.
sudo cp -R mydatadir myusb
Once finished with the USB drive, be sure to first unmount it before removing it.
sudo umount /dev/sdb1
The USB drive's directory cannot be your working directory.
Setting the date and time
You can set the system date and time either manually or by referencing an Internet time server. You could also use your local hardware clock. To set the system time manually, you use the date command. The date command has several options for adjusting both the date and time. You can set the time by month or minutes with the --set option. You can use a sequence of numbers to set a specific time beginning with the month, day, hour, minute, and year. The following sets the date to July 22, 8:15 AM 2008.
sudo date 072208152008
The date command also has formatting options for the day, month, or year.
To use a time server, you use the ntpdate command and the address of the time server.
sudo ntpdate ntp.ubuntu.com
To access the hardware clock, you use the hwclock command. The command itself will display the hardware clock time.
hwclock
The --hctosys option will set the system clock using the hardware clock's time, and the --systohc option resets the hardware clock using the system time. Use the --set and --date options to set the hardware clock to a certain time.
sudo hwclock --systohc
The time zone was set when you installed your system. If you need to change it, you can copy a new time zone from the files in the /usr/share/zoneinfo subdirectories. They are arranged by location and city. Copy the new time zone to the /etc/localtime file.
sudo cp /usr/share/zoneinfo/Europe/London /etc/localtime
Editing files with the command line interface: text editors
If you are using the command line interface only, you will often have to edit configuration files directly to configure your system and servers. You will have to use a command-line based editor to perform your editing tasks. Most command line editors provide a screen-based interface that makes displaying and editing a file fairly simple. Two standard command line editors are installed by default on your system, vi and nano. Several common command line text editors are listed in Table 3-1 . The commands you use to start the editors are also the editor names, in lower case, like vi for the Vi editor, nano, joe, and emacs for Emacs.
The vi editor is the standard editor used on most Linux and UNIX systems. It can be very difficult to use by people accustomed to a desktop editor. The nano editor is much easier to use, featuring a screen-based interface that you can navigate with arrow keys. If you do not already know vi, you may want to use nano instead.
The nano editor is a simple screen-based editor that lets you visually edit your file, using arrow and page keys to move around the file. You use control keys to perform actions. Ctrl-x will exit and prompt you to save the file, Ctrl-o will save it.
|
Editor |
Description |
|
vi |
The Vi editor, difficult to use, considered the standard editor on Linux ad UNIX system, installed by default |
|
nano |
Easy to use screen based editor, installed by default |
|
emacs |
Powerful and complex screen-based editor, though easier to use than Vi, Ubuntu repository |
|
vim |
Easier to use version of vi, Ubuntu repository |
|
joe |
Simple screen based editor similar to Emacs, Universe repository |
|
the |
Screen based editor similar to Emacs, Universe repository |
|
ne |
Simple screen based editor similar to nano, Universe repository |
|
aee |
Simple screen based editor similar to nano, Universe repository |
Table 3-1: Command line interface text editors
Start nano with the nano command. To edit a configuration file you will need administrative access. You would start nano with the sudo command. Figure 3-6 shows the nano editor being used to edit the /etc/network/interfaces file. To edit a configuration file like/etc/network/interfaces you would enter the following.
sudo nano /etc/network/interfaces
More powerful editors you may find helpful are vim and emacs. You will have to first install them. The vim editor provides a slightly easier interface for vi. Emacs provides an interface similar to nano, but much more complex.
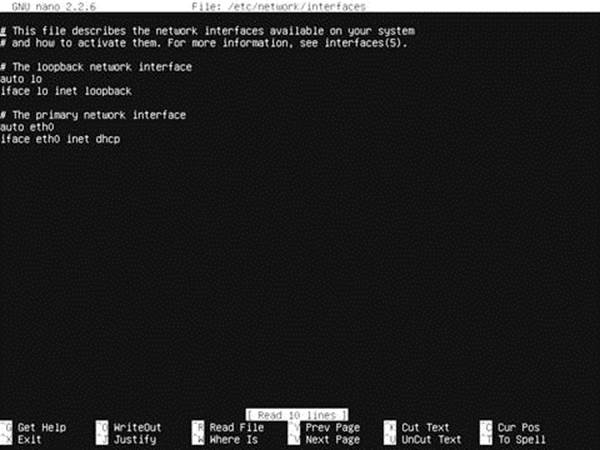
Figure 3-6: Editing with nano
Other simple screen-based editors you may find helpful are joe, aee, ne, and the. All are available on the Universe repository. joe and the are similar to Emacs. ne and aee are more like nano.
Help Resources accessible from the command line
There are several different resources you can access for help on your system. If you have installed a desktop, you can use the Ubuntu help center. The Ubuntu server CD will not install the desktop. You will have access to command line help tools, like the man and info pages. The/usr/share/doc directory will hold any documentation installed for applications. For many servers, like the Bind server, these include helpful examples or Web-based manuals. Often the documentation for applications like servers are included in a separate software package, usually with the suffix -doc in the name, like bind9-doc for the DNS BIND documentation.
A great deal of support documentation is already installed on your system, as well as accessible from online sources.
If you need to ask a question, you can obtain help support at http://answers.launchpad.net and http://askubuntu.com. Here you can submit your question, as well as check answered questions.
Application Documentation
On your system, the /usr/share/doc directory contains documentation files installed by each application. Within each directory, you can usually find HOW-TO, README, and INSTALL documents for that application. Some documentation will include detailed manuals. Many applications have separate documentation packages, usually with the -doc suffix, like bind9-doc. Such documentation may be located under their package name, instead of their application name, like /usr/share/doc/bind9-doc for the DNS server documentation.
The Man Pages
You can also access the Man pages, which are manuals for Linux commands available from the command line interface, using the man command. Enter man with the command on which you want information. The following example asks for information on the ls command:
$ man ls
Pressing the SPACEBAR key advances you to the next page. Pressing the b key moves you back a page. When you finish, press the q key to quit the Man utility and return to the command line. You activate a search by pressing either the slash (/) or question mark (?). The / searches forward; the ? searches backward. When you press the /, a line opens at the bottom of your screen, and you then enter a word to search for. Press ENTER to activate the search. You can repeat the same search by pressing the N key. You needn’t reenter the pattern.
The Info Pages
Online documentation for GNU applications, such as the gcc compiler and the Emacs editor, also exist as info pages. You can also access this documentation by entering the command info. This brings up a special screen listing different GNU applications. The info interface has its own set of commands. You can learn more about it by entering infoinfo at the command prompt. Typing m opens a line at the bottom of the screen where you can enter the first few letters of the application. Pressing ENTER brings up the info file on that application.
Using the Ubuntu Desktop Interface
The Ubuntu desktop will install the complete set of desktop packages, including multimedia and graphics packages you may have no use for on your server. The Ubuntu desktop also installs all the administrative packages you may want to use, like the Synaptic Package Manager, the Ubuntu Software Center, Network Manager, User and Group management, and the Update manager.
You can install the Ubuntu desktop on a server system using the ubuntu-desktop meta-package and the tasksel software management tool. Run tasksel with the sudo command, then use the arrow keys to move to the Ubuntu Desktop entry and press the spacebar. Then tab to the OK button and press ENTER. You could also add ubuntu-desktop as a parameter to tasksel to install the desktop directly, as shown here.
sudo tasksel ubuntu-desktop
You also could use apt-get with the ubuntu-desktop meta-package, as shown here.
sudo apt-get install ubuntu-desktop
Download and setup can take an hour or more. You then logout and restart your system. The LightDM will start up as shown in Figure 3-7 .
The Light Display Manager: LightDM
The graphical login interface displays a login window with a box, listing a menu of usernames. The currently selected user name displays a text box where you enter your password. Upon pressing ENTER, you log in to the selected account and your desktop starts up.
Graphical logins are handled by the Light Display Manager (LightDM). The LightDM manages the login interface along with authenticating a user password and username, and then starts up a selected desktop.
From the LightDM, you can shift to the command line interface with the CTRL-ALT-F1 keys, and then shift back to the LightDM with the CTRL-ALT-F7 keys. The keys F1 through F6 provide different command line terminals, as in CTRL-ALT-F3 for the third command line terminal.
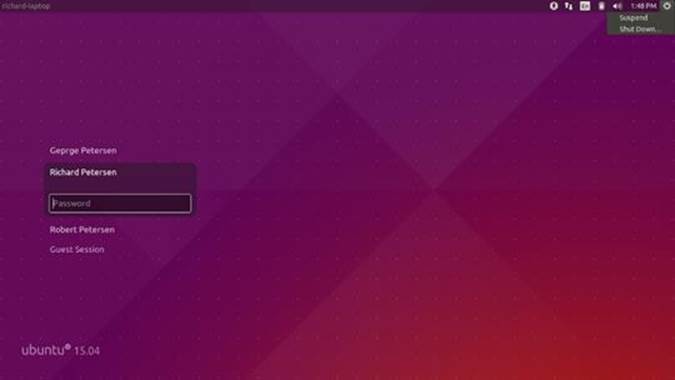
Figure 3-7: LightDM Login Screen with user list
When the LightDM starts up, it shows a listing of users (see Figure 3-7 ). A session (power icon) menu at the top right of the screen shows the entries Suspend, Restart, and Shut Down. The time is displayed next to the Power icon. Passing the mouse over the time expands it to the calendar, showing the date. Next to the time, the sound menu lets you adjust or mute the sound. The network menu lets you configure network access. The keyboard menu lets you choose a keyboard. The accessibility menu displays options such as the on-screen keyboard, high contrast, and the screen reader.
You can use the arrow keys to move through the list of users. For the selected user, you are prompted to enter the user's password (see Figure 3-8 ). Once the password is entered, press ENTER, or click the arrow to the right. The desktop then starts up.
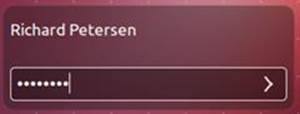
Figure 3-8: LightDM Login Screen: password entry
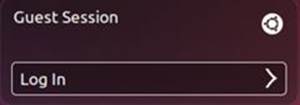
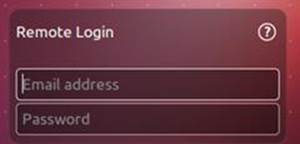
The Guest Session user has no password, just a simple Log In button. The Remote Login user prompts for an email address and password, as shown here.
If you have installed more than one desktop interface, such as Kubuntu, an Ubuntu icon appears to the right of the user name. Click on it to display a menu (see Figure 3-9 ) from which you can select the desktop interface you want to start up. The menu shows all installed possible desktop interfaces. Here you can choose KDE to use the KDE Desktop. The KDE option is not shown unless you have already installed KDE. The interface you selected in your previous login is chosen automatically. Once you have made your choice, click the OK entry, or the back arrow to return to the user listing with the password text box. The icon for the desktop you have chosen is displayed next to your name. Enter your password and press ENTER to start up Ubuntu with the chosen interface.
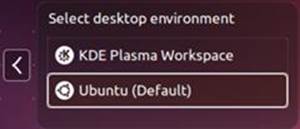
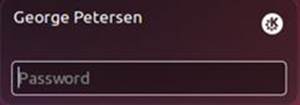
Figure 3-9: LightDM Login screen with desktop choices
If you log out from a user desktop, you will return to the LightDM login screen. To shut down your Ubuntu system, select the Shut Down entry in the session menu (power icon, top right). You can also shut down the system directly from the Ubuntu desktop by clicking the session icon on the top panel to the right. The desktop Session menu is displayed with entries for Lock Screen, Log Out, Restart, Suspend, and Shut Down.
Tip: To restart the system from the login screen using the keyboard, you first have to enter the command line interface. Press Ctrl-Alt-F1 to enter the command line interface, then press Ctrl-Alt-Del to restart the system.
The Session menu and the User Switcher
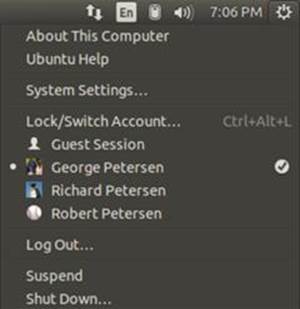
The Ubuntu desktop displays a Session menu on the right side of the top panel as the sprocket power icon (see Figure 3-10 ). You will usually use the Session menu to log out, restart, or shut down your system. The last section of the menu shows entries for Log Out, Suspend, Restart, and Shutdown. The Log Out entry logs out of your session and returns to the Login screen. From the menu, you can also shut down or restart your system directly from the desktop. To restart, choose Restart entry. Use the Lock entry to lock desktop access.
A System Settings entry opens the GNOME 3 System Settings dialog from which you can access desktop administrative tools such as those for users, mouse and touchpad, and Bluetooth. Guest Session allows a guest login.
![]()
Figure 3-10: Desktop Session menu with single user and multiple users configured
The User Switcher is integrated into the Session menu. It is no longer a separate menu, as in previous releases. The User Switcher entries list other users on the system. It lets you switch to another user without having to log out or end your current user session. The user switching operations will keep you logged in while you log in to another user. Your active programs will continue to run in the background.
If your system has more than one user set up, then the Lock entry becomes the "Lock/Switch Account" entry, and lets you log in from the lock screen as a user not currently logged in. Additional users are also listed below the Lock/Switch Account entry (see Figure 3-10 ). Users already logged in will have a check mark next to their names. The current user has a dot preceding its name. Selecting one of these user entries suspends your current session (though applications continue to run), and starts up the login screen with the user list positioned at that user.
If you log out of a user you have switched to (Log Out entry), LightDM login screen will start up letting you log in as a different user. If you choose to switch to a user already logged in, then the login dialog for the lock screen will appear for that user. From the lock screen, you can log in (Unlock), or choose to switch to another user (Switch User). A logged in user’s original session will continue with the same open windows and applications running when the user switched off.
You can easily switch back and forth between logged-in users, with all users retaining their session from where they left off. When you switch off from a user, that user’s running programs will continue in the background.
Guest login
Ubuntu supports a guest account, allowing you to let other users use your system, without having to give them a user account of their own or use someone else's. It is designed for situations like letting someone use your laptop to check a Web site quickly. The Guest login is accessible from the Session menu as the Guest Session entry (see Figure 3-9 ). The guest user is immediately placed on their own desktop as the guest user, while your account remains locked. The guest user name will appear on the User Switcher menu icon on the top panel. Upon logging out from the guest account, the LightDM login screen is displayed, letting you log in to your own account again. The guest user can also use the User Switcher menu to switch to another user, while the guest session remains logged in. This way the guest user's work is retained, while you access another user or your own account. You can then switch back to the guest user. The guest user's open windows and work will be restored.
Lock Screen
You can choose to lock your screen and suspend your system by choosing the Lock entry in the Session menu, or by pressing Ctrl-Alt-L. To start up again, press the spacebar and the Lock Screen dialog appears (see Figure 3-11 ). This is the same as the login screen, with only a single entry for your user name and the password prompt. Enter your password to start up your desktop session again.
From the lock screen, you also can switch to another user by clicking the Session button at the top right of the screen to open a menu with entries for other users. Select one to open the LightDM login screen at that user.
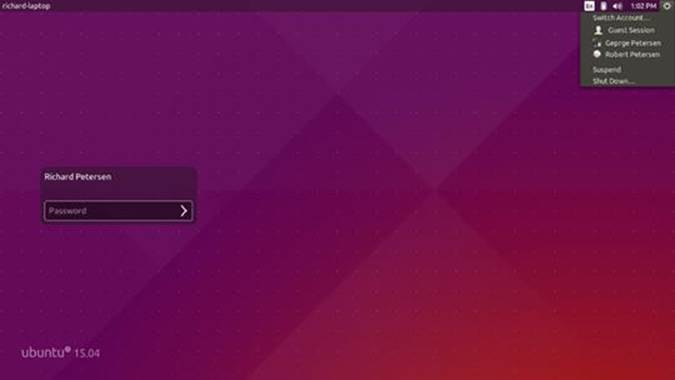
Figure 3-11: Lock Screen
Shut down and Logging out
To shut down from the Ubuntu desktop, click the session icon (power sprockets) on the right side of the top panel to open the Session menu. The Shut down options are displayed at the bottom of the menu: Log out, Suspend, and Shut Down (see Figure 3-10 ). To log out, you can use the Session menu Log Out entry, which returns you to the login screen where you login again as a different user. Restart is an option on the Shut Down dialog.
There are several ways to shut down your system:
Session menu: select one of the shut down options (see Figure 3-10 ).
Press the power button on your computer. This opens a menu with shutdown options (see Figure 3-13 ).
Should your display freeze or become corrupted, one safe way to shut down and restart is to press a command line interface key (like CTRL-ALT-F1) to revert to the command line interface, and then press CTRL-ALT-DEL to restart. You can also log in on the command line interface (terminal) and then enter the sudoshutdown -h now command.
When you select the Shut Down, Suspend, or Log Out entry from the Session menu, the appropriate dialog is displayed. From the Shut Down dialog you can also choose to restart (see Figure 3-12 ). From the Log Out dialog you can also choose to lock.
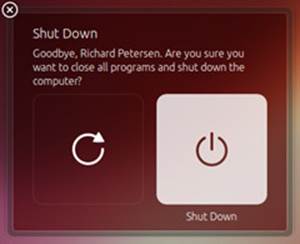
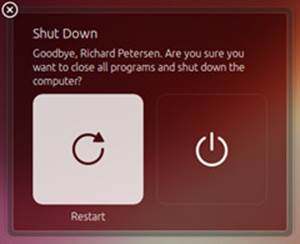
Figure 3-12: Shut Down and Restart dialog
You can also press your computer power button to shut down, restart, or suspend your system, which displays a shut down dialog with menu entries for Lock, Suspend, Restart, and Shut Down (see Figure 3-13 ).
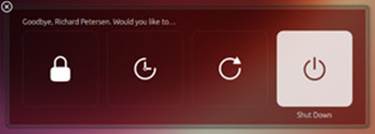
Figure 3-13: Shut down dialog
Use Suspend to stop your system temporarily, using little or no power. Press the space key to redisplay the locked login screen where you can access your account again and continue your session from where you left off.
The Ubuntu Desktop (Unity)
Ubuntu 15.04 supports two major different desktop interfaces: Ubuntu and Kubuntu. The Ubuntu Desktop DVD installs Ubuntu. The Ubuntu desktop uses the Ubuntu Unity interface.
Ubuntu prefers hardware acceleration support provided by the appropriate display driver. If your current graphics driver does not support hardware acceleration, you will be logged in using acceleration simulation with LLVMpipe on OpenGL running on the CPU. This can result in a slower system.
The Kubuntu DVD installs the KDE desktop interface. You can also install KDE on an Ubuntu desktop system using the Ubuntu Software Center KDE meta-packages: kubuntu-desktop or kubuntu-full. Although the GNOME and KDE interfaces appear similar, they are very different desktop interfaces with separate tools for selecting preferences.
Ubuntu uses the Ubuntu Ambiance theme for its interface, with the Ubuntu screen background and menu icons as its default (see Figure 3-11 ). Another Ubuntu theme is available called Radiance. Ambience is a darker color theme, while Radiance uses lighter colors. The Ambiance theme is used in the examples in this book. You can change to the Radiance theme on the Appearance dialog's Look tab's Theme menu. The Appearance tool is accessible from the Customization dash and from System Settings.
|
Key press |
Action |
|
SHIFT |
Move a file or directory, default |
|
CTRL |
Copy a file or directory |
|
CTRL-SHIFT |
Create a link for a file or directory |
|
F2 |
Rename selected file or directory |
|
CTRL-ALT-Arrow (right, left, up, down) |
Move to a different desktop |
|
CTRL-w |
Close current window |
|
ALT-spacebar |
Open window menu for window operations |
|
ALT-F2 |
Open Run command box |
|
ALT-F1 |
Open Applications menu |
|
Ctrl-F |
Find file |
Table 3-2: Window and File Manager Keyboard shortcuts
The Ambience and Radiance themes place the window control buttons (close, maximize, and minimize buttons) on the left side of a window title bar, as shown here. There are three window buttons: an x for close, a dash (-) for minimize, and a square for maximize. The close button is highlighted in orange.
![]()
window buttons ![]()
To move a window, click and drag its title bar. Each window supports Minimize, Maximize, and Close buttons located on the left side of the title bar. Double-clicking the title bar will maximize the window. Many keyboard operations are also similar, as listed in Table 3-2 .
Ubuntu Unity
Logging in to the Ubuntu desktop uses the Ubuntu Unity interface. Unity is designed to make the best use of screen space, placing a launcher on the left side to free up vertical space, making the window menu bar part of the top panel, along with indicator menus for Network Manager, sound volume, messaging, time and date, and the Session menu (see Figure 3-14 ).
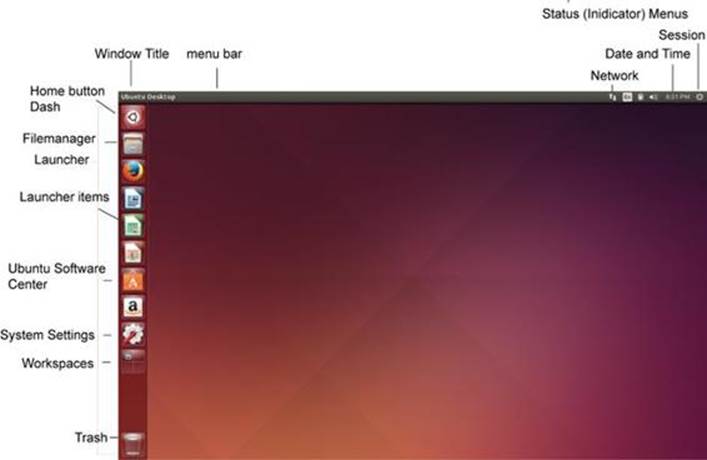
Figure 3-14: Ubuntu Unity interface
The Unity interface features a Launcher for applications and tasks, with icons for the dash home, the home folder, the Firefox browser, LibreOffice applications (Writer, Calc, and Impress), the Ubuntu Software Center, and System Settings. There are also icons for accessing workspaces and the trash. You can use the System Settings Appearance tool to configure changes to your Unity interface, such as Launcher hiding options and the size of the Launcher item icons.
The dash home button at the top of the Launcher (Ubuntu logo) opens the dash, displaying a search box to let you search for applications (see Figure 3-15 ). At the bottom of the dash are icons for different lenses: home, applications, files & folders, videos, music, and pictures. If you configure access to an online account such as Facebook, a social networking lens is also displayed. Click on an icon to open that lens. Clicking on the applications button (books) opens the Applications dash with a filter menu for accessing different application categories, such as Internet, Multimedia, and System. Applications are organized into the most frequently used, those installed, and those available for download, which connects directly to the Ubuntu Software Center.
You can close the dash by clicking the dash close button (x) located at the top left side of the panel, or by pressing the ESC key. You can expand it to full-screen by clicking the square button at the lower right corner of the dash.
The top panel displays the applications menu and the indicator menus. The left side of the top panel is the application menu, showing the menu bar for the currently selected open window.
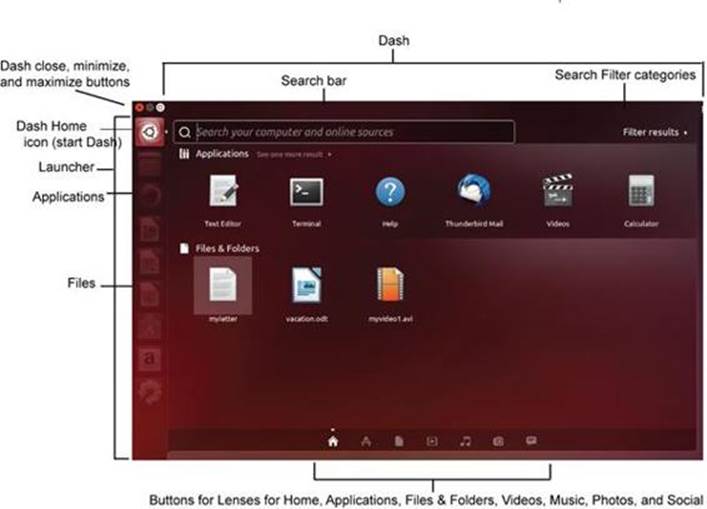

Figure 3-15: Unity Dash
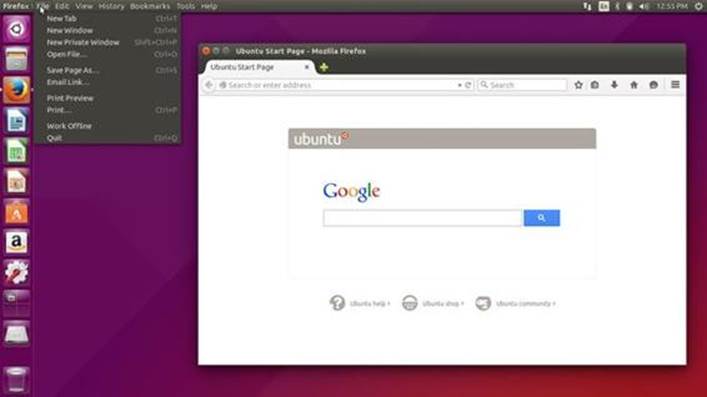
Figure 3-16: Ubuntu Unity interface with selected window and applications menu
The right side of the top panel holds indicator menus for the network manager, sound volume, messaging, Date and time, the User Switcher, and the Session menu (configuration tools and shut down options).
By default, application menus are now displayed in a window's title bar. You can change it to the top bar's menu bar in the Behavior tab of the System Settings Appearance dialog. Then, when you click on a window, its title is displayed on the top panel. When you move your mouse to the left side of the top panel (the menu bar), that window's menu bar is displayed (see Figure 3-16 ).
With Unity, Icons have become much more important for identifying an application. Instead of names on menus, users focus more on the icon in the Launcher and on the Dash. Table 3-3 lists the default launcher item icons.
|
Icon |
Launcher item |
|
|
Dash home |
|
|
Home Folder |
|
|
Firefox Web browser |
|
|
Libre Office Writer |
|
|
Libre Office Calc |
|
|
Libre Office Impress |
|
|
Ubuntu Software Center |
|
|
System Settings |
|
|
Workspace Switcher |
|
|
Trash |
Table 3-3: Ubuntu Unity Launcher default items and icons
Gnome file manager (Nautilus)
Ubuntu (Unity) uses the Nautilus file manager. You can access your home folder from its entry in the Go menu, or by clicking the Home Folder item in the Launcher. A file manager window opens showing your home directory. Your home directory will already have default directories created for commonly used files. These include Pictures, Documents, Music, Videos, and Downloads.
Your office applications will automatically save files to the Documents directory by default. Image and photo applications place image files in the Pictures directory. The Desktop folder will hold all files and directories saved to your desktop. When you download a file, it is placed in the Downloads directory.
The file manager window displays several components, including a toolbar and a sidebar showing devices, file systems, bookmarks, and folders. Use view and tools menus, accessible from button on the right side of the toolbar, to manage files and folders (zoom, sorting, folder creation, and bookmarks). When you open a new folder, the same window is used to display it, and you can use the forward and back arrows to move through previously opened directories. The location bar displays folder buttons showing your current folder and its parent folders. You can click on a parent folder to move to it. Figure 3-17 shows the file manager window. From the Files menu on the desktop applications menu bar (top bar), you can open a new file manager window, access an ftp site, enter path name (location), or manage bookmarks.
The file manager also supports tabs. You can open up several folders in the same file manager window. To open a new tab, select New Tab from the File menu or press Ctrl-t. You can use the entries in the Tabs menu to move from one tab to another, or to rearrange tabs. You also can use the Ctrl-PageUp and Ctrl-PageDown keys to move from one tab to another. Use the Shift-Ctrl-PageUp and Shift-Ctrl-PageDown keys to rearrange the tabs.
The file manager supports full drag-and-drop capabilities using combinations of key presses and mouse clicks. You can drag folders, icons, and applications to the desktop or other file manager windows open to other folders. The move operation is the default drag operation (you can also press the SHIFT key while dragging). To copy files, press the CTRL key and then click-and-drag before releasing the mouse button. To create a link (short cut), hold down both the CTRL and SHIFT keys while dragging the icon to where you want the link to appear, such as the desktop.
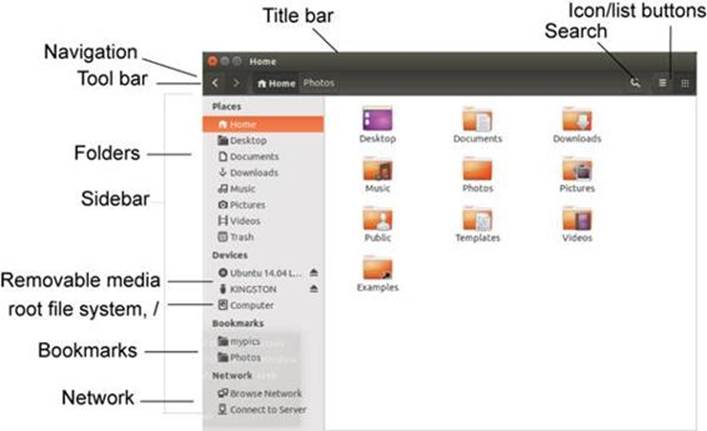

Figure 3-17: File manager for home folder
Note: The K Desktop Environment (KDE) displays a panel at the bottom of the screen that looks very similar to one displayed on the top of the GNOME desktop. The file manager appears slightly different but operates much the same way as the GNOME file manager.
Network Connections from the desktop
Network connections will be set up for you by Network Manager, which will detect your network connections automatically, both wired and wireless. Network Manager provides status information for your connection, and allows you to switch easily from one configured connection to another as needed. For initial configuration, it detects as much information as possible about the new connection.
Wired connections will be started automatically. For wireless connections, when a user logs in, Network Manager selects the connection preferred by that user. The user can choose the wireless connection to use from a menu of detected wireless networks.
The network menu displays a Network Manager icon on the top panel to the right. The Network Manager icon will vary according to the type of connection and your connection status. An Ethernet (wired) connection would display two arrows pointing in opposite directions. A wireless connection will display a staggered wave graph (see Figure 3-18 ). If no connection is active (wireless or wired), an empty wave graph is displayed. When Network Manager makes a wired or wireless connection, it displays a pulsing staggered wave graph. If you have both a wired and wireless connection, and the wired connection is active, the wired connection image (opposite arrows) will be displayed.
![]()
![]()
![]()
Figure 3-18: Network Manager wired, wireless, and disconnected icons.
Network Manager wired connections
For computers connected to a wired network, like an Ethernet connection, Network Manager will automatically detect the network connection and establish a connection. Most networks use DHCP to provide network information like an IP address and network DNS server automatically. With this kind of connection, Network Manager can connect automatically to your network whenever you start your system. The network connection would be labeled something like Wired connection 1, eth0 being the actual Ethernet network device name on your system. When you connect, a connection established message is displayed, as shown here.
![]()
The Network Manager panel icon will display the arrows pointed in opposite directions, as shown here.
![]()
The Network Manager menu displays your wired connection, shown here as Wired connection 1.
To disconnect your wired connection, you can choose the Disconnect entry on this menu. The menu will then show that you are disconnected. The wired connection will be displayed as a connection option. To reconnect later, choose an available wired connection, in this example Wired connection 1.
Network Manager wireless connections
With multiple wireless access points for Internet connections, a system could have several different network connections to choose from, instead of a single-line connection like DSL or cable. This is particularly true for notebook computers that could access different wireless connections at different locations. Instead of manually configuring a new connection each time one is encountered, the Network Manager tool can configure and select a connection to use automatically.
Network Manager will scan for wireless connections, checking for Extended Service Set Identifiers (ESSIDs). If an ESSID identifies a previously used connection, then it is selected. If several are found, then the recently used one is chosen. If only a new connection is available, then Network Manager waits for the user to choose one. A connection is selected only if the user is logged in.
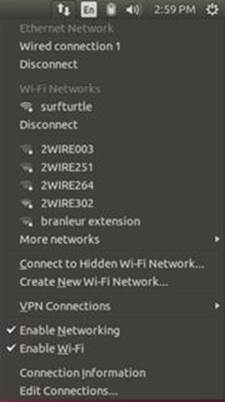
Open the Network Manager menu to see a list of all possible network connections, including all available wireless connections (see Figure 3-19 ). Wireless entries display the name of the wireless network and a wave graph showing the strength of its signal. Computers with both wired and wireless devices show entries for both Wired Network and Wireless Networks. Computers with a wireless device only show entries for Wireless Networks. You can disable the display of wireless networks by selecting Enable Wireless from the menu. The check mark next to this entry is removed, and wireless detection is disabled. To re-activate your wireless connections, click the Enable Wireless entry again. A checkmark is displayed next to the entry and your wireless connections are now listed in the Network Manager menu.
![]()
Figure 3-19: Network Manager connections menu: wired and wireless
Note: If a computer has both wired (Ethernet or dial-up) and wireless connection devices, as most laptops have, then you will see entries for both Wired and Wireless networks.
To connect to a wireless network, find its network entry in the Network Manager menu and click on it. If this the first time you are trying to connect to that network, you will be prompted to enter connection information: the wireless security and passphrase. The type of wireless security used by the network will be detected and displayed for you. If it is incorrect, you can use the drop-down menu to select the correct method. The entries will change depending on the method chosen. The WPA passphrase is one of the more common methods. Figure 3-20 shows the prompt for the passphrase to a wireless network that uses the WPA security method. A checkbox lets you see the passphrase should you need to check that you are entering it correctly. Click Connect to activate the connection.
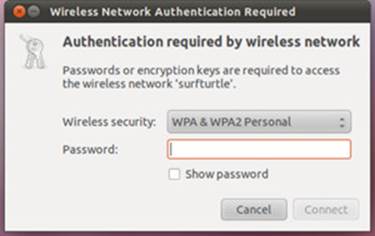
Figure 3-20: Network Manager wireless authentication
Once connected, a message is displayed indicating that the connection has been established, as shown here.
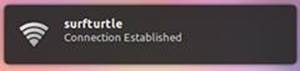
To disconnect from a particular wireless network, on the Network Manager menu click on the Disconnect option under the wireless entry.
When you connect to a wireless network for the first time, a configuration entry will be made for the wireless connection in the Wireless tab of the Network Connections dialog accessible from the System dash.
The very first time you make a wireless connection, you will be prompted to set up a keyring. The keyring holds your wireless connection passphrase, allowing you to connect to a wireless network without having to re-enter the network passphrase each time. You will be asked to create a keyring password for accessing the keyring. This is a one-time operation. Once the keyring is set up, any additional wireless connection passphrases will be added to it. When you first log in and try to connect to a wireless network, you will be prompted for your keyring password.
On KDE, clicking the Network Manager icon on the Plasma panel displays the KDE Network Manager widget. Interfaces are listed on the left, and connections on the right. To see a list of wireless connections, click the WLAN Interface icon on the left. Information about the WLAN interface is displayed with a list of possible wireless connections shown on the right side. Click the one you want to use to open an Add Network Connection dialog displaying the Wireless Security tab, where you can choose the type of security and enter the password. If you have not already set up a KDE Wallet password, you are prompted to do so now. This will allow automatic access to the connection later. You are then connected. You can click the Show Less button to hide all connections except the active one. Click Show More to see all possible connections, allowing you to switch to a different one. The Manage Connections button opens the KDE Network Manager dialog where you can manage all your connections.
Wireless connections can also be hidden. These are wireless connections that do not broadcast an SSID, making them undetectable by an automatic scan. To connect to a hidden wireless network, select "Connect to hidden wireless network" on the Network Manager menu. The Connection drop-down menu will select the New entry. If you have set up any hidden connections previously, they also are listed in the Connection drop-down menu. For a New connection, enter the wireless network name and select a security method. You are prompted in either case for your network keyring password.
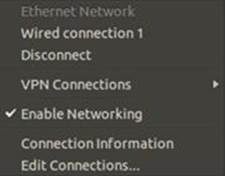
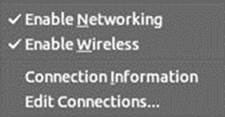
Network Manager options
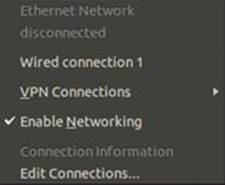
The network menu also provides options for editing your connection, shutting off your connection (Enable Networking and Enable Wireless), disabling all network access (Enable Networking), or viewing information about the connection, as shown here. On Ubuntu (Unity), these entries are included on the Network Manager menu. A computer with both wired and wireless connections will have entries to Enable Networking and Enable Wireless. Selecting Enable Wireless will disconnect only the wireless connections, leaving the wired connection active. The Enable Wireless checkbox will become unchecked and a message will be displayed telling you that your wireless connection is disconnected. Selecting Enable Networking will disable your wired connection, along with any wireless connections. Do this to work offline, without any network access.
A computer with only a wired network device (no wireless) will only show an Enable Networking entry. Selecting it will disconnect you from any network access, allowing you to work offline.
Setting up shared directories on the desktop (nautilus-share)
The GNOME desktop also provides an easy way to set up shared folders. The nautilus-share package (installed by default with the desktop) provides automatic configuration and access using Samba and NFS. You first have to install the Samba and NFS servers.
To share a folder on your Ubuntu system, right-click on it and select Sharing Options. This opens a window where you can allow sharing, and decide whether to permit modifying, adding, or deleting files in the folder (see Figure 3-21 ). You can also use the Share tab on the file's properties dialog. You can allow access to anyone who does not also have an account on your system (guest). Once you have made your selections, click the Create Share button. You can later change the sharing options if you want.
For a user to create a share, they have to have permission to do so. New users are not given this permission by default. On the Users and Group's Advanced dialog's Privileges tab set the "Share files with the local network" option.
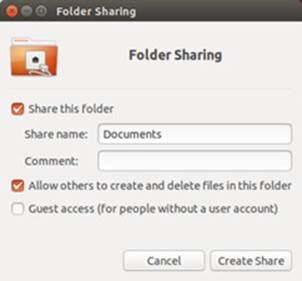
Figure 3-21: Folder Sharing Options
To allow access by other users, permissions on the folder will have to be changed. You are prompted to allow Nautilus to make these changes for you. Just click the "Add the permissions automatically" button (see Figure 3-21 ).
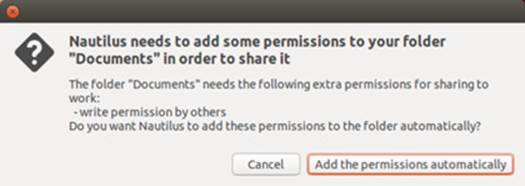
Figure 3-22 Folder Sharing permissions prompt
Note: If you are running a firewall, be sure to configure access for the NFS and Samba services, including browsing support. Otherwise, access to your shared folders by other computers may be blocked.
Folders that are shared display a sharing emblem next to their icon on a file manager window.

To allow other computers to access your folders be sure the sharing servers are installed: Samba for Windows systems and NFS (nfs-kernelserver) for Linux/Unix systems. The servers are configured and run for you automatically. You will not be able to share folders until these servers are installed. If your sharing servers are not installed, you will be prompted to install them the first time you try to share a folder (see Figure 3-23 ). Click the Install service button. The Samba servers will be downloaded and installed. You are then prompted to restart your desktop session. Click the Restart session button. You are now placed in the LightDM login screen. Log in again and then open the folder sharing dialog for the folder you want to share (Sharing Options).
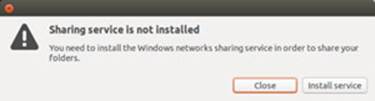
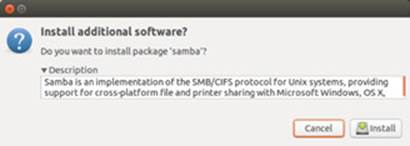
Figure 3-23: Prompt to install sharing service (Samba and NFS)
Note: To share folders (directories) with other Linux systems on your network, you use the NFS service (nfs-kernelserver). For Windows systems you use the Samba service (samba). For Samba configuration you can use system-config-samba.
You can also install the Samba server directly with the Synaptic Package Manager (samba package) and from the Ubuntu Software Center | System | SMB/CIFS file, print, and login server for Unix (samba). Two servers are installed and run using the smbd and nmbd service scripts in the /etc/init.d directory (the samba service script is not longer used). The smbd server is the Samba server, and the nmbd server is the network discovery server.
Should the Samba server fail to start, you can start it manually in a terminal window with the commands:
sudo service nmbd start
sudo service smbd start
You can check the current status with the status option and restart with the restart option:
sudo service nmbd status
sudo service smbd status
When first installed, Samba imports the user accounts already configured on your Ubuntu system. Corresponding Windows users with the same user name and password as an Ubuntu account on your Ubuntu system are connected automatically to the Ubuntu shared folders. Should the Windows user have a different password, that user is prompted on Windows to enter a user name and password. This is an Ubuntu user name and password. In the case of a Windows user with the same user name but different password, the user would enter in the same user name with Ubuntu user password, not the Windows password.
Access is granted to all shares by any user. Should you want to implement restricted access by specific users and passwords, you would have to configure user level access using a Samba configuration tool, such as system-config-samba, as discussed in the next section.
To change the sharing permissions for a folder later, open the folder's Properties window and select the Share tab. When you make a change, a Modify Share button is displayed. Click it to make the changes.
Note: Avahi (installed with the desktop) provides your Ubuntu desktop with immediate access to any shared Windows directories. But, Windows or Linux clients can only access your shared Ubuntu directories through Samba and NFS.
Terminal Window on the desktop
The Terminal window allows you to enter Linux commands on a command line, accessible as Terminal, from the Applications lens | Accessories filter. It also provides you with a shell interface for using shell commands instead of your desktop. The command line is editable, allowing you to use the backspace key to erase characters on the line. Pressing a key will insert that character. You can use the left and right arrow keys to move anywhere on the line, and then press keys to insert characters, or use backspace to delete characters (see Figure 3-24 ). Folders, files, and executable files are color-coded: black for files, blue for folders, green for executable files, and aqua for links. Shared folders are displayed with a green background.
The terminal window will remember the previous commands you entered. Use the up and down arrows to have those commands displayed in turn on the command line. Press the ENTER key to re-execute the currently displayed command. You can even edit a previous command before running it, allowing you to execute a modified version of a previous command. This can be helpful if you need to re-execute a complex command with a different argument, or if you mistyped a complex command and want to correct it without having to re-type the entire command. The terminal window will display all your previous interactions and commands for that session. Use the scrollbar to see any previous commands you ran and their displayed results.
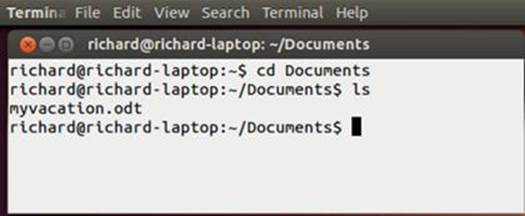

Figure 3-24: Terminal Window
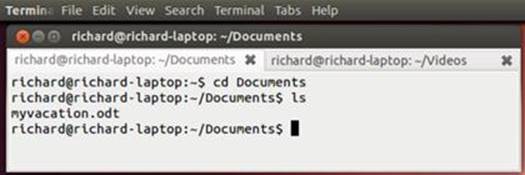
Figure 3-25: Terminal Window with tabs
You can open as many terminal windows as you want, each working in its own shell. Instead of opening a separate window for each new shell, you can open several shells in the same window, using tabs. Select Open Tab from the File menu to open a new tab (Shift-Ctrl-t). Each tab runs a separate shell, letting you enter different commands in each. You can use the Tabs menu to move to different tabs, or just click on its tab to select it. The Tab menu is displayed on the toolbar only if multiple tabs are open. For a single window, the Tab menu is not shown (see Figure 3-24 ).
The terminal window also supports desktop cut/copy and paste operations. You can copy a line from a Web page and paste it to the terminal window (you can use the Paste entry on the Terminal window's Edit menu, or press Shift-Ctrl-v). The command will appear and you can press ENTER to execute the command. This is useful for command line operations displayed on an instructional Web page. Instead of typing in a complex command yourself, just select and copy from the Web page directly, and then paste to the Terminal window. You can also perform any edits on the command, if needed, before executing it.
You can customize terminal windows using profiles. A default profile is set up already. You can create new ones with customized preferences. To customize your terminal window, select Profile Preferences from the Edit menu. This opens a window for setting your profile options with tabs for General, Title and Command, Colors, Background, Scrolling, and Compatibility. The window title lists your current profile. This will be the default profile if you have not set up and selected another profile (see Figure 3-26 ).
To create a new profile, choose New Profile from the File menu. This opens a Profiles window listing current profiles. Click the New button to open the New Profile window where you can enter the profile name, and select any profile to base it on. The default profile will be chosen initially. To edit a profile, select Profiles from the Edit menu to open the Profile window. Choose the one you want to edit, then click the Edit button to open the Editing Profile window for that profile.
On the General tab, you can select the default size of a terminal window in text rows and columns.
The Scrolling tab specifies the number of command lines your terminal history will keep. These are the lines you can move back through and select to re-execute. You can set this to unlimited to keep all the commands. You can also place the scrollbar on the right or left side.
Your terminal window will be set up to use a black background with white text. You can edit the profile to change the background and text colors on the Colors tab. De-select the "Use colors from system theme" entry. This enables the "Built-in schemes" menu from which you can select a "Black on white" display. Other color combinations are also listed, such as "Black on light yellow" and "Green on black." The Custom option lets you choose your own text and background colors. The colors on your open terminal window will change according to your selection, allowing you to see how the color choices will look.
Should you want a transparent or image background, use the Background tab. Initially the background will be set to a solid color (the colors chosen on the Colors tab). To use an image instead, select the Background image entry, then choose an image file. For a transparent background, choose the Transparent background entry and then set the amount of shading (none is completely transparent and maximum shows no transparency).
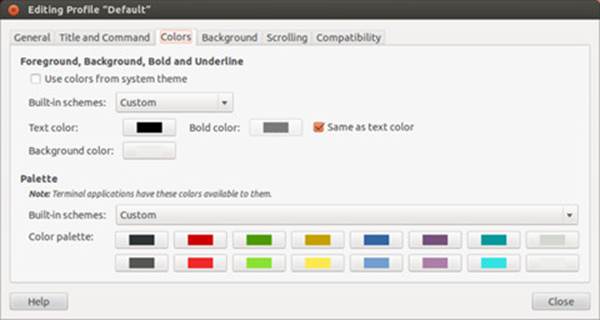
Figure 3-26: Terminal Window Profile configuration
System Settings
You can configure desktop settings and perform most administrative tasks using the administration tools listed in the GNOME System Settings dialog, accessible from the session menu and the Launcher. System Settings organizes tools into Personal, Hardware, and System categories (see Figure 3-27 ).
|
Setting |
Description |
|
|
Appearance |
Desktop Backgrounds, Themes, and Launcher behavior configuration. |
|
|
Assistive Technologies |
Enables features like accessible login and keyboard screen. |
|
|
Backup |
Deja Dup backup tool |
|
|
Bluetooth |
Bluetooth detection and configuration |
|
|
Brightness and Lock |
Set screen brightness and the inactivity time to dim or lock the screen. |
|
|
Color |
Set the color profile for a device |
|
|
Details |
System and hardware information, default applications, and defaults for removable media. |
|
|
Displays |
Change your screen resolution, refresh rate, and screen orientation. |
|
|
Keyboard |
Configure repeat key sensitivity, and keys for special tasks. |
|
|
Language Support |
Language selection |
|
|
Landscape Service |
Canonical's Landscape commercial management service |
|
|
Mouse and Touchpad |
Mouse and touchpad configuration: select hand orientation, speed, and accessibility. |
|
|
Network |
Lets you turn wired and wireless networks on and off. You can access an available wireless network and proxy configuration |
|
|
Online Accounts |
Configure online accounts for use by social networking applications. |
|
|
Power |
Set the power options for laptop inactivity. |
|
|
Printers |
Printer configuration with system-config-printer (see Chapter 10) |
|
|
Sound |
Configure sound effects, output volume, sound device options, input volume, and sound application settings. |
|
|
Time & Date |
Set the time and date, including time zone, along with clock display options. |
|
|
Security & Privacy |
Manage when to require a password, your history logs, and search options. |
|
|
Software & Updates |
Manage repositories and drivers (Additional Drivers tab) |
|
|
Text Entry |
Configure your keyboard: selecting options, models, and typing breaks, accessibility features like slow, bounce, and sticky keys. |
|
|
Universal Access |
Set Universal access settings for the screen reader, text size, contrast, visual alerts, screen keyboard, and keypad based mouse. |
|
|
User Accounts |
Manage users, a GNOME 3 tool |
|
|
Wacom Graphics tablet |
Wacom graphics tablet configuration |
|
Table 3-4: Desktop System Settings
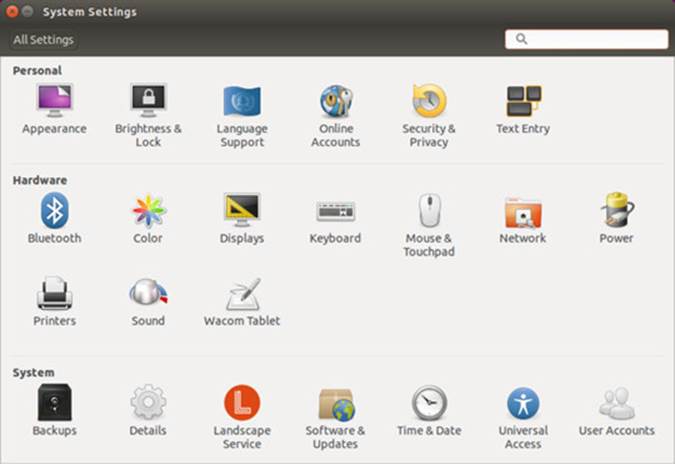

Figure 3-27: System Settings dialog
Many invoke the Ubuntu supported system tools available from previous releases such as Sound (PulseAudio) and Printing (system-config-printer). Others use the new GNOME 3 configuration and administrative tools such as Brightness, User Accounts, and Power. The Color tool lets you choose color schemes for different devices such as scanners, cameras, and printers. System Settings tools will open with an "All Settings" button at the top, which you can click to return to the System Settings dialog. Table 3-4 lists the System Settings tools.
Ubuntu Help Center on the desktop
A great deal of support documentation is already installed on your system, and is accessible from online sources. The GNOME and KDE desktops feature Help systems that use a browser-like interface to display help files. The Help browsers support the Ubuntu Help Center, which provides Ubuntu specific help.
If you need to ask a question, you can choose Help | Get online help to access the Ubuntu help support at https://answers.launchpad.net and at http://askubuntu.com. Here you can submit your question, and check answered questions about Ubuntu.
Ubuntu Desktop Guide
To start the Ubuntu Desktop Guide, choose "Ubuntu Help" from the Session menu. The Guide displays several links covering Ubuntu topics (see Figure 3-28 ). Unity topics covered include the Launcher, the Dash, indicator menus, window management, and workspace access.You can use the right and left arrows to move through the previous documentation you displayed. You can also search for topics. The search box displays the name of the current document. Clicking on the search bar lets you enter a search term. Press ENTER to display the results. You can also add bookmarks for documents and search results by clicking the yellow start button at the right of the search box (or choosing "Add Bookmark" from the Bookmarks menu).
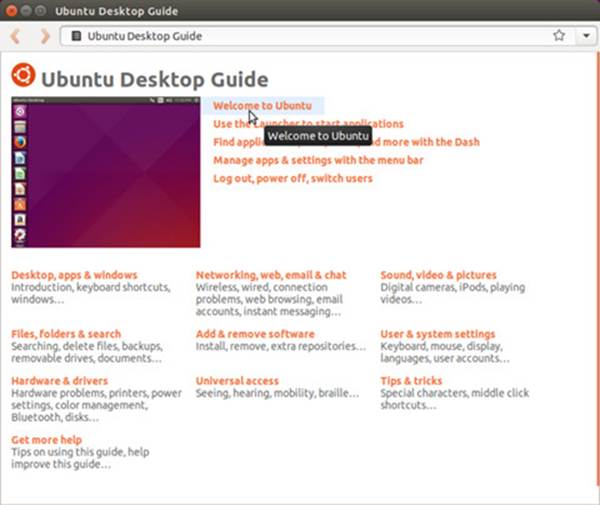

Figure 3-28: Ubuntu Desktop Guide
These pages are organized more like frequently asked questions documents with more detailed headings, designed to provide a clearer understanding of what the document is about (see Figure 3-29 ). The Sound, video, and pictures link opens a page with entries like "Why won't DVDs play" and "My new iPod won't work."

Figure 3-29: Ubuntu Desktop Guide topics
Help documents will include helpful links such as an install link that opens the Ubuntu Software Center showing the software you have to install, or a link to a user guide for a relevant application (see Figure 3-30 ). At the bottom of most pages, a More Information section will have links for more detailed information.
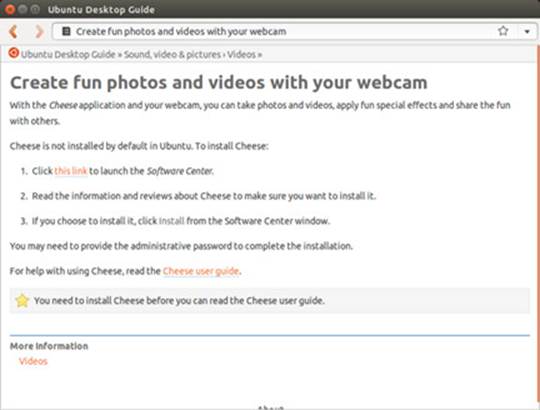
Figure 3-30: Ubuntu Desktop Guide page
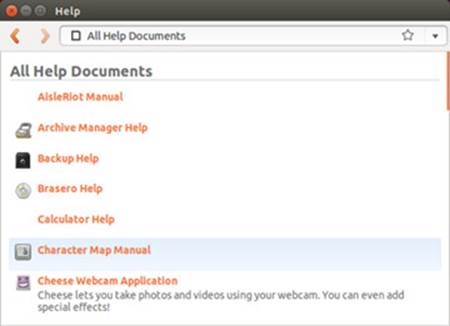
Figure 3-31: Ubuntu Help, All Documents
If you want to see the available application help documents, choose All Documents from the Help application's Go menu. You will see application manuals installed applications such as the Shotwell, Synaptic package manager, Totem movie player, the Ubuntu Software Center, and Rhythmbox (see Figure 3-31 ).