Pro ASP.NET SignalR: Real-Time Communication in .NET with SignalR 2.1 (2014)
Chapter 6. An Overview of the Clients that Support SignalR
This chapter discusses clients that are supported in SignalR and the details that separate individual clients. First, we show clients’ configuration and how they can be adjusted for your application. The next section shows the communication that occurs between the client and server, which is followed by connection lifetime events that occur that can affect the client’s connection. Finally, we go over a sample server and individual clients with details about clients’ differences.
For you to get a good understanding of the clients, we discuss the supported clients and their interactions with the server. The clients are all very similar in terms of configuration, communication, and connection lifetime events. To demonstrate the interaction with the server, we furnish an example server code that can be used with all the clients of the particular type of persistent connection or hub.
Clients Supported by SignalR
To understand which clients are supported by SignalR, it is best to define what supported means. In this chapter, we define supported clients as client binaries that are compiled to run with the .NET framework or in a modern-day web browser. With these supported binaries, the following clients are available:
· JavaScript
· Basic .NET 4.0+ applications (such as Win Forms, WPF, and Console applications)
· Silverlight 5
· Windows Store
· Windows Phone 8
There are also nonsupported native clients such as the iPhone and Android that require native SDKs or third-party tools (covered in Chapter 7).
Client Configuration
To get the most from the client, options are available to customize the connection and transport for persistent connections and hubs. The configuration changes are all done to the connection. The options available to configure on the connection are query string parameters, HTTP headers, cookies, certificates, and transports. All the configuration options must be configured before the connection is started. These configuration changes are applied to every request.
Setting Query String Values for a Request
All SignalR clients allow extra query string parameters to be added, and the extra query string parameters will be appended to every communication request sent to the server. A JavaScript example of adding a query string value to a connection is shown in Listing 6-1, in which the ABTestkey with a value of V1 is added.
Listing 6-1. JavaScript Client Configuration to Set Query String Parameters
var connection = $.hubConnection();
connection.qs = {'ABTest' : 'V1'};
Another example of a .NET client that adds a query string parameter is shown in Listing 6-2.
Listing 6-2. Another SignalR Client Configuration to Set Query String Parameters
Dictionary<string, string> queryString = new Dictionary<string, string>();
queryString["ABTest"] = "V1";
var connection = new Microsoft.AspNet.SignalR.Client.HubConnection("http://localhost", queryString);
For the JavaScript client, query string parameters are set in the qs property of the connection. In other SignalR clients, the query string parameters are set in the connection constructor.
Adding HTTP Headers
Besides the JavaScript client, all clients support adding HTTP headers that are added to the connection object. In Listing 6-3, a header named X-SpecialHeader is added to the request header collection with the value of MyValue. Like query string parameters, the headers are passed on every request sent to the server.
Listing 6-3. Adding HTTP Headers to a Connection
var connection = new Microsoft.AspNet.SignalR.Client.HubConnection("http://localhost");
connection.Headers.Add(“X-SpecialHeader”, “MyValue”);Adding Cookies to the Request
Cookies are supported by all the clients. For the JavaScript client, cookies are added using the standard JavaScript functions. For other clients, the cookies are added to a CookieContainer to the CookieContainer property of the connection.
The example shown in Listing 6-4 adds a new CookieContainer to the connection. Next, a new cookie is added to the CookieContainer with the name, value, path, and domain specified in the constructor. As with headers and query string parameters, cookies are sent on every request.
Listing 6-4. Example of Setting Cookies on .NET Clients
var connection = new Microsoft.AspNet.SignalR.Client.HubConnection("http://localhost");
connection.CookieContainer = new System.Net.CookieContainer();
connection.CookieContainer.Add(new System.Net.Cookie(“TestCookie”, “CookieValue”,“/”,“localhost”));Setting Client Certificates
SignalR enables you to configure client certificates to connect to secure servers. The certificate configuration for JavaScript and Silverlight 5 clients is done by the web browser that is hosting the sites. For other clients, it is configured on the connection by calling theAddClientCertificate method.
Listing 6-5 shows a new certificate of type X509Certificate2 being created from a file called Certificate.cer and added to the connection using the AddClientCertificate method.
Listing 6-5. Adding Client Certificate to SignalR Connection
var connection = new Microsoft.AspNet.SignalR.Client.HubConnection("http://localhost");
connection.AddClientCertificate(new System.Security.Cryptography.X509Certificates.X509Certificate2("Certificate.cer"));
![]() Note The X509Certificate2 class was added to the .NET 2.0+ Framework to provide extended functionality to the X509Certificate class.
Note The X509Certificate2 class was added to the .NET 2.0+ Framework to provide extended functionality to the X509Certificate class.
Customizing the Transport
SignalR provides the functionality to select the priority and types of transports to use for your connection. JavaScript client configuration is different from all the other clients. This configuration option can be used if you have determined the transport(s) that work best for your application. It can also be used to restrict your application to use only certain transports that the application can adequately support. If a transport cannot be successfully negotiated, an error is raised and the connection fails.
The JavaScript client allows four types of transports: webSockets, foreverFrame, serverSendEvents, and longPolling. By default, the connection tries to find the first transport that both the client and server support. This list of transports can be overridden by passing the supported transports to the Start method of the connection. The override supports a single transport, as shown in Listing 6-6.
Listing 6-6. JavaScript Client Configuration for Single Transport
var connection = $.hubConnection();
//excluded connection logic
connection.start({ transport: 'webSockets' });
The override also supports an array of transports, as shown in Listing 6-7.
Listing 6-7. JavaScript Client Configuration with Multiple Transports for Fail-over
var connection = $.hubConnection();
//excluded connection logic
connection.start({ transport: ['webSockets','foreverFrame'] });
Other SignalR clients do not have support for the foreverFrame transport, but have the AutoTransport transport. If no transport is configured, the AutoTransport transport is the default. AutoTransport tries to negotiate the best transport out of the available transports. The configuration allows only one transport to be specified in the Start method of the connection. If the client does not support .NET 4.5, the webSockets transport is not available even if the server can support web sockets. Listing 6-8 is an example of how to start a connection usingWebSocketTransport to use only web sockets for that connection.
Listing 6-8. .NET 4.5 Configuration of a Web Socket–Only Transport Connection
var connection = new Microsoft.AspNet.SignalR.Client.HubConnection("http://localhost");
//excluded connection logic
await connection.Start(new Microsoft.AspNet.SignalR.Client.Transports.WebSocketTransport());
Although transports do not usually need to be configured, they have limitations. To configure the clients with different transports or connection logic, a custom class is required. These types of customizations are covered in Chapter 7.
Client and Server Communication
Once a persistent connection or hub has been connected, the communication between client and server is made through connection-specific methods or proxy-generated methods. The persistent connection communication is through a Send method and a Receive event. The hub communication is through proxy methods that call methods on the server or the client.
Persistent Connection Communication
The persistent connection provides a relatively simple format for communication. To send information to the server, the client calls the Send method on the connection. To receive data from the server, the client subscribes to the Receive event. (Examples of sending and subscribing for various clients is available later in the chapter in the respective client section.)
Server Methods Called by the Hub Client
Clients can invoke server methods that are defined in the class that derives from the Hub class. Once a method has been defined on the server, the client calls the method by calling the invoke method on the HubProxy. The invoke method requires the method name and can send zero or more parameters to that method. Each client has an example in the respective client section.
Hub Client Methods Called by the Server
The server can call methods on the client by calling dynamic methods exposed by the HubContext and the client subscribing to the event in the HubProxy. The method can be called with zero or more parameters. Each client has a slightly different way of handling these events, so examples are provided in the respective client section.
Client-side Logging
During SignalR application development, things do not always work as expected. All the clients support some form of logging on the client to provide diagnostic information that should be used only in a non-production environment. For the JavaScript client, this logging is to the web browser console. The other clients log through the TraceWriter.
JavaScript client logging is enabled by setting the logging property on the connection to true, as shown in Listing 6-9. The trace output is then visible in the web browser console.
Listing 6-9. Example of Setting Logging in the JavaScript Client
var connection = $.hubConnection();
connection.logging = true;
.NET clients have more options when it comes to trace logging. There are multiple levels of tracing: All, Events, Messages, None, and StateChanges. Even the output location of the trace is configurable.
In Listing 6-10, we set the trace level of the client to All, which is all the traceable events. Next, the output of the logging is set to the console window output.
Listing 6-10. Example of Setting Logging in.NET Clients
var connection = new Microsoft.AspNet.SignalR.Client.HubConnection("http://localhost");
connection.TraceLevel = Microsoft.AspNet.SignalR.Client.TraceLevels.All;
connection.TraceWriter = Console.Out;Connection Lifetime Events
Connection lifetime events are raised during events that affect the state of a connection. Eight possible events can be raised by the clients; two are specific to the JavaScript client, one is specific to the other clients, and the rest of the events are raised by all clients.
The Starting and Disconnected events are specifically raised in the JavaScript client. The Starting event is raised once a successful connection has been negotiated, and the Disconnected event is raised when the connection has been disconnected.
The event specific to the other clients is the Closed event. This event is synonymous with the Disconnected event and is raised when the connection has been disconnected.
The rest of the events are raised by all clients: Received, ConnectionSlow, Reconnecting, Reconnected, and StateChanged. The Received event is raised when data is received from the server. The ConnectionSlow event is raised if the keep-alive signal has not arrived from the server within two-thirds of the connection timeout since the last keep-alive signal was received. The Reconnecting event is raised when the connection attempts to reconnect to the server. The next event is Reconnected, which occurs after a connection has successfully reconnected. The last event is StateChanged, which occurs when the connection has changed state.
Server Example for Clients
The persistent connection and hub server examples are provided for the client examples later in the chapter. These sample server examples should work with all clients of the respective types.
Persistent Connection Server Example
We now reuse the persistent connection server example from Chapter 2. It is a brief overview, so please revisit Chapter 2 if more detail is needed.
1. Create a new ASP.NET web application, as shown in Figure 6-1.
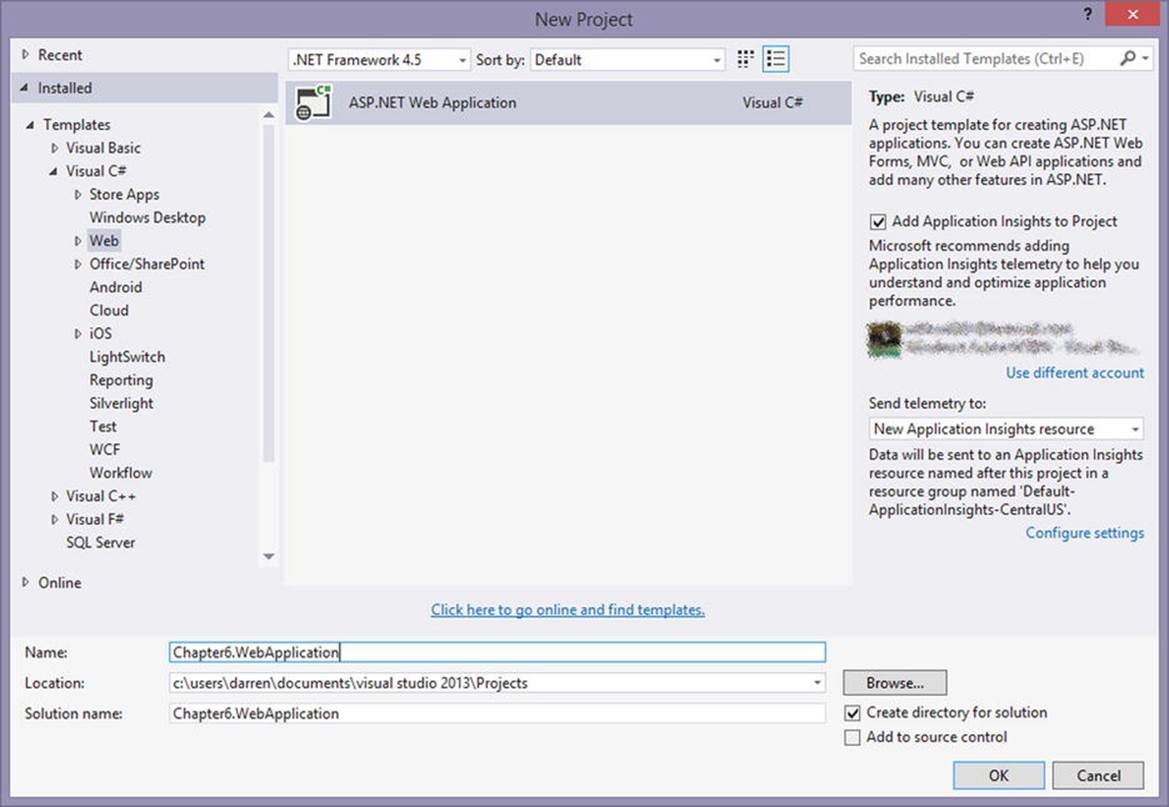
Figure 6-1. Web application selection window
2. Choose the MVC template, as shown in Figure 6-2.
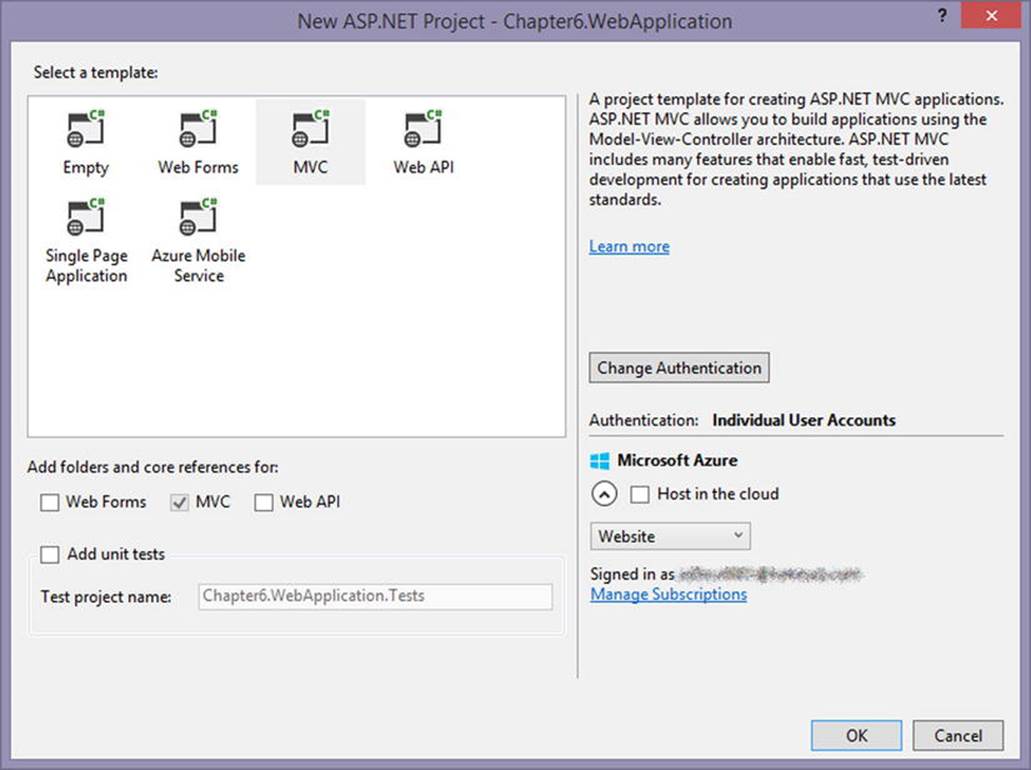
Figure 6-2. New ASP.NET Project dialog box
3. Run the following command in the package explorer window to install the necessary SignalR files: Install-Package Microsoft.AspNet.SignalR.
4. Open the Startup.cs file that was added by the NuGet command.
5. Add the code in Listing 6-11 to the Startup class in the Configuration method to register the PersistentConnection.
Listing 6-11. .NET C# PersistentConnection Registration in Configuration Code
app.MapSignalR<SamplePersistentConnection>("/SamplePC");
6. Create a PersistentConnections folder.
7. Add a new class to the PersistentConnections folder called SamplePersistentConnection.
8. Update the class to look like Listing 6-12.
Listing 6-12. .NET C# PersistentConnection Sample Code
public class SamplePersistentConnection : PersistentConnection
{
protected override System.Threading.Tasks.Task OnReceived(IRequest request, string connectionId, string data)
{
return Connection.Broadcast(data);
}
}
9. Add Microsoft.AspNet.SignalR; to the class so that the Broadcast extension method is available.
We now have a functioning persistent connection example server that works with all the persistent connection client examples in the chapter.
Hub Server Example
In this section, we create a server with hub endpoints to be accessible by all the hub clients. After we complete the following steps, we’ll have a working server with hub endpoints.
1. Create a new ASP.NET web application (refer to Figure 6-1).
2. Choose the MVC template (refer to Figure 6-2).
3. Run the following command in the package explorer window to install the necessary SignalR files: Install-Package Microsoft.AspNet.SignalR.
4. Open the Startup.cs file that was added by the NuGet command.
5. Add app.MapSignalR(); to the class, as shown in Listing 6-13.
Listing 6-13. Startup Class that Configures the SignalR Server
[assembly: OwinStartupAttribute(typeof(Chapter6.HubServer.Startup))]
namespace Chapter6.HubServer
{
public partial class Startup
{
public void Configuration(IAppBuilder app)
{
ConfigureAuth(app);
app.MapSignalR();
}
}
}
6. Create a new folder for the hubs.
7. Create the three classes listed in Listing 6-14.
Listing 6-14. Three Classes Needed to Create the Hub Server Example
public class AuctionHub : Microsoft.AspNet.SignalR.Hub
{
public AuctionHub()
{
BidManager.Start();
}
public override System.Threading.Tasks.Task OnConnected()
{
Clients.Caller.CloseBid();
Clients.All.UpdateBid(BidManager.CurrentBid);
return base.OnConnected();
}
public void MakeCurrentBid()
{
BidManager.CurrentBid.BidPrice += 1;
BidManager.CurrentBid.ConnectionId = this.Context.ConnectionId;
Clients.All.UpdateBid(BidManager.CurrentBid);
}
public void MakeBid(double bid)
{
if (bid < BidManager.CurrentBid.BidPrice)
{
return;
}
BidManager.CurrentBid.BidPrice = bid;
BidManager.CurrentBid.ConnectionId = this.Context.ConnectionId;
Clients.All.UpdateBid(BidManager.CurrentBid);
}
}
public static class BidManager
{
static System.Threading.Timer _timer = new System.Threading.Timer(BidInterval, null, 0, 2000);
public static Bid CurrentBid { get; set; }
public static void Start()
{
//Empty class to make sure Static class is started
}
static void BidInterval(object o)
{
var clients = Microsoft.AspNet.SignalR.GlobalHost.ConnectionManager.GetHubContext<AuctionHub>().Clients;
if (BidManager.CurrentBid == null || BidManager.CurrentBid.TimeLeft <= 0)
{
BidManager.SetBid();
}
BidManager.CurrentBid.TimeLeft -= 2;
if (BidManager.CurrentBid.TimeLeft <= 0)
{
clients.AllExcept(CurrentBid.ConnectionId).CloseBid();
if (!string.IsNullOrWhiteSpace(CurrentBid.ConnectionId))
clients.Client(CurrentBid.ConnectionId).CloseBidWin(CurrentBid);
}
clients.All.UpdateBid(BidManager.CurrentBid);
}
static List<Bid> _items = new List<Bid>(){
new Bid(){Name="Bike", Description="10 Speed", TimeLeft = 30, BidPrice = 120.0},
new Bid(){Name="Car", Description="Sports Car", TimeLeft = 30, BidPrice = 1500.0},
new Bid(){Name="TV", Description="Big screen TV", TimeLeft = 30, BidPrice = 330.0},
new Bid(){Name="Boat", Description="Party Boat", TimeLeft = 30, BidPrice = 1200.0}
};
public static void SetBid()
{
Random rnd = new Random();
CurrentBid = (Bid)_items[rnd.Next(0, _items.Count - 1)].Clone();
}
}
public class Bid
{
public Bid Clone()
{
return (Bid)MemberwiseClone();
}
public string Name { get; set; }
public string Description { get; set; }
public double BidPrice { get; set; }
public int TimeLeft { get; set; }
public string ConnectionId { get; set; }
}
With those steps completed, we now have a fully functional server with a hub endpoint that exposes the basic hub functionality. This example server has the MakeCurrentBid and MakeBid server methods that take zero and one parameter, respectively. The server is also wired up to call the CloseBid, CloseBidWin, and UpdateBid client methods on the client that take zero, one simple type parameter, and one complex type parameter, respectively.
![]() Note For the Silverlight example to work, a crossdomain.xml file is needed on the server that contains the content of Listing 6-15.
Note For the Silverlight example to work, a crossdomain.xml file is needed on the server that contains the content of Listing 6-15.
Listing 6-15. Contents of crossdomain.xml File
<?xml version="1.0" ?>
<cross-domain-policy>
<allow-access-from domain="*" />
</cross-domain-policy>
Now that we have created servers to handle persistent connection and hub requests, we can create the clients that consume them.
HTML and JavaScript Clients
SignalR provides support for JavaScript clients using JQuery to provide persistent connection and hub clients to web browsers. These clients function a little differently from the rest of the client types provided by SignalR. This section discusses setting up the JavaScript client examples.
Persistent Connection Client
The persistent connection example in this section shows a simple chat application. It connects to the persistent connection server example created earlier in the chapter.
JavaScript Persistent Connection Example
To create this example, it is easiest to demonstrate using the persistent connection server example as the base. So we complete the following steps on that example:
1. Add a new HTML page to the root of the project.
2. Update the head section to reflect Listing 6-16.
Listing 6-16. Javascript Example Client Script Code
<script src="/scripts/jquery-1.8.2.js" type="text/javascript"></script>
<script src="/scripts/jquery.signalR-2.0.0-rc1.js" type="text/javascript"></script>
<script>
$(function () {
var connection = $.connection('http://localhost:####/samplepc');
connection.received(function (data) {
$('#messages').append('<li>' + data + '</li>');
});
connection.start().done(function()
{
$("#btnSend").click(function () {
connection.send($('#name').val() + ': ' + $('#message').val());
});
})
});
</script>
3. Update the version numbers of the JQuery and JQuery.SignalR scripts to the appropriate version that is in the Scripts folder.
4. Update #### in the connection to the port in which the example server is running.
5. Update the HTML section to reflect Listing 6-17.
Listing 6-17. Javascript Example Client HTML
<ul id="messages" style="border: 1px solid black; height: 250px; width: 450px; overflow:scroll; list-style:none;"></ul>
<label>Name: </label>
<input id="name" value="User A" />
<label>Message: </label>
<input id="message" />
<button id="btnSend">Send</button>
Once we start the server and navigate to the HTML page that we created in multiple tabs or browsers, we can test the communication using a persistent connection (see Figure 6-3).
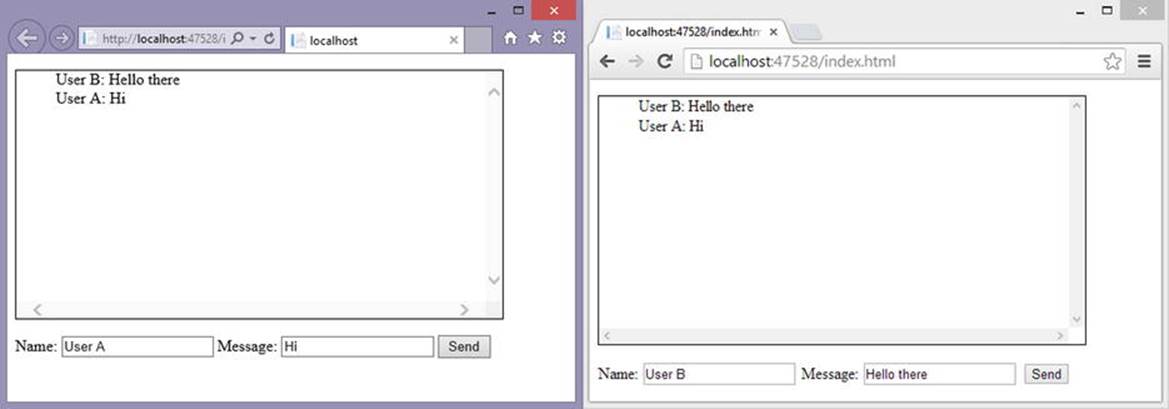
Figure 6-3. Communication between two JavaScript clients over a persistent connection
The next step is to create the JavaScript hub client example.
Hub Client
In this section, we go over an example of setting up a JavaScript–based hub client. This example demonstrates an auction by using the hub server example from earlier in the chapter.
Server Methods Called by the Client
The server methods called from the JavaScript client can contain zero or more parameters. Listings 6-18 and 6-19 show the syntax of calling the invoke method with zero or more parameters.
Listing 6-18. JavaScript Example of Calling a Server Method with No Parameters
var hubProxy = connection.createHubProxy('SampleHub');
hubProxy.invoke('SampleMethod');
Listing 6-19. JavaScript Example of Calling a Server Method with Multiple Parameters and a Complex Type
var hubProxy = connection.createHubProxy('SampleHub');
var complexType = {Name: 'Sam', Age: 23};
hubProxy.invoke('SampleMethod', complexType, 5);
Client Methods Called by the Server
The server can also “call” methods on a client by the JavaScript client subscribing to events on the HubProxy. Listings 6-20 and 6-21 show calling the on method with zero or more parameters.
Listing 6-20. JavaScript Example of Calling Client Methods from the Server with No Parameters
var hubProxy = connection.createHubProxy('SampleHub');
hubProxy.on('ClientMethod',
function () {
//perform some action on the client
});
Listing 6-21. JavaScript Example of Calling Client Methods from the Server with Multiple Parameters
var hubProxy = connection.createHubProxy('SampleHub');
hubProxy.on('ClientMethod',
function (param, anotherParam) {
//perform some action on the client
//param and anotherParam would be the two parameters passed in from the server
});
Now that you know the syntax to call methods on the server and client, you can see them in use in the next example.
JavaScript Hub Example
This example creates an auction client using the hub server example to demonstrate the calls from the server to the client and vice versa. This example can be easily added to the server example to show the functionality with the following steps:
1. Add a new HTML page to the root of the project.
2. Update the head section to reflect Listing 6-22.
Listing 6-22. Javascript Example Client Script Code
<script src="/scripts/jquery-1.8.2.min.js"></script>
<script src="/scripts/jquery.signalr-2.0.0-rc1.min.js"></script>
<script src="/signalr/hubs"></script>
<script>
$(document).ready(function () {
var connection = $.hubConnection();
var hubProxy = connection.createHubProxy('AuctionHub');
hubProxy.on('CloseBid', function () {
UpdateButtons(false);
})
hubProxy.on('CloseBidWin', function (data) {
UpdateButtons(false);
UpdateBid(data, 1);
})
hubProxy.on('UpdateBid', function (data) {
UpdateBid(data, 0);
UpdateButtons(true);
})
function UpdateBid(bid, updateObject)
{
if(bid)
{
$('#lblName').text(bid.Name);
$('#lblDescr').text(bid.Description);
$('#lblBid').text(bid.BidPrice);
$('#lblTime').text(bid.TimeLeft);
if(updateObject > 0)
{
$('#lstWins').append('<li>' + bid.Name + ' at ' + bid.BidPrice + '</li>')
}
}
}
function UpdateButtons(state) {
$('#btnCurrentBid').enabled = state;
$('#btnMakeBid').enabled = state;
}
connection.start().done(function () {
$('#btnCurrentBid').click(function () { hubProxy.invoke('MakeCurrentBid'); });
$('#btnMakeBid').click(function () { hubProxy.invoke('MakeBid', $('#txtBid').val()); });
});
});
</script>
3. Update the version numbers of the JQuery and JQuery.SignalR scripts to the appropriate version in the Scripts folder.
4. Update the HTML section to reflect Listing 6-23.
Listing 6-23. Javascript Example Client HTML
<label id="lblName"></label>
<label id="lblBid"></label><br />
<label id="lblDescr"></label>
<label>Time Left:</label>
<label id="lblTime"></label><br />
<button id="btnCurrentBid">Current Bid</button>
<button id="btnMakeBid">Make Bid</button>
<input type="text" id="txtBid" />
<ul id="lstWins" style="list-style: none;"></ul>
Now when we use the browser and go to the index page, we have an auction client (see Figure 6-4).
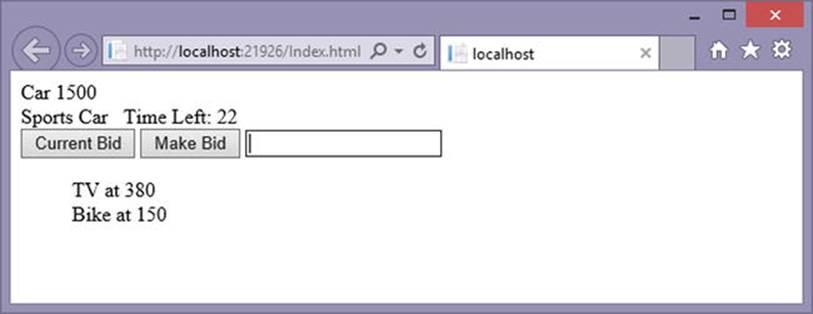
Figure 6-4. Hub client example after two successful bid wins
Other clients are very similar, but have small differences that we will show through examples—starting with basic .NET client.
.NET Clients
.NET clients are the core .NET 4.0+ clients such as WPF, Win Forms, and Console applications. Because the Silverlight, Windows Store, and Windows Phone 8 clients use different API wrappers around the .NET functionality, they are described later in their own sections.
Persistent Connection Client
The persistent connection client is fairly straightforward, so we re-create the persistent connection example of a simple chat room as a Win Forms application.
.NET Persistent Connection Example
For .NET SignalR Win Forms clients, you can use either the .NET 4.0 or 4.5 framework. To create the client sample, the following steps should be taken:
1. Create a new Windows Forms project (see Figure 6-5).
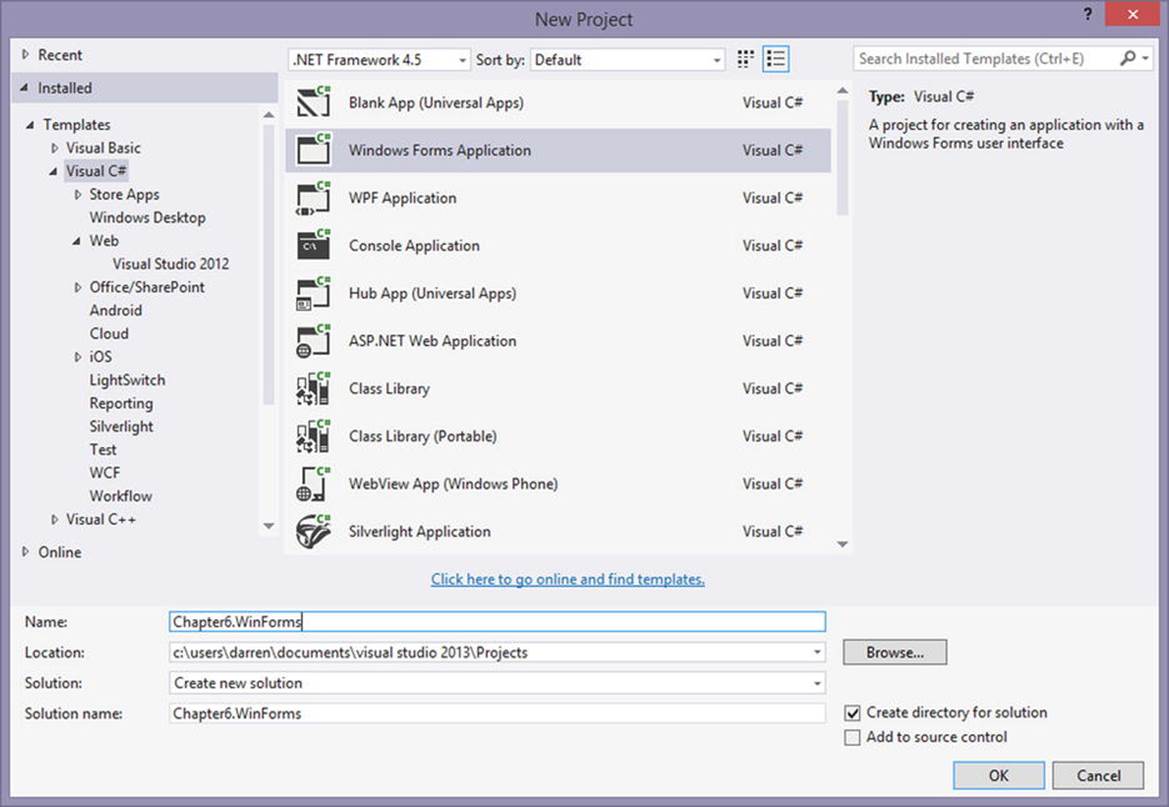
Figure 6-5. Win Forms application selection menu
2. Run the following command in the package explorer window: Install-Package Microsoft.AspNet.SignalR.Client.
3. Add a couple of text boxes, a button, and a list box to the form to look like Figure 6-6.
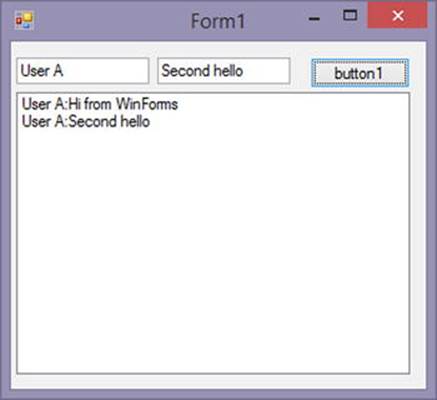
Figure 6-6. Example of Win Forms persistent connection chat application
4. Update the form code to look like Listing 6-24.
Listing 6-24. .NET C# Win Forms SignalR Client Code
public partial class Form1 : Form
{
Microsoft.AspNet.SignalR.Client.Connection myConnection = new Microsoft.AspNet.SignalR.Client.Connection("http://localhost:####/SamplePC/");
public Form1()
{
InitializeComponent();
button1.Click += button1_Click;
myConnection.Received += myConnection_Received;
myConnection.Start();
}
private void button1_Click(object sender, EventArgs e)
{
myConnection.Send(textBox1.Text + ":" + textBox2.Text);
}
void myConnection_Received(string obj)
{
listBox1.Invoke(new Action(() => listBox1.Items.Add(obj)));
}
}
5. Update the #### in the connection to the correct port of your server application.
Because we have completed the persistent connection example, the next example is the Win Forms hub example.
Hub Client
In this section, we create a hub client using Win Forms. To show client differences, we use the same examples from the previous client sections—but in the context of the current client.
Server Methods Called by the Client
The server methods called from the Win Forms client can contain zero or more parameters. Listings 6-25 and 6-26 show examples.
Listing 6-25. Win Forms Example of Calling a Server Method with No Parameters
Var auctionProxy = hubConnection.CreateHubProxy("AuctionHub");
auctionProxy.Invoke("SampleMethod");
Listing 6-26. Win Forms Example of Calling a Server Method with Multiple Parameters and a Complex Type with a Return Value of bool
Var auctionProxy = hubConnection.CreateHubProxy("AuctionHub");
int age = 25;
var profile = new Profile("Handle", "Password");
auctionProxy.Invoke<bool>("SampleMethod", profile, age);
The Invoke method is what initiates the call. The first parameter listed is the name of the function to invoke on the server. The next parameter is a params, which can take 0 or many objects that are passed as input parameters. These input parameters are provided to the function specified in the first parameter of the invoke call. If the server method returns the type of value defined by the Invoke function’s generic definition.
Client Methods Called by the Server
The server can “call” client methods by the Win Forms client subscribing to events on the HubProxy. The HubProxy can be called with zero parameters, as shown in Listing 6-27; and with one or more parameters, as shown in Listing 6-28.
Listing 6-27. Win Forms Example of Calling Client Methods from the Server with No Parameters
void Setup(){
var auctionProxy = _hubConnection.CreateHubProxy("AuctionHub");
auctionProxy.Subscribe("SampleMethodName").Received += SampleMethod;
}
void SampleMethod (IList<Newtonsoft.Json.Linq.JToken> obj) {
//Invoke delegate on UI thread with no parameters from the server
this.Invoke(sampleDelegate);
}
Listing 6-28. Win Forms Example of Calling Client Methods from the Server with Multiple Parameters
void Setup(){
var auctionProxy = _hubConnection.CreateHubProxy("AuctionHub");
auctionProxy.Subscribe("SampleMethodName").Received += SampleMethod;
}
void SampleMethod (IList<Newtonsoft.Json.Linq.JToken> obj) {
//Invoke delegate on UI thread with the first parameter from the server
this.Invoke(sampleDelegate, obj[0]);
}
The clients subscribe to the Received event with the specified event name. When these events are raised, they are from a thread other than the UI thread, so a delegate must be used to update other threads. In these examples, the delegate is used to update the UI thread. If the server has parameters to pass in, they are contained in the IList<JToken> object and can be accessed by their index position. In the next section, you see these methods in action.
.NET Hub Example
This is an example of the Win Forms client as an auction client connecting to the hub server example.
1. Create a new Windows Form project (refer to Figure 6-5).
2. Run the following command in the package explorer window: Install-Package Microsoft.AspNet.SignalR.Client.
3. Add a couple of buttons named btnCurrentBid and btnMakeBid showing Current Bid and Make Bid, respectively.
4. Add a text box named txtBid.
5. Add a list box named lstWins.
6. Add four labels named lblName, lblDescr, lblBid, and lblTime showing Name, Description, Bid, and Time, respectively.
7. The arrangement of these items can be made to look like Figure 6-7.
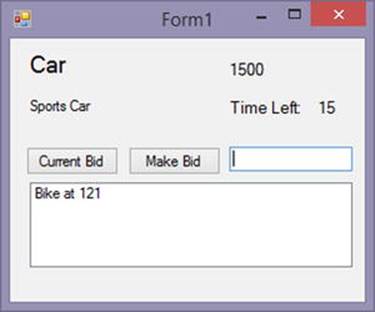
Figure 6-7. Final output of example hub application
8. Update the form code to look like Listing 6-29.
Listing 6-29. Win Forms Code of Hub Example
public partial class frmAuctionClient : Form
{
public Microsoft.AspNet.SignalR.Client.HubConnection _hubConnection;
public Microsoft.AspNet.SignalR.Client.IHubProxy _auctionProxy;
delegate void UpdateBid(dynamic bid, int formObject);
delegate void UpdateButtons(bool enabled);
UpdateBid _updateDelegate;
UpdateButtons _updateButtonsDelegate;
public frmAuctionClient()
{
InitializeComponent();
SetupHub();
}
private async void SetupHub()
{
_updateDelegate = new UpdateBid(UpdateBidMethod);
_updateButtonsDelegate = new UpdateButtons(UpdateButtonsMethod);
_hubConnection = new Microsoft.AspNet.SignalR.Client.HubConnection("http://localhost:####");
_auctionProxy = _hubConnection.CreateHubProxy("AuctionHub");
_auctionProxy.Subscribe("UpdateBid").Received += UpdateBid_auctionProxy;
_auctionProxy.Subscribe("CloseBid").Received += CloseBid_auctionProxy;
_auctionProxy.Subscribe("CloseBidWin").Received += CloseBidWin_auctionProxy;
await _hubConnection.Start();
}
void UpdateBidMethod(dynamic bid, int formObject)
{
if (bid != null)
{
lblName.Text = bid.Name;
lblDescr.Text = bid.Description;
lblBid.Text = bid.BidPrice;
lblTime.Text = bid.TimeLeft;
if(formObject > 0)
{
lstWins.Items.Add(bid.Name + " at " + bid.BidPrice);
}
}
}
void UpdateButtonsMethod(bool enabled)
{
btnCurrentBid.Enabled = enabled;
btnMakeBid.Enabled = enabled;
}
void UpdateBid_auctionProxy(IList<Newtonsoft.Json.Linq.JToken> obj)
{
this.Invoke(_updateDelegate, obj[0],0);
this.Invoke(_updateButtonsDelegate, true);
}
void CloseBid_auctionProxy(IList<Newtonsoft.Json.Linq.JToken> obj)
{
this.Invoke(_updateButtonsDelegate, false);
}
void CloseBidWin_auctionProxy(IList<Newtonsoft.Json.Linq.JToken> obj)
{
this.Invoke(_updateButtonsDelegate, false);
this.Invoke(_updateDelegate, obj[0], 1);
}
private void btnCurrentBid_Click(object sender, EventArgs e)
{
_auctionProxy.Invoke("MakeCurrentBid");
}
private void btnMakeBid_Click(object sender, EventArgs e)
{
_auctionProxy.Invoke<string>("MakeBid", txtBid.Text);
}
}
9. Update the #### in the connection to the correct port of your server application
Although the examples are simple and straightforward, they require detail depending on the client that is being implemented. The next section shows Silverlight 5 client examples so you can see the difference between them and Win Forms clients.
Silverlight Clients
SignalR supports Silverlight 5 applications that are .NET 4.0 and greater. The Silverlight 5 clients have most of the functionality of the .NET Win Forms clients, but the network features such as the proxy and capability to set the user agent strings are not available.
Persistent Connection Client
The Silverlight 5 persistent connection example shown here is the same chat application running on the default template web page provided by the project.
Silverlight 5 Persistent Connection Example
The Silverlight 5 client sample is very similar to the Win Forms sample due to a lot of shared client code. Follow these steps to create the client sample:
1. Create a new Silverlight 5 project (see Figure 6-8).
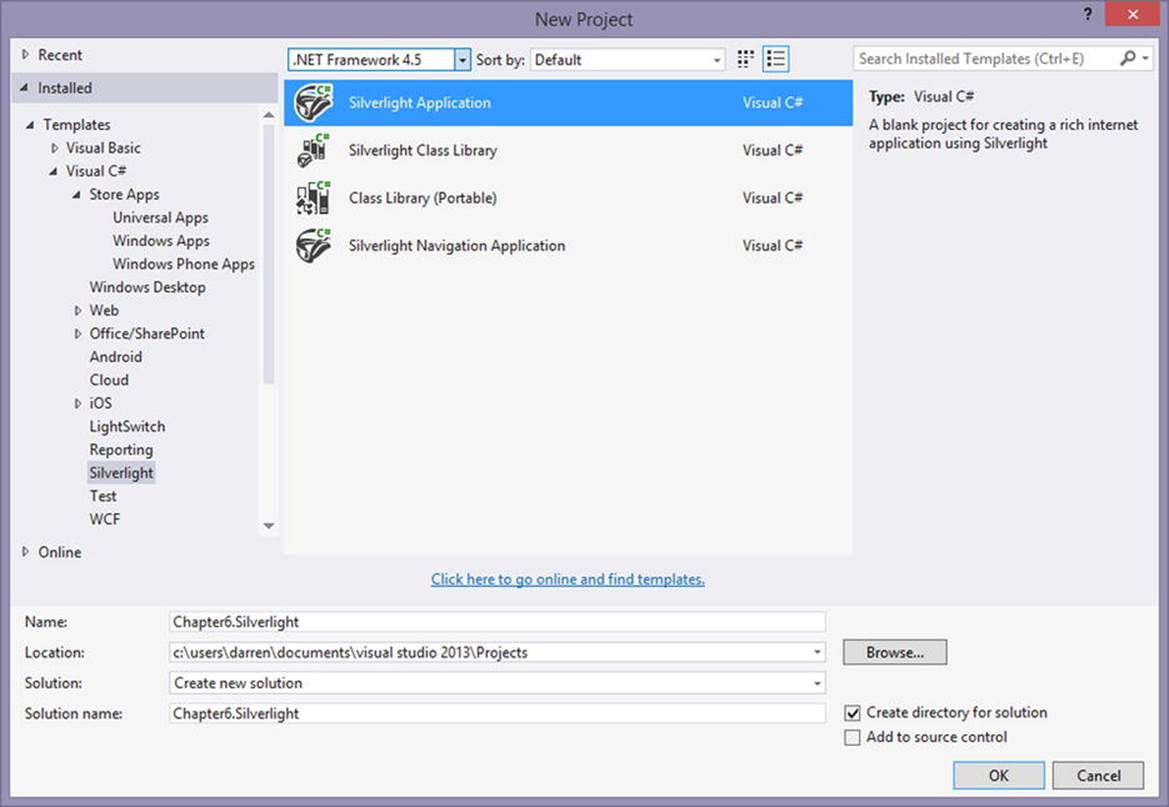
Figure 6-8. Silverlight 5 selection window
2. Select to host the application in a new web site, as shown in Figure 6-9.
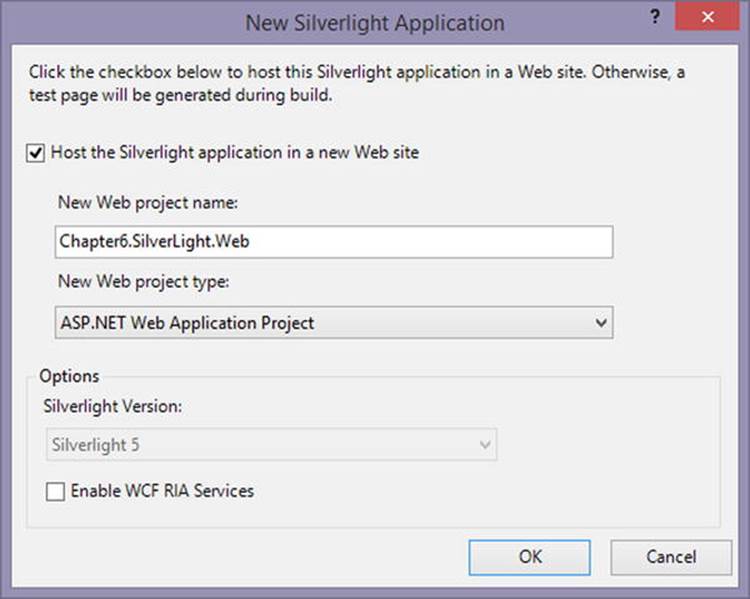
Figure 6-9. Silverlight 5 host selection window
3. After the project is created, select the application as the startup project so that the NuGet install will install the package to this project.
4. Run the following command in the package explorer window: Install-Package Microsoft.AspNet.SignalR.Client.
5. After the package is installed, set the web site as the startup project.
6. Update MainPage.xaml to look like Listing 6-30.
Listing 6-30. Silverlight 5 Client XAML
<UserControl x:Class="SilverlightApplication.MainPage"
xmlns="http://schemas.microsoft.com/winfx/2006/xaml/presentation"
xmlns:x="http://schemas.microsoft.com/winfx/2006/xaml"
xmlns:d="http://schemas.microsoft.com/expression/blend/2008"
xmlns:mc="http://schemas.openxmlformats.org/markup-compatibility/2006"
mc:Ignorable="d"
d:DesignHeight="300" d:DesignWidth="400">
<Grid x:Name="LayoutRoot" Background="White">
<ListBox Name="lstConvo" HorizontalAlignment="Left" Height="204" Margin="10,63,0,0" VerticalAlignment="Top" Width="367"/>
<TextBox Name="txtName" HorizontalAlignment="Left" Height="23" Margin="10,22,0,0" TextWrapping="Wrap" Text="User A" VerticalAlignment="Top" Width="120"/>
<TextBox Name="txtMessage" HorizontalAlignment="Left" Height="23" Margin="146,22,0,0" TextWrapping="Wrap" Text="" VerticalAlignment="Top" Width="120"/>
<Button Name="btnSend" Content="Send" HorizontalAlignment="Left" Margin="287,22,0,0" VerticalAlignment="Top" Width="75"/>
</Grid>
</UserControl>
7. Update the MainPage.cs class to look like Listing 6-31.
Listing 6-31. Silverlight 5 Client Code
public partial class MainPage : UserControl
{
Microsoft.AspNet.SignalR.Client.Connection myConnection = new Microsoft.AspNet.SignalR.Client.Connection("http://localhost:####/SamplePC/");
public MainPage()
{
InitializeComponent();
btnSend.Click += btnSend_Click;
myConnection.Received += myConnection_Received;
myConnection.Start();
}
private void btnSend_Click(object sender, RoutedEventArgs e)
{
myConnection.Send(txtName.Text + ": " + txtMessage.Text);
}
void myConnection_Received(string obj)
{
Dispatcher.BeginInvoke(() => { lstConvo.Items.Add(obj); });
}
}
8. Update the #### in the connection to the correct port of your server application.
After the application is complete, you can run it in a browser and it will look like Figure 6-10.
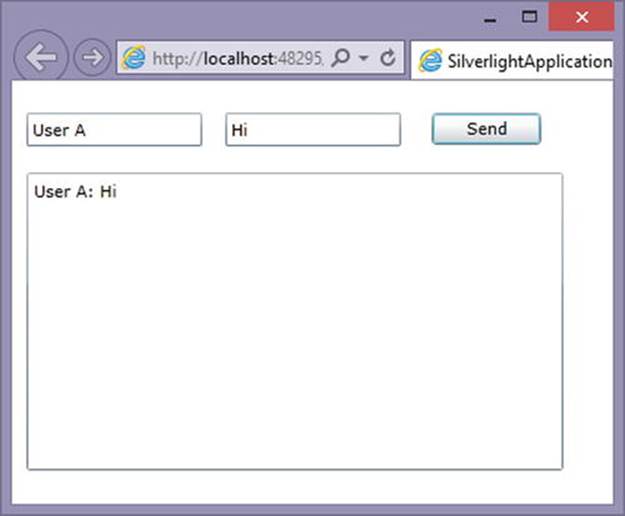
Figure 6-10. Final result of running Silverlight 5 client application and sending some messages
![]() Tip If you run the application in Internet Explorer and you notice that the address bar is accessing the file system instead of a web address such as localhost, you might receive security errors. To correct this problem, access the application using the localhost or web address to run in an Internet Explorer security zone that allows Silverlight applications and enables Internet access from those applications.
Tip If you run the application in Internet Explorer and you notice that the address bar is accessing the file system instead of a web address such as localhost, you might receive security errors. To correct this problem, access the application using the localhost or web address to run in an Internet Explorer security zone that allows Silverlight applications and enables Internet access from those applications.
This example resembles the .NET client example, but has a different control layout (XAML), has a different mechanism for cross-thread communication, and runs in the web browser. You will continue to see differences in the remaining client examples.
Hub Client
In this section, a hub client is created using Silverlight 5. The hub client example in this section is an auction client using the example hub server.
Server Methods Called by the Client
The server methods called from the Silverlight 5 client can contain zero or more parameters. Examples of calling Invoke with zero parameters and more than one parameter can be seen in Listings 6-32 and 6-33.
Listing 6-32. Silverlight 5 Example of Calling a Server Method with No Parameters
Var auctionProxy = hubConnection.CreateHubProxy("AuctionHub");
auctionProxy.Invoke("SampleMethod");
Listing 6-33. Silverlight 5 Example of Calling a Server Method with Multiple Parameters and a Complex Type with a Return Value of bool
Var auctionProxy = hubConnection.CreateHubProxy("AuctionHub");
int age = 25;
var profile = new Profile("Handle", "Password");
auctionProxy.Invoke<bool>("SampleMethod", profile, age);
Client Methods Called by the Server
The server can “call” client methods by the Silverlight 5 client subscribing to events on the HubProxy with zero (see Listing 6-34) or more (see Listing 6-35) parameters.
Listing 6-34. Silverlight 5 Example of Calling Client Methods from the Server with No Parameters
void Setup(){
var auctionProxy = _hubConnection.CreateHubProxy("AuctionHub");
auctionProxy.Subscribe("SampleMethodName").Received += SampleMethod;
}
void SampleMethod (IList<Newtonsoft.Json.Linq.JToken> obj) {
//Perform action on UI thread with delegate
Dispatcher.BeginInvoke(someDelegate);
}
Listing 6-35. Silverlight 5 Example of Calling Client Methods from the Server with Multiple Parameters
void Setup(){
var auctionProxy = _hubConnection.CreateHubProxy("AuctionHub");
auctionProxy.Subscribe("SampleMethodName").Received += SampleMethod;
}
void SampleMethod (IList<Newtonsoft.Json.Linq.JToken> obj) {
//Perform action on UI thread with delegate
Dispatcher.BeginInvoke(someDelegate, obj[0]);
}
Silverlight 5 Hub Example
As we have done in the previous sections we will use the following steps to create out Silverlight 5 hub example.
1. Create a new Silverlight 5 project (refer to Figure 6-8).
2. Select to host the application in a new web site (refer to Figure 6-9).
3. After the project is created, select the application as the startup project so that the NuGet install will install the package to this project.
4. Run the following command in the package explorer window: Install-Package Microsoft.AspNet.SignalR.Client.
5. Run the following command in the package explorer window: Install-package Microsoft.Bcl.Async.
6. After the package is installed, set the web site as the startup project.
7. Update MainPage.xaml to look like Listing 6-36.
Listing 6-36. Silverlight 5 Client XAML
<UserControl x:Class="Chapter6.Silverlight.MainPage"
xmlns="http://schemas.microsoft.com/winfx/2006/xaml/presentation"
xmlns:x="http://schemas.microsoft.com/winfx/2006/xaml"
xmlns:d="http://schemas.microsoft.com/expression/blend/2008"
xmlns:mc="http://schemas.openxmlformats.org/markup-compatibility/2006"
mc:Ignorable="d"
d:DesignHeight="600" d:DesignWidth="500">
<Grid x:Name="LayoutRoot" Background="Transparent">
<Grid.RowDefinitions>
<RowDefinition Height="Auto"/>
<RowDefinition Height="*"/>
</Grid.RowDefinitions>
<StackPanel>
<Grid>
<TextBlock HorizontalAlignment="Left" Name="lblName"></TextBlock>
<TextBlock Margin="0,0,50,0" HorizontalAlignment="Right" Name="lblBid"></TextBlock>
</Grid>
<Grid Margin="0,50,0,0">
<TextBlock HorizontalAlignment="Left" Name="lblDescr"></TextBlock>
<TextBlock HorizontalAlignment="Center">Time Left:</TextBlock>
<TextBlock Margin="0,0,50,0" HorizontalAlignment="Right" Name="lblTime"></TextBlock>
</Grid>
<Grid Margin="0,50,0,0">
<Button Name="btnCurrentBid" HorizontalAlignment="Left" Width="175">Current Bid</Button>
<Button Name="btnMakeBid" HorizontalAlignment="Center" Width="150">Make Bid</Button>
<TextBox Name="txtBid" HorizontalAlignment="Right" Width="175"/>
</Grid>
<ListBox Name="lstWins"></ListBox>
</StackPanel>
</Grid>
</UserControl>
8. Update the MainPage.cs class to look like Listing 6-37.
Listing 6-37. Silverlight 5 Client Code
public partial class MainPage : UserControl
{
public Microsoft.AspNet.SignalR.Client.HubConnection _hubConnection;
public Microsoft.AspNet.SignalR.Client.IHubProxy _auctionProxy;
delegate void UpdateBid(dynamic bid, int formObject);
delegate void UpdateButtons(bool enabled);
UpdateBid _updateDelegate;
UpdateButtons _updateButtonsDelegate;
public MainPage()
{
InitializeComponent();
btnCurrentBid.Click += btnCurrentBid_Click;
btnMakeBid.Click += btnMakeBid_Click;
SetupHub();
}
private async void SetupHub()
{
_updateDelegate = new UpdateBid(UpdateBidMethod);
_updateButtonsDelegate = new UpdateButtons(UpdateButtonsMethod);
_hubConnection = new Microsoft.AspNet.SignalR.Client.HubConnection("http://192.168.1.108:####/");
_auctionProxy = _hubConnection.CreateHubProxy("AuctionHub");
_auctionProxy.Subscribe("UpdateBid").Received += UpdateBid_auctionProxy;
_auctionProxy.Subscribe("CloseBid").Received += CloseBid_auctionProxy;
_auctionProxy.Subscribe("CloseBidWin").Received += CloseBidWin_auctionProxy;
await _hubConnection.Start();
}
void UpdateBidMethod(dynamic bid, int formObject)
{
if (bid != null)
{
lblName.Text = (string)bid["Name"];
lblDescr.Text = (string)bid["Description"];
lblBid.Text = (string)bid["BidPrice"];
lblTime.Text = (string)bid["TimeLeft"];
if (formObject > 0)
{
lstWins.Items.Add((string)bid["Name"] + " at " + (string)bid["BidPrice"]);
}
}
}
void UpdateButtonsMethod(bool enabled)
{
btnCurrentBid.IsEnabled = enabled;
btnMakeBid.IsEnabled = enabled;
}
void UpdateBid_auctionProxy(IList<Newtonsoft.Json.Linq.JToken> obj)
{
Dispatcher.BeginInvoke(_updateDelegate, obj[0], 0);
Dispatcher.BeginInvoke(_updateButtonsDelegate, true);
}
void CloseBid_auctionProxy(IList<Newtonsoft.Json.Linq.JToken> obj)
{
Dispatcher.BeginInvoke(_updateButtonsDelegate, false);
}
void CloseBidWin_auctionProxy(IList<Newtonsoft.Json.Linq.JToken> obj)
{
Dispatcher.BeginInvoke(_updateButtonsDelegate, false);
Dispatcher.BeginInvoke(_updateDelegate, obj[0], 1);
}
private void btnCurrentBid_Click(object sender, EventArgs e)
{
_auctionProxy.Invoke("MakeCurrentBid");
}
private void btnMakeBid_Click(object sender, EventArgs e)
{
_auctionProxy.Invoke<string>("MakeBid", this.txtBid.Text);
}
}
9. Update the #### in the connection to the correct port of your server application
The final product of this example can be seen in Figure 6-11.
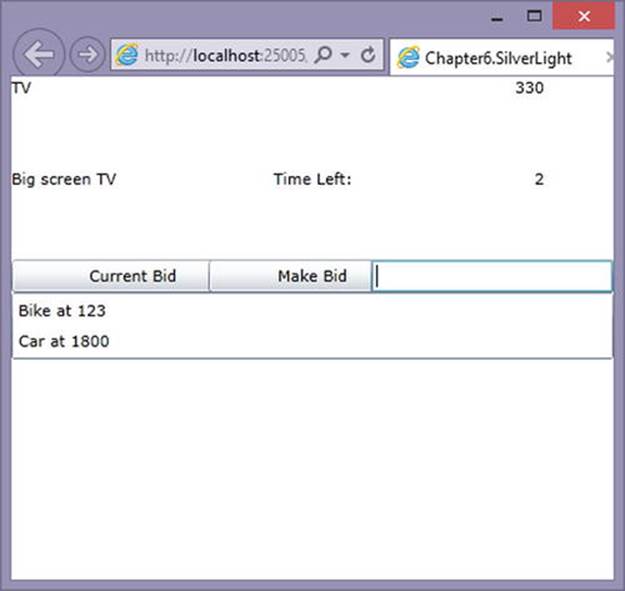
Figure 6-11. Example of Silverlight 5 hub client
This is another successful example client that further demonstrates the differences between the various clients. The next clients to be discussed are Windows Store clients.
Windows Store Clients
Both persistent connections and hubs are supported for Windows Store clients. To develop these client applications, Windows 8.1 must be installed to support the newest additions to store apps.
Persistent Connection Client
The Windows Store client applications support persistent connection clients. The following example creates a simple chat application using a Windows Store template.
Windows Store Client Persistent Connection Example
To create the client sample, follow these steps:
1. Create a new Windows Store project with the Blank App template, as shown in Figure 6-12.
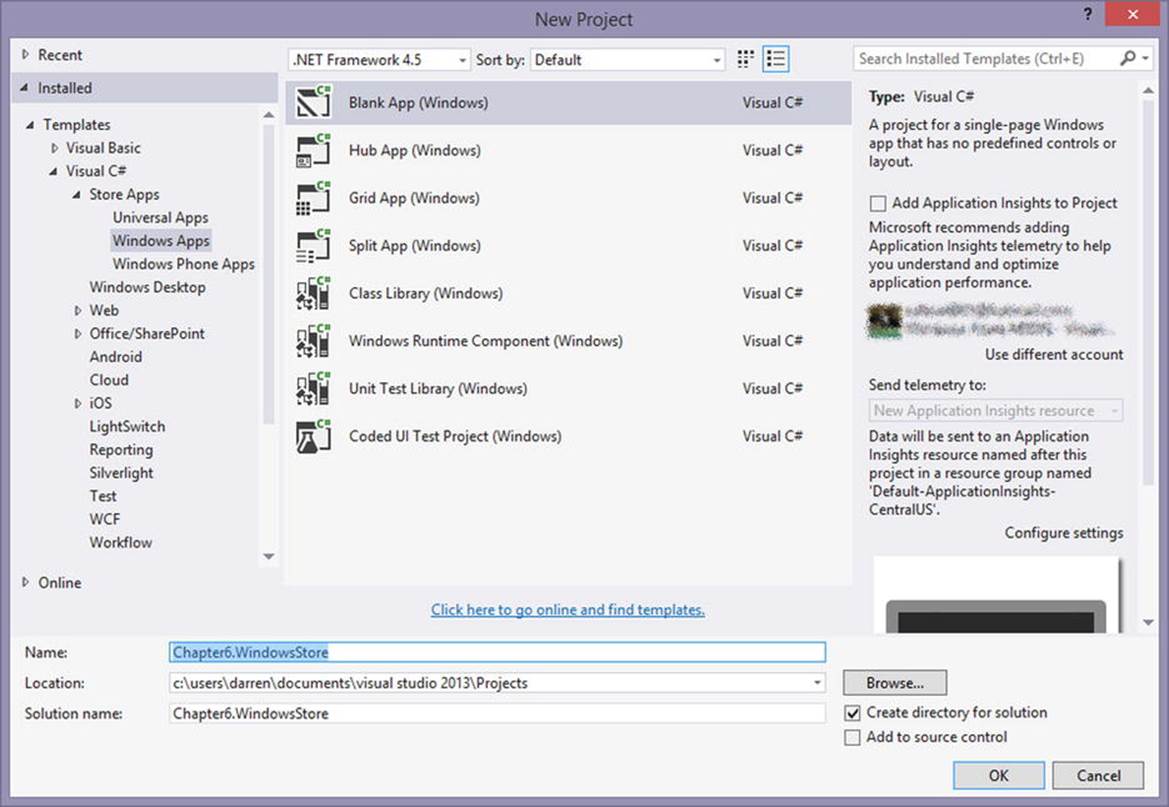
Figure 6-12. Windows Store client project selection
2. Run the following command in the package explorer window: Install-Package Microsoft.AspNet.SignalR.Client.
3. Update the MainPage.xaml.cs class to look like Listing 6-38.
Listing 6-38. .NET C# Windows Store SignalR Client Code
public sealed partial class MainPage : Page
{
Microsoft.AspNet.SignalR.Client.Connection myConnection = new Microsoft.AspNet.SignalR.Client.Connection("http://localhost:####/SamplePC/");
public MainPage()
{
this.InitializeComponent();
myConnection.Received += myConnection_Received;
myConnection.Start().Wait();
}
private void SendButton_Click(object sender, RoutedEventArgs e)
{
myConnection.Send(txtName.Text + ": " + txtInput.Text);
}
private void myConnection_Received(string data)
{
UpdateList(data);
}
private async void UpdateList(string data)
{
await itemListBox.Dispatcher.RunAsync(Windows.UI.Core.CoreDispatcherPriority.Normal,
() =>
{
var item = new ListBoxItem() { Content = data };
itemListBox.Items.Add(item);
});
}
}
4. Update MainPage.xaml to look like Listing 6-39.
Listing 6-39. .NET C# Windows Store Client XAML
<Page
x:Class="Chapter6_WindowsStoreClient.MainPage"
xmlns="http://schemas.microsoft.com/winfx/2006/xaml/presentation"
xmlns:x="http://schemas.microsoft.com/winfx/2006/xaml"
xmlns:local="using:Chapter6_WindowsStoreClient"
xmlns:d="http://schemas.microsoft.com/expression/blend/2008"
xmlns:mc="http://schemas.openxmlformats.org/markup-compatibility/2006"
mc:Ignorable="d">
<Grid Background="{StaticResource ApplicationPageBackgroundThemeBrush}">
<TextBlock Margin="10,10,0,0">Name:</TextBlock>
<TextBlock Margin="120,10,0,0">Data:</TextBlock>
<TextBox x:Name="txtName"
Text="User A"
Width="100"
Height="50"
HorizontalAlignment="Left"
VerticalAlignment="Top"
IsEnabled="True"
IsReadOnly="False"
Margin="10,30,0,0"
TabIndex="1"/>
<TextBox x:Name="txtInput"
Width="250"
Height="50"
HorizontalAlignment="Left"
VerticalAlignment="Top"
IsEnabled="True"
IsReadOnly="False"
Margin="120,30,0,0"
TabIndex="1"/>
<Button x:Name="btnSend"
Click="SendButton_Click"
Width="100"
Height="50"
Margin="380,30,0,0"
VerticalAlignment="Top">Send
</Button>
<ListBox
x:Name="itemListBox"
AutomationProperties.AutomationId="ItemsListView"
AutomationProperties.Name="Items"
Grid.Row="1"
Margin="0,100,0,0"
Width="450"
HorizontalAlignment="Left">
</ListBox>
</Grid>
</Page>
5. Update the #### in the connection to the correct port of your server application.
If you run the code in the emulator, you should see an example that looks like Figure 6-13.
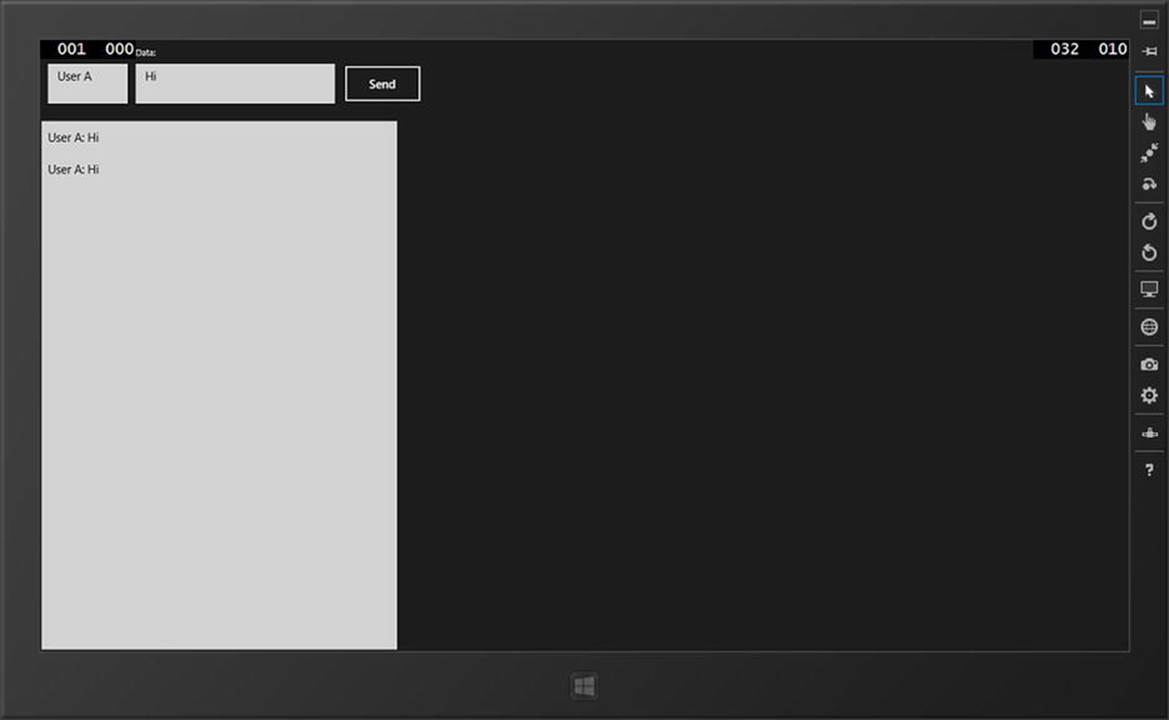
Figure 6-13. Example of Windows Store client
The Windows Store client has a control layout similar to the Silverlight application. But the real difference between the clients is that the Windows Store app runs locally, and Silverlight runs in the browser. Another major difference is the way the threads are dispatched. The Windows Store hub client is discussed next.
Hub Client
In this section, we show how to create a hub client using the Windows Store client application. It is the same auction client that we used in the previous examples so that the clients can be compared.
Server Methods Called by the Client
The server methods called from the Windows Store client can contain zero or more parameters. Examples of calling the Invoke method with zero or one or more parameters can be seen in Listings 6-40 and 6-41, respectively.
Listing 6-40. Windows Store Client Example of Calling a Server Method with No Parameters
Var auctionProxy = hubConnection.CreateHubProxy("AuctionHub");
auctionProxy.Invoke("SampleMethod");
Listing 6-41. Windows Store Client Example of Calling a Server Method with Multiple Parameters and a Complex Type with a Return Value of bool
Var auctionProxy = hubConnection.CreateHubProxy("AuctionHub");
int age = 25;
var profile = new Profile("Handle", "Password");
auctionProxy.Invoke<bool>("SampleMethod", profile, age);
Client Methods Called by the Server
The server can “call” client methods by the Windows Store client subscribing to events on the HubProxy (see Listings 6-42 and 6-43).
Listing 6-42. Windows Store Client Example of Calling Client Methods from the Server with No Parameters
void Setup(){
var auctionProxy = _hubConnection.CreateHubProxy("AuctionHub");
auctionProxy.Subscribe("SampleMethodName").Received += SampleMethod;
}
async void SampleMethod (IList<Newtonsoft.Json.Linq.JToken> obj) {
await Dispatcher.RunAsync(Windows.UI.Core.CoreDispatcherPriority.Normal, () =>{
//Perform action on UI thread
}
}
Listing 6-43. Windows Store Client Example of Calling Client Methods from the Server with Multiple Parameters
void Setup(){
var auctionProxy = _hubConnection.CreateHubProxy("AuctionHub");
auctionProxy.Subscribe("SampleMethodName").Received += SampleMethod;
}
async void SampleMethod (IList<Newtonsoft.Json.Linq.JToken> obj) {
await Dispatcher.RunAsync(Windows.UI.Core.CoreDispatcherPriority.Normal, () =>{
//Perform action on UI thread
this.Age = obj[0];
}
}
Windows Store Client Hub Example
To create the client sample, follow these steps:
1. Create a new Windows Store project with the Blank App template.
2. Run the following command in the package explorer window: Install-Package Microsoft.AspNet.SignalR.Client.
3. Update the MainPage.xaml.cs class to look like Listing 6-44.
Listing 6-44. Windows Store Client Code
public sealed partial class MainPage : Page
{
public Microsoft.AspNet.SignalR.Client.HubConnection _hubConnection;
public Microsoft.AspNet.SignalR.Client.IHubProxy _auctionProxy;
public MainPage()
{
InitializeComponent();
btnCurrentBid.Click += btnCurrentBid_Click;
btnMakeBid.Click += btnMakeBid_Click;
SetupHub();
}
private async void SetupHub()
{
_hubConnection = new Microsoft.AspNet.SignalR.Client.HubConnection("http://192.168.1.108:####/");
_auctionProxy = _hubConnection.CreateHubProxy("AuctionHub");
_auctionProxy.Subscribe("UpdateBid").Received += UpdateBid_auctionProxy;
_auctionProxy.Subscribe("CloseBid").Received += CloseBid_auctionProxy;
_auctionProxy.Subscribe("CloseBidWin").Received += CloseBidWin_auctionProxy;
await _hubConnection.Start();
}
void UpdateBid(dynamic bid, int formObject)
{
if (bid != null)
{
lblName.Text = bid.Name;
lblDescr.Text = bid.Description;
lblBid.Text = bid.BidPrice;
lblTime.Text = bid.TimeLeft;
if(formObject > 0)
{
lstWins.Items.Add(bid.Name + " at " + bid.BidPrice);
}
}
}
void UpdateButtons(bool enabled)
{
btnCurrentBid.IsEnabled = enabled;
btnMakeBid.IsEnabled = enabled;
}
async void UpdateBid_auctionProxy(IList<Newtonsoft.Json.Linq.JToken> obj)
{
await Dispatcher.RunAsync(Windows.UI.Core.CoreDispatcherPriority.Normal,
() =>{
UpdateBid(obj[0],0);
UpdateButtons(true);
});
}
async void CloseBid_auctionProxy(IList<Newtonsoft.Json.Linq.JToken> obj)
{
await Dispatcher.RunAsync(Windows.UI.Core.CoreDispatcherPriority.Normal,
() =>{
UpdateButtons(false);
});
}
async void CloseBidWin_auctionProxy(IList<Newtonsoft.Json.Linq.JToken> obj)
{
await Dispatcher.RunAsync(Windows.UI.Core.CoreDispatcherPriority.Normal,
() =>
{
UpdateButtons(false);
UpdateBid(obj[0], 1);
});
}
private void btnCurrentBid_Click(object sender, RoutedEventArgs e)
{
_auctionProxy.Invoke("MakeCurrentBid");
}
private void btnMakeBid_Click(object sender, RoutedEventArgs e)
{
_auctionProxy.Invoke<string>("MakeBid", this.txtBid.Text);
}
}
4. Update MainPage.xaml to look like Listing 6-45.
Listing 6-45. Windows Store Client XAML
<Page
x:Class="WindowsStore.MainPage"
xmlns="http://schemas.microsoft.com/winfx/2006/xaml/presentation"
xmlns:x="http://schemas.microsoft.com/winfx/2006/xaml"
xmlns:local="using:WindowsStore"
xmlns:d="http://schemas.microsoft.com/expression/blend/2008"
xmlns:mc="http://schemas.openxmlformats.org/markup-compatibility/2006"
mc:Ignorable="d">
<Grid x:Name="LayoutRoot" Background="Transparent">
<Grid.RowDefinitions>
<RowDefinition Height="Auto"/>
<RowDefinition Height="*"/>
</Grid.RowDefinitions>
<StackPanel>
<Grid Margin="0,50,0,0">
<TextBlock Name="lblName" Width="150" HorizontalAlignment="Left"></TextBlock>
<TextBlock Margin="185,0,0,0" >Last Bid:</TextBlock>
<TextBlock Margin="240,0,0,0" Name="lblBid"></TextBlock>
</Grid>
<Grid>
<TextBlock Name="lblDescr"></TextBlock>
<TextBlock Margin="185,0,0,0" >Time Left:</TextBlock>
<TextBlock Margin="240, 0,0,0" Name="lblTime"></TextBlock>
</Grid>
<Grid Margin="0,10,0,0">
<Button Name="btnCurrentBid" Width="175">Current Bid</Button>
<Button Name="btnMakeBid" Margin="185,0,0,0" Width="150">Make Bid</Button>
<TextBox Name="txtBid" Margin="360, 0,0,0" Width="175" HorizontalAlignment="Left"/>
</Grid>
<ListBox Name="lstWins"></ListBox>
</StackPanel>
</Grid>
</Page>
5. Update the #### in the connection to the correct port of your server application.
When you view this example in the browser, you see something similar to Figure 6-14.
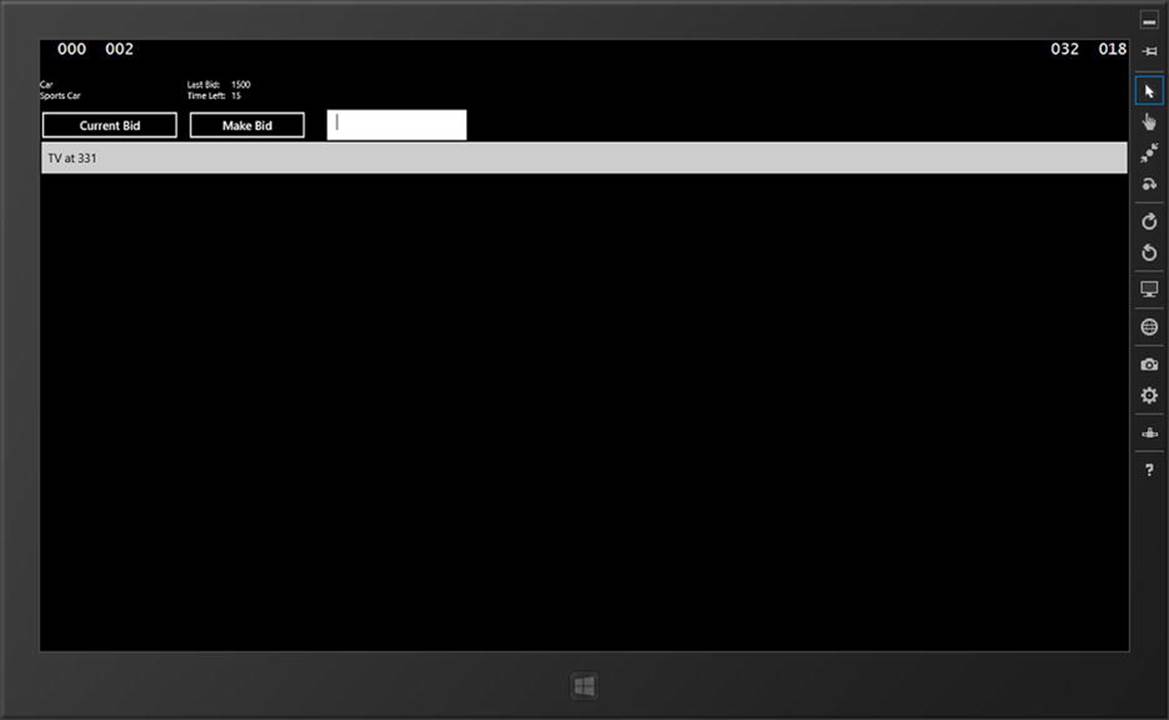
Figure 6-14. Example of Windows Store hub client
Now that the Windows Store client examples are complete, we have only one more client variation to show: on the Windows Phone 8 clients.
Windows Phone 8 Clients
SignalR, which is supported on Windows Phone 8 clients, has support for persistent connection and hub applications. For Windows Phone 8 client development, the 64-bit version of Windows 8 is required as well as the Windows Phone 8 SDK.
Persistent Connection Client
The persistent connection client shown in the following example is the same chat application used in previous examples.
Windows Phone 8 Persistent Connection Example
To create the client sample, follow these steps:
1. Create a new Windows Store project with the Windows Phone App template (see Figure 6-15).
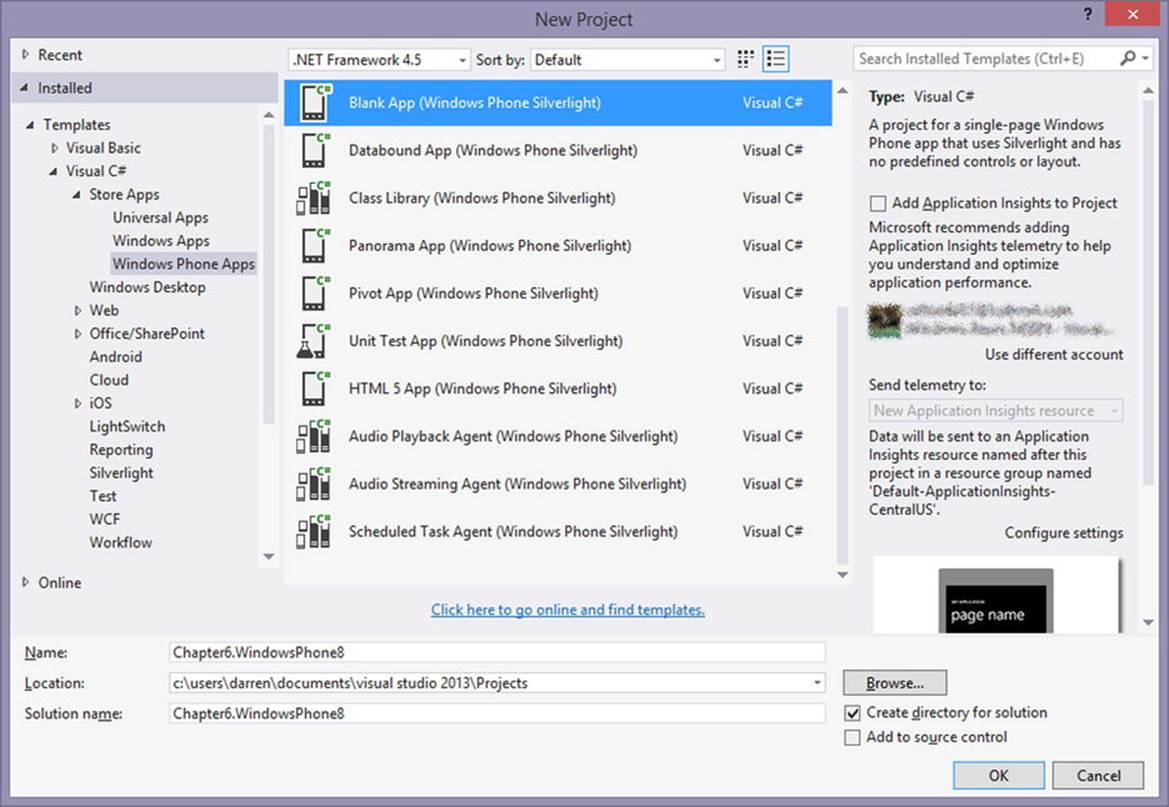
Figure 6-15. Windows Phone 8 application selection
2. Select the version of the Windows Phone you want to target. This example targets Windows Phone 8.0 (see Figure 6-16).
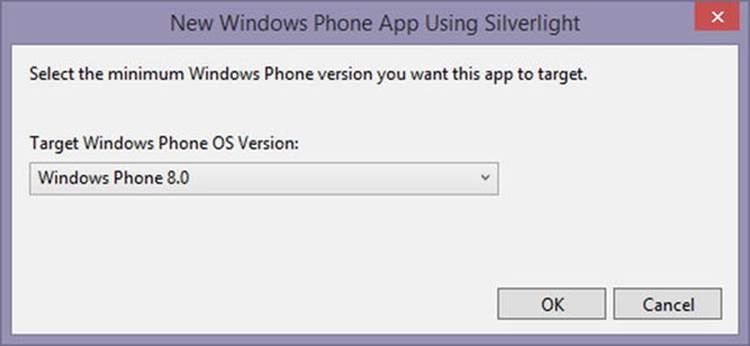
Figure 6-16. Windows Phone 8 OS version selection
3. Run the following command in the package explorer window: Install-Package Microsoft.AspNet.SignalR.Client.
4. Update the MainPage.xaml.cs class to look like Listing 6-46.
Listing 6-46. Windows Phone 8 Client Code
public partial class MainPage : PhoneApplicationPage
{
Microsoft.AspNet.SignalR.Client.Connection myConnection = new Microsoft.AspNet.SignalR.Client.Connection("http://localhost:####/SamplePC/");
public MainPage()
{
this.InitializeComponent();
myConnection.Received += myConnection_Received;
myConnection.Start();
}
private void SendButton_Click(object sender, RoutedEventArgs e)
{
myConnection.Send(txtName.Text + ": " + txtInput.Text);
}
private void myConnection_Received(string data)
{
UpdateList(data);
}
private void UpdateList(string data)
{
itemListBox.Dispatcher.BeginInvoke(new Action(() =>
{
var item = new ListBoxItem() { Content = data };
itemListBox.Items.Add(item);
}));
}
}
5. Update MainPage.xaml to look like Listing 6-47.
Listing 6-47. Windows Phone 8 Client XAML
<phone:PhoneApplicationPage
x:Class="Chapter6_WindowsPhone.MainPage"
xmlns="http://schemas.microsoft.com/winfx/2006/xaml/presentation"
xmlns:x="http://schemas.microsoft.com/winfx/2006/xaml"
xmlns:phone="clr-namespace:Microsoft.Phone.Controls;assembly=Microsoft.Phone"
xmlns:shell="clr-namespace:Microsoft.Phone.Shell;assembly=Microsoft.Phone"
xmlns:d="http://schemas.microsoft.com/expression/blend/2008"
xmlns:mc="http://schemas.openxmlformats.org/markup-compatibility/2006"
mc:Ignorable="d"
FontFamily="{StaticResource PhoneFontFamilyNormal}"
FontSize="{StaticResource PhoneFontSizeNormal}"
Foreground="{StaticResource PhoneForegroundBrush}"
SupportedOrientations="Portrait" Orientation="Portrait"
shell:SystemTray.IsVisible="True">
<Grid x:Name="LayoutRoot" Background="Transparent">
<Grid.RowDefinitions>
<RowDefinition Height="Auto"/>
<RowDefinition Height="*"/>
</Grid.RowDefinitions>
<TextBlock Margin="10,10,0,0">Name:</TextBlock>
<TextBlock Margin="120,10,0,0">Data:</TextBlock>
<TextBox x:Name="txtName"
Text="User A"
Width="125"
Height="75"
HorizontalAlignment="Left"
VerticalAlignment="Top"
IsEnabled="True"
IsReadOnly="False"
Margin="10,30,0,0"
TabIndex="1"/>
<TextBox x:Name="txtInput"
Width="250"
Height="75"
HorizontalAlignment="Left"
VerticalAlignment="Top"
IsEnabled="True"
IsReadOnly="False"
Margin="120,30,0,0"
TabIndex="1"/>
<Button x:Name="btnSend"
Click="SendButton_Click"
Width="100"
Height="75"
Margin="380,30,0,0"
VerticalAlignment="Top">Send
</Button>
<ListBox
x:Name="itemListBox"
AutomationProperties.AutomationId="ItemsListView"
AutomationProperties.Name="Items"
Grid.Row="1"
Margin="0,100,0,0"
Width="450"
HorizontalAlignment="Left">
</ListBox>
</Grid>
</phone:PhoneApplicationPage>
6. Update the #### in the connection to the correct port of your server application
Figure 6-17 shows what the chat application looks like in the Windows Phone emulator.
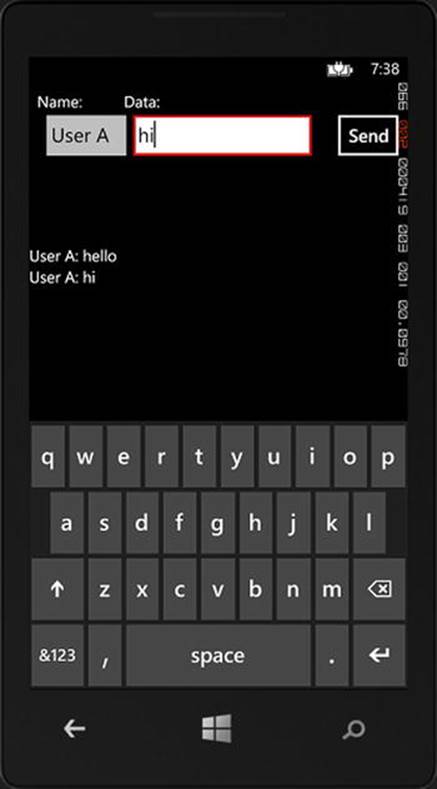
Figure 6-17. Example of Windows Phone 8 persistent connection client
![]() Note If you test the Windows Phone sample application using the emulator, you may need to configure IIS Express and the firewall to get a successful connection. Microsoft has published an article dealing with this issue: http://msdn.microsoft.com/en-us/library/windowsphone/develop/jj684580.aspx.
Note If you test the Windows Phone sample application using the emulator, you may need to configure IIS Express and the firewall to get a successful connection. Microsoft has published an article dealing with this issue: http://msdn.microsoft.com/en-us/library/windowsphone/develop/jj684580.aspx.
Now that we have created the persistent connection client, the next step is to create the hub client.
Hub Client
This section shows how to create a hub client using a Windows Phone 8 client application. The hub client example in this section is an auction client.
Server Methods Called by the Client
The server methods called from the Windows Phone 8 client can contain zero or more parameters, as shown in Listings 6-48 and 6-49, respectively.
Listing 6-48. Windows Phone 8 Example of Calling a Server Method with No Parameters
Var auctionProxy = hubConnection.CreateHubProxy("AuctionHub");
auctionProxy.Invoke("SampleMethod");
Listing 6-49. Windows Phone 8 Example of Calling a Server Method with Multiple Parameters and a Complex Type with a Return Value of bool
Var auctionProxy = hubConnection.CreateHubProxy("AuctionHub");
int age = 25;
var profile = new Profile("Handle", "Password");
auctionProxy.Invoke<bool>("SampleMethod", profile, age);
Client Methods Called by the Server
The server can “call” client methods by the Windows Phone 8 client subscribing to events on the HubProxy. These methods can have zero or one or more parameters, as shown in Listings 6-50 and 6-51, respectively.
Listing 6-50. Windows Phone 8 Example of Calling Client Methods from the Server with No Parameters
void Setup(){
var auctionProxy = _hubConnection.CreateHubProxy("AuctionHub");
auctionProxy.Subscribe("SampleMethodName").Received += SampleMethod;
}
void SampleMethod (IList<Newtonsoft.Json.Linq.JToken> obj) {
//Perform action on UI thread with delegate
Dispatcher.BeginInvoke(someDelegate);
}
Listing 6-51. Windows Phone 8 Example of Calling Client Methods from the Server with Multiple Parameters
void Setup(){
var auctionProxy = _hubConnection.CreateHubProxy("AuctionHub");
auctionProxy.Subscribe("SampleMethodName").Received += SampleMethod;
}
void SampleMethod (IList<Newtonsoft.Json.Linq.JToken> obj) {
//Perform action on UI thread with delegate
Dispatcher.BeginInvoke(someDelegate, obj[0]);
}
Windows Phone 8 Hub Example
To create the client sample, follow these steps:
1. Create a new Windows Store project with the Windows Phone App template (refer to Figure 6-15).
2. Select the Windows Phone version you want to target; this example targets Windows Phone 8.0 (refer to Figure 6-16).
3. Run the following command in the package explorer window: Install-Package Microsoft.AspNet.SignalR.Client.
4. Update the MainPage.xaml.cs class to look like Listing 6-52.
Listing 6-52. Windows Phone 8 Client Code
public partial class MainPage : PhoneApplicationPage
{
public Microsoft.AspNet.SignalR.Client.HubConnection _hubConnection;
public Microsoft.AspNet.SignalR.Client.IHubProxy _auctionProxy;
delegate void UpdateBid(dynamic bid, int formObject);
delegate void UpdateButtons(bool enabled);
UpdateBid _updateDelegate;
UpdateButtons _updateButtonsDelegate;
public MainPage()
{
InitializeComponent();
btnCurrentBid.Click += btnCurrentBid_Click;
btnMakeBid.Click += btnMakeBid_Click;
SetupHub();
}
private async void SetupHub()
{
_updateDelegate = new UpdateBid(UpdateBidMethod);
_updateButtonsDelegate = new UpdateButtons(UpdateButtonsMethod);
_hubConnection = new Microsoft.AspNet.SignalR.Client.HubConnection("http://192.168.1.108:####/");
_auctionProxy = _hubConnection.CreateHubProxy("AuctionHub");
_auctionProxy.Subscribe("UpdateBid").Received += UpdateBid_auctionProxy;
_auctionProxy.Subscribe("CloseBid").Received += CloseBid_auctionProxy;
_auctionProxy.Subscribe("CloseBidWin").Received += CloseBidWin_auctionProxy;
await _hubConnection.Start();
}
void UpdateBidMethod(dynamic bid, int formObject)
{
if (bid != null)
{
lblName.Text = bid.Name;
lblDescr.Text = bid.Description;
lblBid.Text = bid.BidPrice;
lblTime.Text = bid.TimeLeft;
if(formObject > 0)
{
lstWins.Items.Add(bid.Name + " at " + bid.BidPrice);
}
}
}
void UpdateButtonsMethod(bool enabled)
{
btnCurrentBid.IsEnabled = enabled;
btnMakeBid.IsEnabled = enabled;
}
void UpdateBid_auctionProxy(IList<Newtonsoft.Json.Linq.JToken> obj)
{
Dispatcher.BeginInvoke(_updateDelegate, obj[0],0);
Dispatcher.BeginInvoke(_updateButtonsDelegate, true);
}
void CloseBid_auctionProxy(IList<Newtonsoft.Json.Linq.JToken> obj)
{
Dispatcher.BeginInvoke(_updateButtonsDelegate, false);
}
void CloseBidWin_auctionProxy(IList<Newtonsoft.Json.Linq.JToken> obj)
{
Dispatcher.BeginInvoke(_updateButtonsDelegate, false);
Dispatcher.BeginInvoke(_updateDelegate, obj[0], 1);
}
private void btnCurrentBid_Click(object sender, EventArgs e)
{
_auctionProxy.Invoke("MakeCurrentBid");
}
private void btnMakeBid_Click(object sender, EventArgs e)
{
_auctionProxy.Invoke<string>("MakeBid", this.txtBid.Text);
}
}
5. Update MainPage.xaml to look like Listing 6-53.
Listing 6-53. Windows Phone 8 Client XAML
<phone:PhoneApplicationPage
x:Class="Chapter6.WindowsPhone8.MainPage"
xmlns="http://schemas.microsoft.com/winfx/2006/xaml/presentation"
xmlns:x="http://schemas.microsoft.com/winfx/2006/xaml"
xmlns:phone="clr-namespace:Microsoft.Phone.Controls;assembly=Microsoft.Phone"
xmlns:shell="clr-namespace:Microsoft.Phone.Shell;assembly=Microsoft.Phone"
xmlns:d="http://schemas.microsoft.com/expression/blend/2008"
xmlns:mc="http://schemas.openxmlformats.org/markup-compatibility/2006"
mc:Ignorable="d"
FontFamily="{StaticResource PhoneFontFamilyNormal}"
FontSize="{StaticResource PhoneFontSizeNormal}"
Foreground="{StaticResource PhoneForegroundBrush}"
SupportedOrientations="Portrait" Orientation="Portrait"
shell:SystemTray.IsVisible="True">
<Grid x:Name="LayoutRoot" Background="Transparent">
<Grid.RowDefinitions>
<RowDefinition Height="Auto"/>
<RowDefinition Height="*"/>
</Grid.RowDefinitions>
<StackPanel>
<Grid>
<TextBlock HorizontalAlignment="Left" Name="lblName"></TextBlock>
<TextBlock Margin="0,0,50,0" HorizontalAlignment="Right" Name="lblBid"></TextBlock>
</Grid>
<Grid>
<TextBlock HorizontalAlignment="Left" Name="lblDescr"></TextBlock>
<TextBlock HorizontalAlignment="Center">Time Left:</TextBlock>
<TextBlock Margin="0,0,50,0" HorizontalAlignment="Right" Name="lblTime"></TextBlock>
</Grid>
<Grid>
<Button Name="btnCurrentBid" HorizontalAlignment="Left" Width="175">Current Bid</Button>
<Button Name="btnMakeBid" HorizontalAlignment="Center" Width="150">Make Bid</Button>
<TextBox Name="txtBid" HorizontalAlignment="Right" Width="175"/>
</Grid>
<ListBox Name="lstWins"></ListBox>
</StackPanel>
</Grid>
</phone:PhoneApplicationPage>
6. Update the #### in the connection to the correct port of your server application.
We have now completed the final example. If we run it with the emulator, it looks similar to Figure 6-18.

Figure 6-18. Windows Phone 8 example
![]() Note If you test the Windows Phone sample application using the emulator, you may need to configure IIS Express and the firewall to get a successful connection. Microsoft published an article dealing with this issue: http://msdn.microsoft.com/en-us/library/windowsphone/develop/jj684580.aspx.
Note If you test the Windows Phone sample application using the emulator, you may need to configure IIS Express and the firewall to get a successful connection. Microsoft published an article dealing with this issue: http://msdn.microsoft.com/en-us/library/windowsphone/develop/jj684580.aspx.
We have now gone through the standard list of clients that are supported. iPhone and Android clients are available as well, but they require customization, which is discussed in detail in Chapter 7.
Summary
This chapter showed you what clients are available and how to configure them. The most configurable piece of the client is the connection, which allows us to customize the query string, headers, cookies, certificates, and transport.
We also discussed the communication that occurs between the server and client. In general, the mechanics of the communication is the same for all the clients, but there are subtle differences in consuming the data and moving it off of the connection’s thread. We went through the iterations of the examples for each client.
The next chapter will cover using SignalR on non–Windows operating systems that include iPhone and Android clients.