Automating Microsoft Azure Infrastructure Services
Chapter 2. Getting Started with Azure PowerShell
Installation
The Microsoft Azure PowerShell cmdlets are officially supported on Windows 2008 R2, Windows 7, Windows 8/8.1, and Server 2012/2012 R2. Assuming you are running one of these operating systems (and likely later operating systems) and at least PowerShell 3.0, launch your browser and go to the Microsoft Azure home page at http://azure.microsoft.com. From there, click the Downloads link on the page; you will then see another menu for the various download types available. You, of course, are a PowerShell user, so you will want to click the link for Command Line Tools.
The installation can take several minutes because there is a dependency on the Microsoft Azure SDK, which has its own set of dependencies. For a leaner installation, the Azure PowerShell cmdlets also come as a standalone install. You can install the standalone version by going directly to the GitHub repository at http://bit.ly/azure-sdk-tools.
Setting Up Your Environment
When the installation for the cmdlets is complete, you can choose your method of running them. You can launch PowerShell either by clicking the PowerShell icon on your computer or by running powershell.exe. Another alternative is running a more interactive editor that provides features such as IntelliSense and code snippets. My preference is the latter, and the editor I will use going forward in this book is the PowerShell Integrated Scripting Environment (ISE). In Windows 7 and above, the PowerShell ISE is installed by default, and all that is required is to runpowershell_ise.exe.
Launch the PowerShell ISE and click the small arrow at the top right of the console. This will open the Script pane, where you can type PowerShell commands and save it as a separate script file.
Authenticating to Microsoft Azure
You have two choices for authenticating to Microsoft Azure from PowerShell. You can use your Microsoft Azure username and password with support for a Microsoft or an Organization account in the Azure Active Directory, or you can use certificate-based authentication.
Authenticating with a certificate
The easiest way to get started with certificate authentication is to download a .publishsettings file from Microsoft Azure by using the Get-AzurePublishSettingsFile cmdlet. This cmdlet launches the default browser and takes you to a page on the Microsoft Azure site where you can log in with a Microsoft or Organization account that has access to your Microsoft Azure subscription. When you have successfully logged in, you will be prompted to select a subscription if your account has access to more than one and then prompted to download a .publishsettings file.
To execute, press F5, or highlight the call to the Get-AzurePublishSettingsFile cmdlet in the editor and press F8 (see Figure 2-1).
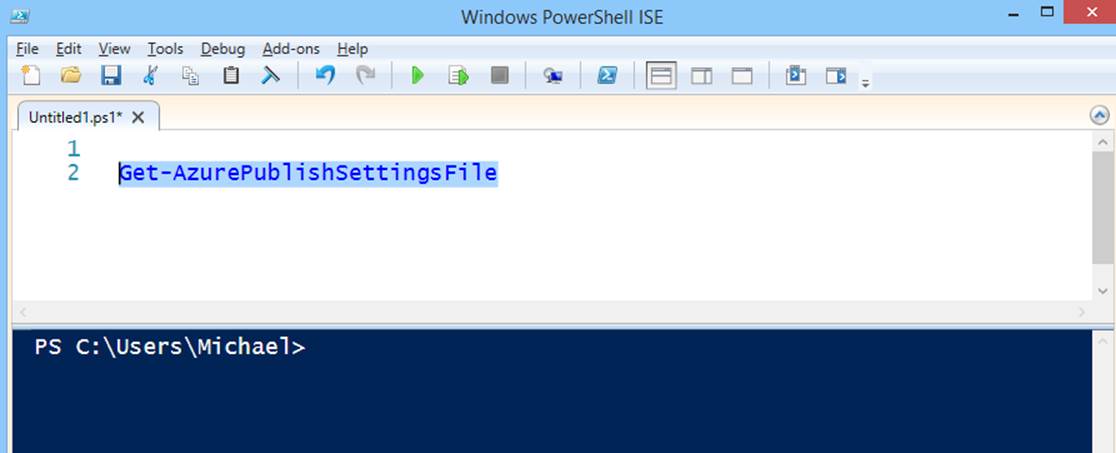
Figure 2-1. Executing Get-AzurePublishSettingsFile
About the .publishsettings file
The file you download should be treated with care. In the file is the name of your subscription, subscription ID, and a newly-generated management certificate that allows you to access the subscription. Whoever has access to this file has access to your subscription. Microsoft Azure imposes a limit on the total number of management certificates that can be associated with a subscription at any given time.
At the time of this writing, the maximum number of certificates is 100. Each time you run the Get-AzurePublishSettingsFile cmdlet, Microsoft Azure generates a new management certificate in the subscription you choose. If there are multiple users on a subscription, you should develop a certificate management strategy early on to avoid problems later.
Importing the .publishsettings file
The next step in configuring the Microsoft Azure PowerShell cmdlets is importing the previously downloaded .publishsettings file. As I mentioned earlier, this file contains a management certificate that allows access to your Microsoft Azure subscription. The cmdlets use this certificate for authentication to the Service Management API.
To import, simply add a call to Import-AzurePublishSettingsFile and pass to it the path to the previously downloaded file (see Figure 2-2). Press F5, or highlight the text and press F8.
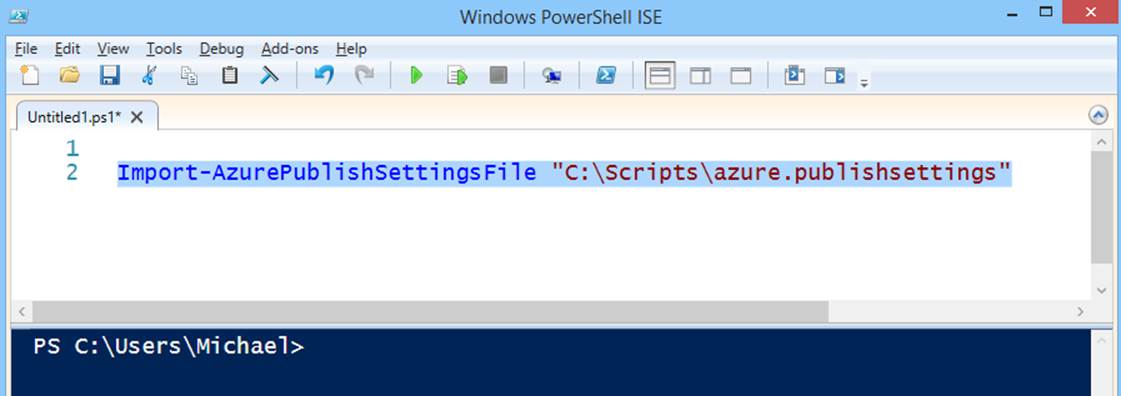
Figure 2-2. Importing a .publishsettings file
Using Microsoft Azure AD to authenticate with PowerShell
An alternative method to using certificates is to authenticate using an account from the Microsoft Azure Active Directory. Each new Microsoft Azure subscription will have its own Active Directory tenant by default. From a PowerShell perspective, this means that you are not required to use management certificates to authenticate and access your subscription.
Using the Add-AzureAccount cmdlet, you can specify the username and password of a user who has administrative or co-administrative rights on your subscription, and use the returned token to execute PowerShell commands with your subscription (see Figure 2-3).
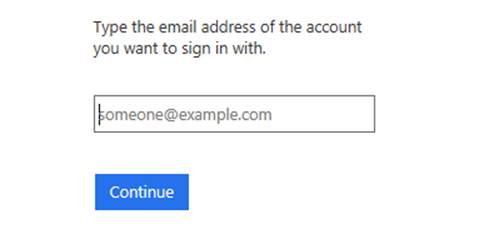
Figure 2-3. Using Add-AzureAccount to authenticate
The token returned from Add-AzureAccount is valid for up to 12 hours. After the token expires, you will need to authenticate again by running Add-AzureAccount and entering your username and password. This is not ideal for scripts that need to run in a purely automated fashion without user intervention of any kind. For noninteractive scripts, the Add-AzureAccount cmdlet supports passing a PSCredential object to the -Credential parameter. At the moment, this support works only with organizational accounts.
SWITCHING BACK TO CERTIFICATE AUTHENTICATION
When you use the Add-AzureAccount cmdlet, all of your subscriptions for that account will be modified to use Azure AD authentication. If you want to switch back to using certificates, you will have to remove the account settings first by calling Remove-AzureAccount.
Managing Subscriptions
Once you have downloaded and imported your subscription settings (or authenticated using your username and password), there are several other cmdlets you should be aware of that are involved with managing your subscription settings in PowerShell.
Get-AzureSubscription
The Get-AzureSubscription cmdlet returns and enumerates subscriptions that have been imported or manually configured with the Set-AzureSubscription cmdlet. These settings are persisted in the $env:APPDATA\Windows Azure PowerShell folder.
Get-AzureSubscription also supports the parameters listed in Table 2-1 to help you identify subscription settings.
Table 2-1. Get-AzureSubscription parameters
|
-Default |
Returns the default subscription. When you start a new PowerShell session, this will be the subscription used if no other subscription is selected. |
|
-Current |
Returns the currently selected subscription. |
|
-ExtendedDetails |
Returns quota details for the current or specified subscription. |
The -ExtendedDetails parameter is especially useful for ensuring that you have enough quota available in your subscription for whatever operation you are automating (see Figure 2-4).
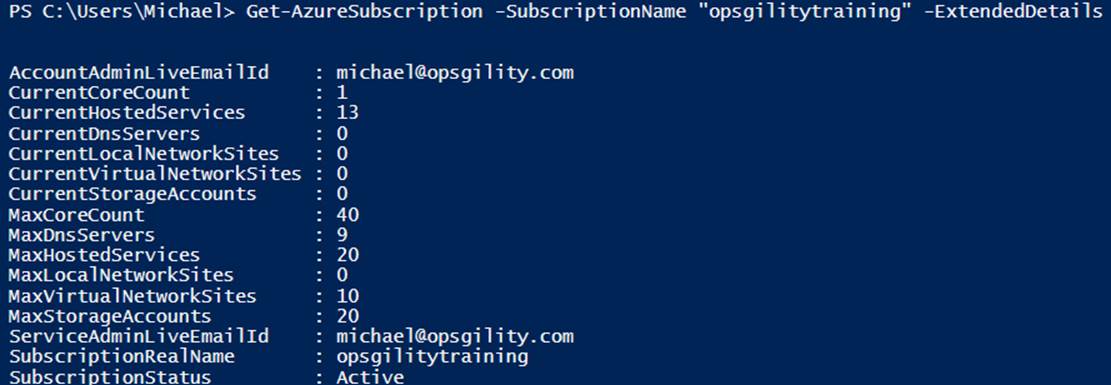
Figure 2-4. Viewing quota information with Get-AzureSubscription
Select-AzureSubscription
At runtime, the cmdlets have a concept of the current subscription selected in your PowerShell session. This functionality allows you to execute scripts using multiple subscriptions. For instance, you could write a script that enumerates all of your subscriptions and deletes unused disks in each of them or stops all virtual machines. The cmdlet to switch between subscriptions is Select-AzureSubscription (see Example 2-1). Simply call the cmdlet with the subscription name you want to work on, and any new calls to Azure will use this subscription.
Example 2-1. Switching between multiple subscriptions
Select-AzureSubscription "[subscription one name]"
Get-AzureVM # returns the status of all VMs in subscription one
Select-AzureSubscription "[subscription two name]"
Get-AzureVM # returns the status of all VMs in subscription two
This cmdlet can also be used to change the current and default subscriptions for your PowerShell sessions with the parameters in Table 2-2.
Table 2-2. Select-AzureSubscription parameters
|
-Default |
Changes the subscription specified to be the new default subscription for all PowerShell sessions. |
|
-Current |
Changes the subscription specified to be the new current subscription for the active PowerShell session. |
|
-NoDefault |
Clears the default subscription settings from all PowerShell sessions. |
|
-NoCurrent |
Clears the current subscription settings from the active PowerShell session. |
Set-AzureSubscription
The Set-AzureSubscription cmdlet allows you to add a subscription to the stored settings or change properties on an existing subscription.
Example 2-2 shows how to associate a manually created certificate and associate it with a Microsoft Azure subscription. The same call could be used to modify an existing subscription by changing the certificate associated with the subscription.
Example 2-2. Manually configuring a Microsoft Azure subscription
$cert = Get-Item Cert:\CurrentUser\My\[certificate thumbprint]
$subscriptionID = "[your subscription ID]"
$localName = "[manually added subscription name]"
Set-AzureSubscription -SubscriptionName $localName `
-SubscriptionId $subscriptionID `
-Certificate $cert
MANUALLY CREATING AND UPLOADING MANAGEMENT CERTIFICATES
If you would like to manually create and manage management certificates, simply use the makecert.exe utility as documented in MSDN http://bit.ly/use_makecert_utility and upload the certificate through the management portal. You can also view the certificate thumbprint in the portal user interface.
Just as you can add and update a subscription, you can also remove the subscription from your local PowerShell configuration by calling the Remove-AzureSubscription cmdlet (see Example 2-3).
Example 2-3. Removing a Microsoft Azure subscription
$subscriptionName = "[subscription name]"
Remove-AzureSubscription -SubscriptionName $subscriptionName
Executing Scripts in This Book
It may take several lines of script when using the Microsoft Azure PowerShell cmdlets to execute a task. During these times, I find it is simpler to add the lines to a single script and use the PowerShell ISE to execute the entire script at once (see Figure 2-5).
Other times you may want simple environment information from Microsoft Azure such as the name of the available regions or a list of storage account names in your subscription. For these one-line operations, I prefer to execute the scripts using the PowerShell console (the Console pane of the PowerShell ISE works well too) and then use the values within the script that I am building.
Throughout this book are examples that I recommend you try as learning exercises and others that are just for reference. In the learning exercises, I will note when I am using the Console pane to execute a command and when I am building a new script by noting that the code should go in the Script pane (see Figure 2-5). You may, of course, do this however you like, but if you are new to PowerShell, I hope these tips will help guide you along the examples throughout the book.
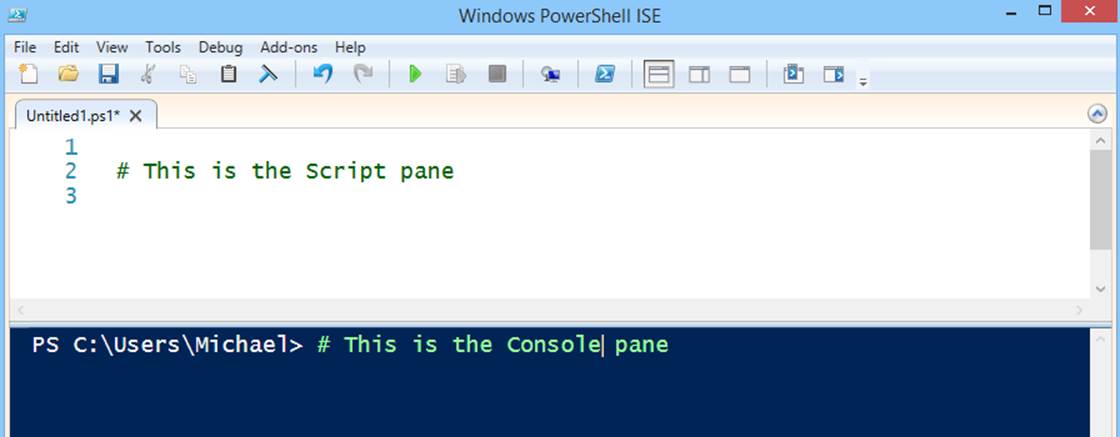
Figure 2-5. The PowerShell ISE
EXECUTING SCRIPT WITH F5 VERSUS F8 IN THE POWERSHELL ISE SCRIPT PANE
As you progress through the book, you will be asked to execute code in several ways. Within the Script pane are two primary methods that you will use in this book. Pressing F5 in the Script pane executes the entire script that is loaded. Pressing F8 executes only the script code that is currently selected or the line that the cursor is on. Sometimes you should execute the entire script with F5 and sometimes only the selected portion with F8.
Summary
In this chapter we have seen where to download the cmdlets from and how to configure one or more Microsoft Azure subscriptions. In Chapter 3 we will dive right into doing something useful with the cmdlets, starting with creating and configuring virtual machines.