Web Programming for Business - PHP Object-Oriented Programming with Oracle
3 Login Security
Overview
Web security is critical to building a robust website. To help you build a secure website, several techniques are introduced, including login authentication, cleansing login data, encryption, strong password creation, SQL injection protection, session protection, and CAPTCHA. The security techniques introduced in this chapter are concerned with securing interactions with the Oracle database. Another form of web security, input validation, is introduced in the next chapter.
Learning Objectives
After you complete this chapter, you will gain a fundamental understanding of web security techniques that mitigate improper interactions with the Oracle database. The following objectives summarize the skills the chapter will help you develop:
1. Learn how to create an Oracle login table.
2. Learn how to cleanse login-related data.
3. Learn how to encrypt passwords.
4. Learn how to create a login page.
5. Learn how to implement login authentication.
6. Learn how to create a strong password.
7. Learn how to protect against SQL injection attacks.
8. Learn how to use session variables for added login security.
9. Learn how to implement CAPTCHA for added login security.
Login Data
Before you can learn about website security, you need data to secure. So, I start by showing you how to create an Oracle database table with valid usernames and passwords. Next, I show you how to create an Oracle database connection class. Finally, I show you how to test the connection class to ensure that it is working properly.
To interact with Oracle, I highly recommend using ‘Oracle SQL Developer’ (see Chapter 1 for installation guidance). Not only is this tool very widely used, it is user friendly.
Now, open an ‘Oracle SQL Developer’ session. On the top menu, click ‘View’, and choose ‘Connections’. Click on the ‘green’ button (top left, directly under ‘Connections’ tab) and a login window appears. Enter ‘Connection Name’, ‘Username’, ‘Password’, ‘Hostname’, ‘Port’, and ‘SID’.
‘Connection Name’ is your choice (I use ‘test’). ‘Username’ and ‘Password’ are for the Oracle database (not for your Linux account). However, I use the same usernames and passwords for both Oracle and Linux accounts when I teach. ‘Hostname’ is the name of the host server where Oracle is installed. ‘Port’ is where Oracle listens for user requests. ‘SID’ is the system identifier for your Oracle instance. Ask your IT expert for appropriate login information. Click the ‘Test’ button. If successful, click the ‘Connect’ button to start a new session. Figure 3.1 shows the connection information that I use to access Oracle.
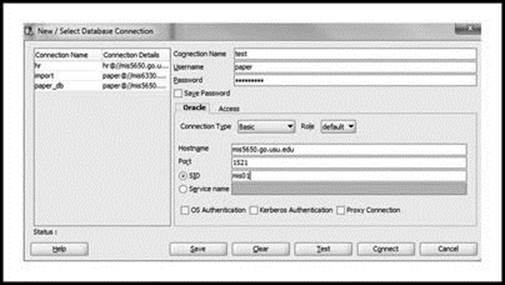
Figure 3.1 Display of Login Information from Oracle SQL Developer (http://www.oracle.com/technetwork/developer-tools/sql-developer/downloads/index.html)
Once connected, icon ‘test’ (or whatever name you entered for ‘Connection Name’) appears because this is the name you provided for ‘Connection Name’. Click the small ‘+’ button to the left of the ‘Connection Name’. You see a multitude of object types from ‘Tables’ to ‘Other Users’.Figure 3.2 shows the available Oracle objects.
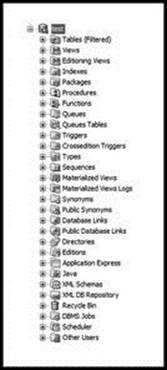
Figure 3.2 Display of Available Oracle Objects (http://www.oracle.com/technetwork/developer-tools/sql-developer/downloads/index.html)
Click on the small ‘+’ to the left of ‘Tables’ to see table objects. Since no table objects have been created, none are displayed. To the right, there should be a ‘Worksheet’ window. This window is where you type Structured Query Language (SQL) commands. SQL is the language of choice for interacting with relational databases like Oracle. If the worksheet is not displayed, click the ‘Tools’ tab and choose ‘SQL Worksheet’. Now you are ready to create your first Oracle database table. Type (or copy) the SQL code into the worksheet window as follows:
CREATE TABLE web_site
( vid CHAR(3),
vuser VARCHAR2(15),
pswd VARCHAR2(50),
lvl NUMBER(1)
);
Figure 3.3 shows how the code should look in the worksheet window.
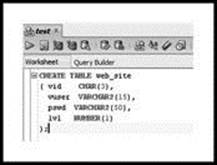
Figure 3.3 Output from SQL Worksheet of Table Creation Code (http://www.oracle.com/technetwork/developer-tools/sql-developer/downloads/index.html)
Remove any blank lines or spaces from the beginning or end of code. To run code, click the second button from the left (directly above the ‘Worksheet’ tab). The button looks like a document with a small green triangle (on its side). Don’t click the first button (green triangle on its side) because it does not run SQL scripts. A message stating that the table was created properly should appear in a new window below the worksheet window, labeled ‘Script Output’ (see Figure 3.4).
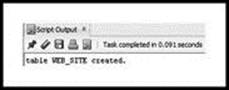
Figure 3.4 Output from SQL Worksheet, Showing that Table Was Created (http://www.oracle.com/technetwork/developer-tools/sql-developer/downloads/index.html)
The next step is to add data. First, clear the ‘Worksheet’ and ‘Script Output’ windows by pressing the eraser buttons that look like the end of a pencil. Type (or copy) the SQL code into the worksheet window.
INSERT INTO web_site VALUES ('001','ben','dover',1);
INSERT INTO web_site VALUES ('002','dandy','lion',2);
INSERT INTO web_site VALUES ('003','sally','forth',2);
INSERT INTO web_site VALUES ('004','oliver','clozoff',2);
INSERT INTO web_site VALUES ('005','betty','wont',2);
Run the code by pressing the little document button with the green triangle. You should see that five rows have been inserted (see Figure 3.5).
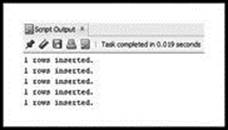
Figure 3.5 Output from SQL Worksheet, Showing that Data Was Added to Table (http://www.oracle.com/technetwork/developer-tools/sql-developer/downloads/index.html)
Clear both windows again by pressing the pencil eraser buttons. To save changes to the database, type (or copy) ‘COMMIT;’ in the worksheet window and run.
COMMIT;
Clear both windows once again. To verify that data was added, type (or copy) the code in the worksheet window and run.
SELECT * FROM web_site;
The ‘Script Output’ window should show data from ‘web_site’ (Figure 3.6).
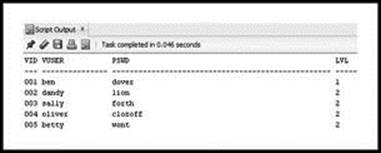
Figure 3.6 Output from SQL Worksheet, Showing Data from Table (http://www.oracle.com/technetwork/developer-tools/sql-developer/downloads/index.html)
Let’s review. To create a new table, use SQL command ‘CREATE TABLE’ with table name, field names, and data types for each field. The ‘vid’ field is defined as a fixed-length string of three characters. The ‘vuser’ field is defined as a variable-length string of up to 15 characters. The ‘pswd’ field is defined as a variable-length string of up to 50 characters. The ‘lvl’ field is defined as a number with a size of one digit. Use SQL command ‘INSERT’ to add data to the ‘web_site’ table with values for each field. Use SQL command ‘COMMIT’ to save changes to the database (to undo changes, use SQL command ‘ROLLBACK’). Use SQL command ‘SELECT’ to retrieve all records from the table. The ‘*’ symbol retrieves all records and all fields from a table.
Connection Class
In this chapter, I use application programming interfaces (APIs) to communicate with Oracle. An API enables a software program to interact with other software programs.
PHP includes a set of Oracle APIs to enable interaction with Oracle. The database connection class needs four APIs – three to connect, parse, and execute an SQL statement, and one to fetch a result set of data. The API to connect to Oracle is ‘OCI_CONNECT’. The API to parse (prepare) an Oracle statement for execution is ‘OCI_PARSE’. The API to execute an Oracle statement is ‘OCI_EXECUTE’. The API to return the next row from a result set of data as an associative array is ‘OCI_FETCH_ASSOC’. An example is now presented.
The example uses two PHP files – ‘dbGeneral.php’ and ‘call_dbGeneral.php’. PHP file ‘dbGeneral.php’ includes an Oracle connection class ‘dbGeneral’ (lines 3–44). The class connects to Oracle, parses an SQL query, and executes the SQL query. PHP file ‘call_dbGeneral.php’ creates a new instance of class ‘dbGeneral’ (line 5) and verifies that it works properly.
In the ‘dbGeneral’ class, the Oracle username, password, and host server are not included (left empty) in the ‘setParms()’ method (lines 17–22) for two reasons. First, you must supply your own Oracle connection information in the ‘setParms()’ method. Second, I am protecting my database information. Be careful to surround your user (schema), password, and host server information with single quotes. In my Oracle installation, the host is composed of two forward slashes, the host server where Oracle resides followed by a forward slash, and the system identifier (SID) – //host_server/SID. As an example, my host information is:
//dbase.brigham.usu.edu:1521/orcl/doracle
The ‘dbGeneral’ class contains five ‘private’ properties (lines 5–9) and one ‘public’ property (line 10). The class also contains a constructor (lines 11–16) that sets the SQL query to a property and automatically invokes ‘setParms()’ (lines 17–22) and ‘connDB()’ (lines 23–28) methods. Methods ‘parse()’ (lines 29–35) and ‘exe()’ (lines 40–43) are invoked by the calling environment when needed. Since binding is introduced later in the chapter, ignore the ‘bind()’ method (lines 36–39) for now.
The ‘private’ properties are used to hold the username, password, host string, SQL query, and connection information. The ‘public’ property is used to hold the result set generated by the SQL query. The constructor sets the incoming query to a property (line 13), and invokes the ‘setParms()’ (line 14) and ‘connDB()’ (line 15) methods. The ‘setParms()’ method sets the username (line 19), password (line 20), and host string (line 21).
1 <?php
2 // File dbGeneral.php
3 class dbGeneral
4 {
5 private $_schema;
6 private $_password;
7 private $_host;
8 private $_query;
9 private $_conn;
10 public $result;
11 function __construct($sql)
12 {
13 $this->_query = $sql;
14 $this->setParms();
15 $this->connDB();
16 }
17 function setParms()
18 {
19 $this->_schema = '';
20 $this->_password = '';
21 $this->_host = '';
22 }
23 function connDB()
24 {
25 if(!$this->_conn = oci_connect($this->_schema,
26 $this->_password, $this->_host))
27 { echo 'error connecting'; }
28 }
29 function parse()
30 {
31 if(!$parse = oci_parse($this->_conn, $this->_query))
32 { echo 'error parsing'; }
33 else
34 { $this->result = $parse; }
35 }
36 function bind($bind,$choice,$length)
37 {
38 oci_bind_by_name($this->result, $bind, $choice,$length);
39 }
40 function exe()
41 {
42 oci_execute($this->result);
43 }
44 }
45 ?>
The ‘connDB()’ method uses API ‘oci_connect()’ with username, password, and host string as parameters to connect to Oracle (lines 25 and 26). If the connection is unsuccessful an error message is displayed (line 27). The ‘parse()’ method uses API ‘oci_parse()’ with connection and query information to parse the SQL query (line 31). If the parse is unsuccessful an error message is displayed (line 32). Otherwise, parse information is set to ‘$this->_result’ (line 34). The ‘exe()’ method uses API ‘oci_execute()’ with ‘$this->_result’ as parameter to run the query (line 42).
1 <?php
2 // File call_dbGeneral.php
3 require_once 'dbGeneral.php';
4 $query = "SELECT * FROM web_site ORDER BY vid";
5 $connect = new dbGeneral($query);
6 $connect->parse();
7 $stmt = $connect->result;
8 $connect->exe();
9 while($row = oci_fetch_assoc($stmt))
10 {
11 echo $row['VID'] . ' ' . $row['VUSER'];
12 echo ' ' . $row['PSWD'] . $row['LVL'];
13 echo '<br />';
14 }
15 ?>
PHP file ‘call_dbGeneral.php’ sets the query (line 4), creates a new instance of ‘dbGeneral()’ (line 5), parses the SQL query (line 6), sets the parse result to ‘$stmt’ (line 7), runs the parsed query (line 8), and displays results (lines 9–14).
The ‘oci_fetch_assoc()’ API (line 9) grabs one row at a time from the Oracle result set as an associative array. Using an associative array is very practical because you can use the field names from the ‘web_site’ table to access their corresponding values. That is, you can associatively retrieve the field value with it corresponding field name. For instance, ‘$row[‘VID’]’ is the field value of the database field ‘VID’ for a particular row from the result set. Be sure to use capital letters when retrieving field names because Oracle only recognizes capital letters for field names in database tables.
Load ‘call_dbGeneral.php’ in a browser to verify that the connection class is working properly. If you encounter difficulties, consult your IT expert. Figure 3.7 shows the results.
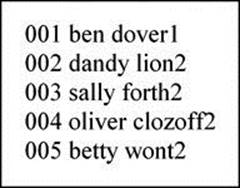
Figure 3.7 Output from ‘dbGeneral’ Class, Showing Data from Table
Cleansing Login Data
Login implements user authentication, but does not protect against unauthorized injection of spurious (bad) data. In this section, I build a simple class to prevent unauthorized injection of ‘DOCTYPE’ declarations, HTML and PHP tags, HTML entities, and select special characters. Hackers inject such information to trick the web browser and PHP engine into carrying out nefarious activities.
Usernames and passwords should never contain ‘DOCTYPE’ declarations, HTML or PHP tags, or HTML entities. It is therefore prudent to remove any such material. Depending on the application, you may or may not want to allow special characters. The example illustrates how to cleanse login information.
The example uses two PHP files – ‘clean.php’ and ‘call_clean.php’. The ‘clean’ class (lines 3–26) in PHP file ‘clean.php’ uses PHP built-in functions to remove any such nefarious material from input data. The class adds flexibility with the addition of a method for dealing with special characters and a method for reducing the size of a string. You can use either method or both depending on your needs. You can also allow or disallow special characters by modifying the first parameter string (line 18) of the ‘preg_replace’ function in the ‘clean_special()’ method. If you do not wish to change the size of a string, do not use the ‘reduce_size()’ method.
1 <?php
2 // File clean.php
3 class clean
4 {
5 function cleanse($data)
6 {
7 $clean = str_replace('<!DOCTYPE','<DOCTYPE',$data);
8 $clean = strip_tags($clean);
9 $clean = htmlentities(trim($clean));
10 $clean = html_entity_decode($clean);
11 $clean = str_replace(' ','',$clean);
12 $clean = str_replace(' ','',$clean);
13 return $clean;
14 }
15 function clean_special($data)
16 {
17 $clean_special = preg_replace
18 ('#[.\\\/*\#$?!=@%,\'\"]#s','',$data);
19 return $clean_special;
20 }
21 function reduce_size($data)
22 {
23 $reduced = substr($data,0,20);
24 return $reduced;
25 }
26 }
27 ?>
In the ‘cleanse()’ method (lines 5–14), the ‘str_replace()’ function (line 7) deals with ‘DOCTYPE’ declaration injections. The ‘<!DOCTYPE>’ declaration tells the web browser the version of the HTML document. The ‘<!DOCTYPE>’ declaration is not HTML. It is supported in all browsers and must be the very first item in an HTML document, before the <html> tag. The ‘strip_tags()’ function (line 8) strips HTML and PHP tags from a string. The ‘htmlentities()’ function (line 9) converts applicable characters to HTML entities. The ‘trim()’ function removes any leading and following blank spaces from a string. The ‘html_entity_decode()’ function (line 10) converts all HTML entities to their applicable characters. Finally, two ‘str_replace()’ functions are provided. The first one (line 11) removes any ‘ ’ HTML entities. The second one (line 12) removes all spaces by replacing ' ' with ''.
The result is robust because you normally do not want any spaces in a username or password. In the ‘clean_special()’ method (lines 15–20), the ‘preg_replace()’ function (lines 17 and 18) replaces special characters (first parameter) with '' (second parameter) for string ‘$data’ (third parameter). The string provided in the first parameter is a regular expression. A regular expression is a way to recognize strings of text. Regular expressions are discussed in detail in the next chapter.
In the ‘reduce_size()’ method (lines 21–25), the ‘substr()’ function (line 23) ensures that input data is no longer than 20 characters. You can modify this length depending on your needs. However, keep this number as low as possible because hackers like to use long strings of characters to inject nefarious instructions into the web browser or PHP engine.
PHP file ‘call_clean.php’ creates a new instance of ‘clean’ (line 6), invokes ‘cleanse()’ (line 7), and outputs the cleansed string (line 8). Next, ‘clean_special()’ is invoked (line 9) and results are displayed (line 10). Finally, ‘reduce_size()’ is invoked (line 11) and results are displayed (line 12). Figure 3.8 shows the results.
1 <?php
2 // File call_clean.php
3 require_once 'clean.php';
4 $data = ' "hey"/\*<html><div>#%=@!?$ ';
5 $data .= '..</html>dudes, how\'s it hanging? ';
6 $clean = new clean();
7 $clean_tags = $clean->cleanse($data);
8 echo $clean_tags;
9 $clean_special = $clean->clean_special($clean_tags);
10 echo '<br />' . $clean_special;
11 $reduced = $clean->reduce_size($clean_special);
12 echo '<br>' . $reduced
13 ?>
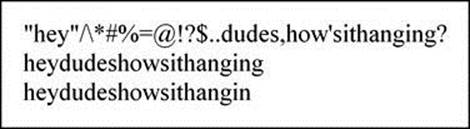
Figure 3.8 Output from ‘clean’ Class
The ‘cleanse()’ method removes HTML tags and the ‘ ’ HTML entity. The ‘clean_special()’ method removes all special characters. The ‘reduce_size()’ method reduces the size of the string to 20 characters. I recommend that you study class ‘clean’ and the resultant output very carefully before moving on to the next section because the class looks pretty simple but it is quite complex.
Encryption
Encryption is the conversion of data into a form that cannot be easily understood (deciphered) by unauthorized users. To encrypt passwords, I use ‘SHA1’, which is a cryptographic hash algorithm developed by the National Security Agency (NSA). This algorithm is the successor to the earlier ‘MD5’ algorithm. I add a double-salt algorithm for enhanced security. A salt is a random string of data used to modify a password hash. A hash is the digital footprint of a piece of data. The next example illustrates how to encrypt passwords.
The example uses two PHP files – ‘salt.php’ and ‘encrypt.php’. PHP file ‘salt.php’ contains a ‘salt’ class (lines 3–16) that uses two salts to modify the password hash. The password hash is created with the ‘SHA1’ algorithm.
1 <?php
2 // File salt.php
3 class salt
4 {
5 function doubleSalt($toHash,$password)
6 {
7 if(strlen($password) < 40)
8 {
9 $arr_pass = str_split($toHash,
10 (strlen($toHash)/2)+1);
11 $hash = hash('sha1', $password.$arr_pass[0] .
12 'centerSalt'.$arr_pass[1]);
13 return $hash;
14 }
15 }
16 }
17 ?>
Class ‘salt’ includes the ‘doubleSalt()’ method (lines 5–15), which takes a salt string and password hash as parameters (line 5). The double salt is accomplished by rearranging the salt and feeding the ‘SHA1’ algorithm the password hash and different pieces of the revised salt as a single concatenated string.
Specifically, function ‘str_split()’ (lines 9 and 10) converts the salt into an array ‘$arr_pass’ with the number of elements determined by the length of salt divided by two, plus one (first salt). For instance, a salt of six characters is converted to an array of index 4 ((6/2)+1). Remember, PHP arrays start at index zero, so an array with index four contains five elements. Function ‘hash’ (lines 11 and 12) uses ‘SHA1’ to encrypt a string composed of the password hash, the first element of ‘$arr_pass’, the string ‘centerSalt’, and the second element of ‘$arr_pass’ concatenated together (second salt). PHP file ‘encrypt.php’ contains the code that encrypts a string (typically a password).
1 <?php
2 // File encrypt.php
3 require_once 'dbGeneral.php';
4 require_once 'salt.php';
5 $query = "SELECT * FROM web_site
6 WHERE vid = '001'";
7 $connect = new dbGeneral($query);
8 $connect->parse();
9 $stmt = $connect->result;
10 $connect->exe();
11 $row = oci_fetch_assoc($stmt);
12 $name = $row['PSWD'];
13 $name = trim($name);
14 if(strlen($name) >= 40)
15 { $flag = FALSE; }
16 elseif(strlen($name) < 40)
17 { $flag = TRUE; }
18 $vid = $row['VID'];
19 $toHash = 'tiger';
20 $salt = new Salt();
21 if($flag)
22 {
23 $pass = $salt->doubleSalt($toHash,$name);
24 $sql = "UPDATE web_site SET
25 pswd = '$pass' WHERE vid = '$vid'";
26 $connect = new dbGeneral($sql);
27 $connect->parse();
28 $stmt = $connect->result;
29 $connect->exe();
30 echo 'Password <strong style="color: indianred;">';
31 echo $name . '</strong> encrypted!';
32 }
33 else
34 { echo 'Password already encrypted!'; }
35 ?>
I include ‘dbGeneral.php’ and ‘salt.php’ (lines 3 and 4) so the script can access the ‘dbGeneral’ and ‘salt’ classes. The query (lines 5 and 6) access a row from the ‘web_site’ table. Next, the result set is obtained by creating a new instance of ‘dbGeneral’ (line 7), using ‘parse()’ (line 8) to parse the query, placing the parsed result in ‘$stmt’ (line 9), using ‘exe()’ (line 10) to run the parsed result, and using ‘oci_fetch_assoc()’ (line 11) to fetch the result into ‘$row’.
The password value is then placed in ‘$name’ by referencing the password with ‘$row['PSWD']’ (line 12). The password length is checked to see if it is already encrypted (lines 14–17). If the length is greater than or equal to ‘40’, I know it has been encrypted because ‘SHA1’ creates a string of 40 characters, and most unencrypted passwords are much shorter than that. Line 19 is the hash string used in the ‘salt’ class. If the password has not been encrypted (line 21), run ‘doubleSalt()’ method (line 23) and update the table with the new password (lines 24–29). If the password is already encrypted, pass an appropriate message back to the calling environment (lines 33 and 34). Load ‘encrypt.php’ to encrypt the password for the first record (Figure 3.9). Run ‘encrypt.php’ again and see what happens (Figure 3.10).
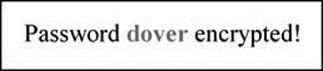
Figure 3.9 Output from ‘dbGeneral’ Class, Showing Encrypted Data
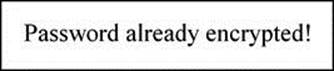
Figure 3.10 Output from ‘dbGeneral’ Class, Attempting to Encrypt Same Data
Since the code tests for length, it does not encrypt an already encrypted password. To verify encryption, open ‘Oracle SQL Developer’ and login. Click ‘+’ to left of ‘Tables’ and click ‘+’ to left of ‘WEB_SITE’ table. Click ‘Data’ tab to see results. The first username ‘ben’ should now have an encrypted password. Now, change the ‘vid’ field value (line 6) and run ‘encrypt.php’ (once for each record) to encrypt the remaining passwords. The remaining queries should look like this:
$query = "SELECT * FROM web_site WHERE vid = '002'";
$query = "SELECT * FROM web_site WHERE vid = '003'";
$query = "SELECT * FROM web_site WHERE vid = '004'";
$query = "SELECT * FROM web_site WHERE vid = '005'";
Be sure to run ‘encrypt.php’ one time for each of the four queries. Load ‘call_dbGeneral.php’ to see data with encrypted passwords (Figure 3.11).
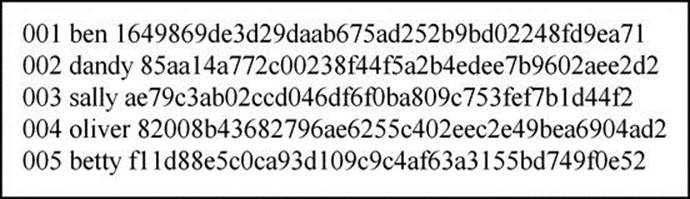
Figure 3.11 Output from ‘dbGeneral’ Class, Showing Five Encrypted Passwords
Before you move to the next section, study ‘encrypt.php’ carefully to make sure that you understand how the entire piece of code works.
Create Login Page and Authenticate
The login page example authenticates usernames and passwords. Three PHP files are used to demonstrate login authentication. First, ‘login.php’ contains HTML for login. Second, ‘verify.php’ authenticates usernames and passwords. Third, ‘onward.php’ is activated if login is successful.
1 <?php
2 // File login.php
3 ?>
4 <html><head>
5 <style type="text/css">
6 table.center {
7 margin-left:auto;
8 margin-right:auto;
9 }
10 </style></head>
11 <body style="background-color:burlywood;">
12 <div style="text-align:center;">
13 <h1 style="color:indigo;">Sign On Page</h1>
14 <form method="post" action="verify.php">
15 <table class="center">
16 <tr><td>User:</td>
17 <td><input type="text"
18 name="user"></td></tr>
19 <tr><td>Password:</td>
20 <td><input type="password"
21 name="password"></td></tr>
22 <tr><td></td><td></td></tr>
23 <tr><td></td>
24 <td><input type="submit"
25 value="Log In"></td></tr>
26 <tr><td></td>
27 </table></form></div>
28 </html>
PHP file ‘login.php’ uses the more secure ‘post’ method (line 14) to send data placed in ‘user’ (lines 16–18) and ‘password’ (lines 19–21). It includes a ‘submit’ button (lines 24 and 25) to allow manual submission of the form. Once submitted, action moves to ‘verify.php’ (line 14). The form is contained in an HTML table (lines 15–27).
PHP file ‘verify.php’ cleans ‘user’ and ‘password’ data posted from the form (lines 9–14), encrypts the password (15–17), queries the database (lines 18–23) to see if the passwords match (line 24), and takes appropriate action. If the passwords match, three session variables are created to hold the values (lines 26–28) for use in PHP file ‘onward.php’. A PHP session provides a way to preserve certain data across subsequent accesses. PHP function ‘session_start()’ should be at the beginning of a script (line 3) and starts a new session or resumes an existing one. A PHP session variable is the mechanism used to preserve data.
1 <?php
2 // File verify.php
3 session_start();
4 require_once 'clean.php';
5 require_once 'dbGeneral.php';
6 require_once 'salt.php';
7 $user = $_POST['user'];
8 $pass = $_POST['password'];
9 $clean = new clean();
10 $clean_tags = $clean->cleanse($user);
11 $clean_special = $clean->clean_special($clean_tags);
12 $user = $clean->reduce_size($clean_special);
13 $clean_tags = $clean->cleanse($pass);
14 $pass = $clean->clean_special($clean_tags);
15 $toHash = 'tiger';
16 $salt = new Salt();
17 $pass = $salt->doubleSalt($toHash,$pass);
18 $query = "SELECT * FROM web_site WHERE";
19 $query = $query . " vuser='$user' AND pswd='$pass'";
20 $connect = new dbGeneral($query);
21 $connect->parse();
22 $stmt = $connect->result;
23 $connect->exe();
24 if ($row = oci_fetch_assoc($stmt))
25 {
26 $_SESSION['VID'] = $row['VID'];
27 $_SESSION['VUSER'] = $row['VUSER'];
28 $_SESSION['VPSWD'] = $row['PSWD'];
29 header ("location: onward.php");
30 }
31 else
32 { header ("location: login.php"); }
33 ?>
Session variables are created with ‘$_SESSION['varname']’ (lines 26–28). Notice how ‘verify.php’ directs the browser to a PHP file with the ‘header()’ function (lines 29 and 32). Don’t forget to turn on a session with ‘session_start()’ (to create and use session variables). So, both ‘verify.php’ and ‘onward.php’ start new sessions.
1 <?php
2 // File onward.php
3 session_start();
4 $vid = $_SESSION['VID'];
5 $vuser = $_SESSION['VUSER'];
6 $vpswd = $_SESSION['VPSWD'];
7 ?>
8 <html>
9 <head><style type="text/css">
10 table.center {
11 margin-left:auto;
12 margin-right:auto;
13 }
14 </style></head>
15 <body style="background-color:burlywood;">
16 <div style="text-align:center;">
17 <h1 style="color:indigo">Successful Login</h1>
18 <table class="center">
19 <tr><td><?php echo $vid . ' ' . $vuser . ' ' .
20 $vpswd; "/></td></tr>
21 </table></div></body>
22 </html>
PHP file ‘onward.php’ retrieves and outputs session variables created in ‘verify.php’. Session variables are retrieved (lines 4–6) and their values are displayed (lines 19 and 20). Load ‘login.php’ in a browser. Figure 3.12 shows the login page with username ‘sally’ and password ‘forth’. Click the ‘Log In’ button. Figure 3.13 show the results.

Figure 3.12 Display of Login Page with Username and Password
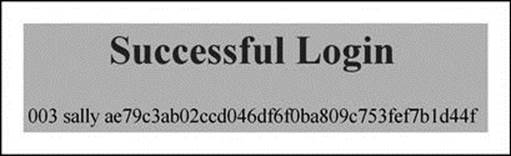
Figure 3.13 Display of Successful Login
Strong Passwords
I intentionally created simple (weak) passwords to ease testing. However, you should create stronger passwords for added security. First, make your passwords at least eight characters long. Second, mix together uppercase letters, lowercase letters, and numbers. Although including special characters creates a stronger password, it is not recommended. The reason is that special characters have meaning in PHP, HTML, Oracle, Linux, JavaScript, and web browsers. For instance, two tags have meaning in multiple contexts. Symbol ‘>’ is part of a PHP tag, part of an HTML tag, and signals output redirection in Linux. Symbol ‘?’ is used to append content to a URL in a web browser, is part of a PHP tag, and can be used as a placeholder for binding variables in Oracle.
Many special characters have meaning in multiple contexts, so be careful if you allow such characters in passwords. For even more security, change passwords often, don’t use the same password for everything, store your passwords off site so that others cannot access them, and be sure that no one is watching when you type in your password.
SQL Injection Protection
SQL injection is a technique often used to attack databases through a website. Specifically, it involves creating or altering existing SQL commands to expose hidden data, override valuable data or even execute dangerous system-level commands on the database host. Your website can actually enable SQL injection by allowing spurious user input and unknowingly combining it with static parameters to build an unauthorized SQL query. For instance, a culprit can send spurious SQL to your website and use his or her knowledge of PHP (in this case your PHP code) to inject.
SQL injection can be dealt with. First, never trust any kind of input coming into your website, especially that which comes from the client (user) side. Even input that comes from a ‘select’ box, hidden input field, or cookie is suspect. Second, never connect to the database as a super user, database administrator (DBA) user, or database owner. Third, allow only customized users with very limited privileges (i.e., the ‘web_site’ table I built in this chapter holds only the users authorized to access the website). Fourth, check whether the given input has the expected data type. Fifth, always use bind variables (covered in the next section) with SQL statements for security and performance reasons. Sixth, do not print out any database-specific information, especially information about your schema. A schema is synonymous with an Oracle user account. Seventh, use stored procedures and previously defined cursors (discussed later in the chapter) to abstract data access so that users do not directly access tables or views.
Bind Variables
Oracle uses the value of a bind variable exclusively and does not interpret the contents of the variable in any way, which drastically mitigates SQL injection problems. A bind variable is a placeholder variable in an SQL statement that must be replaced with a valid value before the statement can successfully execute.
Binding allows the database to reuse statement context and caches from previous executions of the statement, even if another user or process originally executed it. Binding also reduces SQL injection concerns because data associated with a bind variable is never treated as part of the SQL statement. Bound PHP variables can be changed and the SQL statement re-executed without needing to re-parse or re-bind the SQL statement.
To implement SQL injection protection, prepare the SQL statement with the ‘OCI_BIND_BY_NAME’ API. The API serves two purposes. First, it enhances performance because you can use the same SQL statement with different bind values without changing the database (query) execution plan. A database execution plan is an ordered set of steps used to access or modify information in an Oracle database management system (DBMS). Second, it protects against SQL injection if the SQL statement is properly prepared.
The ‘dbGeneral’ class I built earlier includes a ‘bind()’ method. The ‘bind()’ method uses the Oracle API ‘OCI_BIND_BY_NAME’ to bind a PHP placeholder to an Oracle placeholder by name. The ‘bind()’ method accepts a bind variable, the variable being bound, and the maximum length of the variable being bound. Replace the original ‘verify.php’ with the following code.
1 <?php
2 // File verify.php
3 session_start();
4 require_once 'clean.php';
5 require_once 'dbGeneral.php';
6 require_once 'salt.php';
7 $user = $_POST['user'];
8 $pass = $_POST['password'];
9 $clean = new clean();
10 $clean_tags = $clean->cleanse($user);
11 $clean_special = $clean->clean_special($clean_tags);
12 $user = $clean->reduce_size($clean_special);
13 $clean_tags = $clean->cleanse($pass);
14 $pass = $clean->clean_special($clean_tags);
15 $toHash = 'tiger';
16 $salt = new Salt();
17 $pass = $salt->doubleSalt($toHash,$pass);
18 $query = "SELECT * FROM web_site
19 WHERE vuser=:a AND pswd=:b";
20 $connect = new dbGeneral($query);
21 $connect->parse();
22 $connect->bind(':a',$user,20);
23 $connect->bind(':b',$pass,50);
24 $stmt = $connect->result;
25 $connect->exe();
26 if ($row = oci_fetch_assoc($stmt))
27 {
28 $_SESSION['VID'] = $row['VID'];
29 $_SESSION['VUSER'] = $row['VUSER'];
30 $_SESSION['VPSWD'] = $row['PSWD'];
31 header ("location: onward.php");
32 }
33 else
34 { header ("location: login.php"); }
35 ?>
Only a few changes have been made to the original file. First, the SQL ‘SELECT’ statement uses placeholders ':a' and ':b' (lines 18 and 19) respectively instead of ‘$user’ and ‘$pass’ values. Second, the ‘bind()’ method is called twice (once for each bind variable) to bind PHP placeholders ‘$user’ and ‘$pass’ to Oracle placeholders (lines 22 and 23).
Now, let’s test login with bind variables. Clear all browser information because earlier login information might still be in the browser’s cache. Next, load ‘login.php’ in a browser. Figure 3.14 shows the login page with username ‘sally’ and password ‘forth’. Click the ‘Log In’ button.Figure 3.15 shows the results.

Figure 3.14 Display of Login Page with Username and Password
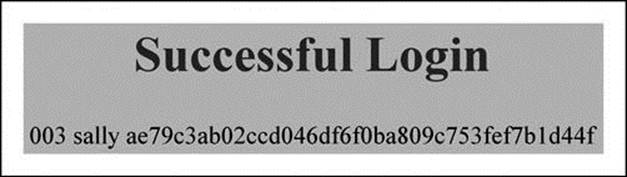
Figure 3.15 Display of Successful Login Based on Strict Security
Although the results look the same, the variables in SQL query were bound properly, which greatly mitigates SQL injection. To this point, I built a secure login page with login authentication, cleansed data, encrypted passwords, and illustrated SQL injection protection (for the ‘SELECT’ SQL statement). SQL can also be injected through the ‘INSERT’, ‘UPDATE’, and ‘DELETE’ SQL statements. An ‘INSERT’ SQL statement is used to add data to the database. PHP file ‘bind_ins.php’ prepares (protects) an ‘INSERT’ statement from SQL injection.
1 <?php
2 // File bind_ins.php
3 require_once 'dbGeneral.php';
4 $query = "INSERT INTO web_site VALUES ";
5 $query = $query . "(:a, :b, :c, :d)";
6 $connect = new dbGeneral($query);
7 $connect->parse();
8 $connect->bind(':a','006',3);
9 $connect->bind(':b','eileen',15);
10 $connect->bind(':c','downe',50);
11 $connect->bind(':d',2,1);
12 $stmt = $connect->result;
13 $connect->exe();
14 ?>
Lines 4 and 5 represent the ‘insert’ query with four bind variables – ':a', ':b', ':c', and ':d'. A new ‘dbGeneral’ object is created (line 6), the query is parsed (line 7), bind variables are given proper values (lines 8–11), and the query is run (lines 12 and 13).
Load the file in a browser. To verify that the code worked as intended, load ‘call_dbGeneral.php’ (created earlier in the chapter) in a browser. Figure 3.16 shows that a record with ‘VID’ of ‘006’ was added to the table.
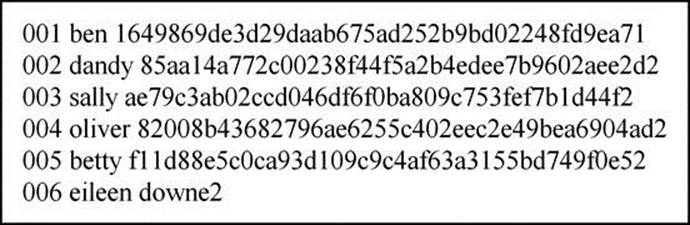
Figure 3.16 Output from ‘dbGeneral’ Class, Showing Added Bound Record
The ‘UPDATE’ SQL statement is used to modify database data. PHP file ‘bind_upd.php’ prepares (protects) an ‘UPDATE’ statement against SQL injection. It also encrypts the password of the newly added record.
Lines 5 and 6 establish the ‘vid’ and ‘password’ (to be encrypted). Line 7 is the hash string fed to the ‘salt’ class. Lines 8 and 9 encrypt the password. Lines 10 and 11 represent the query. Lines 12–17 run the update. Load the file in a browser.
1 <?php
2 // File bind_upd.php
3 require_once 'dbGeneral.php';
4 require_once 'salt.php';
5 $name = 'downe';
6 $vid = '006';
7 $toHash = 'tiger';
8 $salt = new Salt();
9 $pass = $salt->doubleSalt($toHash,$name);
10 $sql = "UPDATE web_site SET
11 pswd = :a WHERE vid = :b";
12 $connect = new dbGeneral($sql);
13 $connect->parse();
14 $connect->bind(':a',$pass,50);
15 $connect->bind(':b',$vid,3);
16 $stmt = $connect->result;
17 $connect->exe();
18 ?>
Notice that the script encrypts the new user’s password and updates the database with this new information. Load ‘call_dbGeneral.php’ in a browser to verify. Figure 3.17 shows that the new record’s password was encrypted.
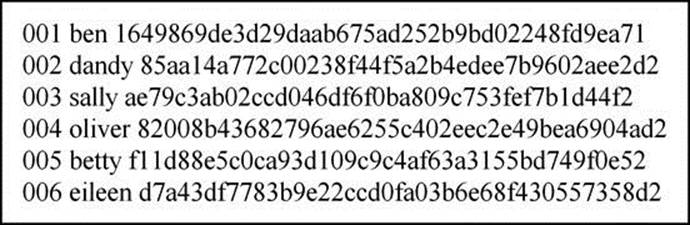
Figure 3.17 Output from ‘dbGeneral’ Class, Showing Updated Bound Record
The ‘DELETE’ SQL statement is used to delete database data. PHP file ‘bind_del.php’ prepares (protects) a ‘DELETE’ statement from SQL injection. Lines 4 and 5 represent the record to be deleted and the query. Lines 6–10 connect to the database, parse, bind, and run the query. Load the file in a browser.
1 <?php
2 // File bind_del.php
3 require_once 'dbGeneral.php';
4 $vid = '006';
5 $sql = "DELETE FROM web_site WHERE vid = :a";
6 $connect = new dbGeneral($sql);
7 $connect->parse();
8 $connect->bind(':a',$vid,3);
9 $stmt = $connect->result;
10 $connect->exe();
11 ?>
Notice that the script deletes the most recently added user. Again, load ‘call_dbGeneral.php’ in a browser. Figure 3.18 shows that the most recently added record is no longer in the table.
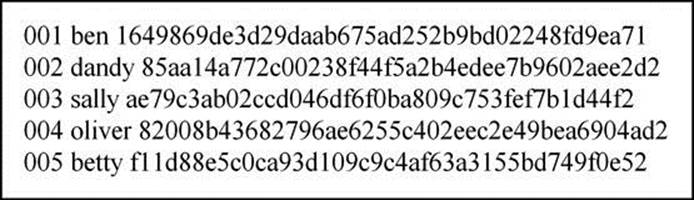
Figure 3.18 Output from ‘dbGeneral’ Class, Showing Deleted Bound Record
Before I add, modify or delete data, I always prepare (protect) the statement from SQL injection. I also prepare any ‘SELECT’ SQL when appropriate.
PL/SQL Binding
In the ‘Bind Variable’ section, seven ways to mitigate SQL injection were introduced. The seventh advocates stored procedures and previously defined cursors. Oracle has an embedded procedural language (PL/SQL) that enables such activity. PL/SQL is an extension to SQL embedded in the Oracle database. It has an advantage in that every reference to a variable is automatically a bind variable.
PL/SQL can be compiled and executed in ‘Oracle SQL Developer’ in the same window as SQL. In the following examples, I illustrate how to use PL/SQL to protect input data from SQL injection. Be sure to remove all line numbers before running the PL/SQL scripts. Line numbers are only included to explain the code.
The first example is presented in two parts. Part one shows you how to create a stored PL/SQL procedure using ‘SELECT’ to place data in a result set. Part two shows you how to run the procedure.
Compile the code for part one in ‘Oracle SQL Developer’. To accomplish this, open an ‘SQL Worksheet’, place the PL/SQL code in the window, and press the button that looks like a document with a green triangle on its side. Be careful to remove the line numbers and any leading or following blank lines and spaces from the code. The button is second from the left. Do not press the button that looks like a green triangle on its side because this one is for single-line SQL statements only.
1 CREATE OR REPLACE PROCEDURE rpt(p_id IN CHAR)
2 AS
3 v_data web_site%ROWTYPE;
4 v_stmt VARCHAR2(100);
5 BEGIN
6 v_stmt := 'SELECT * FROM web_site WHERE vid = :vid';
7 EXECUTE IMMEDIATE v_stmt INTO v_data USING p_id;
8 DBMS_OUTPUT.PUT(v_data.vid || ' ' || v_data.vuser || ' ');
9 DBMS_OUTPUT.PUT_LINE(v_data.pswd || ' ' || v_data.lvl);
10 END rpt;
Create the PL/SQL procedure (line 1). Define variables (lines 3 and 4). The ‘v_data’ variable is defined as ‘%ROWTYPE’, which means that it mirrors a record in the ‘web_site’ table. So, ‘v_data’ is really a record with all fields in the ‘web_site’ table. The ‘v_stmt’ variable is defined to hold a variable-length character string of up to 100 characters. PL/SQL procedures begin logic with a ‘BEGIN’ (line 5) and end logic with an ‘END’ (line 10). ‘v_stmt’ (line 6) is assigned an SQL statement. Notice that assignment in PL/SQL is ‘:=’. So, be careful because this is different from other programming languages. Next SQL is run with ‘EXECUTE IMMEDIATE’ (line 7), which reconciles the bind variable ‘:vid’ from the SQL statement.
‘EXECUTE IMMEDIATE’ is dynamic SQL, which is an advanced topic in PL/SQL. So, I will not discuss it in any more depth. ‘DMBS_OUTPUT.PUT’ (line 8) and ‘DBMS_OUTPUT.PUT_LINE’ (line 9) display results to the Oracle SQL Developer console.
Figure 3.19 shows the results displayed in the ‘Script Output’ window when the PL/SQL code is run. You should see ‘PROCEDURE rpt compiled’, which means that the code executed properly.
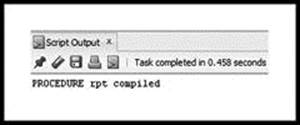
Figure 3.19 Output from SQL Worksheet, Showing Compiled ‘rpt’ Procedure
To review, procedure ‘rpt’ has a ‘CHAR’ parameter ‘p_id’ (line 1), which is the ‘VID’ from the ‘web_site’ table that you wish to display. Variable ‘v_data’ is a ‘%ROWTYPE’ record, which means that it takes on the field characteristics of an entire row in the ‘web_site’ table. Variable ‘v_stmt’ is a variable-length variable that holds the ‘SELECT’ statement. The ‘EXECUTE_IMMEDIATE’ statement places the data from the query into ‘v_data’. The ‘DBMS_OUTPUT’ statements display each piece of ‘v_data’ by database field names.
Once compiled, PL/SQL procedure ‘rpt’ is stored in the Oracle database. The following anonymous block of code runs ‘rpt’. An anonymous block is code that is not named. Notice that the procedure compiled earlier was named ‘rpt’, so it is not anonymous. Run the anonymous block in an ‘SQL worksheet’.
1 SET SERVEROUTPUT ON
2 DECLARE
3 v_id CHAR(3) := '001';
4 BEGIN
5 rpt(v_id);
6 END;
Line 1 turns the Oracle display on. If this is not turned on, nothing will be displayed. Line 2 defines a ‘DECLARE’ block, where variables are declared in an anonymous block. Line 3 defines ‘v_id’ as a fixed character with length of ‘3’ and assigns ‘001’ to it. Lines 4 and 6 define a ‘BEGIN–END’ block. Line 5 runs the ‘rpt’ procedure. Figure 3.20 shows the results from the ‘Script Output’ window. This is expected, since the anonymous block called procedure ‘rpt’ with parameter ‘001’.
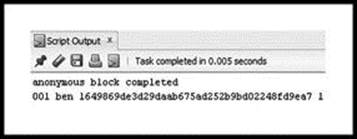
Figure 3.20 Output from SQL Worksheet, Showing Results from ‘rpt’ Procedure
The next three examples are also in two parts – compile and run – for ‘INSERT’, ‘UPDATE’, and ‘DELETE’ SQL injection protection. The ‘add_dynamic’ procedure prepares an ‘INSERT’ statement. I suggest using the button that looks like a little pencil with an eraser to clean up the windows for each example and corresponding output.
1 CREATE OR REPLACE PROCEDURE add_dynamic(
2 p_id web_site.vid%TYPE,
3 p_user web_site.vuser%TYPE,
4 p_pswd web_site.pswd%TYPE,
5 p_lvl web_site.lvl%TYPE)
6 AS
7 v_stmt VARCHAR2(100);
8 BEGIN
9 v_stmt := 'INSERT INTO web_site VALUES(:vid,:vuser,:pswd,:lvl)';
10 EXECUTE IMMEDIATE v_stmt USING p_id,p_user,p_pswd,p_lvl;
11 COMMIT;
12 END add_dynamic;
Line 1 creates the procedure with four parameters (lines 2–5). The ‘%TYPE’ keyword defines a variable or parameter as the corresponding field type of a table. For instance, ‘p_id’ is defined the same as the ‘vid’ field in the ‘web_site’ table. Both ‘%TYPE’ and ‘%ROWTYPE’ are very convenient! Line 7 defines ‘v_stmt’ as a variable-length string of up to 100 characters. Lines 8 and 12 define the ‘BEGIN–END’ block. Line 9 assigns an ‘insert’ query to ‘v_stmt’. Line 10 runs the query. Line 11 saves query results to the database. Be sure to commit any ‘insert’, ‘update’, or ‘delete’ queries. Otherwise, the changes will not be saved to the database!
First, compile ‘add_dynamic’ (same as ‘rpt’). Next, run the following anonymous block of code.
1 SET SERVEROUTPUT ON
2 BEGIN
3 add_dynamic('007','ivan','tohumpalot',2);
4 END;
Figure 3.21 shows the results of compiling the ‘add_dynamic’ procedure. You should see ‘PROCEDURE add_dynamic compiled’. Figure 3.22 shows the results from running the anonymous block.
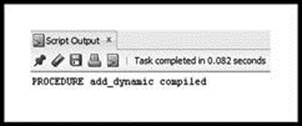
Figure 3.21 Output from SQL Worksheet, Showing Compiled ‘add_dynamic’
Figure 3.22 Output from SQL Worksheet, Showing Results from ‘add_dynamic’
Load ‘call_dbGeneral.php’ in a browser. Figure 3.23 shows that a record with ‘VID’ of ‘007’ was added.
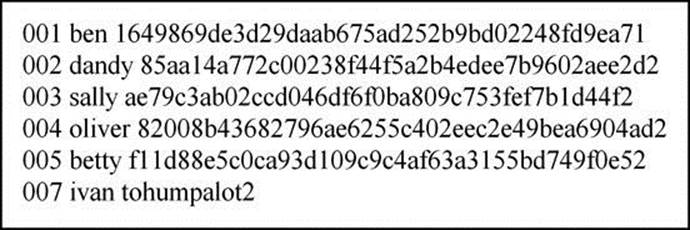
Figure 3.23 Output from ‘dbGeneral’ Class, Showing that Record Was Added
The ‘update_dynamic’ procedure uses similar logic to ‘add_dynamic’, but prepares an ‘UPDATE’ SQL statement instead. Line 1 creates the procedure. Lines 2–5 define the parameters. Line 7 defines a variable. Lines 8–13 represent the logic of the procedure.
1 CREATE OR REPLACE PROCEDURE update_dynamic(
2 p_id web_site.vid%TYPE,
3 p_user web_site.vuser%TYPE,
4 p_pswd web_site.pswd%TYPE,
5 p_lvl web_site.lvl%TYPE)
6 AS
7 v_stmt VARCHAR2(200);
8 BEGIN
9 v_stmt := 'UPDATE web_site
10 SET vuser = :vuser, pswd = :pswd,
11 lvl = :lvl WHERE vid = :vid';
12 EXECUTE IMMEDIATE v_stmt USING p_user,
13 p_pswd,p_lvl,p_id;
14 COMMIT;
15 END update_dynamic;
Compile ‘update_dynamic’ and run the following anonymous block to invoke it.
1 SET SERVEROUTPUT ON
2 BEGIN update_dynamic('007','ivan','tohumpalot',1);
3 END;
Check the ‘web_site’ table to ensure that ‘LVL’ changed from ‘2’ to ‘1’.
The ‘del_dynamic’ procedure allows you to delete a record of your choice. Compile the procedure. Line 1 creates the procedure. Line 2 defines the parameter. Line 4 defines the variable that holds the SQL statement. Line 7 runs the query and line 8 saves results to the Oracle database.
1 CREATE OR REPLACE PROCEDURE del_dynamic(
2 p_id web_site.vid%TYPE)
3 AS
4 v_stmt VARCHAR2(100);
5 BEGIN
6 v_stmt := 'DELETE FROM web_site WHERE vid = :vid';
7 EXECUTE IMMEDIATE v_stmt USING p_id;
8 COMMIT;
9 END del_dynamic;
Run the anonymous block to delete record with ‘VID’ of ‘007’.
1 SET SERVEROUTPUT ON
2 BEGIN
3 del_dynamic('007');
4 END;
Check the ‘web_site’ table to see that the record was deleted. Now, I will show you how to run PL/SQL stored procedures from PHP scripts. In the first example, I add data with the ‘add_dynamic’ procedure. In the second, I modify data with the ‘update_dynamic’ procedure. Finally, I delete data with the ‘del_dynamic’ procedure. Login to your Linux account using ‘PuTTY’, change to the ‘public_html’ directory, and create and save the PHP file ‘add_plsql.php’.
1 <?php
2 // File add_plsql.php
3 require_once 'dbGeneral.php';
4 $a = '008';
5 $b = 'mark';
6 $c = 'deespot';
7 $d = '2';
8 $sql = "BEGIN add_dynamic(:a,:b,:c,:d); END;";
9 $connect = new dbGeneral($sql);
10 $connect->parse();
11 $connect->bind(':a',$a,3);
12 $connect->bind(':b',$b,15);
13 $connect->bind(':c',$c,50);
14 $connect->bind(':d',$d,1);
15 $stmt = $connect->result;
16 $connect->exe();
17 ?>
Lines 4–7 define the values for each field. Line 8 assigns PL/SQL to ‘$sql’. Instead of an SQL query, a ‘BEGIN–END’ block is used to run the procedure. Line 9 creates a new ‘dbGeneral’ object. Line 10 parses the ‘BEGIN–END’ block. Lines 11–14 bind values to variables. Finally, lines 15 and 16 complete the run.
Load ‘add_plsql.php’ in a web browser to add the new record. Load ‘call_dbGeneral.php’ in a browser to see what happened. Figure 3.24 shows that a record with ‘VID’ of ‘008’ was added.
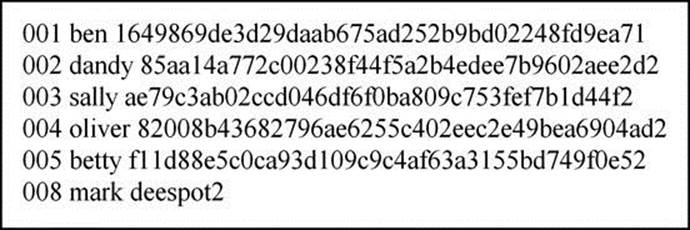
Figure 3.24 Output from ‘dbGeneral’ Class, Showing Another Record Added
Create and save PHP file ‘mod_plsql.php’.
1 <?php
2 // File mod_plsql.php
3 require_once 'dbGeneral.php';
4 $a = '008';
5 $b = 'mark';
6 $c = 'deespot';
7 $d = '1';
8 $sql = "BEGIN update_dynamic(:a,:b,:c,:d); end;";
9 $connect = new dbGeneral($sql);
10 $connect->parse();
11 $connect->bind(':a',$a,3);
12 $connect->bind(':b',$b,15);
13 $connect->bind(':c',$c,50);
14 $connect->bind(':d',$d,1);
15 $stmt = $connect->result;
16 $connect->exe();
17 ?>
Lines 4–7 assign field values. Line 8 builds the ‘BEGIN–END’ block. Line 9 creates a new ‘dbGeneral’ object. Line 10 parses the PL/SQL block. Lines 11–14 bind values to variables. Lines 15 and 16 complete the run. Load the file in a browser. The ‘LVL’ for the record should now be ‘1’.
Create and save the PHP file ‘del_plsql.php’.
1 <?php
2 // File del_plsql.php
3 require_once 'dbGeneral.php';
4 $vid = '008';
5 $sql = "BEGIN del_dynamic(:vid); end;";
6 $connect = new dbGeneral($sql);
7 $connect->parse();
8 $connect->bind(':vid',$vid,3);
9 $stmt = $connect->result;
10 $connect->exe();
11 ?>
Line 4 assigns the field value. Line 5 builds the ‘BEGIN–END’ block. Line 6 creates a new ‘dbGeneral’ object. Line 7 parses the PL/SQL block. Line 8 binds a value to a variable. Lines 9 and 10 complete the run. Load the file in a browser. The record with ‘VID’ of ‘008’ should be deleted.
To this point in the chapter, several techniques have been introduced to enhance the security of a website, with the focus on securing login. The remaining two sections delve even deeper by offering advanced techniques for securing login and protecting other web pages from unauthorized access.
Session Variables (Redirect Unauthorized Access)
Session variables are used for two purposes. First, the values of input data can be saved for as long as the session is active. This allows the use of these values on any web page during an active session. Second, unauthorized users can be kept away from a web page by testing whether a session variable was set.
In ‘verify.php’, I set a session variable for ‘VID’ with ‘$_SESSION['VID'] = $row['VID'];’ if login was successful. So, I have modified ‘onward.php’ to redirect users to the login page (‘login.php’) if login was unsuccessful. I also added a JavaScript event handler. A JavaScript event handler executes JavaScript when an event occurs (like pressing a button). Replace the original ‘onward.php’ with the following code.
1 <?php
2 // File onward.php
3 session_start();
4 if(!IsSet($_SESSION['VID']))
5 { header ("location: login.php"); }
6 $vid = $_SESSION['VID'];
7 $vuser = $_SESSION['VUSER'];
8 ?>
9 <html><head><style type="text/css">
10 table.center {
11 margin-left:auto;
12 margin-right:auto;
13 }
14 </style></head>
15 <body style="background-color:burlywood;">
16 <script src="destroy.js"></script>
17 <div style="text-align:center;">
18 <h1 style="color:indigo">Successful Login</h1>
19 <table class="center">
20 <tr><td><input type=button onClick="killSession();"
21 value="destroy"</td></tr>
22 </table></div>
23 <div style="text-align:center;" id="txtHint">
24 <?php
25 echo "<h5 style='text-align:center;'";
26 print_r($_SESSION);
27 ?>
28 </div></body></html>
At the beginning of ‘onward.php’, I start a new session with ‘session_start()’ (line 3). Next, an ‘if’ statement checks if session variable ‘VID’ is set (or not) (line 4). If not set, the page is redirected to ‘login.php’ (line 5). If set, processing continues normally. Values of session variables ‘VID’ and ‘VUSER’ are captured from the session array set in the ‘verify.php’ script (lines 6 and 7). In line 20, I added a JavaScript event handler ‘onClick’ (inactive at this time). I also added a ‘print_r[$_SESSION]’ statement (line 26) to display session variables.
Test what we have so far by reloading ‘login.php’ into a browser and submitting with username ‘sally’ and password ‘forth’. Figure 3.25 shows the login page and Figure 3.26 shows the result. The ‘destroy’ button does not work yet, but don’t worry. I will show you how to make this work in the next section.
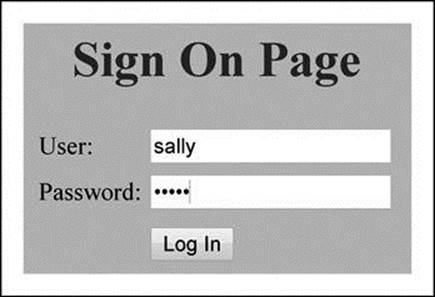
Figure 3.25 Display of Login Page with Username and Password

Figure 3.26 Display of Successful Login with Simple AJAX Functionality
To test the redirect logic, clear the browser cache and load ‘onward.php’ directly into a browser. Figure 3.27 shows that the page was automatically redirected to ‘login.php’, which means that the web page is protected!
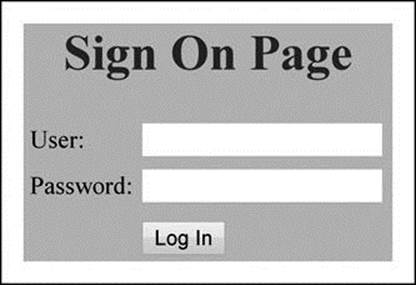
Figure 3.27 Display of Login Page, Verifying that Page Was Redirected
AJAX
Asynchronous JavaScript and XML (AJAX) allows web pages to be updated asynchronously by exchanging small amounts of data with the server without reloading the whole page. Asynchronous describes communications in data that can be transmitted intermittently rather than in a steady stream. For instance, a telephone conversation is asynchronous because both parties can talk whenever they like. If it were synchronous, each party would have to wait a specified interval before speaking. AJAX therefore allows content on web pages to update immediately when a user performs an action. In contrast, with a synchronous HTTP request (i.e., HTML form submission) the user must wait for a whole new page to load.
AJAX uses a combination of an ‘XMLHttpRequest’ object, JavaScript, the document object model (DOM), CSS (optional), and XML (optional). The ‘XMLHttpRequest’ object enables asynchronous data exchange with a server. The ‘JavaScript/DOM’ allows display and interaction of information on a web page. ‘CSS’ allows styling of the data for refined web design. Since this book focuses on web programming, I do not present design principles. ‘XML’ is often used as the format for transferring data. However, AJAX can also transfer text, images, and database data.Figure 3.28 offers a graphical representation of the AJAX process.
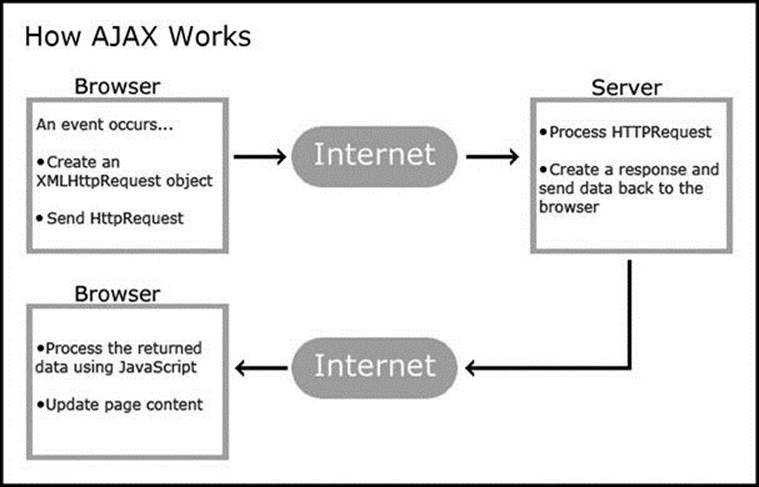
Figure 3.28 Graphical Representation of the AJAX Process (http://www.w3schools.com/ajax/ajax_intro.asp)
AJAX works with a JavaScript file that creates an ‘XMLHttpRequest’ object and sends it to the server. The user can load this file through a JavaScript event handler (i.e., by clicking a button). Once the file is loaded, the web browser sends the request to the server. The server processes the ‘HTTPRequest’, creates a response, and sends data back to the browser. The browser processes the returned data using JavaScript (in the JavaScript file), and updates web page content.
To implement JavaScript event hander ‘onClick()’ in ‘onward.php’, a JavaScript file that implements AJAX is required. I created JavaScript file ‘destroy.js’ for this purpose. Be careful to use file extension ‘js’ to inform the PHP engine that the file is JavaScript.
1 /* File destroy.js */
2 var xhr;
3 xhr = new XMLHttpRequest();
4 function killSession(str)
5 {
6 var url="logout.php";
7 xhr.open("POST",url,true);
8 xhr.setRequestHeader('Content-Type',
9 'application/x-www-form-urlencoded; charset=iso-8859-1');
10 xhr.send("q="+str+"&sid="+Math.random());
11 xhr.onreadystatechange=function()
12 {
13 if (xhr.readyState==4)
14 { document.getElementById("txtHint").innerHTML =
15 xhr.responseText; }
16 }
17 }
I create an instance of ‘XMLHttpRequest’ and place it in variable ‘xhr’ (line 3). In function ‘killSession()’ (lines 4–17), ‘logout.php’ is placed in variable ‘url’ (line 6). With method ‘open’ (line 7) the browser is informed to ‘POST’ file ‘logout.php’. With ‘POST’, header information must be manually sent with method ‘setRequestHeader()’ (lines 8 and 9). The request is sent with method ‘send()’ (line 10). The response from the server is checked with method ‘onreadystatechange()’ (line 11). Once the response is verified (line 13), it is then sent to the web page with method ‘responseText’ (line 15) and placed in document ‘onward.php’ with ‘document.getElementById("txtHint").innerHTML’ (line 14).
The identifier of one of the HTML ‘div’ tags in ‘onward.php’ is ‘txtHint’, which appropriately directs the response. That is, the response is added directly after the ‘div’ tag.
Next, I create PHP file ‘logout.php’. This file is invoked when the JavaScript event handler (‘destroy’ button) is pressed. The file contains a ‘logout’ class (lines 3–11) that destroys all session information (lines 8 and 9). It also contains a statement that creates a new instance of the ‘logout’ class (line 12) and displays that the session was destroyed (line 13).
1 <?php
2 //File logout.php
3 class logout
4 {
5 public function __construct()
6 {
7 session_start();
8 unset($_SESSION);
9 session_destroy();
10 }
11 }
12 $logout = new logout();
13 echo "<h5>Session Destroyed</h5>";
14 ?>
Now, let’s test the latest ‘login’ incarnation. Reload ‘login.php’ into a web browser with username ‘sally’ and password ‘forth’, and press the ‘Log In’ button.
Figure 3.29 displays the results. Now press the ‘destroy’ button, which is now active because we implemented AJAX. Figure 3.30 displays that the session was destroyed.
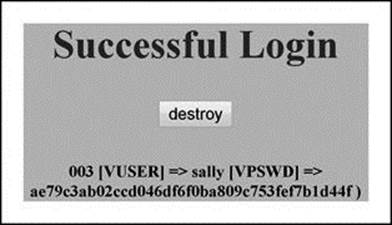
Figure 3.29 Display of Successful Login with ‘destroy’ Button
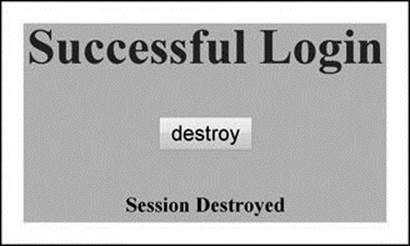
Figure 3.30 Display after ‘destroy’ Button Is Pressed
CAPTCHA
A completely automated public Turing test to tell computers and humans apart (CAPTCHA) is a type of challenge–response test used to ensure that a response is not generated by a computer. The challenge–response is typically a distorted image of letters and numbers that (hopefully) only a human being can decipher. The process usually involves one computer (server) asking a user to complete a simple test that the computer is able to generate and grade. For websites, CAPTCHA is used to verify a form or other login. To implement CAPTCHA, I use ‘Securimage’.
Securimage
Securimage is an open-source free PHP CAPTCHA script for generating complex images and CAPTCHA codes to protect forms from spam and abuse. To install, go to www.phpcaptcha.org and click the ‘Download’ link. Click the ‘zip download’ link in the green window for version 3.5.4 (this is the latest stable version as of writing). Keep in mind that the version and download instructions may change at the discretion of ‘Securimage’ administration. This version assumes that you are running PHP 5 or higher.
Click the arrow to the right of ‘securimage.zip’ on the bottom left of the display and choose ‘Show in folder’. Right click the ‘securimage’ icon in your ‘Downloads’ directory and choose ‘Extract All’. Click the ‘Extract’ button (use the default destination provided). A new ‘securimage’ directory should now appear in your ‘Downloads’ directory.
Open and log into ‘WinSCP’ and you should see a left and right window. The left window is the local computer and the right window is the Linux file structure. On the left window, open the ‘Downloads’ directory. On the right window, open ‘public_html’ directory. Next, copy the contents of the ‘securimage’ directory to the right window (into a ‘securimage’ directory that you must create), and copy (be careful to put it within your ‘public_html’). Now, you should have the ‘securimage’ directory in your ‘public_html’ directory. If you have any difficulty running the software, consult your IT expert.
PHP file ‘login_captcha.php’ shows the code for the CAPTCHA-protected login script.
1 <?php
2 // File login_captcha.php
3 session_start();
4 if(!isSet($_SESSION['captcha']) )
5 { $_SESSION['captcha'] = 0; }
6 ?>
7 <html><head><style type="text/css">
8 table.center {
9 margin-left:auto;
10 margin-right:auto;
11 }
12 </style></head>
13 <body style="background-color:lightgreen";>
14 <h1 style="text-align:center";>Sign On Page</h1>
15 <form method=post action='verify_captcha.php'>
16 <table class="center";>
17 <tr><td>User:</font></td>
18 <td><input type=text name=user></td></tr>
19 <tr><td>Password:</font></td>
20 <td><input type=password name=password></td></tr>
21 <tr><td colspan=2>
22 <tr><td></td><td></td></tr>
23 <tr><td></td>
24 <td><input type=submit value="Log In"></td></tr>
25 <tr><td></td>
26 <?php
27 if($_SESSION['captcha']>= 5)
28 {
29 echo "<td><img id=\"captcha\"
30 src=\"securimage/securimage_show.php\"
31 alt=\"CAPTCHA Image\" /></td></tr>";
32 echo "<tr><td></td>";
33 echo "<td><input type=\"text\" name=\"captcha_code\"
34 size=\"10\" maxlength=\"6\" /></td></tr> <tr><td></td>";
35 echo "<td><a href=\"#\"
36 onclick=\"document.getElementById('captcha').src =
37 'securimage/securimage_show.php?' + Math.random();
38 return false\">Reload Image</a></td></tr>";
39 }
40 ?>
41 </table></form></html>
The ‘login_captcha.php’ file is modified (from ‘login.php’) in three ways. First, a new session is started at the beginning of the script (line 3). Second, logic is added to check if login has been attempted. If not, the session variable ‘captcha’ is set to zero (lines 4 and 5). Otherwise, processing continues normally. Third, logic is added to check if session variable ‘captcha’ is greater than or equal to five (five or more login attempts) (line 27). If so, CAPTCHA code is executed (lines 29–38). Don’t be too concerned if you don’t understand the new logic because it was adapted from logic provided on the ‘Securimage’ website. Go to the ‘Quickstart Guide’ on the ‘Securimage’ website to see details or just use the code provided.
PHP file ‘verify_captcha.php’ has two additions. First, it checks if ‘captcha’ is greater than or equal to five (number of login attempts) (line 7). If so, it loads the CAPTCHA code (line 9), creates a new instance of the ‘Securimage’ class (line 10), and checks if the user typed the CAPTCHA text correctly (line 11). Second, it iterates ‘captcha’ by one each time login fails (line 42). So, ‘login_captcha.php’ and ‘verify_captcha.php’ scripts work together to show the CAPTCHA image if more than five login attempts are made.
1 <?php
2 // File verify_captcha.php
3 session_start();
4 require_once 'clean.php';
5 require_once 'dbGeneral.php';
6 require_once 'salt.php';
7 if($_SESSION['captcha'] >= 5)
8 {
9 include_once ('securimage/securimage.php');
10 $securimage = new Securimage();
11 if($securimage->check($_POST['captcha_code']) == false)
12 { die('The code you entered was incorrect.
13 Go back and try again.'); }
14 }
15 $user = $_POST['user'];
16 $pass = $_POST['password'];
17 $clean = new clean();
18 $clean_tags = $clean->cleanse($user);
19 $clean_special = $clean->clean_special($clean_tags);
20 $user = $clean->reduce_size($clean_special);
21 $clean_tags = $clean->cleanse($pass);
22 $pass = $clean->clean_special($clean_tags);
23 $toHash = 'tiger';
24 $salt = new Salt();
25 $pass = $salt->doubleSalt($toHash,$pass);
26 $query = "SELECT * FROM web_site
27 WHERE vuser=:a AND pswd=:b";
28 $connect = new dbGeneral($query);
29 $connect->parse();
30 $connect->bind(':a',$user,20);
31 $connect->bind(':b',$pass,50);
32 $stmt = $connect->result;
33 $connect->exe();
34 if ($row = oci_fetch_assoc($stmt))
35 {
36 $_SESSION['VID'] = $row['VID'];
37 $_SESSION['VUSER'] = $row['VUSER'];
38 header ("location: onward_captcha.php");
39 }
40 else
41 {
42 $_SESSION['captcha'] += 1;
43 header ("location: login_captcha.php");
44 }
45 ?>
PHP file ‘onward_captcha.php’ has the same logic as the most recently modified ‘onward.php’, except that it redirects to ‘login_captcha.php’ (line 5).
1 <?php
2 // File onward_captcha.php
3 session_start();
4 if(!IsSet($_SESSION['VID']))
5 { header ("location: login_captcha.php"); }
6 $vid = $_SESSION['VID'];
7 $vuser = $_SESSION['VUSER'];
8 ?>
9 <html><body style="background-color:lightgreen";>
10 <script src="destroy_captcha.js"></script>
11 <h1 style="text-align:center";>Successful Login</h1>
12 <div style="text-align:center"; id="txtHint">
13 <table align=center>
14 <tr><td><input type=button onClick="killSession();
15 clearInnerHTML();" value="destroy"</td></tr>
16 </table>
17 </body>
18 <?php
19 echo "<br />Session array: ";
20 print_r($_SESSION);
21 ?>
22 </div><html>
JavaScript file ‘destroy_captcha.js’ includes the same logic as ‘destroy.js’. Be sure to use extension ‘js’ to tell PHP that the file is JavaScript.
1 /* File destroy_captcha.js */
2 var xhr;
3 xhr = new XMLHttpRequest();
4 function killSession(str)
5 {
6 var url="logout_captcha.php";
7 xhr.open("POST",url,true);
8 xhr.setRequestHeader('Content-Type',
9 'application/x-www-form-urlencoded; charset=iso-8859-1');
10 xhr.send("q="+str+"&sid="+Math.random());
11 xhr.onreadystatechange=function()
12 {
13 if (xhr.readyState==4)
14 {
15 document.getElementById("txtHint").innerHTML =
16 xhr.responseText;
17 }
18 }
19 }
PHP file ‘logout_captcha.php’ adds a bit of HTML for a different look than the earlier ‘logout.php’ file.
1 <?php
2 //File: logout_captcha.php
3 class logout
4 {
5 public function __construct()
6 {
7 session_start();
8 unset($_SESSION);
9 session_destroy();
10 }
11 }
12 $logout = new logout();
13 ?>
14 <html style="align-text:center";>
15 <form method="post" action="login_captcha.php">
16 <input type="submit" value="Return">
17 </form>
18 </html>
19 <?php
20 echo '<strong style="color:yellow;">
21 Session Destroyed!</strong>';
22 ?>
Allowing only five attempts at login before CAPTCHA is enacted mitigates the chances of unauthorized access. Load ‘login_captcha.php’ into a browser and click the ‘Log In’ button five times. Type in an authorized username and password (in this case username ‘ben’ and password ‘dover’), and type the required text underneath the CAPTCHA image. Figure 3.31 shows the page at this point. Now, click ‘Log In’ to enter. Figure 3.32 shows a successful login.
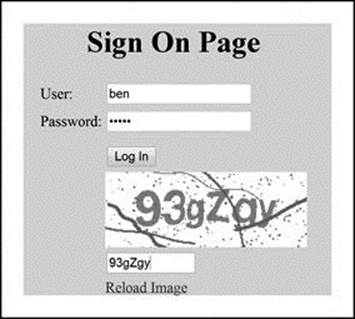
Figure 3.31 Display of ‘CAPTCHA’ Login Page with Login Information
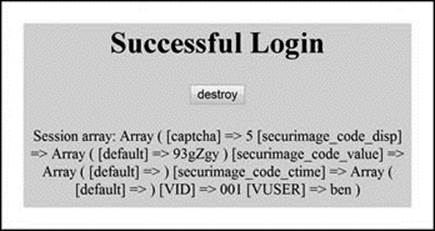
Figure 3.32 Display of Successful ‘CAPTCHA’ Login
Click the ‘destroy’ button. The session is now destroyed, as shown in Figure 3.33. Click ‘Return’ to go back to the login page. In this section, I showed you how to rethink earlier login logic to incorporate added security with CAPTCHA. I strongly recommend using this added feature to protect your website from unauthorized access.
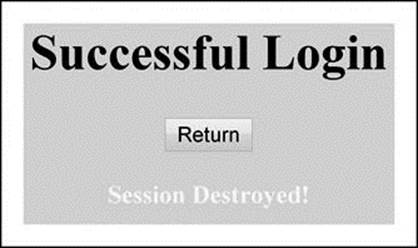
Figure 3.33 Display after ‘destroy’ Button Is Pressed, Showing ‘Return’ Button
Summary
The goal of this chapter was to help you gain a fundamental understanding of web security techniques that mitigate improper interactions with Oracle. I introduced ways to ‘cleanse’ data, encrypt data, protect web pages from unauthorized access, and use CAPTCHA for added login security.