PHP, MySQL, JavaScript & HTML5 All-in-One For Dummies (2013)
Book VI: Web Applications
Chapter 4: Building a Members-Only Website
In This Chapter
![]() Understanding the concepts involved in authentication and authorization
Understanding the concepts involved in authentication and authorization
![]() Adding a user database
Adding a user database
![]() Building login page functionality
Building login page functionality
![]() Authenticating users
Authenticating users
![]() Using PHP’s mail function
Using PHP’s mail function
Many websites are secret — restricted to only authorized users — or have secret sections. Such websites require users to log in before they can see the secret information. Here are some examples of situations in which websites might restrict access:
![]() E-commerce administration: Many online merchants require customers to log in so that their information can be stored for future transactions. The customer information, particularly financial information, needs to be protected from public view.
E-commerce administration: Many online merchants require customers to log in so that their information can be stored for future transactions. The customer information, particularly financial information, needs to be protected from public view.
![]() Confidentiality: Many websites need to restrict information to certain people. For instance, company information might be restricted to company staff or members of a certain department.
Confidentiality: Many websites need to restrict information to certain people. For instance, company information might be restricted to company staff or members of a certain department.
![]() Paid access: Some websites provide access to information that’s available for sale, so the information needs to be restricted to people who have paid for it.
Paid access: Some websites provide access to information that’s available for sale, so the information needs to be restricted to people who have paid for it.
User login is one of the most common applications on the web, with many uses. We’re sure you’ve seen and logged in to many login applications.
If you need to build a complex login application, this chapter is for you. Here, we tell you about some important features of these types of applications and then walk you through creating all the required elements: the user database, web forms to collect the information and log users in, and all the backend details that allow this type of application to run smoothly.
Understanding a Members-Only Site
User login applications can be quite simple, such as an application in which the administrator sets up a list of valid users. Anyone who tries to access a protected file is prompted to enter a username and password, which is checked against the list of valid users. On the other hand, a login application can be much more complicated. It can allow the website visitor to register for access, setting up his or her own account. The application might collect information from the customers as they register. The application might provide the capability for the users to manage their own accounts. The features that a login application can provide are varied.
The basic function of the login application in this chapter is to allow registered users to enter the website and to keep out users who haven’t registered. Its second major function is to allow users to register, storing their information in a database. To meet its basic functionality, the user login application should do the following:
![]() Give customers a choice of whether to register for website access or to log in to the website if they’re already registered.
Give customers a choice of whether to register for website access or to log in to the website if they’re already registered.
![]() Display a registration form that allows new customers to type their registration information. The information to be collected in the form is discussed in the following section, Creating the User Database.
Display a registration form that allows new customers to type their registration information. The information to be collected in the form is discussed in the following section, Creating the User Database.
![]() Validate the information submitted in the form. Make sure the required fields are not blank and the submitted information is in the correct format.
Validate the information submitted in the form. Make sure the required fields are not blank and the submitted information is in the correct format.
![]() Store the validated information in the database.
Store the validated information in the database.
![]() Display a login form that asks for the registered customer’s username and password.
Display a login form that asks for the registered customer’s username and password.
![]() Compare the username and password that’s entered with the usernames and passwords in the database. If a match is found, send a web page from the site to the customer. If no match is found, give the customer the opportunity to try another login.
Compare the username and password that’s entered with the usernames and passwords in the database. If a match is found, send a web page from the site to the customer. If no match is found, give the customer the opportunity to try another login.
Aside from the capability to register and log in, a login application can get much more complex, giving the capability for an administrator to assign roles to certain accounts. For example, a user might be an administrator who can view and change details of other user accounts. Although that functionality is beyond the scope of this chapter, it’s another function for an authentication system.
Creating the User Database
The application design calls for a database that stores user information. The database is the core of this application. The database is needed to store the usernames and passwords of all users allowed to access the website. Often, the database is used to store much more information about the customer. This information can be used for marketing purposes.
The login application in this chapter assumes that the users are customers who are willing to provide their names, addresses, and other information. This type of application is most appropriate for sites that sell products to customers. The user database is named Customer.
Designing the Customer database
Your first design task is to select the information you want to store in the Customer database. At the very least, you need to store a username and a password that the user can use to log in. It's also useful to know when the user account was created. In deciding which information to collect during the user registration, you need to balance your urge to collect all the potentially useful information that you can think of against your users' urges to avoid forms that look too time-consuming and their reluctance to give out personal information. One compromise is to ask for some optional information. Users who don't mind will enter it, and those who object can just leave it blank. You saw examples of this in Chapter 3 of this minibook, where only certain fields were required on the form.
Some information is required for your website to perform its function. For instance, users can readily see that a site that’s going to send them something needs to collect a name and address. However, they might not see why you need a phone number. Even if you require it, users sometimes enter fake phone numbers. So, unless you have a captive audience, such as your employees, who must give you everything you ask for, think carefully about what information to collect. It’s easy for users to leave your website when irritated. It’s not like they drove miles to your store and looked for a parking space for hours. They can leave with just a click.
For the sample application in this chapter, assume the website is an online store that sells products. Thus, you need to collect the customer’s contact information. you believe you need her phone number in case you need to contact her about her order. Most customers are willing to provide phone numbers to reputable online retailers, recognizing that orders can have problems that need to be discussed. The remainder of this section discusses the details of the information and its storage in a MySQL database.
The database contains only one table. The customer information is stored in the table, one record (row) for each customer. The fields needed for the table are shown in Table 4-1.
Table 4-1 Database Table: Customer
|
Variable Name |
Type |
Description |
|
id |
INT |
Auto-incrementing primary key |
|
|
VARCHAR(255) |
E-mail address for the account. This will also be used as the username for login of the user account. |
|
create_date |
DATE |
Date when account was added to table |
|
password |
VARCHAR(255) |
Password for the account |
|
last_name |
VARCHAR(255) |
Customer’s last name |
|
first_name |
VARCHAR(255) |
Customer’s first name |
|
street |
VARCHAR(255) |
Customer’s street address |
|
city |
VARCHAR(255) |
City where customer lives |
|
state |
CHAR(2) |
Two-letter state code |
|
zip |
CHAR(10) |
ZIP code; 5 numbers or ZIP + 4 |
|
phone |
VARCHAR(25) |
Phone number where customer can be reached |
|
phone_type |
VARCHAR(255) |
Phone type (work or home) |
The table has 12 fields. The first four fields, id, email, password, and create_date, are required and cannot be blank. The remaining fields contain information like the customer's name, address, and phone, which are allowed to be blank. The first field, id, is the primary key.
Building the Customer database
You can create the MySQL database using any of the methods discussed in Book V, Chapter 3. The following SQL statement creates this database:
CREATE DATABASE CustomerDirectory;
The following SQL statement creates the table:
CREATE TABLE Customer (
id INT NOT NULL PRIMARY KEY AUTO_INCREMENT,
email VARCHAR(255) NOT NULL,
create_date DATETIME NOT NULL,
password VARCHAR(255) NOT NULL,
last_name VARCHAR(255),
first_name VARCHAR(255),
street VARCHAR(255),
city VARCHAR(255),
state CHAR(2),
zip CHAR(10),
phone VARCHAR(25),
phone_type VARCHAR(255)
);
Accessing the Customer database
PHP provides MySQL functions for accessing your database from your PHP script. The MySQL functions are passed the information needed to access the database, such as a MySQL account name and password. The MySQL account name and password are not related to any other account name or password that you have, such as a password to log in to the system.
In this application, the information needed by the PHP mysqli functions is stored in a separate file called dbstuff.inc. This file is stored in a directory outside the web space, for security reasons. The file contains information similar to the following:
<?php
define("DBHOST", "YOURHOST");
define("DBUSER", "YOURUSER");
define("DBPASS", "YOURPASSWORD");
define("DB","CustomerDirectory");
?>
 Notice the PHP tags at the beginning and the end of the file. If these tags are not included, the information might display on the web page for the whole world to see. Not what you want at all.
For security reasons, this file is stored in a directory outside the web space. You can set the include directory in your php.ini file. Include files are explained in detail in Book IV, Chapter 2.
This database is intended to hold data entered by customers — not by you. It will be empty when the application is first made available to customers until customers add data.
 When you test your application scripts, the scripts will add a row to the database. You need to add a row with a username and password for your own use when testing the scripts.
Creating Base Functions
The first step in creating any large application is to create some base files that will be used to house generic functions. In Chapter 3 of this minibook, a file for validation is created. For this application, use that validation file along with a main functions file that will then require other files.
This represents an important conceptual change from the forms used in Chapter 3. The functions file will be responsible for starting sessions, setting up any constants that you might need, and including other required files. This saves you from having to remember what to include where and from having to remember to start sessions everywhere.
Your basic functions file will be called functions.inc and will be placed in the document root. Listing 4-1 shows that file.
Listing 4-1: A Basic Functions File
<?php
//generic file for generic functions and other includes
session_start();
require_once("../dbstuff.inc");
require_once("validation.inc");
?>
As you can see from Listing 4-1, the session is started and two files are required: the dbstuff.inc file that you saw in the preceding section and a validation.inc file, shown in Listing 4-2.
Listing 4-2: The validation.inc File
<?php
function is_valid_state($state) {
$validStates = array("AL","CA","CO","FL","IL","NJ","NY","WI");
if (in_array($state,$validStates)) {
return true;
} else {
return false;
}
} //end function is_valid_state
function is_valid_zip($zip) {
if (preg_match('/^[\d]+$/',$zip)) {
return true;
} else if (strlen($zip) == 5 || strlen($zip) == 9) {
return true;
} else {
return false;
}
} //end function is_valid_zip
?>
This validation.inc file is similar to that used from Chapter 3. The main change is to the array of valid states.
As you move through this chapter, other files will be added to the functions.inc file and other functions may be added as you need them.
Creating Web Forms
The pages involved in the application will use jQuery, along with an external JavaScript and Cascading Style Sheet (CSS) file. This is essentially the same pattern used in Chapter 3, and as you’ll see, the registration form looks strikingly similar to that used in that chapter, too!
Creating the registration pages
The registration page borrows heavily from the form in Chapter 3. There are a couple additional fields, based on the data requirements for this application, and there's a require_once at the top of the file to include your generic functions file.
Listing 4-3 shows the code for the registration page, called register.php.
Listing 4-3: The Registration Page
<?php require_once("functions.inc"); ?>
<!doctype html>
<html>
<head>
<script type="text/javascript" src="https://ajax.googleapis.com/ajax/libs/jquery/1.8.3/jquery.min.js"></script>
<script type="text/javascript" src="register.js"></script>
<link rel="stylesheet" type="text/css" href="form.css">
<title>A form</title>
</head>
<body>
<form id="userForm" method="POST" action="register-process.php">
<div>
<fieldset>
<legend>Registration Information</legend>
<div id="errorDiv">
<?php
if (isset($_SESSION['error']) && isset($_SESSION['formAttempt'])) {
unset($_SESSION['formAttempt']);
print "Errors encountered<br />\n";
foreach ($_SESSION['error'] as $error) {
print $error . "<br />\n";
} //end foreach
} //end if
?>
</div>
<label for="fname">First Name:* </label>
<input type="text" id="fname" name="fname">
<span class="errorFeedback errorSpan" id="fnameError">First Name is required</span>
<br />
<label for="lname">Last Name:* </label>
<input type="text" id="lname" name="lname">
<span class="errorFeedback errorSpan" id="lnameError">Last Name is required</span>
<br />
<label for="email">E-mail Address:* </label>
<input type="text" id="email" name="email">
<span class="errorFeedback errorSpan" id="emailError">E-mail is required</span>
<br />
<label for="password1">Password:* </label>
<input type="password" id="password1" name="password1">
<span class="errorFeedback errorSpan" id="password1Error">Password required</span>
<br />
<label for="password2">Verify Password:* </label>
<input type="password" id="password2" name="password2">
<span class="errorFeedback errorSpan" id="password2Error">Passwords don't match</span>
<br />
<label for="addr">Address: </label>
<input type="text" id="addr" name="addr">
<br />
<label for="city">City: </label>
<input type="text" id="city" name="city">
<br />
<label for="state">State: </label>
<select name="state" id="state">
<option></option>
<option value="AL">Alabama</option>
<option value="CA">California</option>
<option value="CO">Colorado</option>
<option value="FL">Florida</option>
<option value="IL">Illinois</option>
<option value="NJ">New Jersey</option>
<option value="NY">New York</option>
<option value="WI">Wisconsin</option>
</select>
<br />
<label for="zip">ZIP: </label>
<input type="text" id="zip" name="zip">
<br />
<label for="phone">Phone Number: </label>
<input type="text" id="phone" name="phone">
<span class="errorFeedback errorSpan" id="phoneError">Format: xxx-xxx-xxxx</span>
<br />
<br />
<label for="work">Number Type:</label>
<input class="radioButton" type="radio" name="phonetype" id="work" value="work">
<label class="radioButton" for="work">Work</label>
<input class="radioButton" type="radio" name="phonetype" id="home" value="home">
<label class="radioButton" for="home">Home</label>
<span class="errorFeedback errorSpan phoneTypeError" id="phonetypeError">Please choose an option</span>
<br />
<input type="submit" id="submit" name="submit">
</fieldset>
</div>
</form>
</body>
</html>
When viewed in a browser, the page looks like that in Figure 4-1.
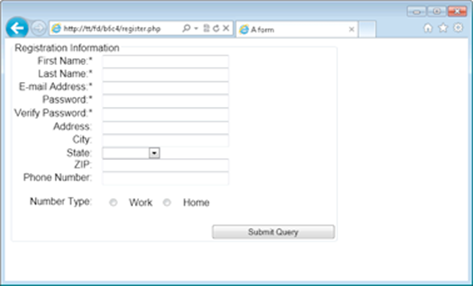
Figure 4-1: The registration page layout.
The registration page uses nearly the same JavaScript and CSS as Chapter 3's form, too. The registration page's HTML refers to them as register.js and form.css, respectively. Listing 4-4 shows the JavaScript used for the registration page.
Listing 4-4: Registration JavaScript
$(document).ready(function() {
$("#userForm").submit(function(e) {
removeFeedback();
var errors = validateForm();
if (errors == "") {
return true;
} else {
provideFeedback(errors);
e.preventDefault();
return false;
}
});
function validateForm() {
var errorFields = new Array();
//Check required fields have something in them
if ($('#lname').val() == "") {
errorFields.push('lname');
}
if ($('#fname').val() == "") {
errorFields.push('fname');
}
if ($('#email').val() == "") {
errorFields.push('email');
}
if ($('#password1').val() == "") {
errorFields.push('password1');
}
// Check passwords match
if ($('#password2').val() != $('#password1').val()) {
errorFields.push('password2');
}
//very basic e-mail check, just an @ symbol
if (!($('#email').val().indexOf(".") > 2) && ($('#email').val().indexOf("@"))) {
errorFields.push('email');
}
if ($('#phone').val() != "") {
var phoneNum = $('#phone').val();
phoneNum.replace(/[^0-9]/g, "");
if (phoneNum.length != 10) {
errorFields.push("phone");
}
if (!$('input[name=phonetype]:checked').val()) {
errorFields.push("phonetype");
}
}
return errorFields;
} //end function validateForm
function provideFeedback(incomingErrors) {
for (var i = 0; i < incomingErrors.length; i++) {
$("#" + incomingErrors[i]).addClass("errorClass");
$("#" + incomingErrors[i] + "Error").removeClass("errorFeedback");
}
$("#errorDiv").html("Errors encountered");
}
function removeFeedback() {
$("#errorDiv").html("");
$('input').each(function() {
$(this).removeClass("errorClass");
});
$('.errorSpan').each(function() {
$(this).addClass("errorFeedback");
});
}
});
Listing 4-5 shows the CSS used for the registration page.
Listing 4-5: Registration Page CSS
body {
font-family: arial,helvetica;
}
form fieldset {
display: inline-block;
}
.radioButton {
float: none;
display: inline;
margin-right: 0.1em;
width: 2em;
}
form label {
width: 8em;
margin-right: 1em;
float: left;
text-align: right;
display: block;
}
form input {
width: 15em;
}
#submit {
margin-top: 2em;
float: right;
}
.errorClass {
background-color: #CC6666;
}
#errorDiv {
color: red;
}
.errorFeedback {
visibility: hidden;
}
.phoneTypeError {
margin-left: 1.2em;
padding: 0.1em;
background-color: #CC6666;
}
Much of the work for a members-only site happens through objects, which you learn about in Book IV, Chapter 4. Later in this chapter, you create a user object. One area that doesn’t really call for the power and reusability of object-oriented code is in the registration. For example, you won’t need to call the registration function from multiple places and the functions used within it are very specific to registration. All these factors add up to being able to use a simple function for registration.
The registration-process PHP page, which is called as the form action from the register.php page (refer to Listing 4-3), includes much of the same error handling that you see in Chapter 3's example. In addition, the registration function is also included on the page. Listing 4-6 shows theregister-process.php page.
Listing 4-6: The register-process Page
<?php
require_once('functions.inc');
//prevent access if they haven't submitted the form.
if (!isset($_POST['submit'])) {
die(header("Location: register.php"));
}
$_SESSION['formAttempt'] = true;
if (isset($_SESSION['error'])) {
unset($_SESSION['error']);
}
$_SESSION['error'] = array();
$required = array("lname","fname","email","password1","password2");
//Check required fields
foreach ($required as $requiredField) {
if (!isset($_POST[$requiredField]) || $_POST[$requiredField] == "") {
$_SESSION['error'][] = $requiredField . " is required.";
}
}
if (!preg_match('/^[\w .]+$/',$_POST['fname'])) {
$_SESSION['error'][] = "First Name must be letters and numbers only.";
}
if (!preg_match('/^[\w .]+$/',$_POST['lname'])) {
$_SESSION['error'][] = "Last Name must be letters and numbers only.";
}
if (isset($_POST['state']) && $_POST['state'] != "") {
if (!is_valid_state($_POST['state'])) {
$_SESSION['error'][] = "Please choose a valid state";
}
}
if (isset($_POST['zip']) && $_POST['zip'] != "") {
if (!is_valid_zip($_POST['zip'])) {
$_SESSION['error'][] = "ZIP code error.";
}
}
if (isset($_POST['phone']) && $_POST['phone'] != "") {
if (!preg_match('/^[\d]+$/',$_POST['phone'])) {
$_SESSION['error'][] = "Phone number should be digits only";
} else if (strlen($_POST['phone']) < 10) {
$_SESSION['error'][] = "Phone number must be at least 10 digits";
}
if (!isset($_POST['phonetype']) || $_POST['phonetype'] == "") {
$_SESSION['error'][] = "Please choose a phone number type";
} else {
$validPhoneTypes = array("work","home");
if (!in_array($_POST['phonetype'],$validPhoneTypes)) {
$_SESSION['error'][] = "Please choose a valid phone number type.";
}
}
}
if (!filter_var($_POST['email'],FILTER_VALIDATE_EMAIL)) {
$_SESSION['error'][] = "Invalid e-mail address";
}
if ($_POST['password1'] != $_POST['password2']) {
$_SESSION['error'][] = "Passwords don't match";
}
//final disposition
if (count($_SESSION['error']) > 0) {
die(header("Location: register.php"));
} else {
if(registerUser($_POST)) {
unset($_SESSION['formAttempt']);
die(header("Location: success.php"));
} else {
error_log("Problem registering user: {$_POST['email']}");
$_SESSION['error'][] = "Problem registering account";
die(header("Location: register.php"));
}
}
function registerUser($userData) {
$mysqli = new mysqli(DBHOST,DBUSER,DBPASS,DB);
if ($mysqli->connect_errno) {
error_log("Cannot connect to MySQL: " . $mysqli->connect_error);
return false;
}
$email = $mysqli->real_escape_string($_POST['email']);
//check for an existing user
$findUser = "SELECT id from Customer where email = '{$email}'";
$findResult = $mysqli->query($findUser);
$findRow = $findResult->fetch_assoc();
if (isset($findRow['id']) && $findRow['id'] != "") {
$_SESSION['error'][] = "A user with that e-mail address already exists";
return false;
}
$lastName = $mysqli->real_escape_string($_POST['lname']);
$firstName = $mysqli->real_escape_string($_POST['fname']);
$cryptedPassword = crypt($_POST['password1']);
$password = $mysqli->real_escape_string($cryptedPassword);
if (isset($_POST['addr'])) {
$street = $mysqli->real_escape_string($_POST['addr']);
} else {
$street = "";
}
if (isset($_POST['city'])) {
$city = $mysqli->real_escape_string($_POST['city']);
} else {
$city = "";
}
if (isset($_POST['state'])) {
$state = $mysqli->real_escape_string($_POST['state']);
} else {
$state = "";
}
if (isset($_POST['zip'])) {
$zip = $mysqli->real_escape_string($_POST['zip']);
} else {
$zip = "";
}
if (isset($_POST['phone'])) {
$phone = $mysqli->real_escape_string($_POST['phone']);
} else {
$phone = "";
}
if (isset($_POST['phonetype'])) {
$phoneType = $mysqli->real_escape_string($_POST['phonetype']);
} else {
$phoneType = "";
}
$query = "INSERT INTO Customer (email,create_date,password,last_name,first_name,street,city,state,zip,phone,phone_type) " .
" VALUES ('{$email}',NOW(),'{$password}','{$lastName}','{$firstName}'" .
",'{$street}','{$city}','{$state}','{$zip}','{$phone}','{$phoneType}')";
if ($mysqli->query($query)) {
$id = $mysqli->insert_id;
error_log("Inserted {$email} as ID {$id}");
return true;
} else {
error_log("Problem inserting {$query}");
return false;
}
} //end function registerUser
?>
The registerUser function is called if no other errors are encountered. Therefore, by the time you get to the registerUser function, you already know that there's a valid e-mail address, that the passwords match, and the required fields are all filled in. This means that the registerUserfunction can concentrate on its job: Get the user information entered into the database.
The registerUser function first connects to the MySQL database by using the constants defined in the dbstuff.inc file. Assuming the connection is there, the e-mail address is escaped to make it safe to use in an SQL statement. The e-mail address is then used to check if a user already exists with that e-mail address. If one is found, then an error is set and Boolean false is returned, which will trigger the error display.
The MySQL table is named Customer, with an uppercase C. If you attempt to access it with a lowercase c, as in customer, the query will fail.
Assuming that an existing user isn't found, each of the values to be inserted into the database is then escaped using the mysqli_real_escape_string() PHP function. The password is also encrypted using the built-in PHP crypt() function as well.
An INSERT statement is built and executed against the database. If the statement executes correctly, then the ID is retrieved; otherwise, an error is generated.
Building a success page
If registration is successful, the user is redirected to success.php. In the example, success.php is going to be a really simple page, but you can make the page as complex as you'd like.
Listing 4-7 shows the code for the success page.
Listing 4-7: The Success Page
<!doctype html>
<html>
<head>
<title>Registration Success</title>
</head>
<body>
<div>
Thank you for registering
</div>
<div>
<a href="login.php">Click here to login</a>
</div>
</body>
</html>
Now run through a registration using the code built so far. This procedure assumes that you've created the CustomerDirectory database and Customer table.
Figure 4-2 shows the registration page with all the fields filled in correctly.
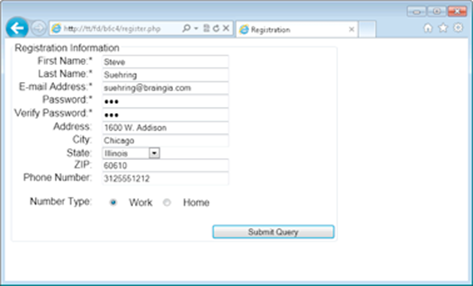
Figure 4-2: Filling out the registration page.
Once filled in, clicking Submit Query sends the form to the register-process.php page, which then registers the user and redirects to the success page shown in Figure 4-3.
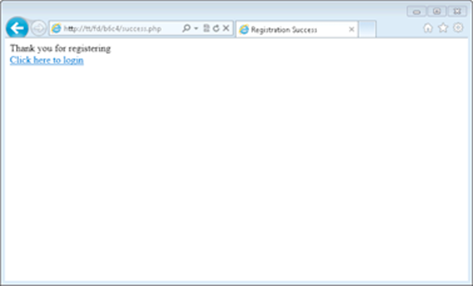
Figure 4-3: The success page.
At this point, there’s a database row created with the information from the registration form and the user is ready to log in. If only you had a login page!
Creating the login page
Now that you have the capability to register a user, it’s time to create a page related to logging in to the application. The login page will look like Figure 4-4.
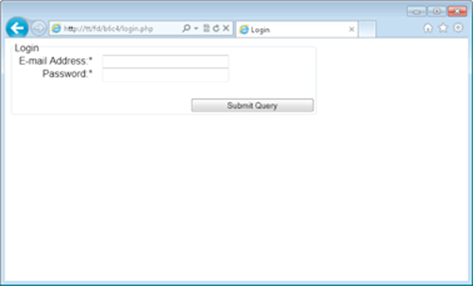
Figure 4-4: The login page.
Listing 4-8 shows the code to build the login page.
Listing 4-8: The Code for the Login Page
<?php require_once("functions.inc"); ?>
<!doctype html>
<html>
<head>
<script type="text/javascript" src="https://ajax.googleapis.com/ajax/libs/jquery/1.8.3/jquery.min.js"></script>
<script type="text/javascript" src="login.js"></script>
<link rel="stylesheet" type="text/css" href="form.css">
<title>Login</title>
</head>
<body>
<form id="loginForm" method="POST" action="login-process.php">
<div>
<fieldset>
<legend>Login</legend>
<div id="errorDiv">
<?php
if (isset($_SESSION['error']) && isset($_SESSION['formAttempt'])) {
unset($_SESSION['formAttempt']);
print "Errors encountered<br />\n";
foreach ($_SESSION['error'] as $error) {
print $error . "<br />\n";
} //end foreach
} //end if
?>
</div>
<label for="email">E-mail Address:* </label>
<input type="text" id="email" name="email">
<span class="errorFeedback errorSpan" id="emailError">E-mail is required</span>
<br />
<label for="password">Password:* </label>
<input type="password" id="password" name="password">
<span class="errorFeedback errorSpan" id="passwordError">Password required</span>
<br />
<input type="submit" id="submit" name="submit">
</fieldset>
</div>
</form>
</body>
</html>
This code uses a JavaScript file called form.js, which is shown in Listing 4-9.
Listing 4-9: JavaScript for the Login Page
$(document).ready(function() {
$("#loginForm").submit(function(e) {
removeFeedback();
var errors = validateForm();
if (errors == "") {
return true;
} else {
provideFeedback(errors);
e.preventDefault();
return false;
}
});
function validateForm() {
var errorFields = new Array();
//Check required fields have something in them
if ($('#email').val() == "") {
errorFields.push('email');
}
if ($('#password').val() == "") {
errorFields.push('password');
}
//very basic e-mail check, just an @ symbol
if (!($('#email').val().indexOf(".") > 2) && ($('#email').val().indexOf("@"))) {
errorFields.push('email');
}
return errorFields;
} //end function validateForm
function provideFeedback(incomingErrors) {
for (var i = 0; i < incomingErrors.length; i++) {
$("#" + incomingErrors[i]).addClass("errorClass");
$("#" + incomingErrors[i] + "Error").removeClass("errorFeedback");
}
$("#errorDiv").html("Errors encountered");
}
function removeFeedback() {
$("#errorDiv").html("");
$('input').each(function() {
$(this).removeClass("errorClass");
});
$('.errorSpan').each(function() {
$(this).addClass("errorFeedback");
});
}
});
The CSS used in this file is the same as is used for the registration page, form.css (refer to Listing 4-5). Therefore, you don't need to create a new file for it. The action of the login form is login-process.php, which you build in the next section.
Creating a User Object
The basis for the authenticated portion of your customer's site is the user — specifically, who they are and whether they're logged in or not. To that end, a User object will provide a helpful abstraction layer, enabling you to add functionality later as you need it.
Building the User class
The User class (it's common to start classes with an uppercase letter in PHP) will be stored in a file called ClassUser.php. That file will be included in the functions.inc file with this line:
require_once("ClassUser.php");
Now the User class will be available everywhere that uses the functions.inc file (which is pretty much everywhere in your application).
The User class is used to authenticate users and to set their information to and from sessions so that it can be used across multiple pages of the application. Listing 4-10 shows the code for the User class.
Listing 4-10: The Code for the User Class
<?php
class User {
public $id;
public $email;
public $firstName;
public $lastName;
public $address;
public $city;
public $state;
public $zip;
public $phone;
public $phoneType;
public $isLoggedIn = false;
function __construct() {
if (session_id() == "") {
session_start();
}
if (isset($_SESSION['isLoggedIn']) && $_SESSION['isLoggedIn'] == true) {
$this->_initUser();
}
} //end __construct
public function authenticate($user,$pass) {
$mysqli = new mysqli(DBHOST,DBUSER,DBPASS,DB);
if ($mysqli->connect_errno) {
error_log("Cannot connect to MySQL: " . $mysqli->connect_error);
return false;
}
$safeUser = $mysqli->real_escape_string($user);
$incomingPassword = $mysqli->real_escape_string($pass);
$query = "SELECT * from Customer WHERE email = '{$safeUser}'";
if (!$result = $mysqli->query($query)) {
error_log("Cannot retrieve account for {$user}");
return false;
}
// Will be only one row, so no while() loop needed
$row = $result->fetch_assoc();
$dbPassword = $row['password'];
if (crypt($incomingPassword,$dbPassword) != $dbPassword) {
error_log("Passwords for {$user} don't match");
return false;
}
$this->id = $row['id'];
$this->email = $row['email'];
$this->firstName = $row['first_name'];
$this->lastName = $row['last_name'];
$this->address = $row['street'];
$this->city = $row['city'];
$this->zip = $row['zip'];
$this->state = $row['state'];
$this->phone = $row['phone'];
$this->phoneType = $row['phone_type'];
$this->isLoggedIn = true;
$this->_setSession();
return true;
} //end function authenticate
private function _setSession() {
if (session_id() == '') {
session_start();
}
$_SESSION['id'] = $this->id;
$_SESSION['email'] = $this->email;
$_SESSION['firstName'] = $this->firstName;
$_SESSION['lastName'] = $this->lastName;
$_SESSION['address'] = $this->address;
$_SESSION['city'] = $this->city;
$_SESSION['zip'] = $this->zip;
$_SESSION['state'] = $this->state;
$_SESSION['phone'] = $this->phone;
$_SESSION['phoneType'] = $this->phoneType;
$_SESSION['isLoggedIn'] = $this->isLoggedIn;
} //end function setSession
private function _initUser() {
if (session_id() == '') {
session_start();
}
$this->id = $_SESSION['id'];
$this->email = $_SESSION['email'];
$this->firstName = $_SESSION['firstName'];
$this->lastName = $_SESSION['lastName'];
$this->address = $_SESSION['address'];
$this->city = $_SESSION['city'];
$this->zip = $_SESSION['zip'];
$this->state = $_SESSION['state'];
$this->phone = $_SESSION['phone'];
$this->phoneType = $_SESSION['phoneType'];
$this->isLoggedIn = $_SESSION['isLoggedIn'];
} //end function initUser
} //end class User
The constructor for the User class first checks to see if the session is started (this will be a common theme for most of the functions in the class). Granted, the session should be started already but if it's not, you definitely don't want to be messing around with session-related variables. So if the session isn't already there, start it.
Next in the constructor, check to see if the user is logged in. If he is, run the initUser function. The initUser function grabs the user's information from the session and sets each of the elements of their information as properties.
The authenticate function is used to check the credentials entered on the form against what's in the database. A database connection is created and a query is built using the e-mail address entered on the login form. If no user is found with that e-mail address, an error is logged behind the scenes and false is returned from the function.
Assuming that a user is found, her password is retrieved from the database. The password will be encrypted, just as you entered it when the user registered. Therefore, the code needs to call the crypt() function with both the incoming password from the login form and the password retrieved from the database. If both encrypted versions match, then you know the user is using the correct password.
With the user successfully authenticated, set the various details from the database into properties and call the setSession() function. The setSession() function takes the properties and sets them into the session so that they can be used on other pages of the application.
That's the User class, so far at least. You add to it as you need to later.
Building the login-process PHP file
Now that the User class is ready to go, you can build the login-process.php file. The login-process.php file is the login form's action. When someone clicks the Submit Query button to log in, he will be sent to this file, which will do the business of authenticating him and sending him on to the appropriate place.
The login-process code is shown in Listing 4-11.
Listing 4-11: Code for the login-process File
<?php
require_once('functions.inc');
//prevent access if they haven't submitted the form.
if (!isset($_POST['submit'])) {
die(header("Location: login.php"));
}
$_SESSION['formAttempt'] = true;
if (isset($_SESSION['error'])) {
unset($_SESSION['error']);
}
$_SESSION['error'] = array();
$required = array("email","password");
//Check required fields
foreach ($required as $requiredField) {
if (!isset($_POST[$requiredField]) || $_POST[$requiredField] == "") {
$_SESSION['error'][] = $requiredField . " is required.";
}
}
if (!filter_var($_POST['email'],FILTER_VALIDATE_EMAIL)) {
$_SESSION['error'][] = "Invalid e-mail address";
}
if (count($_SESSION['error']) > 0) {
die(header("Location: login.php"));
} else {
$user = new User;
if ($user->authenticate($_POST['email'],$_POST['password'])) {
unset($_SESSION['formAttempt']);
die(header("Location: authenticated.php"));
} else {
$_SESSION['error'][] = "There was a problem with your username or password.";
die(header("Location: login.php"));
}
}
?>
The code from the login-process file shares much of the same logic from the register-process file earlier in the chapter. That initial logic is analyzed in Chapter 3.
New for the login-process is the instantiation of the User class and the use of the User class for authentication. The authenticate() function in the User class returns true if the user was authenticated; therefore, it can be wrapped in an if() conditional. A user who logs in successfully gets redirected to a page called authenticated.php. If the login is unsuccessful, the user gets sent back to login.php with an error.
Adding Authenticated Pages
Your application has the capability to register users and to have them log in. It uses a class for handling User information, but there's really nothing for users to do once they log in. At this point, you don't even have an authenticated page built! It's time to fix that.
Building a protected page
Pages that need to be protected — in other words, those that a user needs to be logged in to in order to access them — can be built easily with the help of the User class. Whenever a user is logged in, a property called isLoggedIn gets set to Boolean true. That means you can effectively check whether a user is logged in on any page by checking that property.
Session is used heavily as part of the application. You might be tempted to access things like the isLoggedIn parameter right from the session. However, best practice is to use the object-oriented interface (the User class) whenever possible. There are times when the object-oriented interface may need to do additional checks to see if a user is logged in (or whatever other property is being requested). Therefore, by using the object-oriented interface you're keeping in line with the abstraction techniques and will allow the greatest flexibility later.
The authenticated page used by the login-process file is called authenticated.php. The code for authenticated.php is in Listing 4-12.
Listing 4-12: Code for an Authenticated Page
<?php
require_once("functions.inc");
$user = new User;
if (!$user->isLoggedIn) {
die(header("Location: login.php"));
}
?>
<!doctype html>
<html>
<head>
<title>Super Secret Authenticated Page</title>
</head>
<body>
<div>
<?php print "Welcome {$user->firstName}<br />\n"; ?>
</div>
<div>
<a href="logout.php">Click here to logout</a>
</div>
</body>
</html>
The heart of the page's code is right at the top, where a new User is instantiated and the isLoggedIn property is checked. If the isLoggedIn property is false, the user is redirected back to the login page. If the isLoggedIn property is true, then the page's execution continues and the user is welcomed to the page, as shown in Figure 4-5.
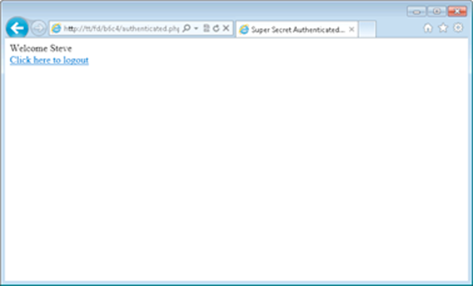
Figure 4-5: An authenticated page.
You can see that the authenticated page refers to a logout.php file. That file has yet to be built.
Essentially, any page that needs to be protected should have this code added to it:
<?php
require_once("functions.inc");
$user = new User;
if (!$user->isLoggedIn) {
die(header("Location: login.php"));
}
?>
With that code (and the accompanying class and support files), a user can't access the page unless the isLoggedIn property is set to true.
Building a log out page
A page to securely log out of the application is just as important as logging in. The page needs to do the obvious, change the isLoggedIn property to false, but should also clear any user data out of the session too. And for an extra layer of security, the session itself can be destroyed, as recommended in the PHP manual.
The actual logout function should be added to the User class, since that's essentially a part of the user-related duties. The logout functionality might also be used from multiple pages, thus making it a good candidate for abstraction into a common area. There are two tasks then:
![]() Build the logout function and add it to the User class.
Build the logout function and add it to the User class.
![]() Build the logout page itself.
Build the logout page itself.
You tackle both of them next.
Creating a logout function
A logout function not only needs to set the isLoggedIn property to false, but also needs to clear the session variables related to the login. Doing this helps to prevent the user from potentially still being logged in or having his information remain in the browser.
The PHP manual's page for session_destroy contains some helpful code for completely removing the session, which you adapt for your logout function; no point reinventing the wheel here.
You can view the PHP manual's session_destroy page at http://php.net/manual/en/function.session-destroy.php.
Listing 4-13 shows the logout function. This function is added to the ClassUser.php file, within the class (just before the closing brace to end the User class).
Listing 4-13: The Logout Function
public function logout() {
$this->isLoggedIn = false;
if (session_id() == '') {
session_start();
}
$_SESSION['isLoggedIn'] = false;
foreach ($_SESSION as $key => $value) {
$_SESSION[$key] = "";
unset($_SESSION[$key]);
}
$_SESSION = array();
if (ini_get("session.use_cookies")) {
$cookieParameters = session_get_cookie_params();
setcookie(session_name(), '', time() - 28800,
$cookieParameters['path'],$cookieParameters['domain'],
$cookieParameters['secure'],$cookieParameters['httponly']
);
} //end if
session_destroy();
} //end function logout
This function sets the isLoggedIn property to false and then proceeds to clear all session variables. If HTTP cookies are used for the session, a new cookie is sent to the browser, effectively expiring the cookie.
Building the logout page
When users click the Logout link anywhere on the site, they'll be sent to a page called logout.php, which performs the actual logout and sends the users back to the login page. The code for the logout page, called logout.php, is only four lines and is shown in Listing 4-14.
Listing 4-14: The Logout Page
<?php
require_once("functions.inc");
$user = new User;
$user->logout();
die(header("Location: login.php"));
?>
With that code in place, a user can register, log in, and log out of the application. However, two areas should be enhanced. First, if a user goes to the login page, you should call the logout function; second, you should also set the isLoggedIn property to false whenever the authenticate method is called.
Enhancing logout
When users go to the login page, you should make sure that they’re really logged out. If you don’t, a user could easily navigate there, see an empty form, and think she’s logged out. In reality, her session is still going, so if another user walked up to the first user’s computer, the second user could navigate through the first user’s history and get into the application. Here’s a demonstration of that behavior.
This demonstration begins by logging in to the application, shown in Figure 4-6.
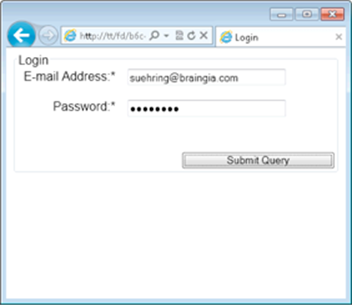
Figure 4-6: Logging in to the application.
With the correct credentials, you’re logged in, as shown in Figure 4-7.
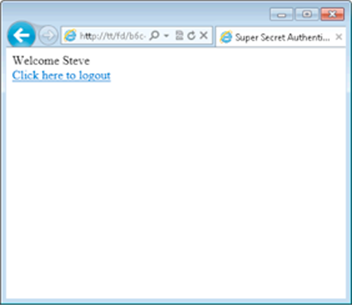
Figure 4-7: Logged in to the application.
Without clicking logout, simply clicking the Back button in the browser goes back to the login.php page. The login.php page is empty, as shown in Figure 4-8, and the user might think that he is now logged out.
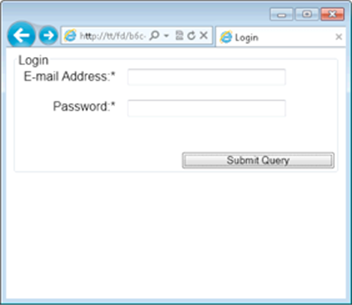
Figure 4-8: The login page, accessed from browser history.
However, using the Forward button or manually entering the authenticated.php page reveals that the user is still logged in, as shown in Figure 4-9.
Figure 4-9: Still logged in when accessed through browser history.
Luckily, the fix for this is rather easy. Adding a call to the logout method to the top of the login page solves the issue. Any time the login.php page is accessed, the user will be logged out. While this might catch a user who mistakenly accesses the login page again, resulting in her having to log in again, it's better than the alternative of allowing unauthorized access to the application.
The top of the login.php page, prior to the <!doctype html>, now looks like this:
<?php
require_once("functions.inc");
$user = new User;
$user->logout();
?>
One final enhancement is to the authenticate method within ClassUser.php. The isLoggedIn session variable and property should be set to false any time a user tries to authenticate. To accomplish that task, add the following code to the top of the authenticate method:
if (session_id() == "") {
session_start();
}
$_SESSION['isLoggedIn'] = false;
$this->isLoggedIn = false;
Adding E-mail Functionality
Users forget their passwords. Sometimes they even forget their usernames, but because your application uses an e-mail address as the username, that scenario is less likely to happen (hopefully). You can add the capability for a user to reset his password. Doing so involves some additional database work and new pages, so we tell you how to do that here. Sending the actual e-mail is rather trivial; it’s all the stuff surrounding password resets that gets a bit more complex.
The overall flow for a password reset on this site will call for a reset page, where users can enter their e-mail address. When submitted, the form will look up the e-mail address to see if it’s a valid account and will then create a unique URL for the password reset. This unique URL will contain a pseudo-random string of characters and will also be stored in a database table on the server.
When the user receives the e-mail response to the request for a password reset, she follows the link with the unique URL. The user then fills in her e-mail address again, along with her new password. This information is looked up in the database, and the random string is compared to the one from the user, along with her e-mail address. If both match, then you can be fairly certain that the same person who requested the reset also controls that e-mail address and is hopefully then authorized to do a password reset for that account.
Assuming everything checks out, the password is reset and the user can log in with the new password immediately. You build this functionality next.
Building the password reset database
The database table for the password reset will store the unique random characters for the URL, the ID of the e-mail address being reset, the date the reset request was received, and whether the reset request is active.
The CREATE statement looks like this:
CREATE TABLE resetPassword (
id INT NOT NULL PRIMARY KEY AUTO_INCREMENT,
email_id INT,
pass_key VARCHAR(255),
date_created DATETIME,
status VARCHAR(255)
);
The status field might be used at a later date to set old reset requests to inactive. Notice that the email_id field is an INT type. The unique ID from the Customer table will be used here, rather than the actual e-mail address. Doing so saves disk space and maintains data integrity at the same time.
This table should be created prior to continuing.
Building the password recovery page
The first password recovery page is a simple form that contains only one field: the e-mail address. The form sends a POST to a file called email-process.php, following the pattern used throughout the chapter. Listing 4-15 shows the code for the initial e-mail password page.
Listing 4-15: Code for the Initial Password Recovery Page
<?php require_once("functions.inc"); ?>
<!doctype html>
<html>
<head>
<script type="text/javascript" src="https://ajax.googleapis.com/ajax/libs/jquery/1.8.3/jquery.min.js"></script>
<script type="text/javascript" src="email.js"></script>
<link rel="stylesheet" type="text/css" href="form.css">
<title>Forgotten Credentials</title>
</head>
<body>
<form id="emailForm" method="POST" action="email-process.php">
<div>
<fieldset>
<legend>Password Recovery</legend>
<div id="errorDiv">
<?php
if (isset($_SESSION['error']) && isset($_SESSION['formAttempt'])) {
unset($_SESSION['formAttempt']);
print "Errors encountered<br />\n";
foreach ($_SESSION['error'] as $error) {
print $error . "<br />\n";
} //end foreach
} //end if
?>
</div>
<label for="email">E-mail Address:* </label>
<input type="text" id="email" name="email">
<span class="errorFeedback errorSpan" id="emailError">E-mail is required</span>
<br />
<input type="submit" id="submit" name="submit">
</fieldset>
</div>
</form>
</body>
</html>
When viewed in a browser, the page looks like the one in Figure 4-10.
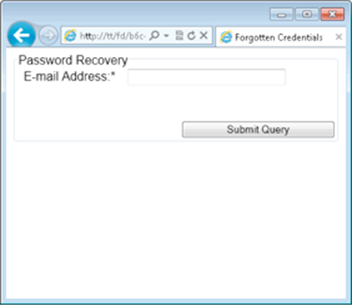
Figure 4-10: The page used for password recovery.
Adding a link to the password recovery page
The password recovery page should be linked from the login page, so that users can get there easily. The following code should be added to the login.php page immediately above the closing </fieldset> tag:
<br />
<a href="emailpass.php">Forgot your password?</a>
Figure 4-11 shows the resulting page.

Figure 4-11: Adding a link to the forgotten password page.
Adding JavaScript
The password recovery page uses its own JavaScript validation, shown in Listing 4-16.
Listing 4-16: JavaScript for Password Recovery Validation
$(document).ready(function() {
$("#loginForm").submit(function(e) {
removeFeedback();
var errors = validateForm();
if (errors == "") {
return true;
} else {
provideFeedback(errors);
e.preventDefault();
return false;
}
});
function validateForm() {
var errorFields = new Array();
//Check required fields have something in them
if ($('#email').val() == "") {
errorFields.push('email');
}
//very basic e-mail check, just an @ symbol
if (!($('#email').val().indexOf(".") > 2) && ($('#email').val().indexOf("@"))) {
errorFields.push('email');
}
return errorFields;
} //end function validateForm
function provideFeedback(incomingErrors) {
for (var i = 0; i < incomingErrors.length; i++) {
$("#" + incomingErrors[i]).addClass("errorClass");
$("#" + incomingErrors[i] + "Error").removeClass("errorFeedback");
}
$("#errorDiv").html("Errors encountered");
}
function removeFeedback() {
$("#errorDiv").html("");
$('input').each(function() {
$(this).removeClass("errorClass");
});
$('.errorSpan').each(function() {
$(this).addClass("errorFeedback");
});
}
});
Building the success page
When a user fills out the form to reset his password, assuming he has done it successfully, he gets sent to a page called email-success.php. Listing 4-17 shows the code for that page.
Listing 4-17: The Password Recovery E-Mail Success Page
<!doctype html>
<html>
<head>
<title>Success</title>
</head>
<body>
<div>
Password reset instructions will be e-mailed to you
</div>
<div>
<a href="login.php">Click here to login</a>
</div>
</body>
</html>
Building the password reset page
The actual password reset form contains fields for the e-mail address and passwords. Users access it when they follow a link in their e-mail. (We show that behind-the-scenes code later.) For now, Listing 4-18 shows the code for the password reset page, called reset.php.
Listing 4-18: Password Reset Page
<?php
require_once("functions.inc");
$invalidAccess = true;
if (isset($_GET['user']) && $_GET['user'] != "") {
$invalidAccess = false;
$hash = $_GET['user'];
}
//if they've attempted the form but had a problem, we need to allow them in.
if (isset($_SESSION['formAttempt']) && $_SESSION['formAttempt'] == true) {
$invalidAccess = false;
$hash = $_SESSION['hash'];
}
if ($invalidAccess) {
die(header("Location: login.php"));
}
?>
<!doctype html>
<html>
<head>
<link rel="stylesheet" type="text/css" href="form.css">
<title>Reset Password</title>
</head>
<body>
<form id="loginForm" method="POST" action="reset-process.php">
<div>
<fieldset>
<legend>Reset Password</legend>
<div id="errorDiv">
<?php
if (isset($_SESSION['error']) && isset($_SESSION['formAttempt'])) {
unset($_SESSION['formAttempt']);
print "Errors encountered<br />\n";
foreach ($_SESSION['error'] as $error) {
print $error . "<br />\n";
} //end foreach
} //end if
?>
</div>
<label for="email">E-mail Address:* </label>
<input type="text" id="email" name="email">
<span class="errorFeedback errorSpan" id="emailError">E-mail is required</span>
<br />
<label for="password1">Password:* </label>
<input type="password" id="password1" name="password1">
<span class="errorFeedback errorSpan" id="password1Error">Password is required</span>
<br />
<label for="password2">Password:* </label>
<input type="password" id="password2" name="password2">
<span class="errorFeedback errorSpan" id="password2Error">Passwords don't match</span>
<br />
<?php
print "<input type=\"hidden\" name=\"hash\" value=\"{$hash}\">\n";
?>
<input type="submit" id="submit" name="submit">
</fieldset>
</div>
</form>
</body>
</html>
This code creates a form, but prior to doing so it looks to see how the user arrived at the page. The first thing examined is whether a $_GET index of 'user' is set and is available. If so, it means the user probably arrived by following a link in her e-mail. The 'user' index contains the unique value generated by your program (that you see later).
If the $_GET['user'] variable is not available, next look to see if the user already tried submitting the form and had a problem. The problem might be as simple as the passwords he entered don't match. Regardless, if he has attempted to fill out the form, the formAttempt index of $_SESSIONwill be set. If it is, then you allow the user to continue.
If neither $_GET['user'] nor $_SESSION['formAttempt'] is available, then the user probably shouldn't be here, so you redirect him away.
Assuming that the user should be here and fills out the form correctly, you submit the form's contents to a file called reset-process.php.
Building the success page
Like other pages, if the user fills the form out correctly, he gets sent to a success page, this time reset-success.php, shown in Listing 4-19.
Listing 4-19: The Reset Success Page
<!doctype html>
<html>
<head>
<title>Reset Success</title>
</head>
<body>
<div>
Your password has been reset
</div>
<div>
<a href="login.php">Click here to login</a>
</div>
</body>
</html>
Building the process files
Both the initial password recovery page and the reset page have their own processing files that take care of the work of actually e-mailing and resetting passwords, respectively. Actually, the process pages call the User class for the real work, but process pages are handy for validation and handling business rule logic. Keep reading for instructions on how to create these two files.
Creating the password recovery process file
The password recovery processing file, called email-process.php, is shown in Listing 4-20.
Listing 4-20: The Password Recovery Process File
<?php
require_once('functions.inc');
//prevent access if they haven't submitted the form.
if (!isset($_POST['submit'])) {
die(header("Location: login.php"));
}
$_SESSION['formAttempt'] = true;
if (isset($_SESSION['error'])) {
unset($_SESSION['error']);
}
$_SESSION['error'] = array();
$required = array("email");
//Check required fields
foreach ($required as $requiredField) {
if (!isset($_POST[$requiredField]) || $_POST[$requiredField] == "") {
$_SESSION['error'][] = $requiredField . " is required.";
}
}
if (!filter_var($_POST['email'],FILTER_VALIDATE_EMAIL)) {
$_SESSION['error'][] = "Invalid e-mail address";
}
if (count($_SESSION['error']) > 0) {
die(header("Location: emailpass.php"));
} else {
$user = new User;
if ($user->emailPass($_POST['email'])) {
unset($_SESSION['formAttempt']);
die(header("Location: email-success.php"));
} else {
$_SESSION['error'][] = "There was a problem locating the e-mail address.";
die(header("Location: emailpass.php"));
}
}
?>
There's not much complexity involved in this file — at least none that you haven't seen a few times already. Much of the detail involves validation logic. Assuming everything is valid, the User class is instantiated and the emailPass() method is called. You build that later.
Creating the reset process file
The reset process file follows the same pattern as the e-mail process file. Listing 4-21 shows the code for the reset process file.
Listing 4-21: The Reset Process File
<?php
require_once('functions.inc');
//prevent access if they haven't submitted the form.
if (!isset($_POST['submit'])) {
die(header("Location: login.php"));
}
$_SESSION['formAttempt'] = true;
if (isset($_SESSION['error'])) {
unset($_SESSION['error']);
}
$_SESSION['error'] = array();
$required = array("email","password1","password2");
//Check required fields
foreach ($required as $requiredField) {
if (!isset($_POST[$requiredField]) || $_POST[$requiredField] == "") {
$_SESSION['error'][] = $requiredField . " is required.";
}
}
if (!filter_var($_POST['email'],FILTER_VALIDATE_EMAIL)) {
$_SESSION['error'][] = "Invalid e-mail address";
}
if (count($_SESSION['error']) > 0) {
die(header("Location: reset.php"));
} else {
$user = new User;
if ($user->validateReset($_POST)) {
unset($_SESSION['formAttempt']);
die(header("Location: reset-success.php"));
} else {
if ($user->errorType = "nonfatal") {
$_SESSION['hash'] = $_POST['hash'];
$_SESSION['error'][] = "There was a problem with the form.";
die(header("Location: reset.php"));
} else {
$_SESSION['error'][] = "There was a problem with the form.";
die(header("Location: emailpass.php"));
}
}
}
?>
One new item in this file is the concept of an error type. Specifically, the application now defines the type of error encountered as being fatal, meaning that the processing shouldn't continue, and nonfatal, meaning the user can be alerted to the issue and possibly fix it. You can see this reflected in the check for errorType in the code. If it's a nonfatal error, then you keep the unique ID in session and let the user try again. If you notice what you believe to be a fatal error, then you don't let the user try again. An example of a fatal error might be something that you detect as a possible attempt to hack into the application. You don't want to allow the user to continue in that case, and you might take other action, like blocking her IP address, and so on.
For now, use the nonfatal designation in this file and within the User class, which you see next.
Building the class methods
The final step in the password reset process is to build functions or methods for handling the steps involved. You have already built the pages and the processing files, so all you have left to do is add methods to the User class.
Adding an e-mail method
The emailPass method, which is called from within the email-process.php file from Listing 4-20, is responsible for looking up the e-mail address entered by the user, generating a unique hash, entering that information into the database, and e-mailing the reset instructions to the user.
A useful abstraction, which is not included in this chapter, would be to create methods for each of those duties, such as one to return the user’s ID and another to generate a unique hash.
Listing 4-22 shows the emailPass method, which should be added to the User class.
Listing 4-22: The emailPass Method
public function emailPass($user) {
$mysqli = new mysqli(DBHOST,DBUSER,DBPASS,DB);
if ($mysqli->connect_errno) {
error_log("Cannot connect to MySQL: " . $mysqli->connect_error);
return false;
}
// first, lookup the user to see if they exist.
$safeUser = $mysqli->real_escape_string($user);
$query = "SELECT id,email FROM Customer WHERE email = '{$safeUser}'";
if (!$result = $mysqli->query($query)) {
$_SESSION['error'][] = "Unknown Error";
return false;
}
if ($result->num_rows == 0) {
$_SESSION['error'][] = "User not found";
return false;
}
$row = $result->fetch_assoc();
$id = $row['id'];
$hash = uniqid("",TRUE);
$safeHash = $mysqli->real_escape_string($hash);
$insertQuery = "INSERT INTO resetPassword (email_id,pass_key,date_created,status) " .
" VALUES ('{$id}','{$safeHash}',NOW(),'A')";
if (!$mysqli->query($insertQuery)) {
error_log("Problem inserting resetPassword row for " . $id);
$_SESSION['error'][] = "Unknown problem";
return false;
}
$urlHash = urlencode($hash);
$site = "http://localhost";
$resetPage = "/reset.php";
$fullURL = $site . $resetPage . "?user=" . $urlHash;
//set up things related to the e-mail
$to = $row['email'];
$subject = "Password Reset for Site";
$message = "Password reset requested for this site.\r\n\r\n";
$message .= "Please go to this link to reset your password:\r\n";
$message .= $fullURL;
$headers = "From: webmaster@example.com\r\n";
mail($to,$subject,$message,$headers);
return true;
} //end function emailPass
The PHP mail() function is used in the emailPass method. This built-in function accepts four arguments: the destination (To) for the e-mail, the subject of the e-mail, the actual message itself, and any additional headers. Those additional headers include things like the From: header that you typically see in an e-mail, but can also include things like the Reply-To: header, and CC and BCC headers too.
Creating the validation method
The validateReset() method is called from the reset-process file and has the task of validating everything sent by the user for this request and also carrying out the task of resetting the password. Listing 4-23 shows the validateReset() method, which should be added to the User class.
Listing 4-23: The validateReset Method
public function validateReset($formInfo) {
$pass1 = $formInfo['password1'];
$pass2 = $formInfo['password2'];
if ($pass1 != $pass2) {
$this->errorType = "nonfatal";
$_SESSION['error'][] = "Passwords don't match";
return false;
}
$mysqli = new mysqli(DBHOST,DBUSER,DBPASS,DB);
if ($mysqli->connect_errno) {
error_log("Cannot connect to MySQL: " . $mysqli->connect_error);
return false;
}
$decodedHash = urldecode($formInfo['hash']);
$safeEmail = $mysqli->real_escape_string($formInfo['email']);
$safeHash = $mysqli->real_escape_string($decodedHash);
$query = "SELECT c.id as id, c.email as email FROM Customer c, resetPassword r WHERE " .
"r.status = 'A' AND r.pass_key = '{$safeHash}' " .
" AND c.email = '{$safeEmail}' " .
" AND c.id = r.email_id";
if (!$result = $mysqli->query($query)) {
$_SESSION['error'][] = "Unknown Error";
$this->errorType = "fatal";
error_log("database error: " . $formInfo['email'] . " - " . $formInfo['hash']);
return false;
} else if ($result->num_rows == 0) {
$_SESSION['error'][] = "Link not active or user not found";
$this->errorType = "fatal";
error_log("Link not active: " . $formInfo['email'] . " - " . $formInfo['hash']);
return false;
} else {
$row = $result->fetch_assoc();
$id = $row['id'];
if ($this->_resetPass($id,$pass1)) {
return true;
} else {
$this->errorType = "nonfatal";
$_SESSION['error'][] = "Error resetting password";
error_log("Error resetting password: " . $id);
return false;
}
}
} //end function validateReset
The validateReset method first checks to see if the passwords match. No use continuing if they don't. A complex query is then built using the information entered. Here's the SELECT statement:
SELECT c.id as id, c.email as email
FROM Customer c, resetPassword r
WHERE
r.status = 'A'
AND r.pass_key = '{$safeHash}'
AND c.email = '{$safeEmail}'
AND c.id = r.email_id
The SELECT statement looks to retrieve the ID and e-mail address from the Customer table. Each of those fields is aliased, which makes accessing them programmatically slightly less complex. The tables Customer and resetPassword are themselves aliased as c and r, respectively. Doing so helps to uniquely identify any fields that might share the same column name in each table.
The WHERE clause looks for the status of A (Active) in the resetPassword table and looks for a pass_key equal to the one passed in from the user's form, along with an e-mail address equal to that passed in from the user's form. Finally, the tables are joined by their common column, which is the Customer table's id column and the resetPassword table's email_id column.
If all those elements align, then you know that you have a valid and active password reset occurring. If nothing is returned from this query, then you know that either the e-mail address doesn’t exist or isn’t associated with the hash being passed in.
Assuming that the attempt is valid, a private method, _resetPass, is called. Listing 4-24 shows the code for the _resetPass method.
 A private method is one that can only be accessed from within the class itself.
Listing 4-24: The resetPass method
private function _resetPass($id,$pass) {
$mysqli = new mysqli(DBHOST,DBUSER,DBPASS,DB);
if ($mysqli->connect_errno) {
error_log("Cannot connect to MySQL: " . $mysqli->connect_error);
return false;
}
$safeUser = $mysqli->real_escape_string($id);
$newPass = crypt($pass);
$safePass = $mysqli->real_escape_string($newPass);
$query = "UPDATE Customer SET password = '{$safePass}' " .
"WHERE id = '{$safeUser}'";
if (!$mysqli->query($query)) {
return false;
} else {
return true;
}
} //end function _resetPass
The code from Listing 4-24 performs no validation and can reset any password, given the ID. If the password reset is successful, true is returned.
Other changes to the User class
One final change to the User class is to add a property for the errorType. The following code is added to the class definition:
public $errorType = "fatal";
With that, you can now create an account, log in, and reset your password all with the help of fewer than 1,500 lines of code, and PHP, of course.