SQL Server Integration Services Design Patterns, Second Edition (2014)
Chapter 4. SQL Server Source Patterns
In the first section of this book, we looked at patterns focused on the control flow area of SQL Server Integration Services, including metadata, workflow execution, and scripting. The second section focuses on the data flow area of SQL Server Integration Services. This and the following chapters will discuss source, transformation, and logging patterns in the pipeline area of an Integration Services package.
Integration Services supports a wide variety of sources, including SQL Server, Oracle, and SAP. In addition, developers and third-party vendors have the ability to create custom sources for providers not included out-of-the-box. This technology-agnostic approach creates a very flexible system for loading all sorts of data. Even with all of the potential sources, loading data into or out of a SQL Server database is a very common occurrence, since a company that owns Integration Services typically uses all Microsoft products.
This chapter discusses different patterns associated with using SQL Server as a source. Due to the common occurrence of SQL Server databases in shops using Integration Services, we have a defined set of patterns for extracting data from SQL Server. Specifically, we will look at the best way to connect to a SQL Server database, how to choose the data you will use, and how to more easily use the rest of the data flow’s objects. Finally, we will look at a new component in SQL Server Denali that helps jump-start your development when connecting to any source.
Setting Up a Source
When connecting to external data, Integration Services uses a few objects to help make the connection, retrieve the correct data, and start any necessary data manipulations. Every time an Integration Services developer creates a package, the developer will need to select the correct objects and ensure they have all been created. The objects that will need to be set up are as follows:
· Connection Manager: The object that tells Integration Services where to get data. Can be used in the control flow, data flow, and event handlers.
· Provider: The object that the connection manager uses to talk to the data source.
· Source Component: The object that sets the properties to tell Integration Services what data to get. The matching Connection Manager object is set in this object.
· Source Component Query: The information the external data source needs to give Integration Services data. The query is stored in the Source Component object.
Let’s take a look at the important factors associated with each of these items. We’ll begin in the next section by looking at connection managers.
Selecting a SQL Server Connection Manager and Provider
Between ADO.NET, ODBC, and OLE DB, there are enough connection managers to make you want to pull your hair out! All of these connection managers will connect to SQL Server, so how do you know when you should use which one? To answer that question, let’s talk about what the connection manager is actually doing and then look at each connection manager type that you can use to connect to SQL Server.
A connection manager is the object that holds connection information for an external source, akin to an application data source or a Reporting Services shared data source. The connection manager provides an abstraction layer between Integration Services and the rest of the components so that information about the external source can be modified in one place to affect all tasks and components. To see all of the connection manager types available, take a look at Figure 4-1.
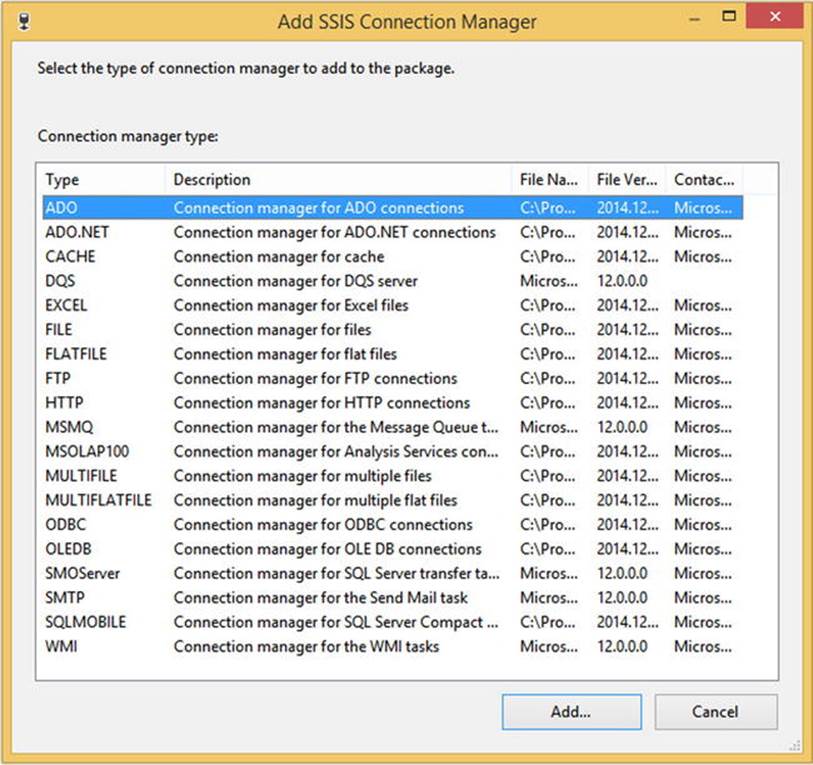
Figure 4-1. Connection manager types
These are the three connection manager types that you can use to connect to a SQL Server database:
· ADO.NET
· ODBC
· OLE DB
Let’s take a look at each connection manager type individually.
ADO.NET
The ADO.NET connection manager type is used to make a connection through the .NET Framework. Not only can this type be used for SQL Server, but it also provides access to other applications and other databases. The ADO.NET layer quickly retrieves data from the source using aDataReader object in the .NET Framework.
The ADO.NET connection manager for SQL Server is best used as a source when you are using it elsewhere in the package. For example, the Lookup component uses an ADO.NET connection manager to connect, so then you should use it as a source. On the other hand, if a component uses another connection manager type, stick with that connection manager type. Consistency is really the key here. For a sample connection manager property window set to connect to the AdventuresWorks2012 database on the same server, see Figure 4-2.
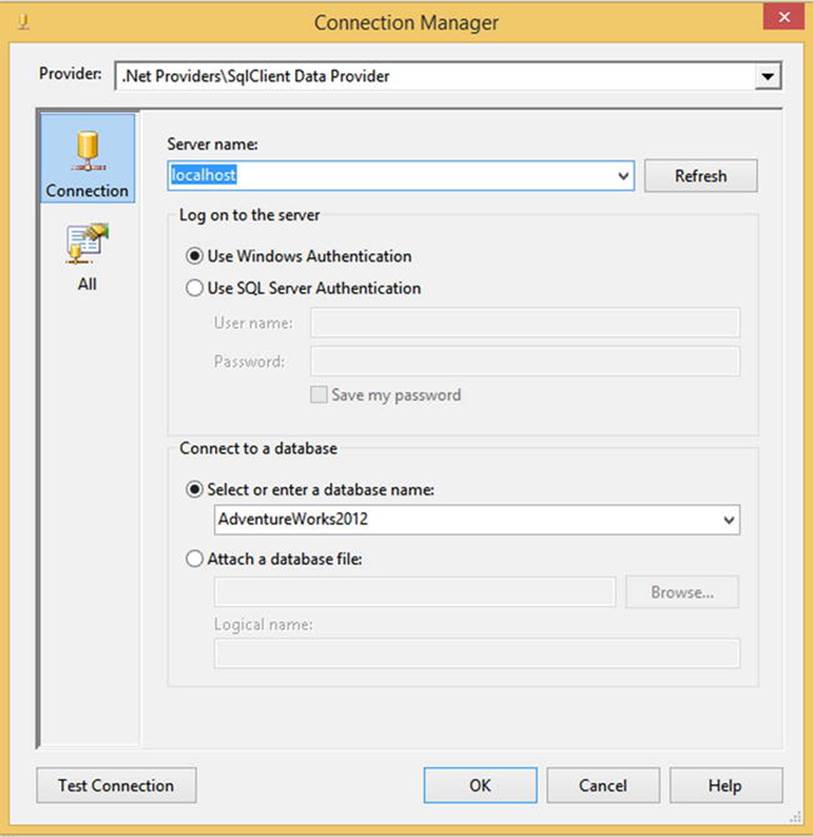
Figure 4-2. ADO.NET connection manager property screen
ODBC
ODBC is the open database connectivity standard. Its purpose is to allow connections from any application to any database, regardless of the vendor. Often, an organization will use DSNs (data source names) to create an abstraction layer between the application and the connection string the ODBC provider uses. If you have an organization that really wants to use DSNs with SQL Server, ODBC is the option for you. Otherwise, stick with an ADO.NET or OLE DB connection manager.
SSIS did not have an ODBC Source component prior to SQL Server 2012. Instead, you could and still can use the ADO.NET connection manager with a few tweaks. After you create the ADO.NET connection manager, change the provider at the top of the window to Odbc Data Provider, as shown in Figure 4-3.
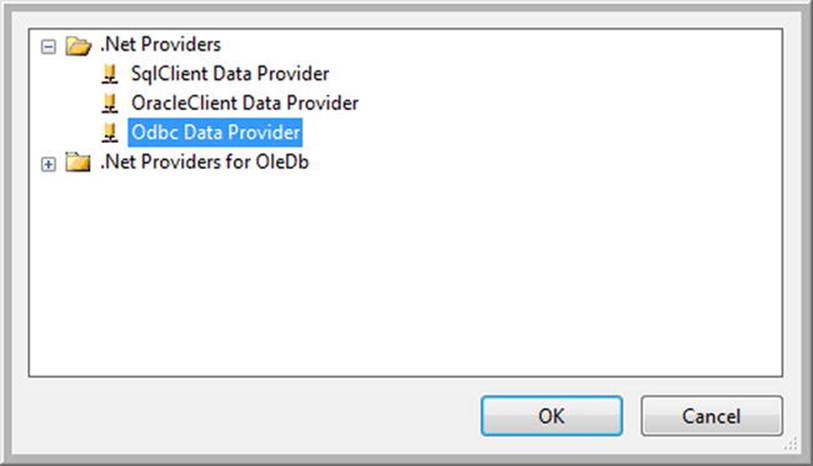
Figure 4-3. ADO.NET providers
Then add the DSN name or connection string. For our local AdventureWorks2012 database, the connection string will look like Listing 4-1.
Listing 4-1. ODBC Connection String
Driver={SQL Server Native Client 11.0};
Server=localhost;
Database=AdventureWorks2012;
Trusted_Connection=yes
Our completed Connection Manager screen for an ADO.NET connection with an ODBC provider looks like Figure 4-4.
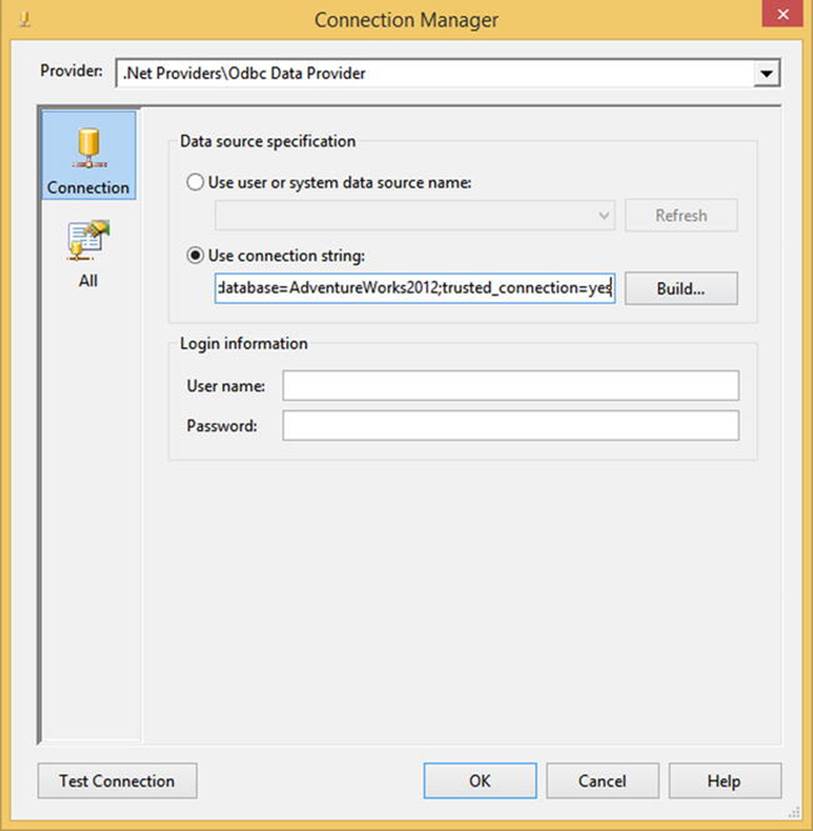
Figure 4-4. ODBC ADO.NET connection manager property screen
If you are using SQL Server 2012 or later, you can use the ODBC Source component. Configuring the ODBC Source is very similar to the ADO.NET Source, except that you use an ODBC connection manager. The ODBC Source provides additional performance benefits over ADO.NET; however, it requires SQL Server Enterprise Edition to run outside of the SQL Server Data Tools environment.
OLE DB
Finally, we move on to what is arguably the most common connection manager used to connect to SQL Server: OLE DB. The OLE DB protocol was written by Microsoft as the next version of the ODBC provider. In addition to SQL Server databases, you can use the OLE DB connection manager to connect to file-based databases or Excel spreadsheets.
OLE DB tends to be my default when I’m connecting to a SQL Server database. If you do not fall into the category of using mostly components that use an ADO.NET connection manager, and you do not fall into the category of having an organization that wants to use a DSN, you will want to use an OLE DB connection manager.
You can fill out the property screen of the OLE DB connection manager as shown in Figure 4-5.
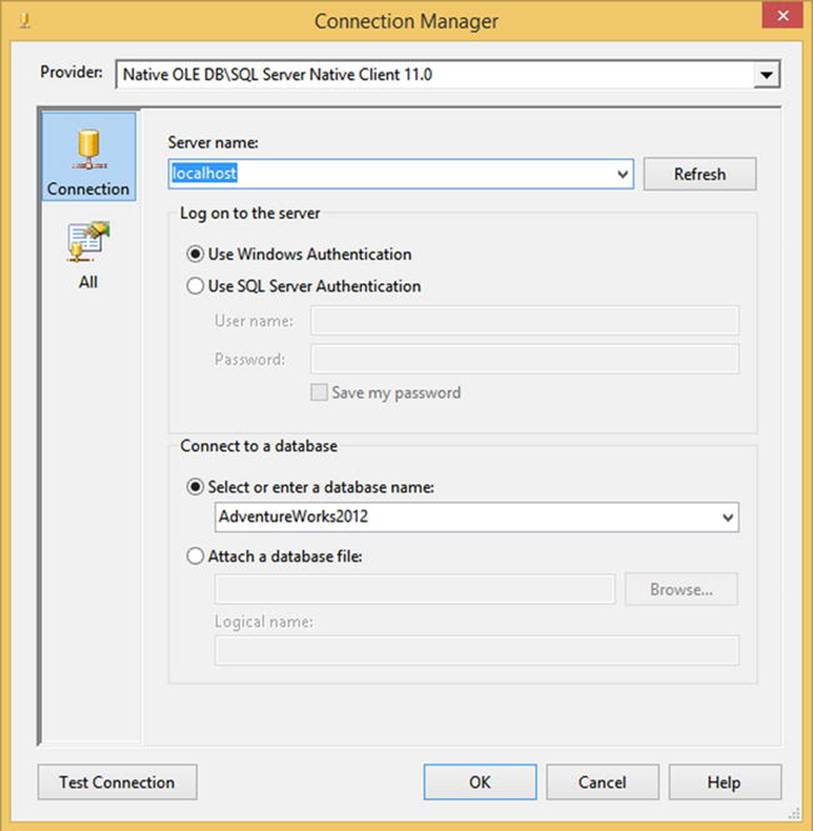
Figure 4-5. OLE DB connection manager property screen
Creating a SQL Server Source Component
Once you’ve picked the correct connection manager and provider, you need to use them in a Source Component for our data pull. Begin by looking at the SSIS Toolbox when you are on the Data Flow tab. If you have not rearranged the SSIS Toolbox, you will see all possible sources under the Other Sources grouping, as seen in Figure 4-6.
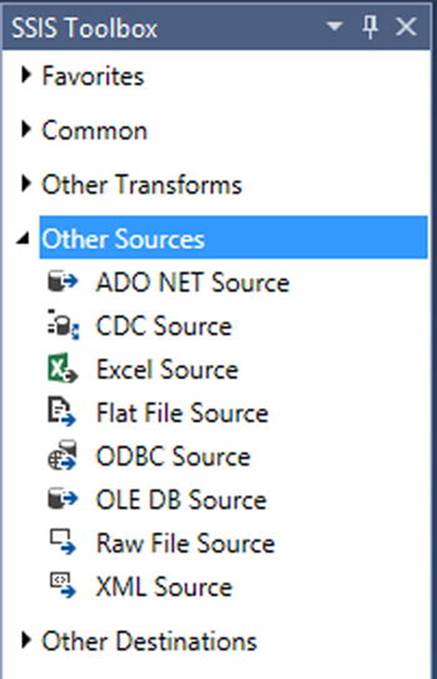
Figure 4-6. Other Sources grouping in the SSIS Toolbox
Now it’s time to choose one.
Most of the hard decision-making was already completed when you set up the connection manager. If you use an OLE DB connection manager, then you must use the OLE DB source. If you decided to use an ADO.NET connection manager with either an ADO.NET or ODBC provider, you must use the ADO NET Source.
Once you drag the desired source onto the Data Flow design window, the data flow contains one component, as shown in Figure 4-7. Integration Services lets the developer know that there is an issue with the source by displaying the red circle with the white X in it. In this case, the issue is that you have not yet set any of the source’s properties, starting with the destination table, as shown in the tooltip.
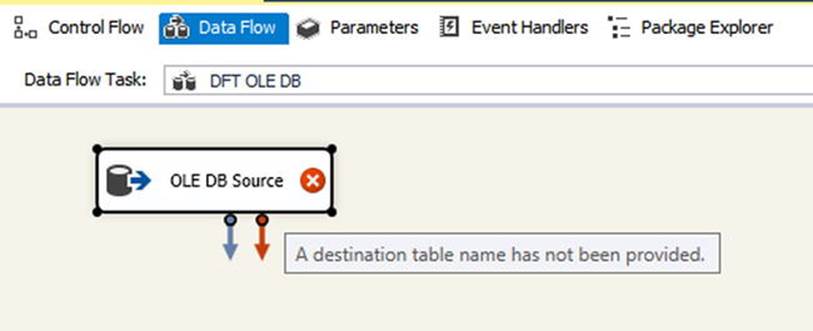
Figure 4-7. Data Flow task with new source
To open the source component, either double-click the component or right-click and select Edit. Inside the source component, you can fill in the Connection Manager property. The first connection manager of the appropriate type will automatically be populated, but selecting the drop-down list arrow will let you select any of the other connection managers that match. You can see the OLE DB Source Editor screen up to this point in Figure 4-8.
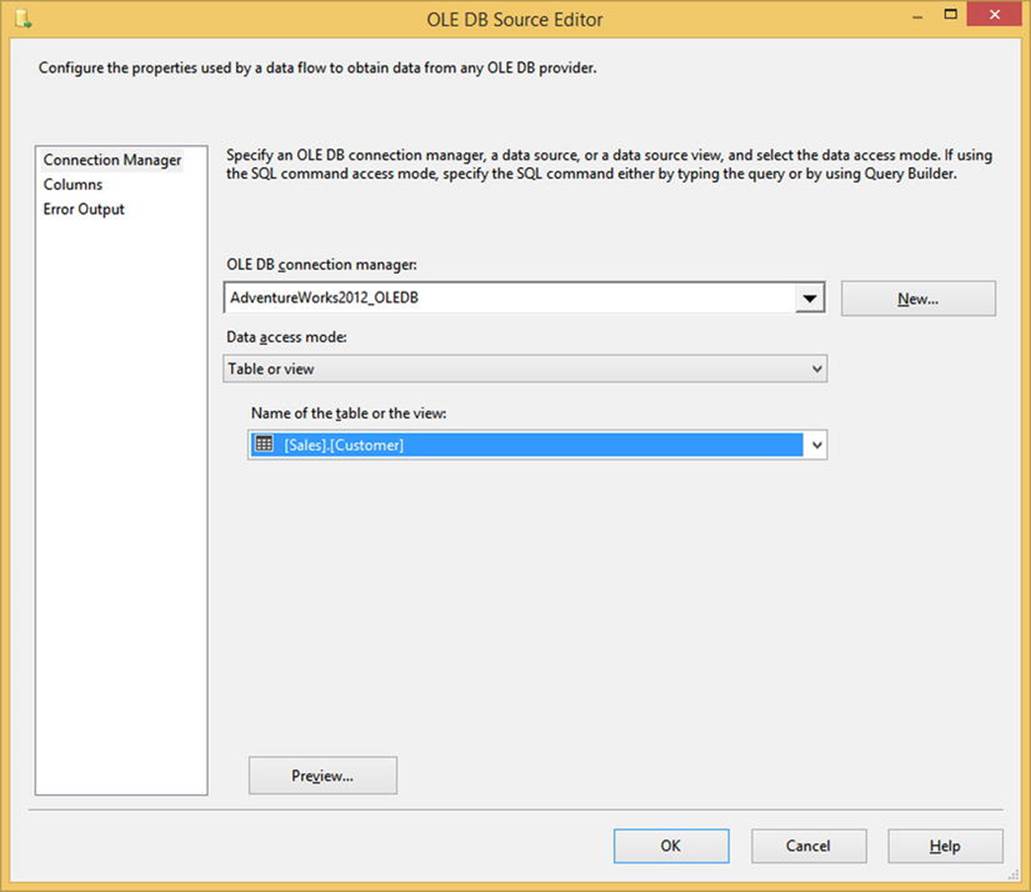
Figure 4-8. Initial OLE DB Source Editor screen
Although most of the decision-making work was already done when you created the connection manager, it is important to understand the part the source plays in the Integration Services package. The source is the glue that holds all of the other pieces together and ensures that you have one place to go to for future maintenance issues or changes. Setting up the SQL Server source was an easy step to get you warmed up before you move on to create and optimize the query that the source uses.
Writing a SQL Server Source Component Query
Now that you have walked through the creation of the connection manager and provider and decided which source component to use, you need to set up the metadata for pulling the data. You do this by selecting what type of access you want to make and then adding the query information to the source component. In addition, you will want to review a few patterns when you’re setting up the query and column metadata. Let’s get started.
ADO.NET Data Access
If you decided to use the ADO.NET source component, either with the ADO.NET or ODBC provider, you have two options to select what data you want to see:
· Table or View: Select which table or view from which you want to receive data. The list of tables and views should be prepopulated and listed based on your access. We do not recommend this option because it includes unnecessary columns, even if you restrict the column list in the component.
· SQL Command: Enter text that will be executed on the SQL Server database.
Because the Table or View option is not our recommended option, let’s dig into the SQL Command option a little deeper. You can enter either a direct SQL query that returns a dataset or a stored procedure using the EXEC statement.
Whether you are using a SQL query or executing a stored procedure, you will need to be aware that the ADO.NET source does not allow you to use parameters in your query. If you need to modify the query that gets used, you will need to use an expression. Expressions are only set at the control flow level, so you will need to take a look there to set up your expression. Follow these steps to set a new SQL command at design time:
1. When in the Data Flow task, click the background to ensure no components are selected and look in the Properties menu for the Expressions property.
2. Once the Expression Property window is open, select the [ADO NET Source].[SqlCommand] option in the Property field and click the ellipses button next to the Expression field.
3. In the Expression Editor, create your command using variables. For example, if you were to run a stored procedure where you wanted to pass in an end date, you could use the following expression: "EXEC GetCustomerData '" + (DT_STR, 29, 1252)@[System::ContainerStartTime] + "'"
4. Once the expression has been validated, click the OK button. The final Property Expressions Editor screen should look like Figure 4-9.
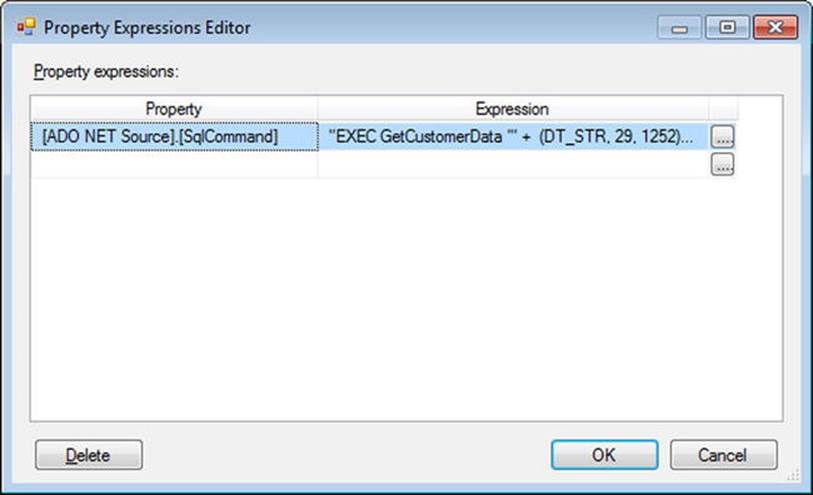
Figure 4-9. Property Expressions Editor with SQLCommand property
When the package runs, it will now use the expression you just created.
OLE DB Data Access
If you’ve selected the OLE DB source component, you have four options for how to retrieve data:
· Table or View: Similar to access in the ADO.NET source, this option allows you to select a table or view from which to pull all columns of data into the package. This option is not recommended for the same reason explained in the ADO.NET source.
· Table Name or View Name Variable: Instead of hardcoding the name of the table or view, you can instead point to a user-created variable that contains that information. This option is not recommended.
· SQL Command: Similar to access in the ADO.NET source, you can enter the SQL query or execution of a stored procedure once you’ve selected this option.
· SQL Command from Variable: If you want to create a query to change at runtime or to pass a variable to a stored procedure, this is the option you will want to use. Instead of creating an expression to modify the SQL Command, as you did with ADO.NET, you will create a variable that creates your expression. You can then select the variable you created after you select this option.
By picking one of these options, you will determine how the data is returned from SQL Server. After you select the type of data retrieval, you’ll want to add the appropriate properties. For example, if you select the Table or View option, you’ll need to select the object that contains the data. If you select the SQL Command option, you’ll need to enter the SQL query or stored procedure execution that returns the data. Once that is set, you can move on to designing the rest of your data flow.
Waste Not, Want Not
As data professionals, we often think that the more data we can get, the better. This isn’t always the best scenario when you are dealing with sources. When you are talking about the amount of data to pull, you will want to follow a different pattern.
No matter which query option you selected, it is important to only ask for the columns that you need in your data load process. Requesting all columns is similar to running a select * from table query against a database. Not only are you asking the database and network to do more work, but you are also asking Integration Services to do more work. All of that unnecessary data will get stored in memory, or even cause paging if there isn’t enough memory, using up space that could be used to grab more data for the important columns and slowing down the overall package execution.
All source components give you the option to pick a subset of columns on the Columns menu. Be sure to make the column reduction in the query itself rather than in the Columns menu to reap the full benefit of a faster package.
Data Translations
Another Integration Services source trap that is easy to fall into is to perform the majority of the data transformations in the source query itself. Because Integration Services developers often have a SQL background, we tend to want to use a familiar tool to accomplish our tasks.
The types of data transformations that can be undertaken in either the source query or the rest of the data flow include merging of datasets, case statements, string concatenation, and more. Remember that SQL Server is very good at set-based actions, whereas Integration Services is very good at computationally expensive tasks that use a lot of memory. Although you should test your individual situation, these are good rules of thumb to follow.
Follow the pattern listed in Table 4-1 when you are deciding where to put your data translation logic.
Table 4-1. Data Translation Locations
|
Data Translation |
Concern |
Location |
|
Merge datasets |
Set-based |
Source component |
|
Case statements |
Memory intensive |
Data flow |
|
String concatenation |
Procedural |
Data flow |
|
Sorting data |
Set-based |
Source component |
Source Assistant
Now that you have retrieved data from SQL Server the hard way, you’re going to learn the easy way to do the same thing. The Source Assistant is a new wizard introduced in SQL Server 2012 that takes you through the steps of setting up your Source objects without having to make many of the same decisions that you just had to go through. This is a great way for people who are just getting started with Integration Services to get up and running quickly.
To begin, create a new Data Flow task. As seen in Figure 4-10, the Source Assistant appears in the SSIS Toolbox. Initially it will be in the Favorites grouping, unless you have moved the items around.
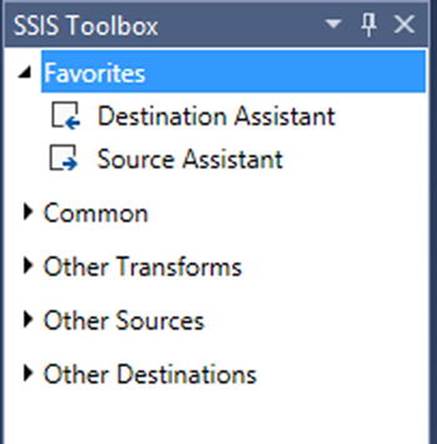
Figure 4-10. Source Assistant in Favorites grouping in SSIS Toolbox
Drag the Source Assistant component onto the Data Flow design area to start the wizard. The first screen can be seen in Figure 4-11.
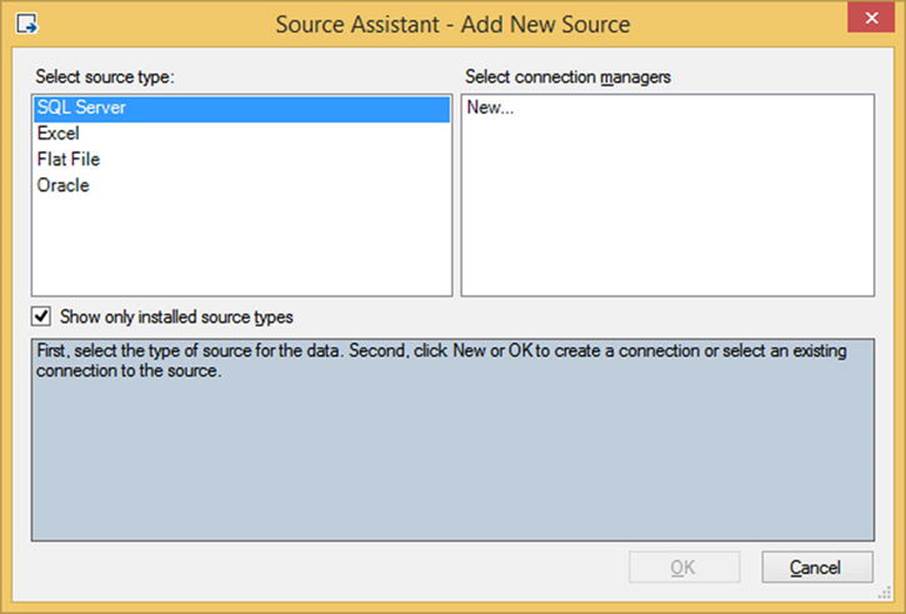
Figure 4-11. Add New Source screen in Source Assistant
To begin, you can see that there are only a few types listed for you to use: SQL Server, Excel, Flat File, and Oracle. If you want to see a list of components available if you install the providers, you can uncheck the Show Only Installed Source Types option. By only offering the one SQL Server choice, Integration Services is making your life easier by directing you to the correct provider immediately. When you select the Source Assistant’s SQL Server type, it will use the OLE DB connection manager, which is also your go-to connection manager!
Once you select the SQL Server type, you have the option of selecting an existing connection manager from the pane on the right or creating a new one. Creating a new connection manager will take you through the exact steps you looked at previously for setting up an OLE DB connection manager.
Finally, pick your new or existing connection manager and click the OK button. This will create the connection manager and add the SQL Server source to the Data Flow task. You can then immediately pick up your development by creating and optimizing the SQL query. The Source Assistant is a great way to get started with developing your Integration Services package, especially if you are new to Integration Services. If you know that you want to use one of the other types of connections, you can just create the connection manager and source directly, without having to use the Source Assistant. Either way, you have a few ways to start your development as quickly as possible.
Summary
At this point, we described why you would want to use certain SQL Server sources over others, how to set up the source, and how to clean up the source query to get the best performance out of your package. We also covered sources in general to set up the rest of the source chapters.
Although all of the principles described in this chapter are patterns for SQL Server, you can apply many of them to other source types as well. Be sure to review the rest of the source chapters for patterns that you can use for SQL Server in addition to what we have already discussed.
All materials on the site are licensed Creative Commons Attribution-Sharealike 3.0 Unported CC BY-SA 3.0 & GNU Free Documentation License (GFDL)
If you are the copyright holder of any material contained on our site and intend to remove it, please contact our site administrator for approval.
© 2016-2026 All site design rights belong to S.Y.A.