Learning PHP, MySQL & JavaScript: With jQuery, CSS & HTML5, Fourth Edition (2015)
Chapter 11. Form Handling
The main way that website users interact with PHP and MySQL is through the use of HTML forms. These were introduced very early on in the development of the World Wide Web in 1993—even before the advent of ecommerce—and have remained a mainstay ever since, due to their simplicity and ease of use.
Of course, enhancements have been made over the years to add extra functionality to HTML form handling, so this chapter will bring you up to speed on state-of-the-art form handling and show you the best ways to implement forms for good usability and security. Plus, as you will see a little later on, the HTML5 specification has further improved the use of forms.
Building Forms
Handling forms is a multipart process. First a form is created, into which a user can enter the required details. This data is then sent to the web server, where it is interpreted, often with some error checking. If the PHP code identifies one or more fields that require reentering, the form may be redisplayed with an error message. When the code is satisfied with the accuracy of the input, it takes some action that usually involves the database, such as entering details about a purchase.
To build a form, you must have at least the following elements:
§ An opening <form> and closing </form> tag
§ A submission type specifying either a Get or Post method
§ One or more input fields
§ The destination URL to which the form data is to be submitted
Example 11-1 shows a very simple form created with PHP, which you should type in and save as formtest.php.
Example 11-1. formtest.php—a simple PHP form handler
<?php // formtest.php
echo <<<_END
<html>
<head>
<title>Form Test</title>
</head>
<body>
<form method="post" action="formtest.php">
What is your name?
<input type="text" name="name">
<input type="submit">
</form>
</body>
</html>
_END;
?>
The first thing to notice about this example is that, as you have already seen in this book, rather than dropping in and out of PHP code, the echo <<<_END..._END construct is used whenever multiline HTML must be output.
Inside of this multiline output is some standard code for commencing an HTML document, displaying its title, and starting the body of the document. This is followed by the form, which is set to send its data using the Post method to the PHP program formtest.php, which is the name of the program itself.
The rest of the program just closes all the items it opened: the form, the body of the HTML document, and the PHP echo <<<_END statement. The result of opening this program in a web browser is shown in Figure 11-1.
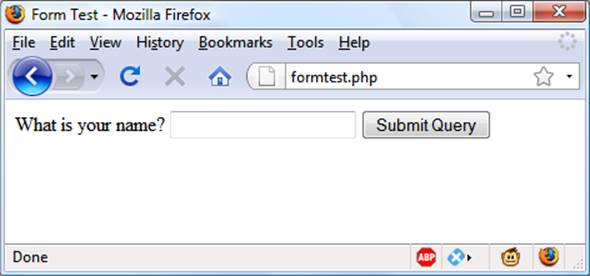
Figure 11-1. The result of opening formtest.php in a web browser
Retrieving Submitted Data
Example 11-1 is only one part of the multipart form-handling process. If you enter a name and click the Submit Query button, absolutely nothing will happen other than the form being redisplayed. So now it’s time to add some PHP code to process the data submitted by the form.
Example 11-2 expands on the previous program to include data processing. Type it or modify formtest.php by adding in the new lines, save it as formtest2.php, and try the program for yourself. The result of running this program and entering a name is shown in Figure 11-2.
Example 11-2. Updated version of formtest.php
<?php // formtest2.php
if (isset($_POST['name'])) $name = $_POST['name'];
else $name = "(Not entered)";
echo <<<_END
<html>
<head>
<title>Form Test</title>
</head>
<body>
Your name is: $name<br>
<form method="post" action="formtest2.php">
What is your name?
<input type="text" name="name">
<input type="submit">
</form>
</body>
</html>
_END;
?>
The only changes are a couple of lines at the start that check the $_POST associative array for the field name having been submitted. Chapter 10 introduced the $_POST associative array, which contains an element for each field in an HTML form. In Example 11-2, the input name used wasname and the form method was Post, so element name of the $_POST array contains the value in $_POST['name'].
The PHP isset function is used to test whether $_POST['name'] has been assigned a value. If nothing was posted, the program assigns the value (Not entered); otherwise, it stores the value that was entered. Then a single line has been added after the <body> statement to display that value, which is stored in $name.
NOTE
Notice how the <input> elements in this example do not use the /> form of self-closing, because in the new world of HTML5 this style is optional (and it was never actually required in HTML4 anyway; it was recommended purely because XHTML was planned to supersede HTML at some point—but this never happened). So since I’m always in favor of less work when programming, I no longer use these characters except for actual XHTML (where this type of closing remains necessary), saving both a space and a slash for every self-closing tag.
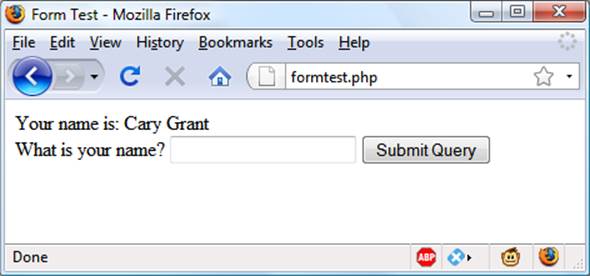
Figure 11-2. formtest.php with data handling
register_globals: An Old Solution Hangs On
Before security became such a big issue, the default behavior of PHP was to assign the $_POST and $_GET arrays directly to PHP variables. For example, there would be no need to use the instruction $name=$_POST['name']; because $name would already be given that value automatically by PHP at the program start!
Initially (prior to version 4.2.0 of PHP), this seemed a very useful idea that saved a lot of extra code writing, but this practice has now been discontinued and the feature is disabled by default. Should you find register_globals enabled on a production web server for which you are developing, you should urgently ask your server administrator to disable it.
So why disable register_globals? It enables anyone to enter a Get input on the tail of a URL, like this: http://myserver.com?override=1. If your code were ever to use the variable $override and you forgot to initialize it (for example, with the statement $override=0;), the program could be compromised by such an exploit.
In fact, because many installations on the Web still have this gaping hole, I advise you to always initialize every variable you use, just in case your code will ever run on such a system. Initialization is also good programming practice, because you can comment each initialization to remind yourself and other programmers what a variable is for.
NOTE
If you ever find yourself maintaining code that seems to assume values for certain variables for no apparent reason, you can make an educated guess that the programmer probably wrote the code using register_globals, and that these values are intended to be extracted from a Post or Get. If so, I recommend that you rewrite the code to load these variables explicitly from the correct $_POST or $_GET array.
Default Values
Sometimes it’s convenient to offer your site visitors a default value in a web form. For example, suppose you put up a loan repayment calculator widget on a real estate website. It could make sense to enter default values of, say, 25 years and 6 percent interest, so that the user can simply type either the principle sum to borrow or the amount that she can afford to pay each month.
In this case, the HTML for those two values would be something like Example 11-3.
Example 11-3. Setting default values
<form method="post" action="calc.php"><pre>
Loan Amount <input type="text" name="principle">
Monthly Repayment <input type="text" name="monthly">
Number of Years <input type="text" name="years" value="25">
Interest Rate <input type="text" name="rate" value="6">
<input type="submit">
</pre></form>
NOTE
If you wish to try this (and the other HTML code samples), type it and save it with an .html (or .htm) file extension, such as test.html (or test.htm), and then load that file into your browser.
Take a look at the third and fourth inputs. By populating the value attribute, you display a default value in the field, which the users can then change if they wish. With sensible default values, you can often make your web forms more user-friendly by minimizing unnecessary typing. The result of the previous code looks like Figure 11-3. Of course, this was created to illustrate default values and, because the program calc.php has not been written, the form will not do anything if submitted.
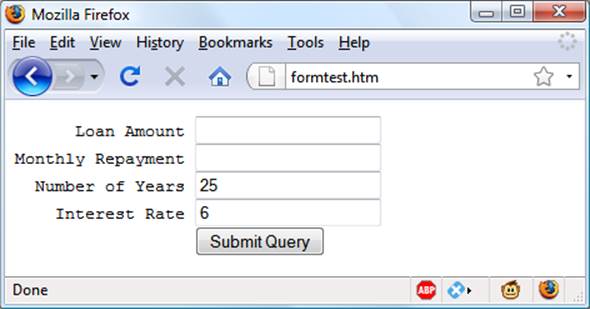
Figure 11-3. Using default values for selected form fields
Default values are also used for hidden fields if you want to pass extra information from your web page to your program, in addition to what users enter. We’ll look at hidden fields later in this chapter.
Input Types
HTML forms are very versatile and allow you to submit a wide range of input types, from text boxes and text areas to checkboxes, radio buttons, and more.
Text boxes
The input type you will probably use most often is the text box. It accepts a wide range of alphanumeric text and other characters in a single-line box. The general format of a text box input is as follows:
<input type="text" name="name" size="size" maxlength="length" value="value">
We’ve already covered the name and value attributes, but two more are introduced here: size and maxlength. The size attribute specifies the width of the box (in characters of the current font) as it should appear on the screen, and maxlength specifies the maximum number of characters that a user is allowed to enter into the field.
The only required attributes are type, which tells the web browser what type of input to expect, and name, for giving the input a name that will be used to process the field upon receipt of the submitted form.
Text areas
When you need to accept input of more than a short line of text, use a text area. This is similar to a text box, but, because it allows multiple lines, it has some different attributes. Its general format looks like this:
<textarea name="name" cols="width" rows="height" wrap="type">
</textarea>
The first thing to notice is that <textarea> has its own tag and is not a subtype of the <input> tag. It therefore requires a closing </textarea> to end input.
Instead of a default attribute, if you have default text to display, you must put it before the closing </textarea>, and it will then be displayed and be editable by the user:
<textarea name="name" cols="width" rows="height" wrap="type">
This is some default text.
</textarea>
To control the width and height, use the cols and rows attributes. Both use the character spacing of the current font to determine the size of the area. If you omit these values, a default input box will be created that will vary in dimensions depending on the browser used, so you should always define them to be certain about how your form will appear.
Last, you can control how the text entered into the box will wrap (and how any such wrapping will be sent to the server) using the wrap attribute. Table 11-1 shows the wrap types available. If you leave out the wrap attribute, soft wrapping is used.
|
Type |
Action |
|
off |
Text does not wrap, and lines appear exactly as the user types them. |
|
soft |
Text wraps but is sent to the server as one long string without carriage returns and line feeds. |
|
hard |
Text wraps and is sent to the server in wrapped format with soft returns and line feeds. |
|
Table 11-1. The wrap types available in a textarea input |
|
Checkboxes
When you want to offer a number of different options to a user, from which he can select one or more items, checkboxes are the way to go. Here is the format to use:
<input type="checkbox" name="name" value="value" checked="checked">
If you include the checked attribute, the box is already checked when the browser is displayed. The string you assign to the attribute should be either a double quote or the value "checked", or there should be no value assigned. If you don’t include the attribute, the box is shown unchecked. Here is an example of creating an unchecked box:
I Agree <input type="checkbox" name="agree">
If the user doesn’t check the box, no value will be submitted. But if he does, a value of "on" will be submitted for the field named agree. If you prefer to have your own value submitted instead of the word on (such as the number 1), you could use the following syntax:
I Agree <input type="checkbox" name="agree" value="1">
On the other hand, if you wish to offer a newsletter to your readers when submitting a form, you might want to have the checkbox already checked as the default value:
Subscribe? <input type="checkbox" name="news" checked="checked">
If you want to allow groups of items to be selected at one time, assign them all the same name. However, only the last item checked will be submitted, unless you pass an array as the name. For example, Example 11-4 allows the user to select his favorite ice creams (see Figure 11-4 for how it displays in a browser).
Example 11-4. Offering multiple checkbox choices
Vanilla <input type="checkbox" name="ice" value="Vanilla">
Chocolate <input type="checkbox" name="ice" value="Chocolate">
Strawberry <input type="checkbox" name="ice" value="Strawberry">
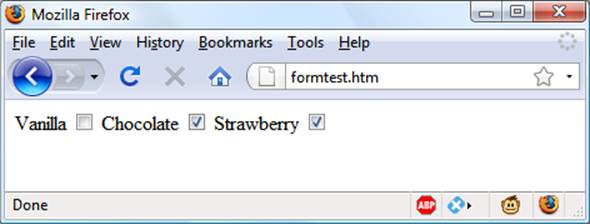
Figure 11-4. Using checkboxes to make quick selections
If only one of the checkboxes is selected, such as the second one, only that item will be submitted (the field named ice would be assigned the value "Chocolate"). But if two or more are selected, only the last value will be submitted, with prior values being ignored.
If you want exclusive behavior—so that only one item can be submitted—then you should use radio buttons (see the next section), but to allow multiple submissions, you have to slightly alter the HTML, as in Example 11-5 (note the addition of the square brackets, [], following the values ofice).
Example 11-5. Submitting multiple values with an array
Vanilla <input type="checkbox" name="ice[]" value="Vanilla">
Chocolate <input type="checkbox" name="ice[]" value="Chocolate">
Strawberry <input type="checkbox" name="ice[]" value="Strawberry">
Now, when the form is submitted, if any of these items have been checked, an array called ice will be submitted that contains any and all values. In each case, you can extract either the single submitted value, or the array of values, to a variable like this:
$ice = $_POST['ice'];
If the field ice has been posted as a single value, $ice will be a single string, such as "Strawberry". But if ice was defined in the form as an array (like Example 11-5), $ice will be an array, and its number of elements will be the number of values submitted. Table 11-2 shows the seven possible sets of values that could be submitted by this HTML for one, two, or all three selections. In each case, an array of one, two, or three items is created.
|
One value submitted |
Two values submitted |
Three values submitted |
|
$ice[0] => Vanilla $ice[0] => Chocolate $ice[0] => Strawberry |
$ice[0] => Vanilla $ice[1] => Chocolate $ice[0] => Vanilla $ice[1] => Strawberry $ice[0] => Chocolate $ice[1] => Strawberry |
$ice[0] => Vanilla $ice[1] => Chocolate $ice[2] => Strawberry |
|
Table 11-2. The seven possible sets of values for the array $ice |
||
If $ice is an array, the PHP code to display its contents is quite simple and might look like this:
foreach($ice as $item) echo "$item<br>";
This uses the standard PHP foreach construct to iterate through the array $ice and pass each element’s value into the variable $item, which is then displayed via the echo command. The <br> is just an HTML formatting device to force a new line after each flavor in the display. By default, checkboxes are square.
Radio buttons
Radio buttons are named after the push-in preset buttons found on many older radios, where any previously depressed button pops back up when another is pressed. They are used when you want only a single value to be returned from a selection of two or more options. All the buttons in a group must use the same name and, because only a single value is returned, you do not have to pass an array.
For example, if your website offers a choice of delivery times for items purchased from your store, you might use HTML like that in Example 11-6 (see Figure 11-5 to see how it displays).
Example 11-6. Using radio buttons
8am-Noon<input type="radio" name="time" value="1">
Noon-4pm<input type="radio" name="time" value="2" checked="checked">
4pm-8pm<input type="radio" name="time" value="3">
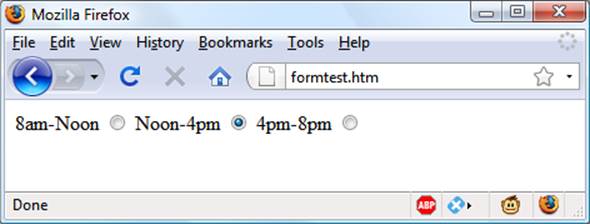
Figure 11-5. Selecting a single value with radio buttons
Here, the second option of Noon–4pm has been selected by default. This default choice ensures that at least one delivery time will be chosen by the user, which she can change to one of the other two options if she prefers. Had one of the items not been already checked, the user might forget to select an option, and no value would be submitted at all for the delivery time. By default, radio buttons are round.
Hidden fields
Sometimes it is convenient to have hidden form fields so that you can keep track of the state of form entry. For example, you might wish to know whether a form has already been submitted. You can achieve this by adding some HTML in your PHP code, such as the following:
echo '<input type="hidden" name="submitted" value="yes">'
This is a simple PHP echo statement that adds an input field to the HTML form. Let’s assume the form was created outside the program and displayed to the user. The first time the PHP program receives the input, this line of code has not run, so there will be no field named submitted. The PHP program re-creates the form, adding the input field. So when the visitor resubmits the form, the PHP program receives it with the submitted field set to "yes". The code can simply check whether the field is present:
if (isset($_POST['submitted']))
{...
Hidden fields can also be useful for storing other details, such as a session ID string that you might create to identify a user, and so on.
WARNING
Never treat hidden fields as secure—because they are not. Someone could easily view the HTML containing them by using a browser’s View Source feature.
<select>
The <select> tag lets you create a drop-down list of options, offering either single or multiple selections. It conforms to the following syntax:
<select name="name" size="size" multiple="multiple">
The attribute size is the number of lines to display. Clicking on the display causes a list to drop down, showing all the options. If you use the multiple attribute, a user can select multiple options from the list by pressing the Ctrl key when clicking. So to ask a user for his favorite vegetable from a choice of five, you might use HTML as in Example 11-7, which offers a single selection.
Example 11-7. Using select
Vegetables
<select name="veg" size="1">
<option value="Peas">Peas</option>
<option value="Beans">Beans</option>
<option value="Carrots">Carrots</option>
<option value="Cabbage">Cabbage</option>
<option value="Broccoli">Broccoli</option>
</select>
This HTML offers five choices, with the first one, Peas, preselected (due to it being the first item). Figure 11-6 shows the output where the list has been clicked to drop it down, and the option Carrots has been highlighted. If you want to have a different default option offered first (such asBeans), use the <selected> tag, like this:
<option selected="selected" value="Beans">Beans</option>
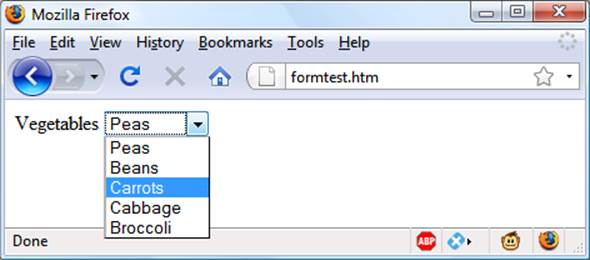
Figure 11-6. Creating a drop-down list with select
You can also allow users to select more than one item, as in Example 11-8.
Example 11-8. Using select with the multiple attribute
Vegetables
<select name="veg" size="5" multiple="multiple">
<option value="Peas">Peas</option>
<option value="Beans">Beans</option>
<option value="Carrots">Carrots</option>
<option value="Cabbage">Cabbage</option>
<option value="Broccoli">Broccoli</option>
</select>
This HTML is not very different; only the size has been changed to "5" and the attribute multiple has been added. But, as you can see from Figure 11-7, it is now possible for the user to select more than one option by using the Ctrl key when clicking. You can leave out the size attribute if you wish, and the output will be the same; however, with a larger list, the drop-down box might take up too much screen space, so I recommend that you pick a suitable number of rows and stick with it. I also recommend against multiple select boxes smaller than two rows in height—some browsers may not correctly display the scroll bars needed to access it.
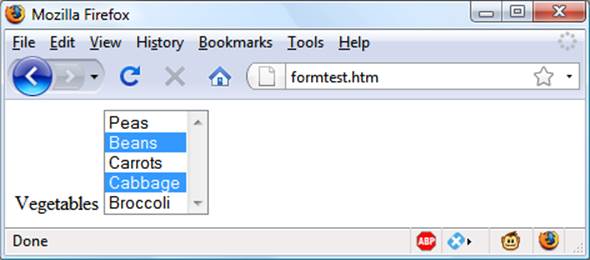
Figure 11-7. Using a select with the multiple attribute
You can also use the selected attribute within a multiple select and can, in fact, have more than one option preselected if you wish.
Labels
You can provide an even better user experience by utilizing the <label> tag. With it, you can surround a form element, making it selectable by clicking any visible part contained between the opening and closing <label> tags.
For example, going back to the example of choosing a delivery time, you could allow the user to click the radio button itself and the associated text, like this:
<label>8am-Noon<input type="radio" name="time" value="1"></label>
The text will not be underlined like a hyperlink when you do this, but as the mouse passes over, it will change to an arrow instead of a text cursor, indicating that the whole item is clickable.
The submit button
To match the type of form being submitted, you can change the text of the submit button to anything you like by using the value attribute, like this:
<input type="submit" value="Search">
You can also replace the standard text button with a graphic image of your choice, using HTML such as this:
<input type="image" name="submit" src="image.gif">
Sanitizing Input
Now we return to PHP programming. It can never be emphasized enough that handling user data is a security minefield, and that it is essential to learn to treat all such data with utmost caution from the word go. It’s actually not that difficult to sanitize user input from potential hacking attempts, but it must be done.
The first thing to remember is that regardless of what constraints you have placed in an HTML form to limit the types and sizes of inputs, it is a trivial matter for a hacker to use her browser’s View Source feature to extract the form and modify it to provide malicious input to your website.
Therefore, you must never trust any variable that you fetch from either the $_GET or $_POST arrays until you have processed it. If you don’t, users may try to inject JavaScript into the data to interfere with your site’s operation, or even attempt to add MySQL commands to compromise your database.
Therefore, instead of just using code such as the following when reading in user input:
$variable = $_POST['user_input'];
you should also use one or more of the following lines of code. For example, to prevent escape characters from being injected into a string that will be presented to MySQL, use the following. Remember that this function takes into account the current character set of a MySQL connection, so it must be used with a mysqli connection object (in this instance, $connection), as discussed in Chapter 10.
$variable = $connection->real_escape_string($variable);
NOTE
Remember that the safest way to secure MySQL from hacking attempts is to use placeholders and prepared statements, as described in Chapter 10. If you do so for all accesses to MySQL, it becomes unnecessary to escape data being transferred into or out of the database. You will, however, still need to sanitize input when including it within HTML.
To get rid of unwanted slashes, use this:
$variable = stripslashes($variable);
And to remove any HTML from a string, use the following:
$variable = htmlentities($variable);
For example, this would change a string of interpretable HTML code like <b>hi</b> into <b>hi</b>, which displays as text, and won’t be interpreted as HTML tags.
Finally, if you wish to strip HTML entirely from an input, use the following (but ensure you use it before calling htmlentities, which replaces any angle brackets used as part of HTML tags):
$variable = strip_tags($variable);
In fact, until you know exactly what sanitization you require for a program, Example 11-9 shows a pair of functions that brings all these checks together to provide a very good level of security.
Example 11-9. The sanitizeString and sanitizeMySQL functions
<?php
function sanitizeString($var)
{
$var = stripslashes($var);
$var = strip_tags($var);
$var = htmlentities($var);
return $var;
}
function sanitizeMySQL($connection, $var)
{
$var = $connection->real_escape_string($var);
$var = sanitizeString($var);
return $var;
}
?>
Add this code to the end of your PHP programs, and you can then call it for each user input to sanitize, like this:
$var = sanitizeString($_POST['user_input']);
Or, when you have an open MySQL connection, and a mysqli connection object (in this case, called $connection):
$var = sanitizeMySQL($connection, $_POST['user_input']);
NOTE
If you are using the procedural version of the mysqli extension, you will need to modify the sanitizeMySQL function to call the mysqli_real_escape_string function, like this (in which case $connection will then be a handle, not an object):
$var = mysqli_real_escape_string($connection, $var);
An Example Program
So let’s look at how a real-life PHP program integrates with an HTML form by creating the program convert.php listed in Example 11-10. Type it as shown and try it for yourself.
Example 11-10. A program to convert values between Fahrenheit and Celsius
<?php // convert.php
$f = $c = '';
if (isset($_POST['f'])) $f = sanitizeString($_POST['f']);
if (isset($_POST['c'])) $c = sanitizeString($_POST['c']);
if ($f != '')
{
$c = intval((5 / 9) * ($f - 32));
$out = "$f °f equals $c °c";
}
elseif($c != '')
{
$f = intval((9 / 5) * $c + 32);
$out = "$c °c equals $f °f";
}
else $out = "";
echo <<<_END
<html>
<head>
<title>Temperature Converter</title>
</head>
<body>
<pre>
Enter either Fahrenheit or Celsius and click on Convert
<b>$out</b>
<form method="post" action="convert.php">
Fahrenheit <input type="text" name="f" size="7">
Celsius <input type="text" name="c" size="7">
<input type="submit" value="Convert">
</form>
</pre>
</body>
</html>
_END;
function sanitizeString($var)
{
$var = stripslashes($var);
$var = strip_tags($var);
$var = htmlentities($var);
return $var;
}
?>
When you call up convert.php in a browser, the result should look something like Figure 11-8.
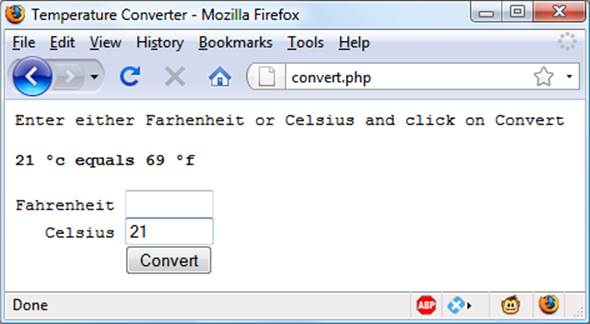
Figure 11-8. The temperature conversion program in action
To break the program down, the first line initializes the variables $c and $f in case they do not get posted to the program. The next two lines fetch the values of either the field named f or the one named c, for an input Fahrenheit or Celsius value. If the user inputs both, the Celsius is simply ignored and the Fahrenheit value is converted. As a security measure, the new function sanitizeString from Example 11-9 is also used.
So, having either submitted values or empty strings in both $f and $c, the next portion of code constitutes an if...elseif...else structure that first tests whether $f has a value. If not, it checks $c; otherwise, the variable $out is set to the empty string (more on that in a moment).
If $f is found to have a value, the variable $c is assigned a simple mathematical expression that converts the value of $f from Fahrenheit to Celsius. The formula used is Celsius = (5 / 9) × (Fahrenheit – 32). The variable $out is then set to a message string explaining the conversion.
On the other hand, if $c is found to have a value, a complementary operation is performed to convert the value of $c from Celsius to Fahrenheit and assign the result to $f. The formula used is Fahrenheit = (9 / 5) × Celsius + 32. As with the previous section, the string $out is then set to contain a message about the conversion.
In both conversions, the PHP intval function is called to convert the result of the conversion to an integer value. It’s not necessary, but looks better.
With all the arithmetic done, the program now outputs the HTML, which starts with the basic head and title and then contains some introductory text before displaying the value of $out. If no temperature conversion was made, $out will have a value of NULL and nothing will be displayed, which is exactly what we want when the form hasn’t yet been submitted. But if a conversion was made, $out contains the result, which is displayed.
After this, we come to the form, which is set to submit using the Post method to the file convert.php (the program itself). Within the form, there are two inputs for either a Fahrenheit or Celsius value to be entered. A submit button with the text Convert is then displayed, and the form is closed.
After outputting the HTML to close the document, we come finally to the function sanitizeString from Example 11-9. Try playing with the example by inputting different values into the fields; for a bit of fun, can you find a value for which Fahrenheit and Celsius are the same?
NOTE
All the examples in this chapter have used the Post method to send form data. I recommend this, as it’s the neatest and most secure method. However, the forms can easily be changed to use the Get method, as long as values are fetched from the $_GET array instead of the $_POST array. Reasons to do this might include making the result of a search bookmarkable or directly linkable from another page.
What’s New in HTML5?
With HTML5, developers can draw on a number of useful enhancements to form handling to make using forms easier than ever, including new attributes; color, date, and time pickers; and new input types—although some of these features are not yet implanted across all major browsers. The following new features, however, will work on all browsers.
The autocomplete Attribute
You can apply the autocomplete attribute to either the <form> element, or to any of the color, date, email, password, range, search, tel, text, or url types of the <input> element.
With autocomplete enabled, previous user inputs are recalled and automatically entered into fields as suggestions. You can also disable this feature by turning autocomplete off. Here’s how to turn autocomplete on for an entire form but disable it for specific fields (highlighted in bold):
<form action='myform.php' method='post' autocomplete='on'>
<input type='text' name='username'>
<input type='password' name='password' autocomplete='off'>
</form>
The autofocus Attribute
The autofocus attribute gives immediate focus to an element when a page loads. It can be applied to any <input>, <textarea>, or <button> element, like this:
<input type='text' name='query' autofocus='autofocus'>
NOTE
Browsers that use touch interfaces (such as Android, iOS, or Windows Phone) usually ignore the autofocus attribute, leaving it to the user to tap on a field to give it focus; otherwise, the zoom in, focusing, and pop-up keyboards this attribute would generate could quickly become very annoying.
Because this feature will cause the focus to move in to an input element, the Backspace key will no longer take the user back a web page (although Alt-Left and Alt-Right will still move backward and forward within the browsing history).
The placeholder Attribute
The placeholder attribute lets you place into any blank input field a helpful hint to explain to users what they should enter. You use it like this:
<input type='text' name='name' size='50' placeholder='First & Last name'>
The input field will display the placeholder text as a prompt until the user starts typing, at which point the placeholder will disappear.
The required Attribute
The required attribute is used to ensure that a field has been completed before a form is submitted. You use it like this:
<input type='text' name='creditcard' required='required'>
When the browser detects attempted form submission where there’s an uncompleted required input, a message is displayed, prompting the user to complete the field.
Override Attributes
With override attributes, you can override form settings on an element-by-element basis. So, for example, using the formaction attribute, you can specify that a submit button should submit a form to a different URL than is specified in the form itself, like the following (in which the default and overridden action URLs are bold):
<form action='url1.php' method='post'>
<input type='text' name='field'>
<input type='submit' formaction='url2.php'>
</form>
HTML5 also brings support for the formenctype, formmethod, formnovalidate, and formtarget override attributes, which you can use in exactly the same manner as formaction to override one of these settings.
NOTE
The form overrides have been supported in most major browsers for a few years, but have been featured in Internet Explorer only since version 10.
The width and height Attributes
Using these new attributes, you can alter the dimensions of an input image, like this:
<input type='image' src='picture.png' width='120' height='80'>
Features Awaiting Full Implementation
Since HTML5 is still in its early days (even though it’s been around for many years), browser developers have been implementing features according to their own schedules, so many parts of the specification are available only on some browsers. However, during the life of this edition, more and more of them will become available across the board, so it’s worth mentioning what’s coming here so that you’ll be ready to use them sooner rather than later.
The form Attribute
With HTML5, you no longer have to place <input> elements within <form> elements, because you can specify the form to which an input applies by supplying a form attribute. The following code shows a form being created, but with its input outside of the <form> and </form> tags:
<form action='myscript.php' method='post' id='form1'>
</form>
<input type='text' name='username' form='form1'>
To do this, you must give the form an ID using the id attribute, and this is the ID to which the form attribute of an input element must refer.
At the time of writing, this attribute is unsupported by Internet Explorer.
The list Attribute
HTML5 supports attaching lists to inputs to enable users to easily select from a predefined list. But, at the time of writing, only Firefox, Chrome, Safari, and IE support the list attribute. Nevertheless, once Opera picks it up, it will be a very handy feature, which you’ll be able to use like this:
Select destination:
<input type='url' name='site' list='links'>
<datalist id='links'>
<option label='Google' value='http://google.com'>
<option label='Yahoo!' value='http://yahoo.com'>
<option label='Bing' value='http://bing.com'>
<option label='Ask' value='http://ask.com'>
</datalist>
The min and max Attributes
With the min and max attributes, you can specify minimum and maximum values for inputs, but currently not in Firefox or IE. You use the attributes like this:
<input type='time' name='alarm' value='07:00' min='05:00' max='09:00'>
The browser will then either offer up and down selectors for the range of values allowed, or simply disallow values outside of that range. In tests, however, I have found this attribute to be flaky in some implementations, and suggest you fully test before implementing this feature, even when it is available on all browsers.
The step Attribute
Often used with min and max, the step attribute supports stepping through number or date values, like this:
<input type='time' name='meeting' value='12:00'
min='09:00' max='16:00' step='3600'>
When you are stepping through date or time values, each unit represents 1 second. This attribute is not yet supported by Firefox or IE.
The color Input Type
The color input type calls up a color picker so that you can simply click the color of your choice. You use it like this:
Choose a color <input type='color' name='color'>
Neither Firefox nor IE supports this input type at the time of writing.
The number and range Input Types
The number and range input types restrict input to either a number or a number within a specified range, like this:
<input type='number' name='age'>
<input type='range' name='num' min='0' max='100' value='50' step='1'>
Firefox does not appear to support the number input type at the time of writing.
Date and Time Pickers
When you choose an input type of date, month, week, time, datetime, or datetime-local, a picker will pop up on supported browsers from which the user can make a selection, like this one, which inputs the time:
<input type='time' name='time' value='12:34'>
However, without support from IE or Firefox, these pickers are probably not worth using in your web pages yet.
There are a few other form-related enhancements to HTML5 that are still under development, and you can keep abreast of them at http://tinyurl.com/h5forms (or this direct URL: http://www.w3.org/TR/html5/forms.html).
The next chapter will show you how to use cookies and authentication to store users’ preferences and keep them logged in, and how to maintain a complete user session.
Questions
1. You can submit form data using either the POST or the GET method. Which associative arrays are used to pass this data to PHP?
2. What is register_globals, and why is it a bad idea?
3. What is the difference between a text box and a text area?
4. If a form has to offer three choices to a user, each of which is mutually exclusive so that only one of the three can be selected, which input type would you use, given a choice between checkboxes and radio buttons?
5. How can you submit a group of selections from a web form using a single field name?
6. How can you submit a form field without displaying it in the browser?
7. Which HTML tag is used to encapsulate a form element and supporting text or graphics, making the entire unit selectable with a mouse-click?
8. Which PHP function converts HTML into a format that can be displayed but will not be interpreted as HTML by a browser?
9. What form attribute can be used to help users complete input fields?
10.How can you ensure that an input is completed before a form gets submitted?
See Chapter 11 Answers in Appendix A for the answers to these questions.