PHP & MySQL: Novice to Ninja, 5th Edition (2012)
Chapter 9. Cookies, Sessions, and Access Control
Cookies and sessions are two of those mysterious technologies that are almost always made out to be more intimidating and complex than they really are. In this chapter, I’ll debunk those myths by explaining in simple language what they are, how they work, and what they can do for you. I’ll also provide practical examples to demonstrate each. Finally, we’ll use these new tools to provide sophisticated access control to the administration features of your Internet Joke Database site.
Cookies
Most computer programs these days preserve some form of state when you close them. Whether it be the position of the application window, or the names of the last five files that you worked with, the settings are usually stored in a small file on your system so that they can be read back the next time the program is run. When web developers took web design to the next level, and moved from static pages to complete, interactive online applications, there was a need for similar functionality in web browsers—so cookies were born. A cookie is a name-value pair associated with a given website, and stored on the computer that runs the client (browser). Once a cookie is set by a website, all future page requests to that same site will also include the cookie until it expires or becomes out of date. Other websites are unable to access the cookies set by your site, and vice versa, so, contrary to popular belief, they’re a relatively safe place to store personal information. Cookies in and of themselves are incapable of compromising a user’s privacy. Illustrated in Figure 9.1 is the life cycle of a PHP-generated cookie.
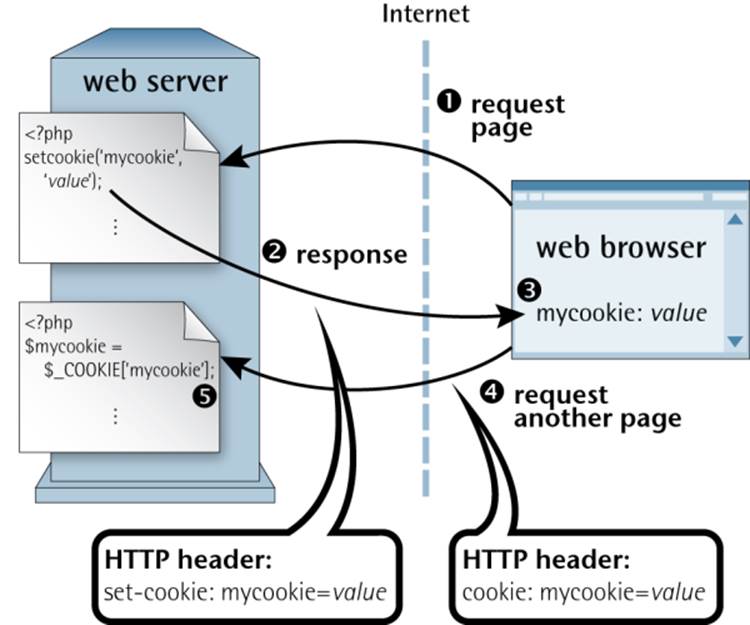
Figure 9.1. The life cycle of a cookie
|
(1) |
First, a web browser requests a URL that corresponds to a PHP script. Within that script is a call to the setcookie function that’s built into PHP. |
|
(2) |
The page produced by the PHP script is sent back to the browser, along with an HTTP set-cookie header that contains the name (for example, mycookie) and value of the cookie to be set. |
|
(3) |
When it receives this HTTP header, the browser creates and stores the specified value as a cookie named mycookie. |
|
(4) |
Subsequent page requests to that website contain an HTTP cookie header that sends the name/value pair (mycookie=value) to the script requested. |
|
(5) |
Upon receipt of a page request with a cookie header, PHP automatically creates an entry in the $_COOKIE array with the name of the cookie ($_COOKIE['mycookie']) and its value. |
In other words, the PHP setcookie function lets you set a variable that will automatically be set by subsequent page requests from the same browser. Before we examine an actual example, let’s take a close look at the setcookie function:
setcookie(name
[, value
[, expiryTime
[, path
[, domain
[, secure
[,
httpOnly
]
]
]
]
]
])
Note: Square Brackets Indicate Optional Code
The square brackets ([…]) indicate portions of the code that are optional. Leave out the square brackets when using the syntax in your code.
Like the header function we saw in Chapter 4, the setcookie function adds HTTP headers to the page, and thus must be called before any of the actual page content is sent. Any attempt to call setcookie after page content has been sent to the browser will produce a PHP error message. Typically, therefore, you’ll use these functions in your controller script before any actual output is sent (by an included PHP template, for example). The only required parameter for this function is name , which specifies the name of the cookie. Calling setcookie with only the name parameter will actually delete the cookie that’s stored on the browser, if it exists. The value parameter allows you to create a new cookie, or modify the value stored in an existing one. By default, cookies will remain stored by the browser, and thus will continue to be sent with page requests until the browser is closed by the user. If you want the cookie to persist beyond the current browser session, you must set the expiryTime parameter to specify the number of seconds from January 1, 1970 to the time at which you want the cookie to be deleted automatically. The current time in this format can be obtained using the PHP time function. Thus, a cookie could be set to expire in one hour, for example, by setting expiryTime to time() + 3600. To delete a cookie that has a preset expiry time, change this expiry time to represent a point in the past (such as one year ago: time() – 3600 * 24 * 365). Here are two examples showing these techniques in practice:
// Set a cookie to expire in 1 year
setcookie('mycookie', 'somevalue', time() + 3600 * 24 * 365);
// Delete it
setcookie('mycookie', '', time() – 3600 * 24 * 365);
The path parameter lets you restrict access to the cookie to a given path on your server. For instance, if you set a path of '/admin/' for a cookie, only requests for pages in the admin directory (and its subdirectories) will include the cookie as part of the request. Note the trailing /, which prevents scripts in other directories beginning with /admin (such as /adminfake/) from accessing the cookie. This is helpful if you’re sharing a server with other users, and each user has a web home directory. It allows you to set cookies without exposing your visitors’ data to the scripts of other users on your server. The domain parameter serves a similar purpose: it restricts the cookie’s access to a given domain. By default, a cookie will be returned only to the host from which it was originally sent. Large companies, however, commonly have several host names for their web presence (for example, www.example.com and support.example.com). To create a cookie that’s accessible by pages on both servers, you would set the domain parameter to '.example.com'. Note the leading ., which prevents another site at fakeexample.com from accessing your cookies on the basis that their domain ends with example.com. The secure parameter, when set to 1, indicates that the cookie should be sent only with page requests that happen over a secure (SSL) connection (that is, with a URL that starts with https://). The httpOnly parameter, when set to 1, tells the browser to prevent JavaScript code on your site from seeing the cookie that you’re setting. Normally, the JavaScript code you include in your site can read the cookies that have been set by the server for the current page. While this can be useful in some cases, it also puts the data stored in your cookies at risk should an attacker figure out a way to inject malicious JavaScript code into your site. This code could then read your users’ potentially sensitive cookie data and do unspeakable things with it. If you set httpOnly to 1, the cookie you’re setting will be sent to your PHP scripts as usual, but will be invisible to JavaScript code running on your site. While all parameters except name are optional, you must specify values for earlier parameters if you want to specify values for later ones. For instance, to call setcookie with a domain value, you also need to specify a value for the expiryTime parameter. To omit parameters that require a value, you can set string parameters (value, path, domain) to '' (the empty string) and numerical parameters (expiryTime, secure) to 0. Let’s now look at an example of cookies in use. Imagine you want to display a special welcome message to people on their first visit to your site. You could use a cookie to count the number of times a user had been to your site before, and only display the message when the cookie was not set. Here’s the code:
chapter9/cookiecounter/index.php
<?php
if (!isset($_COOKIE['visits']))
{
$_COOKIE['visits'] = 0;
}
$visits = $_COOKIE['visits'] + 1;
setcookie('visits', $visits, time() + 3600 * 24 * 365);
include 'welcome.html.php';
This code starts by checking if $_COOKIE['visits'] is set. If it isn’t, it means the visits cookie has yet to be set in the user’s browser. To handle this special case, we set $_COOKIE['visits'] to 0. The rest of our code can then safely assume that $_COOKIE['visits'] contains the number of previous visits the user has made to the site. Next, to work out the number of this visit, we take $_COOKIE['visits'] and add the value 1. This variable, $visits, will be used by our PHP template. Finally, we use setcookie to set the visits cookie to reflect the new number of visits. We set this cookie to expire in one year’s time. With all the work done, our controller includes the PHP template welcome.html.php:
chapter9/cookiecounter/welcome.html.php
<?php include_once $_SERVER['DOCUMENT_ROOT'] .
'/includes/helpers.inc.php'; ?>
<!DOCTYPE html>
<html lang="en">
<head>
<meta charset="utf-8">
<title>Cookie counter</title>
</head>
<body>
<p>
<?php
if ($visits > 1)
{
echo "This is visit number $visits.";
}
else
{
// First visit
echo 'Welcome to my website! Click here for a tour!';
}
?>
</p>
</body>
</html>
Figure 9.2 shows what this example looks like the first time a browser visits the page. Subsequent visits look like Figure 9.3.
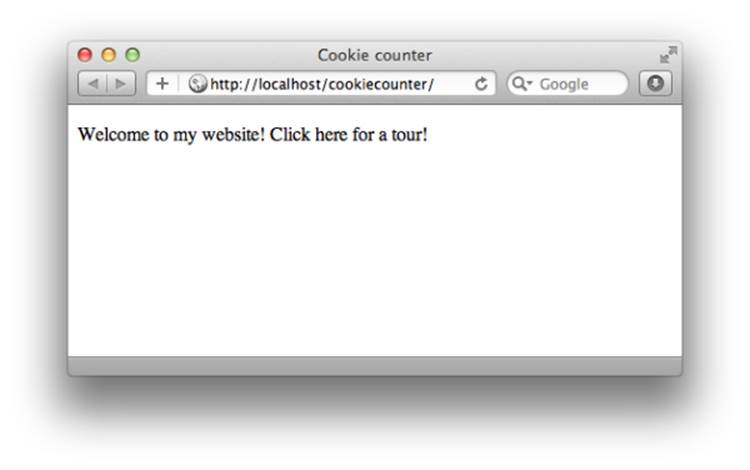
Figure 9.2. The first visit
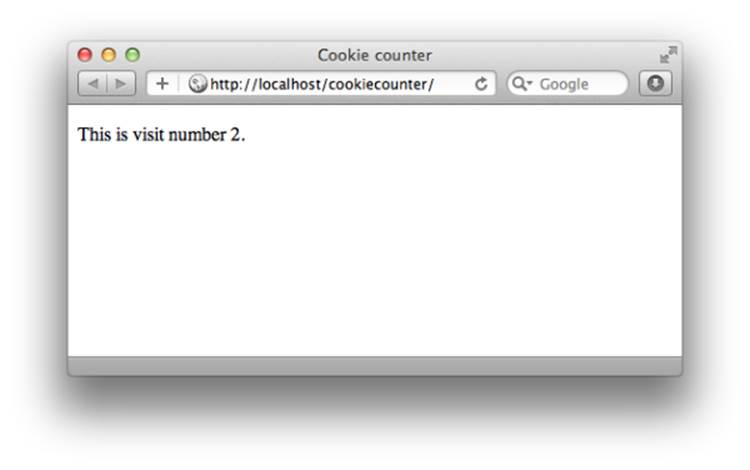
Figure 9.3. The second visit
Before you go overboard using cookies, be aware that browsers place a limit on the number and size of cookies allowed per website. Some browsers will start deleting old cookies to make room for new ones after you’ve set 20 cookies from your site. Other browsers will allow up to 50 cookies per site, but will reject new cookies beyond this limit. Browsers also enforce a maximum combined size for all cookies from all websites, so an especially cookie-heavy site might cause your own site’s cookies to be deleted. For these reasons, do your best to keep the number and size of the cookies your site creates to a minimum.
PHP Sessions
Because of the limitations I’ve just described, cookies are inappropriate for storing large amounts of information. If you run an ecommerce website that uses cookies to store items in shopping carts as users make their way through your site, it can be a huge problem; the bigger a customer’s order, the more likely it will run afoul of a browser’s cookie restrictions. Sessions were developed in PHP as the solution to this issue. Instead of storing all your (possibly large) data as cookies in your visitor’s web browser, sessions let you store the data on your web server. The only value that’s stored in the browser is a single cookie containing the user’s session ID—a long string of letters and numbers that serves to identify that user uniquely for the duration of their visit to your site. It’s a variable for which PHP watches on subsequent page requests, and uses to load the stored data that’s associated with that session. Unless configured otherwise, a PHP session automatically sets a cookie in the user’s browser that contains the session ID. The browser then sends that cookie, along with every request for a page from your site, so that PHP can determine to which of potentially numerous sessions-in-progress the request belongs. Using a set of temporary files that are stored on the web server,[51] PHP keeps track of the variables that have been registered in each session, and their values. Before you can go ahead and use the spiffy session-management features in PHP, you should ensure that the relevant section of your php.ini file has been set up properly. If you’re using one of the all-in-one packages described in Chapter 1 (like XAMPP or MAMP), or if you’re using a server that belongs to your web host, it’s probably safe to assume this has been done for you. Otherwise, open your php.ini file in a text editor and look for the section marked [Session] (say that ten times fast!). Beneath it, you’ll find around 20 options that begin with the word session. Most of them are fine as they are, but there are a few crucial ones you’ll want to check:
session.save_handler = files
session.save_path = "C:\WINDOWS\TEMP"
session.use_cookies = 1
session.save_path tells PHP where to create the temporary files used to track sessions. It must be set to a directory that exists on the system, or you’ll receive ugly error messages when you try to create a session on one of your pages. On Mac OS X and Linux systems, /tmp is a popular choice. In Windows, you could use C:\WINDOWS\TEMP, or some other directory if you prefer (D:\PHP\SESSIONS, for example). With these adjustments made, restart your web server software to allow the changes to take effect. You’re now ready to start working with PHP sessions. Before we jump into an example, let’s quickly look at the most common session management functions in PHP. To tell PHP to look for a session ID, or start a new session if none is found, you simply call session_start. If an existing session ID is found when this function is called, PHP restores the variables that belong to that session. Since this function attempts to create a cookie, it must come before any page content is sent to the browser, just as we saw for setcookie above:
session_start();
To create a session variable that will be available on all pages in the site when accessed by the current user, set a value in the special $_SESSION array. For example, the following will store the variable called password in the current session:
$_SESSION['password'] = 'mypassword';
To remove a variable from the current session, use PHP’s unset function:
unset($_SESSION['password']);
Finally, should you want to end the current session and delete all registered variables in the process, clear all the stored values and use session_destroy:
$_SESSION = array();
session_destroy();
For more detailed information on these and the other session-management functions in PHP, see the relevant section of the PHP Manual. Now that we have these basic functions under our belt, let’s put them to work in a simple example.
A Simple Shopping Cart
This example will consist of a controller script feeding two PHP templates:
· a product catalog, through which you can add items to your shopping cart
· a checkout page, which displays the contents of the user’s shopping cart for confirmation
From the checkout page, the order could then be submitted to a processing system that would handle the details of payment acceptance and shipping arrangements. That system is beyond the scope of this book, but if you’d like to try one I’d recommend playing with PayPal, which is quite easy to set up. The documentation page should be well within reach of your PHP skills at this point. Let’s start with the controller code that sets up the list of items we’ll have for sale in our online store. For each item, we wish to list a description and a price per unit. For this example, we’ll code these details as a PHP array. In a real-world system, you would probably store these details in a database, but I’m using this method so that we can focus on the session code. You should already have all the knowledge to put together a database driven product catalog, so if you’re feeling ambitious, go ahead and write it now. Here’s the code for our list of products:
chapter9/shoppingcart/index.php (excerpt)
<?php
include_once $_SERVER['DOCUMENT_ROOT'] .
'/includes/magicquotes.inc.php';
$items = array(
array('id' => '1', 'desc' => 'Canadian-Australian Dictionary',
'price' => 24.95),
array('id' => '2', 'desc' => 'As-new parachute (never opened)',
'price' => 1000),
array('id' => '3', 'desc' => 'Songs of the Goldfish (2CD set)',
'price' => 19.99),
array('id' => '4', 'desc' => 'Simply JavaScript (SitePoint)',
'price' => 39.95));
Each item in this array is itself an associative array of three items: a unique item ID, the item description, and the price. It’s no coincidence that this looks like an array of results we might build from querying a database. Now we’re going to store the list of items the user placed in the shopping cart in yet another array. Because we’ll need this variable to persist throughout a user’s visit to your site, we’ll store it using PHP sessions. Here’s the code that’s responsible:
chapter9/shoppingcart/index.php (excerpt)
session_start();
if (!isset($_SESSION['cart']))
{
$_SESSION['cart'] = array();
}
session_start either starts a new session (and sets the session ID cookie), or restores the variables registered in the existing session, if one exists. The code then checks if $_SESSION['cart'] exists, and, if it doesn’t, initializes it to an empty array to represent the empty cart. That’s all we need to display a product catalog using a PHP template:
chapter9/shoppingcart/index.php (excerpt)
include 'catalog.html.php';
Let’s look at the code for this template:
chapter9/shoppingcart/catalog.html.php
<?php include_once $_SERVER['DOCUMENT_ROOT'] .
'/includes/helpers.inc.php'; ?>
<!DOCTYPE html>
<html lang="en">
<head>
<meta charset="utf-8">
<title>Product Catalog</title>
<style>
table {
border-collapse: collapse;
}
td, th {
border: 1px solid black;
}
</style>
</head>
<body>
<p>Your shopping cart contains <?php
echo count($_SESSION['cart']); ?> items.</p>(1)
<p><a href="?cart">View your cart</a></p>(2)
<table border="1">
<thead>
<tr>
<th>Item Description</th>
<th>Price</th>
</tr>
</thead>
<tbody>
<?php foreach ($items as $item): ?>
<tr>
<td><?php htmlout($item['desc']); ?></td>
<td>
$<?php echo number_format($item['price'], 2); ?>(3)
</td>
<td>
<form action="" method="post">(4)
<div>
<input type="hidden" name="id" value="<?php
htmlout($item['id']); ?>">
<input type="submit" name="action" value="Buy">
</div>
</form>
</td>
</tr>
<?php endforeach; ?>
</tbody>
</table>
<p>All prices are in imaginary dollars.</p>
</body>
</html>
Here are the highlights:
|
(1) |
We use the built-in PHP function count to output the number of items in the array stored in the $_SESSION['cart']. |
|
(2) |
We provide a link to let the user view the contents of the shopping cart. In a system that provided checkout facilities, you might label this link Proceed to Checkout. |
|
(3) |
We use PHP’s built-in number_format function to display the prices with two digits after the decimal point (see the PHP Manual for more information about this function). |
|
(4) |
For each item in the catalog, we provide a form with a Buy button that submits the unique ID of the item. |
Figure 9.4 shows the product catalog produced by this template.
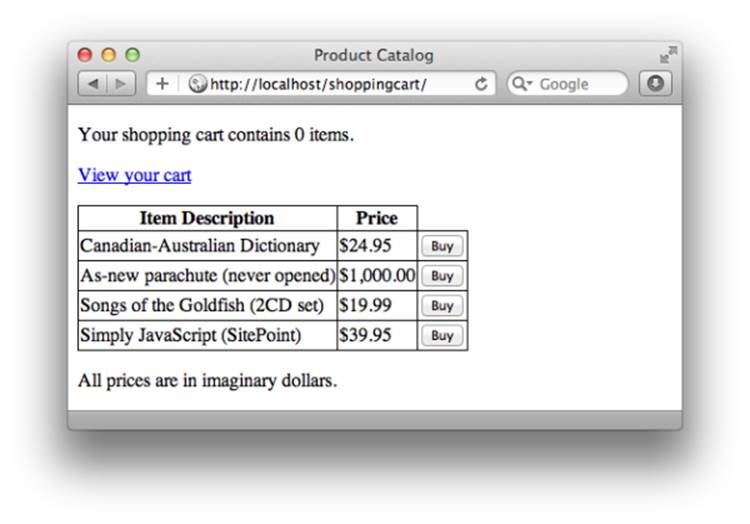
Figure 9.4. The completed product catalog
Now, when a user clicks one of the Buy buttons, our controller will receive a form submission with $_POST['action'] set to 'Buy'. Here’s how we process this in the controller:
chapter9/shoppingcart/index.php (excerpt)
if (isset($_POST['action']) and $_POST['action'] == 'Buy')
{
// Add item to the end of the $_SESSION['cart'] array
$_SESSION['cart'][] = $_POST['id'];
header('Location: .');
exit();
}
We add the product ID of the item to the $_SESSION['cart'] array before redirecting the browser back to the same page, but without submitted form data, thereby ensuring that the user can refresh the page without adding the item to the cart again. When the user clicks the View your cart link, our controller will receive a request with $_GET['cart'] set. Here’s how our controller will handle this:
chapter9/shoppingcart/index.php (excerpt)
if (isset($_GET['cart']))
{
$cart = array();
$total = 0;
foreach ($_SESSION['cart'] as $id)
{
foreach ($items as $product)
{
if ($product['id'] == $id)
{
$cart[] = $product;
$total += $product['price'];
break;
}
}
}
include 'cart.html.php';
exit();
}
What this code does is build an array ($cart) much like the $items array, except that the items in $cart reflect the items the user has added to the shopping cart. To do this, it uses two nested foreach loops. The first loops through the IDs in $_SESSION['cart']. For each of these IDs, it uses the second foreach loop to search through the $items array looking for a product whose ID ($product['id']) is equal to the $id from the cart. When it finds the product, it adds it to the $cart array. At the same time, this code tallies the total price of the items in the shopping cart. Each time the second foreach loop finds the product in the cart, it adds its price ($product['price']) to the $total. The break command tells PHP to stop executing the second foreach loop, since it’s found the product it has been searching for. Once the $cart array is built, we load the second of our two PHP templates, cart.html.php. The code for cart.html.php is very similar to the product catalog template. All it does is list the items in the $cart array instead of the $items array. It also outputs the total in the footer of the table:
chapter9/shoppingcart/cart.html.php
<?php include_once $_SERVER['DOCUMENT_ROOT'] .
'/includes/helpers.inc.php'; ?>
<!DOCTYPE html>
<html lang="en">
<head>
<meta charset="utf-8">
<title>Shopping Cart</title>
<style>
table {
border-collapse: collapse;
}
td, th {
border: 1px solid black;
}
</style>
</head>
<body>
<h1>Your Shopping Cart</h1>
<?php if (count($cart) > 0): ?>
<table>
<thead>
<tr>
<th>Item Description</th>
<th>Price</th>
</tr>
</thead>
<tfoot>
<tr>
<td>Total:</td>
<td>$<?php echo number_format($total, 2); ?></td>
</tr>
</tfoot>
<tbody>
<?php foreach ($cart as $item): ?>
<tr>
<td><?php htmlout($item['desc']); ?></td>
<td>
$<?php echo number_format($item['price'], 2); ?>
</td>
</tr>
<?php endforeach; ?>
</tbody>
</table>
<?php else: ?>
<p>Your cart is empty!</p>
<?php endif; ?>
<form action="?" method="post">
<p>
<a href="?">Continue shopping</a> or
<input type="submit" name="action" value="Empty cart">
</p>
</form>
</body>
</html>
Once you have filled your cart with goodies, Figure 9.5 shows the output of this template.
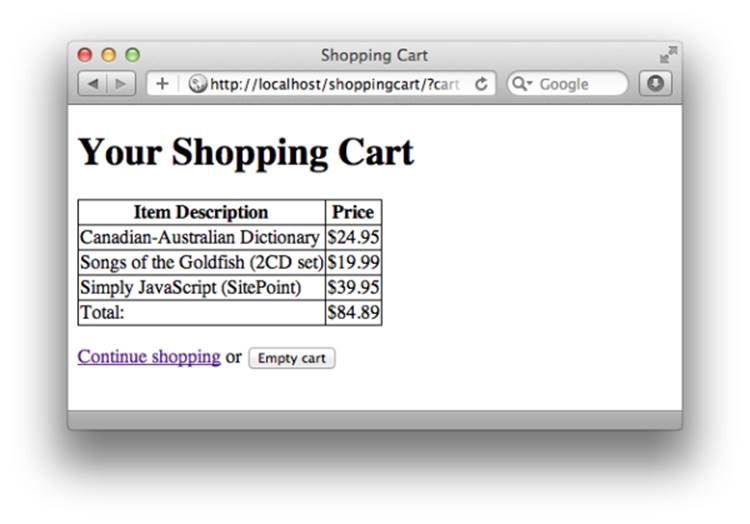
Figure 9.5. A full cart
This template also provides an Empty cart button that causes the controller script to unset the $_SESSION['cart'] variable, which results in a new, empty shopping cart. Here’s the code:
chapter9/shoppingcart/index.php (excerpt)
if (isset($_POST['action']) and $_POST['action'] == 'Empty cart')
{
// Empty the $_SESSION['cart'] array
unset($_SESSION['cart']);
header('Location: ?cart');
exit();
}
And Figure 9.6 shows what the cart looks like once emptied.
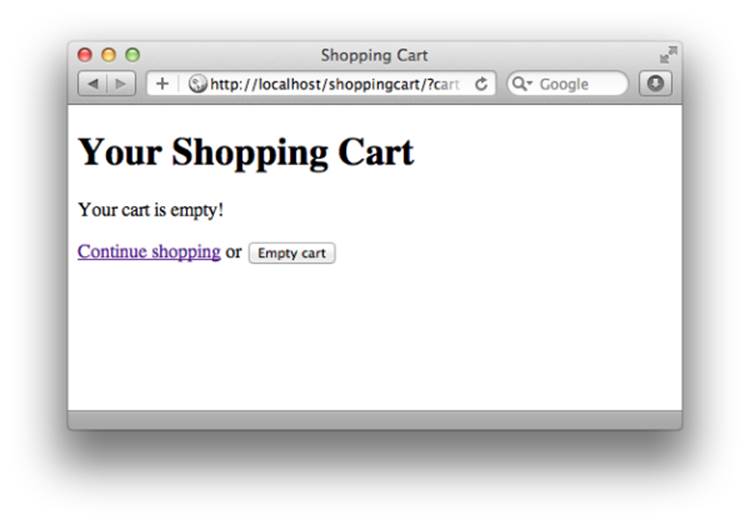
Figure 9.6. Avoid going home empty-handed!
That’s it! Here’s the complete code for the controller, with all the pieces assembled:
chapter9/shoppingcart/index.php
<?php
include_once $_SERVER['DOCUMENT_ROOT'] .
'/includes/magicquotes.inc.php';
$items = array(
array('id' => '1', 'desc' => 'Canadian-Australian Dictionary',
'price' => 24.95),
array('id' => '2', 'desc' => 'As-new parachute (never opened)',
'price' => 1000),
array('id' => '3', 'desc' => 'Songs of the Goldfish (2CD set)',
'price' => 19.99),
array('id' => '4', 'desc' => 'Simply JavaScript (SitePoint)',
'price' => 39.95));
session_start();
if (!isset($_SESSION['cart']))
{
$_SESSION['cart'] = array();
}
if (isset($_POST['action']) and $_POST['action'] == 'Buy')
{
// Add item to the end of the $_SESSION['cart'] array
$_SESSION['cart'][] = $_POST['id'];
header('Location: .');
exit();
}
if (isset($_POST['action']) and $_POST['action'] == 'Empty cart')
{
// Empty the $_SESSION['cart'] array
unset($_SESSION['cart']);
header('Location: ?cart');
exit();
}
if (isset($_GET['cart']))
{
$cart = array();
$total = 0;
foreach ($_SESSION['cart'] as $id)
{
foreach ($items as $product)
{
if ($product['id'] == $id)
{
$cart[] = $product;
$total += $product['price'];
break;
}
}
}
include 'cart.html.php';
exit();
}
include 'catalog.html.php';
Access Control
One of the most common reasons for building a database driven website is that it allows the site owner to update the site from any web browser, anywhere! But, in a world where roaming bands of jubilant hackers will fill your site with viruses and pornography, you need to stop and think about the security of your administration pages. At the very least, you’ll want to require username and password authentication before a visitor to your site can access the administration area. There are two main ways of doing this:
· configure your web server software to require a valid login for the relevant pages
· use PHP to prompt the user and check the login credentials as appropriate
If you have access to your web server’s configuration, the first option is often the easiest to set up, but the second is by far the more flexible. With PHP, you can design your own login form, even embed it into the layout of your site if you wish. PHP also makes it easy to change the credentials required to gain access, or manage a database of authorized users, each with their own credentials and privileges. In this section, you’ll enhance your joke database site to protect sensitive features with username/password-based authentication. In order to control which users can do what, you’ll build a sophisticated role-based access control system. “What does all this have to do with cookies and sessions?” you might wonder. Well, rather than prompting your users for login credentials every time they wish to view a confidential page or perform a sensitive action, you can use PHP sessions to hold onto those credentials throughout their visit to your site.
Database Design
Depending on the type of application you’re working on, you may need to create a new database table to store the list of authorized users and their passwords. In the case of the joke database site, you already have a table to do the job—the author table shown in Figure 9.7.
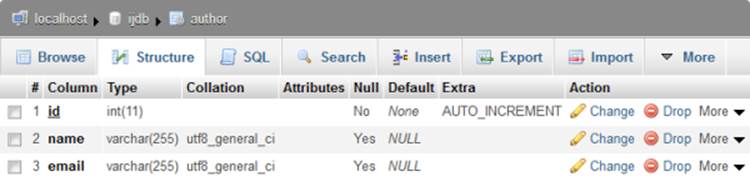
Figure 9.7. The existing structure of the author table
Rather than track authors and users separately, let’s extend this existing database table so that authors can log in to your site. Some authors in the database may never log in, and may exist only to be given credit for jokes. Other authors may never write a joke, existing only to give a person administrative access to the site. But for those users who do both, it will be more elegant to have their details stored in this one table, rather than spread across two different tables. We can use each author’s email address as a username, but to do this, we’ll want to ensure that each author in the database has a unique email address. We can achieve this with an ALTER TABLE ADD UNIQUE command. Use phpMyAdmin’s Query window to run this command:[52]
ALTER TABLE author ADD UNIQUE (email)
With this change made, MySQL will now generate an error if you try to create a new author with the same email address as an existing author. Now all this table needs is an extra column to store each author’s password:
ALTER TABLE author ADD COLUMN password CHAR(32)
Note that we refrain from using the NOT NULL modifier on this column, so some authors may have no password. When we write the PHP code that uses this column, we’ll simply prevent authors with no password from logging in. Note the column type: CHAR(32). It’s a big no-no to store users’ actual passwords in your database. Many users share a bad habit of reusing the same password across many different websites. It’s an expected courtesy, therefore, as a site administrator, to scramble the passwords your users give you, so that even if your database were stolen out from under you, those passwords would be useless to an attacker trying to gain access to your users’ accounts on other websites. A typical method of scrambling passwords is to use the md5 function built into PHP:
$scrambled = md5($password . 'ijdb');
Adding 'ijdb' to the end of the password supplied by the user before scrambling it ensures that the scrambled password in your site’s database is different to the scrambled version of the same password in another site’s database. Security experts call this salt, as in “add a dash of salt before you scramble the eggs.”
Note: A Note from the Security Experts
Security experts will tell you that using the same salt for every password in your database is asking for trouble, since an attacker who’s able to figure out your salt (by obtaining a copy of your site’s code, for example) will be one step closer to guessing the original passwords based on the scrambled versions in your database. Of course, those same security experts will tell you that rather than write your own password-handling code, you should rely on a proven solution developed by security experts like themselves. This example provides a basic level of security with plenty of room for improvement if you’re interested in doing a little research.
The md5 function creates a string exactly 32 characters long made up of apparently random letters and numbers. Although the same password will always generate the same string of 32 characters, it’s effectively impossible to guess the password that was used to generate a given 32-character string. By storing only these strings in your database, you’ll be able to check if a user has entered the correct password. Unlike the VARCHAR column type, a column of type CHAR(32) will only store values exactly 32 characters long. This added regularity makes your database perform faster. Since the md5 function always generates a string 32 characters long, we can safely take advantage of this speed boost. It turns out that MySQL has an MD5 function that performs the same task. Go ahead and store a password for your own author entry—or create one from scratch if you need to—now:
UPDATE author SET password = MD5('passwordijdb')
WHERE id = 1
Note that you have to tack onto your desired password the same suffix ('ijdb' in this example) that you’re using in your PHP code. Next, we need to store the list of sensitive actions each author is permitted to do. While you could simply give every logged-in user carte blanche—blanket permission to do absolutely anything—on most sites it will make greater sense to have more granular control over what each user’s able to do. Let’s build a new table that will contain a list of roles that you’ll be able to assign to each of your authors. Each author may have one or more of these roles assigned to them. An author who’s assigned the role of Content Editor, for example, would be able to edit jokes in your CMS. This type of system is called role-based access control :
CREATE TABLE role (
id VARCHAR(255) NOT NULL PRIMARY KEY,
description VARCHAR(255)
) DEFAULT CHARACTER SET utf8 ENGINE=InnoDB
Each role will have a short string ID and a longer description. Let’s fill in a few roles now:
INSERT INTO role (id, description) VALUES
('Content Editor', 'Add, remove, and edit jokes'),
('Account Administrator', 'Add, remove, and edit authors'),
('Site Administrator', 'Add, remove, and edit categories')
Finally, we will need a lookup table to assign roles to users in a many-to-many relationship:
CREATE TABLE authorrole (
authorid INT NOT NULL,
roleid VARCHAR(255) NOT NULL,
PRIMARY KEY (authorid, roleid)
) DEFAULT CHARACTER SET utf8 ENGINE=InnoDB
While you’re at it, assign yourself the Account Administrator role:
INSERT INTO authorrole (authorid, roleid) VALUES
(1, 'Account Administrator')
That takes care of the database. Now let’s turn our attention to the PHP code that will use these new database structures.
Controller Code
Obviously, access control is a feature that will be handy in many different PHP projects. Therefore, like our database connection code and view helpers, it makes sense to write as much of our access control code as possible as a shared include file, so that we can then reuse it in future projects. Rather than try to guess what functions our shared include file should contain, let’s start by modifying our controller code as if we already had the include file written. You’ll recall that our administration pages start with an ordinary HTML page that displays the menu shown in Figure 9.8.
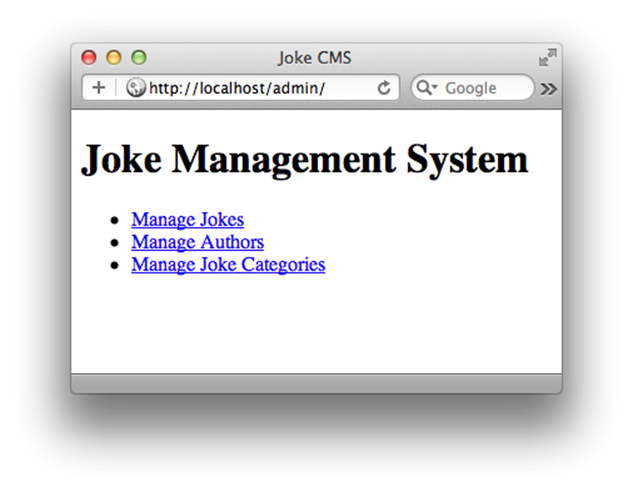
Figure 9.8. No protection required on this page
Your instinct might be to protect this page, but in fact it contains no sensitive information, so we can safely leave it alone. Each of the three links, however, point to a PHP controller script that performs all sorts of sensitive operations:
/admin/jokes/index.php
Searches for, displays, adds, edits, and removes jokes from the system. Only users with the Content Editor role should be able to perform these actions.
/admin/authors/index.php
Lists, adds, edits, and removes authors from the system. Users with the Account Administrator role only should be able to perform these actions.
/admin/categories/index.php
Lists, adds, edits, and removes categories from the system. Only users with the Site Administrator role should be able to perform these actions.
Each of these controllers, therefore, should check if the user is currently logged in and assigned the required role before proceeding. If the user has yet to log in, a login form should be displayed. If the user is logged in but lacks the required role, it should display an appropriate error message. If we imagine that we already have functions to achieve all these actions, here’s what the code might look like:
chapter9/admin/authors/index.php (excerpt)
<?php
include_once $_SERVER['DOCUMENT_ROOT'] .
'/includes/magicquotes.inc.php';
require_once $_SERVER['DOCUMENT_ROOT'] . '/includes/access.inc.php';
if (!userIsLoggedIn())
{
include '../login.html.php';
exit();
}
if (!userHasRole('Account Administrator'))
{
$error = 'Only Account Administrators may access this page.';
include '../accessdenied.html.php';
exit();
}
… The rest of the controller code is unchanged.
We add similar code to each of our other two controllers, but with the appropriate role specified for each:
chapter9/admin/categories/index.php (excerpt)
<?php
include_once $_SERVER['DOCUMENT_ROOT'] .
'/includes/magicquotes.inc.php';
require_once $_SERVER['DOCUMENT_ROOT'] . '/includes/access.inc.php';
if (!userIsLoggedIn())
{
include '../login.html.php';
exit();
}
if (!userHasRole('Site Administrator'))
{
$error = 'Only Site Administrators may access this page.';
include '../accessdenied.html.php';
exit();
}
… The rest of the controller code is unchanged.
chapter9/admin/jokes/index.php (excerpt)
<?php
include_once $_SERVER['DOCUMENT_ROOT'] .
'/includes/magicquotes.inc.php';
require_once $_SERVER['DOCUMENT_ROOT'] . '/includes/access.inc.php';
if (!userIsLoggedIn())
{
include '../login.html.php';
exit();
}
if (!userHasRole('Content Editor'))
{
$error = 'Only Content Editors may access this page.';
include '../accessdenied.html.php';
exit();
}
… The rest of the controller code is unchanged.
From each of these blocks of code, we can see that we have the following tasks ahead of us:
· Write the login form, login.html.php.
· Write the “access denied” error page, accessdenied.html.php.
· Write the shared include file access.inc.php containing the following functions:
userIsLoggedIn
Checks if the user’s already logged in, or if the user has just submitted the login form with a correct email address and password.
userHasRole
Checks if the user who’s logged in has been assigned the specified role in the database.
Since the login form and the error page will be shared by all three of our controllers, we’ll put them in the admin directory alongside index.html. The code for the error page is completely straightforward. All it does is output the $error variable set by the controller:
chapter9/admin/accessdenied.html.php
<?php include_once $_SERVER['DOCUMENT_ROOT'] .
'/includes/helpers.inc.php'; ?>
<!DOCTYPE html>
<html lang="en">
<head>
<meta charset="utf-8">
<title>Access Denied</title>
</head>
<body>
<h1>Access Denied</h1>
<p><?php htmlout($error); ?></p>
</body>
</html>
The login form takes a little more thought. Here’s the code:
chapter9/admin/login.html.php
<?php include_once $_SERVER['DOCUMENT_ROOT'] .
'/includes/helpers.inc.php'; ?>
<!DOCTYPE html>
<html lang="en">
<head>
<meta charset="utf-8">
<title>Log In</title>
</head>
<body>
<h1>Log In</h1>
<p>Please log in to view the page that you requested.</p>
<?php if (isset($loginError)): ?>(1)
<p><?php htmlout($loginError); ?></p>
<?php endif; ?>
<form action="" method="post">(2)
<div>
<label for="email">Email: <input type="text" name="email"
id="email"></label>
</div>
<div>
<label for="password">Password: <input type="password"(3)
name="password" id="password"></label>
</div>
<div>
<input type="hidden" name="action" value="login">(4)
<input type="submit" value="Log in">
</div>
</form>
<p><a href="/admin/">Return to JMS home</a></p>(5)
</body>
</html>
The form takes an email address and a password, as you might expect.
|
(1) |
If the user submits the login form with an incorrect email address or password, the user will be denied access, simply being presented with the login form again. We need a way to tell the user what went wrong in this situation; this template will check if a variable named $loginErrorexists, and if so, will display it above the form. |
|
(2) |
The <form> tag has an empty action attribute, so this form will be submitted back to the same URL that produced it. Thus, if the user’s login attempt is successful, the controller will display the page that the browser originally requested. |
|
(3) |
Notice the second <input> tag has its type attribute set to password. This tells the browser to hide the value that the user types in, to shield the password from prying eyes. |
|
(4) |
This hidden field will be submitted with the form, to act as a signal to the userIsLoggedIn function that the user has submitted this form in an attempt to log in. You might be tempted simply to put the name="action" attribute on the submit button’s <input> tag and watch for that—but if the user submits the form by hitting Enter while editing one of the two text fields, the submit button will not be sent with the form. Using a hidden field like this ensures that the action variable will be submitted no matter how the submission is triggered. |
|
(5) |
A user might request a protected page by accident, or might be unaware that a page is protected until they see the login form. We therefore provide a link back to an unprotected page as a way out. |
This form will take care of people logging in, but we also want to provide a way for a logged-in user to log out. Just as our userIsLoggedIn function will detect submissions of the login form to log users in, we can also make it detect the submission of a logout form to log users out. Let’s add this form to the bottom of each protected page:
chapter9/admin/logout.inc.html.php
<form action="" method="post">
<div>
<input type="hidden" name="action" value="logout">
<input type="hidden" name="goto" value="/admin/">
<input type="submit" value="Log out">
</div>
</form>
Again, we use a hidden action field to signal the user’s intentions. The goto field indicates where we wish to send the user who’s just logged out. To add this form to all our protected pages, simply add the necessary include command to the bottom of each template:
chapter9/admin/authors/authors.html.php (excerpt)
…
<p><a href="..">Return to JMS home</a></p>
<?php include '../logout.inc.html.php'; ?>
</body>
</html>
chapter9/admin/categories/categories.html.php (excerpt)
…
<p><a href="..">Return to JMS home</a></p>
<?php include '../logout.inc.html.php'; ?>
</body>
</html>
chapter9/admin/jokes/jokes.html.php (excerpt)
…
<p><a href="..">Return to JMS home</a></p>
<?php include '../logout.inc.html.php'; ?>
</body>
</html>
chapter9/admin/jokes/searchform.html.php (excerpt)
…
<p><a href="..">Return to JMS home</a></p>
<?php include '../logout.inc.html.php'; ?>
</body>
</html>
Function Library
Finally, we can look at writing the shared include file, access.inc.php. Our code demands a lot from this humble file, but having written all the code that depends on it ahead of time, we have a fairly good idea of what it needs to do. Let’s review. This file must define two custom functions:
userIsLoggedIn
This function should return TRUE if the user is logged in, or FALSE if not. This function should also detect and handle a couple of special cases:
· If the current request contains a submission of the login form, as indicated by the hidden field in the form (which sets $_POST['action'] to 'login'), it should check if the submitted username and password are correct. If they are, it should log in the user and return TRUE. Otherwise, it should set the global variable $loginError to an appropriate error message, and return FALSE.
· If the current request contains a submission of the logout form, as indicated by the hidden field in the form (which sets $_POST['action'] to 'logout'), it should log out the user and redirect the browser to the URL specified by $_POST['goto'].
userHasRole
This function should look in the database and check if the currently logged-in user has been assigned the role that’s passed to the function. If the role has been assigned, the function should return TRUE; if not, it should return FALSE.
Let’s work through these two functions a few lines at a time:
chapter9/includes/access.inc.php (excerpt)
<?php
function userIsLoggedIn()
{
if (isset($_POST['action']) and $_POST['action'] == 'login')
{
We start with the userIsLoggedIn function. The first deed it does is check if the login form has been submitted:
chapter9/includes/access.inc.php (excerpt)
if (!isset($_POST['email']) or $_POST['email'] == '' or
!isset($_POST['password']) or $_POST['password'] == '')
{
$GLOBALS['loginError'] = 'Please fill in both fields';
return FALSE;
}
Next, before we go looking in the database, we should make sure that the user has filled in a value for both the email address and password. If either of these were not submitted, or were submitted as an empty string, we set the global $loginError variable (using the special $GLOBALS array we looked at in Chapter 6) and return FALSE. Now that we’ve checked that an email address and password were actually submitted, we can look for a matching author in the database. Our first task is to scramble the submitted password to match the scrambled version that will be stored in the database:
chapter9/includes/access.inc.php (excerpt)
$password = md5($_POST['password'] . 'ijdb');
Next, we’ll query the database for a matching author record. Since this is an undertaking we’ll have to do more than once in this code, we’ll write another custom function to do it:
chapter9/includes/access.inc.php (excerpt)
function databaseContainsAuthor($email, $password)
{
include 'db.inc.php';
try
{
$sql = 'SELECT COUNT(*) FROM author
WHERE email = :email AND password = :password';
$s = $pdo->prepare($sql);
$s->bindValue(':email', $email);
$s->bindValue(':password', $password);
$s->execute();
}
catch (PDOException $e)
{
$error = 'Error searching for author.';
include 'error.html.php';
exit();
}
$row = $s->fetch();
if ($row[0] > 0)
{
return TRUE;
}
else
{
return FALSE;
}
}
This code should be quite familiar to you by now. We start by connecting to the database using our shared db.inc.php include file.[53] We then use our usual approach to execute a prepared SELECT query containing our two submitted values—the email address and the scrambled password. This database query will count the number of records in the author table that have a matching email address and password. If the number returned is greater than zero, we return TRUE; if not, we return FALSE. Back in the userIsLoggedIn function, we can call our new databaseContainsAuthorfunction:
chapter9/includes/access.inc.php (excerpt)
if (databaseContainsAuthor($_POST['email'], $password))
{
If the database contains a matching author, it means the user filled out the login form correctly and we have to log in the user. But what exactly does “log in the user” mean? There are two approaches to this, both of which involve using PHP sessions:
· You can log in the user by setting a session variable as a “flag” (for example, $_SESSION['loggedIn'] = TRUE). On future requests, you can just check if this variable is set. If it is, the user is logged in, and the isUserLoggedIn function can return TRUE.
· You can store the “flag” variable as well as the submitted email address and scrambled password in two additional session variables. On future requests, you can check if these variables are set. If they are, you can use the databaseContainsAuthor function to check if they still match an author stored in the database. If they do, the isUserLoggedIn function can return TRUE.
The first option will give better performance, since the user’s credentials are only checked once—when the login form is submitted. The second option offers greater security, since the user’s credentials are checked against the database every time a sensitive page is requested. In general, the more secure option is preferable, since it allows you to remove authors from the site even while they’re logged in. Otherwise, once a user is logged in, they’ll stay logged in for as long as their PHP session remains active. That’s a steep price to pay for a little extra performance. So, here’s the code for the second option:
chapter9/includes/access.inc.php (excerpt)
session_start();
$_SESSION['loggedIn'] = TRUE;
$_SESSION['email'] = $_POST['email'];
$_SESSION['password'] = $password;
return TRUE;
}
And finally, of course, if the user submits a login form with incorrect values, we need to ensure the user is logged out, set an appropriate error message, and return FALSE:
chapter9/includes/access.inc.php (excerpt)
else
{
session_start();
unset($_SESSION['loggedIn']);
unset($_SESSION['email']);
unset($_SESSION['password']);
$GLOBALS['loginError'] =
'The specified email address or password was incorrect.';
return FALSE;
}
}
That takes care of processing the login form. The second special case we need to handle is the logout form. This one’s much simpler—so much so that the code should be self-explanatory:
chapter9/includes/access.inc.php (excerpt)
if (isset($_POST['action']) and $_POST['action'] == 'logout')
{
session_start();
unset($_SESSION['loggedIn']);
unset($_SESSION['email']);
unset($_SESSION['password']);
header('Location: ' . $_POST['goto']);
exit();
}
Finally, if neither of the two special cases are detected, we simply check if the user is logged in using the session variables we’ve already discussed:
chapter9/includes/access.inc.php (excerpt)
session_start();
if (isset($_SESSION['loggedIn']))
{
return databaseContainsAuthor($_SESSION['email'],
$_SESSION['password']);
}
}
That takes care of userIsLoggedIn. Now let’s look at userHasRole . This function really just performs a complex database query: Given an author’s email address (stored in the session), and a role ID (passed to the function), we need to check if the specified author has been assigned that role. This query will involve three database tables, so let’s look at the SQL code in isolation:
SELECT COUNT(*) FROM author
INNER JOIN authorrole ON author.id = authorid
INNER JOIN role ON roleid = role.id
WHERE email = :email AND role.id = :roleId
We join the author table to the authorrole table by matching up the author table’s id field with the authorrole table’s authorid field. We then join those with the role table by matching up the authorrole table’s roleid field with the role table’s id field. Finally, with our three tables joined, we use the WHERE clause to look for records with the email address and role ID we’re after. From there, it’s just a matter of writing the PHP code to execute this query and interpret the results:
chapter9/includes/access.inc.php (excerpt)
function userHasRole($role)
{
include 'db.inc.php';
try
{
$sql = "SELECT COUNT(*) FROM author
INNER JOIN authorrole ON author.id = authorid
INNER JOIN role ON roleid = role.id
WHERE email = :email AND role.id = :roleId";
$s = $pdo->prepare($sql);
$s->bindValue(':email', $_SESSION['email']);
$s->bindValue(':roleId', $role);
$s->execute();
}
catch (PDOException $e)
{
$error = 'Error searching for author roles.';
include 'error.html.php';
exit();
}
$row = $s->fetch();
if ($row[0] > 0)
{
return TRUE;
}
else
{
return FALSE;
}
}
Understand all that? Save your changes, and try visiting some of the protected pages. If you gave yourself the Account Administrator role as I suggested, you should be able to visit and use the Manage Authors section of the admin pages. The other sections should display the appropriate “access denied” errors. Also try clicking the Log out button on any of the protected admin pages. These should return you to the admin index, and prompt you to log in again if you try to access a protected page afterwards. If you have any problems, check your code using whatever error messages you see as a guide. For easy reference, here’s the completed access.inc.php file:
chapter9/includes/access.inc.php
<?php
function userIsLoggedIn()
{
if (isset($_POST['action']) and $_POST['action'] == 'login')
{
if (!isset($_POST['email']) or $_POST['email'] == '' or
!isset($_POST['password']) or $_POST['password'] == '')
{
$GLOBALS['loginError'] = 'Please fill in both fields';
return FALSE;
}
$password = md5($_POST['password'] . 'ijdb');
if (databaseContainsAuthor($_POST['email'], $password))
{
session_start();
$_SESSION['loggedIn'] = TRUE;
$_SESSION['email'] = $_POST['email'];
$_SESSION['password'] = $password;
return TRUE;
}
else
{
session_start();
unset($_SESSION['loggedIn']);
unset($_SESSION['email']);
unset($_SESSION['password']);
$GLOBALS['loginError'] =
'The specified email address or password was incorrect.';
return FALSE;
}
}
if (isset($_POST['action']) and $_POST['action'] == 'logout')
{
session_start();
unset($_SESSION['loggedIn']);
unset($_SESSION['email']);
unset($_SESSION['password']);
header('Location: ' . $_POST['goto']);
exit();
}
session_start();
if (isset($_SESSION['loggedIn']))
{
return databaseContainsAuthor($_SESSION['email'],
$_SESSION['password']);
}
}
function databaseContainsAuthor($email, $password)
{
include 'db.inc.php';
try
{
$sql = 'SELECT COUNT(*) FROM author
WHERE email = :email AND password = :password';
$s = $pdo->prepare($sql);
$s->bindValue(':email', $email);
$s->bindValue(':password', $password);
$s->execute();
}
catch (PDOException $e)
{
$error = 'Error searching for author.';
include 'error.html.php';
exit();
}
$row = $s->fetch();
if ($row[0] > 0)
{
return TRUE;
}
else
{
return FALSE;
}
}
function userHasRole($role)
{
include 'db.inc.php';
try
{
$sql = "SELECT COUNT(*) FROM author
INNER JOIN authorrole ON author.id = authorid
INNER JOIN role ON roleid = role.id
WHERE email = :email AND role.id = :roleId";
$s = $pdo->prepare($sql);
$s->bindValue(':email', $_SESSION['email']);
$s->bindValue(':roleId', $role);
$s->execute();
}
catch (PDOException $e)
{
$error = 'Error searching for author roles.';
include 'error.html.php';
exit();
}
$row = $s->fetch();
if ($row[0] > 0)
{
return TRUE;
}
else
{
return FALSE;
}
}
Managing Passwords and Roles
Now that we’ve added passwords and roles to the database, we should update our author admin pages so that they can manipulate these aspects of authors. First, let’s add to the author add/edit form a Set password field, as well as a set of checkboxes for choosing the roles that the user should be assigned:
chapter9/admin/authors/form.html.php
<?php include_once $_SERVER['DOCUMENT_ROOT'] .
'/includes/helpers.inc.php'; ?>
<!DOCTYPE html>
<html lang="en">
<head>
<meta charset="utf-8">
<title><?php htmlout($pageTitle); ?></title>
</head>
<body>
<h1><?php htmlout($pageTitle); ?></h1>
<form action="?<?php htmlout($action); ?>" method="post">
<div>
<label for="name">Name: <input type="text" name="name"
id="name" value="<?php htmlout($name); ?>"></label>
</div>
<div>
<label for="email">Email: <input type="text" name="email"
id="email" value="<?php htmlout($email); ?>"></label>
</div>
<div>
<label for="password">Set password: <input type="password"
name="password" id="password"></label>
</div>
<fieldset>
<legend>Roles:</legend>
<?php for ($i = 0; $i < count($roles); $i++): ?>
<div>
<label for="role<?php echo $i; ?>"><input
type="checkbox"
name="roles[]" id="role<?php echo $i; ?>"
value="<?php htmlout($roles[$i]['id']); ?>"<?php
if ($roles[$i]['selected'])
{
echo ' checked';
}
?>><?php htmlout($roles[$i]['id']); ?></label>:
<?php htmlout($roles[$i]['description']); ?>
</div>
<?php endfor; ?>
</fieldset>
<div>
<input type="hidden" name="id" value="<?php
htmlout($id); ?>">
<input type="submit" value="<?php htmlout($button); ?>">
</div>
</form>
</body>
</html>
The Set password field is a little special because, when it’s left blank, it should cause the controller to leave the user’s current password alone. Remember that because we store only scrambled passwords in the database, we’re unable to display a user’s existing password in the form for editing. The role checkboxes are a lot like the category checkboxes we created for the joke add/edit form in Chapter 7, with one notable difference. Since we’re using strings instead of numbers for our role IDs in the database, we’re unable to use the IDs to generate the <input> tags’ idattributes. The id attribute can’t contain spaces. We therefore have to go a little out of our way to generate a unique number for each role. Instead of using a foreach loop to step through our array of roles, we use an old-fashioned for loop:
chapter9/admin/authors/form.html.php (excerpt)
<?php for ($i = 0; $i < count($roles); $i++): ?>
The counter variable $i starts at 0 and each time through the loop it’s incremented by one. We can therefore access each role within the loop as $roles[$i], and we can also use $i to build our unique id attributes:
chapter9/admin/authors/form.html.php (excerpt)
id="role<?php echo $i; ?>"
Now you can update the controller to handle these new fields. The code for the password field is straightforward, and the code for the role checkboxes is nearly identical to what we wrote to process joke categories. I’ve highlighted the changes in bold below. Take a look, and satisfy yourself that you understand everything that’s going on:
chapter9/admin/authors/index.php
<?php
include_once $_SERVER['DOCUMENT_ROOT'] .
'/includes/magicquotes.inc.php';
require_once $_SERVER['DOCUMENT_ROOT'] . '/includes/access.inc.php';
if (!userIsLoggedIn())
{
include '../login.html.php';
exit();
}
if (!userHasRole('Account Administrator'))
{
$error = 'Only Account Administrators may access this page.';
include '../accessdenied.html.php';
exit();
}
if (isset($_GET['add']))
{
include $_SERVER['DOCUMENT_ROOT'] . '/includes/db.inc.php';
$pageTitle = 'New Author';
$action = 'addform';
$name = '';
$email = '';
$id = '';
$button = 'Add author';
// Build the list of roles
try
{
$result = $pdo->query('SELECT id, description FROM role');
}
catch (PDOException $e)
{
$error = 'Error fetching list of roles.';
include 'error.html.php';
exit();
}
foreach ($result as $row)
{
$roles[] = array(
'id' => $row['id'],
'description' => $row['description'],
'selected' => FALSE);
}
include 'form.html.php';
exit();
}
if (isset($_GET['addform']))
{
include $_SERVER['DOCUMENT_ROOT'] . '/includes/db.inc.php';
try
{
$sql = 'INSERT INTO author SET
name = :name,
email = :email';
$s = $pdo->prepare($sql);
$s->bindValue(':name', $_POST['name']);
$s->bindValue(':email', $_POST['email']);
$s->execute();
}
catch (PDOException $e)
{
$error = 'Error adding submitted author.';
include 'error.html.php';
exit();
}
$authorid = $pdo->lastInsertId();
if ($_POST['password'] != '')
{
$password = md5($_POST['password'] . 'ijdb');
try
{
$sql = 'UPDATE author SET
password = :password
WHERE id = :id';
$s = $pdo->prepare($sql);
$s->bindValue(':password', $password);
$s->bindValue(':id', $authorid);
$s->execute();
}
catch (PDOException $e)
{
$error = 'Error setting author password.';
include 'error.html.php';
exit();
}
}
if (isset($_POST['roles']))
{
foreach ($_POST['roles'] as $role)
{
try
{
$sql = 'INSERT INTO authorrole SET
authorid = :authorid,
roleid = :roleid';
$s = $pdo->prepare($sql);
$s->bindValue(':authorid', $authorid);
$s->bindValue(':roleid', $role);
$s->execute();
}
catch (PDOException $e)
{
$error = 'Error assigning selected role to author.';
include 'error.html.php';
exit();
}
}
}
header('Location: .');
exit();
}
if (isset($_POST['action']) and $_POST['action'] == 'Edit')
{
include $_SERVER['DOCUMENT_ROOT'] . '/includes/db.inc.php';
try
{
$sql = 'SELECT id, name, email FROM author WHERE id = :id';
$s = $pdo->prepare($sql);
$s->bindValue(':id', $_POST['id']);
$s->execute();
}
catch (PDOException $e)
{
$error = 'Error fetching author details.';
include 'error.html.php';
exit();
}
$row = $s->fetch();
$pageTitle = 'Edit Author';
$action = 'editform';
$name = $row['name'];
$email = $row['email'];
$id = $row['id'];
$button = 'Update author';
// Get list of roles assigned to this author
try
{
$sql = 'SELECT roleid FROM authorrole WHERE authorid = :id';
$s = $pdo->prepare($sql);
$s->bindValue(':id', $id);
$s->execute();
}
catch (PDOException $e)
{
$error = 'Error fetching list of assigned roles.';
include 'error.html.php';
exit();
}
$selectedRoles = array();
foreach ($s as $row)
{
$selectedRoles[] = $row['roleid'];
}
// Build the list of all roles
try
{
$result = $pdo->query('SELECT id, description FROM role');
}
catch (PDOException $e)
{
$error = 'Error fetching list of roles.';
include 'error.html.php';
exit();
}
foreach ($result as $row)
{
$roles[] = array(
'id' => $row['id'],
'description' => $row['description'],
'selected' => in_array($row['id'], $selectedRoles));
}
include 'form.html.php';
exit();
}
if (isset($_GET['editform']))
{
include $_SERVER['DOCUMENT_ROOT'] . '/includes/db.inc.php';
try
{
$sql = 'UPDATE author SET
name = :name,
email = :email
WHERE id = :id';
$s = $pdo->prepare($sql);
$s->bindValue(':id', $_POST['id']);
$s->bindValue(':name', $_POST['name']);
$s->bindValue(':email', $_POST['email']);
$s->execute();
}
catch (PDOException $e)
{
$error = 'Error updating submitted author.';
include 'error.html.php';
exit();
}
if ($_POST['password'] != '')
{
$password = md5($_POST['password'] . 'ijdb');
try
{
$sql = 'UPDATE author SET
password = :password
WHERE id = :id';
$s = $pdo->prepare($sql);
$s->bindValue(':password', $password);
$s->bindValue(':id', $_POST['id']);
$s->execute();
}
catch (PDOException $e)
{
$error = 'Error setting author password.';
include 'error.html.php';
exit();
}
}
try
{
$sql = 'DELETE FROM authorrole WHERE authorid = :id';
$s = $pdo->prepare($sql);
$s->bindValue(':id', $_POST['id']);
$s->execute();
}
catch (PDOException $e)
{
$error = 'Error removing obsolete author role entries.';
include 'error.html.php';
exit();
}
if (isset($_POST['roles']))
{
foreach ($_POST['roles'] as $role)
{
try
{
$sql = 'INSERT INTO authorrole SET
authorid = :authorid,
roleid = :roleid';
$s = $pdo->prepare($sql);
$s->bindValue(':authorid', $_POST['id']);
$s->bindValue(':roleid', $role);
$s->execute();
}
catch (PDOException $e)
{
$error = 'Error assigning selected role to author.';
include 'error.html.php';
exit();
}
}
}
header('Location: .');
exit();
}
if (isset($_POST['action']) and $_POST['action'] == 'Delete')
{
include $_SERVER['DOCUMENT_ROOT'] . '/includes/db.inc.php';
// Delete role assignments for this author
try
{
$sql = 'DELETE FROM authorrole WHERE authorid = :id';
$s = $pdo->prepare($sql);
$s->bindValue(':id', $_POST['id']);
$s->execute();
}
catch (PDOException $e)
{
$error = 'Error removing author from roles.';
include 'error.html.php';
exit();
}
// Get jokes belonging to author
try
{
$sql = 'SELECT id FROM joke WHERE authorid = :id';
$s = $pdo->prepare($sql);
$s->bindValue(':id', $_POST['id']);
$s->execute();
}
catch (PDOException $e)
{
$error = 'Error getting list of jokes to delete.';
include 'error.html.php';
exit();
}
$result = $s->fetchAll();
// Delete joke category entries
try
{
$sql = 'DELETE FROM jokecategory WHERE jokeid = :id';
$s = $pdo->prepare($sql);
// For each joke
foreach ($result as $row)
{
$jokeId = $row['id'];
$s->bindValue(':id', $jokeId);
$s->execute();
}
}
catch (PDOException $e)
{
$error = 'Error deleting category entries for joke.';
include 'error.html.php';
exit();
}
// Delete jokes belonging to author
try
{
$sql = 'DELETE FROM joke WHERE authorid = :id';
$s = $pdo->prepare($sql);
$s->bindValue(':id', $_POST['id']);
$s->execute();
}
catch (PDOException $e)
{
$error = 'Error deleting jokes for author.';
include 'error.html.php';
exit();
}
// Delete the author
try
{
$sql = 'DELETE FROM author WHERE id = :id';
$s = $pdo->prepare($sql);
$s->bindValue(':id', $_POST['id']);
$s->execute();
}
catch (PDOException $e)
{
$error = 'Error deleting author.';
include 'error.html.php';
exit();
}
header('Location: .');
exit();
}
// Display author list
include $_SERVER['DOCUMENT_ROOT'] . '/includes/db.inc.php';
try
{
$result = $pdo->query('SELECT id, name FROM author');
}
catch (PDOException $e)
{
$error = 'Error fetching authors from the database!';
include 'error.html.php';
exit();
}
foreach ($result as $row)
{
$authors[] = array('id' => $row['id'], 'name' => $row['name']);
}
include 'authors.html.php';
That’s it! Take your enhancements for a spin and give yourself ultimate power by assigning yourself all the roles! Make sure everything works, and if it doesn’t, fix it. Just for kicks, try changing your own password while you’re logged in. You should be kicked out to the login form with the next link or button you click, where you can enter your new password to log back in.
A Challenge: Joke Moderation
It’s all well and good to follow along with the code that I present, but it’s quite another to write a significant new feature yourself. Now is a good time to try your hand at planning and building a major feature for the joke database website. For the past few chapters, we’ve been so focused on the administration pages that the public side of the site hasn’t progressed much. In fact, it’s gone backwards. Before we removed the Add your own joke link and Delete buttons, the main page of our joke database site looked like Figure 9.9.
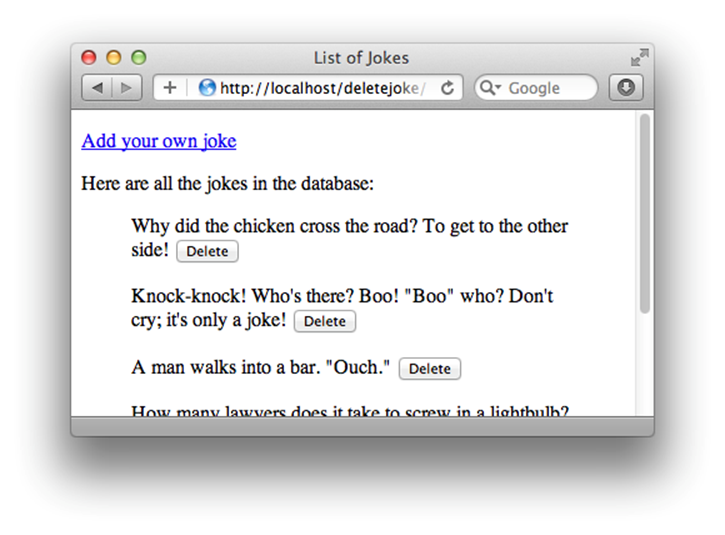
Figure 9.9. The joke list we left behind
Obviously, those Delete buttons had to go, but what about that Add your own joke link? Originally, this link went to the form shown in Figure 9.10.
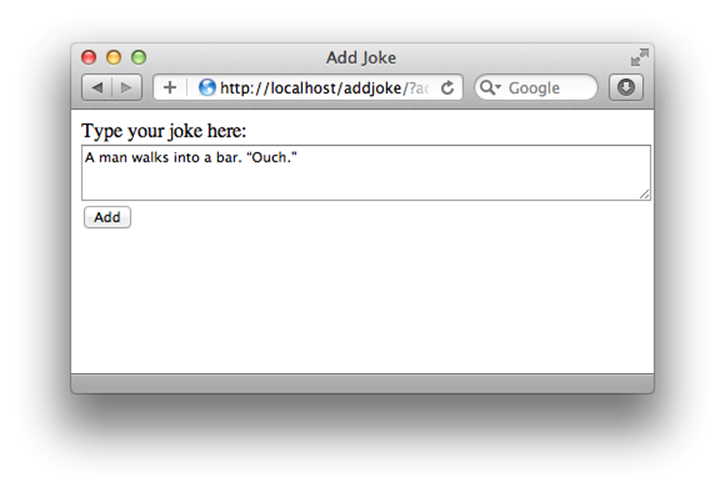
Figure 9.10. Another nugget of comic genius is added to the database
When submitted, this form inserted a new joke into the database with no associated author or categories (because our database didn’t contain those features at the time). Those features would be easy enough for you to add if you wanted to, however; what’s not easy to deal with is the possibility of abuse. Launch the site with a publicly accessible joke submission form like this, and spammers will be filling up your database with junk in no time! How would you deal with this problem? Remove the feature? Force authors to email their submissions to a content editor? Think about it: there must be a way to preserve this “easy submission” feature without having your front page filled with spam. Is it necessary for new joke submissions to appear on the site immediately? What if you add a new column to the joke table called visible that could take one of two values: 'YES' and 'NO'? Newly submitted jokes could automatically be set to 'NO', and be prevented from appearing on the site if you simply added WHERE visible='YES' to any query of the joke table where the results are intended for public viewing. Jokes with visible set to 'NO' would wait in the database for review by a Content Editor, who could edit each joke and assign it an author and categories before making it visible, or just delete it as unwanted. To create a column that can contain either of two values, of which one is the default, you’ll need a new MySQL column type called ENUM:
ALTER TABLE joke ADD COLUMN
visible ENUM('NO', 'YES') NOT NULL
Since we declared this column as required (NOT NULL), the first value listed within the parentheses ('NO' in this case) is the default value, which is assigned to new entries if no value is specified in the INSERT command. All that’s left for you to do is modify the administration system, enabling Content Editors to make hidden jokes visible. A simple checkbox in the joke add/edit form should do the trick. You also may want to modify the joke search form to allow Content Editors to search only for visible or hidden jokes. If you begin with the code as we left it in Chapter 6, newly submitted jokes won’t have an author associated with them. How to deal with that I’ll leave up to you. The Add your own joke form could prompt visitors to include contact information with their submissions, which Content Editors could then use to identify and assign authors to submitted jokes. A more challenging solution might be to invite authors to sign up, set a password, and then log in before submitting new jokes. There’s no right answer, but I challenge you to find a way to deal with the issue, and build that into your Internet Joke Database site. You have all the tools you need: set aside some time and see what you can build if you put your mind to it. If you get stuck, the SitePoint PHP Forum is a friendly place to gain answers to your questions.
The Sky’s the Limit
In this chapter, you learned about the two main methods of creating persistent variables—those variables that continue to exist from page to page in PHP. The first stores the variable in the visitor’s browser in the form of a cookie. By default, cookies terminate at the end of the browser session, but by specifying an expiry time, they can be preserved indefinitely. Unfortunately, cookies are fairly unreliable because you have no way of knowing when the browser might delete your cookies, and because some users occasionally clear their cookies out of concern for their privacy. Sessions, on the other hand, free you from all the limitations of cookies. They let you store an unlimited number of potentially large variables. Sessions are an essential building block in modern ecommerce applications, as we demonstrated in our simple shopping cart example. They’re also a critical component of systems that provide access control, like the one we built for your joke content management system. At this point, you should be equipped with all the basic skills and concepts you need to build your very own database driven website. While you may be tempted to skip the challenge of building a complete system for safely accepting public submissions, I encourage you to give it a try. You already have all the skills necessary to build it, and there is no better way to learn than to make a few mistakes of your own to learn from. At the very least, set this challenge aside for now and come back to it when you’ve finished this book. If you can tackle it with confidence, you may wish to try another challenge. Want to let users rate the jokes on the site? How about letting joke authors make changes to their jokes, but with the backup of requiring an administrator to approve the changes before they go live on the site? The power and complexity of the system is limited only by your imagination. In the rest of this book, I’ll cover more advanced topics that will help optimize your site’s performance and solve some complex problems using less code. Oh, and of course we’ll explore more exciting features of PHP and MySQL! In Chapter 10, we’ll take a step away from our joke database and have a close-up look at MySQL server maintenance and administration. We’ll learn how to make backups of our database (a critical task for any web-based company), to administer MySQL users and their passwords, and to log in to a MySQL server if you’ve forgotten your password.
[51] PHP can also be configured to store sessions in your MySQL database; however, this is only necessary if you need to share session data between multiple web servers.
[52] In this chapter, I’ll show you the SQL commands needed to modify the database we’ve built up to this point. If you need to recreate the database from scratch, the necessary commands are provided in the ijdb.sql file in the code archive for this chapter.
[53] We use include instead of include_once here, since the $pdo variable that db.inc.php creates will be unavailable outside this function. Code elsewhere in our application that requires a database connection will therefore have to include db.inc.php again.
All materials on the site are licensed Creative Commons Attribution-Sharealike 3.0 Unported CC BY-SA 3.0 & GNU Free Documentation License (GFDL)
If you are the copyright holder of any material contained on our site and intend to remove it, please contact our site administrator for approval.
© 2016-2026 All site design rights belong to S.Y.A.