PHP & MySQL: Novice to Ninja, 5th Edition (2012)
Chapter 1. Installation
In this book, I will guide you as you take your first steps beyond the static world of building web pages with the purely client-side technologies of HTML, CSS, and JavaScript. Together, we’ll explore the world of database driven websites and discover the dizzying array of dynamic tools, concepts, and possibilities that they open up. Whatever you do, don’t look down! Okay, maybe you should look down. After all, that’s where the rest of this book is. But remember, you were warned! Before you build your first dynamic website, you must gather together the tools you’ll need for the job. In this chapter, I’ll show you how to download and set up the two software packages required. Can you guess what they are? I’ll give you a hint: their names feature prominently on the cover of this book! They are, of course, PHP and MySQL. If you’re used to building websites with HTML, CSS, and perhaps even a smattering of JavaScript, you’re probably familiar with uploading the files that make up your site to a certain location. It might be a web hosting service you’ve paid for, web space provided by your Internet Service Provider (ISP), or maybe a web server set up by the IT department of the company that you work for. In any case, once you copy your files to any of these destinations, a software program called a web server is able to find and serve up copies of those files whenever they’re requested by a web browser like Internet Explorer, Google Chrome, Safari, or Firefox. Common web server software programs you may have heard of include Apache HTTP Server (Apache) and Internet Information Services (IIS). PHP is a server-side scripting language. You can think of it as a plugin for your web server that enables it to do more than just send exact copies of the files that web browsers ask for. With PHP installed, your web server will be able to run little programs (called PHP scripts) that can do tasks like retrieve up-to-the-minute information from a database and use it to generate a web page on the fly before sending it to the browser that requested it. Much of this book will focus on writing PHP scripts to do exactly that. PHP is completely free to download and use. For your PHP scripts to retrieve information from a database, you must first have a database. That’s where MySQL comes in. MySQL is a relational database management system, or RDBMS. We’ll discuss the exact role it plays and how it works later, but briefly it’s a software program that’s able to organize and manage many pieces of information efficiently while keeping track of how all those pieces of information are related to each other. MySQL also makes that information really easy to access with server-side scripting languages such as PHP, and, like PHP, is completely free for most uses. The goal of this first chapter is to set you up with a web server equipped with PHP and MySQL. I’ll provide step-by-step instructions that work on recent Windows and Mac OS X, so no matter what flavor of computer you’re using, the instructions you need should be right here.[1]
Your Own Web Server
If you’re lucky, your current web host’s web server already has PHP and MySQL installed. Most do—that’s one of the reasons why PHP and MySQL are so popular. If your web host is so equipped, the good news is that you’ll be able to publish your first database driven website without having to shop for a web host that supports the right technologies. However, you’re still going to need to install PHP and MySQL yourself. That’s because you need your own PHP-and-MySQL-equipped web server on which to test your database driven website before you publish it for all the world to see. When developing static websites, you can simply load your HTML files directly from your hard disk into your browser to see how they look. There’s no web server software involved when you do this, which is fine, because web browsers can read and understand HTML code all by themselves. When it comes to dynamic websites built using PHP and MySQL, though, your web browser needs some help! Web browsers are unable to understand PHP scripts; rather, PHP scripts contain instructions for a PHP-savvy web server to execute in order to generate the HTML code that browsers can understand. So, in addition to the web server that will host your site publicly, you also require your own private web server to use in the development of your site. If you work for a company with an especially helpful IT department, you may find there’s already a development web server provided for you. The typical setup is that you must work on your site’s files on a network drive hosted by an internal web server that can be safely used for development. When you’re ready to deploy the site to the public, your files are copied from the network drive to the public web server. If you’re lucky enough to work in this kind of environment, you can skip most of this chapter; however, you’ll want to ask the IT boffins responsible for the development server the same questions I’ve covered in the section called “What to Ask Your Web Host”. That’s because you’ll need to have that critical information handy when you start using the PHP and MySQL support they’ve so helpfully provided.
Windows Installation
In this section, I’ll show you how to start running a PHP-and-MySQL-equipped web server on a Windows XP, Windows Vista, or Windows 7 computer. If you’re using an operating system other than Windows, you can safely skip this section. The easiest way to get a web server up and running on Windows is to use a free software package called XAMPP for Windows. This all-in-one program includes built-in copies of Apache, PHP, and MySQL. Let me take you through the process of installing it.
Note: The Do-it-yourself Option
In past editions of this book, I recommended that you set up Apache, PHP, and MySQL individually, using the official installation packages for each. This is a good practice for beginners, I argued, because it gives you a strong sense of how these pieces all fit together. Unfortunately, this meant that many readers spent their first few hours in “PHP Land” wrestling their way through a protracted sequence of detailed installation instructions. Worse still, sometimes the finer points of these became outdated due to some subtle change to one of the software packages. Nowadays, I strongly believe that the best way to learn PHP and MySQL is to start using them right away. The quicker and more hassle-free the installation process, the better. That’s why I ask you to use XAMPP in this edition. In addition, there’s every chance you’re just dabbling in this stuff, so why junk up your computer with a bunch of separate but interdependent pieces of software that will be tricky to remove? Nevertheless, if you’re a die-hard do-it-yourselfer, a tech-savvy power user, or if you simply reach the end of this book and wonder how the pros do it, I’ve included a detailed set of installation instructions for individual packages in Appendix A. Feel free to follow them instead of the instructions in this section if you’re that way inclined.
1. Download the latest version of XAMPP for Windows from the Apache Friends website (you’ll need to scroll down to find the download links). Grab the Installer version that is recommended (as of this writing, XAMPP for Windows 1.7.7 is 81MB in size), then double-click the file to launch the installer, as shown in Figure 1.1.
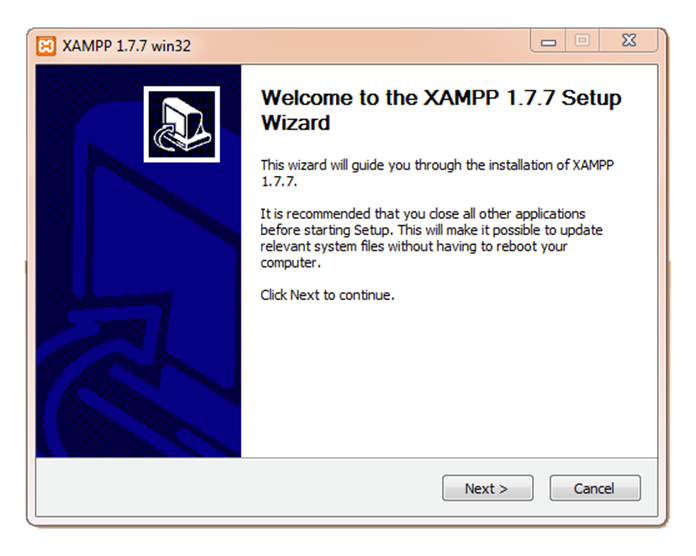
Figure 1.1. The XAMPP Installer
Note: User Account Control (UAC) warning
Depending on the version of Windows you’re using and your exact system configuration, the XAMPP installer may display the warning message shown in Figure 1.2. Although this message is a little alarming at first, be assured it’s no big deal. It simply recommends not to install XAMPP in C:\Program Files as you do most programs due to problems this will cause with file permissions. The installer defaults to installing in C:\xampp anyway.
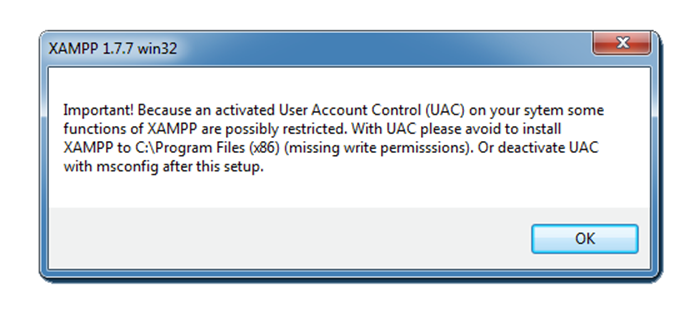
Figure 1.2. XAMPP may warn you about “User Account Control (UAC)”
2. The installer will prompt you for a location to install XAMPP. The default of c:\xampp shown in Figure 1.3 is an ideal choice, but if you have feel strongly about installing it elsewhere (such as on a different drive), go ahead and specify your preferred location. Just avoid the usualC:\Program Files (or similar) location, since XAMPP requires permissions that Windows restricts for files in that folder.

Figure 1.3. The default destination folder is a good choice
3. The installer will prompt you with a number of options. The default selections shown in Figure 1.4 are probably what you want at this stage. If you like to keep a clean desktop, you might want to uncheck the Create a XAMPP desktop icon checkbox. If you want your Apache and MySQL servers running at all times (rather than having to start them manually whenever you sit down to do some development), you can check the Install Apache as service and Install MySQL as service checkboxes. In the following instructions, though, I’ll assume you haven’t.
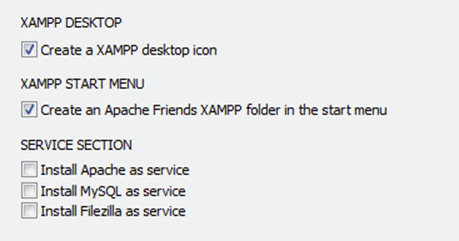
Figure 1.4. The default options are fine
4. Once the installer has completed, you’ll be prompted to start the XAMPP Control Panel. Click No so that I can show you how to start it the conventional way. Once its work is done, the installer will quit.
5. At this point, I recommend shutting down and restarting your computer (even though the XAMPP installer won’t ask you to). In my testing, the next steps failed to work until I restarted my system, and posts on the XAMPP support forum support this.
Once the installation is complete and your system has restarted, you can fire up the XAMPP Control Panel. You’ll find it on the Start menu under All Programs > Apache Friends > XAMPP > XAMPP Control Panel. An orange XAMPP icon will appear in your Windows System Tray (although by default it will disappear after a few seconds), and the XAMPP Control Panel Application shown in Figure 1.5 will open.

Figure 1.5. The XAMPP Control Panel
Click the Start buttons next to Apache and MySql (sic) in the Modules list to launch the Apache and MySQL servers built into XAMPP. A green Running status indicator should appear next to each server in the list. Depending on your Windows version and configuration, you’ll probably receive a Windows Firewall alert for each server, like the one in Figure 1.6. This will happen when the servers attempt to start listening for browser requests from the outside world.
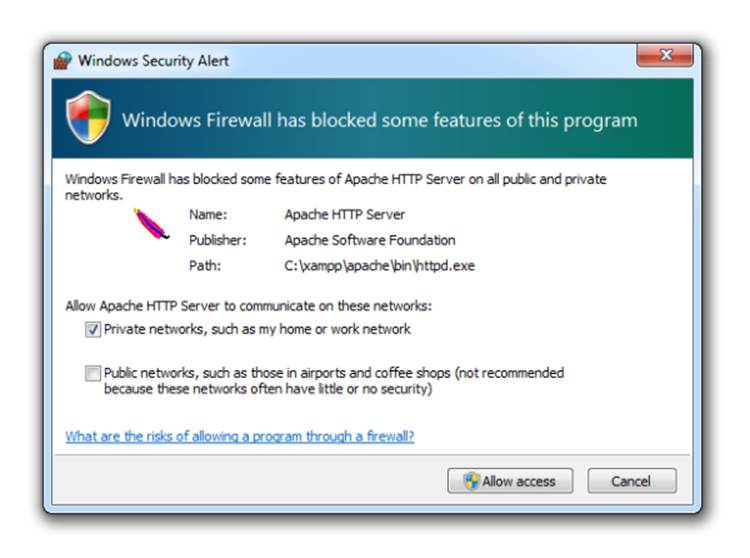
Figure 1.6. This security alert tells you Apache is doing its job
If you want to make absolutely sure that only you can access your development servers, click Cancel. You’ll still be able to connect to the web server using a browser running on your own computer. In some cases, however, it can be handy to access your server from another computer on your network (such as from a co-worker’s machine, to demonstrate the amazing website you have built); for this reason, I recommend selecting the Private networks, such as my home or work network option and clicking Allow access.
Tip: Why doesn’t my server start?
If your Apache or MySQL server fails to start, there are a number of possible causes. By far the most common reason is that you already have a web server (be it another copy of Apache or Microsoft’s Internet Information Services) or MySQL server running on your computer. Look around your Start menu and the Uninstall a program section of your Windows Control Panel to see if you can spot another installation of Apache HTTP Server or MySQL in order to shut off or uninstall. There’s another program similar to XAMPP called WampServer, which, if installed, could be the cause of the problem. If you think you might have Microsoft’s own web server—Internet Information Services (IIS)—running on your system, you can try following Microsoft’s instructions for shutting it down. Still stuck? The advice in theXAMPP for Windows FAQ might help, especially if you’re running Skype (as it can interfere with web servers in some network configurations).
Once both servers appear to be running smoothly, click the Admin… button next to Apache. Launch your web browser and load http://localhost/xampp/, the XAMPP for Windows admin page shown in Figure 1.7.
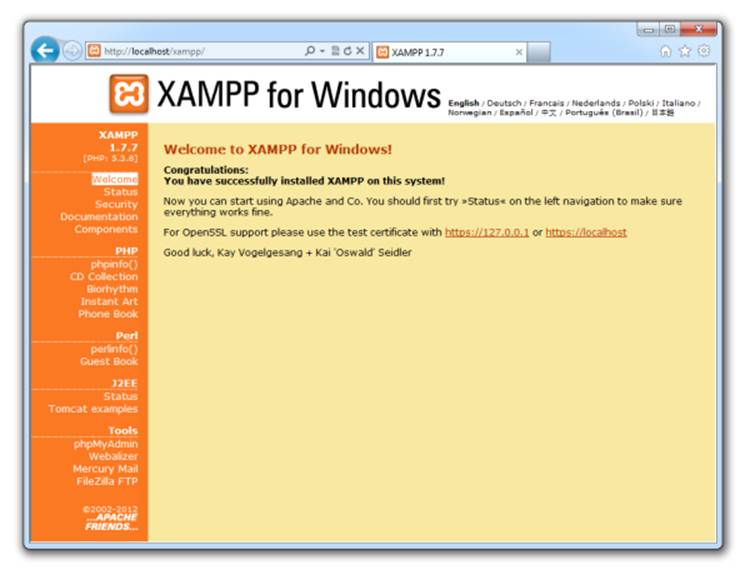
Figure 1.7. The admin page provided by XAMPP confirms your Apache web server is running
If you see this page it means your web server is up and running, because the page you’re looking at was loaded from it! Notice that the URL in your browser’s address bar starts with http://localhost/ (some modern browsers will hide the protocol, “http://”); localhost is a special hostname that always points to your own computer. Throughout this book, whenever you want to load a web page from your own web server, you’ll use a URL that starts with http://localhost/. When you’re done working with the XAMPP Control Panel, shut it down by clicking the Exit button. Alternatively, you can just close the window, which will leave the XAMPP icon in the Windows System Tray (if you have configured it to remain visible). Clicking the icon will promptly launch the XAMPP Control Panel again when you need it.
Important: XAMPP Control Panel Leaves the Lights On
When you exit the XAMPP Control Panel, the Apache and MySQL servers will keep running on your system. If you’ve finished coding for the day, I’d advise you to click the Stop button for each of these servers to shut them down before you quit the XAMPP Control Panel. There’s no sense slowing down those Facebook games you play in the evening by running unnecessary servers!
Set the MySQL Root Password in XAMPP
Once you’ve set up your Windows computer with the proper servers, you now need to assign a root password for MySQL in XAMPP. MySQL only allows authorized users to view and manipulate the information stored in its databases, so you’ll need to tell MySQL who’s authorized and who isn’t. When MySQL is first installed, it’s configured with a user named “root” that has access to do most tasks without entering a password. Therefore, your first task should be to assign a password to the root user so that unauthorized users are prohibited from tampering with your databases.
Important: Why bother?
It’s important to realize that MySQL, just like a web server, can be accessed from any computer on the same network. If you’re working on a computer connected to the Internet, then, depending on the security measures you’ve taken, anyone in the world could connect to your MySQL server. The need to pick a difficult-to-guess password should be immediately obvious!
XAMPP makes it easy to resolve this and other configuration security issues with your new servers. With the Apache and MySQL servers running, open this address in your web browser: http://localhost/security/. Alternatively, you can click the Security link in the menu on the XAMPP administration page. This page will list any security issues that XAMPP can identify with your current server configuration. Among them, you should see “The MySQL admin user root has NO password.” Scroll down past the table and click the link that will fix the problems listed. The very first section of the resulting form will prompt you to set a MySQL root user password. Go ahead and set one you’ll remember. Leave the PhpMyAdmin authentification (sic) set to cookie, and use the option to save the password to a file if you think you might forget it (but beware that the password will be saved where a person using your computer could find it). Click the Password changing button to change your password, then stop and start your MySQL server using the XAMPP Control Panel. Seriously, don’t forget this password. It’s a pain to change it if you do, but I’ll show you how in Chapter 10. Here’s a spot for you to record your MySQL root password in case you need to:
Note: My MySQL Root Password (Windows)
root user password:
_________________________
Note: XAMPP Directory Protection
XAMPP’s security page will also warn you that your web pages are accessible to anyone on your network. While this is technically true, I’m not too worried if a co-worker or family member could stumble on my work-in-progress website; furthermore, most home and office network configurations will prevent people outside your network from accessing the web server running on your computer. That said, if you want to follow XAMPP’s advice to set a username and password that will be required to view pages on your web server, feel free to set one.
Mac OS X Installation
In this section, I’ll show you how to start running a PHP-and-MySQL-equipped web server on a Mac computer running Mac OS X version 10.5 (Leopard). If you’re not using a Mac, you can safely skip this section. Mac OS X distinguishes itself by being the only consumer OS to install both Apache and PHP as components of every standard installation. (For that matter, it also comes with Ruby, Python, and Perl—all of which are popular web programming languages.) That said, they take a few tweaks to switch on, and you will need a MySQL database server as well. The simplest way to handle it is to ignore the built-in software and install everything you need in a convenient, all-in-one package. MAMP (which stands for Mac, Apache, MySQL, and PHP) is a free all-in-one program that includes built-in copies of recent versions of the Apache web server, PHP, and MySQL. Let me take you through the process of installing it.
Note: The Do-it-yourself Option
In past editions of this book, I recommended that you set up the built-in versions of Apache and PHP that come with Mac OS X, and install MySQL using its official installation package. This is a good practice for beginners, I argued, because it gives you a strong sense of how these pieces all fit together. Unfortunately, this meant that many readers spent their first few hours in “PHP Land” wrestling their way through a protracted sequence of detailed installation instructions. Worse still, sometimes the finer points of these became outdated due to some subtle change to one of the software packages. Nowadays, I strongly believe that the best way to learn PHP and MySQL is to start using them right away. The quicker and more hassle-free the installation process, the better. That’s why I ask you to use MAMP in this edition. There’s also every chance you’re just dabbling in this stuff, so why spend time tweaking the innards of your operating system when you can leave them safely set to the factory defaults? Nevertheless, if you’re a die-hard do-it-yourselfer, a tech-savvy power user, or if you simply reach the end of this book and wonder how the pros do it, I’ve included a detailed set of installation instructions for the individual packages in Appendix A. Feel free to follow them instead of the instructions in this section if you’re that way inclined.
1. Download the latest version from the MAMP website (you want the free MAMP, not the commercial MAMP PRO). After downloading the file (as of this writing, MAMP 2.0.5 is about 116MB in size), double-click it to unzip the installer (MAMP.pkg). Then double-click it to launch the MAMP Installer, which is shown in Figure 1.8.
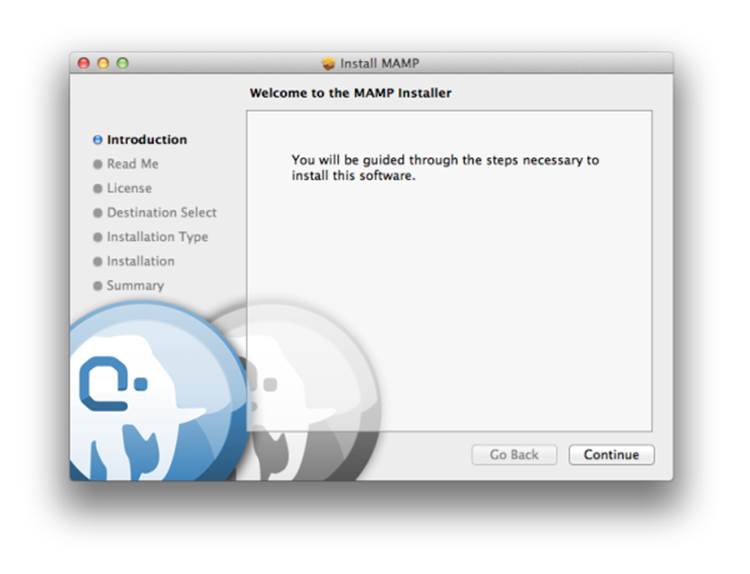
Figure 1.8. The MAMP package
Important: Look Out Below!
The next step is a tricky one. Make sure you read on first before clicking blindly through the installer!
2. During the installation, you’ll be prompted to choose whether or not to perform a standard installation. At this step, instead of clicking the Install button, click Customize. This will give you the opportunity to deselect MAMP PRO (which the installer will otherwise sneakily install in the hopes that you’ll decide to buy it after all). This is especially important because the free MAMP will display a worrying warning message at startup if MAMP PRO is installed.
Tip: Miss this step?
If you missed this step and allowed the installer to put MAMP PRO on your system, it’s easy enough to remove. Open your Applications folder, double-click on the new MAMP PRO folder, and double-click to run the MAMP PRO Uninstaller. Click each checkbox in theUninstaller window. Once they’re all checked, click Uninstall. Quit the Uninstaller.
Browse to your Applications folder and find the new MAMP folder there. Open it, and double-click the MAMP icon inside to launch MAMP. As MAMP starts up, the following will happen. First, the MAMP window shown in Figure 1.9 will appear. The two status indicators will switch from red to green as the built-in Apache and MySQL servers start up. Next, MAMP will open your default web browser and load the MAMP welcome page, shown in Figure 1.10.
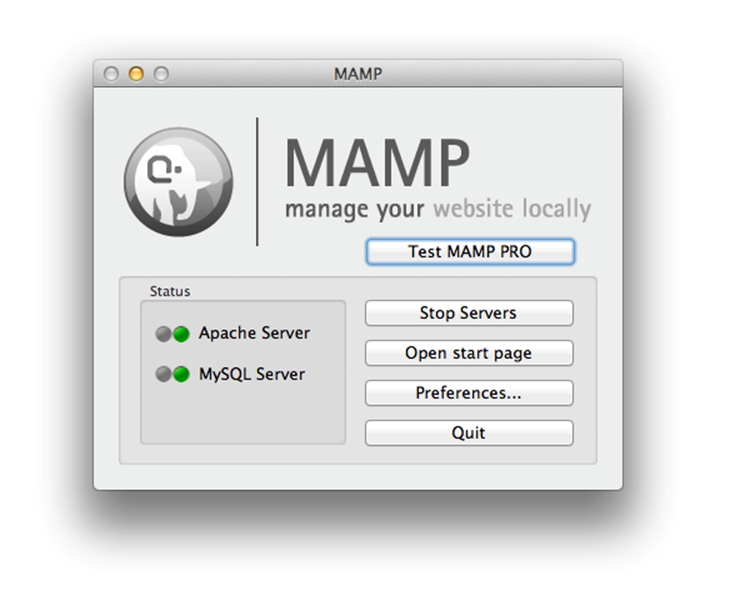
Figure 1.9. The MAMP window
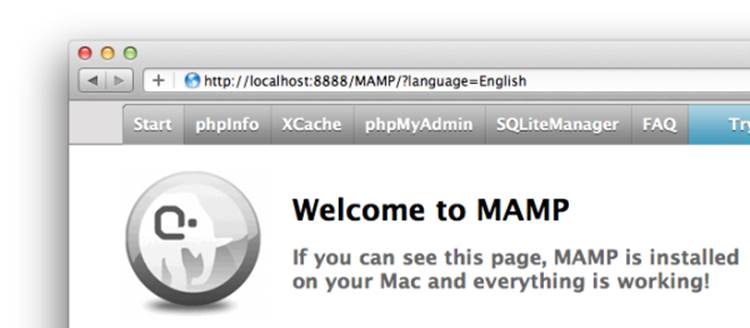
Figure 1.10. The MAMP welcome page confirms Apache, PHP, and MySQL are up and running
If you see this page it means your web server is up and running, because the page you’re looking at was loaded from it! Notice that the URL in your browser’s address bar starts with http://localhost:8888/ (some modern browsers will hide the protocol, “http://”); localhost is a special hostname that always points to your own computer. The “8888” is the port number that the browser is using to connect to your computer. Every server running on a computer listens on a unique port number. Usually, websites are hosted on port 80, and browsers use that to connect when no port number is specified by the URL. By default, MAMP comes configured so that Apache will listen on port 8888 and MySQL will listen on port 8889. This ensures that MAMP will work even if your Mac already has a web server installed and listening on port 80, or a MySQL server listening on port 3306 (the standard MySQL server port).[2] The code and instructions in the rest of this book will assume your web server is running on port 80 and your MySQL server is on port 3306. Now would be a good time to see if MAMP will run happily using these standard port numbers. Here’s how:
1. In the MAMP window, click Stop Servers. Wait for the indicators to turn red.
2. Click the Preferences… button and navigate to the Ports tab.
3. Click the Set to default Apache and MySQL ports button so that Apache will use port 80 and MySQL will use port 3306. Click OK.
4. Click Start Servers. MAMP will prompt you to enter your password, because running a server on an “official” Internet port number like 80 requires administrator privileges.
If both indicators turn green, click the Open start page button again, and verify that the MAMP welcome page shows up this time with a URL starting with http://localhost/ (no port number). If so, you’re in good shape! If one or both indicators don’t turn red in step 1, or if the welcome page fails to load correctly, in all likelihood you have yourself a port conflict. Somewhere on your Mac is another web or MySQL server that’s already using one or both of those ports. One place to check is the Sharing icon in System Preferences. If Web Sharing is enabled, Mac OS X’s built-in Apache server is running (normally on port 80). Another option is to try shutting down various applications. Under some conditions, Skype for Mac has prevented MAMP’s MySQL server from launching for me, for example. If, in the end, you’re only able to make MAMP run happily on its default port numbers (8888 and 8889), go ahead and use them. Whenever this book mentions a URL starting with http://localhost/, you’ll have to add the port number (http://localhost:8888/), and when the time comes to connect to MySQL, I’ll tell you how to specify a nonstandard port number. One last change to make to the default MAMP configuration is to switch on PHP error display. By default, when you make a serious mistake in your PHP code (and believe me, we all make plenty!), MAMP’s Apache server will produce a blank web page. As a developer needing to figure out what you typed wrong, that’s rather unhelpful; I’d much prefer to see a detailed error message in my browser window. The reason why MAMP comes with the error display switched off is so that if you decide to host a publicly accessible website using it, visitors to the site won’t see embarrassing error messages when you make a mistake. What’s embarrassing on a public website, however, is practically essential in the development stage. To switch on PHP error display, open the MAMP folder in your Mac’s Applications folder. From there, drill down into bin/php/. This php folder will contain a subfolder for each version of PHP that comes with MAMP. You can double-check in MAMP’s Preferences to be sure, but it’s probably configured to run the most recent version, so open that folder (it’s php5.3.6 in my copy of MAMP 2.0.5), and then open theconf subfolder. Open the php.ini file in your favorite text editor (TextEdit will work fine), and look for these lines:
; Print out errors (as a part of the output). For production web
↵ sites,
; you're strongly encouraged to turn this feature off, and use
↵ error logging
; instead (see below). Keeping display_errors enabled on a
↵ production web site
; may reveal security information to end users, such as file paths
↵ on your Web
; server, your database schema or other information.
display_errors = Off
Change the Off in that last line to On and save the file. Now click Stop Servers, then Start Servers in MAMP to restart Apache with the new configuration. That’s it—PHP will now display helpful (if a little soul-crushing) error messages. When you’re done working with MAMP, shut it down (along with its built-in servers) by clicking the Quit button in the MAMP window. And when you’re next ready to do some work on a database driven website, just fire it up again!
Set the MySQL Root Password in MAMP
Once MAMP is up and running on your Mac with the relevant servers, your very next action should be to assign a root password for MySQL. MySQL only allows authorized users to view and manipulate the information stored in its databases, so you’ll need to tell MySQL who’s authorized and who’s not. When MAMP first installs MySQL, it’s configured with a user named “root” that has access to perform most tasks. The password for this user is “root”—not exactly Fort Knox! Hence why your first task should be to assign a new password to the root user, preventing any tampering with your databases.
Important: Why bother?
It’s important to realize that MySQL, just like a web server, can be accessed from any computer on the same network. So if you’re working on a computer connected to the Internet, depending on the security measures you’ve taken, anyone in the world could connect to your MySQL server. The need to pick a password that’s difficult for anyone to guess should be immediately obvious!
To set your MySQL root password, first make sure MAMP and its servers are running. Then open the Mac OS X Terminal application (found in the Utilities folder in the Applications folder) and type these commands (hitting Enter after each one):
1. cd /Applications/MAMP/Library/bin/
2.
This navigates to the Library/bin/ subfolder of your MAMP installation, which is where the Terminal utility programs are kept.
3. ./mysqladmin -u root -p password "newpassword"
4.
Replace newpassword with the new password you want to assign to your MySQL root user. When you hit Enter you’ll be prompted to enter the current password: root.
5. Quit Terminal.
Your password is now set, but this creates a new problem: MAMP itself needs unrestricted access to your MySQL server so that it can control it. If you click the Open start page button in MAMP at this point, you’ll receive an error message: “Error: Could not connect to MySQL server!” Obviously, we need to tell MAMP what our new MySQL root password is. You must edit several files in the MAMP folder to make it work again. You can open each of these files in TextEdit, or whichever text editor you prefer to use.
Warning: Editing PHP Scripts in Mac OS X with TextEdit
TextEdit has a nasty habit of mistaking .php files for HTML documents when opening them, and attempting to display them as formatted text. To avoid this, you must select the Ignore rich text commands checkbox in the Open dialog box.
/Applications/MAMP/bin/mamp/index.php
Find the line that looks like this:
$link = @mysql_connect(':/Applications/MAMP/tmp/mysql/mysql.sock',
'root', 'root');
Replace the second 'root' with your new MySQL root password (that is, 'newpassword').
/Applications/MAMP/bin/phpMyAdmin/config.inc.php
This is a large file, so you may need to use your text editor’s Find feature to locate these lines:
$cfg['Servers'][$i]['user'] = 'root';
↵ // MySQL user
$cfg['Servers'][$i]['password'] = 'root';
↵ // MySQL password (only needed
↵ // with 'config' auth_type)
Again, replace the second 'root' with your new MySQL root password (that’s 'newpassword').
/Applications/MAMP/bin/checkMysql.sh , /Applications/MAMP/bin/quickCheckMysqlUpgrade.sh , /Applications/MAMP/bin/repairMysql.sh , /Applications/MAMP/bin/stopMysql.sh , /Applications/MAMP/bin/upgradeMysql.sh
The contents of each of these little files starts out looking a little like this (this is checkMysql.sh):
# /bin/sh
/Applications/MAMP/Library/bin/mysqlcheck --all-databases --check
↵ --check-upgrade -u root -proot
↵ --socket=/Applications/MAMP/tmp/mysql/mysql.sock
See that -proot? The p stands for “password” and the rest is the password. Change it to your new password (-pnewpassword ). Make the same change to each of these five files.
With all those changes made and saved, MAMP should work normally again, with your MySQL server nice and secure from outside intrusion! Oh, and don’t forget this password. It’s kind of a pain to change it if you do (I’ll show you how in Chapter 10). Here’s a spot for you to record your MySQL root password in case you need to.
Note: My MySQL Root Password (Mac)
root user password:
_________________________
Linux Installation
These days, most people who run Linux as their operating system of choice are tech-savvy enough to know how to install software like Apache, PHP, and MySQL. Indeed, they probably feel strongly about how they should be installed, which would doubtlessly clash with any instructions I’d provide here. If this describes you, go ahead and install the most recent versions of Apache, PHP, and MySQL that you’re comfortable installing, using whichever package manager or build process pushes your buttons. Nothing in this book is going to be so advanced that the minutiae of how you configure these packages will matter. That said, just in case you’re one of the rare Linux users who could use some guidance on installing, I’ve included a detailed set of instructions for Linux users in Appendix A.
What to Ask Your Web Host
While you tinker with PHP and MySQL on your own computer, it’s a good idea to start collecting the information you’ll need when it comes time to deploy your first database driven website to the public. Here’s a rundown of the details you should ask of your web host. First, you’ll need to know how to transfer files to your web host. You’ll be uploading PHP scripts to your host the same way you normally send the HTML files, CSS files, and images that make up a static website; so if you already know how to do that, there’s no need to bother your host. If you’re just starting with a new host, however, you’ll have to be aware of what file transfer protocol it supports (FTP or SFTP), as well as knowing what username and password to use when connecting with your (S)FTP program. You also must know what directory to put files into so that they’re accessible to web browsers. In addition, you’ll require a few details about the MySQL server your host has set up for you. It’s important to know the host name to use in order to connect to it (possibly localhost), and your MySQL username and password, which may or may not be the same as your (S)FTP credentials. Your web host will probably have provided an empty database for you to use, which prevents you from interfering with other users’ databases who may share the same MySQL server with you. If they have provided this, you should establish the name of that database. Have you taken all that in? Here’s a spot to record the information you’ll need about your web host.
Note: My Hosting Details
File transfer protocol (circle one):
· FTP
· SFTP
(S)FTP host name:
_________________________
(S)FTP username:
_________________________
(S)FTP password:
_________________________
MySQL host name:
_________________________
MySQL username:
_________________________
MySQL password:
_________________________
MySQL database name:
_________________________
Your First PHP Script
It would be unfair of me to help you install everything, but then stop short of giving you a taste of what a PHP script looks like until Chapter 3. So here’s a morsel to whet your appetite. Open your favorite text or HTML editor and create a new file called today.php. Type this into the file:
chapter1/today.php
<!DOCTYPE html>
<html lang="en">
<head>
<meta charset="utf-8">
<title>Today’s Date</title>
</head>
<body>
<p>Today’s date (according to this web server) is
<?php
echo date('l, F jS Y.');
?>
</p>
</body>
</html>
Important: It’s a Letter, Not a Number
The most important line of the code is this one:
echo date('l, F jS Y.');
Unfortunately, it’s also the one most people type wrong when reading this book. See the character before the comma? It’s not the number one (1), it’s a lowercase L (l).
Warning: Editing PHP Scripts in Windows with Notepad
To save a file with a .php extension in Notepad, you’ll need to either select All Files as the file type, or surround the filename with quotes in the Save As dialog box. Otherwise, Notepad will unhelpfully save the file as today.php.txt, which will fail to work.
Warning: Editing PHP Scripts in Mac OS X with TextEdit
Be careful when using TextEdit to edit .php files, as it will save them in Rich Text Format with an invisible .rtf filename extension by default. To save a new .php file, you must first remember to convert the file to plain text by selecting Format > Make Plain Text (⇧+⌘+T) from the TextEdit menu. TextEdit also has a nasty habit of mistaking existing .php files for HTML documents when opening them, and attempting to display them as formatted text. To avoid this, you must select the Ignore rich text commands checkbox in the Open dialog box.
Tip: Try a Free IDE!
As you can tell from the preceding warnings, the text editors provided with current operating systems are a touch unsuitable for editing PHP scripts. However, there are a number of solid text editors and Integrated Development Environments (IDEs) with rich support for editing PHP scripts that you can download for free. Here are a few that work on Windows, Mac OS X, and Linux:
NetBeans
http://www.netbeans.org/features/php/
Aptana
http://www.aptana.com/php
Komodo Edit
http://www.activestate.com/komodo_edit/
If you’d prefer not to type out all the code, you can download this file—along with the rest of the code in this book—from the code archive. See the Preface for details on how to download the code archive. Save the file, and move it to the web root directory of your local web server.
Note: Where’s my server’s web root directory?
If you’re using an Apache server that you installed manually, the web root directory is the htdocs directory within your Apache installation (that’s C:\Program Files\Apache Software Foundation\Apache2.2\htdocs on Windows and /usr/local/apache2/htdocs on Linux). For the Apache server built into XAMPP, the web root directory is the htdocs directory within your XAMPP installation directory. You can reach it simply by choosing from the Start menu: All Programs > Apache Friends > XAMPP > XAMPP htdocs folder. If the Apache server you’re using is built into Mac OS X, the web root directory is /Library/WebServer/Documents. It can be easily accessed by clicking the Open Computer Website Folder… button under Web Sharing in the Sharing preference panel in System Preferences. The Apache server built into MAMP has a web root directory in the htdocs folder inside the MAMP folder (/Applications/MAMP/htdocs). If you prefer using another folder as your web root, you can change it on the Apache tab of the MAMP application’s Preferences. This facility makes it especially easy to switch between multiple web development projects by pointing MAMP at different folders.
Open your web browser of choice, and type http://localhost/today.php (or http://localhost:port/today.php if Apache is configured to run on a port other than the default of 80) into the address bar to view the file you just created.[3]
Important: You Must Type the URL
You might be used to previewing your web pages by double-clicking on them, or by using the File > Open… feature of your browser. These methods tell your browser to load the file directly from your computer’s hard drive, so they won’t work with PHP files. As previously mentioned, PHP scripts require your web server to read and execute the PHP code they contain before sending the HTML code that’s generated to the browser. Only by typing the URL (http://localhost/today.php) will your browser request the file from your web server for this to happen.
Figure 1.11 shows what the web page generated by your first PHP script should look like.
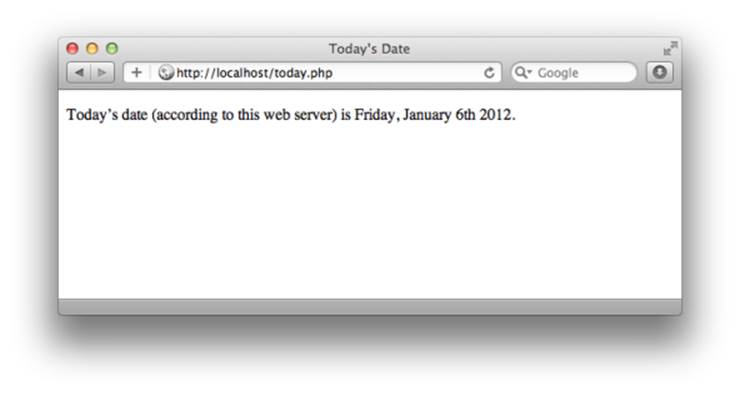
Figure 1.11. See your first PHP script in action!
Neat, huh? If you use the View Source feature in your browser, all you’ll see is a regular HTML file with the date in it. The PHP code (everything between <?php and ?> in the code above) was interpreted by the web server and converted to normal text before it was sent to your browser. The beauty of PHP, and other server-side scripting languages, is that the web browser can remain ignorant—the web server does all the work! If you’re worried that the code you typed made little sense to you, rest assured that you’ll be up to speed on exactly how it works by the end of Chapter 3. If the date is missing, or if your browser prompts you to download the PHP file instead of displaying it, something is amiss with your web server’s PHP support. If you can, use View Source in your browser to look at the code of the page. You’ll probably see the PHP code right there in the page. Since the browser fails to understand PHP, it just sees <?php … ?> as one long invalid HTML tag, which it ignores. Double-check that you’ve requested the file from your web server rather than your hard disk (that is, the location bar in your browser shows a URL beginning withhttp://localhost/), and make sure that your web server supports PHP. You should be fine as long as you followed the installation instructions earlier in this chapter.
Full Toolbox, Dirty Hands
You should now be fully equipped with a web server that supports PHP scripts, a MySQL database server, and a basic understanding of how to use each of these. You should even have gotten your hands dirty by writing and successfully testing your first PHP script! If the today.php script didn’t work for you, drop by the SitePoint Forums and we’ll be glad to help you figure out the problem. In Chapter 2, you’ll learn the basics of relational databases and start working with MySQL. I’ll also introduce you to the language of database: Structured Query Language. If you’ve never worked with a database before, it’ll be a real eye-opener!
[1] Linux users, you’ll find instructions in Appendix A, because I suspect that most of you will probably want to install it your own way, regardless of what I write here.
[2] Of course, there are no guarantees that another application won’t be using port 8888 or 8889 on your system! I’ve had trouble with Playback by Yazsoft (an application for streaming media to game consoles like the Xbox 360 and PlayStation 3), which uses port 8888 when it is running. If in doubt, try a different port number!
[3] If you installed Apache on Windows, you may have selected the option to run it on port 8080. If you’re using MAMP, it’s configured by default to run Apache on port 8888.