Arduino Programming using MATLAB, 1st Edition (2015)
2. Setting Arduino Development for MATLAB
This chapter explains how to work on setting up Arduino board on a computer and then, access it from MATLAB.
2.1 Getting Started
In this chapter, we set up Arduino board development using MATLAB support package for Arduino hardware. To set up this development, you must have MATLAB 2014a or later and MATLAB account to verify while installing.
2.2 Setting up Arduino Development for MATLAB
In this section, we try to set up Arduino development for MATLAB. You can configure MATLAB Support Package for Arduino hardware using MATLAB 2014a or later. We also need internet connection to download this package.
Let's start.
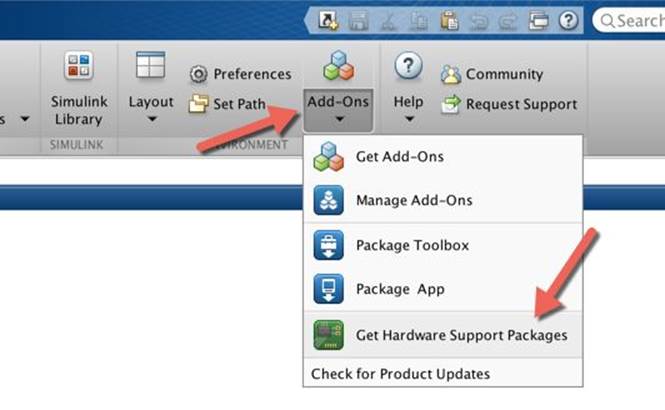
Run MATLAB application. Click Get Hardware Support Packages on Add-Ons icon on toolbox.
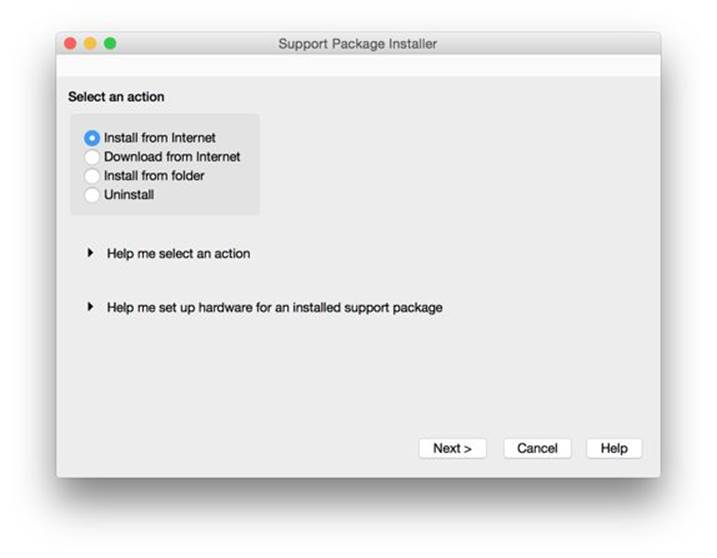
Then, you get a dialog. Select Install from Internet.
If done, click Next> button.
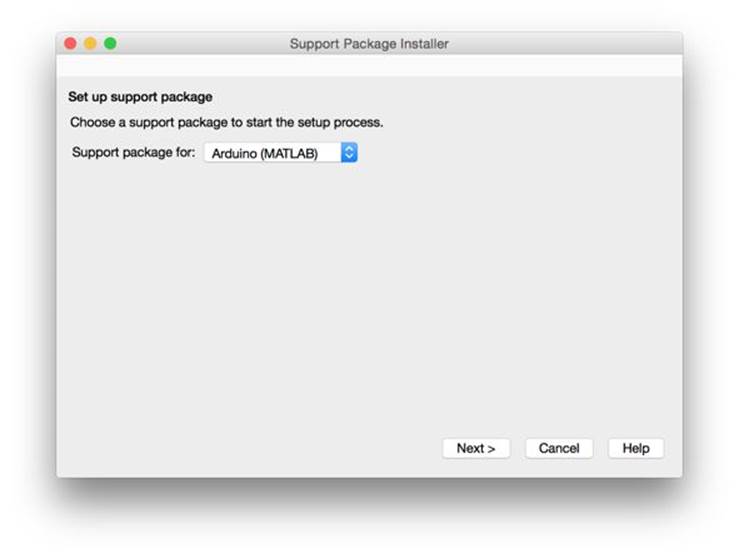
Select Arduino on Support for. You should see two Arduino support packages. You can select both.
If done, click Next> button.

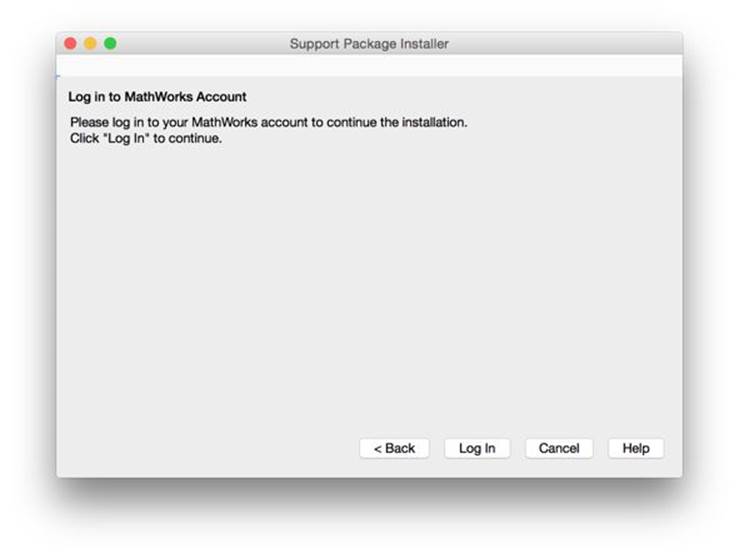
You will be asked to logon with your MATLAB account. You should have MATLAB license. Click Log In button.
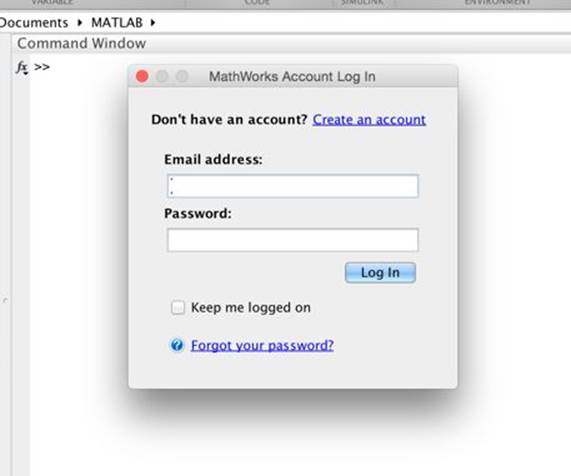
You should the authentication dialog. Fill your account. After that, click Log In button.
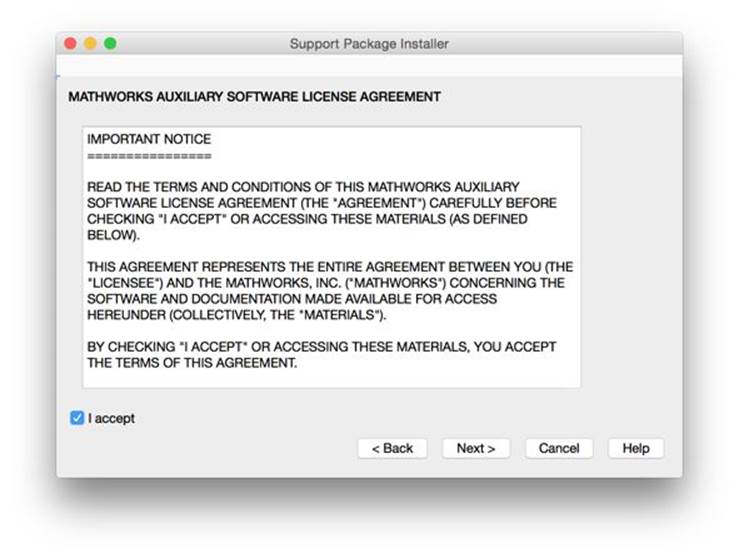
If success, you should get a software license agreement. Checked I accept and then click Next> button.
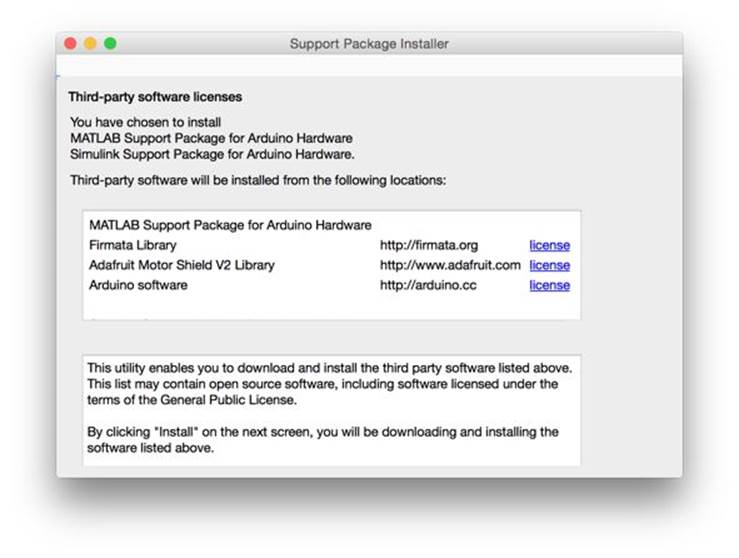
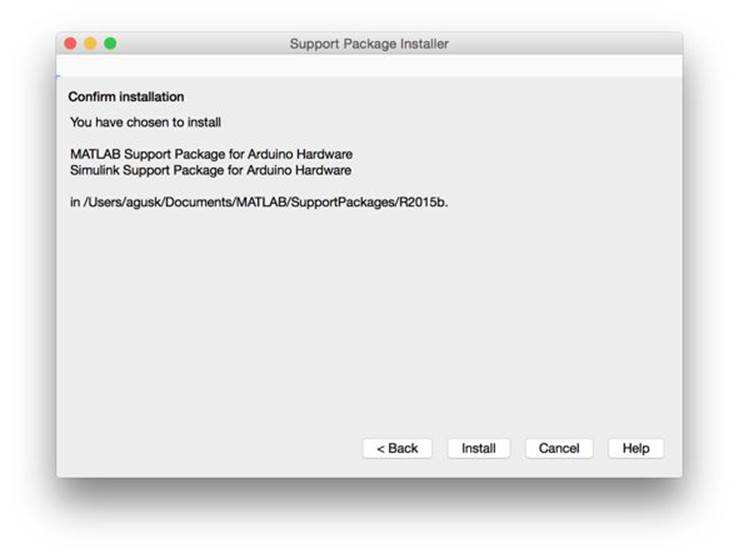
You will get confirmation. Click Next> button.
Click Install button to start installation.
After done, you will be asked to configure Arduino board. Select Arduino and then, click Next> button.
Confirmation form will be shown. Click Continue> button.
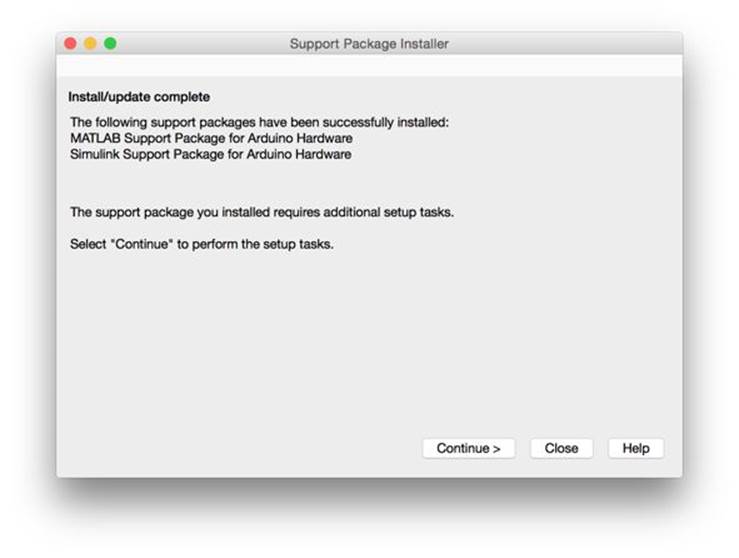
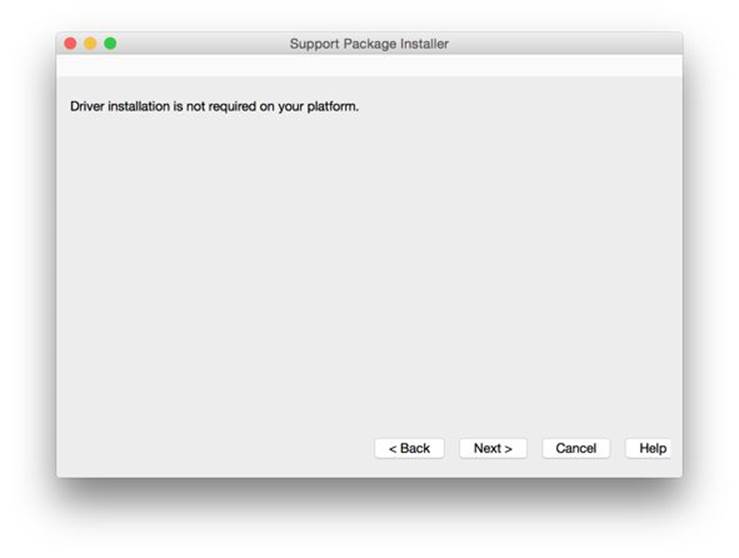
The program will check if your platform needs Arduino driver or not. If you're working on Linux and Mac, you don't need a driver. You need to install Arduino driver if you're working on Windows platform. Click Next> button if done.
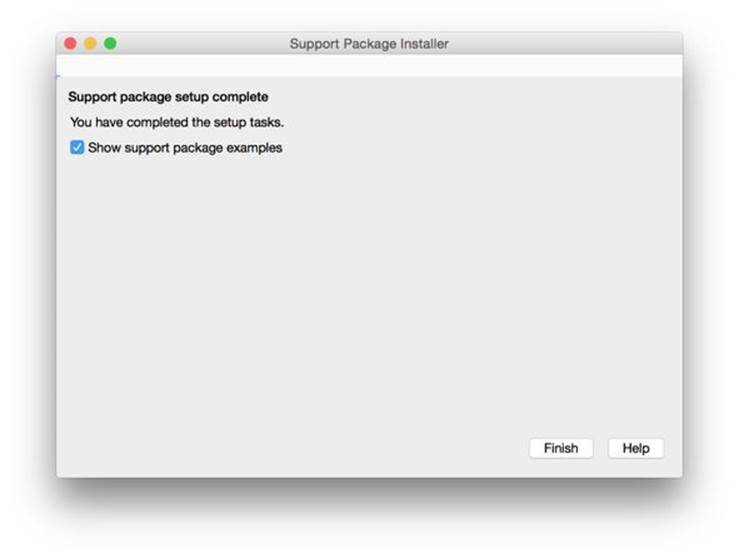
Installation is over. Click Finish button to close installation.
2.3 Connecting Arduino Board to Computer
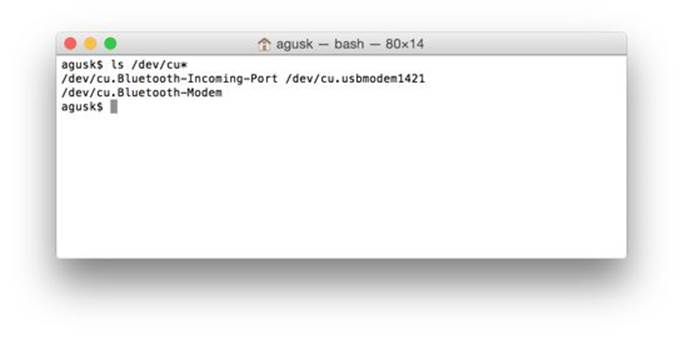
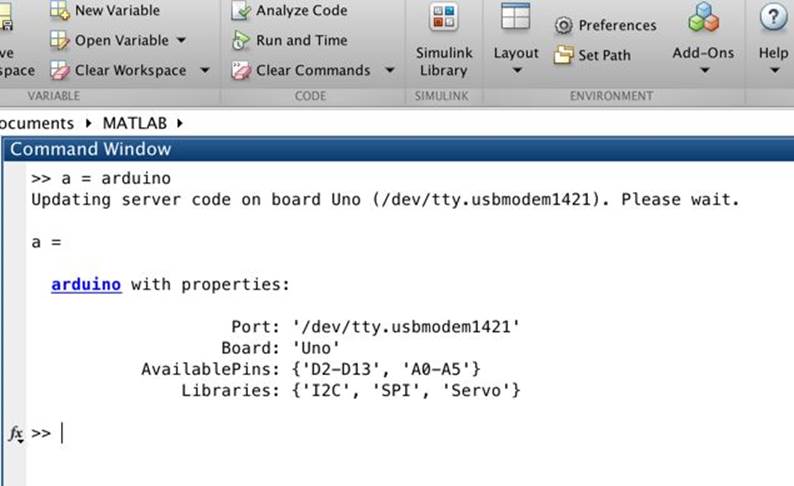
Now you can connect Arduino board to computer. Then, verify which serial port is used for Arduino board. On Mac platform, you type this command.
$ ls /dev/cu*
On Linux platform, you type this command.
$ ls /dev/tty*
You can use Device Manager on Windows platform.
After that, you should see serial port of Arduino board which is attached on the computer.
My OSX detected my Arduino board used /dev/cu.usbmodem1421 serial port.
On MATLAB command Windows, type this command
>> a = arduino
MATLAB will detect your Arduino board. You should detected Arduino board information on Maltab Command Window.
2.4 Hello Arduino: Blinking LED
In this section, we build a blinking LED program using MATLAB. Arduino Uno/Mega/Leonardo boards provides onboard LED which is connected on pin 13.
Let's start to write our Blink program.
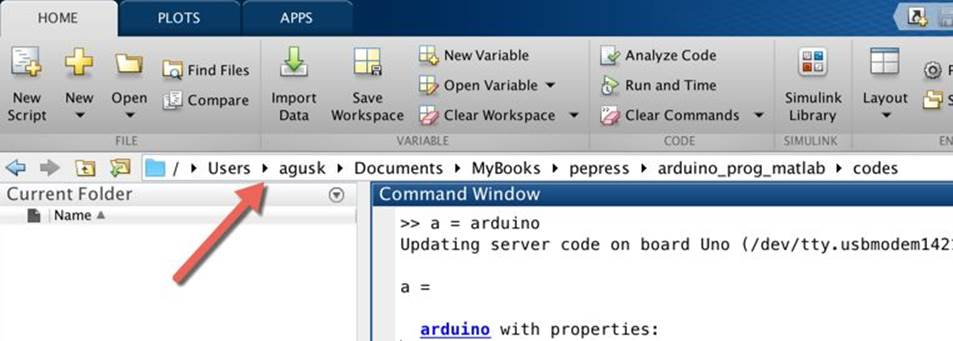
Firstly, you set working folder on MATLAB. You can change it on MATLAB IDE, see a red arrow.
Then, click New Script icon to create a new script file.
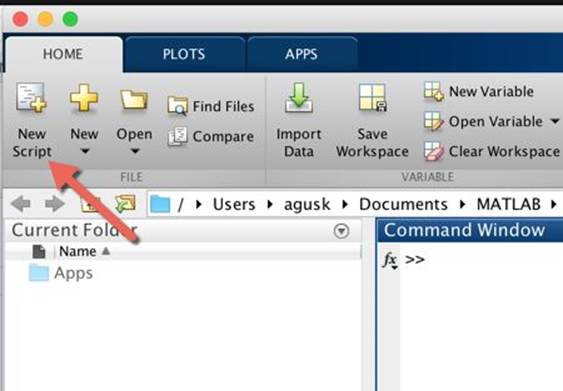
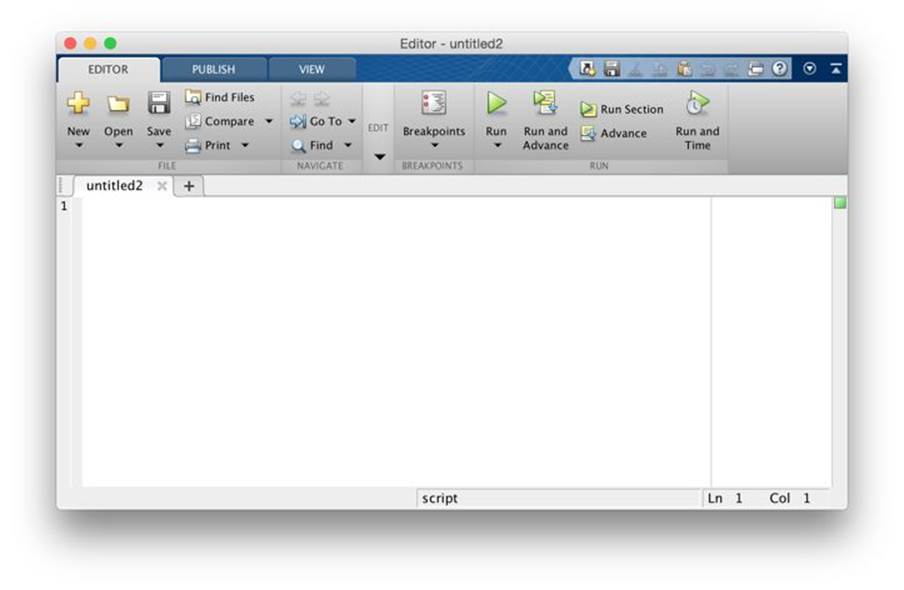
After that, you can get a script editor, shown in Figure below.
board = arduino();
led = 'D13';
for k=1:10
disp('turn on LED');
writeDigitalPin(board,led,1);
pause(1);
disp('turn off LED');
writeDigitalPin(board,led,0);
pause(1);
end
disp('close Arduino board');
clear board;
Save those scripts into a file, called blinking.m. Now you can run it.
>> blinking
You may get error message, shown in Figure below.
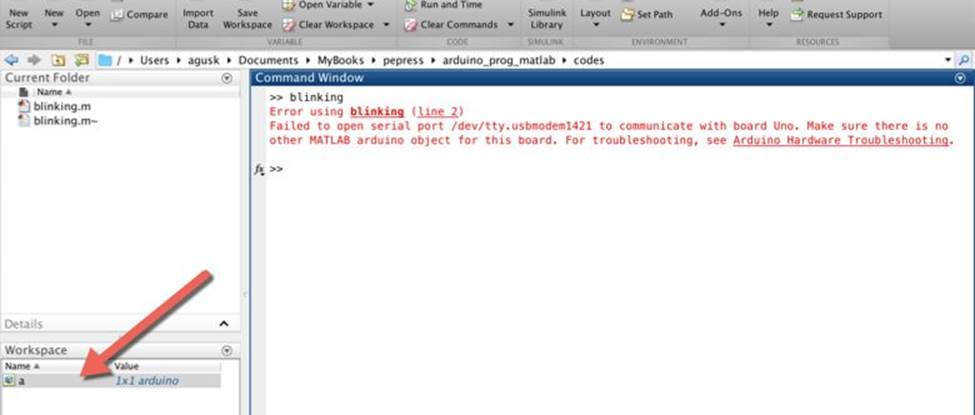
This error occurs because we create arduino object while there is existing arduino object. We can't use multiple arduino object. Delete existing arduino on Workspace Window. See a red arrow on above Figure.
We can clear our arduino object usage using clear syntax.
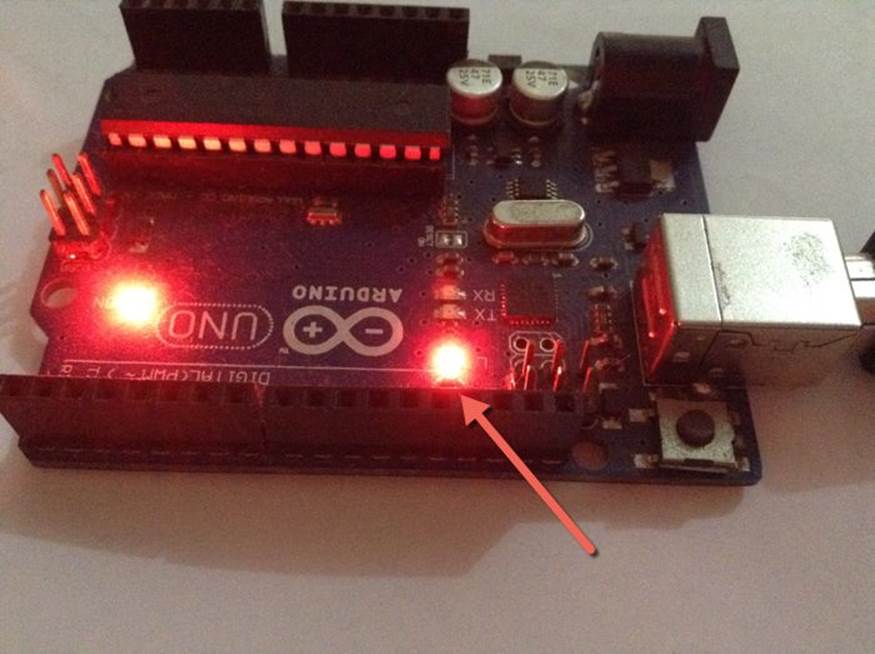
Now you can run the program again. The following is a sample output of blinking program.

You should see blinking LED on Arduino board.
All materials on the site are licensed Creative Commons Attribution-Sharealike 3.0 Unported CC BY-SA 3.0 & GNU Free Documentation License (GFDL)
If you are the copyright holder of any material contained on our site and intend to remove it, please contact our site administrator for approval.
© 2016-2026 All site design rights belong to S.Y.A.