Arduino Programming using MATLAB, 1st Edition (2015)
7. Working with Servo Motor
In this chapter I'm going to explain how to work with servo motor on Arduino board using MATLAB.
7.1 Getting Started
Servo motor provides a shaft movement 360 degree. We can control this movement based on its degree. In this scenario, you can use any DC motor (servo) that will be connected to Arduino. I used a mini servo from Arduino Sidekick Basic kit.
The following is a picture of my mini servo motor.
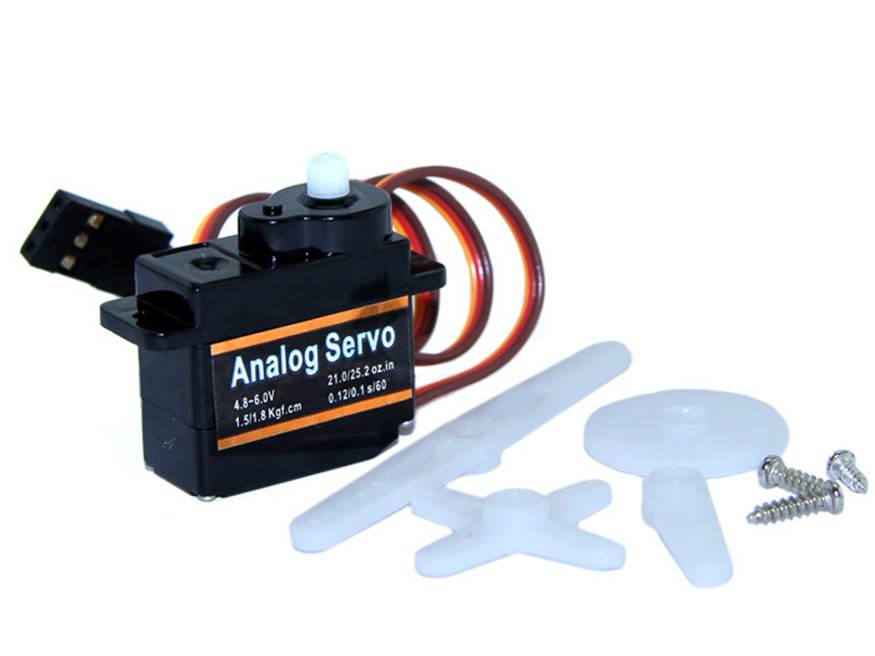
To understand servo's cables, you can identify as follows:
· Red cable is be connected to 5V
· Black or brown cable is be connected to GND
· The rest (yellow or orange cable) is be connected to Arduino PWM pin
The next step we are going to build a MATLAB program with Arduino and servo motor.
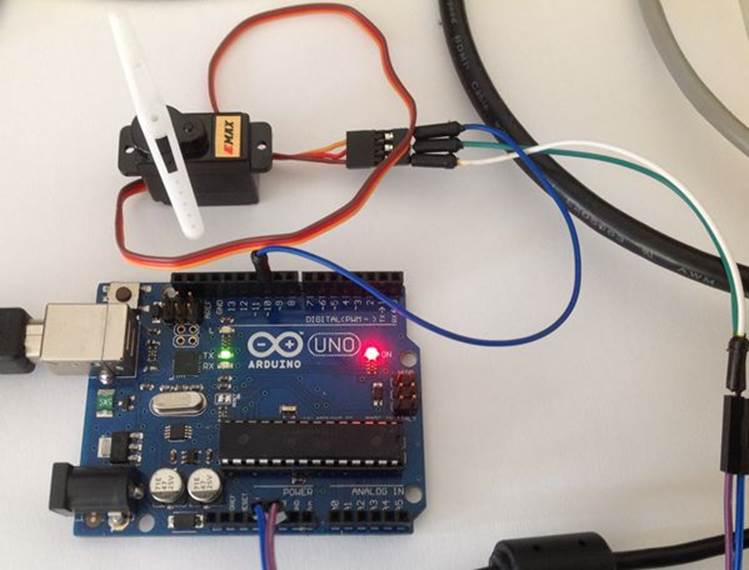
7.2 Wiring
To build hardware implementation, you can connect servo motor to Arduino by following configuration:
· Red cable is be connected to 5V
· Black or brown cable is be connected to GND
· The rest (yellow or orange cable) is be connected to Arduino PWM pin. I used pin 10 for Arduino Uno R3 or Arduino Mega 2560
The following is a sample of hardware implementation.
7.3 Writing a Matlab Program
We can use servo object to control server motor. You can read it on http://www.mathworks.com/help/supportpkg/arduinoio/servo-motors.html . We build a program to run a servo motor from position 0 to 1 using writePosition() function.
Write these scripts.
function [] = servo_motor()
board = arduino();
finishup = onCleanup(@() exitprogram(board));
motor = servo(board,'D10');
disp('press Ctr-C to exit');
while1
for pos = 0:0.25:1
disp(['position: ',num2str(pos)]);
writePosition(motor,pos);
pause(1);
end
for pos = 1:-0.25:0
disp(['position: ',num2str(pos)]);
writePosition(motor,pos);
pause(1);
end
end
end
functionexitprogram(b)
clear b;
disp('program has exit');
end
Save these scritps into a file, servo_motor.m.
7.4 Testing
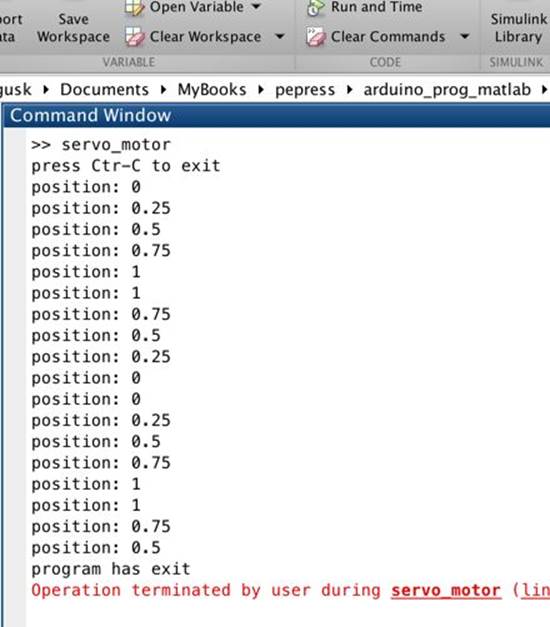
Now you can run the program on Command Window from MATLAB.
>> servo_motor
You should see servor motor is running from degree 0 to 180 and then back again from degree 180 to 0.
A sample output program can be seen in Figure below.
All materials on the site are licensed Creative Commons Attribution-Sharealike 3.0 Unported CC BY-SA 3.0 & GNU Free Documentation License (GFDL)
If you are the copyright holder of any material contained on our site and intend to remove it, please contact our site administrator for approval.
© 2016-2026 All site design rights belong to S.Y.A.