Creating Apps in Kivy (2014)
Chapter 3. Manipulating Widgets
It’s time to think about widgets again. In this chapter, you’ll see how to dynamically change what widgets are displayed in the widget tree. You’ll mainly be implementing searching and the rendering of search results. This will give you a good understanding of the intricacies of the KivyListView widget and its adapters, and you’ll also learn how to create widgets and update the display dynamically in response to user or system events.
A More Extensible Root Widget
While the user will find it useful for the Add Location form to be rendered the first time the application is run, it’s not actually appropriate to set it as the root widget on the app. It’s better to have a custom root widget that knows how to manage the widgets that are displayed on it, such as the various forms I mentioned in Chapter 1.
I expect the root widget to have several methods for manipulating the display of child widgets. Start by adding an empty class to the main.py file. Make it extend BoxLayout, but for now, the class can be otherwise empty (meaning it will behave exactly like a normal BoxLayout). SeeExample 3-1.
Example 3-1. Empty root class
classWeatherRoot(BoxLayout):
pass
For now, set up the KV language file to render an instance of this as the root widget. Then set up a new rule for it to include AddLocationForm as a child, as demonstrated in Example 3-2.
Example 3-2. Root widget with AddLocationForm child
WeatherRoot:
<WeatherRoot>:
AddLocationForm
Since the parent class is a BoxLayout with only one child, it will render AddLocationForm as taking up 100% of its surface area. So, running the application looks exactly the same as before.
You’ll be adding some code to customize this widget class shortly, and a lot more throughout this book, but for now, this empty class is sufficient while you work out how to handle events on the ListView object.
ListView Adapters
The Kivy ListView API includes full support for managing and displaying selection. However, for starters, all you need it to do is hold a list of widgets that can respond to touch events. When the user touches a location in the Add Location list, you need to respond to the event appropriately. We’ll deal with “appropriately” later; for now, just worry about responding to the event!
By default, the ListView renders a Label widget for each string in the list, but Label is an inert widget that doesn’t care when it gets touched. Luckily, ListView can use different classes (including custom classes) as the widget to be displayed for each item. Kivy supplies two classes,ListItemLabel and ListItemButton, that behave like normal Label and Button objects but also contain information for tracking selection. Tracking selection is mandatory for ListView widgets, so it’s almost always a good idea to extend one of these classes, depending on whether you want to just display data (use ListItemLabel) or respond to touch events (use ListItemButton).
Start by editing the weather.kv file. You’ll need to add a couple of import statements at the top of the file first, as shown in Example 3-3.
Example 3-3. Imports for adapter buttons
#: import ListItemButton kivy.uix.listview.ListItemButton
#: import ListAdapter kivy.adapters.listadapter.ListAdapter
KV imports work similarly to Python imports but use a different syntax. They exist because sometimes you need access to Python modules in your KV language file other than those that are magically available as part of the Kivy builder process. This normally happens in the small parts of the KV language file that map to actual Python execution.
Imports in the KV language start with the characters #: import followed by an alias for the module or member being imported. This is followed by the full path to the module or class to be imported. The alias can then be used throughout the KV file as a reference to that item. In this case, you need to import ListAdapter and the ListItemButton classes. See Example 3-4 to learn why.
Example 3-4. ListView with adapter specified
ListView:
id: search_results_list
adapter:
ListAdapter(data=[], cls=ListItemButton)
It’s hard to see the boundary between the KV language and Python here. The adapter property is KV language, but its value is Python code in which you are constructing a ListAdapter object. The ListItemButton class is then passed into this initializer.
The main thing you need to know about the ListAdapter class is that it sits between the ListView and the data (in this case, a list of strings). It can do a few things while it’s sitting there, like keeping track of which item is selected, making sure the view stays up-to-date when data changes, setting what widget class is used to render the data, and mapping data between the input format and widget properties.
The defaults for all of these settings work fine in this example, except the widget class, which is now set to a ListItemButton object instead of the default ListItemLabel. Unfortunately, running this code would break the interface because the Python code you wrote previously is not updating the new ListAdapter. It’s still trying to update the default class on a ListView, called a SimpleListAdapter. This is easily remedied, as shown in Example 3-5.
Example 3-5. Using the ListAdapter API in the search method
def search_location(self):
search_template = "http://api.openweathermap.org/data/2.5/" +
"find?q={}&type=like"
search_url = search_template.format(self.search_input.text)
request = UrlRequest(search_url, self.found_location)
def found_location(self, request, data):
data = json.loads(data.decode()) ifnotisinstance(data, dict) else data
cities = ["{} ({})".format(d['name'], d['sys']['country'])
for d indata['list']]
self.search_results.item_strings = cities
self.search_results.adapter.data.clear() ![]()
self.search_results.adapter.data.extend(cities) ![]()
self.search_results._trigger_reset_populate() ![]()
![]()
You can’t just set the data to an empty list because the container involved is an instance of ObservableList. Instead, clear the list…
![]()
…and then extend it with the new data.
![]()
ListAdapter is supposed to update the display when it sees the data change, but it’s not doing its job, so you should force an update here. This is an undocumented method that it took me half an hour of searching through Kivy source code to find. Sometimes searching through source code is the best way to learn things. The Kivy sources are well written and easy to read; you can learn a ton from perusing them.
Now run the application and search for a location. The ListView renders buttons now, instead of the default labels, as shown in Figure 3-1.
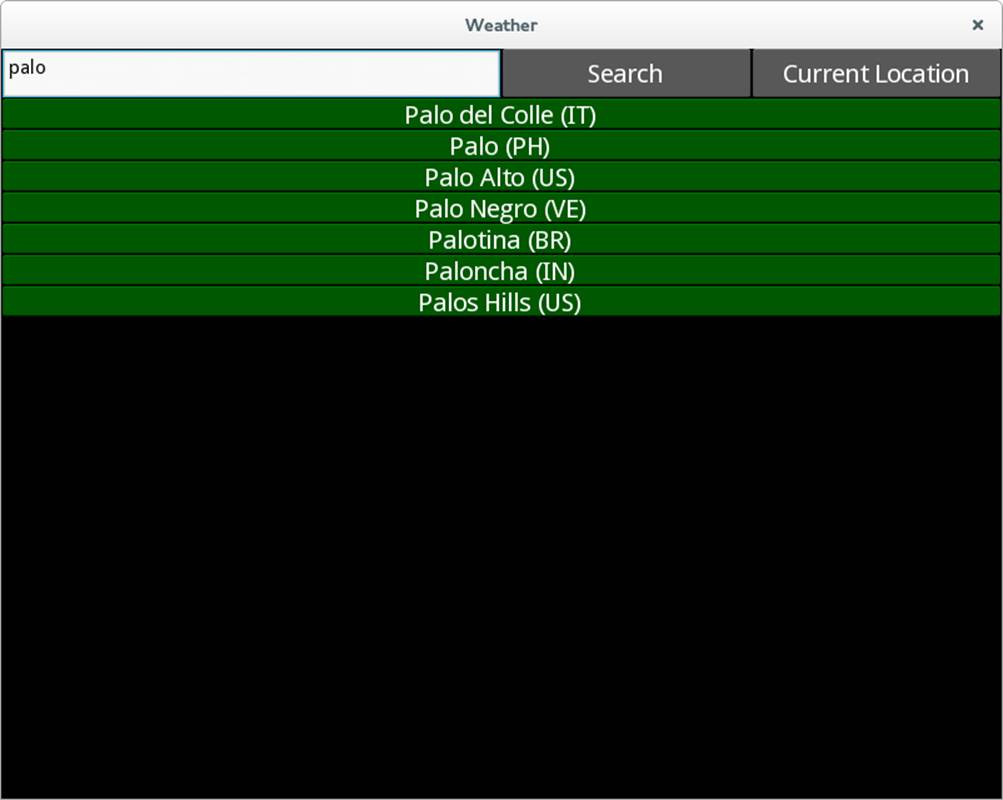
Figure 3-1. Rendering of buttons in the ListView
LIST.CLEAR IN PYTHON 2 AND PYTHON 3
The list class, from which Kivy’s ObservableList inherits, has a handy clear method. This method is being called in Example 3-5 to remove any previous search results from the list.
Unfortunately, clear was introduced to the list class in Python 3 and isn’t available in Python 2. The syntax you’ll want to use instead is del self.search_results.adapter.data[:], which effectively deletes all the objects in the list.
Note that you do not want to do something like self.search_results.adapter.data = []. This will have the effect of clearing the list, but you will have set the value to a normal list instead of the ObservableList that Kivy originally instantiated on the adapter. This means it won’t be able to do the extra Kivy stuff (like listen for change events on the list), and the ListViewwill be broken.
Responding to ListView Item Events
Unfortunately, these buttons don’t provide easy access to event handlers. You can remedy this by making a subclass of the ListItemButton in main.py, as shown in Example 3-6.
Example 3-6. Creating a subclass of ListItemButton
fromkivy.uix.listviewimport ListItemButton
classLocationButton(ListItemButton):
pass
Next, update the imports in weather.kv to import this main module instead of the ListItemButton class; see Example 3-7.
Example 3-7. Importing a custom class from main
#: import main main
#: import ListAdapter kivy.adapters.listadapter.ListAdapter
Finally, update the cls reference, as shown in Example 3-8.
Example 3-8. Point cls at the new class
ListView:
id: search_results_list
adapter:
ListAdapter(data=[], cls=main.LocationButton)
With this slight modification, running the app won’t look any different. However, you can now add style rules to the KV language file, including the event handler in Example 3-9.
Example 3-9. KV rule for Location button
<LocationButton>:
on_press: app.root.show_current_weather(self.text)
In the KV language, the app magic variable points at the currently running App subclass. In your code, this is an instance of WeatherApp. The App class has a root variable that points at the root object defined in the KV language file—in this case, a WeatherRoot instance. That widget doesn’t currently have a show_current_weather function, but you can add that next, as shown in Example 3-10.
Example 3-10. Placeholder to show weather
classWeatherRoot(BoxLayout):
def show_current_weather(self, location):
fromkivy.uix.labelimport Label
self.clear_widgets()
self.add_widget(Label(text=location))
CAUTION
Be careful not to confuse the root magic variable, which refers to the leftmost rule in the current indentation block, with app.root, which always refers to the root widget of the app. app.root refers to the same object anywhere in the KV language file, but root refers to a different thing depending on what rule it is found in.
This method is really just stubbed out as a placeholder. It creates a label in Python code, something you haven’t seen before. So far, you’ve created all your widgets in the KV language file. Occasionally, you need to do it in Python. No widgets accept positional arguments upon construction, but some allow you to pass arbitrary properties into the constructor. Thus, you can set the orientation on a BoxLayout or the size_hint_x on a widget directly when constructing it in Python. This works fine, but it’s less readable than the KV language and, more importantly, fails to separate interface concerns from logic.
I imported the Label class directly in the method because this is temporary code that I expect to remove soon. It is a good idea, when coding, to create something that works in as few lines of code as possible and test that before going on. This approach is far easier to debug and far more likely to generate comprehensible code with fewer errors than writing a hundred lines of code and hoping it’s correct. I make this point because I want it to be clear that this style of development is valuable, and Example 3-10 is not just a pedagogical example. See it running in Figure 3-2. Note that you’ll have to exit the program after selecting the location; you’ll be making the AddLocationForm reusable shortly.
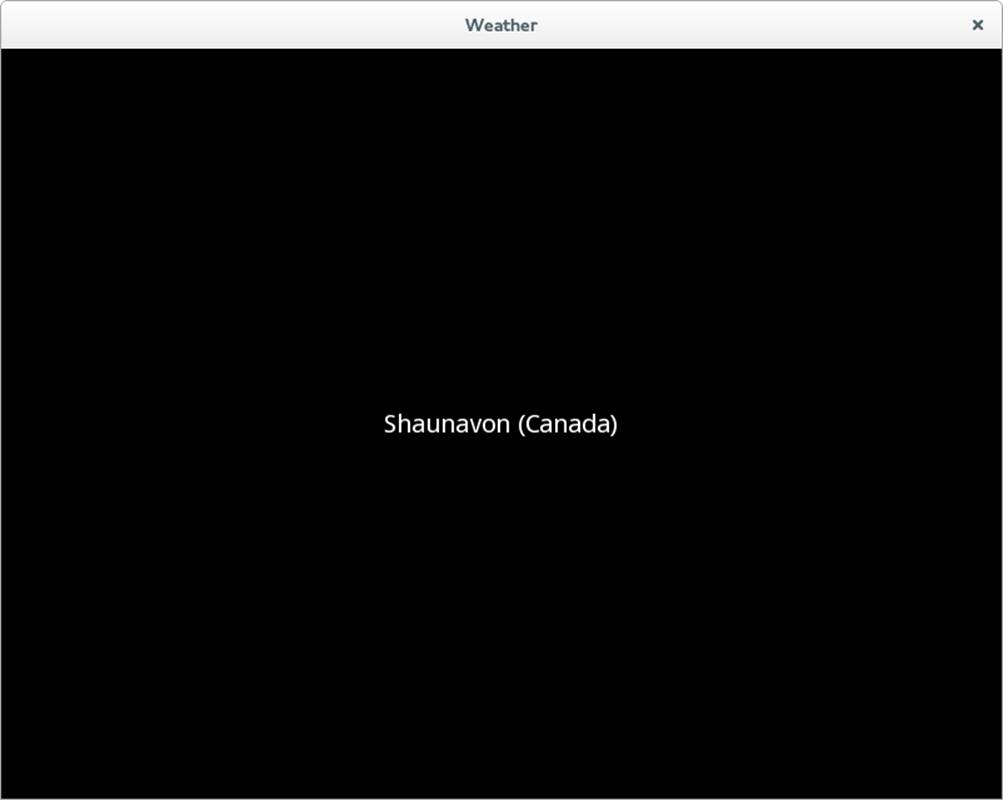
Figure 3-2. Label rendered after selecting a location
Swappable Widgets
You can probably guess that adding a Label directly to the root window isn’t going to be a viable long-term solution. What you need is a way to switch between the AddLocationForm and the CurrentWeather widget. I’ll go through the steps to do this, but take a moment to think about the problem first. How would you approach it?
I think it’s pretty clear that another widget is required to hold the “current weather” data. Anytime you add a new widget to your Kivy project, you should ask yourself, “Does this widget need to have a class in the Python code, or can I use a dynamic widget?” CurrentWeather is largely going to be a display-only object, so a dynamic class seems sufficient for now. The entire widget is stubbed out in Example 3-11.
Example 3-11. Basic layout for CurrentWeather widget
<CurrentWeather@BoxLayout>:
location: "" ![]()
conditions: None
temp: None
temp_min: None
temp_max: None
orientation: "vertical" ![]()
Label:
text: root.location ![]()
BoxLayout:
orientation: "horizontal"
size_hint_y: None ![]()
height: "40dp"
Button:
text: "Add Location"
Button:
text: "Forecast"
![]()
These are the custom properties that I expect to set later when actually setting the weather.
![]()
Setting inherited properties on dynamic classes is also allowed. This widget extends BoxLayout, but you want it to render vertically.
![]()
The root variable is referencing the CurrentWeather object itself. You’re connecting the text property on the Label to the location property that was defined earlier. These are connected dynamically, such that updating the location field on the class will automatically update the displayed label text.
![]()
There’s a good chance you’ve already forgotten that you must explicitly set size_hint_y to None if you are setting a height.
Now all you have to do is generate this class instead of a label in main.py. Since you’re constructing a dynamic class, you won’t be able to simply import it. Instead, add the Factory import to the top of the file, as shown in Example 3-12.
Example 3-12. Importing Factory
fromkivy.factoryimport Factory
Then adapt the show_current_weather method to construct an instance of this dynamic class from the factory, set the location, and render it. Example 3-13 reveals all.
Example 3-13. Constructing a dynamic widget from Factory
classWeatherRoot(BoxLayout):
def show_current_weather(self, location):
self.clear_widgets()
current_weather = Factory.CurrentWeather()
current_weather.location = location
self.add_widget(current_weather)
Notice how the dynamic class is constructed by the factory. Then it can be treated like any other widget, because it is one. If you run the app and render it, it will look like Figure 3-3.
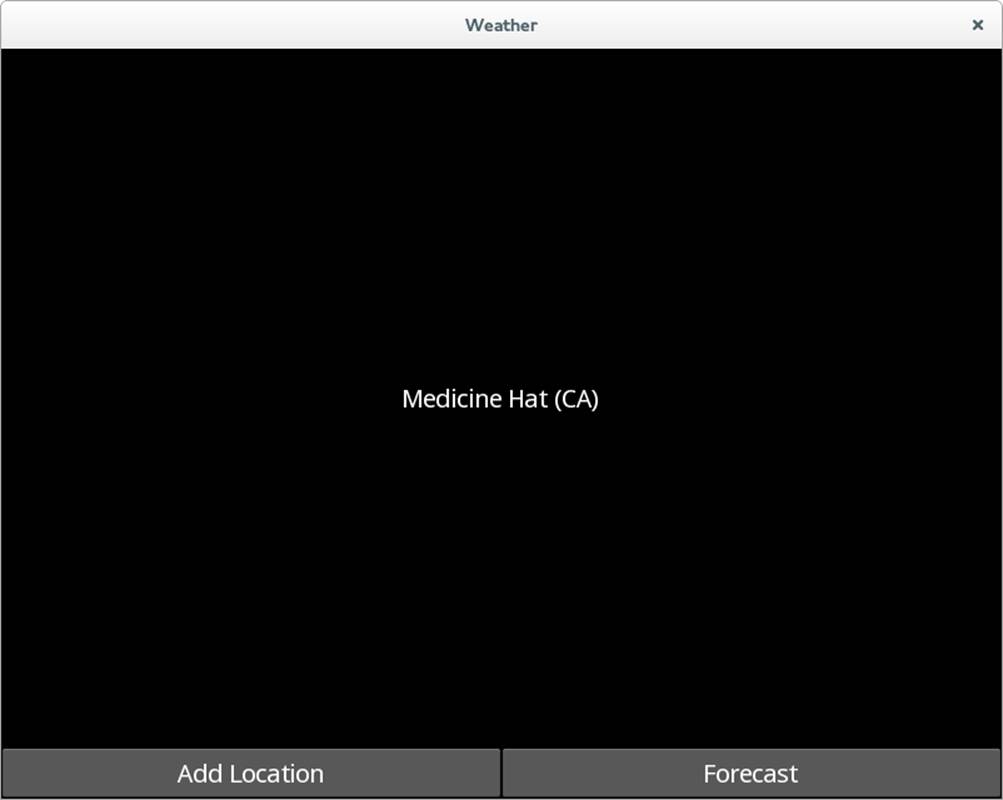
Figure 3-3. Making the widget dynamic
Switching Forms
Try hooking up the on_press handler on the Add Location button that is part of the CurrentWeather widget. It should be a very similar workflow to what you just saw in the previous section, except that instead of constructing a CurrentWeather widget, you’ll construct an Add Location form.
Work on this on your own for a bit before looking at the minor changes in Example 3-14 and Example 3-15.
Example 3-14. Event handler for the Add Location button
Button:
text: "Add Location"
on_press: app.root.show_add_location_form()
Example 3-15. New event handling method on the WeatherRoot object
def show_add_location_form(self):
self.clear_widgets()
self.add_widget(AddLocationForm())
Your user can now move back and forth between the AddLocationForm view and the CurrentWeather view. You aren’t rendering any real data yet, and the “Add” is a bit of a lie, since all you’re doing is switching between locations, not adding them to a list. However, there’s some structure coming to the application, and you can see that it will be pretty easy to hook up weather retrieval machinery in the next chapter.
File It All Away
In this chapter, you picked up some additional experience with Kivy properties and events. These concepts are central to any Kivy application. You also learned more details about the complex ListView API and how to manipulate the widget tree. Here are some additional explorations for you:
§ Change the background color of the LocationButton. You’ll need to check the Kivy docs to find what property to change and how to represent colors in Kivy.
§ Rendering the Add Location form every time is unnecessary. Try storing the entire widget as an ObjectProperty on WeatherRoot and add it to or remove it from the view as needed.
§ Play with the layout of the Current Weather form to render some more placeholders (Label is sufficient) for Current Temp, High/Low, and Current Conditions.
§ If you’re looking for something a little more intense, you now have enough knowledge to make a basic to-do list application in Kivy.
All materials on the site are licensed Creative Commons Attribution-Sharealike 3.0 Unported CC BY-SA 3.0 & GNU Free Documentation License (GFDL)
If you are the copyright holder of any material contained on our site and intend to remove it, please contact our site administrator for approval.
© 2016-2026 All site design rights belong to S.Y.A.