Understanding Swift Programming: Swift 2 (2015)
PART 1: FUNDAMENTALS
3. The Flow of Control
Swift has the basic C-like capabilities for handling the flow of control in a program, including if, if/else, and if/else-if/else statements.
Swift also has the familiar for and while statements that allow iteration by means of an integer counter or while a certain condition is still true. In addition, Swift has a repeat-while statement, similar to the do-while statement in many languages.
In addition, Swift has a for-in statement that allows iterating through arrays, dictionaries, strings, and ranges.
Switch also has the conventional switch statement, but has changed its logic slightly and made its matching capabilities more flexible.
A number of minor changes in the syntax of these statements have been made to Swift that are intended to increase safety and clarity.
Changes to Improve Safety and Clarity of Conditional Expressions
The following changes have been made to improve safety and clarity, and apply to all conditional expressions:
First, parentheses are not required around conditional expressions.
Thus, the following expressions are legitimate in Swift:
if p == 5 {
print("p must be 5")
}
for var i = 0; i < 5; i++ {
print("iteration with i=\(i)")
}
This is arguably cleaner and easier to read, and if it is easier to read it should be easier to detect errors and is thus safer. (Not everyone agrees that this makes the code easier to read.)
Parentheses are allowed if desired:
if (p == 0) {
print("p is equal to 0")
}
A second change is that braces are required around statements that are part of conditional clauses, even in the case of a single statement. The above expressions are correct. The one below is not:
if p == 0 print("p is equal to 0") // Compiler error
Putting braces around single statements that are part of conditional clauses has been a common practice among many programmers, intended to promote consistency and good habits, although it has not been required by most languages.

The third change is that assignment statements are not allowed within conditional expressions. So you are not allowed to do the following:
var m = -2
if var p = m + 2 { // Compiler Error
print("p is equal to 0")
}
This technique is often used in C to make the code more compact but is an invitation to error when a programmer leaves off a "=" when intending to use a "==". If such assignments are simply not allowed, the compiler will catch that error.
The fourth change is that conditional expressions must use actual Boolean types, not just integers with values of 0, 1, or some other nonzero value that are posing as Booleans:
var m = 1
if m { print("m is true") } // Compiler Error
var m = true
if m { print("m is true") } // OK
If, If/else, and If/else-If/else Statements
Swift has the conventional if, if/else, and if/else-if/else statements. We have already seen examples of the if statement.
Swift also allows the usual if/else statement:
if m < 5 {
print("m is less than five")
}
else {
print("m is greater than or equal to five");
}
And it allows if/else-if/else statements:
if m < 5 {
print("m is less than five")
}
else { if p == 7 {
print("m is >= 5 and p is equal to 7");
}
else {
print("m is >= 5 and p is NOT equal to 7");
}
}
Logic Operators and Expressions in Conditional Tests
The following conditional operators are used, as is common:
&& Logical AND
|| Logical OR
< Less than
<= Less than or Equal
> Greater than
>= Greater than or equal
! Logical NOT
Complex expressions are allowed:
if m < 3 && n < 8 || w > 2 {
print("The condition is met")
}
In many such cases parentheses are desirable because they make the expression more readable:
if (m < 3 && n < 8) || (w > 2) {
print("The condition is met")
}
The Guard Statement
The guard statement is an alternative to the if-else statement that often has a cleaner, more readable syntax. The guard statement works like an if-else statement, but has a different syntax and flow of control. It is basically an if-else statement with the logic inverted. If the “guard” (if) condition is true, it does not execute an associated statement that is contained within curly braces like an if statement would. Instead, control passes to the statement just after the end of the “else” part of the guard statement.
An if statement might look like this:
if a == 5 { print("a is 5") }
else { print("a is NOT 5") }
A guard statement, in contrast, looks like this:
guard a == 5
else { return }
print("a is 5")
Note that there is no pair of curly braces analogous to those for the “if” statement. This makes sense, given where control is passed. It also means that any variables or constants created after the guard keyword will remain in scope after the end of the else part of the guard statement.
The guard statement does have a requirement that an if-else statement does not: The else clause must transfer control out of the current flow. The guard statement is thus most commonly used in situations where that is likely, either by returning from a function/method or by throwing an error. The else part of the statement is obviously required—there would be no point to the statement without it.
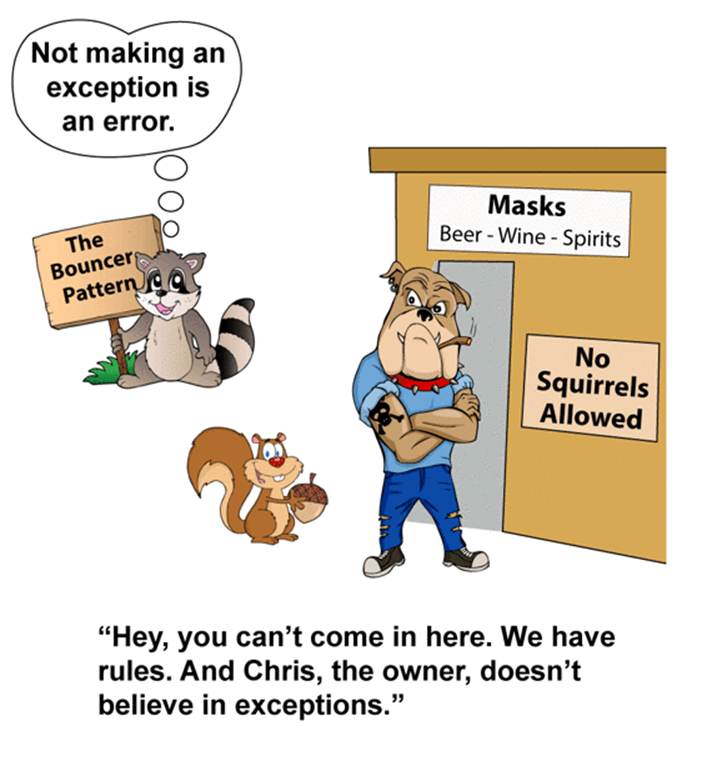
Eric Cerney, in a discussion (ericcerney.com/swift-guard-statement) about why he likes Swift guard statements, calls the pattern that guard statements make easy to create the “Bouncer Pattern”. (See the cartoon above.) The idea is to quickly get rid of the bad cases (like a bouncer for a bar does), then you can focus on what needs to be done for the good cases.
A guard statement can use variable binding, and the variables or constants that are created will be available for code after the end of the guard’s else clause.
Guard statements are often used in error handling, and they can help avoid the convoluted multiple nested if-else statements that can result. For an example of this, see Chapter 21 on “Error Handling”.
For Loops
The usual C-like for loop is used in Swift, but does not require (but allows) the parentheses:
for var m = 0; m < 5; m++ {
print("hey")
}
Semicolons, however, are still required in for loops to separate the parts of the statement that set the initial value, test during each iteration, and perform the iteration.
The same rules about parentheses being optional and braces required around even single statements apply to for loops, while loops, do-while loops, and for-in loops. Assignments are similarly not allowed within the iteration or conditional testing expressions.
The variable in a for loop being iterated must be declared with a var keyword (it obviously cannot be a constant). The logic of the loop is conventional: the variable m is (usually but not necessarily) initially set to 0, and then before each iteration is made a test is made. If the result of that test is true, the statement or statements between the braces are executed. Afterwards, an iterating statement is executed, in this case iterating the variable m. A test is then again made to see if another iteration should be performed. When the test is false, the iteration stops, and control passes to the statement after the last statement in the for loop.
While Loops
While loops test a condition and execute a statement or statements if the condition is true, and keep executing repeatedly as long as the statement is still true.
m = 0
while m < 5 {
print("m is \(m)")
m++;
}
Do-While Loops [Deprecated in Swift 2]
Do-while loops, which exist only in Swift 1, are similar to while loops, but the test is after the first iteration of the statement(s), ensuring that the statement(s) will be executed at least once:
var m = 0
do {
print("m is \(m)")
m++
}
while m < 5
Repeat-While Loops
Repeat-while loops are similar to while loops, but the test is after the first iteration of the statement(s), ensuring that the statement(s) will be executed at least once:
var m = 0
repeat {
print("m is \(m)")
m++
}
while m < 5
// Prints:
m is 0
m is 1
m is 2
m is 3
m is 4
This is new in Swift 2 and replaces the previous do-while loop defined in Swift 1. It works exactly the same as the do-while loop. The reason for the change is to avoid confusion with the new do-try-catch syntax for error handling.
Iterating Through Arrays, Dictionaries, and Strings
Swift has a for-in statement that allows iterating through an array, dictionary, or string. Thus, if an array is:
let cities = ["San Francisco", "Oakland", "San Jose"]
It can be iterated through as follows:
for city in cities {
print("The city is \(city)")
}
The variable city is set to the value of the element in the array and can be accessed within the statements for each particular iteration. Note that the variable does not have to be declared with a var keyword (and if you include it you will get a compiler error); the declaration has already been made as part of the for-in syntax.
The for-in statement can also iterate through a range in Swift.
A range indicates a range of values. Swift expresses this in a shorthand syntax, with two forms:
The range 0...5 (using 3 period characters) indicates the values 1 through 5. This is called a closed range.
The range 0..<5 (using 2 period characters) indicates the values 1 through 4. This is called a half-closed range. This latter expression is often used for iteration.
For-in Filtering
For-in filtering allows a way to select items when iterating through a collection using for-in. This avoids the messiness of another nesting of a control statement, such as an if statement. Instead, a where clause is used.
For example, if you have a collection of numbers and you want to print out only the even ones, you can do:
let numbers = [1,2,3,4,5,6,7,8,9,10]
for number in numbers where number % 2 == 0 {
print(number)
}
(Example from Natasha the Robot)
Break and Continue Statements
The statements break and continue can be used in any of the statements above that do iteration. The break statement causes the iteration to stop immediately, with control passing to the statement just after the iterative loop. The continue statement causes the iteration to stop immediately and for control to be passed to the beginning of the next iteration.
Statement Labels
A statement label is a string that is followed by a colon that appears in front of certain statements in Swift. A statement label is accompanied by a reference to it in a break or continue statement that is used on one of the various loop statements (for, while, repeat) or in a switch statement.
This is a very limited form of the controversial “go to” statement, which is not available in Swift. A go to statement transfers control to anywhere in a program. (See the well-known “Go to statement considered harmful” letter to the editor of the Communications of the ACM, published by E. W. Dijkstra in 1968.)
The following code shows the problem and how a labeled statement solves the problem:
Loop1: for j in 0...10 {
Loop2:
for i in 0...10 {
print("hey")
var result = getIt(j,b: i)
if (result == true){
break Loop1
}
}
}
The code has two for loops, one nested within the other. The idea here is that the getIt() function does some calculation and may or may not get a result. If it does not, we want to continue in the loop. If it does, we want to get out of the loop.
If there was no break statement, the print("hey")statement would be executed 100 times.
A break statement will cause the immediate passing of control to the first statement outside of the loop. The remaining code for the rest of that cycle, and for any additional cycles of the loop, is not executed.
The problem here is that an ordinary break statement will get us out of the second loop, the one with the i being incremented. But it will not get us out of the first loop. We want to get out of both loops.
The labeled statement allows this. When the break statement references a label, it says that it wants to end execution of the statement that is named by that label.
Switch Statements
A switch statement is an alternative to an if/else-if/else statement, useful when things get complex. A variable or constant that contains a value is matched against values that are contained in multiple case clauses. When a match is found, the statement(s) contained in the case that matched is executed. When that code is done executing, control passes to the first statement after the full switch statement. A match is always found because switch statements in Swift are required to be exhaustive. If the existing cases are not exhaustive, a default case is added, as shown below, that is executed when the other cases do not match. The default case must come at the end, after the other cases.
The way to think of a switch statement is that it looks at a value and then "switches" execution to a particular piece of code depending upon that value.
Switch statements in Swift have a number of variations from those in C that are intended to increase safety and clarity and also make the statement considerably more powerful.
Switch statements in C are actually quite primitive, with the value being matched against either an integer or something that can be converted into an integer value, such as a character code or enumeration expressed as an integer.
In Swift, the matching is very flexible. The following example shows a simple matching against values that are strings.
var name = "George"
switch name {
case "Peter":
print ("The name is Peter")
case "George":
print ("The name is George")
case "Jennie":
print ("The name is Jennie")
default:
print ("No match found")
}
The variable or constant being matched against (In this case, name) does not have to be enclosed in parentheses, although it may be.
When a match is found, the code in the case statement that matches is executed. Each case must contain at least one executable statement.
The behavior for the flow of control through the case statements is different from C. In C, if the test for the first case statement is true, the statement or statements below the case statement are executed. The flow of control then passes to the next case statement. In C, the programmer will typically put a break statement in as the last statement for that case, causing the program to exit the switch statement. However, programmers often forget to put in the break statements, which can cause problems if there is also a match with the other cases.
Swift will exit the switch statement after the execution of the statements associated with a case, if there is a match for that case. The effect of this is as if there was a break statement at the end of every group of statements after a case; thus break statements are no longer required for this purpose. Break statements are still allowed to be used and might be used in a more complex set of statements within a case to break out of that particular case. A break statement can also be used as the only statement executed in a case. This is sometimes useful when it is desired to do nothing if a particular case is matched.
If the statement fallthrough is used, it will cause the code in the next case to be executed (in much the same way that switch statements work in C.)
A case statement can contain more than one match, with the different matches separated by commas. They can be placed on more than one line if desired:
switch name {
case "Peter", "George":
print ("The name is either Peter or George")
case "Jennie",
"Susan":
print ("The name is Jennie or Susan")
default:
print ("No match found")
}
Multiple values can be listed for each case, with the values specified after the case keyword but before the colon, and separated by commas.
In this chapter I have described the basic syntax of switch statements and the differences between C and Swift, particularly the difference in behavior relating to break statements.
Switch statements also have a lot of flexibility in terms of matching against different types, using wildcards in matching, matching against ranges, and matching against tuples
A later chapter (Chapter 20 on “The Flow of Control Revisited: Matching with Patterns”) will discuss the more sophisticated matching capabilities that are in the switch statement that use patterns, as well as the (new in Swift 2) if-case and for-case statements that also use patterns for matching.
Hands-On Exercises
Go to the following web address with a Macintosh or Windows PC to do the Hands-On Exercises.
For Chapter 3 exercises, go to
understandingswiftprogramming.com/3
All materials on the site are licensed Creative Commons Attribution-Sharealike 3.0 Unported CC BY-SA 3.0 & GNU Free Documentation License (GFDL)
If you are the copyright holder of any material contained on our site and intend to remove it, please contact our site administrator for approval.
© 2016-2026 All site design rights belong to S.Y.A.