Python in easy steps (2014)
8
Processing requests
This chapter demonstrates how to create server-side Python scripts to process HTML web requests.
Sending responses
Handling values
Submitting forms
Providing text areas
Checking boxes
Choosing radio buttons
Selecting options
Uploading files
Summary
Sending responses
Whenever a user asks to view an online web page in their browser it requests the page from the web server, and receives the page in response, via the HTTP protocol.
Where a requested web page address is an HTML document (typically with an .html file extension) the web server response will return that file to the browser so its contents can be displayed.
Where Python is installed on the computer hosting the web server, the web server can be configured to recognize Python scripts (typically with a .py file extension) and call upon the Python interpreter to process script code before sending an HTML response to the web server, for return to the browser client.

A Python script requested by a web browser can generate a complete HTML document response by describing the content type on the first line as Content-type:text/html\r\n\r\n so the web browser will parse the markup content for display on the screen.

The examples in this chapter use the free Abyss Personal Edition web server available from www.aprelium.com Installed locally on your computer this can be addressed by the domain name localhost or by the IP address 127.0.0.1.
![]() Ensure the web server is running and configured to execute Python scripts
Ensure the web server is running and configured to execute Python scripts

![]() Next, start a new Python script by describing its generated output content type to be an HTML document
Next, start a new Python script by describing its generated output content type to be an HTML document
print( ‘Content-type:text/html\r\n\r\n’ )

response.py
![]() Now, add statements to output an entire web page including all its HTML markup tags
Now, add statements to output an entire web page including all its HTML markup tags
print( ‘<!DOCTYPE HTML>’ )
print( ‘<html lang=”en”>’ )
print( ‘<head>’ )
print( ‘<meta charset=”UTF-8”>’ )
print( ‘<title>Python Response</title>’ )
print( ‘</head>’ )
print( ‘<body>’ )
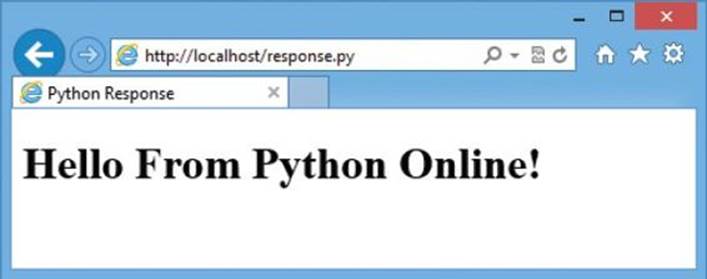
print( ‘<h1>Hello From Python Online!</h1>’ )
print( ‘</body>’ )
print( ‘</html>’ )
![]() Finally, save the file in the web server’s HTML documents directory - typically this will be /htdocs
Finally, save the file in the web server’s HTML documents directory - typically this will be /htdocs
![]() Open a web browser and request the script from the web server via the HTTP protocol - to see the HTML document response provided by the Python script
Open a web browser and request the script from the web server via the HTTP protocol - to see the HTML document response provided by the Python script

The Content-type output description gets sent as an HTTP Header to the browser and must appear on the first line.

Enclose HTML attribute values within double quote marks so they do not get confused with the single quote marks enclosing the strings.
Handling values
Values can be passed to a Python script on the web server when the browser makes an HTTP request. Those values can be used in the script and echoed in a response returned to the browser.
Python’s “cgi” module can be used to easily handle data passed from the web browser by an HTTP request. This provides a FieldStorage() constructor that creates an object storing the passed data as a dictionary of key:value pairs. Any individual value can then be retrieved by specifying its associated key name within the parentheses of that FieldStorage object’s getvalue() method.
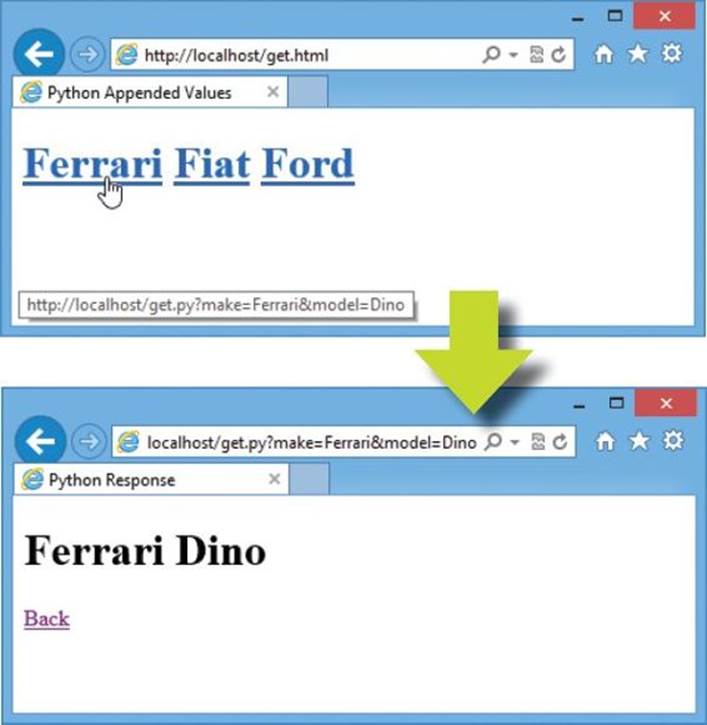
The browser can submit data to the script using a “GET” method that simply appends key=value pairs to the script’s URL address. These follow a ? question mark character after the file name and multiple pairs must be separated by an & ampersand character. For example, script.py?key1=value1&key2=value2.
![]() Create a new HTML document containing hyperlinks with appended values to pass to a Python script
Create a new HTML document containing hyperlinks with appended values to pass to a Python script
<!DOCTYPE HTML>
<html lang=”en”>
<head>
<meta charset=”UTF-8”>
<title>Python Appended Values</title>
</head>
<body>
<h1>
<a href=”get.py?make=Ferrari&model=Dino”>Ferrari</a>
<a href=”get.py?make=Fiat&model=Topolino”>Fiat</a>
<a href=”get.py?make=Ford&model=Mustang”>Ford</a>
</h1>
</body>
</html>

get.html
![]() Next, start a new Python script by making CGI handling features available and create a FieldStorage data object
Next, start a new Python script by making CGI handling features available and create a FieldStorage data object
import cgi
data = cgi.FieldStorage()
get.py
![]() Now, assign two passed values to variables by specifying their associated key names
Now, assign two passed values to variables by specifying their associated key names
make = data.getvalue( ‘make’ )
model = data.getvalue( ‘model’ )
![]() Then, add statements to output an entire HTML web page including passed values in the output
Then, add statements to output an entire HTML web page including passed values in the output
print( ‘Content-type:text/html\r\n\r\n’ )
print( ‘<!DOCTYPE HTML>’ )
print( ‘<html lang=”en”>’ )
print( ‘<head>’ )
print( ‘<meta charset=”UTF-8”>’ )
print( ‘<title>Python Response</title>’ )
print( ‘</head>’ )
print( ‘<body>’ )
print( ‘<h1>’ , make , model , ‘</h1>’ )
print( ‘<a href=”get.html”>Back</a>’ )
print( ‘</body>’ )
print( ‘</html>’ )
![]() Finally, save both files in the web server’s /htdocs directory
Finally, save both files in the web server’s /htdocs directory
![]() Open a web browser and load the HTML document then click any hyperlink - to see passed values in the response
Open a web browser and load the HTML document then click any hyperlink - to see passed values in the response

The request string in the GET method is limited to 1024 characters so is unsuitable for passing lots of key=value pairs.
The values appended to the URL are visible in the browser address field of the response so the GET method should not be used to send passwords or other sensitive data values to the web server.
Submitting forms
Passing data from a web page to a web server using the GET method to append key:value pairs to a URL is simple but has some limitations - the request string length cannot exceed 1024 characters and the values appear in the browser address field.
As a more reliable alternative the browser can submit data to the script using a “POST” method that sends the information to the web server as a separate message not appended to the URL.
Python’s “cgi” module can be used to handle form data sent from the browser with the POST method in exactly the same way as data passed from the browser with the GET method. This module’s FieldStorage() constructor can create an object to store the posted data as a dictionary of key:value pairs for each form field. Any individual value can be retrieved by specifying its associated key name to the object’s getvalue() method.
![]() Create a new HTML document containing a form with two text fields containing default values and a submit button to post all form values to a Python script
Create a new HTML document containing a form with two text fields containing default values and a submit button to post all form values to a Python script
<!DOCTYPE HTML>
<html lang=”en”>
<head>
<meta charset=”UTF-8”>
<title>Python Form Values</title>
</head>
<body>
<form method=”POST” action=”post.py”>
Make: <input type=”text” name=”make” value=”Ford”>
Model:
<input type=”text” name=”model” value=”Mustang”>
<input type=”submit” value=”Submit”>
</form>
</body>
</html>
post.html
![]() Next, start a new Python script by making CGI handling features available and create a FieldStorage data object
Next, start a new Python script by making CGI handling features available and create a FieldStorage data object
import cgi
data = cgi.FieldStorage()
post.py
![]() Now, assign two passed values to variables by specifying their associated key names
Now, assign two passed values to variables by specifying their associated key names
make = data.getvalue( ‘make’ )
model = data.getvalue( ‘model’ )
![]() Then, add statements to output an entire HTML web page including posted values in the output
Then, add statements to output an entire HTML web page including posted values in the output
print( ‘Content-type:text/html\r\n\r\n’ )
print( ‘<!DOCTYPE HTML>’ )
print( ‘<html lang=”en”>’ )
print( ‘<head>’ )
print( ‘<meta charset=”UTF-8”>’ )
print( ‘<title>Python Response</title>’ )
print( ‘</head>’ )
print( ‘<body>’ )
print( ‘<h1>’ , make , model , ‘</h1>’ )
print( ‘<a href=”post.html”>Back</a>’ )
print( ‘</body>’ )
print( ‘</html>’ )
![]() Finally, save both files in the web server’s /htdocs directory
Finally, save both files in the web server’s /htdocs directory
![]() Open a web browser and load the HTML document then push the button - to see posted values in the response
Open a web browser and load the HTML document then push the button - to see posted values in the response

All the HTML documents in this chapter must be loaded into the browser via a web server domain such as localhost - you cannot simply open them directly to try these examples.
Click the Back hyperlink and change the text field values then submit the form again to see your new values echoed.
Providing text areas
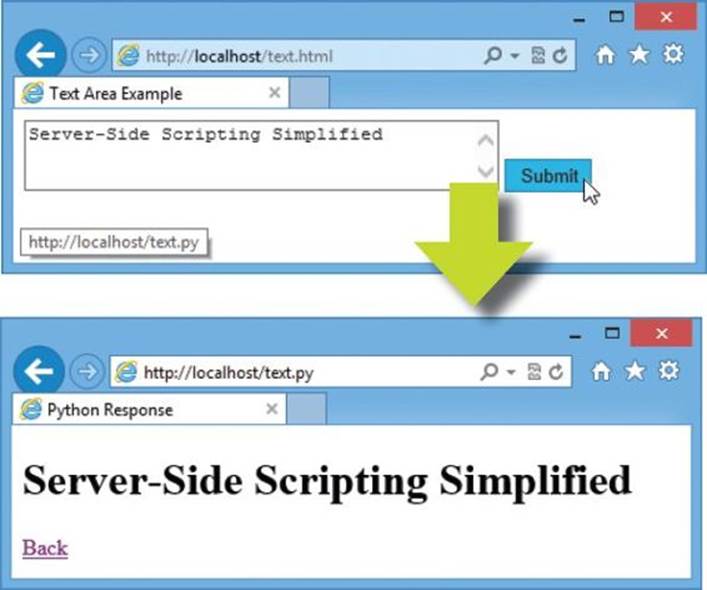
Large amounts of user-input text data can be passed from a web page to a web server using HTML <textarea> tags and the form POST method. This tag has no value attribute so a default value may not be provided. It is, therefore, useful to have the Python script test whether the text area has been left blank and provide a default value when the user has entered no text.
![]() Create a new HTML document containing a form with a text area field and a submit button
Create a new HTML document containing a form with a text area field and a submit button
<!DOCTYPE HTML>
<html lang=”en”>
<head> <meta charset=”UTF-8”>
<title>Text Area Example</title> </head>
<body>
<form method=”POST” action=”text.py”>
<textarea name=”Future Web” rows=”5” cols=”40”>
</textarea>
<input type=”submit” value=”Submit”>
</form>
</body>
</html>
text.html
![]() Next, start a new Python script by making CGI handling features available and create a FieldStorage data object
Next, start a new Python script by making CGI handling features available and create a FieldStorage data object
import cgi
data = cgi.FieldStorage()
text.py
![]() Now, test if the text area is blank then assign its content string or a default string to a variable
Now, test if the text area is blank then assign its content string or a default string to a variable
if data.getvalue( ‘Future Web’ ) :
text = data.getvalue( ‘Future Web’ )
else :
text = ‘Please Enter Text!’
![]() Then, add statements to output an entire HTML web page including posted or default values in the output
Then, add statements to output an entire HTML web page including posted or default values in the output
print( ‘Content-type:text/html\r\n\r\n’ )
print( ‘<!DOCTYPE HTML>’ )
print( ‘<html lang=”en”>’ )
print( ‘<head> <meta charset=”UTF-8”>’ )
print( ‘<title>Python Response</title> </head>’ )
print( ‘<body>’ )
print( ‘<h1>’ , text , ‘</h1>’ )
print( ‘<a href=”text.html”>Back</a>’ )
print( ‘</body>’ )
print( ‘</html>’ )
![]() Finally, save both files in the web server’s /htdocs directory and load the HTML document in a browser then push the form button - to see values in the response
Finally, save both files in the web server’s /htdocs directory and load the HTML document in a browser then push the form button - to see values in the response
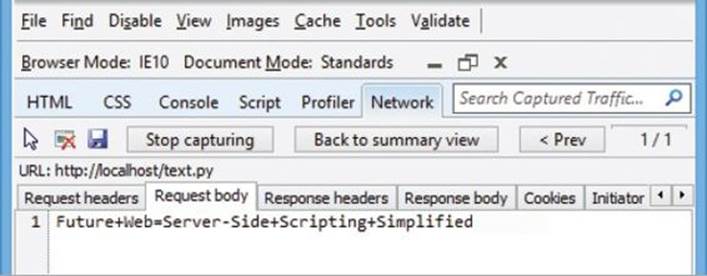
![]() Examine the HTTP request and response components using browser developer tools to see that the text gets sent as a separate message in the HTTP “Request body”
Examine the HTTP request and response components using browser developer tools to see that the text gets sent as a separate message in the HTTP “Request body”
The average character width may vary between browsers - so the physical size of the text area field may vary too.
You can use the F12 Developer Tools in Internet Explorer to examine the HTTP request and response components, as shown.
Checking boxes
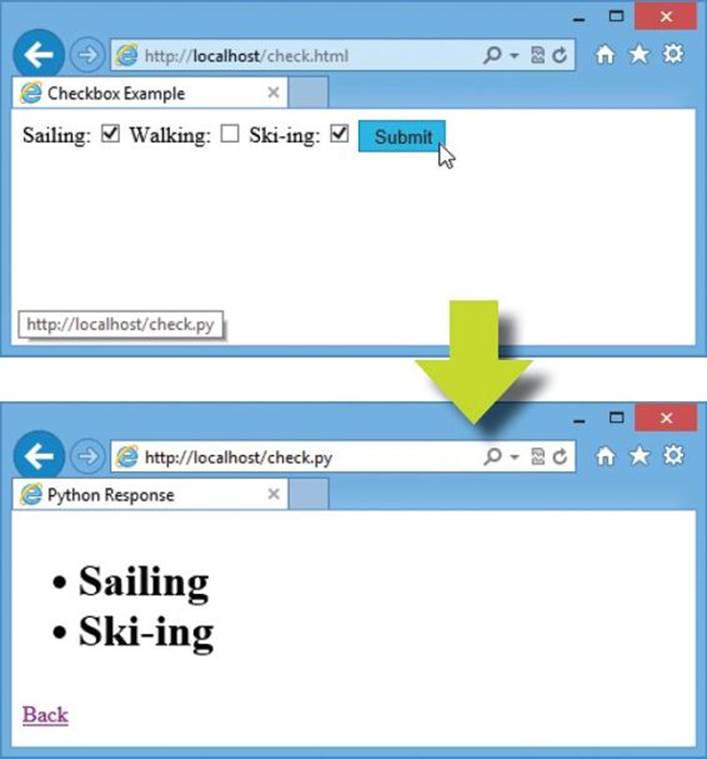
An HTML form can provide a visual checkbox “on/off” switch that the user can toggle to include or exclude its associated data for submission to the web server. The Python script nominated to handle the form data can test whether each check box has been checked simply by testing if a value has been received from the checkbox of that name.
![]() Create a new HTML document containing a form with three checkboxes with associated values and a submit button to post only checked values to a Python script
Create a new HTML document containing a form with three checkboxes with associated values and a submit button to post only checked values to a Python script
<!DOCTYPE HTML>
<html lang=”en”>
<head> <meta charset=”UTF-8”>
<title>Checkbox Example</title> </head>
<body>
<form method=”POST” action=”check.py”>
Sailing:
<input type=”checkbox” name=”sail” value=”Sailing”>
Walking:
<input type=”checkbox” name=”walk” value=”Walking”>
Ski-ing:
<input type=”checkbox” name=”skee” value=”Ski-ing”>
</form>
</body>
</html>
check.html
![]() Next, start a new Python script by making CGI handling features available and create a FieldStorage data object
Next, start a new Python script by making CGI handling features available and create a FieldStorage data object
import cgi
data = cgi.FieldStorage()
check.py
![]() Now, assign a list of checked box values as elements of an unordered HTML list to a variable
Now, assign a list of checked box values as elements of an unordered HTML list to a variable
list = ‘<ul>’
if data.getvalue( ‘sail’ ) :
list += ‘<li>’ + data.getvalue( ‘sail’ )
if data.getvalue( ‘walk’ ) :
list += ‘<li>’ + data.getvalue( ‘walk’ )
if data.getvalue( ‘skee’ ) :
list += ‘<li>’ + data.getvalue( ‘skee’ )
list += ‘</ul>’
![]() Then, add statements to output an entire HTML web page including a list of posted values in the output
Then, add statements to output an entire HTML web page including a list of posted values in the output
print( ‘Content-type:text/html\r\n\r\n’ )
print( ‘<!DOCTYPE HTML>’ )
print( ‘<html lang=”en”>’ )
print( ‘<head>’ )
print( ‘<meta charset=”UTF-8”>’ )
print( ‘<title>Python Response</title>’ )
print( ‘</head>’ )
print( ‘<body>’ )
print( ‘<h1>’ , list , ‘</h1>’ )
print( ‘<a href=”check.html”>Back</a>’ )
print( ‘</body>’ )
print( ‘</html>’ )
![]() Finally, save both files in the web server’s /htdocs directory and load the HTML document in a browser then push the submit button - to see checked values in the response
Finally, save both files in the web server’s /htdocs directory and load the HTML document in a browser then push the submit button - to see checked values in the response
The checked keyword can be added in any checkbox <input> element to make it checked by default.
As the “Walking” checkbox is unchecked in this example, its key:value pair is not even sent to the web server.
Choosing radio buttons
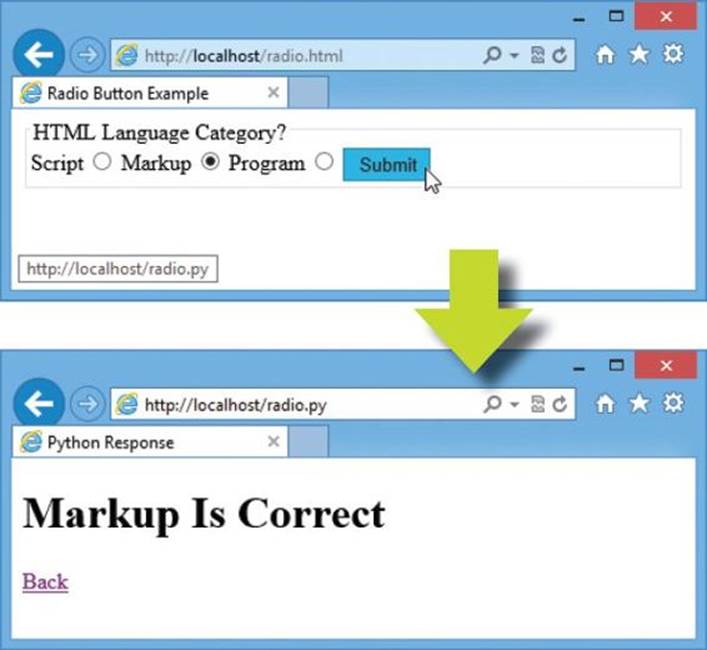
An HTML form can provide a “radio button” group from which the user can select just one button to submit its associated data to the web server. Unlike checkboxes, radio buttons that share a common name are mutually exclusive so when one button in the group is selected, all other buttons in that group are switched off. The Python script nominated to handle the form data can test the value submitted for the radio button group name and supply an appropriate response.
![]() Create a new HTML document containing a form with one group of three radio buttons and a submit button to post the value of the chosen button to a Python script
Create a new HTML document containing a form with one group of three radio buttons and a submit button to post the value of the chosen button to a Python script
<!DOCTYPE HTML>
<html lang=”en”>
<head> <meta charset=”UTF-8”>
<title>Radio Button Example</title> </head>
<body>
<form method=”POST” action=”radio.py”>
<fieldset>
<legend>HTML Language Category?</legend>
Script
<input type=”radio” name=”cat” value=”Script” checked>
Markup
<input type=”radio” name=”cat” value=”Markup”>
Program
<input type=”radio” name=”cat” value=”Program”>
<input type=”submit” value=”Submit”>
</fieldset>
</form>
</body>
</html>
radio.html
![]() Next, start a new Python script by making CGI handling features available and create a FieldStorage data object
Next, start a new Python script by making CGI handling features available and create a FieldStorage data object
import cgi
data = cgi.FieldStorage()
radio.py
![]() Now, test the submitted radio group value and assign an appropriate response to a variable
Now, test the submitted radio group value and assign an appropriate response to a variable
answer = data.getvalue( ‘cat’ )
if answer == ‘Markup’ :
result = answer + ‘ Is Correct’
else :
result = answer + ‘ Is Incorrect’
![]() Then, add statements to output an entire HTML web page including the posted value in an appropriate output
Then, add statements to output an entire HTML web page including the posted value in an appropriate output
print( ‘Content-type:text/html\r\n\r\n’ )
print( ‘<!DOCTYPE HTML>’ )
print( ‘<html lang=”en”>’ )
print( ‘<head>’ )
print( ‘<meta charset=”UTF-8”>’ )
print( ‘<title>Python Response</title>’ )
print( ‘</head>’ )
print( ‘<body>’ )
print( ‘<h1>’ , result , ‘</h1>’ )
print( ‘<a href=”radio.html”>Back</a>’ )
print( ‘</body>’ )
print( ‘</html>’ )
![]() Finally, save both files in the web server’s /htdocs directory
Finally, save both files in the web server’s /htdocs directory
![]() Load the HTML document in a browser then choose the correct radio button answer and push the submit button - to see the associated chosen value in the response
Load the HTML document in a browser then choose the correct radio button answer and push the submit button - to see the associated chosen value in the response
Always include a checked attribute to automatically select one button in each radio button group - to include a default choice.
Radio button elements resemble the buttons on old radios where each button selected a particular radio station - but, of course, no two stations could be selected simultaneously.
Selecting options
An HTML form can provide a dropdown list of possible options from which the user can select a single option to include its associated data for submission to the web server. The submitted value can then be retrieved by specifying its associated list key name within the parentheses of that FieldStorage object’s getvalue() method.
![]() Create a new HTML document containing a form with a dropdown options list and a submit button
Create a new HTML document containing a form with a dropdown options list and a submit button
<!DOCTYPE HTML>
<html lang=”en”>
<head> <meta charset=”UTF-8”>
<title>Selection List Example</title> </head>
<body>
<form method=”POST” action=”select.py”>
<select name=”CityList”>
<option value=”New York”>New York</option>
<option value=”London”>London</option>
<option value=”Paris”>Paris</option>
<option value=”Beijing”>Beijing</option>
</select>
<input type=”submit” value=”Submit”>
</form>
</body>
</html>
select.html
![]() Next, start a new Python script by making CGI handling features available and create a FieldStorage data object
Next, start a new Python script by making CGI handling features available and create a FieldStorage data object
import cgi
data = cgi.FieldStorage()
select.py
![]() Now, assign the selected option value to a variable
Now, assign the selected option value to a variable
city = data.getvalue( ‘CityList’ )
![]() Then, add statements to output an entire HTML web page including the posted option value in the output
Then, add statements to output an entire HTML web page including the posted option value in the output
print( ‘Content-type:text/html\r\n\r\n’ )
print( ‘<!DOCTYPE HTML>’ )
print( ‘<html lang=”en”>’ )
print( ‘<head> <meta charset=”UTF-8”>’ )
print( ‘<title>Python Response</title> </head>’ )
print( ‘<body>’ )
print( ‘<h1>City:’ , city , ‘</h1>’ )
print( ‘<a href=”select.html”>Back</a>’ )
print( ‘</body>’ )
print( ‘</html>’ )
![]() Finally, save both files in the web server’s /htdocs directory and load the HTML document in a browser then push the submit button - to see the selected value in the response
Finally, save both files in the web server’s /htdocs directory and load the HTML document in a browser then push the submit button - to see the selected value in the response
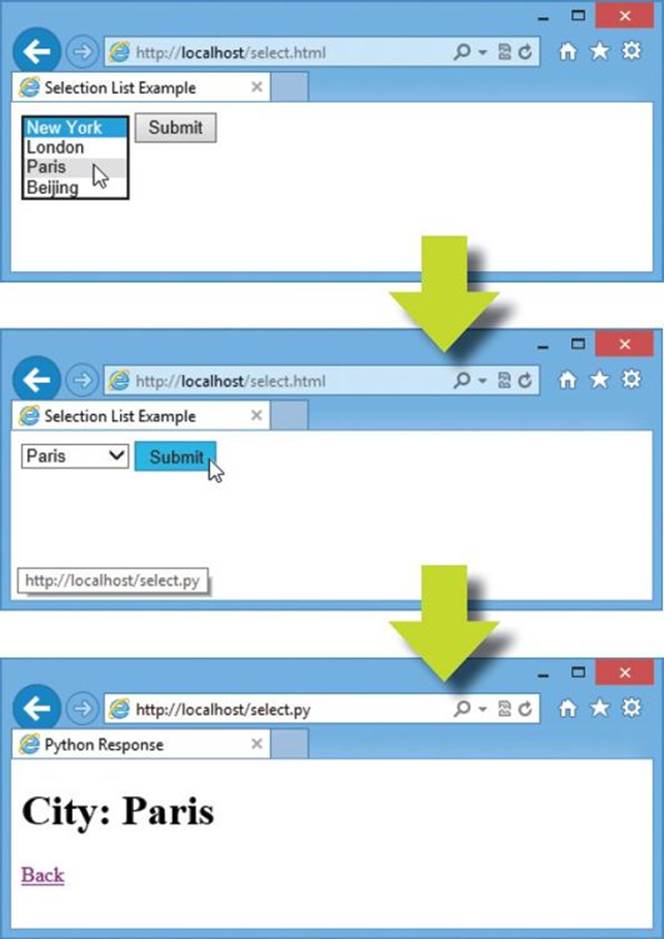
Typically, the first list option will be selected for submission by default unless you click open the dropdown list and select an alternative.
You can include the selected attribute in an <option> tag to automatically select one option in each list - to include a default choice.
Uploading files
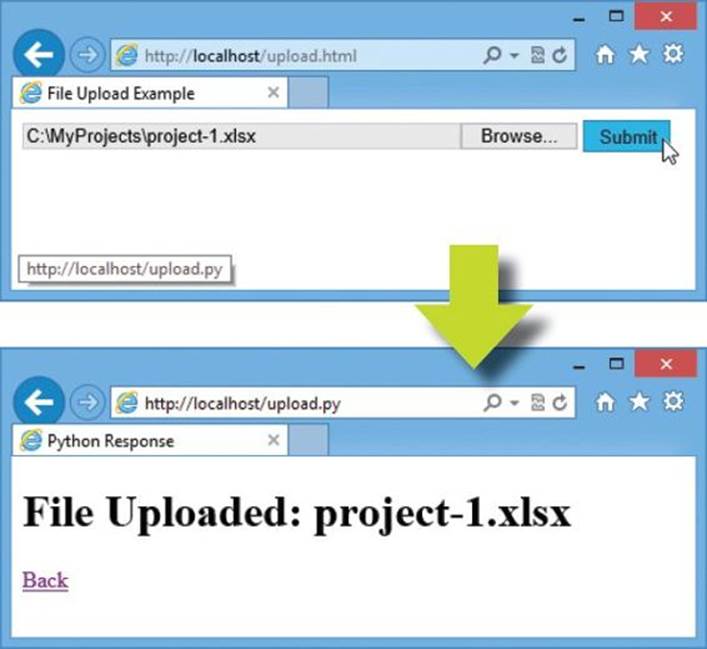
An HTML form can provide a file selection facility, which calls upon the operating system’s “Choose File” dialog, to allow the user to browse their local file system and select a file. To enable this facility the HTML <form> tag must include an enctype attribute specifying the encoding type as “multipart/form-data”.
The full path address of the file selected for upload is a value stored in the FieldStorage object list that can be accessed using its associated key name. Usefully, the file name can be stripped from the path address by the “os” module’s path.basename() method.
A copy of an uploaded file can be written on the web server by reading from the FieldStorage object’s file property.
![]() Create a new HTML document containing a form with a file selection facility and a submit button
Create a new HTML document containing a form with a file selection facility and a submit button
<!DOCTYPE HTML>
<html lang=”en”>
<head> <meta charset=”UTF-8”>
<title>File Upload Example</title> </head>
<body>
<form method=”POST” action=”upload.py” enctype=”multipart/form-data” >
<input type=”file” name=”filename” style=”width:400px”>
<input type=”submit” value=”Submit”>
</form>
</body>
</html>
upload.html
![]() Next, start a new Python script by making CGI handling and operating system features available then create a FieldStorage data object
Next, start a new Python script by making CGI handling and operating system features available then create a FieldStorage data object
import cgi , os
data = cgi.FieldStorage()
upload.py
![]() Now, assign the full path of the uploaded file to a variable and its stripped out file name to another variable
Now, assign the full path of the uploaded file to a variable and its stripped out file name to another variable
upload = data[ ‘filename’ ]
filename = os.path.basename( upload.filename )
![]() Then, write a copy of the uploaded file on the web server
Then, write a copy of the uploaded file on the web server
with open( filename , ‘wb’ ) as copy :
copy.write( upload.file.read() )
![]() Then, add statements to output an entire HTML web page including the uploaded file name in the output
Then, add statements to output an entire HTML web page including the uploaded file name in the output
print( ‘Content-type:text/html\r\n\r\n’ )
print( ‘<!DOCTYPE HTML>’ )
print( ‘<html lang=”en”>’ )
print( ‘<head>’ )
print( ‘<meta charset=”UTF-8”>’ )
print( ‘<title>Python Response</title>’ )
print( ‘</head>’ )
print( ‘<body>’ )
print( ‘<h1>File Uploaded:’ , filename , ‘</h1>’ )
print( ‘<a href=”upload.html”>Back</a>’ )
print( ‘</body>’ )
print( ‘</html>’ )
![]() Finally, save both files in the web server’s /htdocs directory and load the HTML document in a browser then select a file for upload - to see the file upload response
Finally, save both files in the web server’s /htdocs directory and load the HTML document in a browser then select a file for upload - to see the file upload response
Notice that binary file mode is used here to copy the uploaded file.
Summary
•Python can be installed on a web server host to process script code before sending a response to a web browser client
•A server-side Python script can generate an HTML document by describing the content type as Content-type:text/html\r\n\r\n
•The cgi module provides a FieldStorage() constructor to create an object for storing submitted data as key:value pairs
•Any value stored in a FieldStorage object can be retrieved by specifying its key name to the object’s getvalue() method
•The browser can send data to a script using the GET method that appends key=value pairs to its URL address after a ? mark
•Multiple key=value pairs of data can be submitted using the GET method if each pair is separated by an & character
•The GET method request string length cannot exceed 1024 characters and will be visible in the browser address field
•The browser can send data to a script using the POST method that submits key=value pairs as a separate message
•Data submitted from an HTML form can be stored in a FieldStorage object as key:value pairs for each form field
•A server-side Python script can provide default values for submitted HTML form fields that the user has left blank
•Checkbox fields of an HTML form that are unchecked do not get submitted to the web server
•A selected radio button in a group provides the value to be associated with the group name when the form gets submitted
•A selected item in a dropdown list provides the value to be associated with the list name when the form gets submitted
•An HTML form can allow file uploads only if its enctype attribute specifies its encoding type as “multipart/form-data”