Beginners guide to hacking and penetration testing (2017)
Nmap and Zenmap:
Nmap (and the GUI version Zenmap) is a free open source network mapper for network discovery and auditing. It's easy to use, well supported, and flexible.
Zenmap demo:
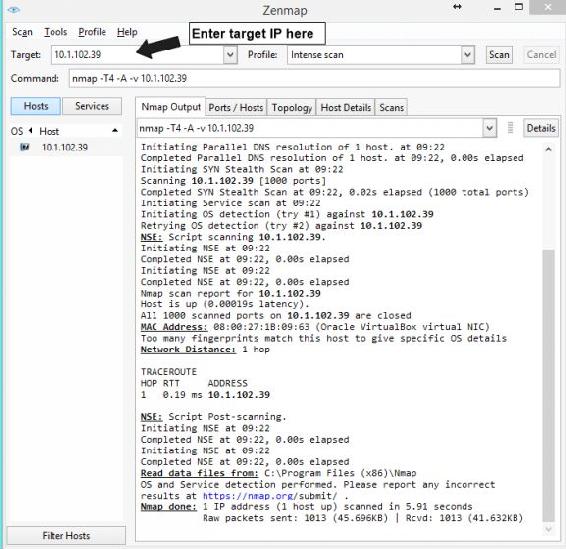
In the above image is an example of a typical Zenmap scan. In this particular example I launched it against my Metasploitable machine that is running in a VirtualBox environment.
Launching a new Scan:
1. Once Zenmap is launched enter your target IP address into the Target field
2. Under Profile select the type of scan you wish to use, by default Intense scan is preselected. Keep in mind there is a tradeoff when scanning. The more intense the scan the more information you will likely yield, however this also means that you scans are more likely to be noticed by the target.
3. Under the Command line the Nmap command will be automatically filled in for the scan that we have selected. This is the same command that we would have entered if we were using Nmap
instead of Zenmap.
4. Once we are ready click the Scan button on the top right. Depending on the scan will depend on how long it will take to finish.
5. Under the Nmap Output we can see the general output of our scan.
a. Ping scan results
b. MAC address
c. We can see the machine is a VirtualBox machine, because of this it was unable to determine the OS type, but knowing it's a virtual machine is also useful to a hacker.
d. Tracerout info
e. Etc.
6. Clicking the other tabs we can see Port information, Topology, etc.
Nessus:
Nessus is a vulnerability scanner by Tenable, that is offered in both a free "home" version and a Pro version. For this book we will be dealing with the home version that can be found over at: https://www.tenable.com/products/nessus-home It is available for Windows, macOS, Linux, FreeBSD, and GPG Keys.
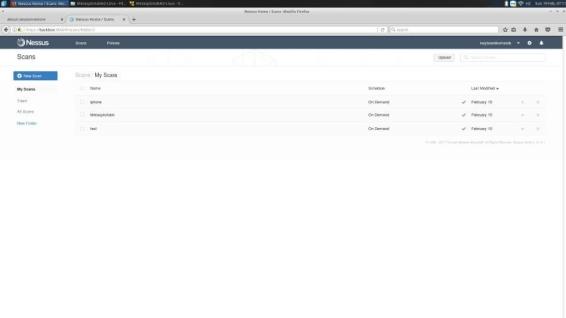
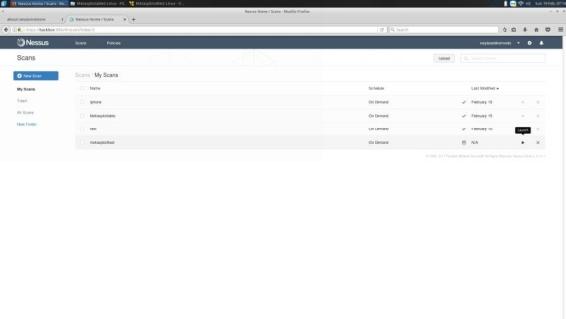
Once Nessus is installed and registered this is the initial screen after logging in. To initiate a new scan click
New Scan.
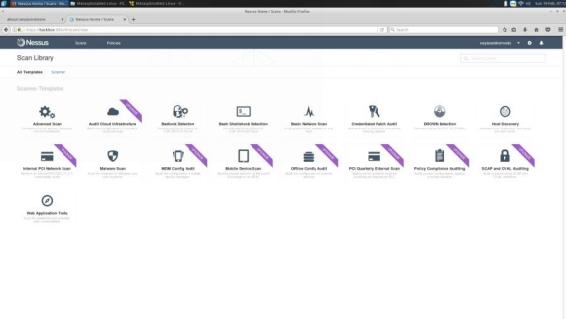
Fro, here we can see a number of different scan options depending if we are using the community version or the Pro version. For this book we are sticking to the community (Free) version. Click Basic Network Scan
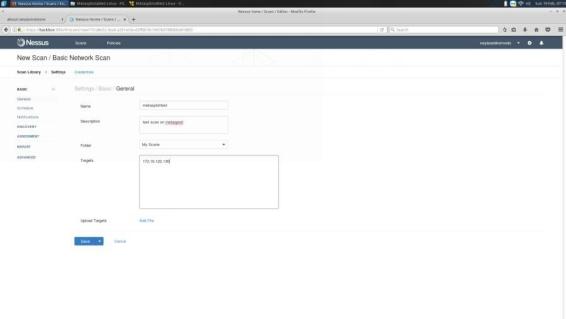
From here you will need to fill out some basic information to start: scan Name, Description of the scan, the Folder you will save your scan to, and your Target(s). You also have the option of setting up a Schedule to scan.
Once you have the necessary fields filled out and saved find your scan and click the Launch option to start.
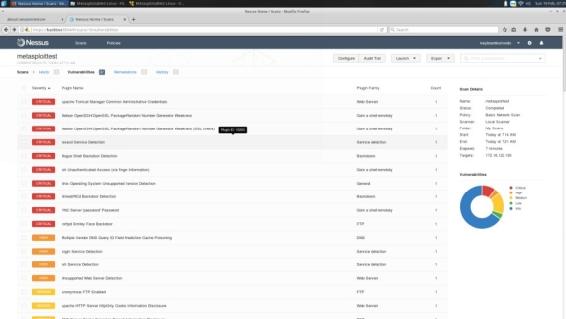
When you scan finishes you will be presented with a comprehensive vulnerability audit detailing its findings. We can click any one of these for more information.
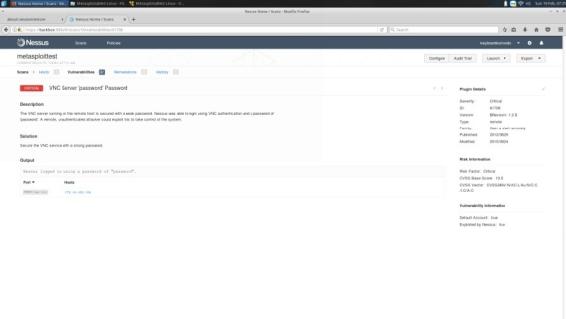
In this case we can see that our target is running a VNC server with the default password of password. We can use this information later when we exploit the machine with Metasploit (explained later). We can also see the Risk Factor, Score, and the CVSS information.