Nmap 6 Cookbook: The Fat Free Guide to Network Security Scanning (2015)
Section 11: Zenmap
Overview
Zenmap is a graphical frontend for Nmap designed to make light work of Nmap’s complex scanning features. The Zenmap GUI is a cross-platform program that can be used on Windows, Mac OS X, and Unix/Linux systems.
Zenmap GUI
Launching Zenmap
Windows Users
Zenmap is installed by default when you install Nmap on Windows systems. To start Zenmap go to Start > Programs > Nmap > Zenmap GUI.
Unix and Linux Users
Zenmap is automatically installed when you compile Nmap from source on a system with a desktop such as Gnome or KDE. If you install Nmap via apt or yum you may have to manually install the Zenmap package. This can be done by executing one of the following commands:
Debian/Ubuntu
# apt-get install zenmap
Fedora/Red Hat/CentOS
# yum install nmap-frontend
Once installed, the Zenmap GUI can be launched by locating the icon on your system's application menu.
Mac OS X Users
Zenmap for Mac OS X is installed in Applications > Zenmap. It is included automatically as part of the default Nmap installation.
Note: The X11 server for Mac OS X is required to run Zenmap on Mac systems. This software can be found on the Mac OS X installation DVD. Newer versions of Mac OS X no longer include X11 server software. The Xquartz program can be installed on these systems in place of the legacy X11 server. Xquartz can be downloaded from xquartz.macosforge.org.
Basic Zenmap Operations
Performing a scan with Zenmap is as simple as 1, 2, 3...
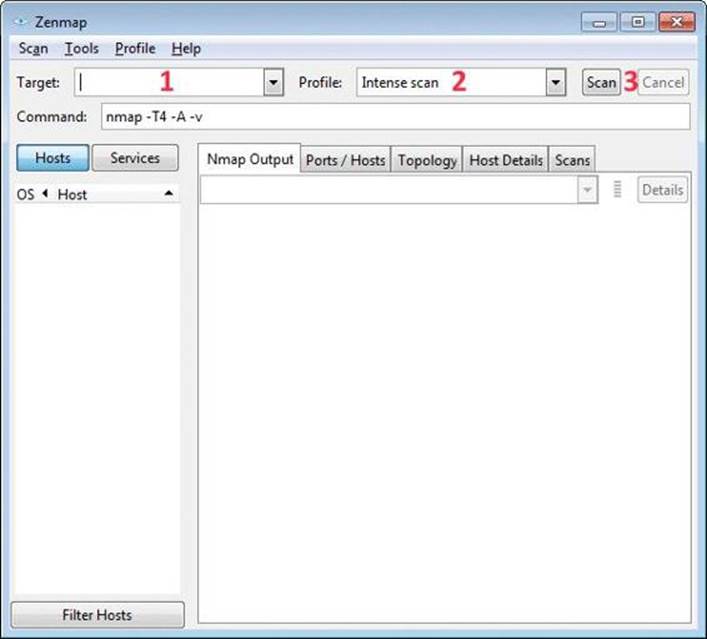
Zenmap GUI overview
Step 1
Enter a target (or select a recent target from the list)
Step 2
Select a scanning profile
Step 3
Press the scan button
Zenmap Results
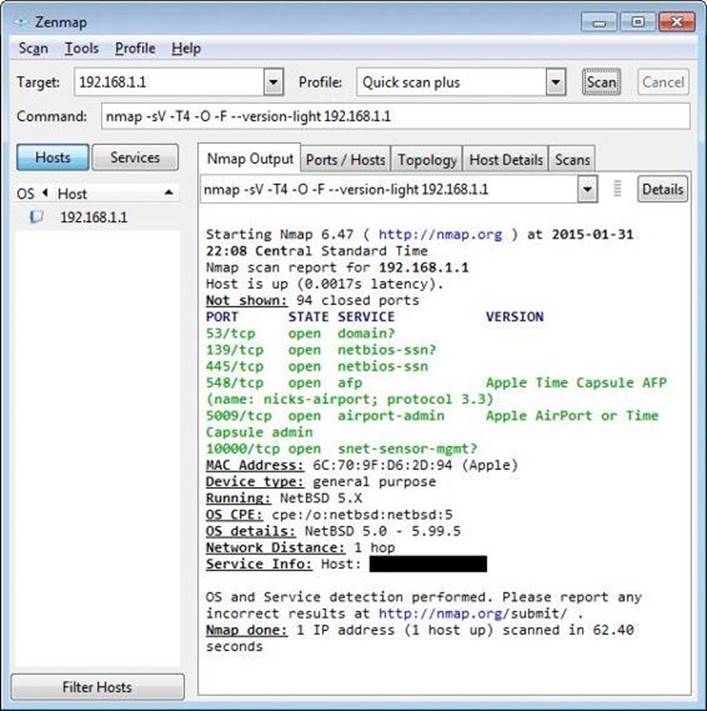
The results of the scan are displayed once the scan is finished. The Nmap Output tab displays the raw output of the scan as it would appear on the command line. Zenmap also keeps a history of your scanning activity. This allows you to reference an earlier scan by selecting it from the sidebar list.
Zenmap scan output
Note: The actual command line string executed is displayed in the Command box above.
Scanning Profiles
Zenmap provides built-in profiles for the most common types of scans. This simplifies the scanning process by eliminating the need to manually specify a long string of arguments on the command line.
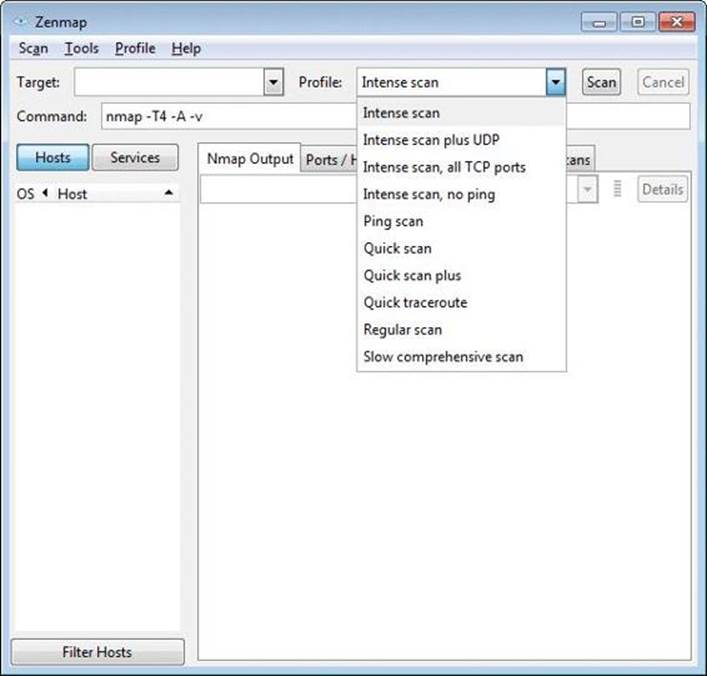
Zenmap scanning profiles
Profile Editor
If the built-in scans don’t meet your exact needs, you can create your own scanning profile. To do this, simply access the profile editor by selecting Profile > New Profile from the Zenmap menu (or press <CTRL + P> on the keyboard).
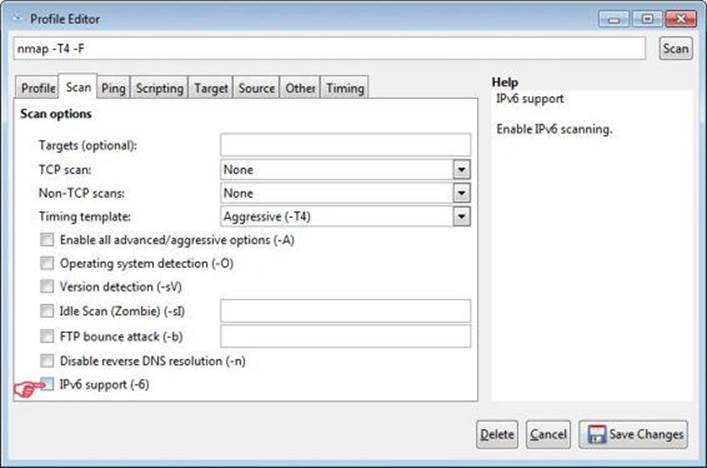
Zenmap profile editor
Within the Zenmap Profile Editor, you can select the options for your custom profile and Zenmap will automatically build the complex Nmap command line string based on your selections.
Tip: Hovering your mouse over various options will show information about the selection in the help field.
Once finished, simply click the Save Changes button and your custom profile will be available for use in the profile selection combo-box.
Viewing Open Ports
Once a scan is completed you can view a user-friendly display of the results on the Ports/Hosts tab. The buttons labeled Hosts and Services can be used to toggle the display of the recent scans.
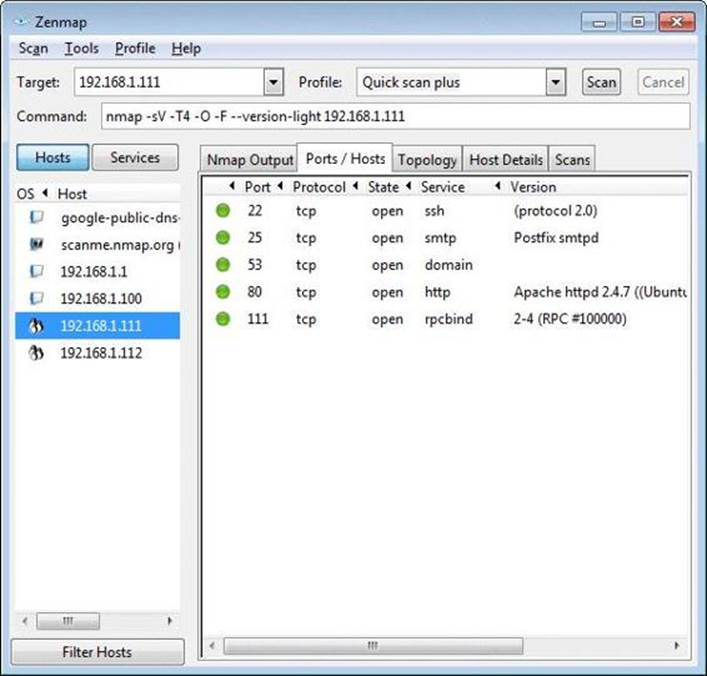
Zenmap ports display
Viewing a Network Map
After performing one or more scans, you can view the results on a graphical map on the Topology tab.
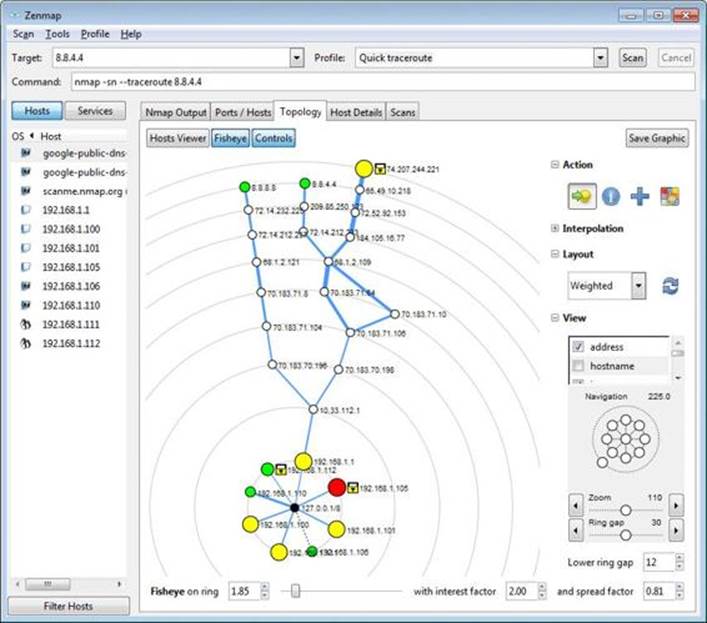
Zenmap topology map
Zenmap’s topology feature provides an interactive graphic that shows the layout of a network and path to targets for completed scans (assuming a traceroute enabled profile is selected).
Tip: The graphic can be manipulated by pressing the Controls button to modify the various display options.
Saving Network Maps
You can also save a Zenmap topology map by pressing the Save Graphic button.
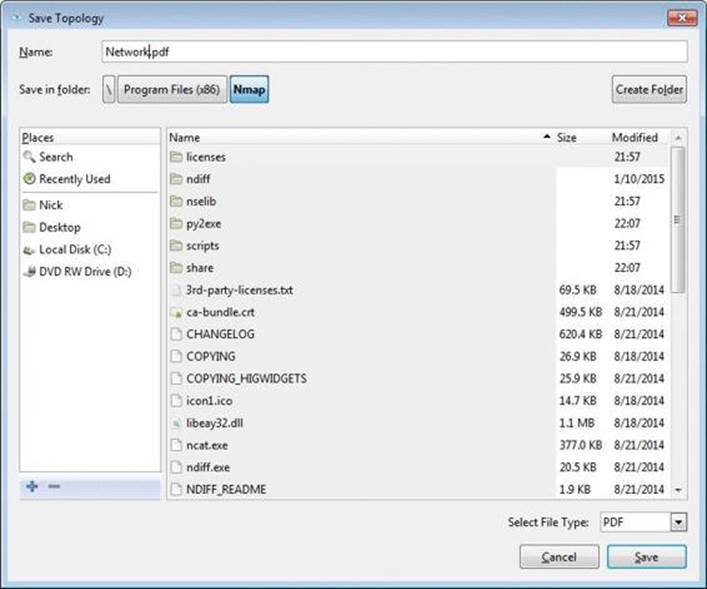
Saving a topology map
Zenmap supports exporting maps to several popular formats including PNG, PDF, SVG, and Postscript.
Viewing Host Details
The Host Details tab provides a user-friendly display of information gathered from a target system.
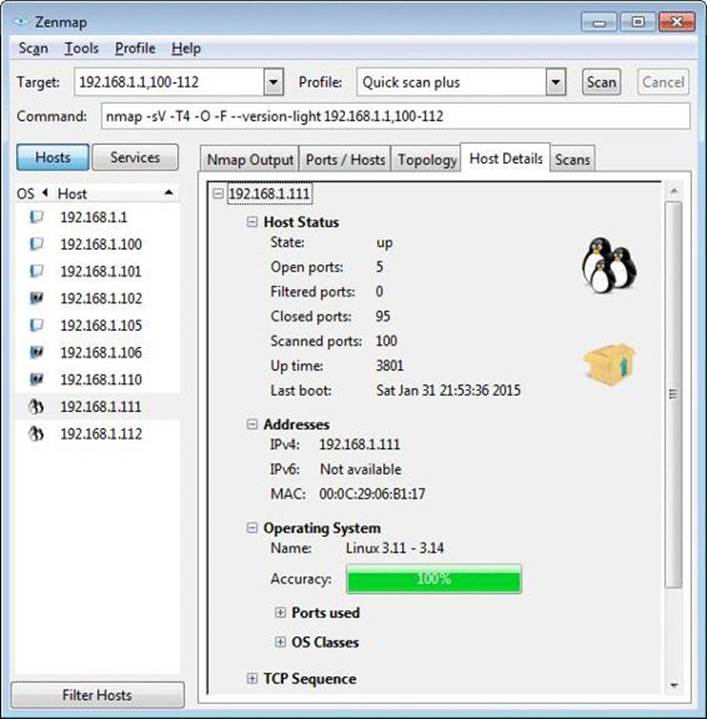
Zenmap host details
Viewing Scan History
The Scans tab displays scanning history for the current session. You can also manage previous scans by using the Add, Remove, or Cancel buttons at the bottom of the screen.
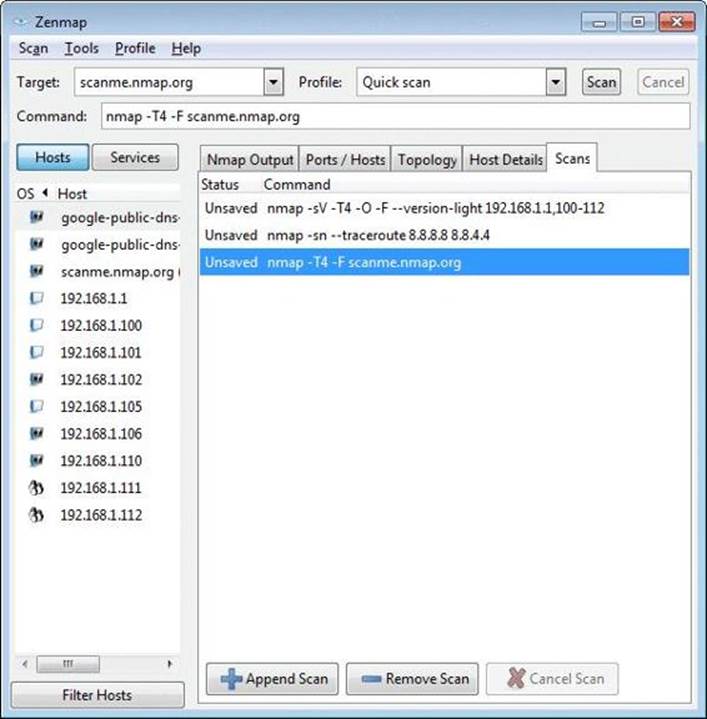
Zenmap scan history
Comparing Scan Results
Nmap and Zenmap scans can be compared using the Compare Results feature. To do this, select Tools > Compare Results from the Zenmap menu or press <CTRL + D>.
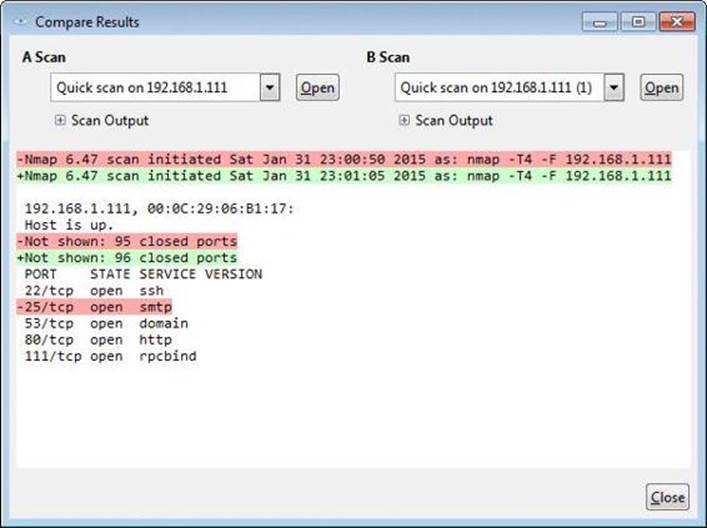
Zenmap comparison utility
Zenmap will load recent scans into the comparison utility or you can import an Nmap XML output file by pressing the Open button. The differences between the two selected scans are highlighted and color-coded for easy comparison.
Saving Scans
Zenmap scans can be saved for future reference by selecting Scan > Save Scan from the menu or pressing <CTRL + S>.
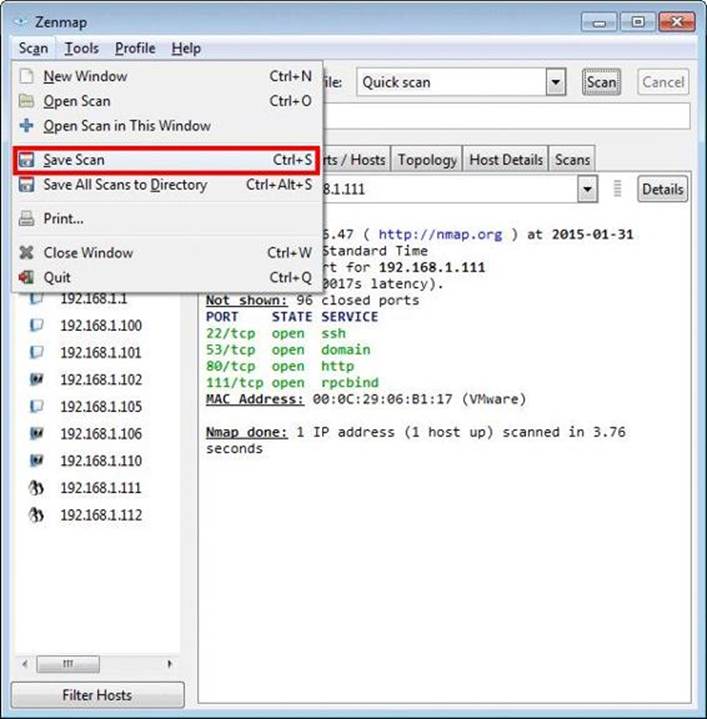
Saving Zenmap scans
All materials on the site are licensed Creative Commons Attribution-Sharealike 3.0 Unported CC BY-SA 3.0 & GNU Free Documentation License (GFDL)
If you are the copyright holder of any material contained on our site and intend to remove it, please contact our site administrator for approval.
© 2016-2026 All site design rights belong to S.Y.A.